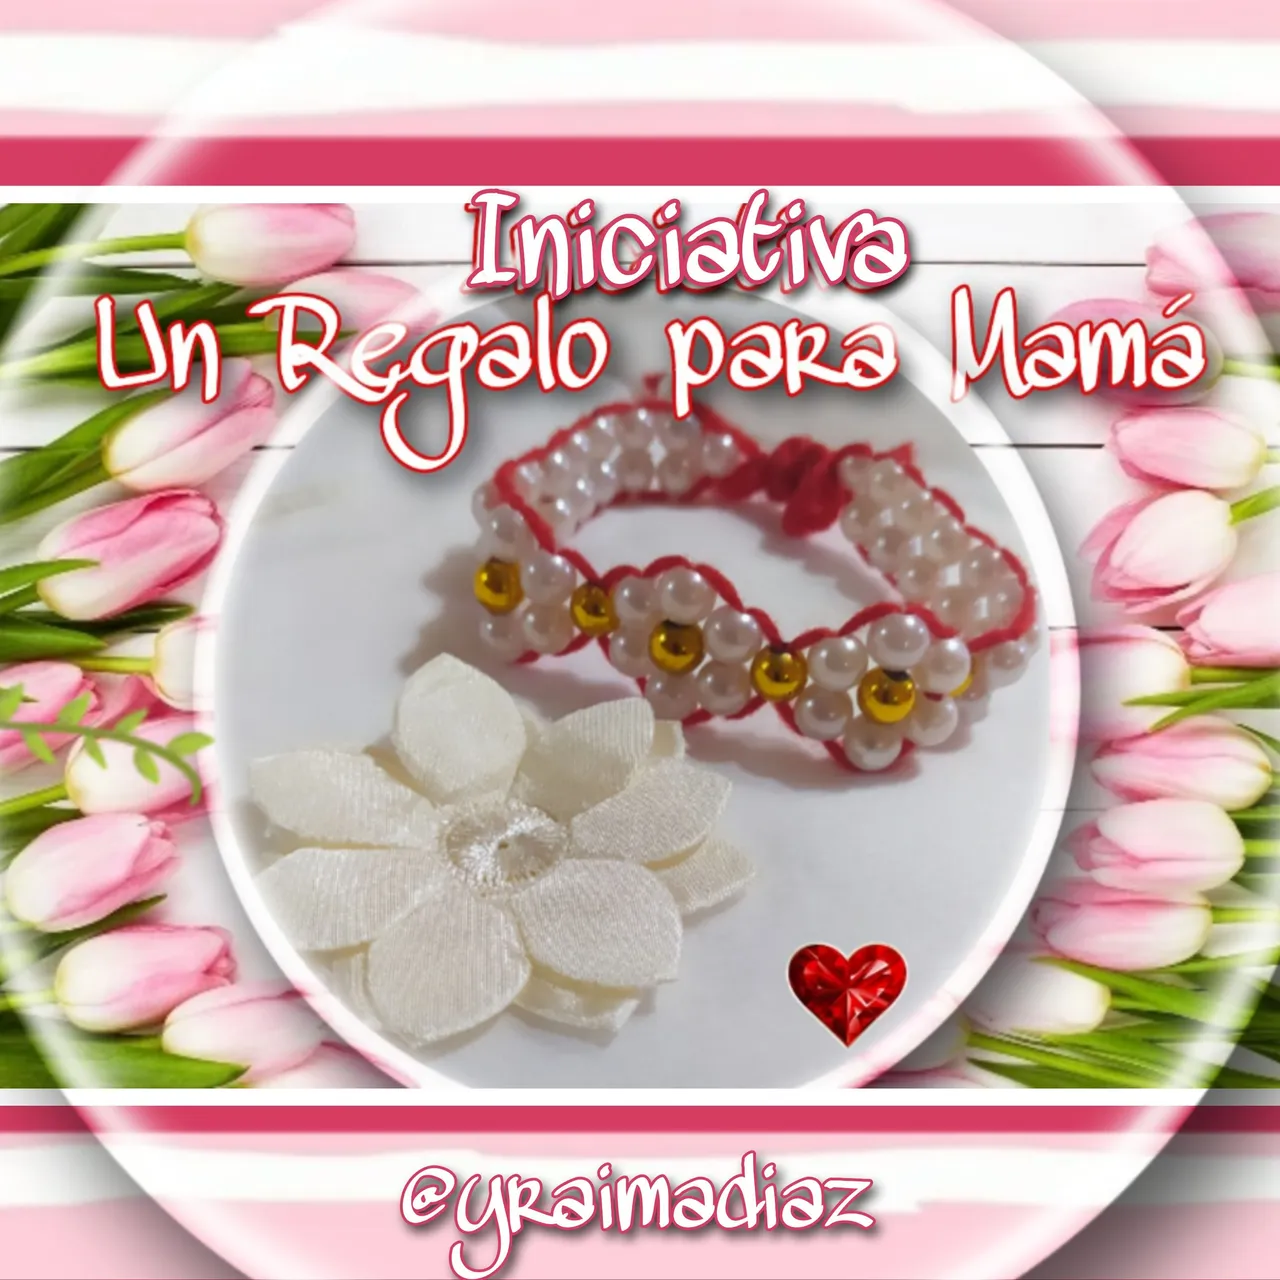
Saludos queridos Hivers amigos hoy en un día muy especial ya que estamos celebrando este fantástico día como lo es el día de las madres así que mis felicitaciones para todas las Hiversmamá
Dios les siga dando una linda vida al lado de sus seres queridos 🌹❤️
Y nada mejor que celebrar este día uniendome a la maravillosa iniciativa que nos trae la fantástica comunidad @jewelry dónde nos pide que hagamos un Regalo para Mamá
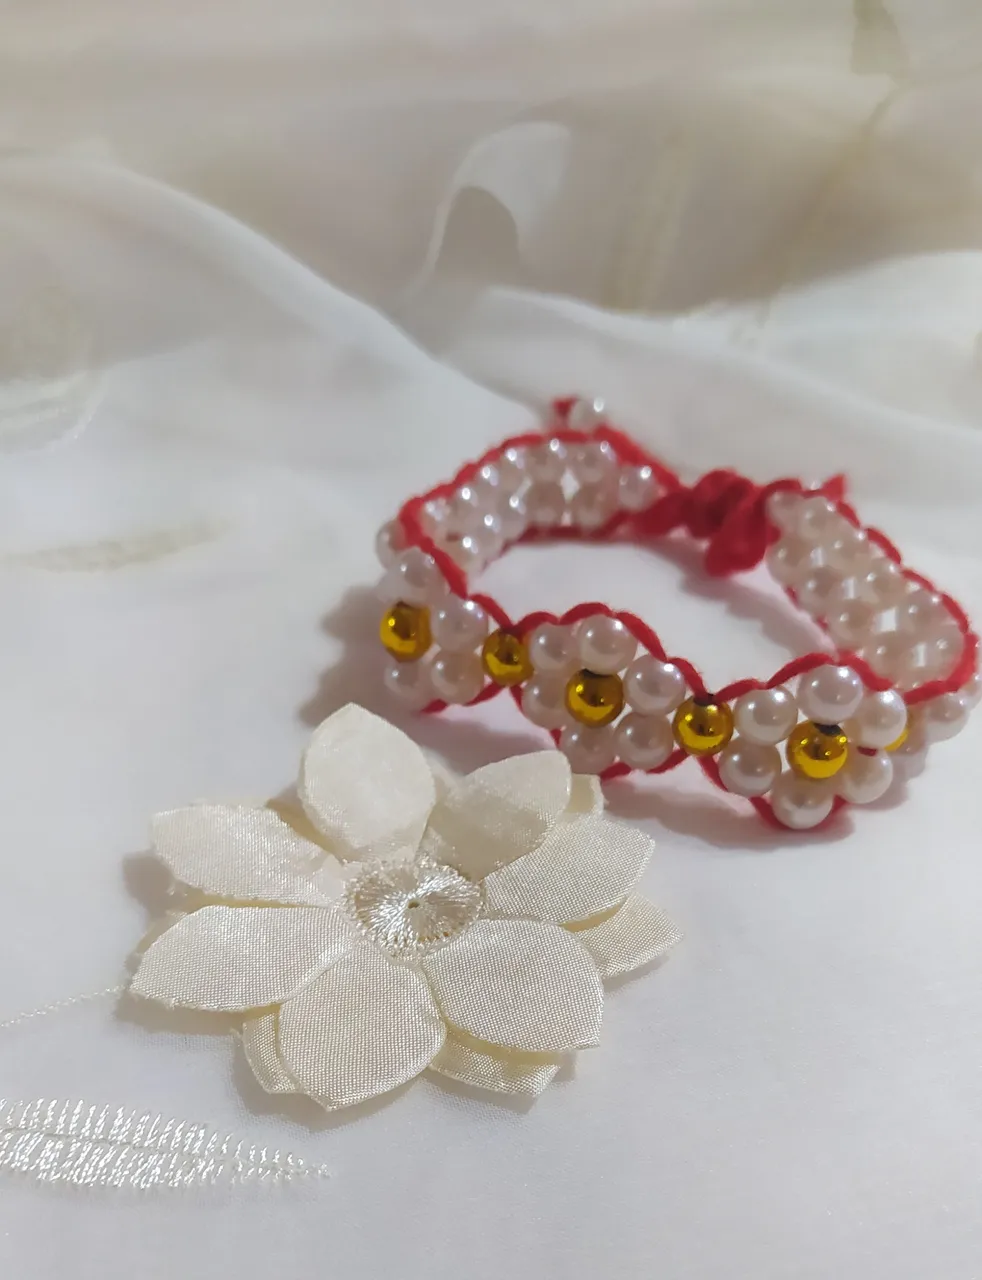
Así que no hay nada más hermoso que consentir a nuestras madres ya que ellas han dado todo a lo largo de sus vidas por nosotros y no hay nada un detalle más bello que las flores así que para honrarlas y celebrarlas hoy les he traído una Hermosa Pulsera de Flores, la cual realice con perlitas blancas y cuentas doradas, es un detalle muy hermoso y fácil de hacer, así que los invito que me acompañen que sean mis cómplices en su realización.
Greetings dear Hivers friends today on a very special day as we are celebrating this fantastic day as it is Mother's Day so my congratulations to all the Hiversmoms.
God continue to give you a nice life next to your loved ones 🌹❤️
And nothing better than celebrating this day joining the wonderful initiative that brings us the fantastic community @jewelry where she asks us to make a Gift for MomSo there is nothing more beautiful than pampering our mothers as they have given everything throughout their lives for us and there is nothing a more beautiful detail than flowers so to honor and celebrate them today I have brought you a beautiful flower bracelet, which I made with white pearls and gold beads, it is a very beautiful and easy to make detail, so I invite you to join me to be my accomplices in its realization.
Los materiales que utilice son los siguientes.
The materials I used are the following.
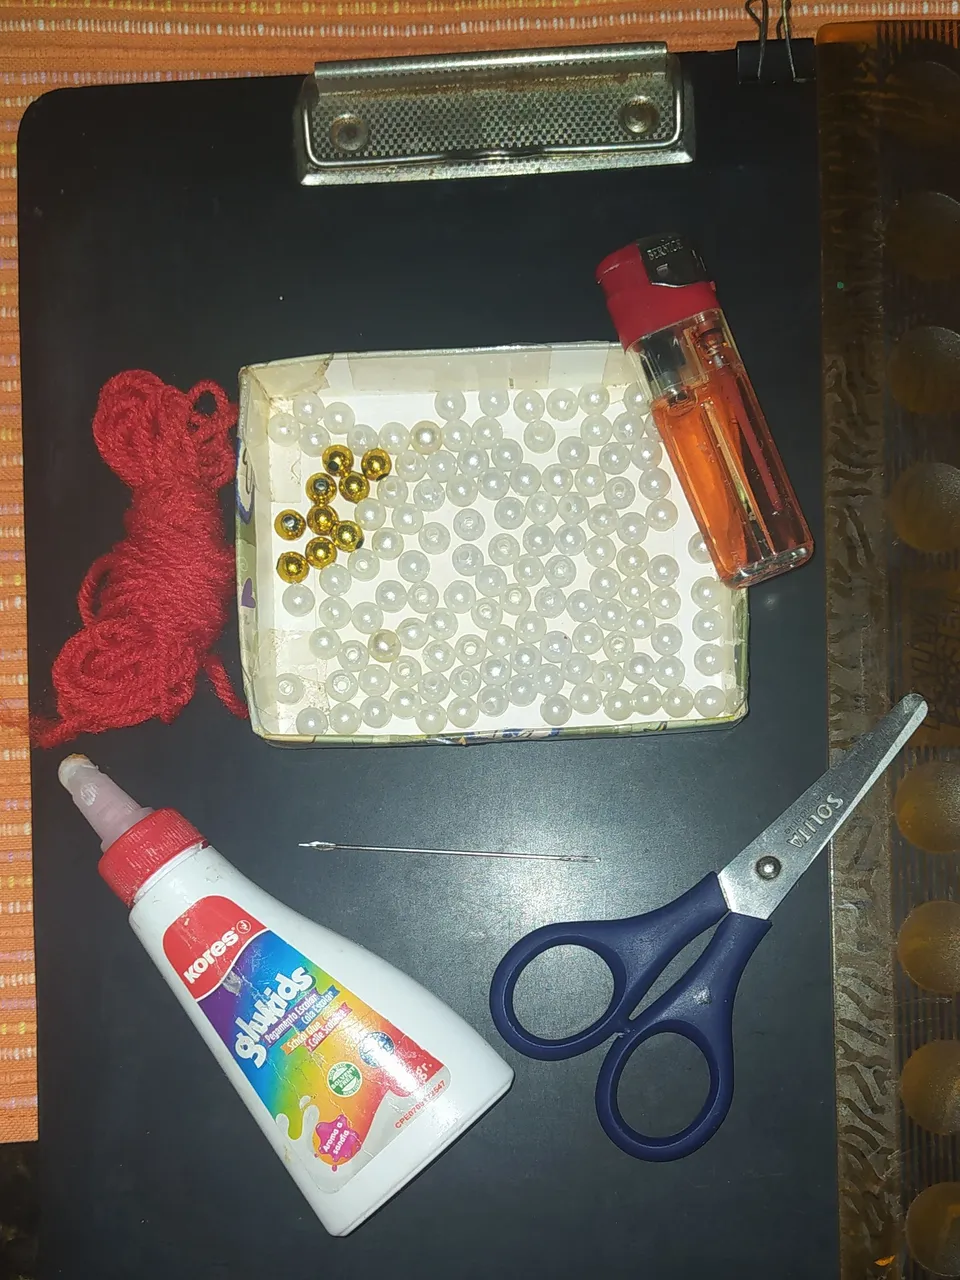
Materiales.
- 50 Perlas blancas.
- 7 cuentas doradas.
- Estambre rojo.
- Pega blanca.
- Aguja.
- Regla.
- Tijeras.
- Encendedor.
Aquí les dejo el paso a paso de su elaboración.
Materials.
- 50 white beads.
- 7 golden beads.
- Red yarn.
- White glue.
- Needle.
- Ruler.
- Scissors.
- Lighter.
Here is the step by step of its elaboration.
 |  |
|---|
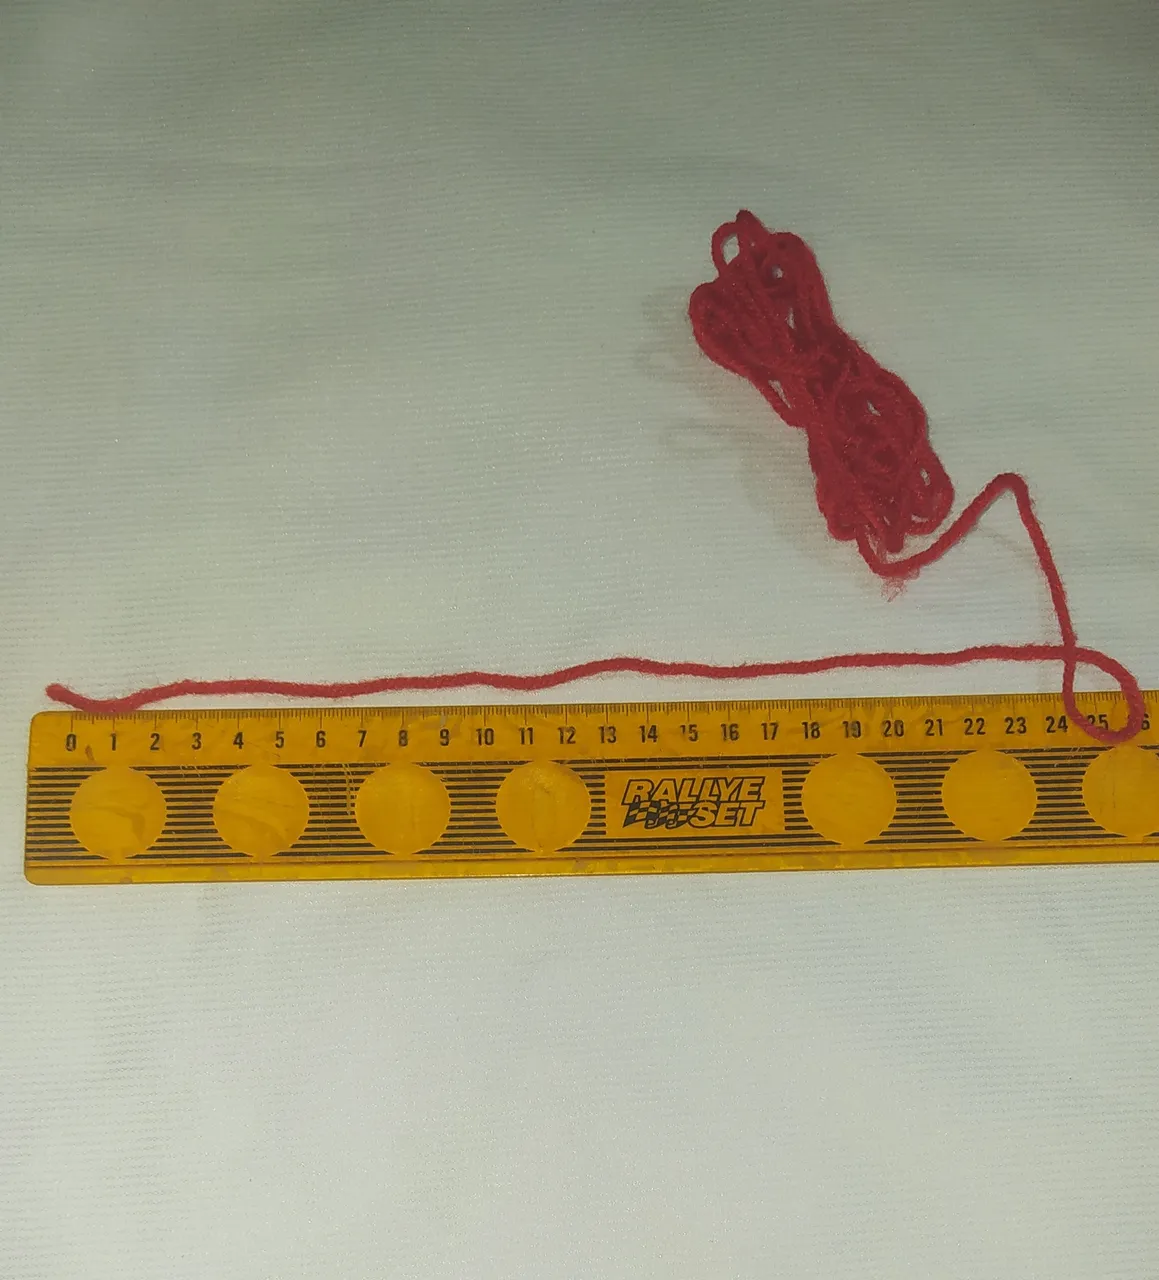
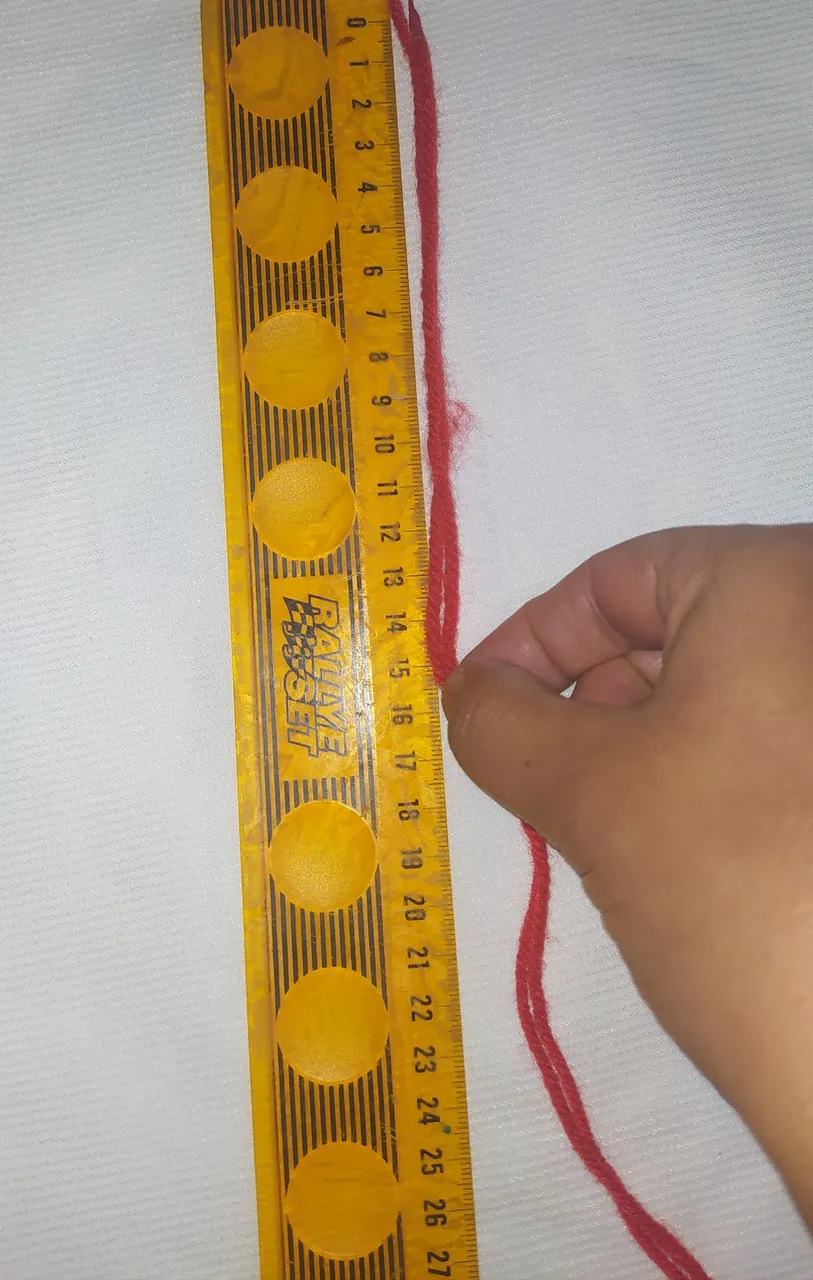
- Medi y corte 1.60 de estambre rojo.
- Luego 20 cm.( cerrar la pulsera)
- Measure and cut 1.60 of red worsted.
- Then 20 cm.( close the bracelet)
 |  |
|---|
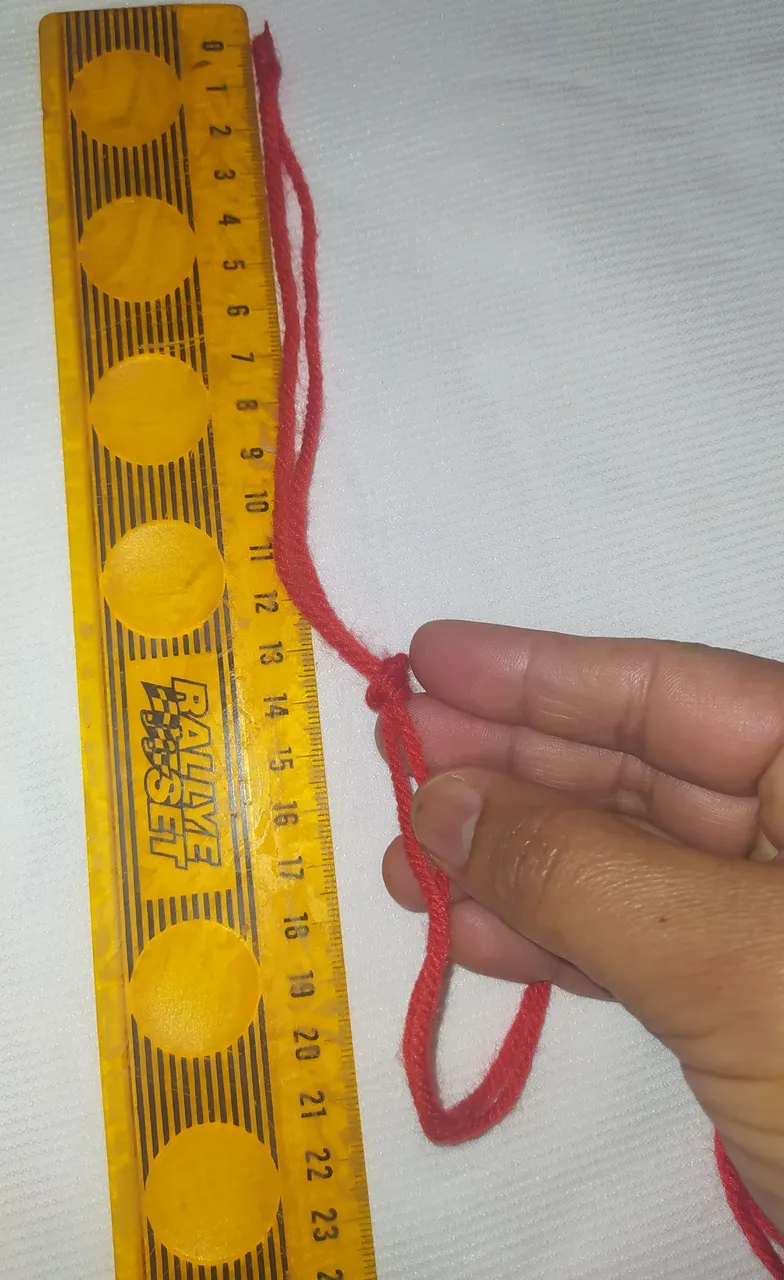
- Luego tome la medida de 15 cm y a esa medida le hice un nudo.
- Then I took the measurement of 15 cm and tied a knot.
 |  |
|---|
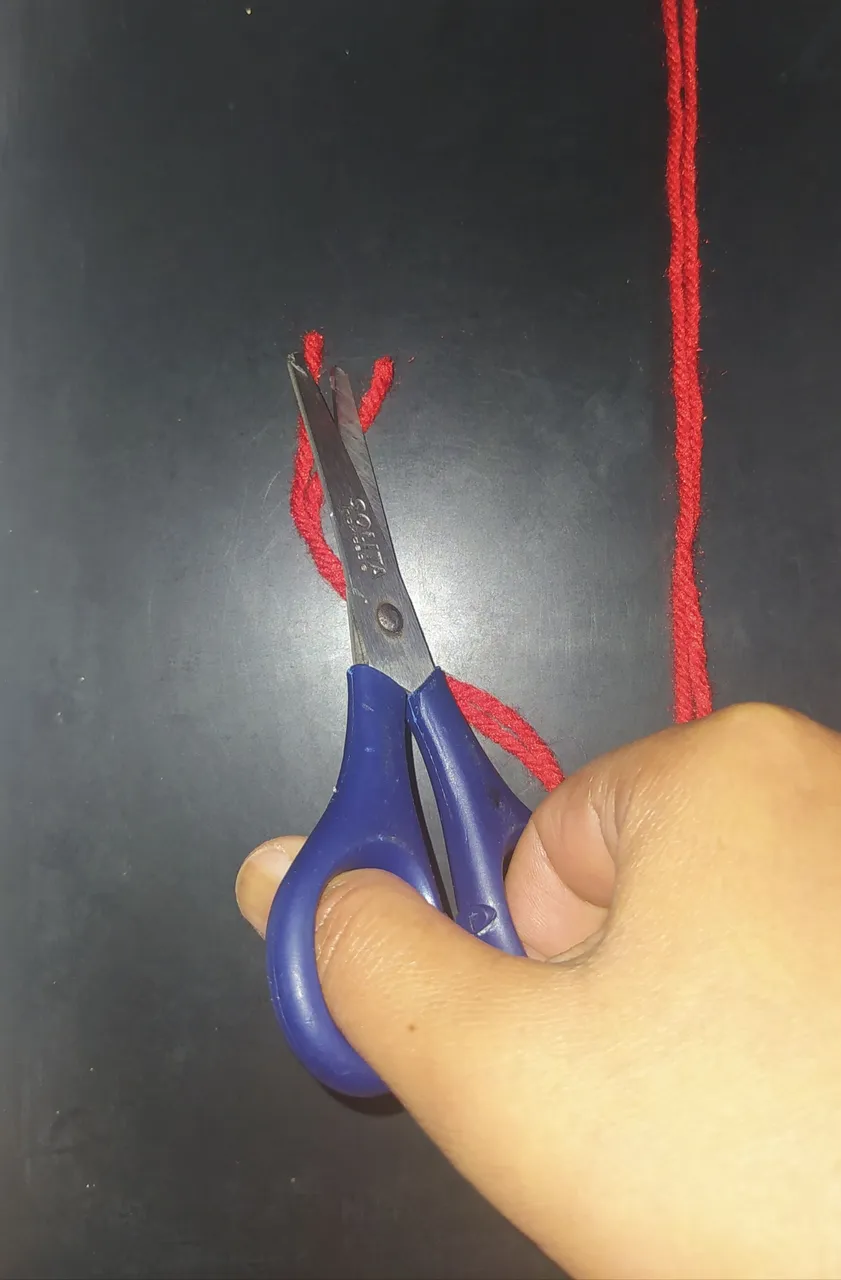
- Lleve el hilo a la tabla donde iba a realizar la pulsera y tome el nudo y lo asegure con la pinza de la tabla.
- Corte la parte de abajo del hilo y de esta forma me quedan dos hilos de 80 cm cada uno.
- Take the thread to the board where I was going to make the bracelet and take the knot and secure it with the clamp on the board.
- Cut the bottom part of the thread and this way I have two threads of 80 cm each.
 |  |
|---|
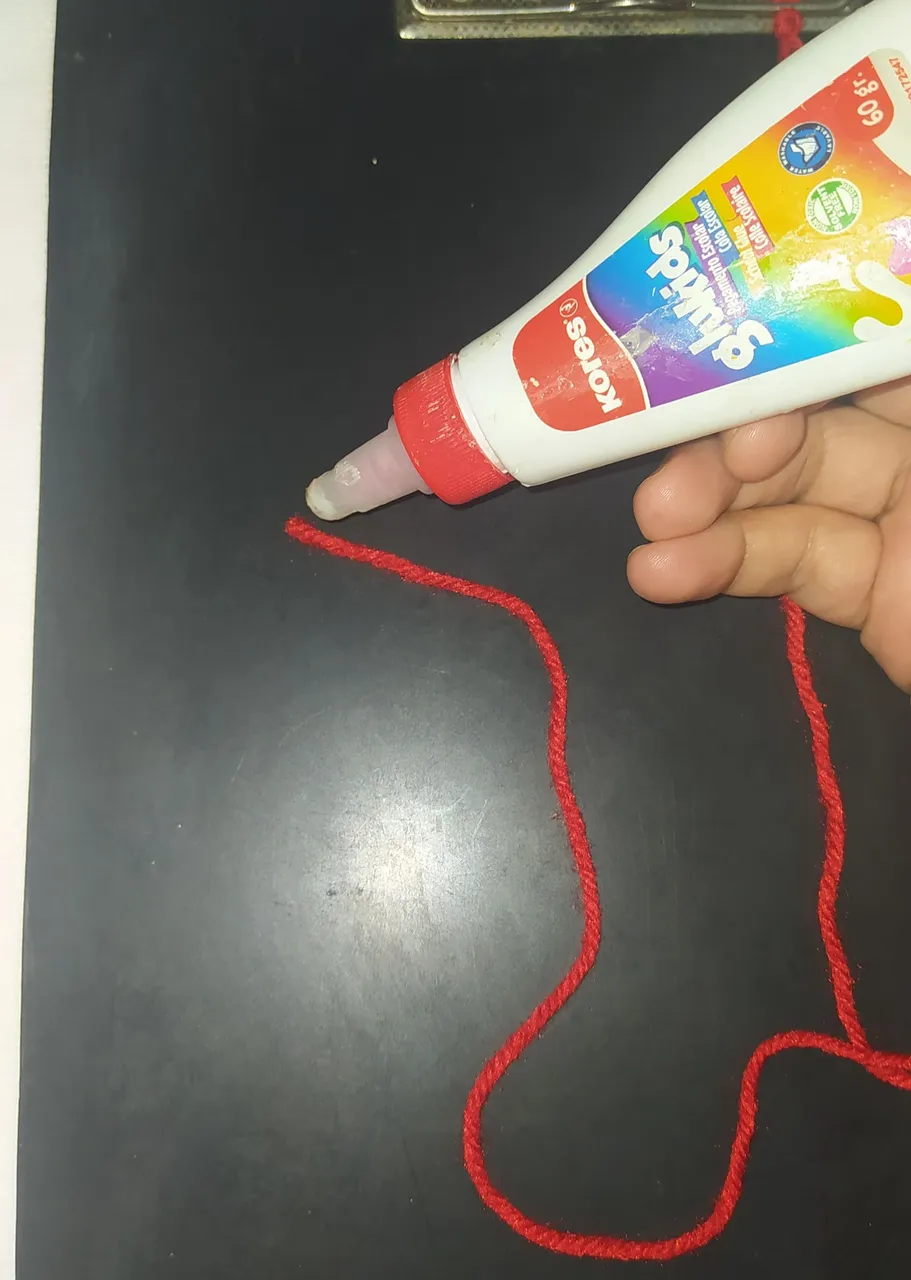
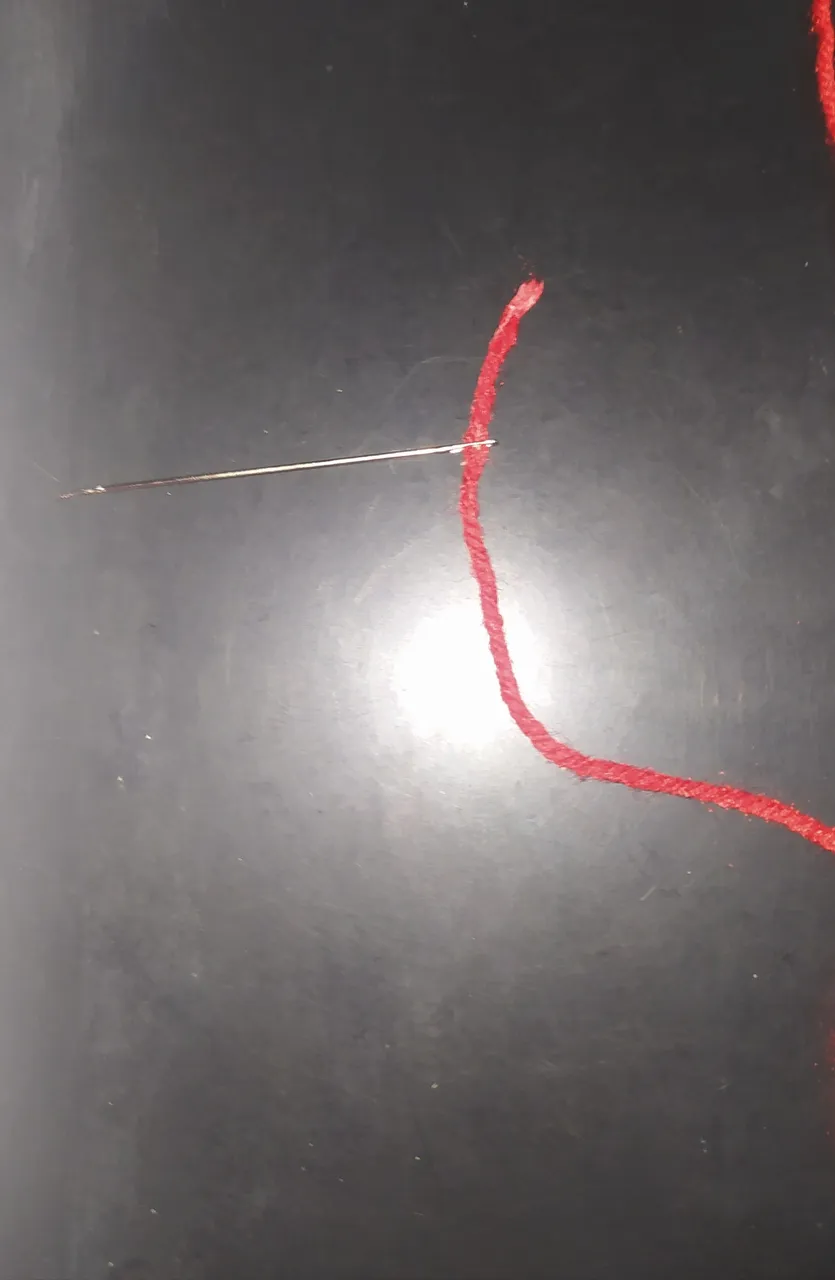
- Luego le coloque un poco de pega a la punta para hacerla más delgada y poderla introducir en ja aguja.
- Then I put a little glue on the tip to make it thinner so that it can be inserted into the needle.
 |  |
|---|---|
 |  |
| - | - |
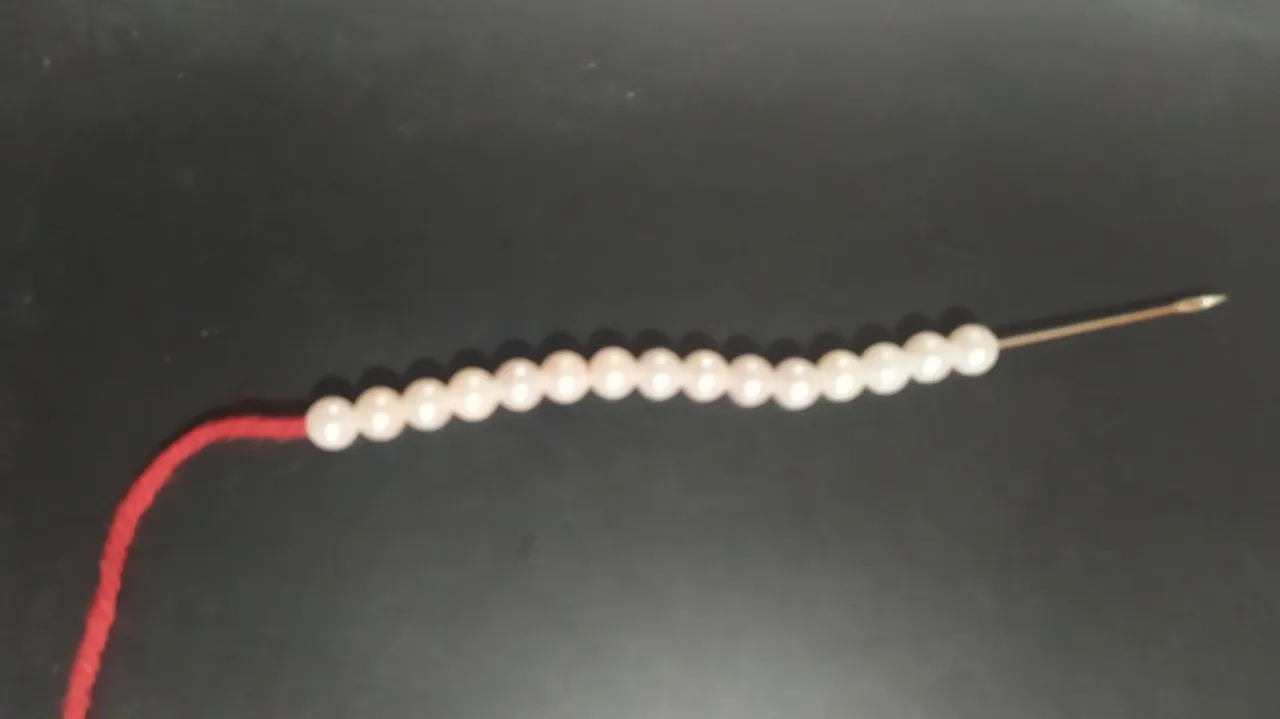
- Introduje 15 perlas blancas.
- Luego una cuenta dorada.
- Después dos perlas blancas.
- Repetí el paso de las dos perlas blanca y la cuenta dorada cinco veces, terminando en una cuenta dorada.
- Después introduje 15 perlas blancas.
De esta forma he colocado todas las cuentas de un solo lado del hilo, las desplazó hacia abajo.
- I inserted 15 white beads.
- Then a golden bead.
- Then two white beads.
*I repeated the step of the two white pearls and the golden bead five times, ending in a golden bead.- Then I inserted 15 white beads.
In this way I placed all the beads on one side of the thread, moved them down.
 |  |
|---|
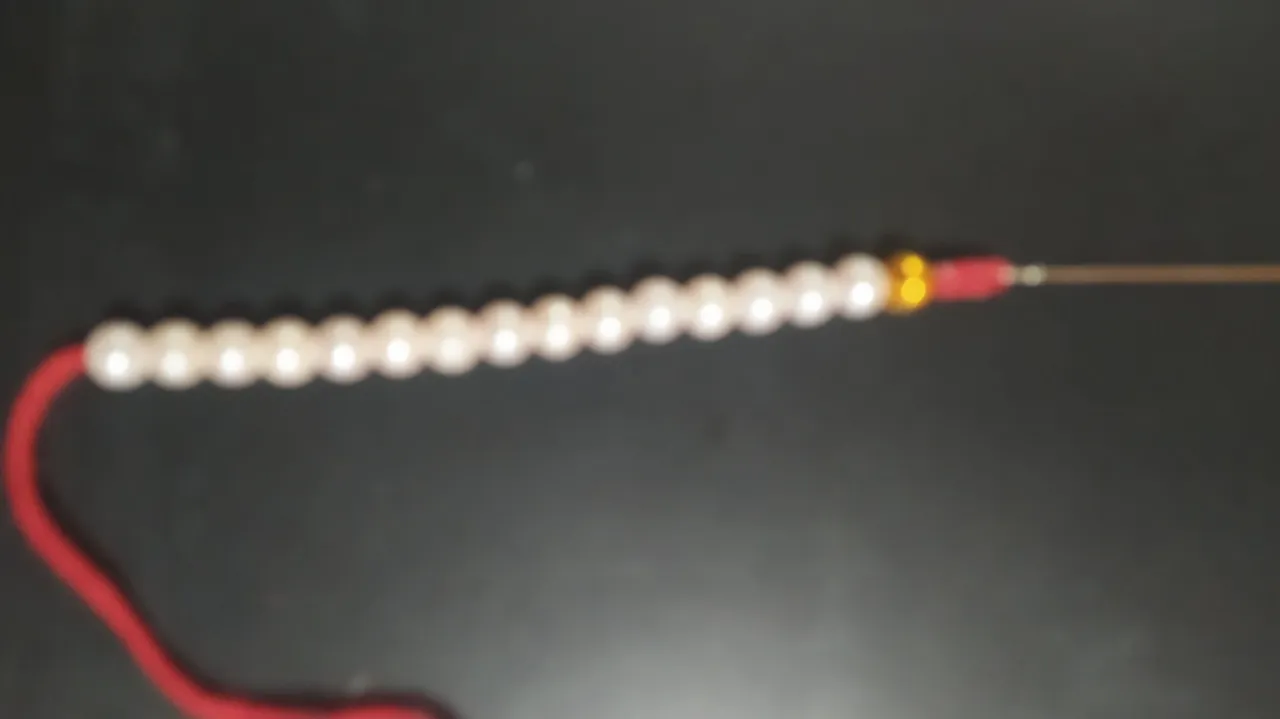
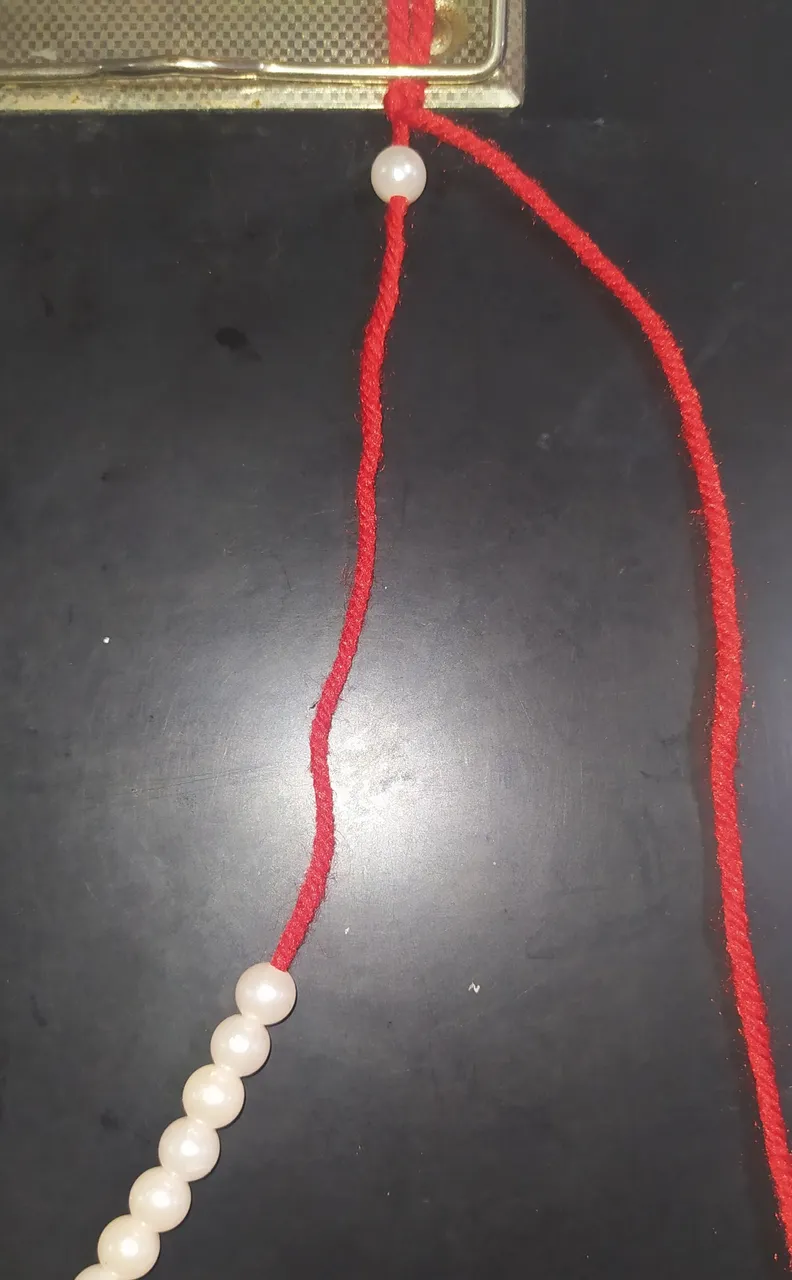
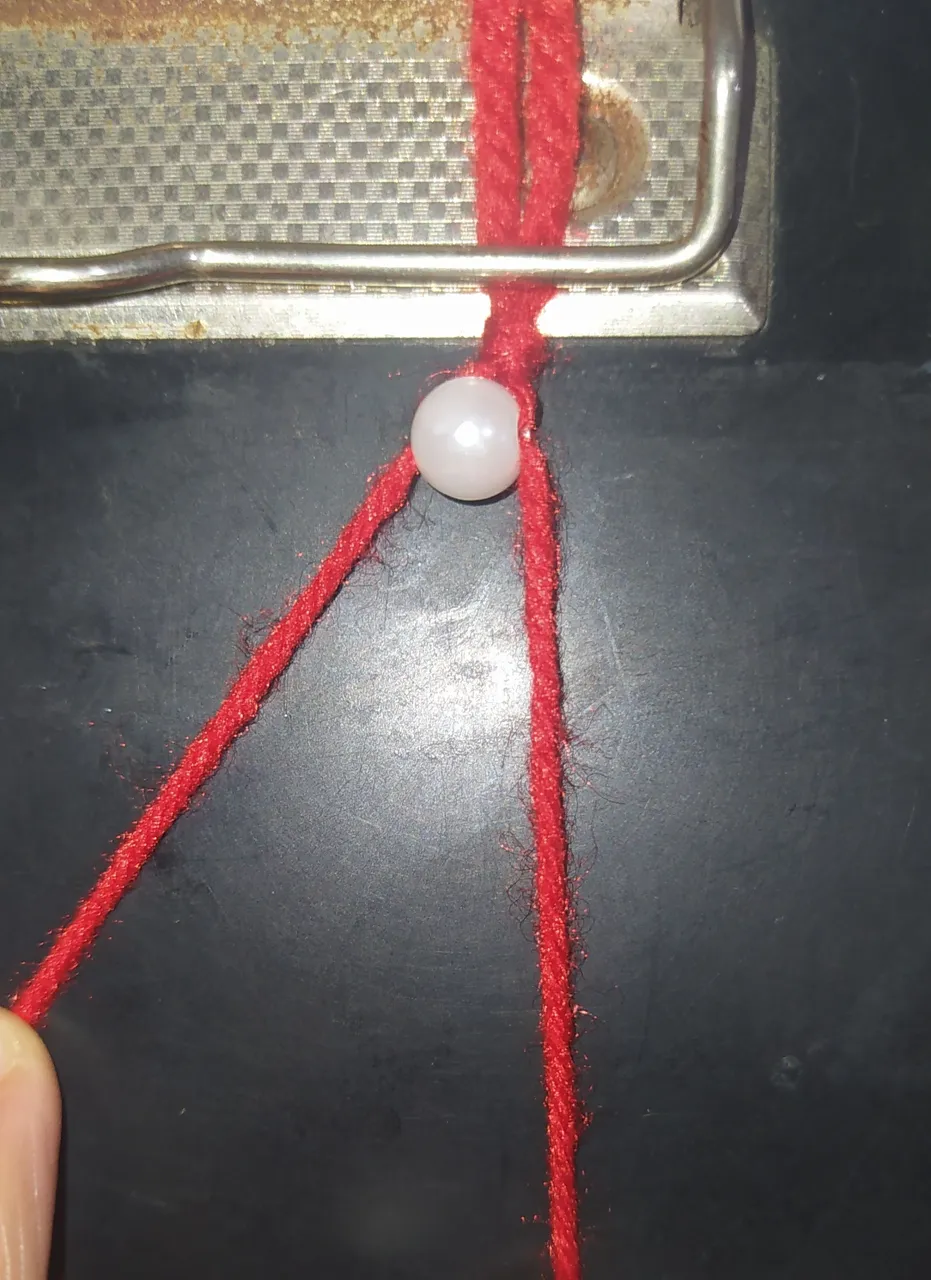
- Subo una perla blanca hasta el nudo.
- Retiro la aguja del hilo donde están las cuentas.
Coloco la aguja del otro lado del hilo.
- Repito el paso de colocarle un poco de pega a la otra punta del hilo para introducir la aguja.
- Luego que he subido la perla meto la aguja por el orificio de la parte de abajo de la perla.
- I bring a white bead up to the knot.
- I remove the needle from the thread where the beads are.
I place the needle on the other side of the thread.
- I repeat the step of putting some glue on the other end of the thread to introduce the needle.
- After I have pulled up the bead I put the needle through the hole at the bottom of the bead.
 |  |
|---|
- Halo los dos extremos de hilo para que la perla quede segura.
- Pull the two thread ends together to secure the bead.
 |  |
|---|---|
 |  |
| - | - |
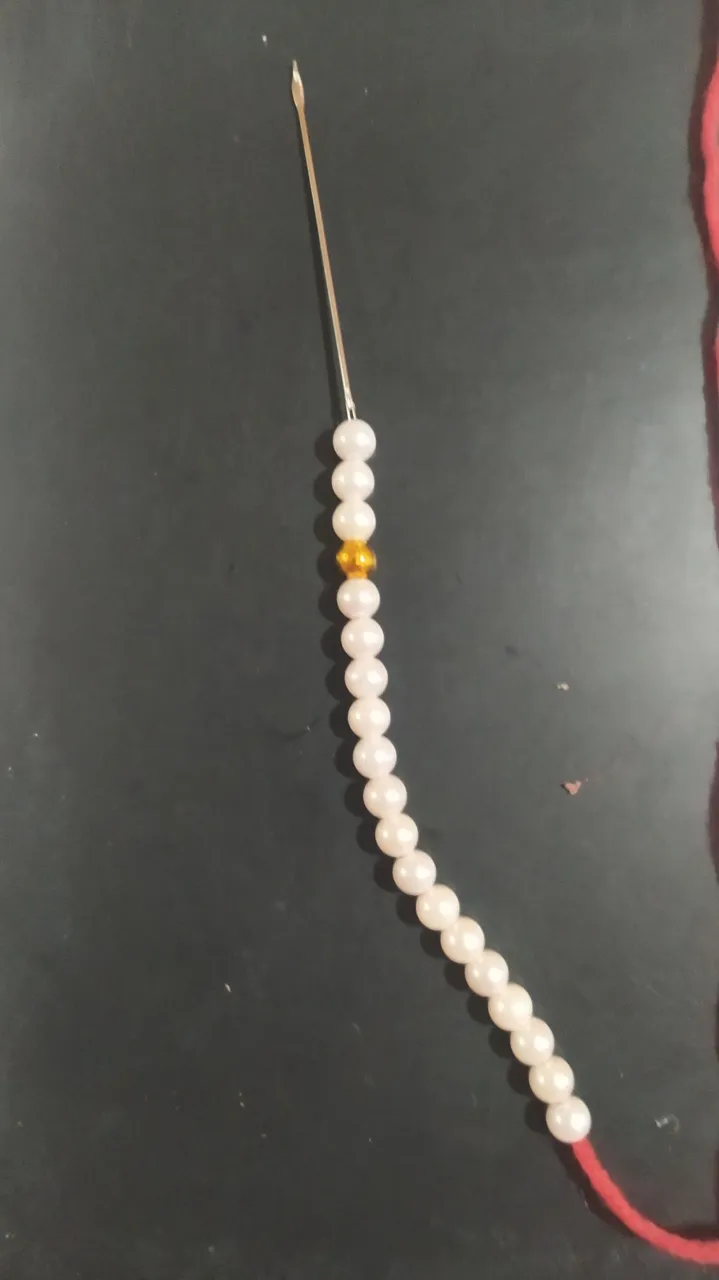
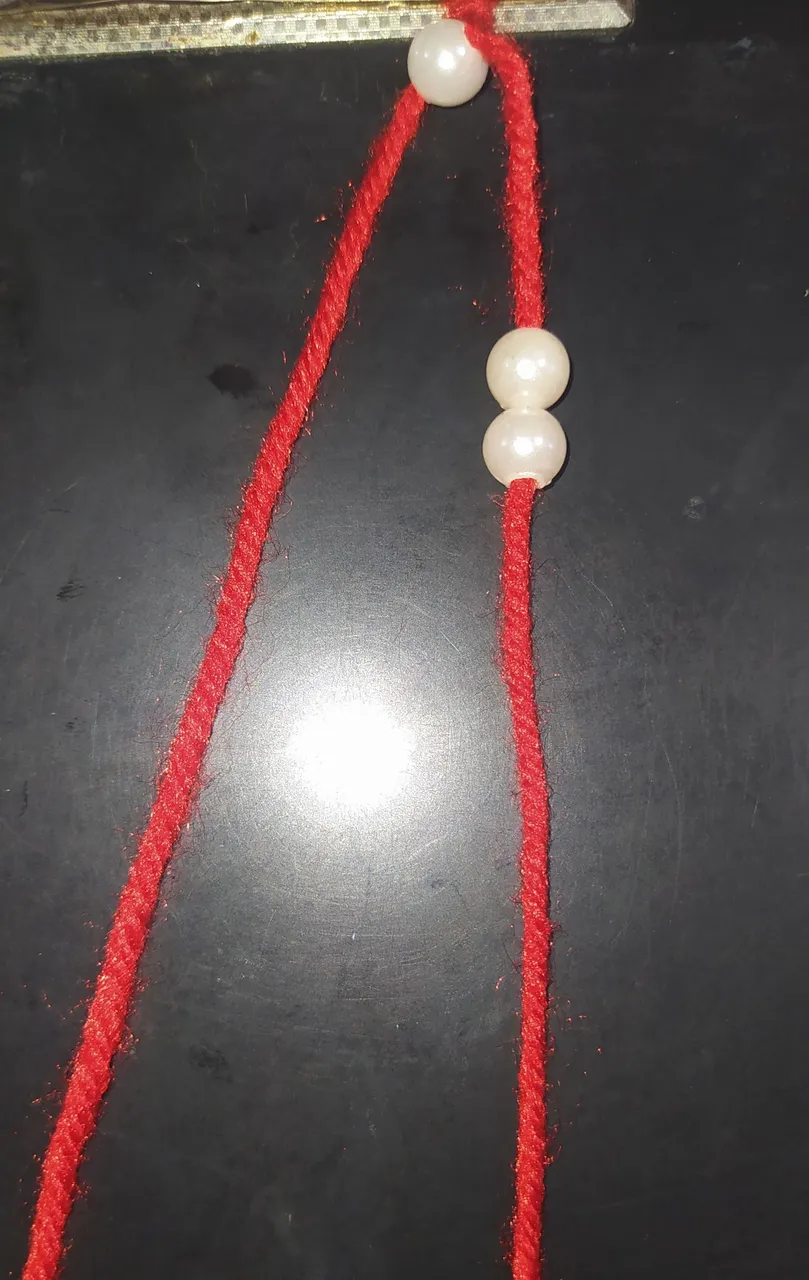
- Subo dos perlas.
- Repito el paso de introducir la aguja con el hilo por la parte de abajo y halar los hilos para asegurarlas perlas.
- I pull up two beads.
- Repeat the step of inserting the needle with the thread from the bottom and pulling the threads to secure the beads.
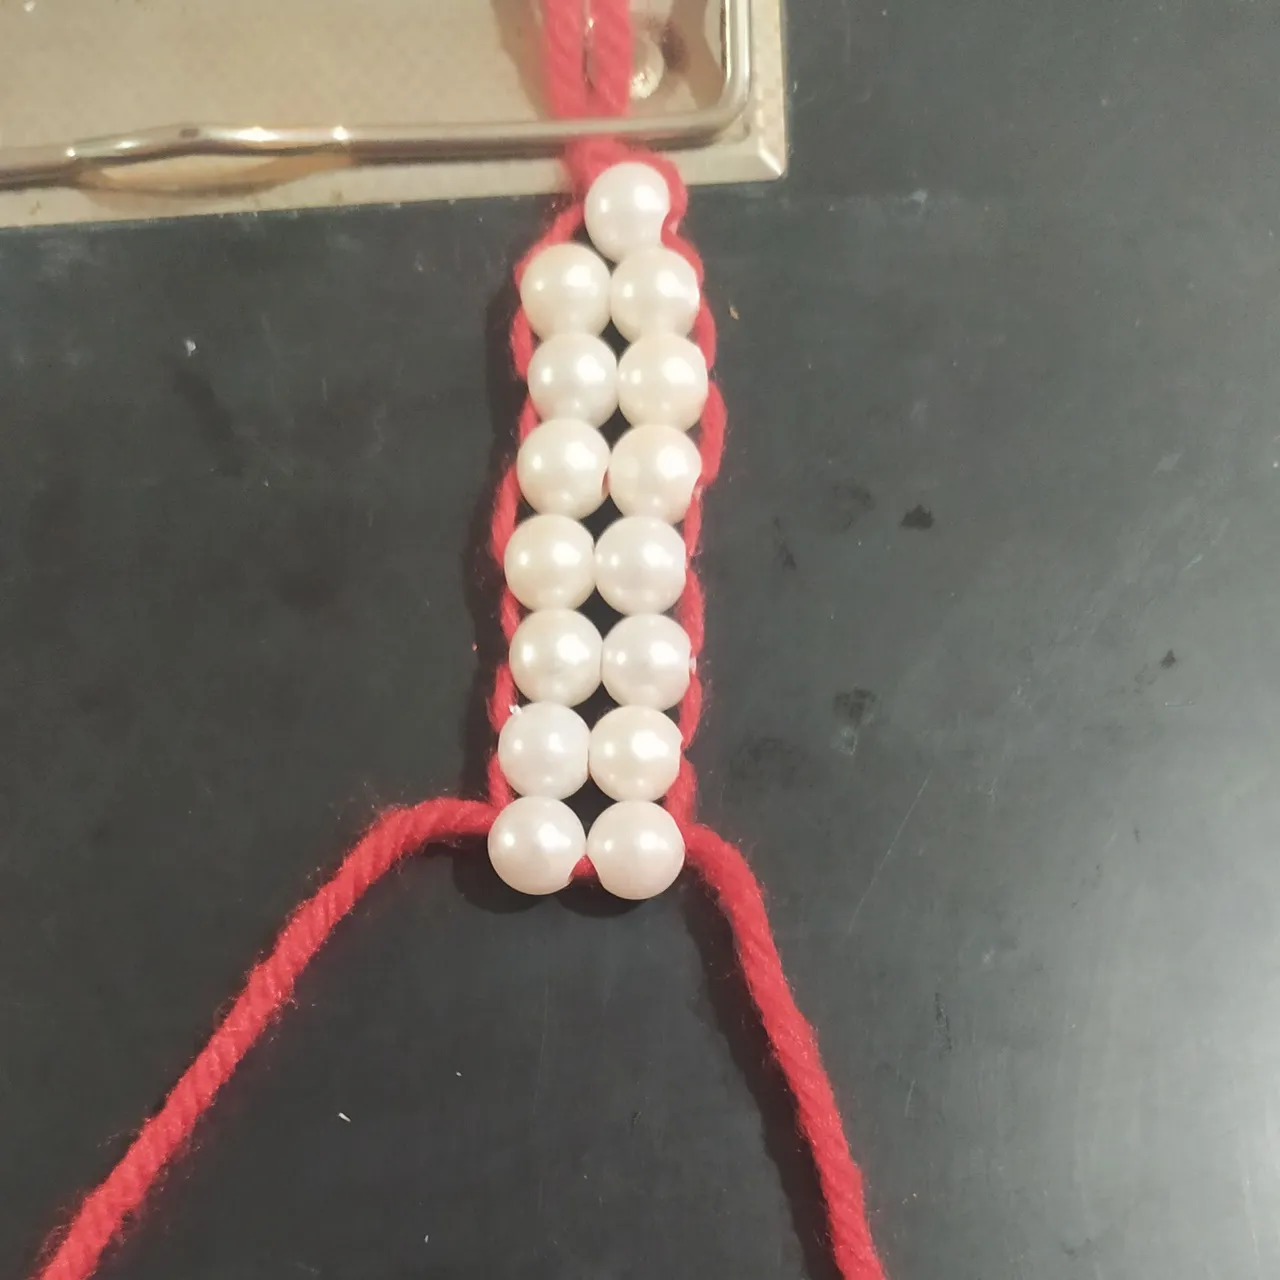
- Repito este paso hasta haber colocado las las 15 perlas que van a formar un lado de la pulsera.
- I repeat this step until I have placed the 15 beads that will form one side of the bracelet.
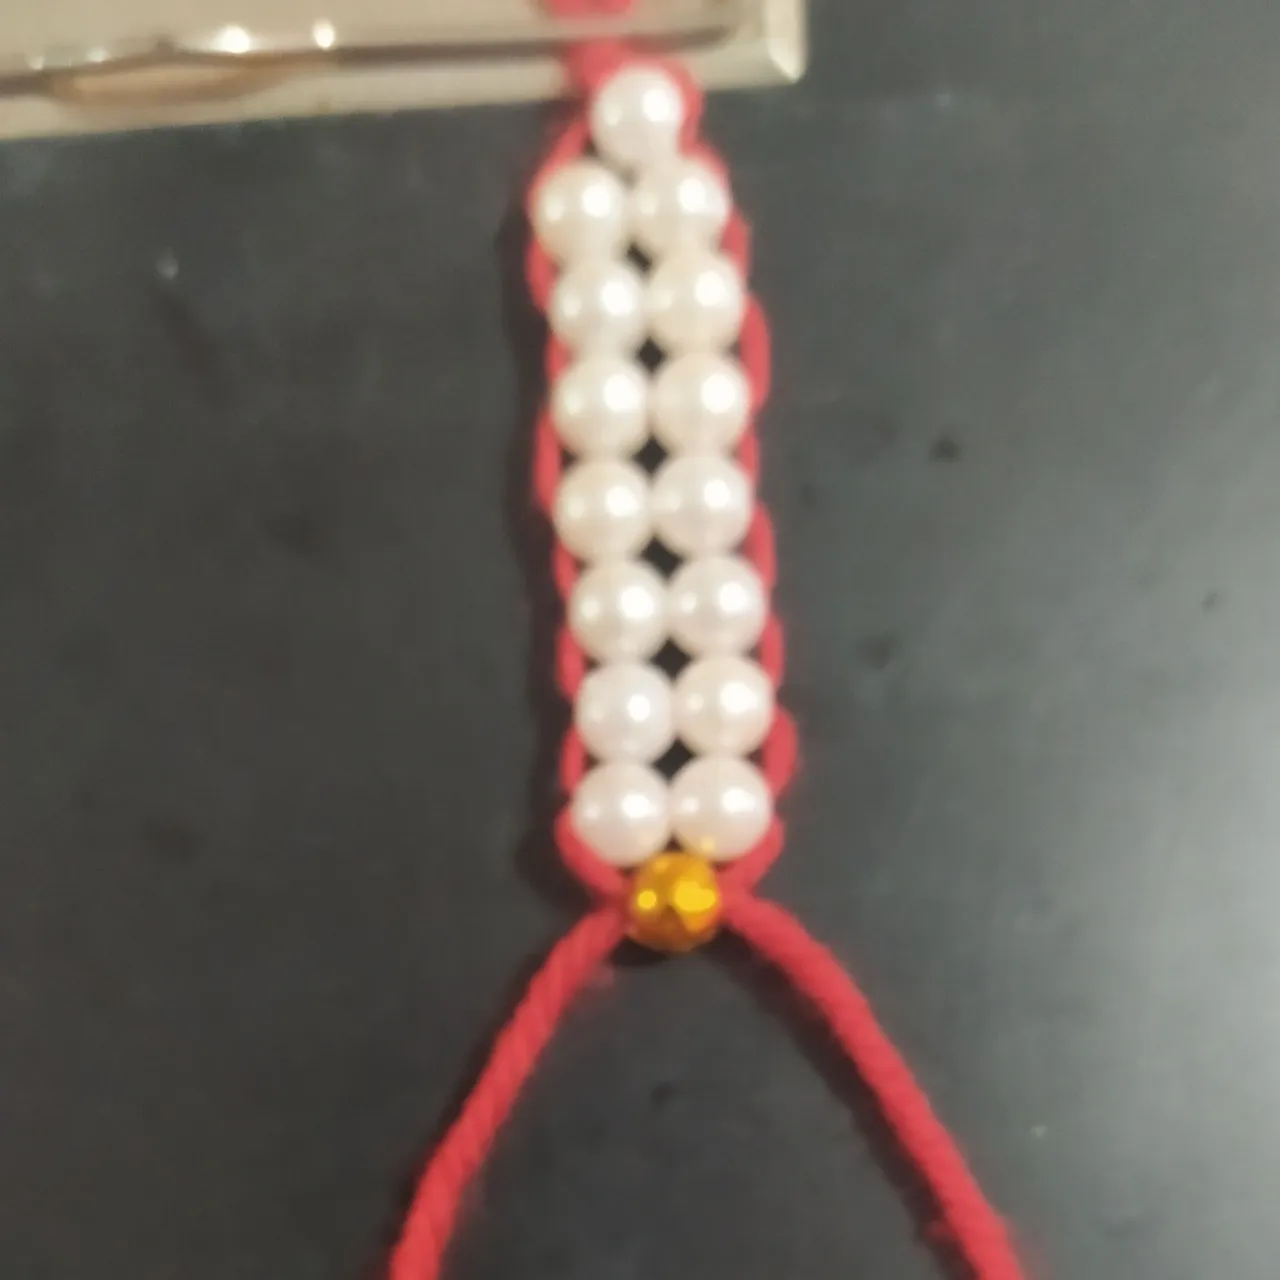
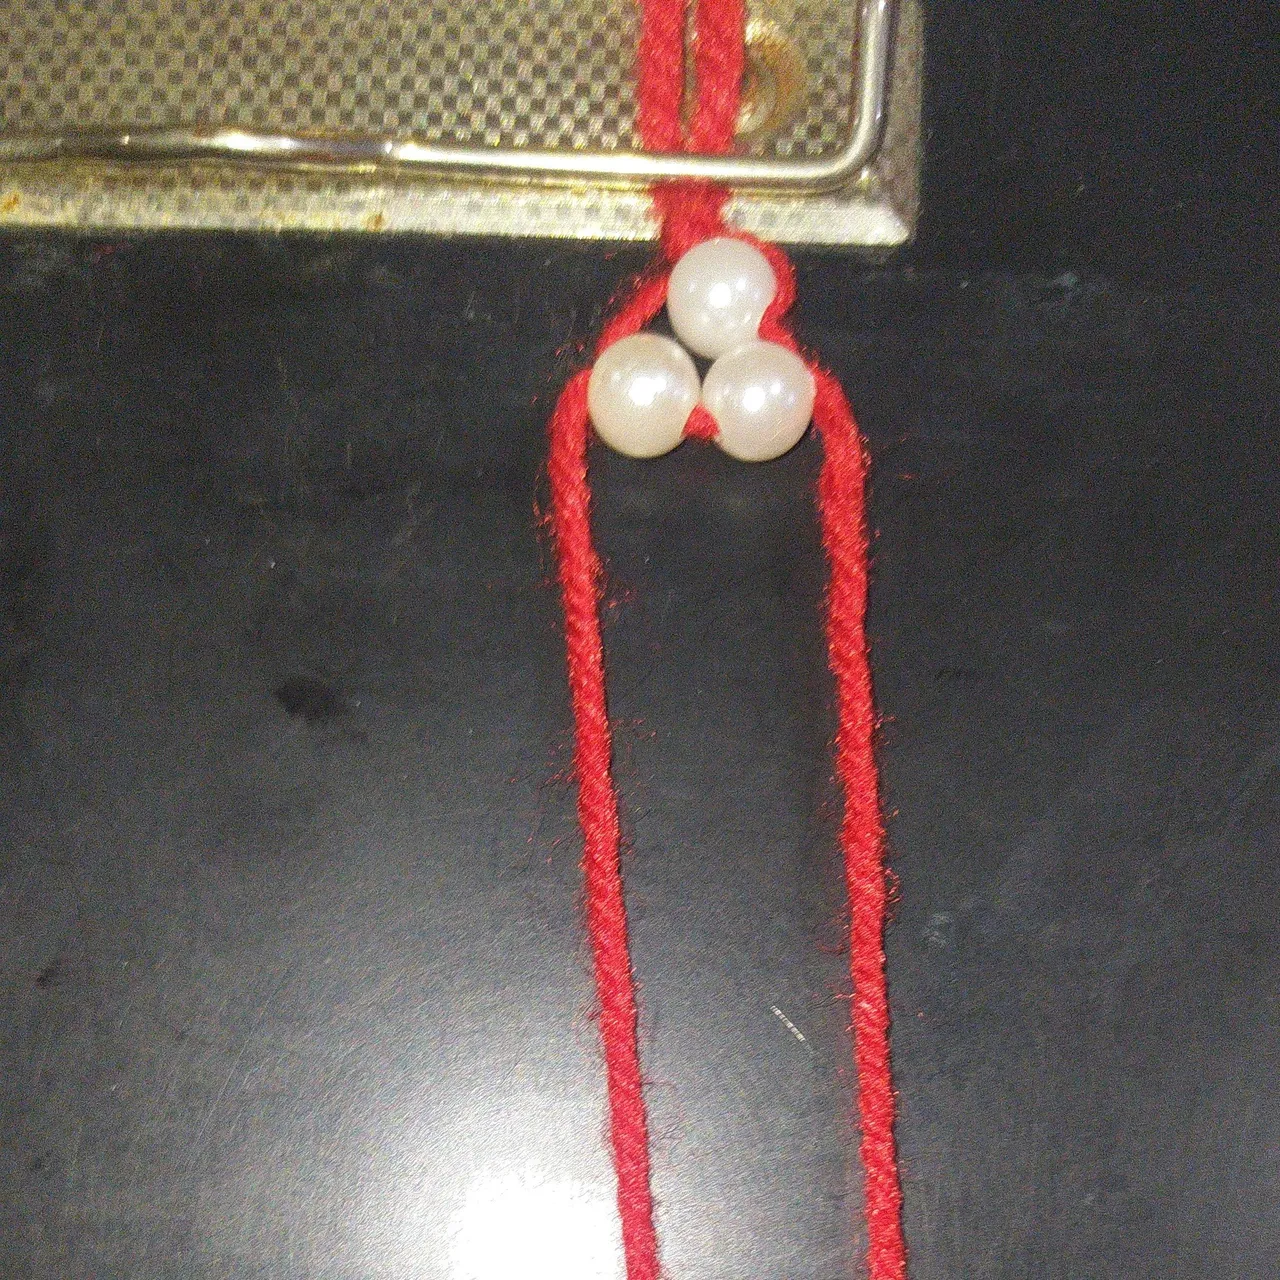
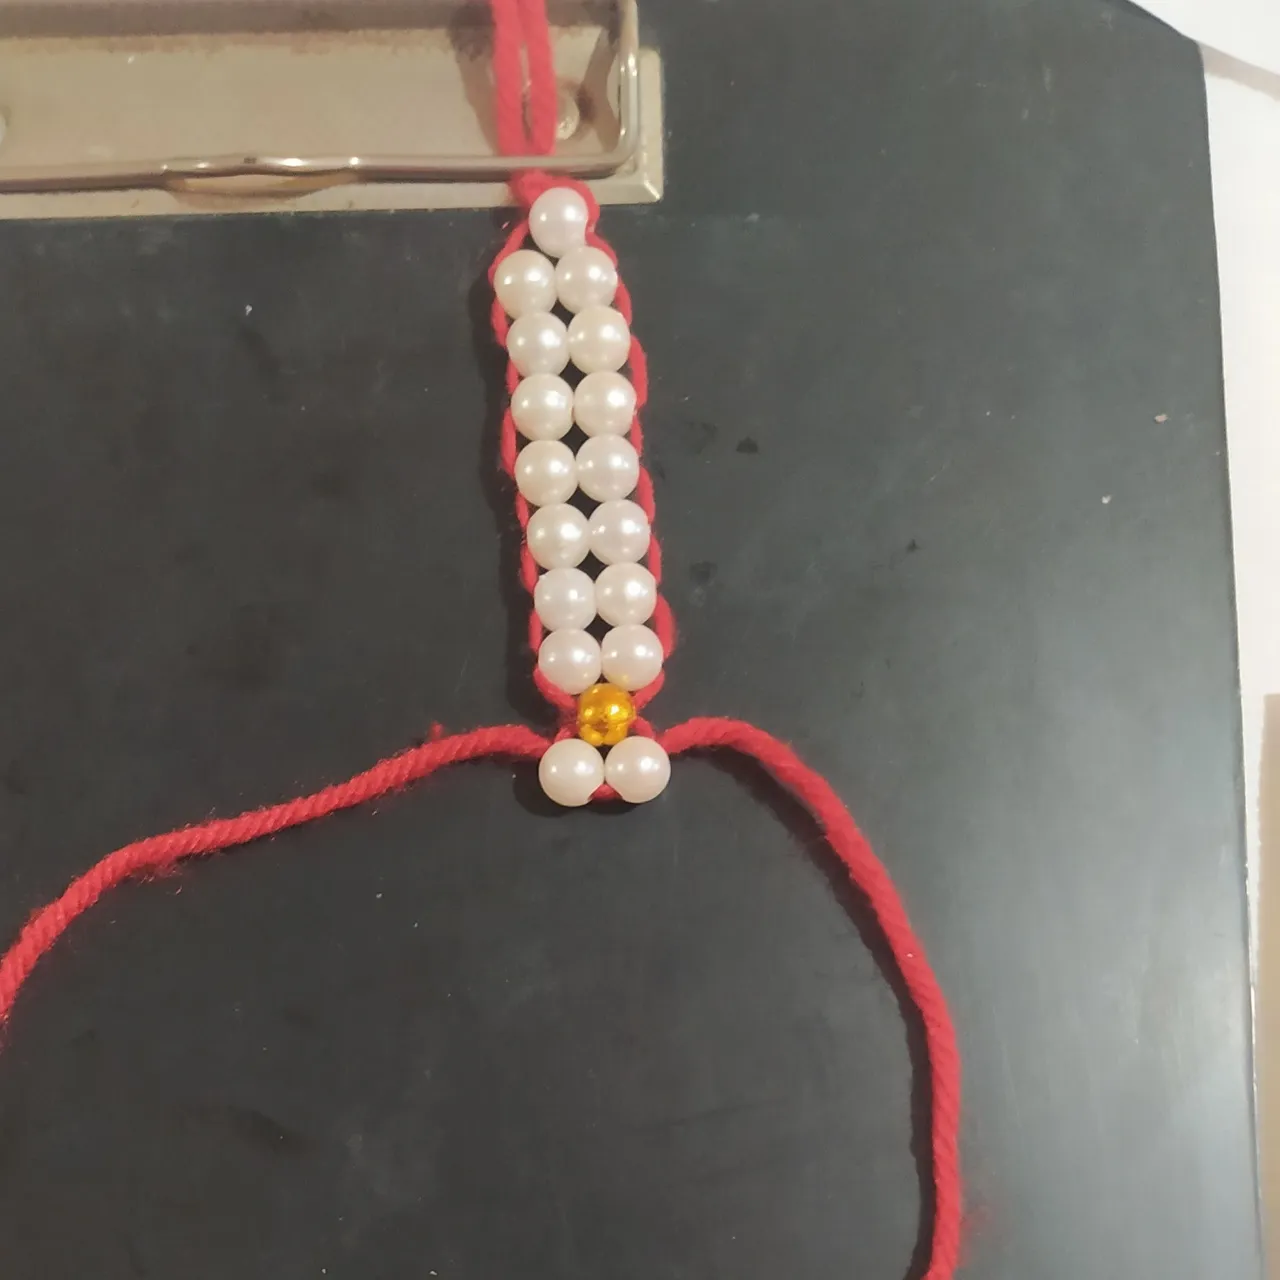
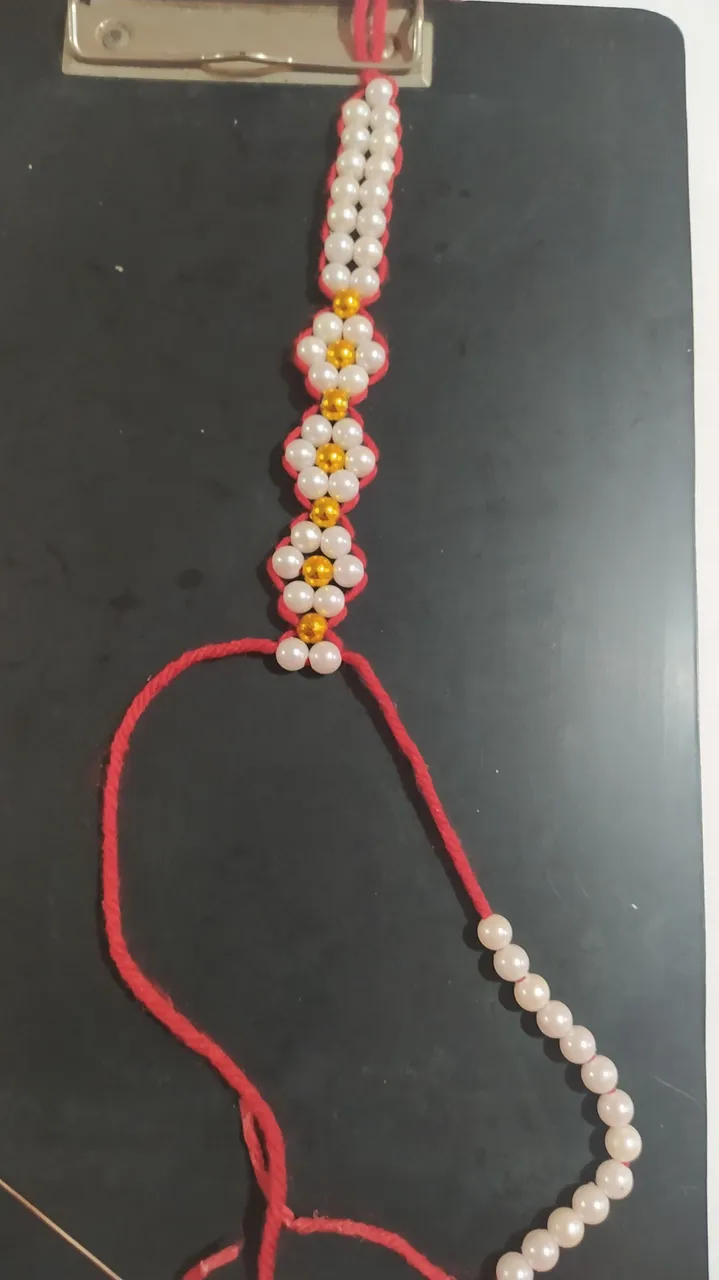
- Coloco uno cuenta dorada.
Empezamos a formar la Primera flor.
- I place a golden bead.
We begin to form the first flower.
 |  |
|---|
 |  |
|---|
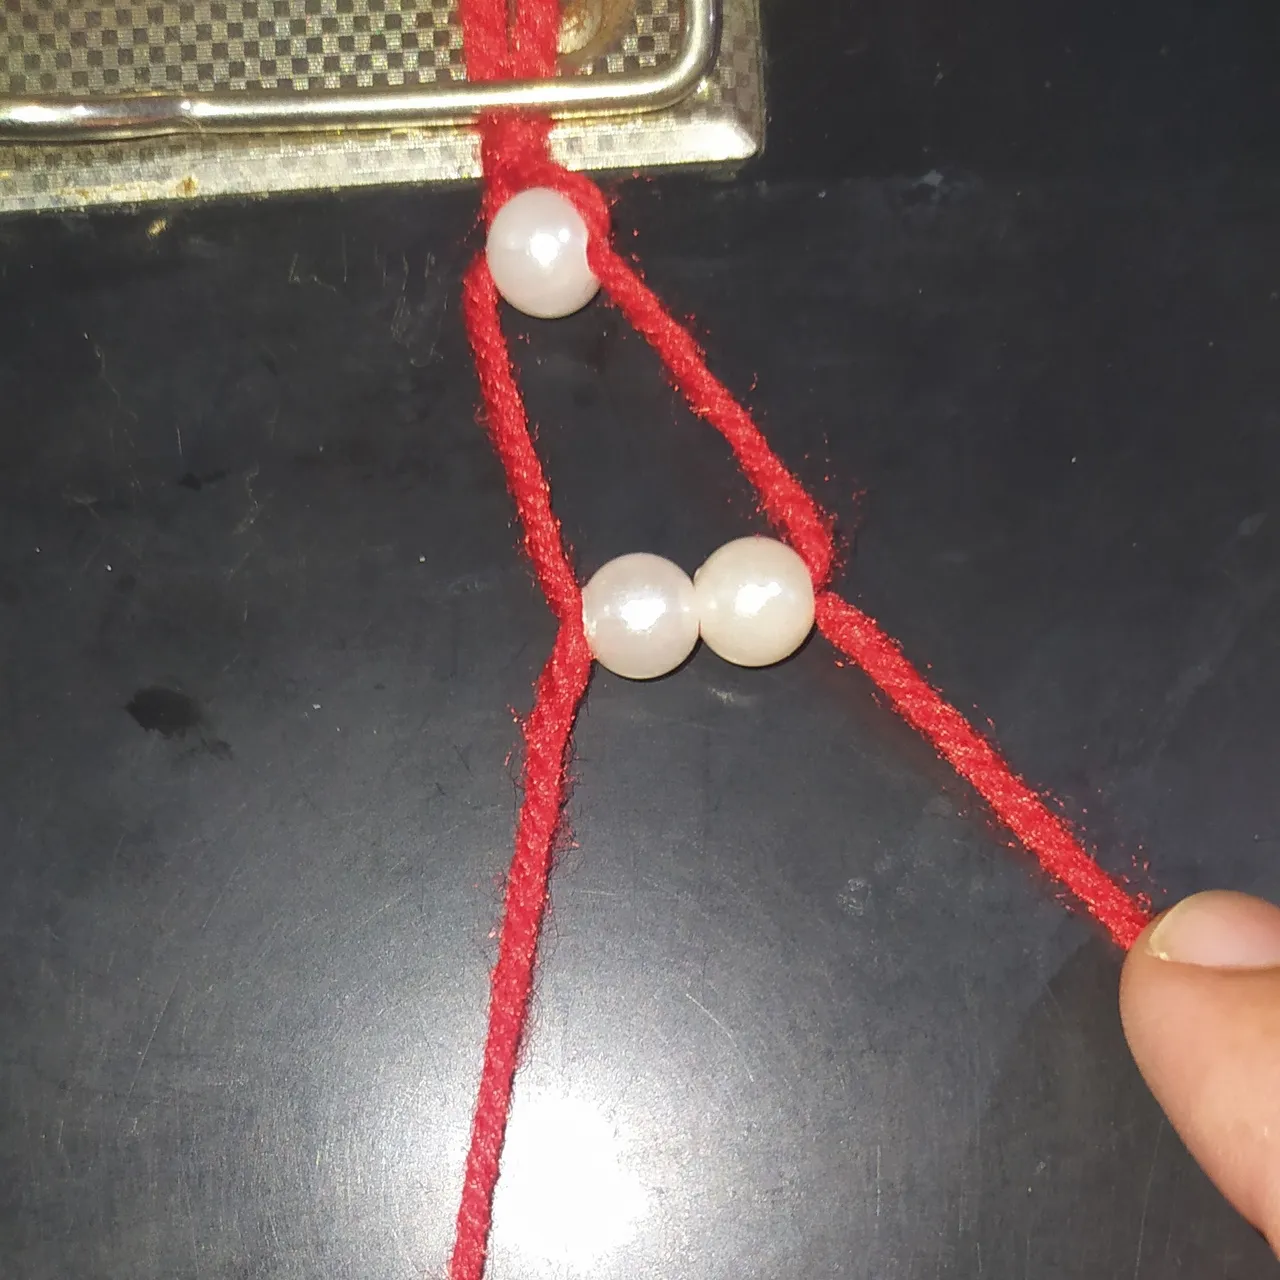
- Para hacer la primera flor subimos dos perlas blancas introducimos la aguja con el hilo por la parte de abajo halamos los hilos aseguramos.
- Luego subimos una perla blanca, una cuenta dorada y una perlas blancas, repetimos el paso de introducir la aguja por la parte de abajo y halamos y aseguramos.
- Subimos dos perlas blancas y repetimos el paso con la aguja para asegurar.
- To make the first flower we pull up two white beads, introduce the needle with the thread at the bottom, pull the threads and secure.
- Then we raise a white bead, a golden bead and a white bead, we repeat the step of introducing the needle from the bottom and we pull and we secure.
- Then we pull up two white beads and repeat the step with the needle to secure the threads.
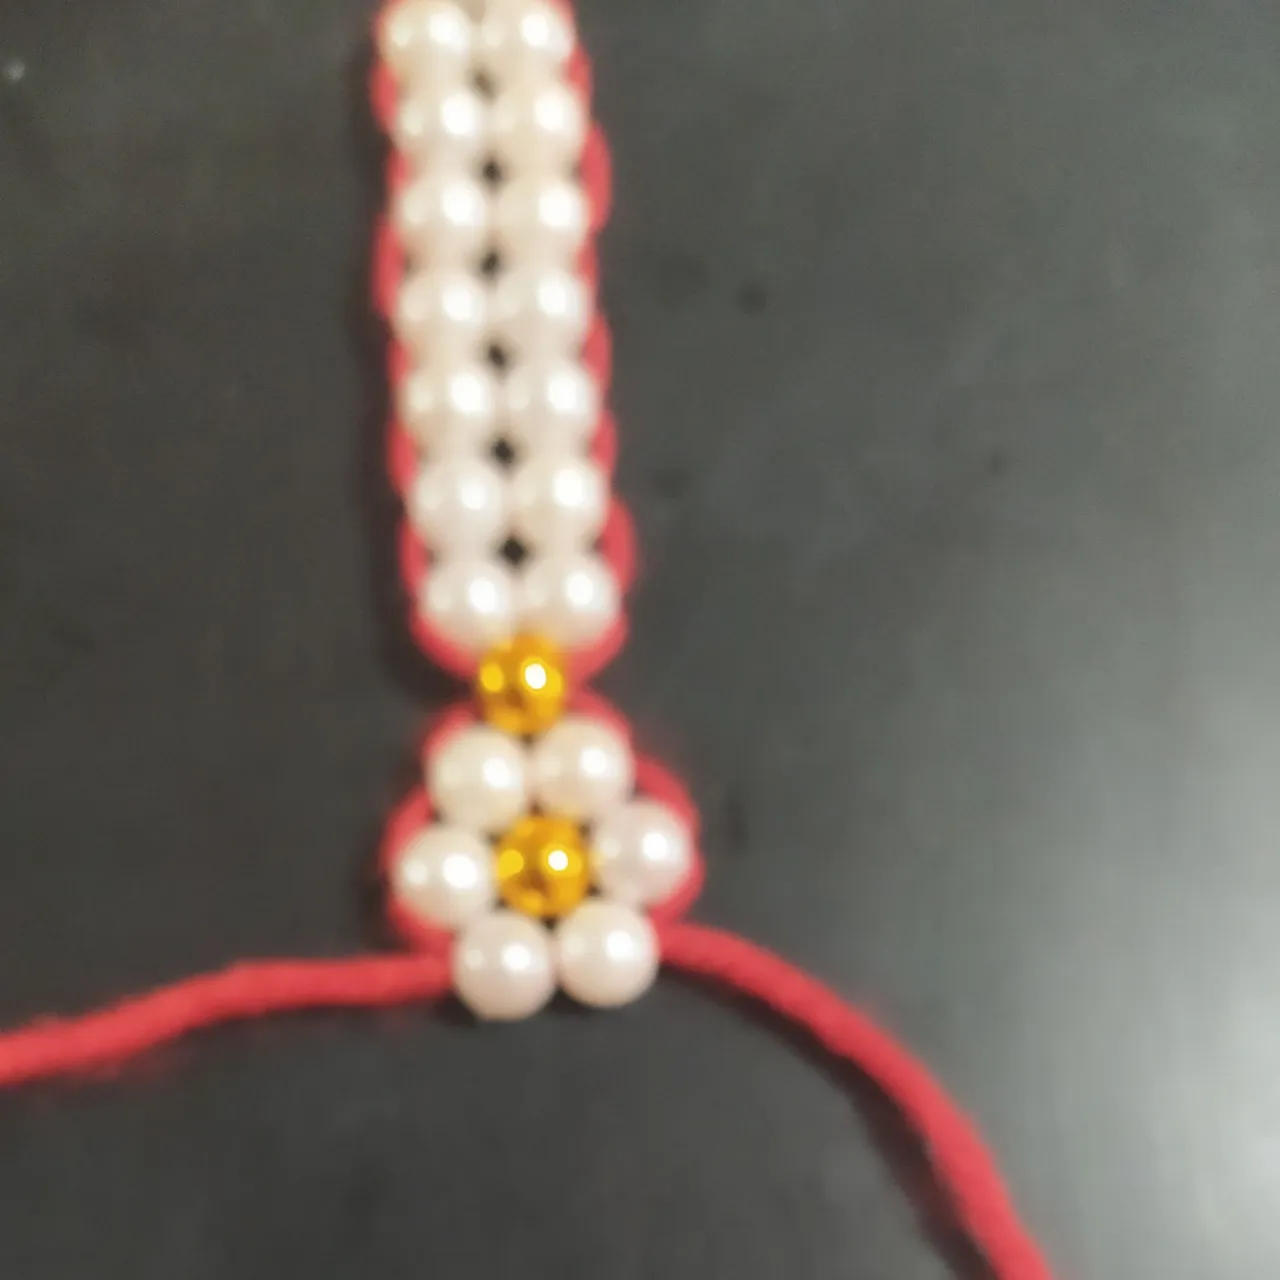
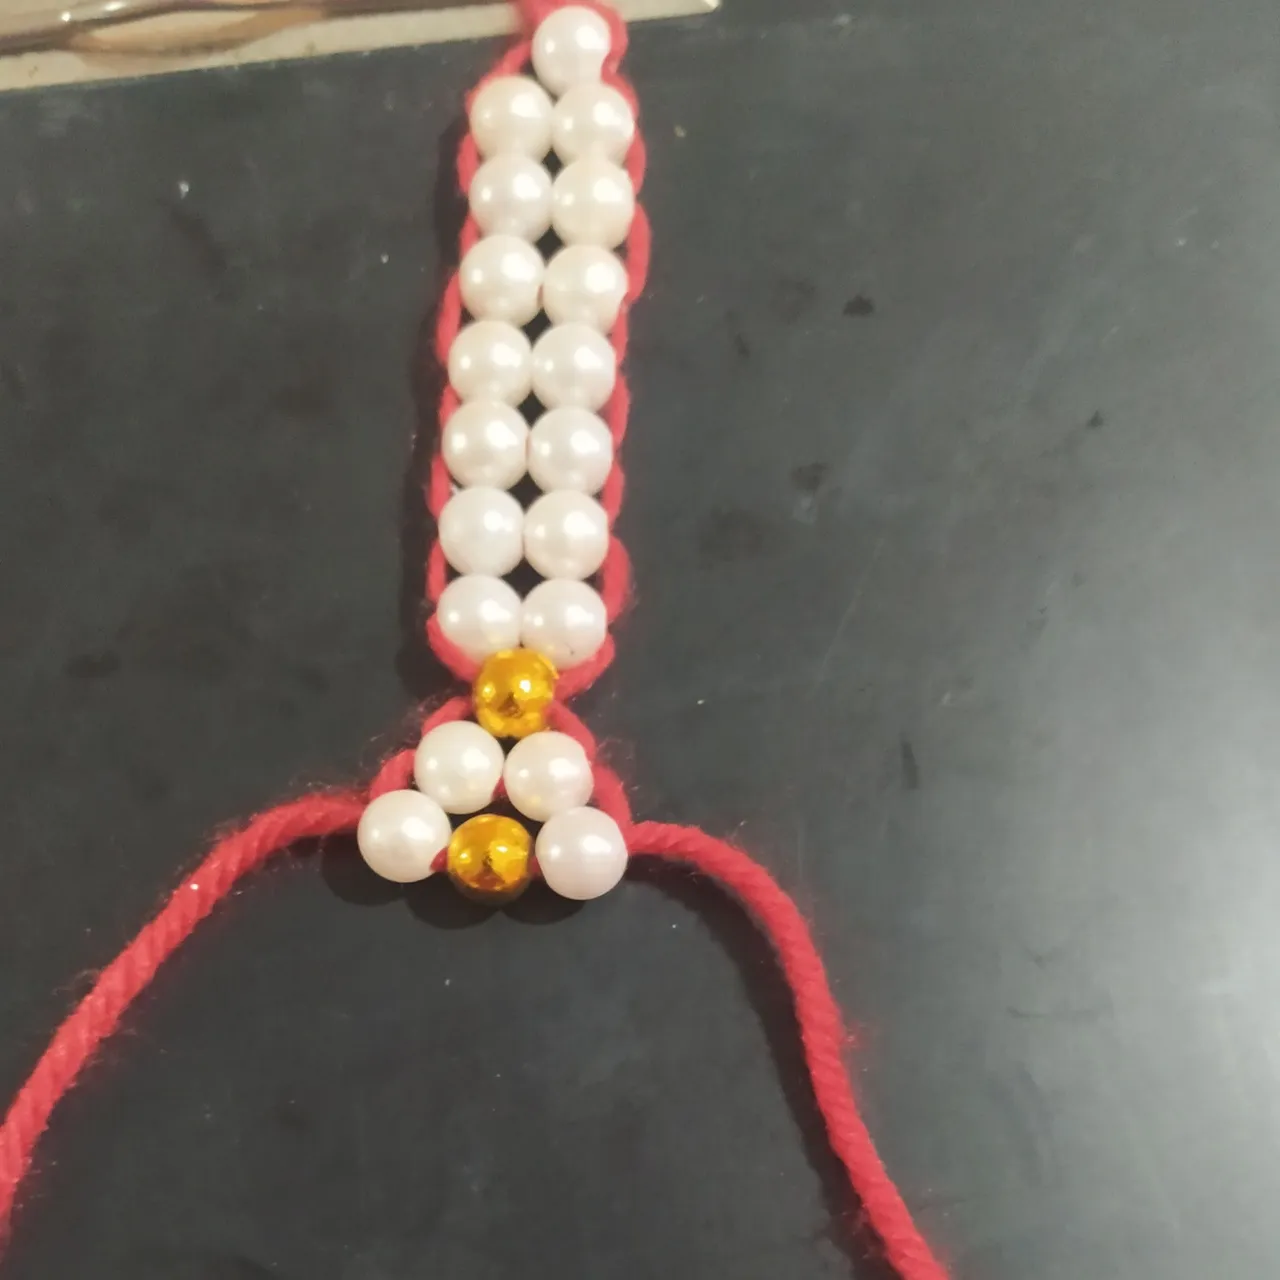
- De esta forma tan linda ya nos queda lista la primera flor.
- In this beautiful way the first flower is ready.
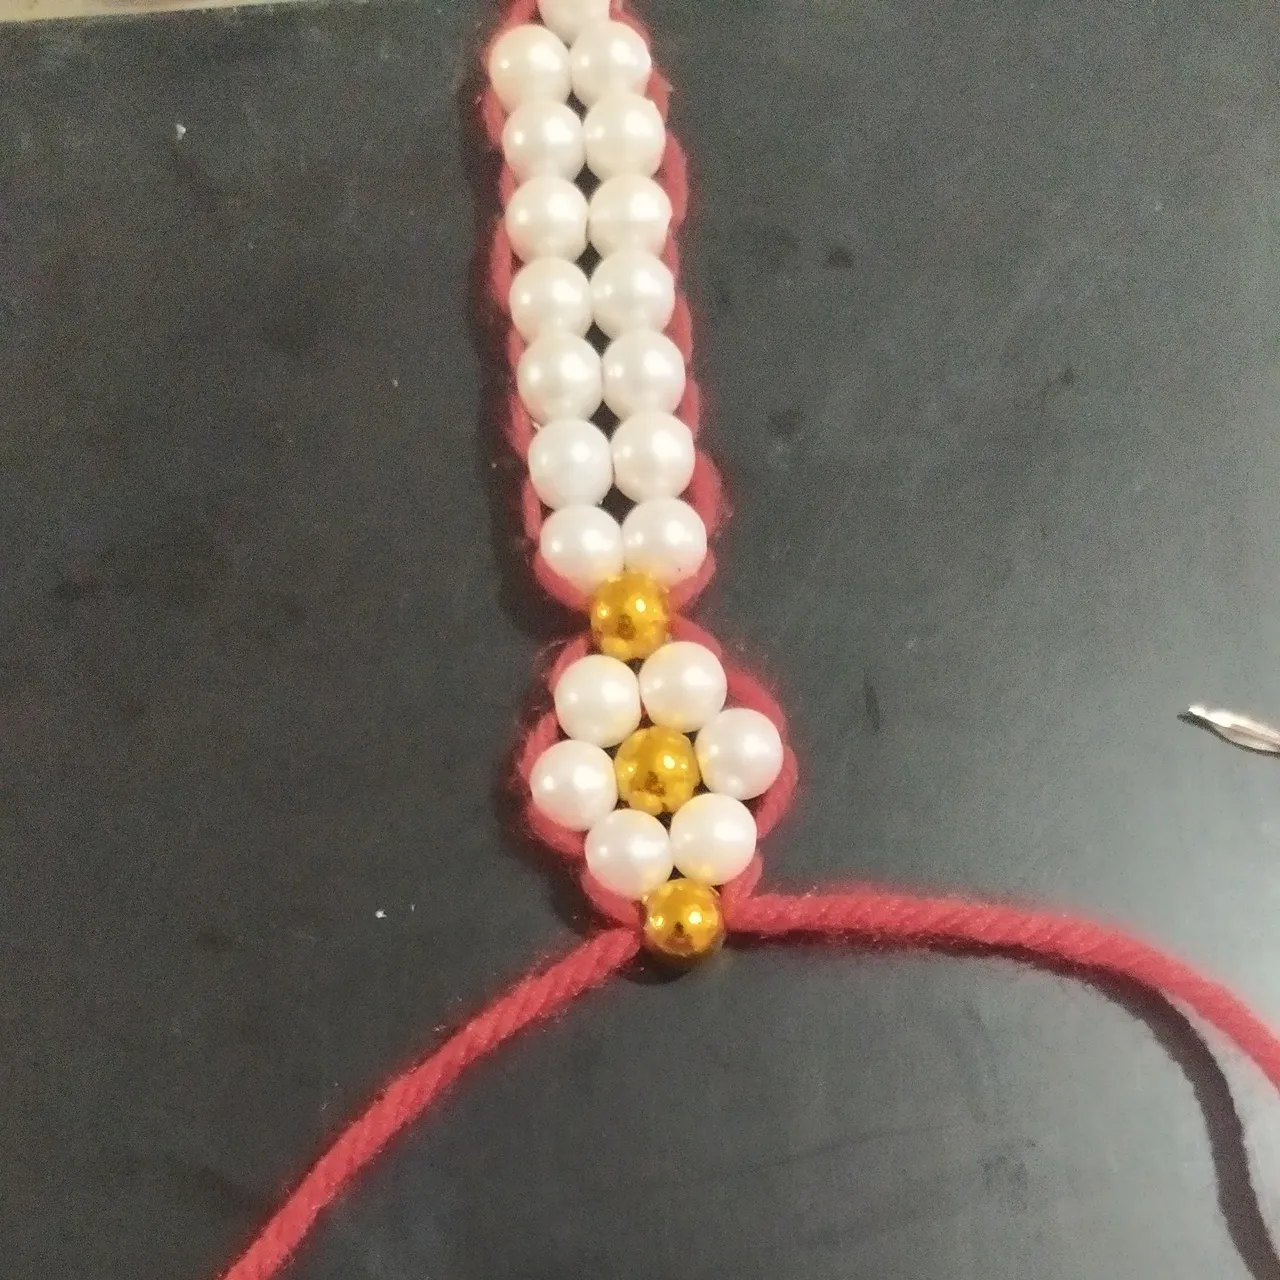
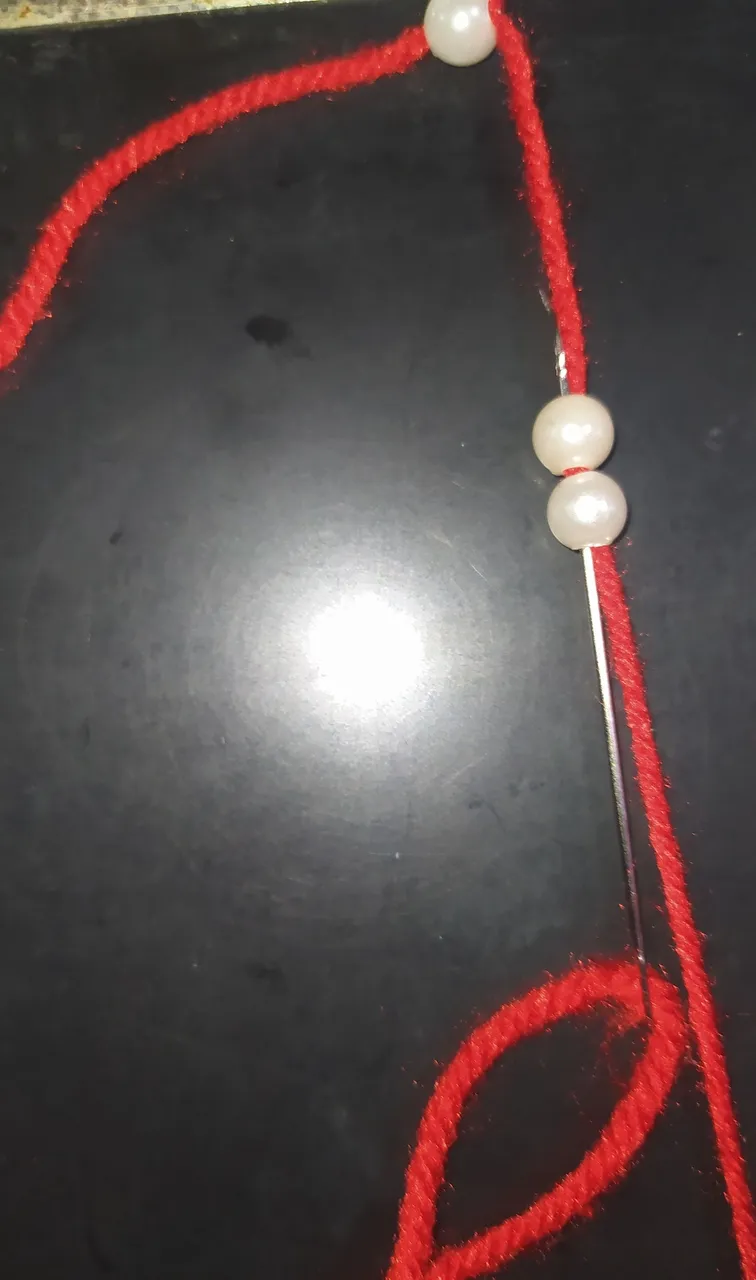
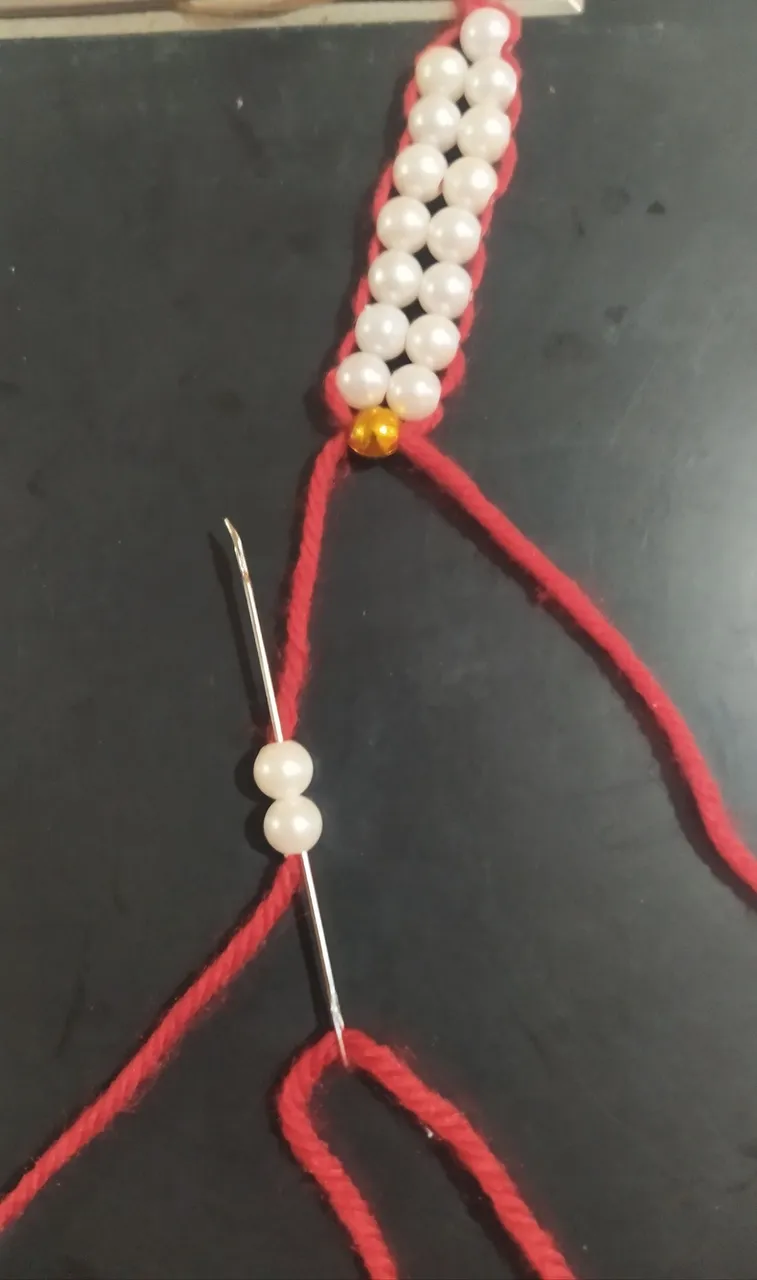
- Para hacer la segunda flor separamos con una cuenta dorada la cual subimos y hacemos el mismo proceso con la aguja.
- To make the second flower we separate it with a golden bead which we raise and do the same process with the needle.
- Y repetimos los mismos pasos hasta hacer un total de tres flores.
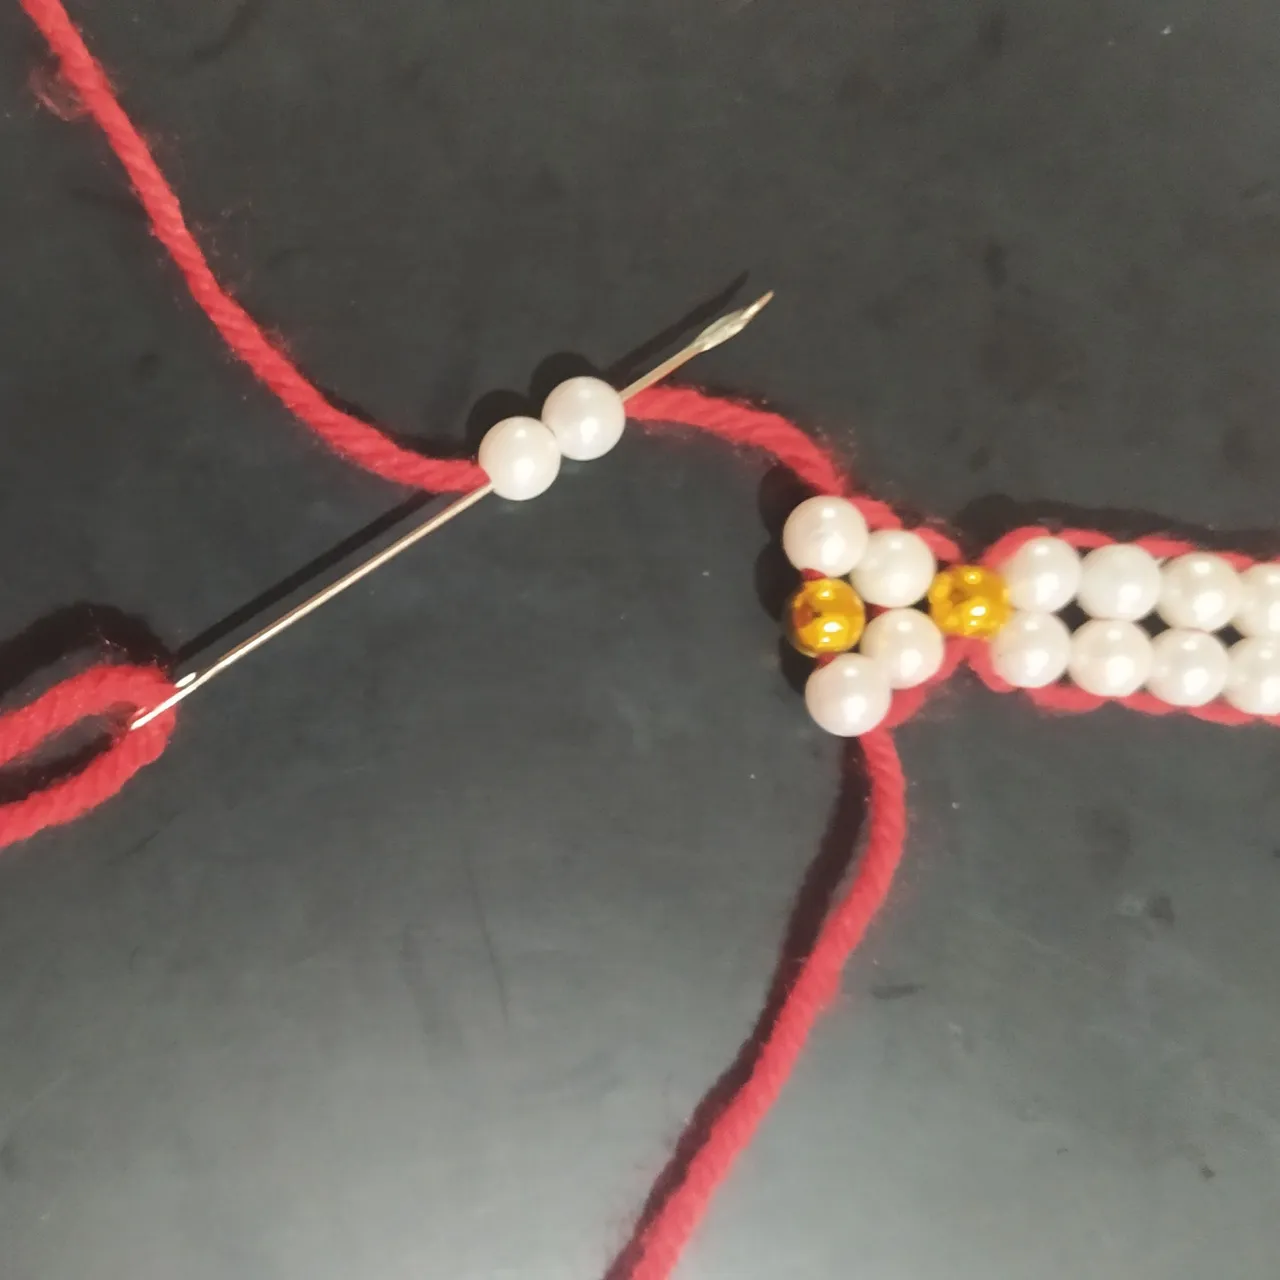
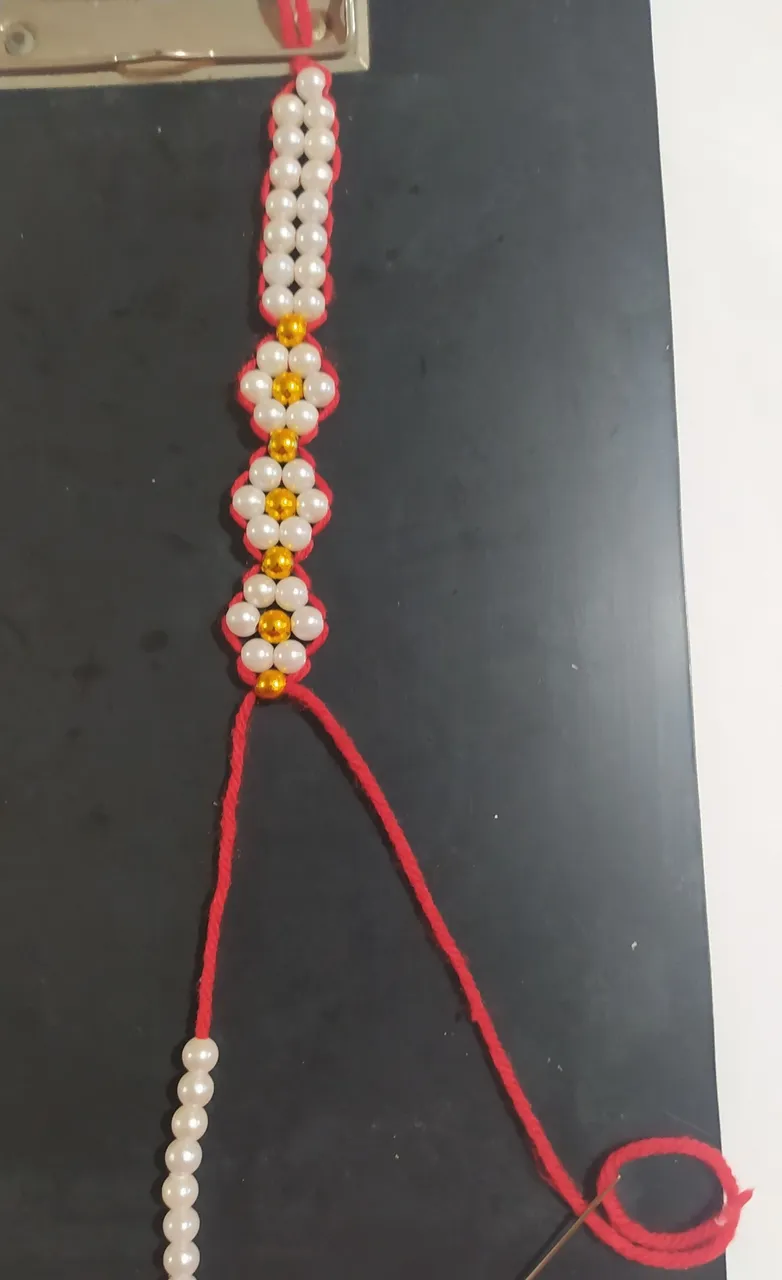
- Subimos una cuenta dorada y empezamos a realizar el otro lado de la pulsera
- Repitiendo la misma forma que al principio de la pulsera.
- And we repeat the same steps until we have a total of three flowers.
- We raise a golden bead and begin to make the other side of the bracelet.
- Repeating the same way as at the beginning of the bracelet.
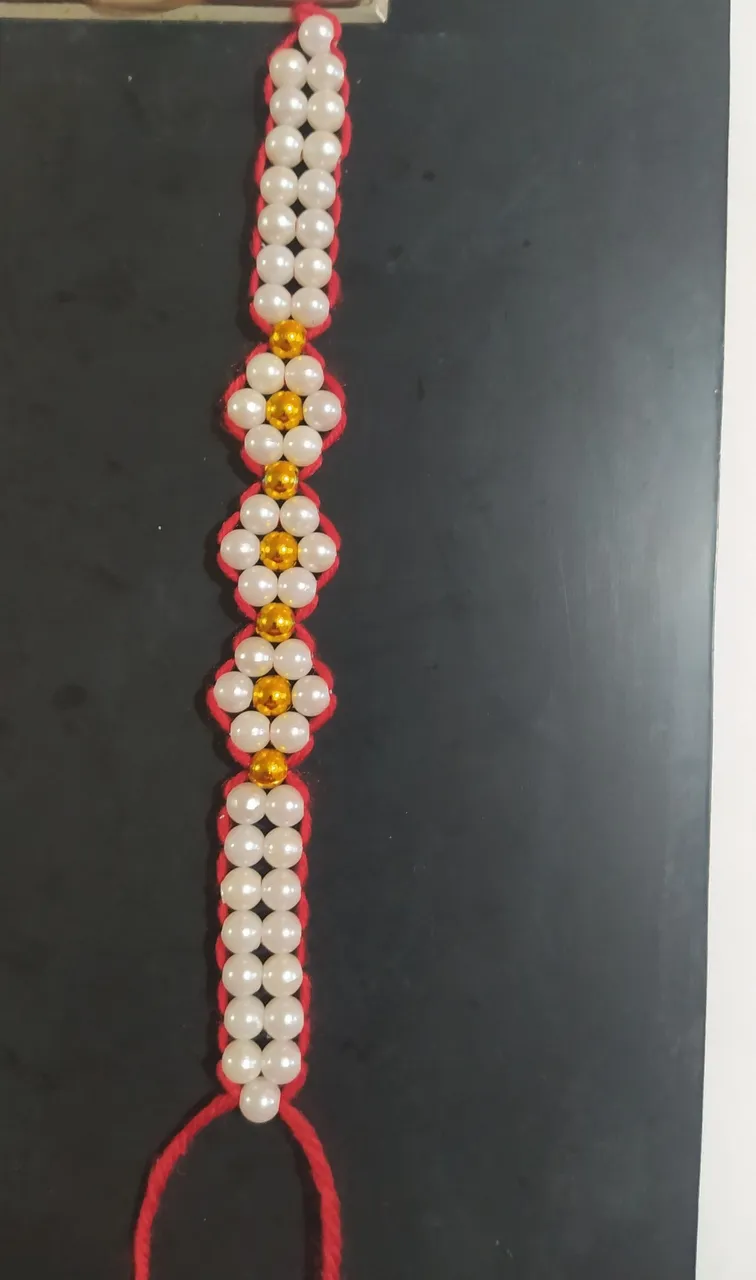
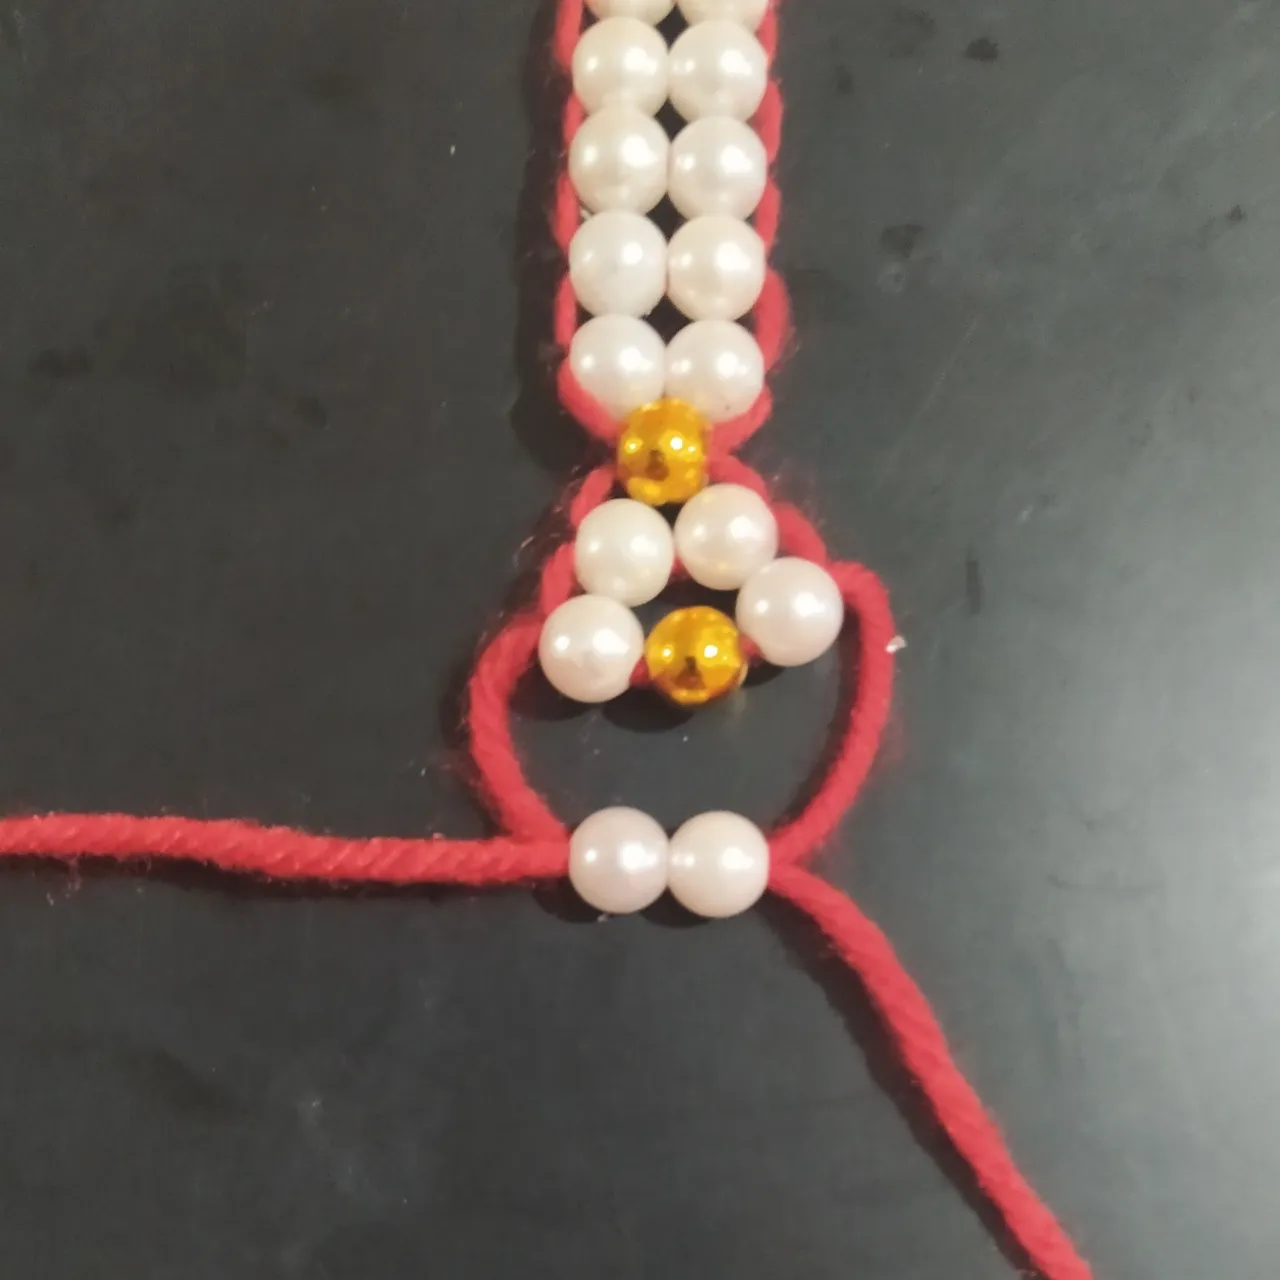
- En dónde subimos dos cuentas aseguramos con la aguja y el hilo, y repetimos el proceso hasta terminar subiendo una sola perla.
- Where we raise two beads we secure with the needle and thread, and repeat the process until we end up raising only one bead.
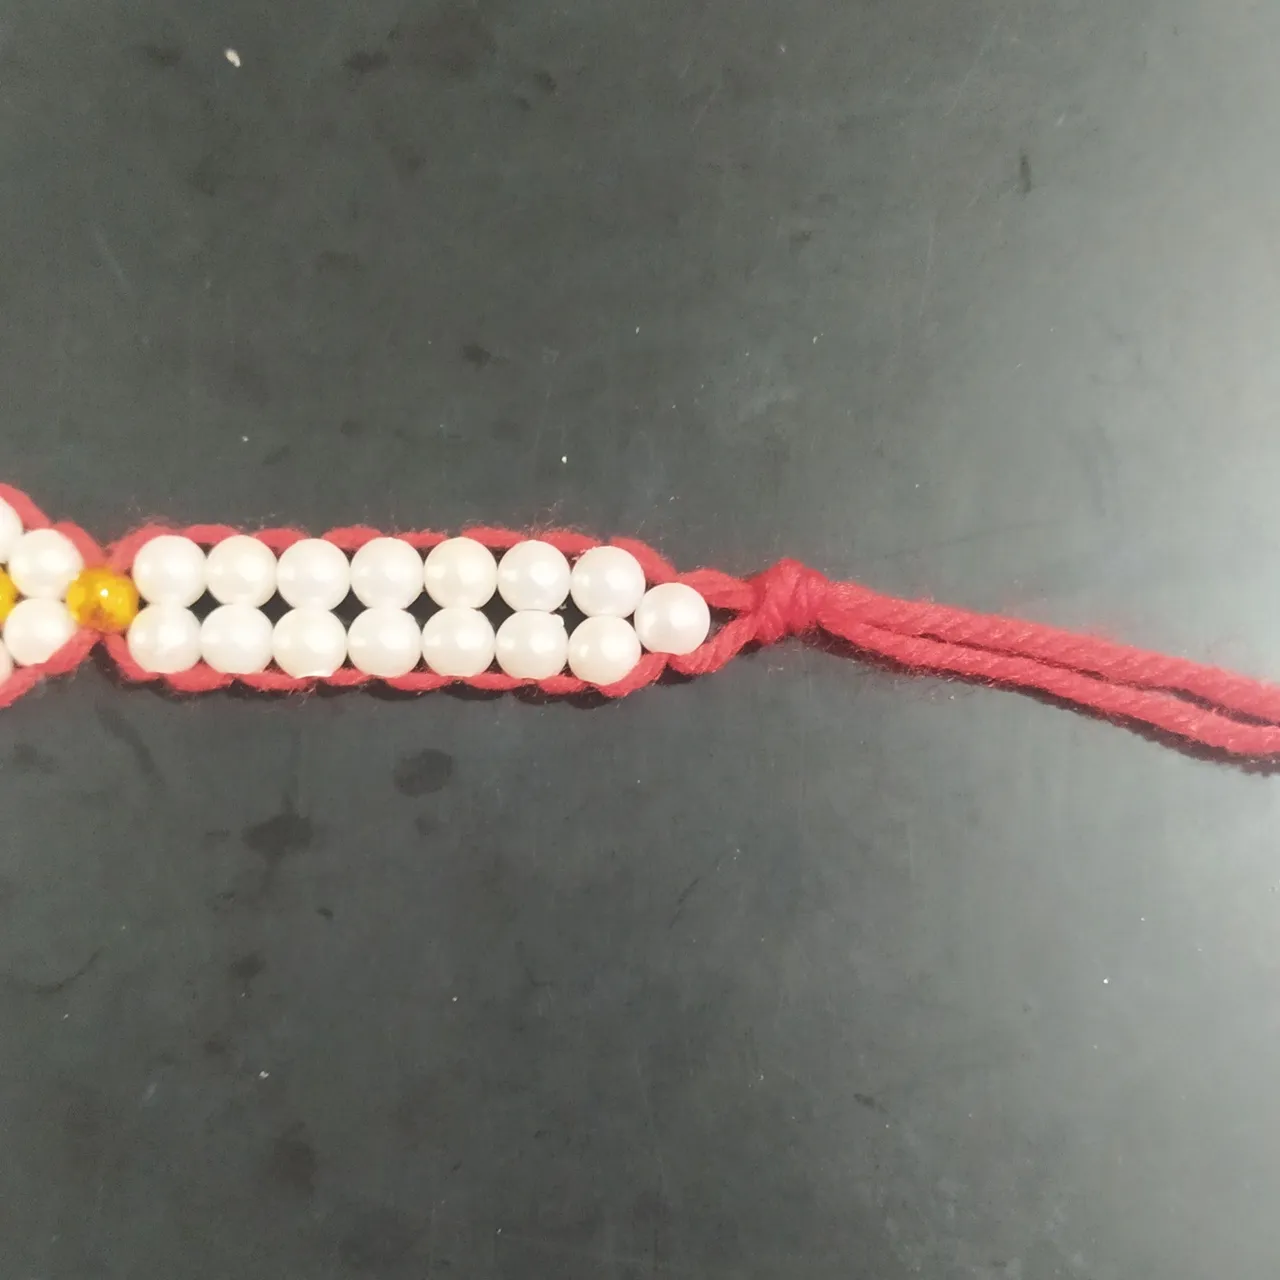
- Luego le hacemos un nudo para asegurar y terminar este lado.
- Then we tie a knot to secure and finish this side.
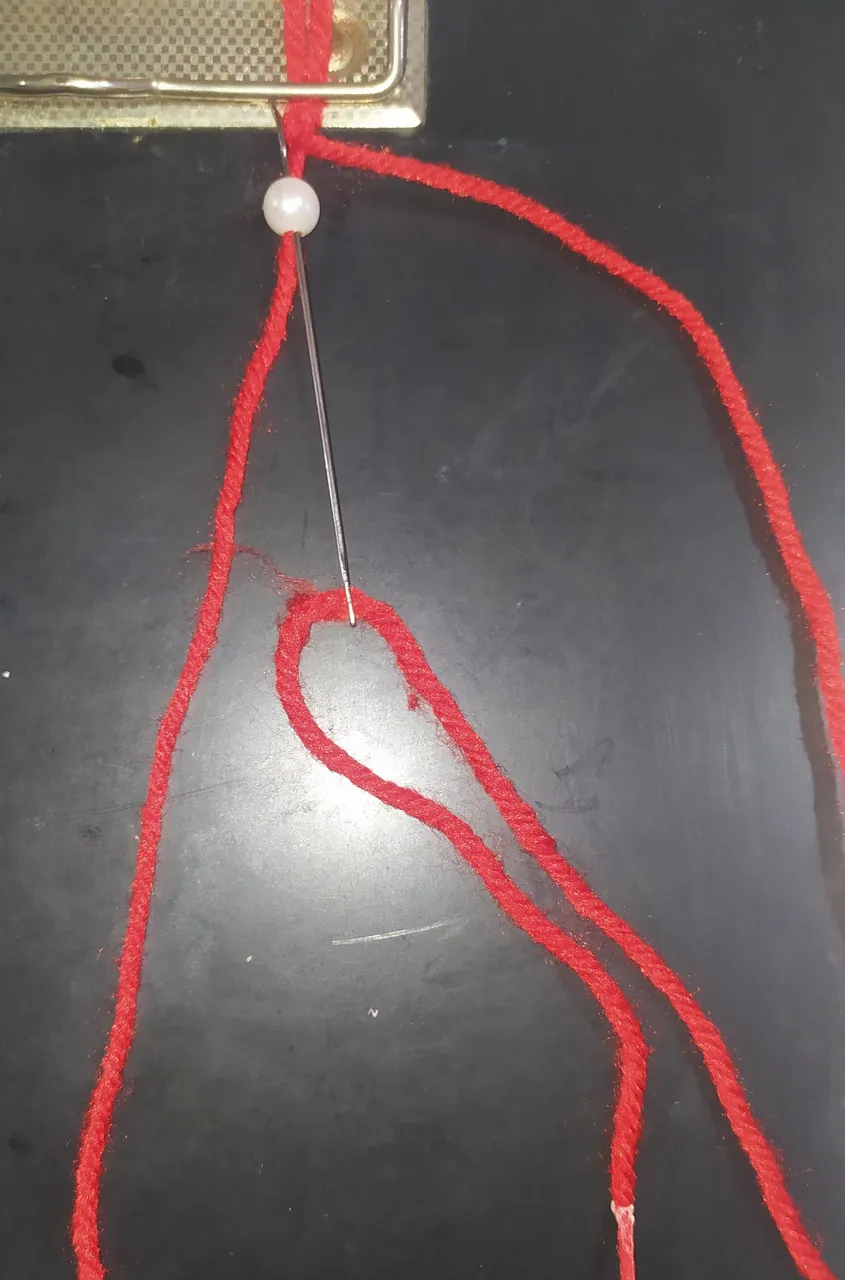
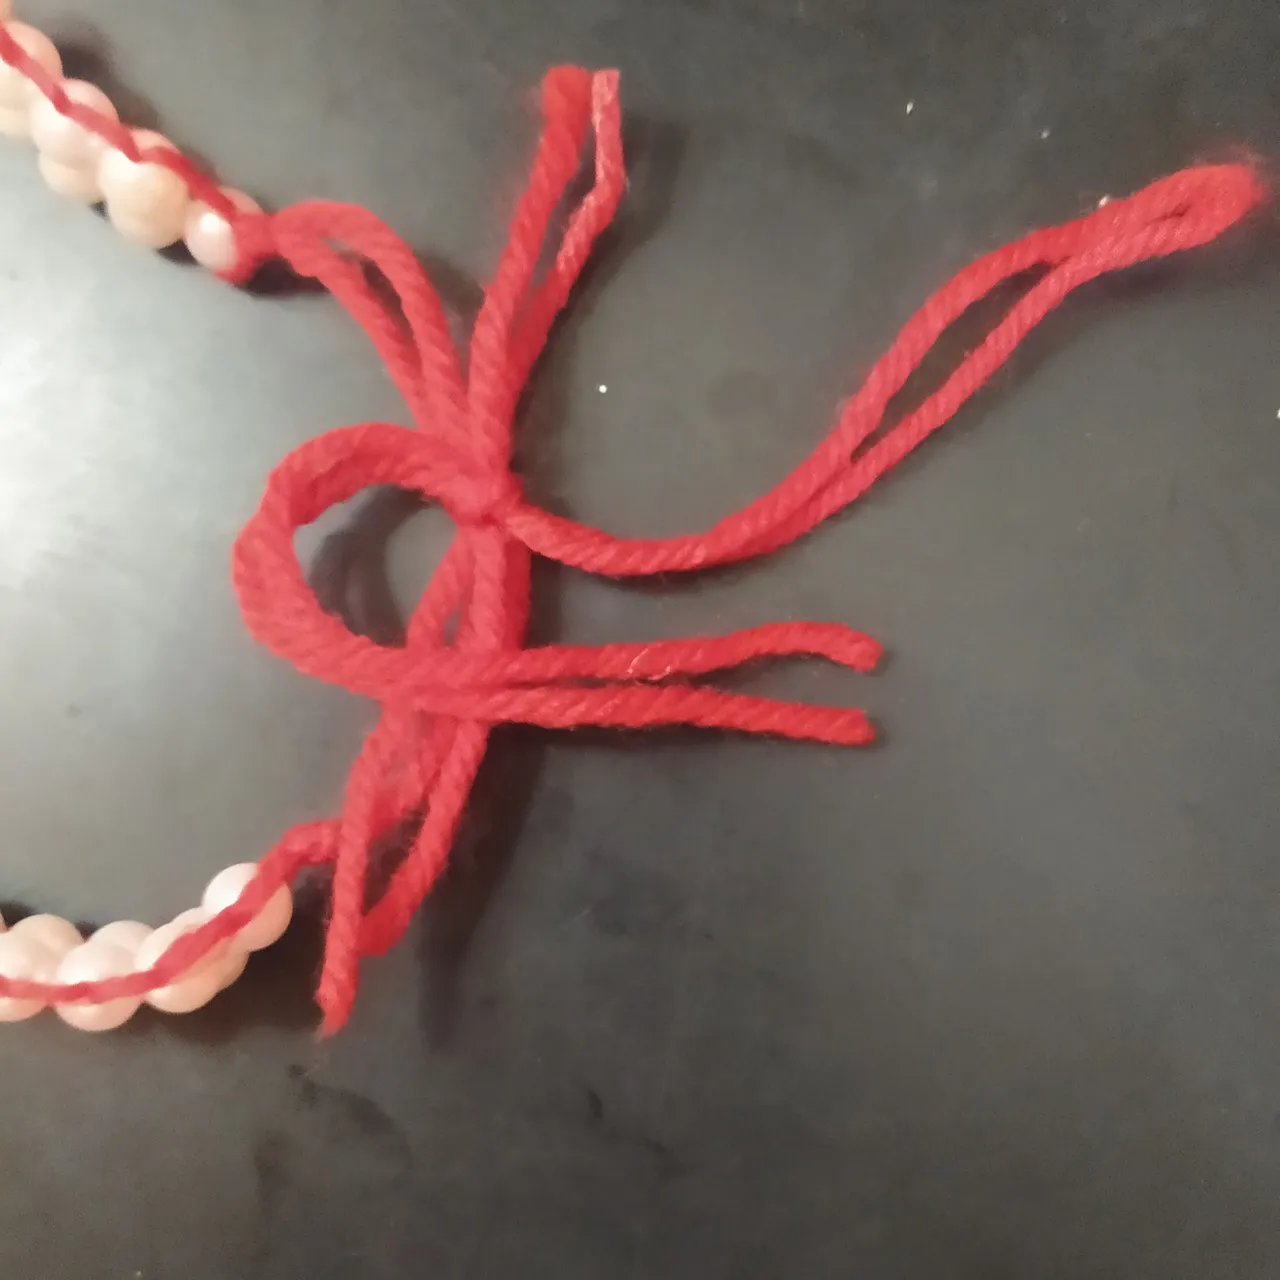
Pasemos a realizar nudo corredizo de la pulsera.
Let's move on to making the bracelet slip knot.
 |  |
|---|
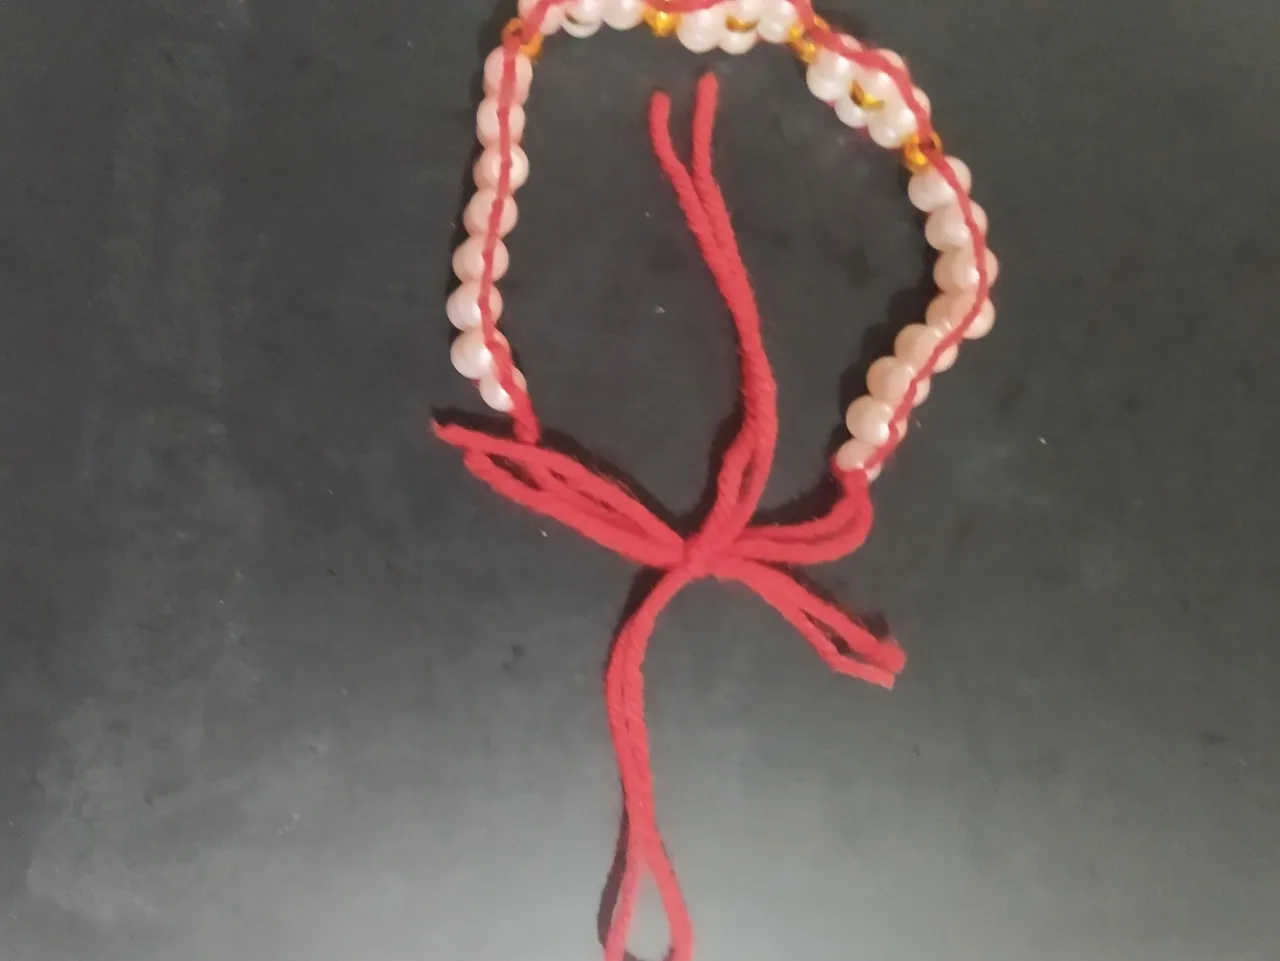
- Enfrentamos los hilos que nos quedan sobrantes de la pulsera.
- Tomamos el hilo que habíamos cortado de 20 cm al principio.
- Lo colocamos en el centro y hacemos un nudo normal.
- We face the leftover threads of the bracelet.
- We take the thread that we had cut of 20 cm at the beginning.
- We place it in the center and make a normal knot.
 |  |  |
|---|
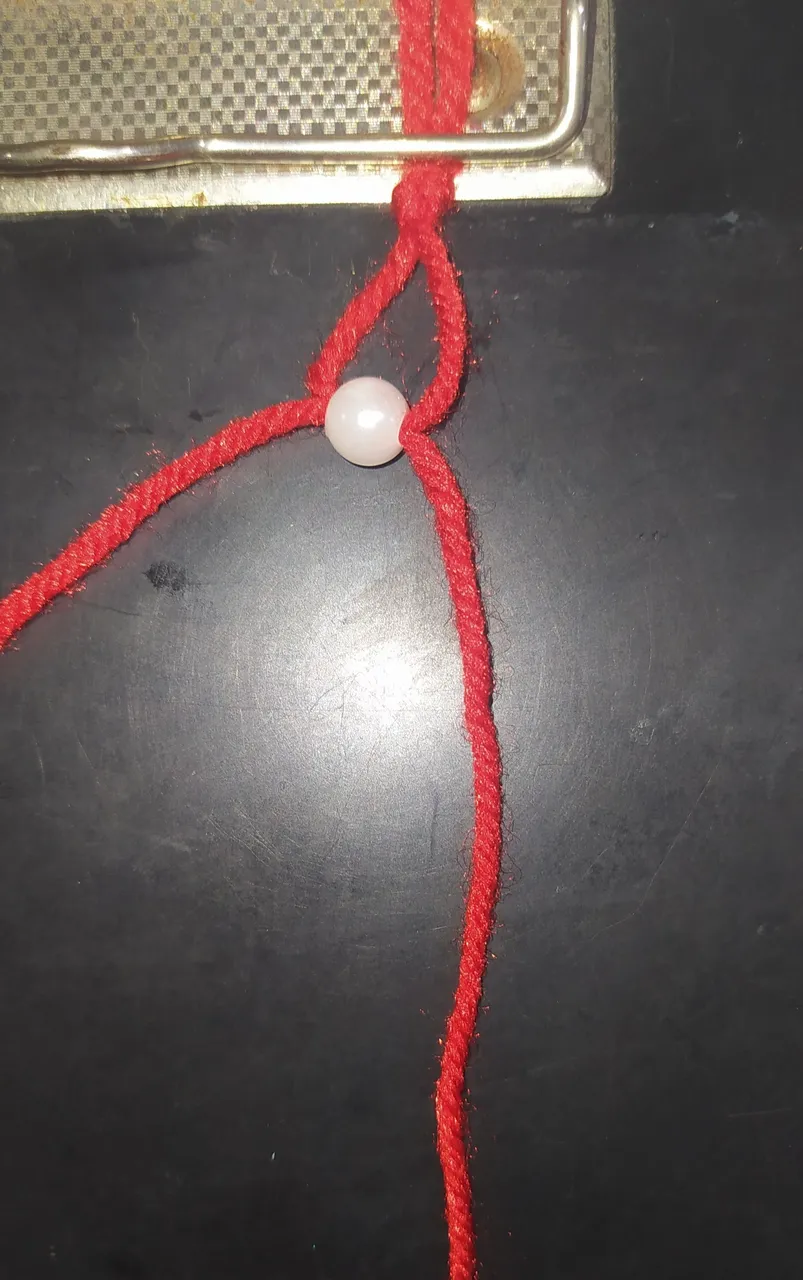
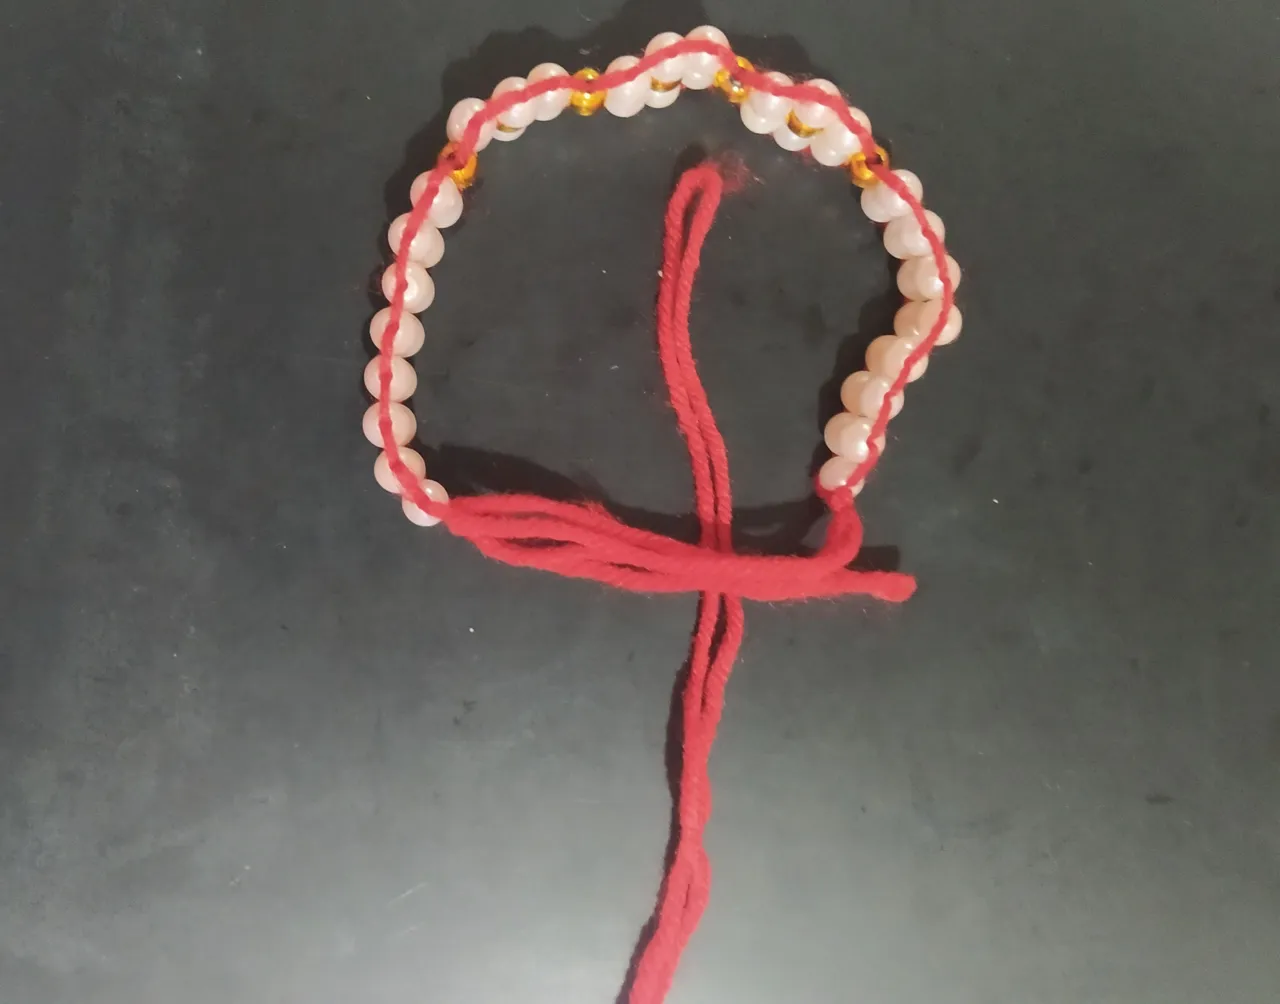
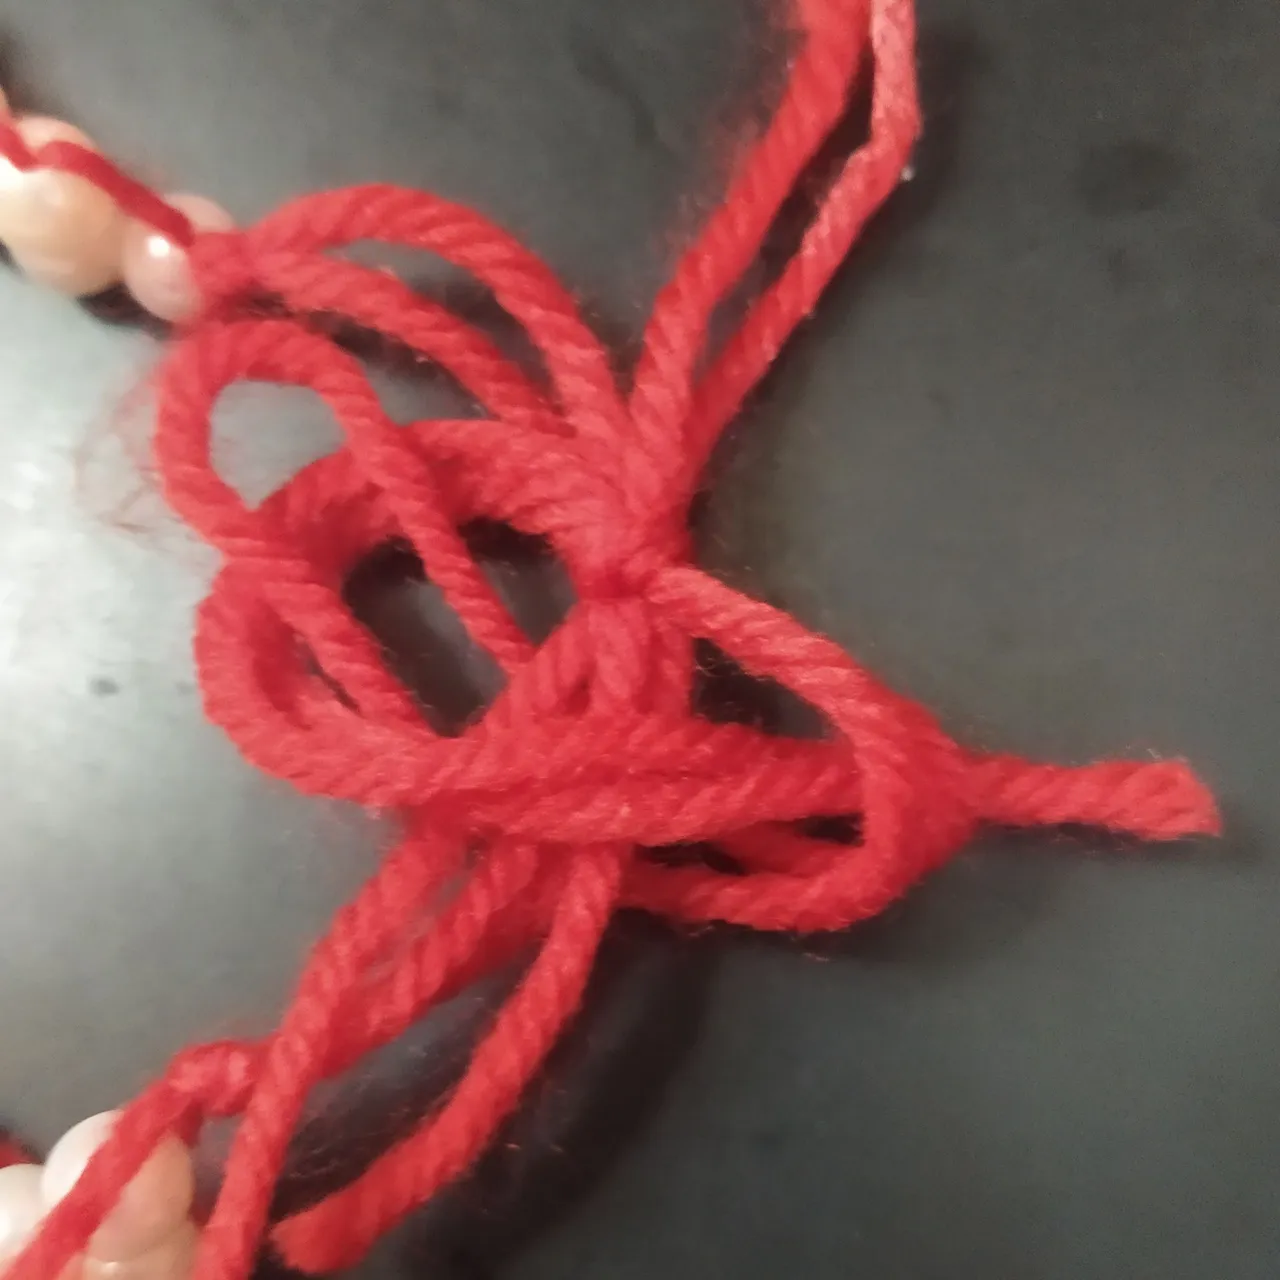
- Tomamos un extremo del hilo de 20 cm lo colocamos por encima de los hilos.
- Introducimos el otro extremo del hilo por la parte de abajo y luego hablamos ambas puntas para asegurarlo, como indico en la foto, repetimos varias veces, luego recortamos las puntas y quemamos con el yesquero para asegurar, teniendo mucho cuidado.
- We take one end of the 20 cm thread and place it on top of the threads.
- We introduce the other end of the thread at the bottom and then we talk both ends to secure it, as indicated in the photo, repeat several times, then trim the ends and burn with the tinder to secure, being very careful.
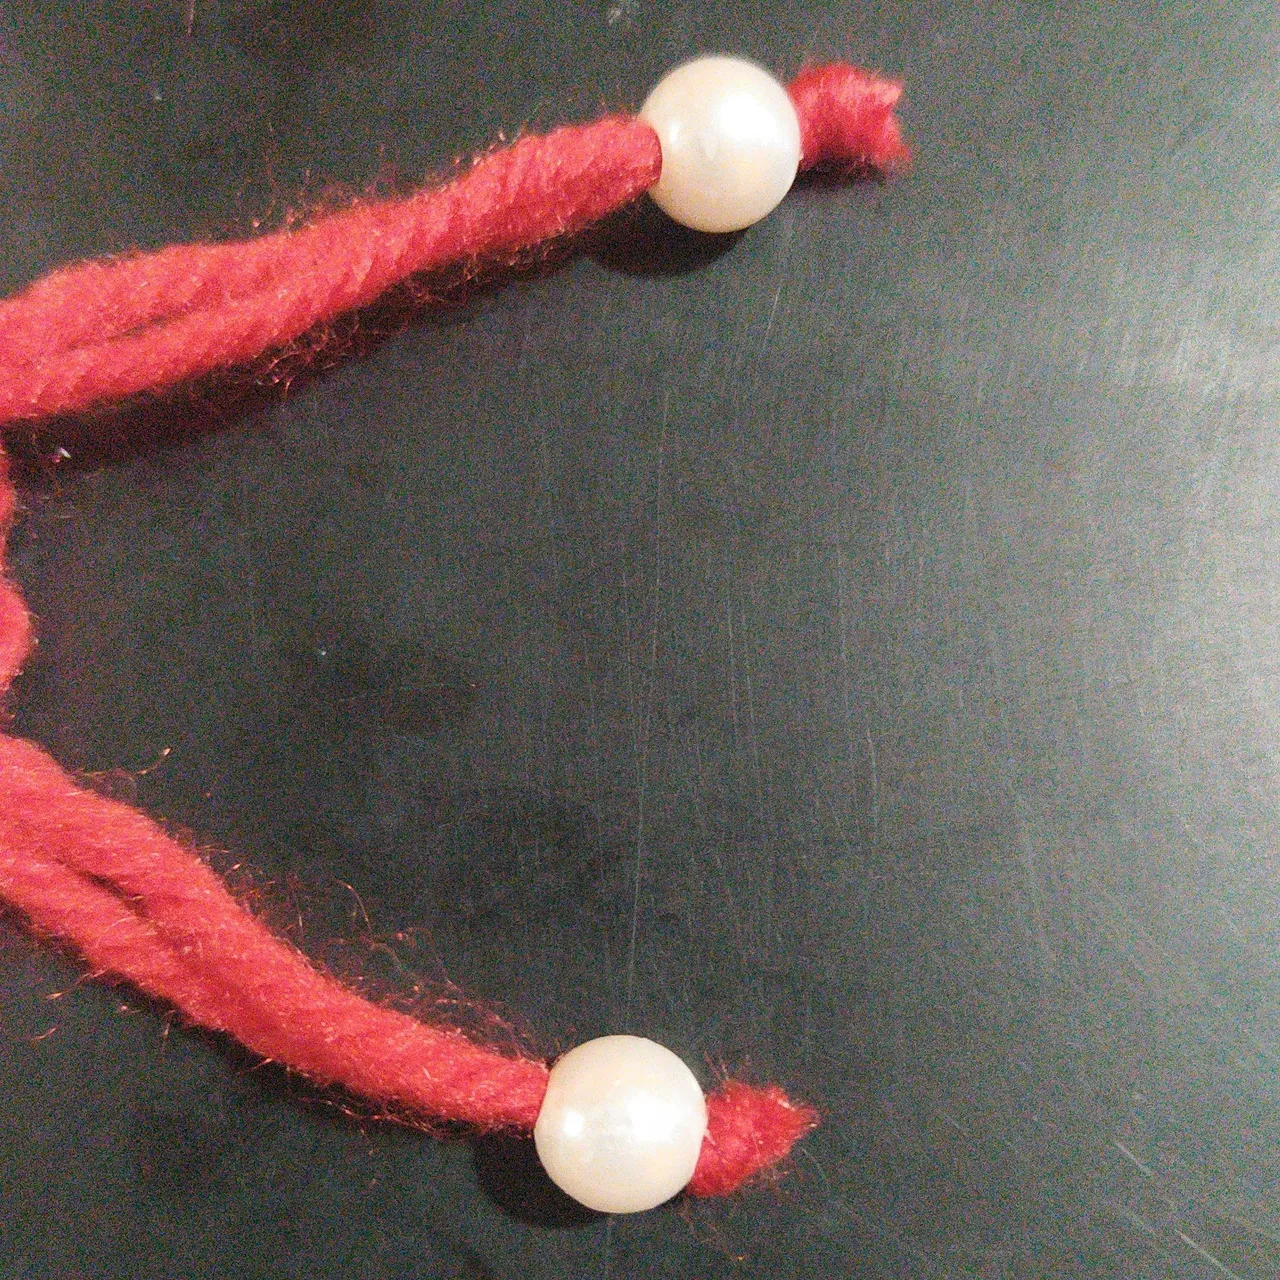
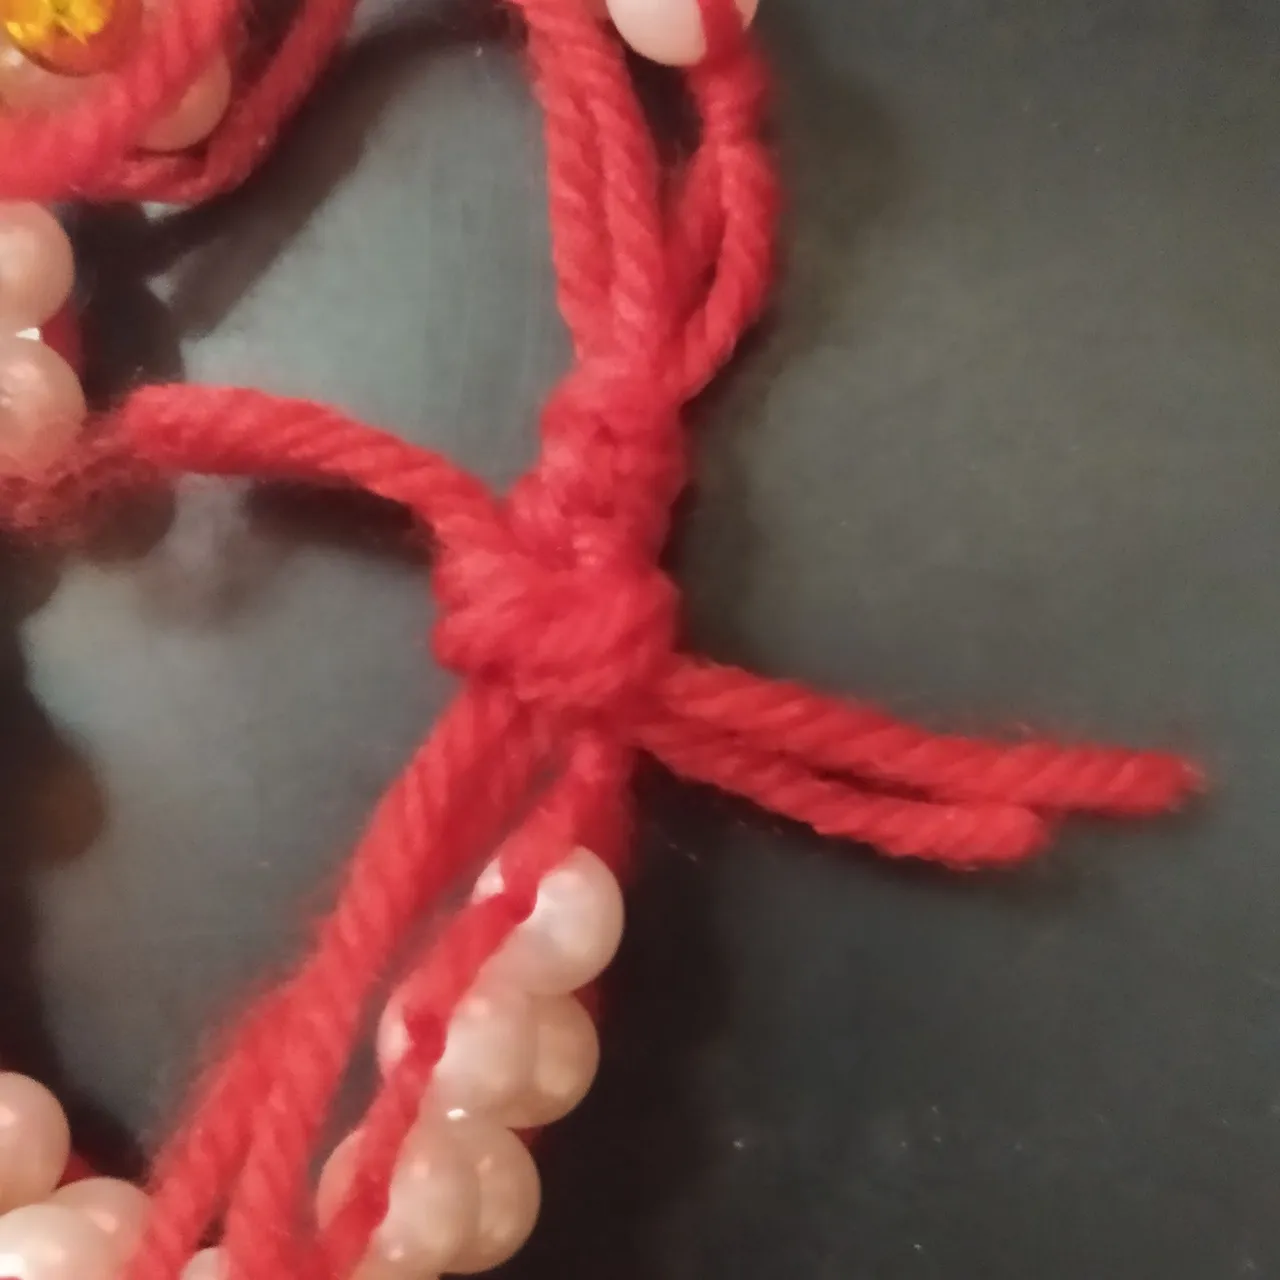
- Para hacerla más coqueta le colocamos una perlita a cada lado del hilo sobrante de la pulsera.
- To make it more flirtatious we place a bead on each side of the leftover thread of the bracelet.
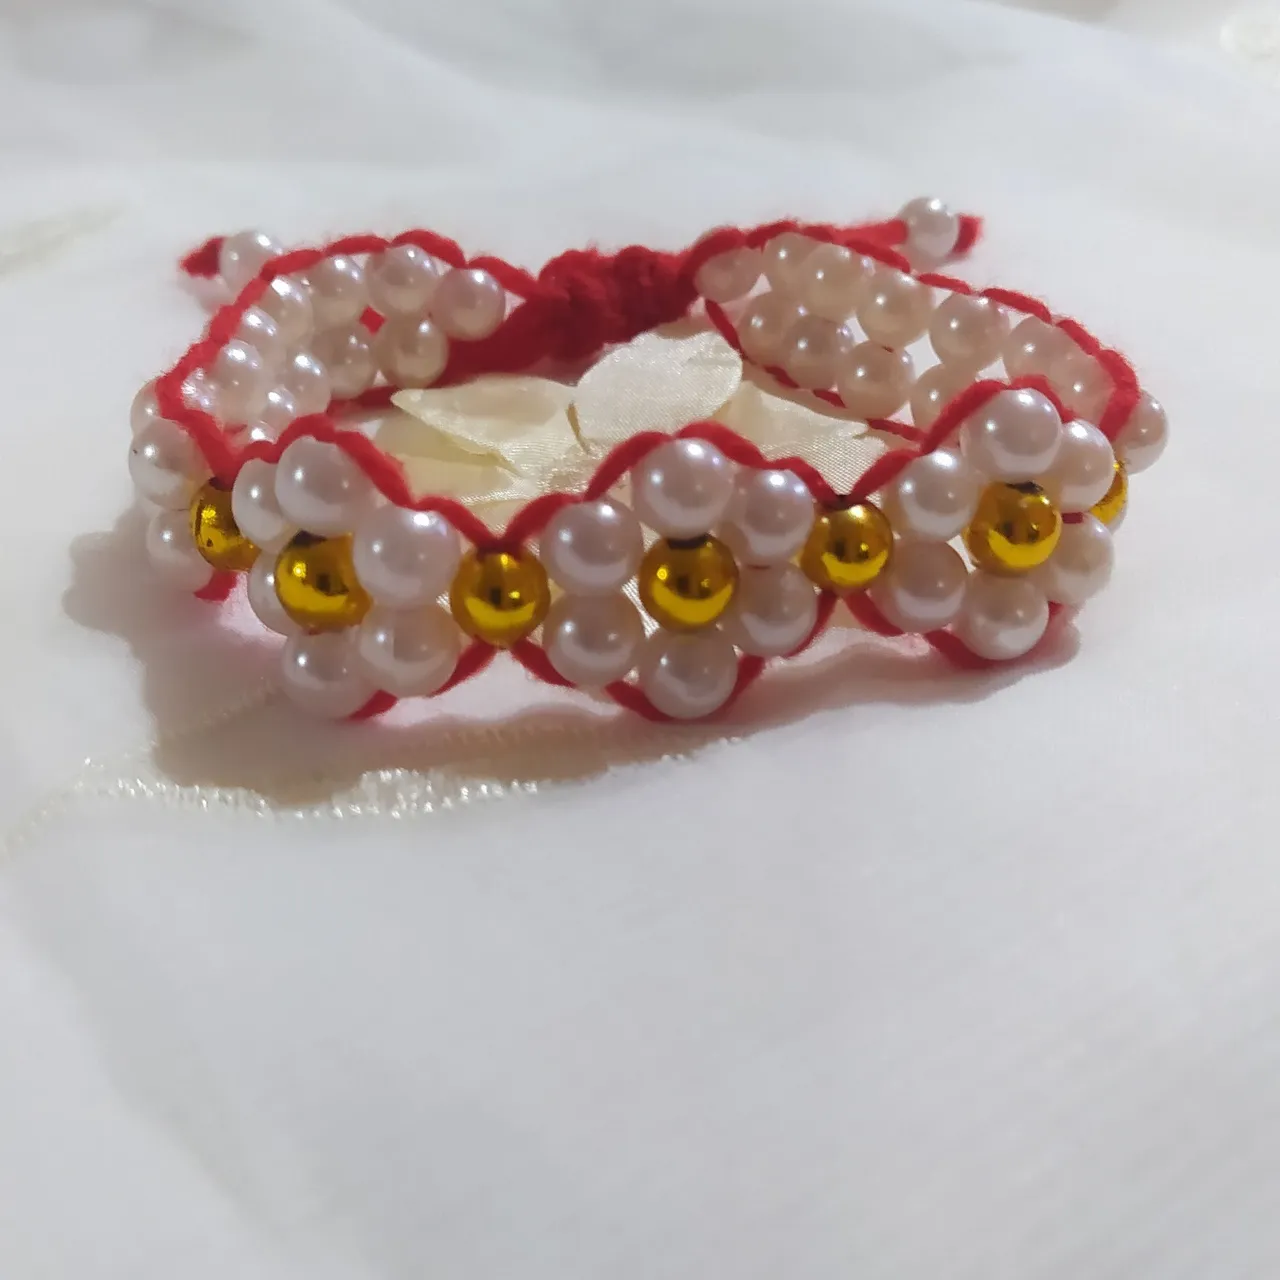
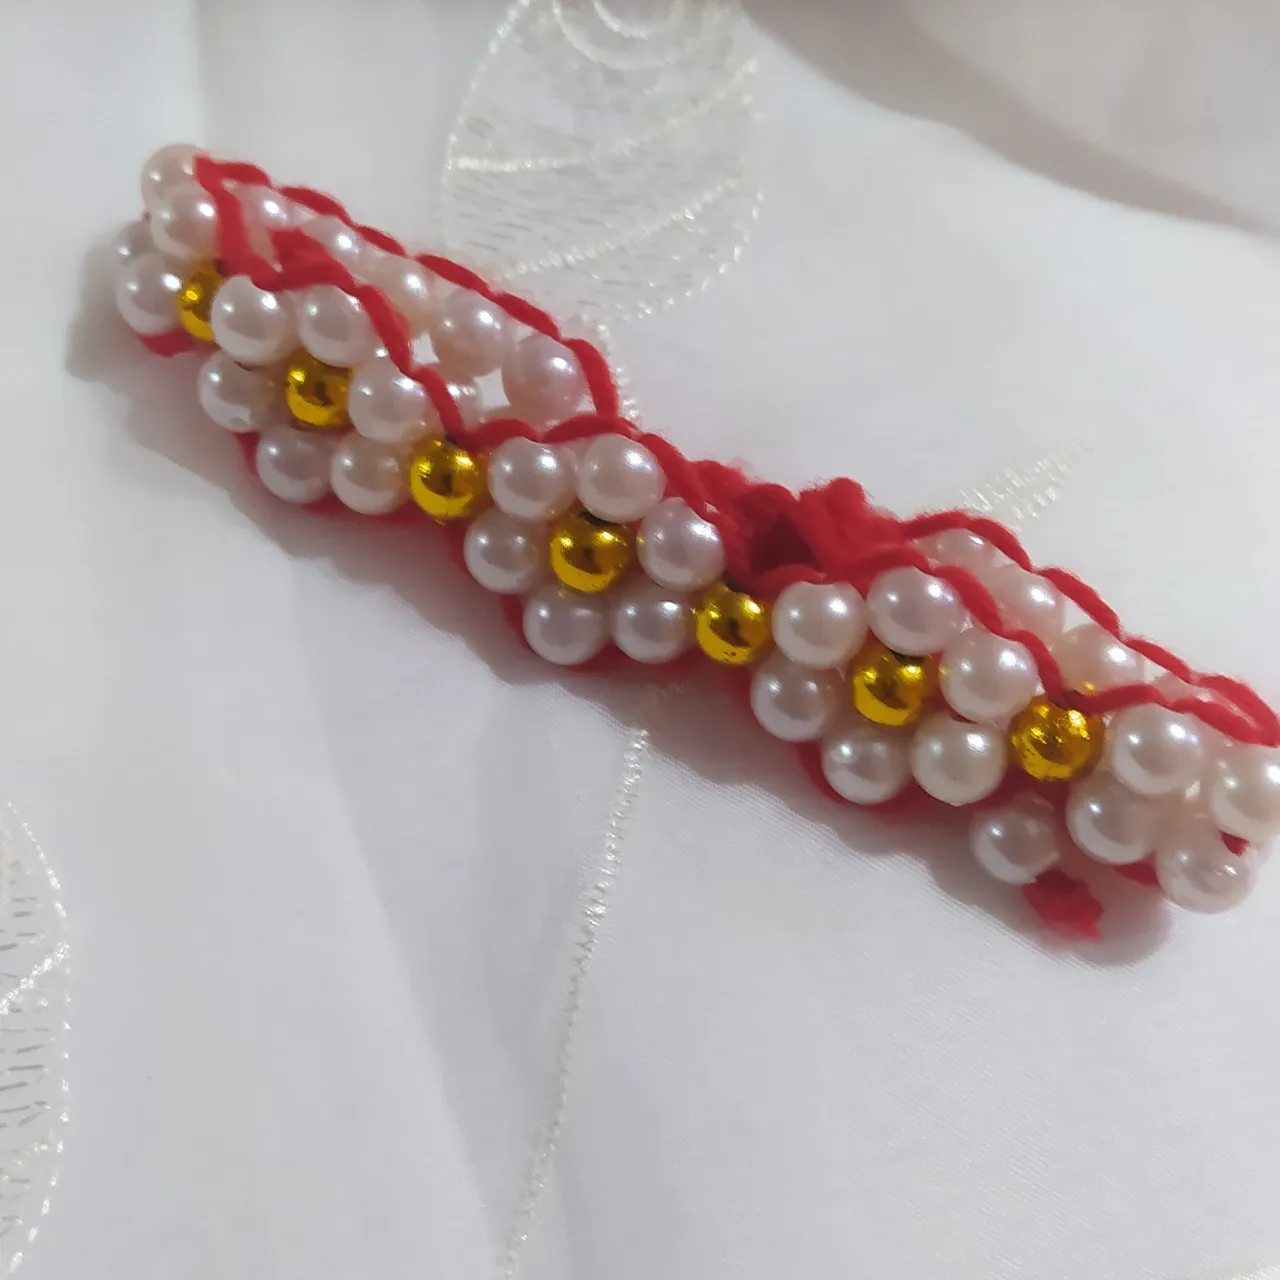

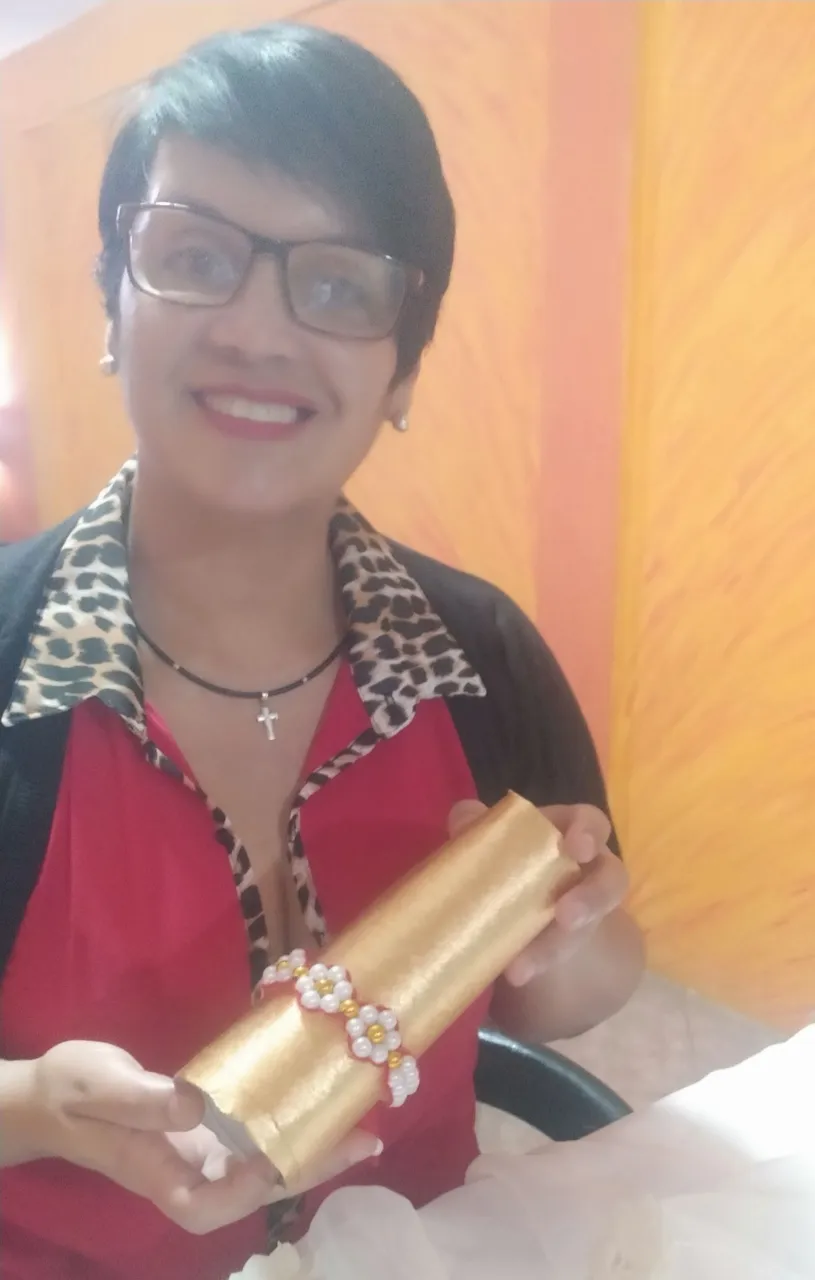
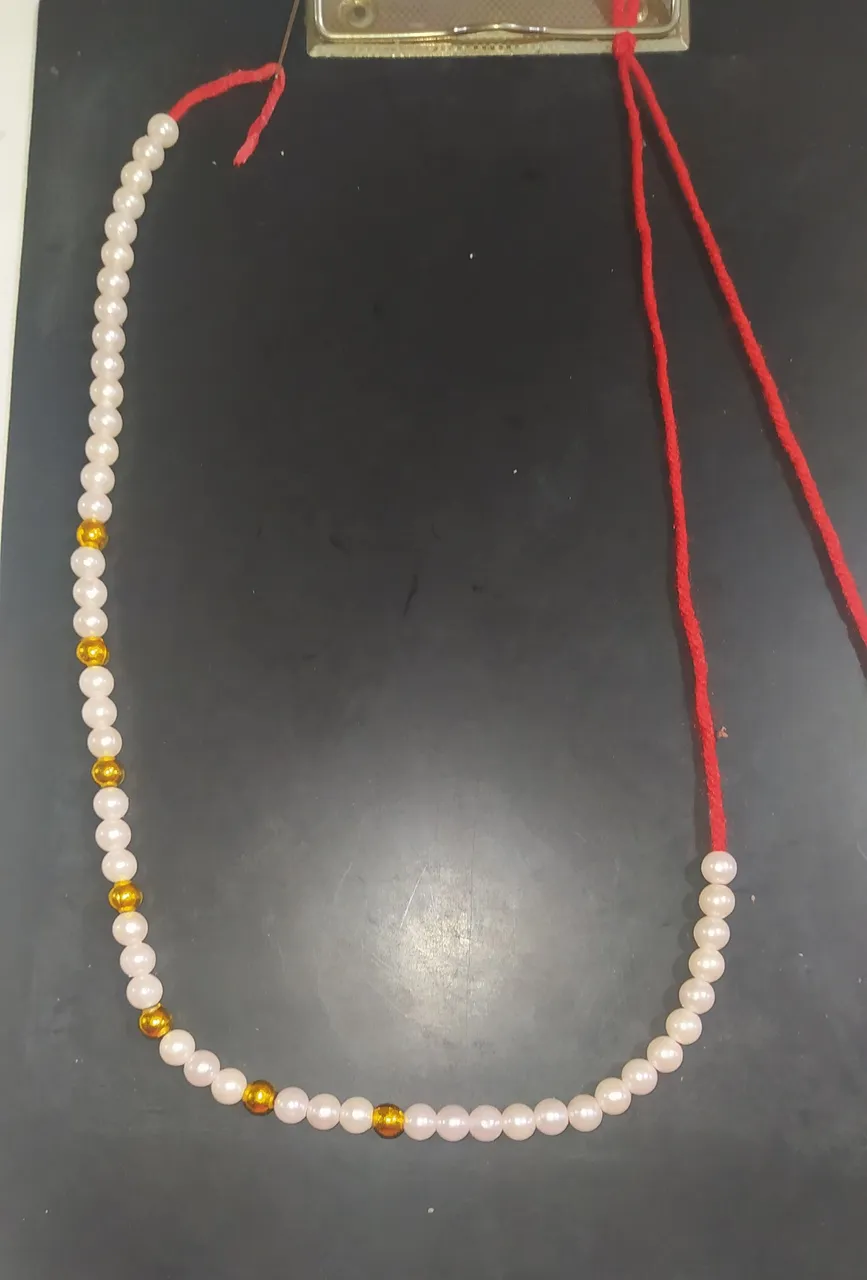
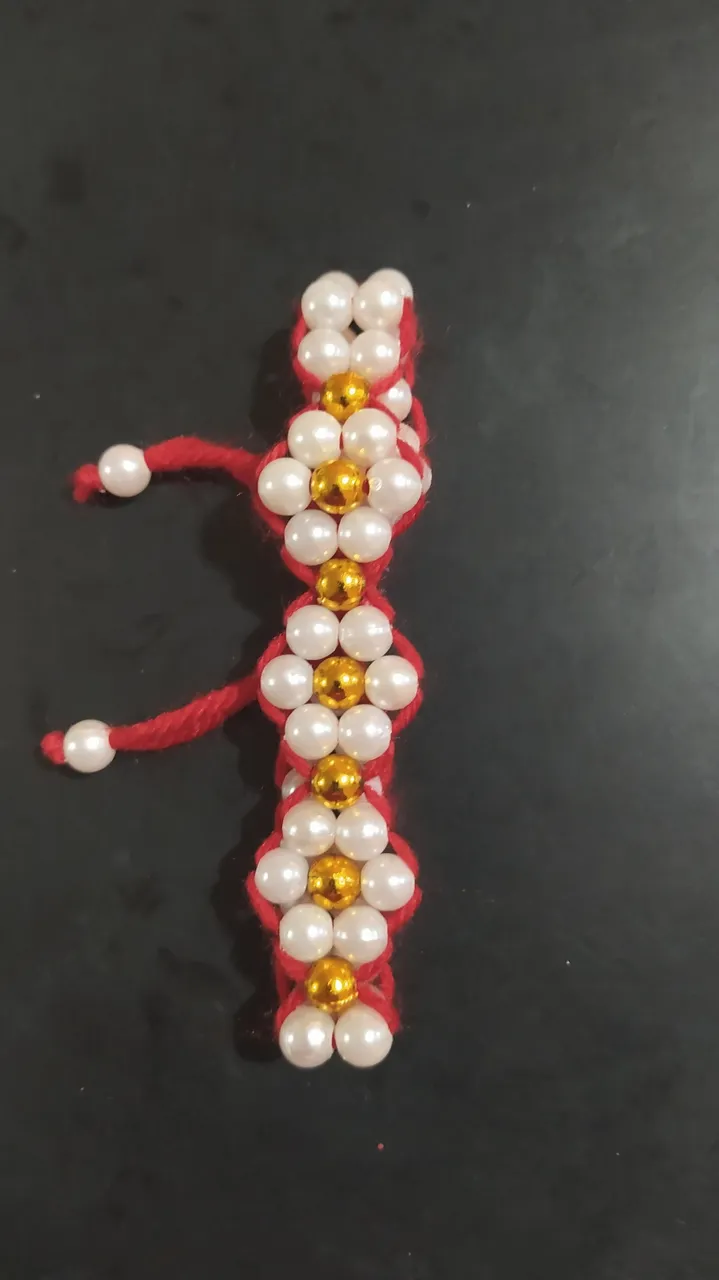
Aquí les muestro la pulsera ya terminada la cual quedó muy hermosa un lindo detalle hecho con mucho amor para honrar a mi madre.
Quiero invitar a mis amigas @dlizara @yagelybr para que se unan a esta bella iniciativa.
Gracias por haberme acompañado hasta aquí espero les guste y no olvides comentar dejándome tu opinión.
Here I show you the finished bracelet which was very beautiful a nice detail made with love to honor my mother.
I want to invite my friends @dlizara @yagelybr to join this beautiful initiative.
Thank you for joining me here I hope you like it and don't forget to comment leaving me your comments.
- Fotos de mi autoría tomadas con teléfono Xiaomi redmi note 8.
- Editor utilizado PicsArt.
- Traductor DeepL.
- Photos of my authorship taken with Xiaomi redmi note 8 phone.
- Editor used PicsArt.
- Translator DeepL.