Hello, hello my beautiful people of this beautiful #jewelry community today I want to send a wonderful greeting to all the gentlemen who make life in Hive and to pamper them I have brought a beautiful accessory for them to look well papasitos and fashionable.
Hola, hola mi gente hermosa de está bella comunidad #jewelry hoy quiero enviarles un maravilloso saludo a todos los caballeros que hacen vida en Hive y para consentirlos les he traído un hermoso accesorio para que luzcan bien papasitos y a la moda.
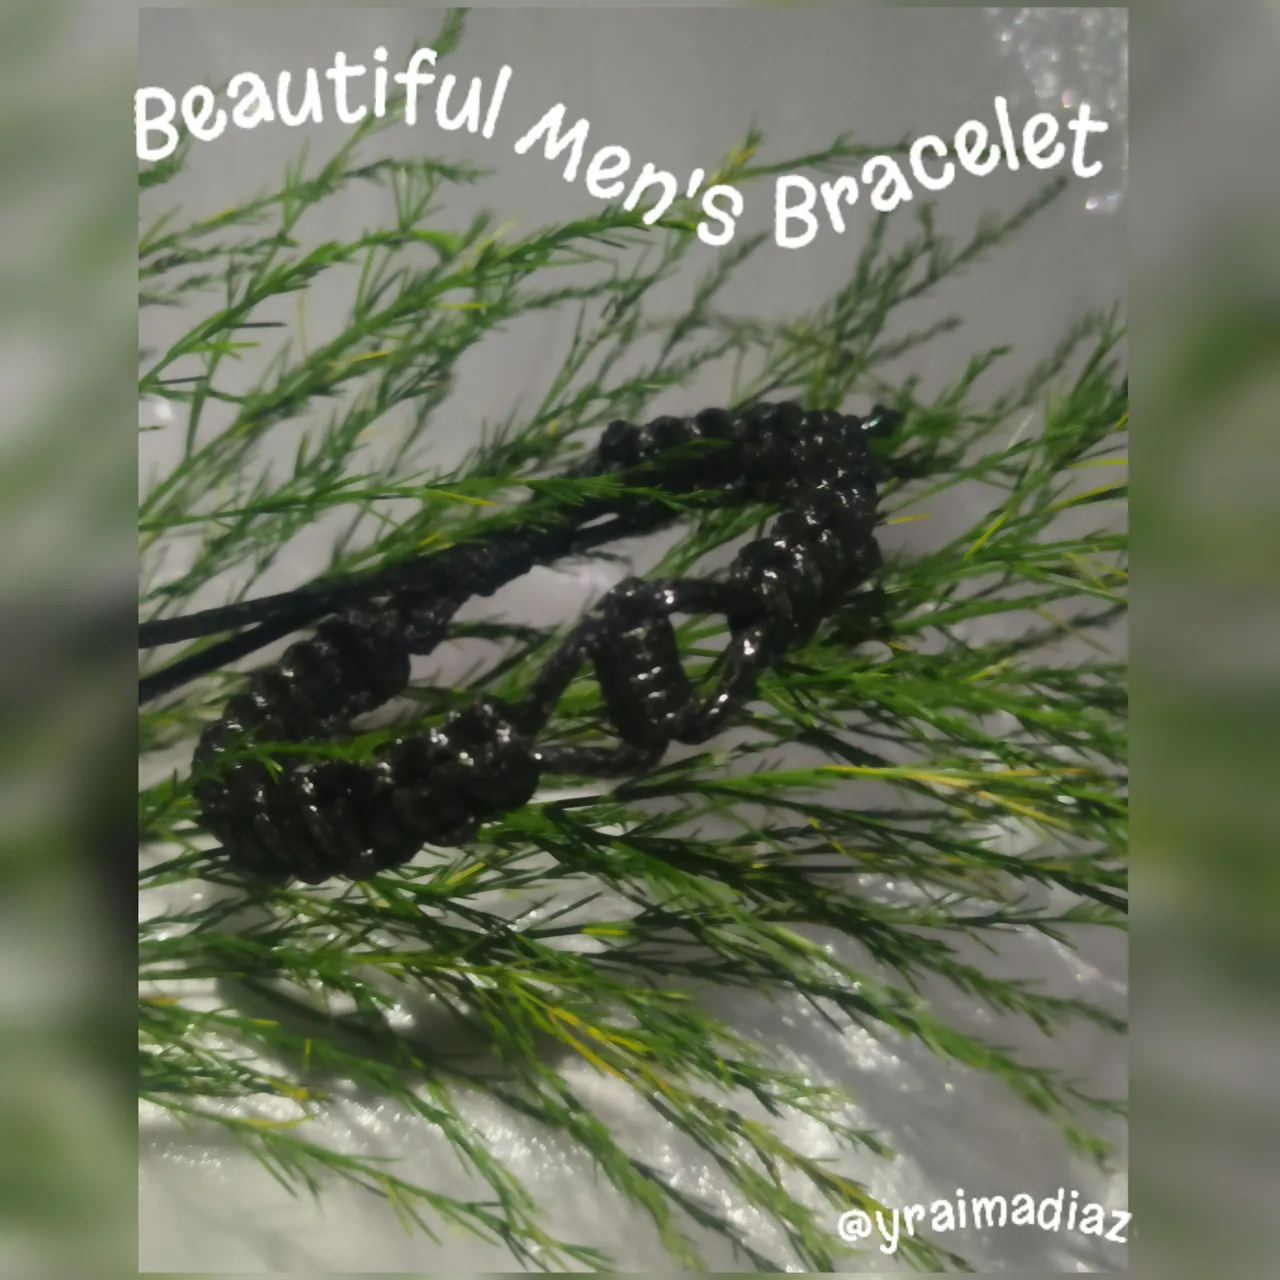
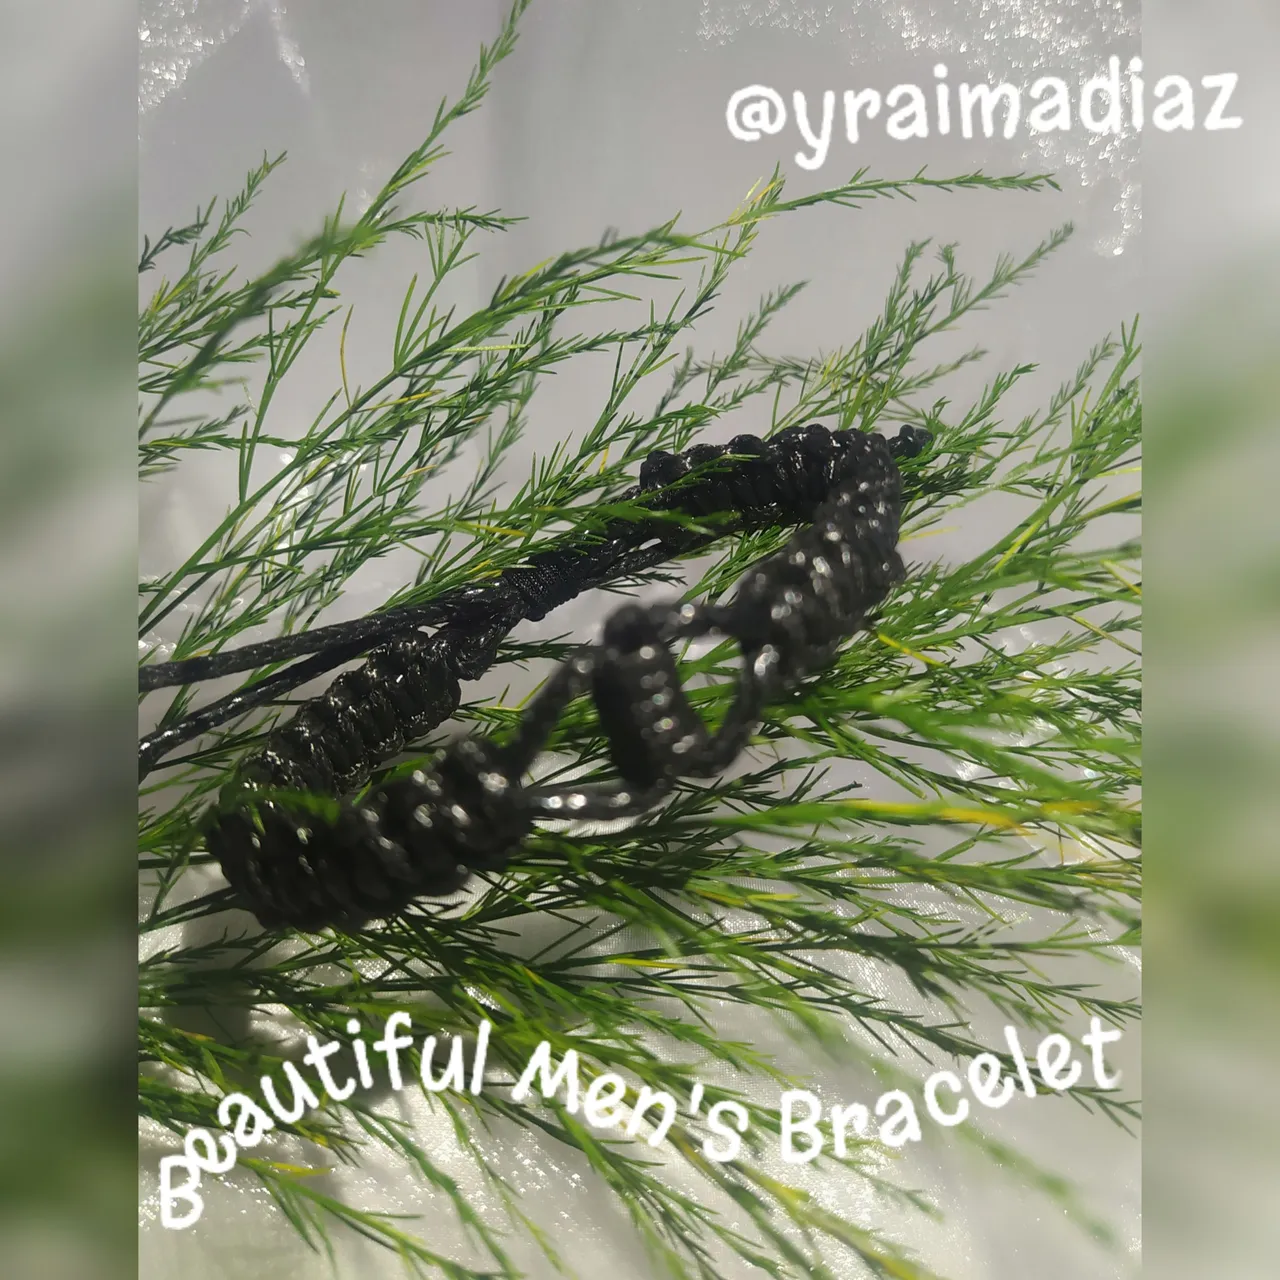
It is a beautiful bracelet which I have made with leather thread and in which I have applied the technique of the flat knot and the Franciscan knot.
It is very beautiful and easy to make, I know that you will love it because our gallants will highlight their outfits.
Es una bella Pulsera la cual he realizado con hilo de cuerina y en la que he aplicado la técnica del nudo plano y el nudo Franciscano.
Es muy hermosa y facil de realizar se que la van amar ya que nuestros galanes pondrán resaltar sus outfit.
Let's move on to its realization.
Pasemos a su realización.
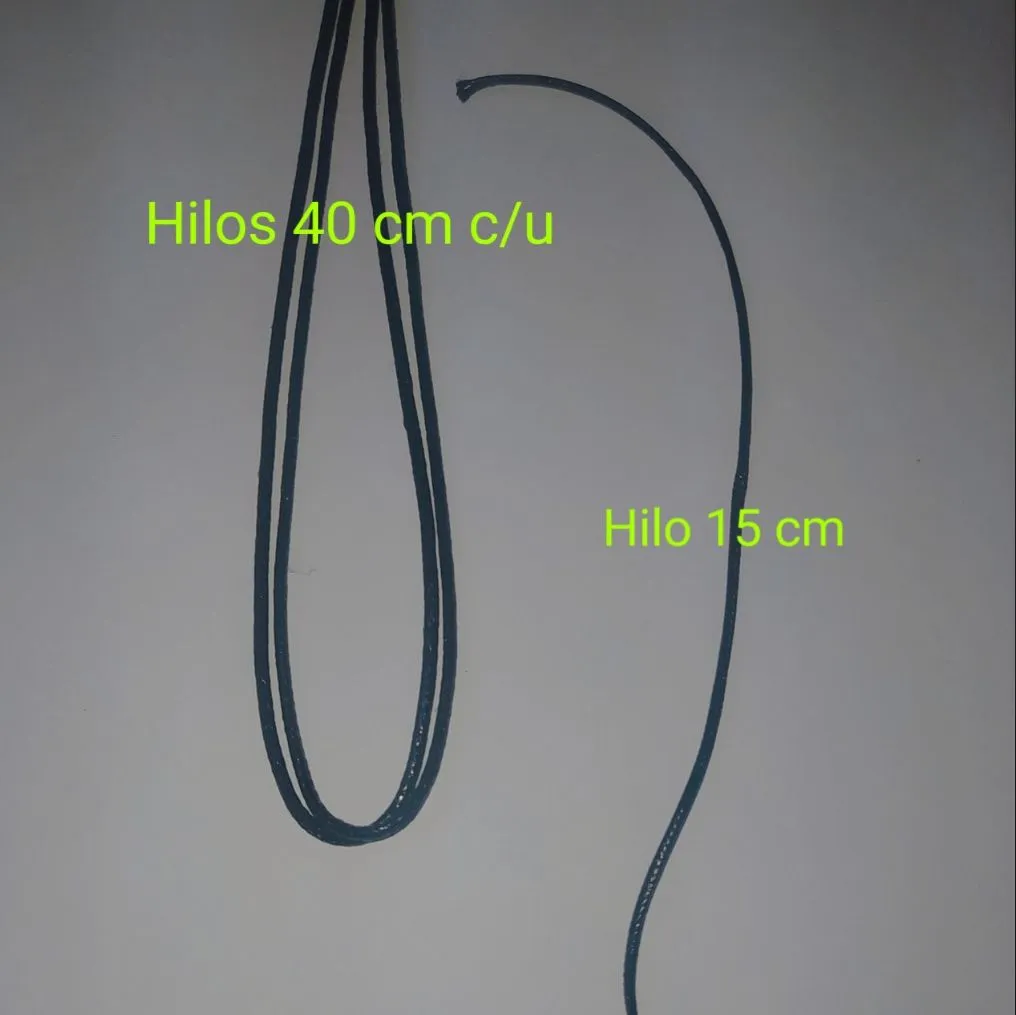
Materiales
- Dos hilos de cuerina de 40 cm cada uno.
- Un hilo de cuerina de 15 cm
- Dos hilo de cuerina de 80 cm cada uno.
- Un hilo chino de 20 Cm.
Materials
- Two strands of leather of 40 cm each one.
- One 15 cm. leather thread.
- Two 80 cm each one of leather thread.
- A Chinese thread of 20 cm
- The first thing we are going to make is the center of the bracelet.
- We will be using the Franciscan knot technique.
- Lo primero que vamos a realizar es el centro de la pulsera.
- Estaremos empleando la técnica del nudo Franciscano.
- We start with the 40 Cm. strands of leather yarn.
- We join both ends of the two ends to get the exact half of the yarns.
- We mark it by folding it in the center.
- Empezamos con los hilos de cuerina de 40 Cm.
- Unimos ambas puntas de los dos extremos para conseguir la mitad exacta de los hilos.
- La marcamos doblando en el centro.
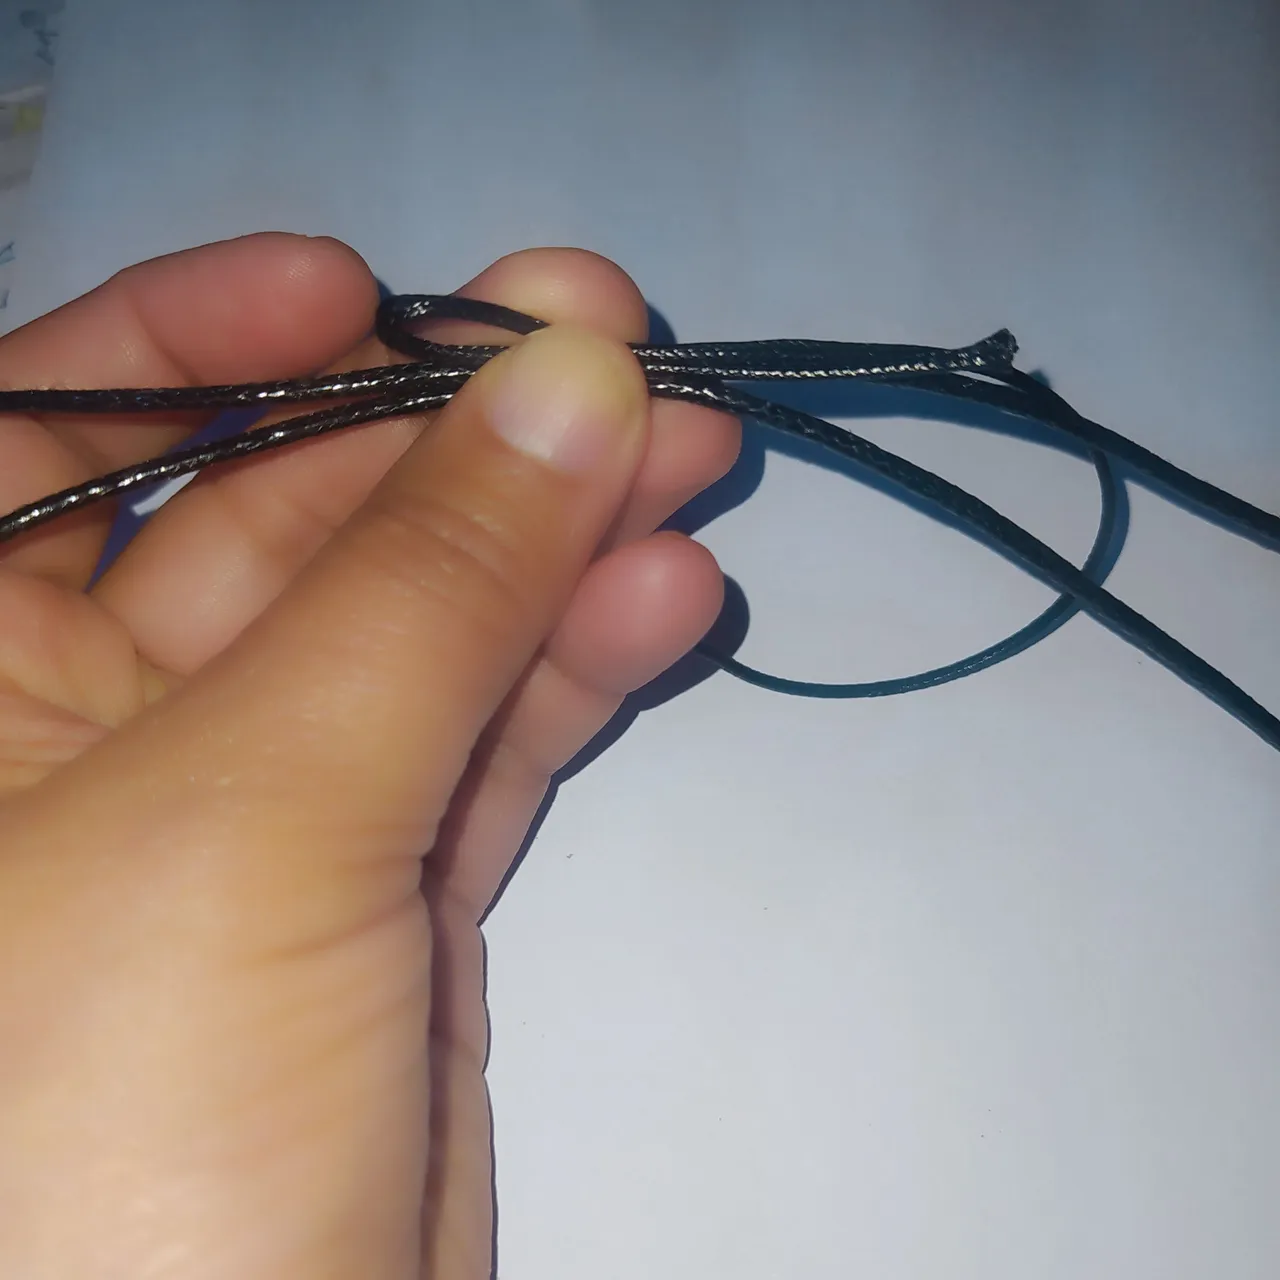
- We take the two strands of 40 cm and just in the center where we have marked we place the thread of 15 cm which we fold in half as if and make a loop leaving a longer tip.
- Then with the thumb we place it on top so that the thread remains firm.
- tomamos los dos hilos de cuerina de 40 cm y justo en el centro donde hemos marcado colocamos el hilo de 15 cm el cual doblamos a la mitad como si y hacemos un bucle dejando una punta mas larga.
- Luego con el dedo pulgar lo colocamos encima para que el hilo se mantenga firme.
- I take the yarn that has the longest end and make several turns of all the yarns, but they must be directed towards the left side, towards the thumb.
- Each of the turns must be very tight.
- We must give turns until we get approximately one cm long.
- Tomo el hilo que tiene la punta más larga y doy varias vueltas a todos los hilos, pero deben ir dirigidas hacia el lado izquierdo, hacia el dedo pulgar.
- Cada una de las vueltas deben estar bien apretaditas.
- Debemos dar vueltas hasta conseguir aproximadamente un cm de largo.
 |  |
|---|
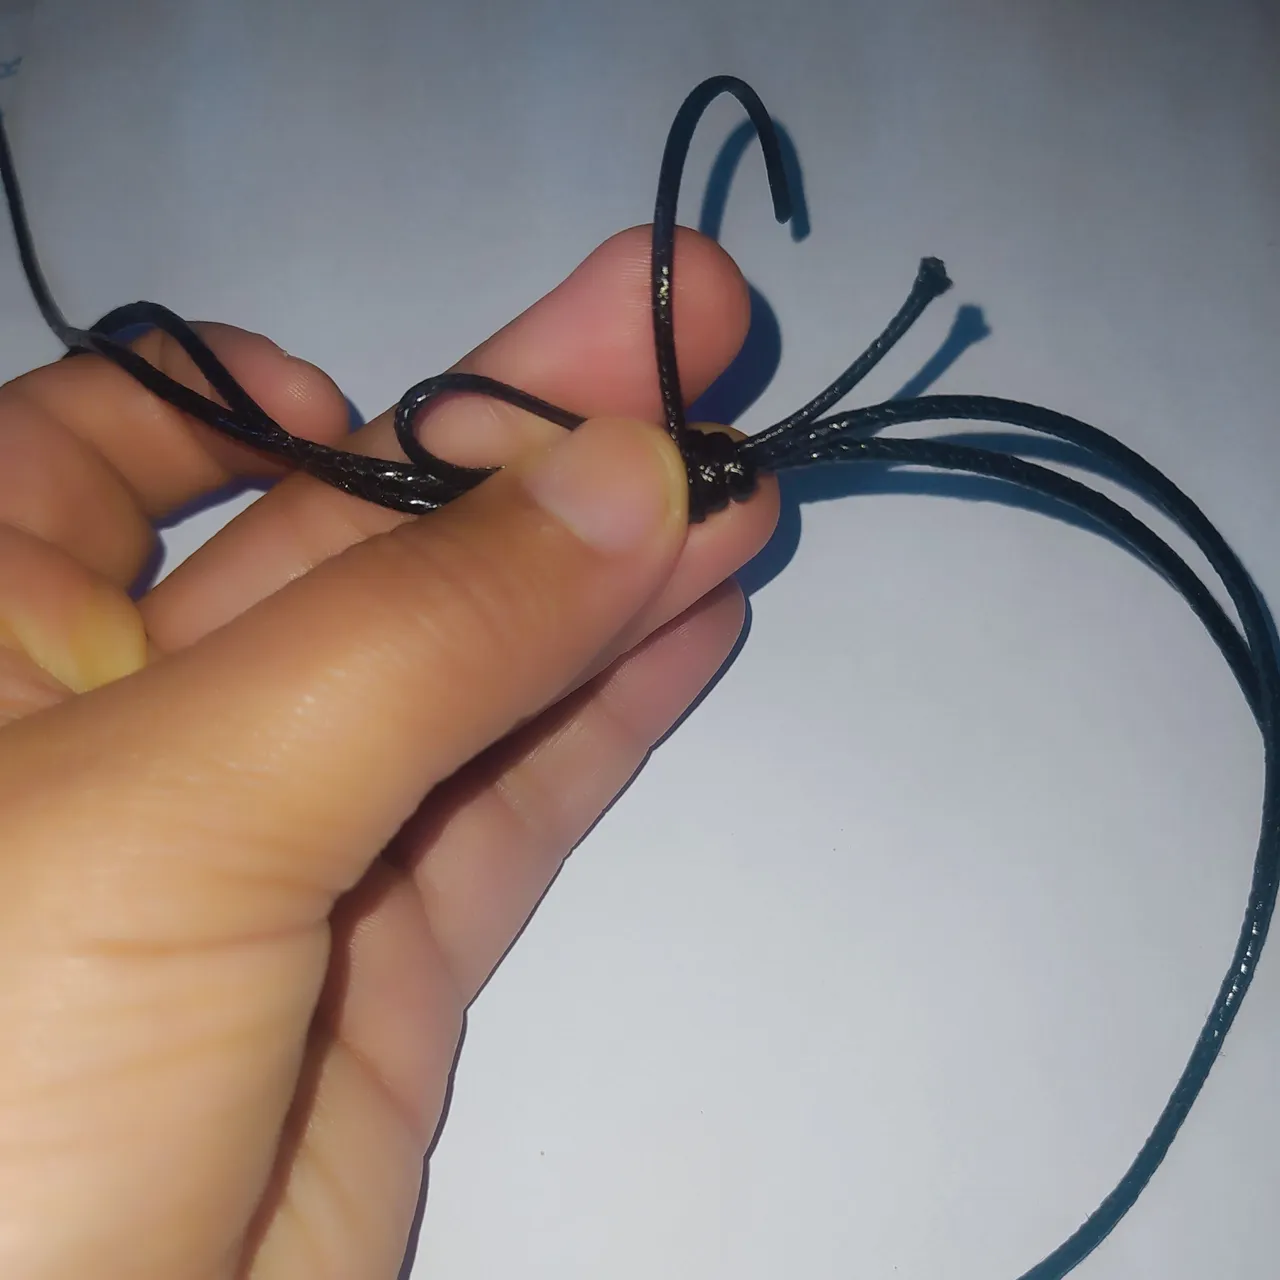
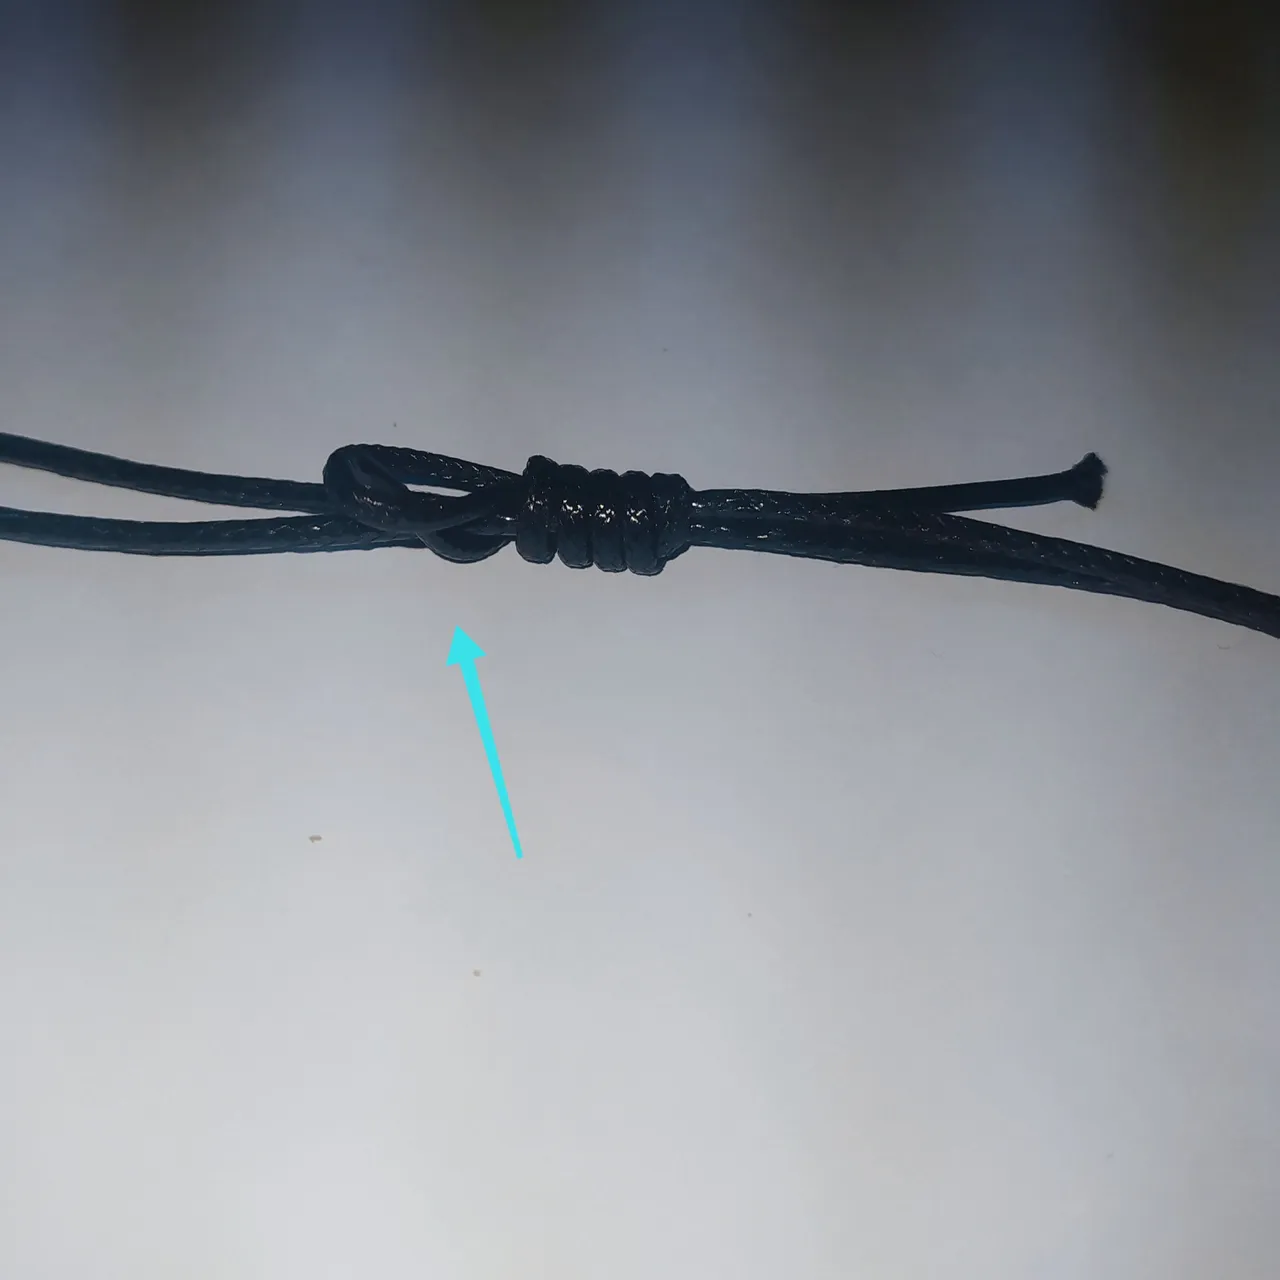
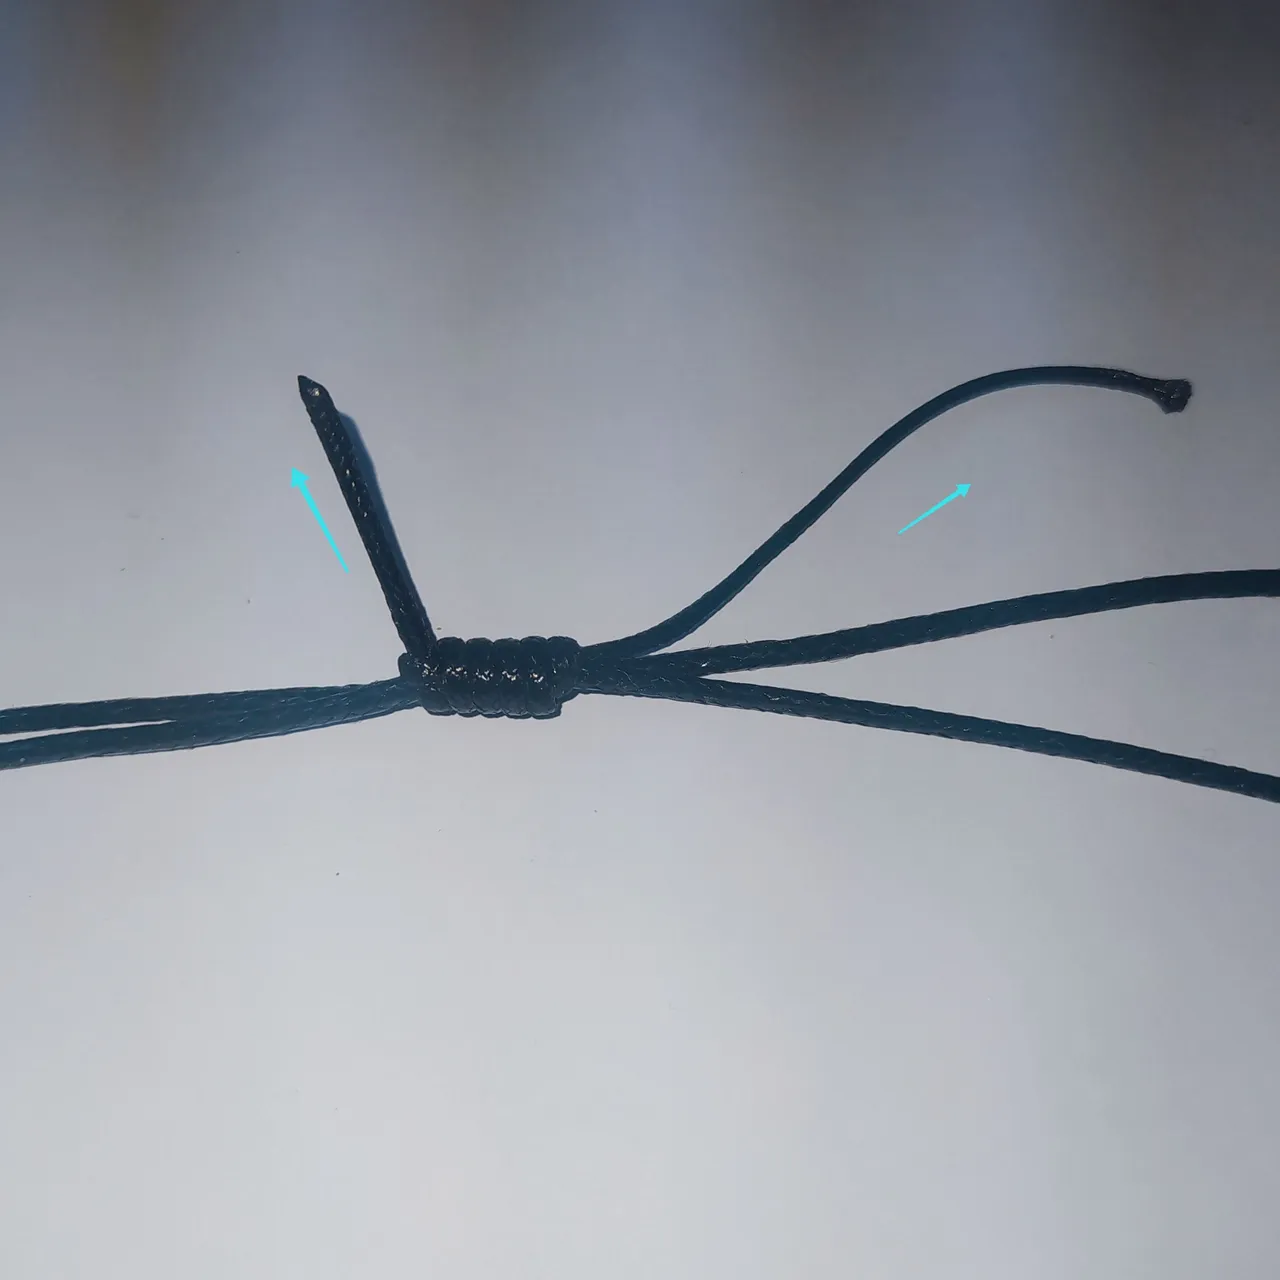
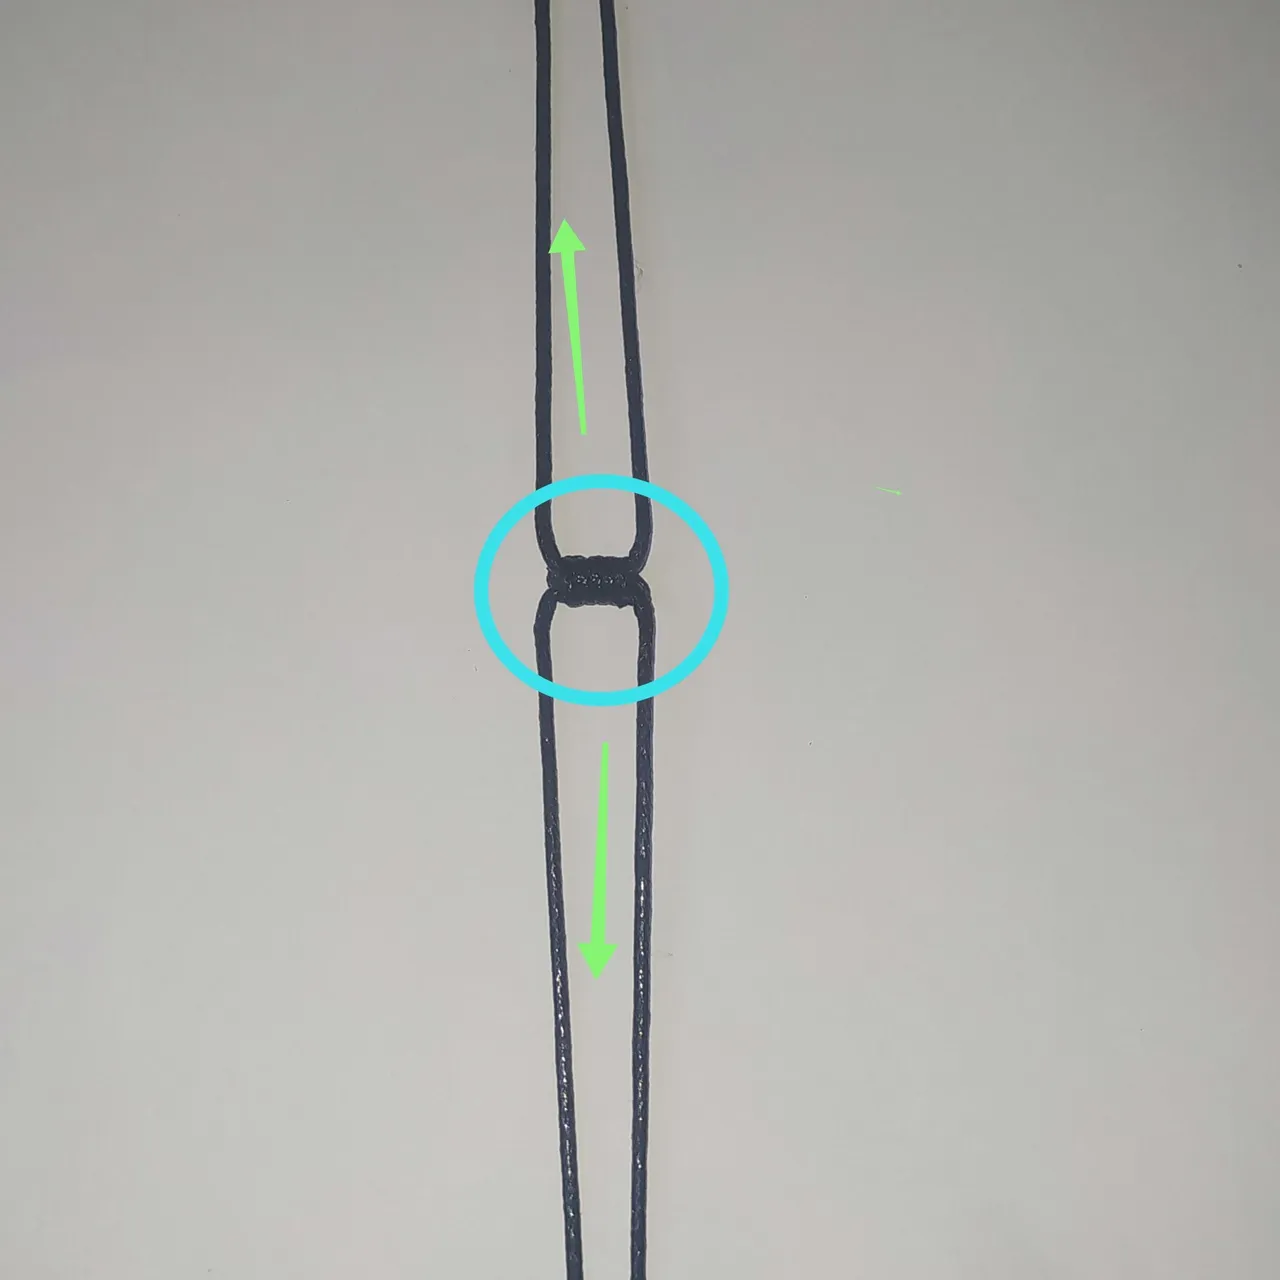
*Then we lift the loop on the left side and put the thread through the hole from the bottom to the top, tighten.
- Pull the short thread to close the loop and seal the Franciscan knot very well.
*Luego levantamos el bucle de lado izquierdo y metemos el hilo por el agujerito de abajo hacia arriba, apretamos.
- Halamos el hilo corto para cerrar el bucle y sellar muy bien el nudo Franciscano.
 |  |
|---|
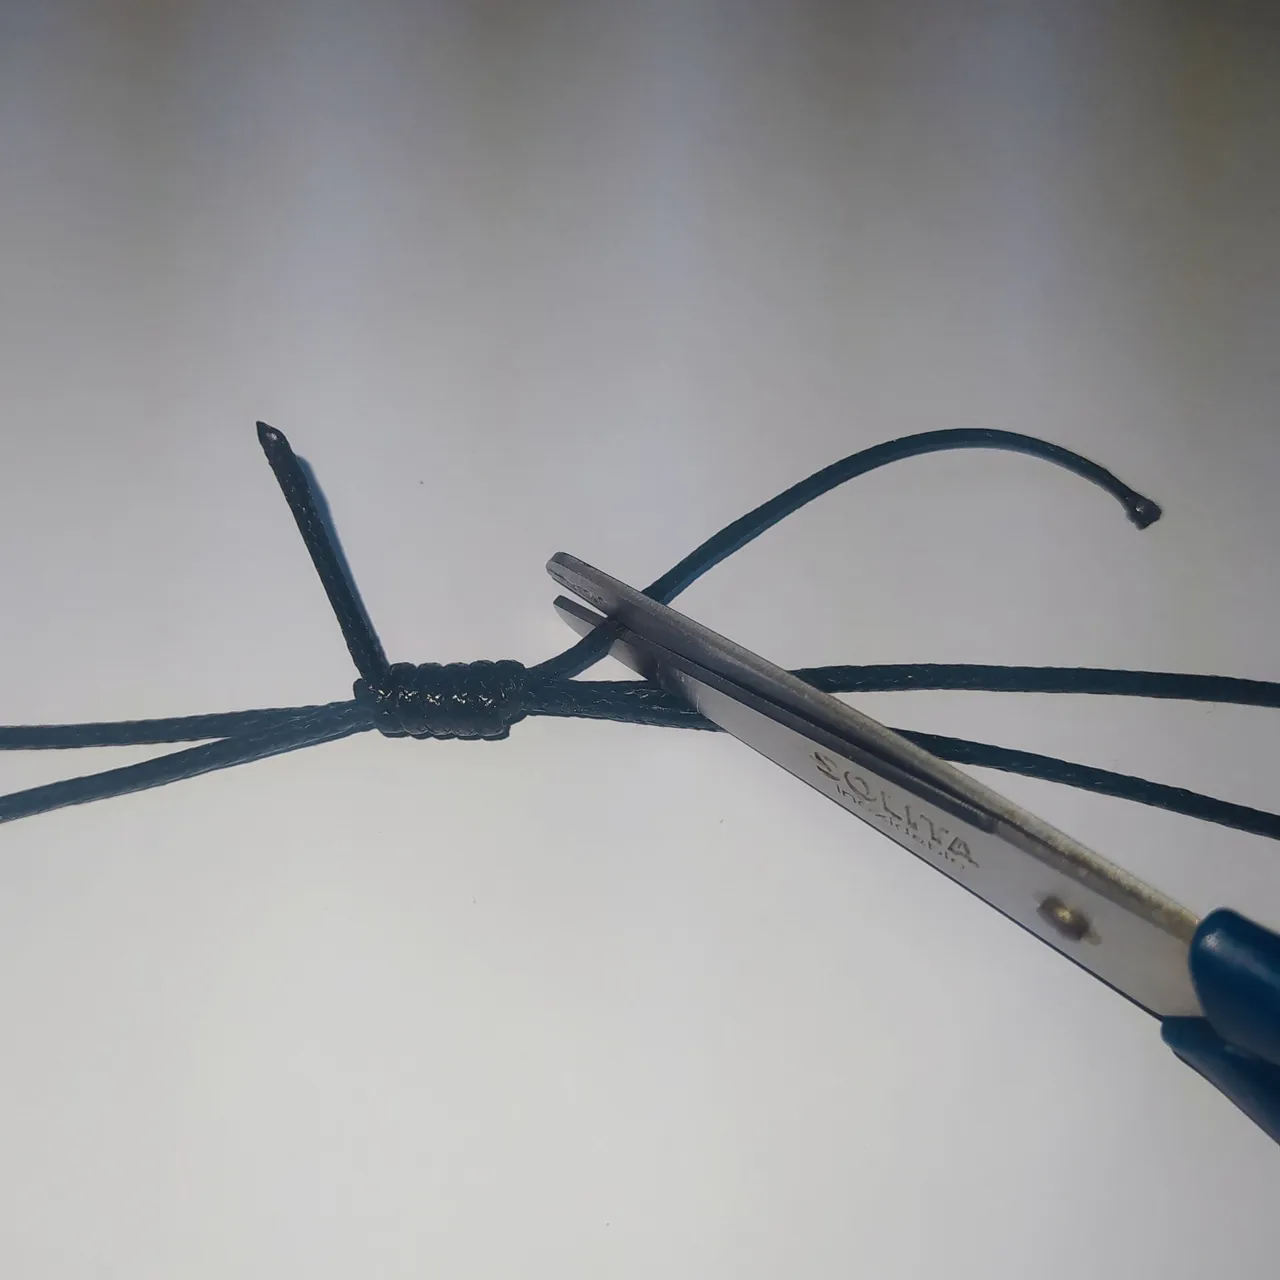
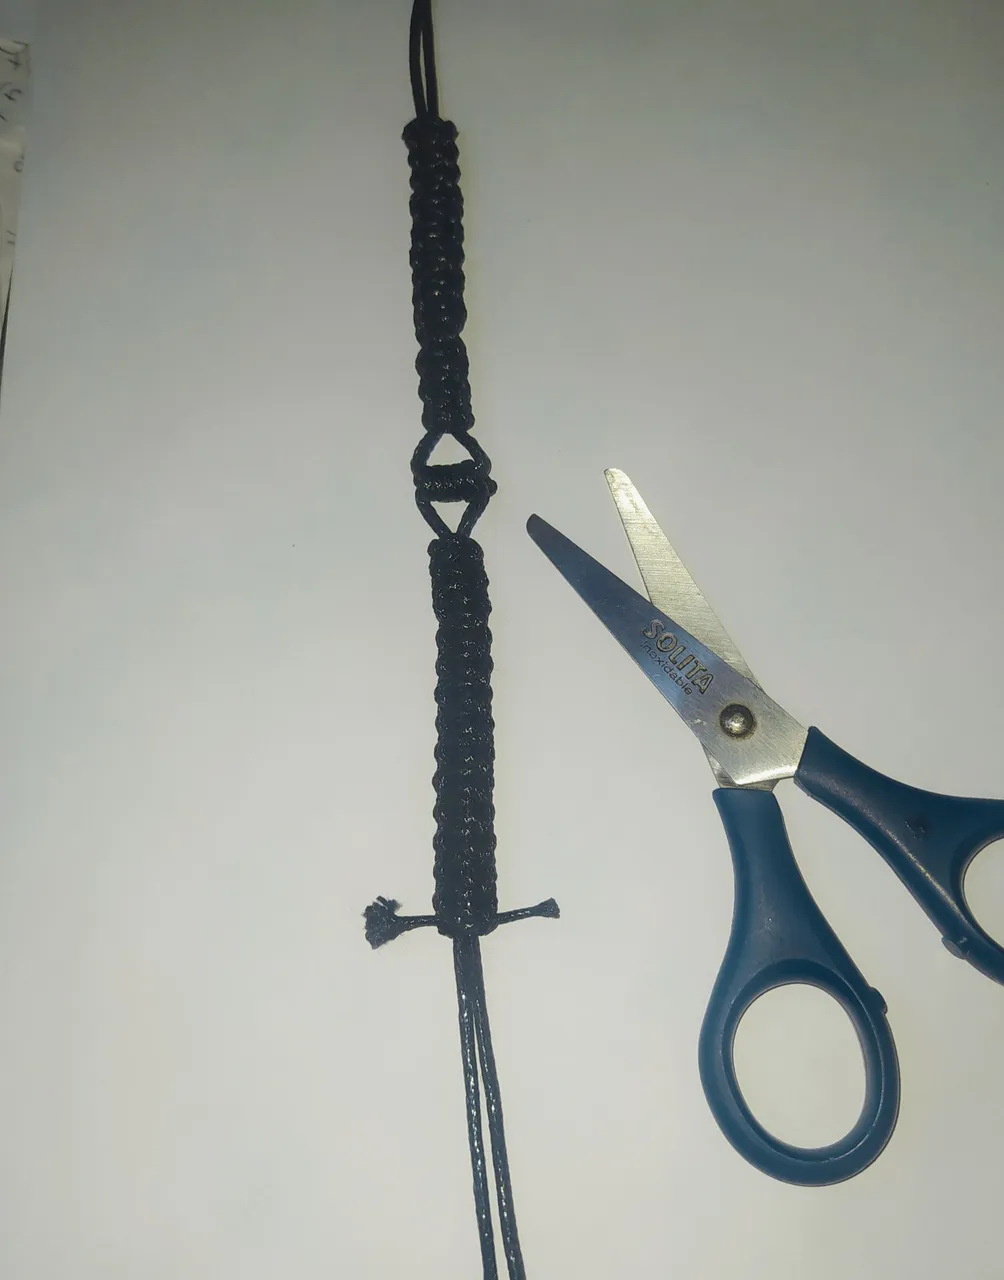
- We cut the excess of thread.
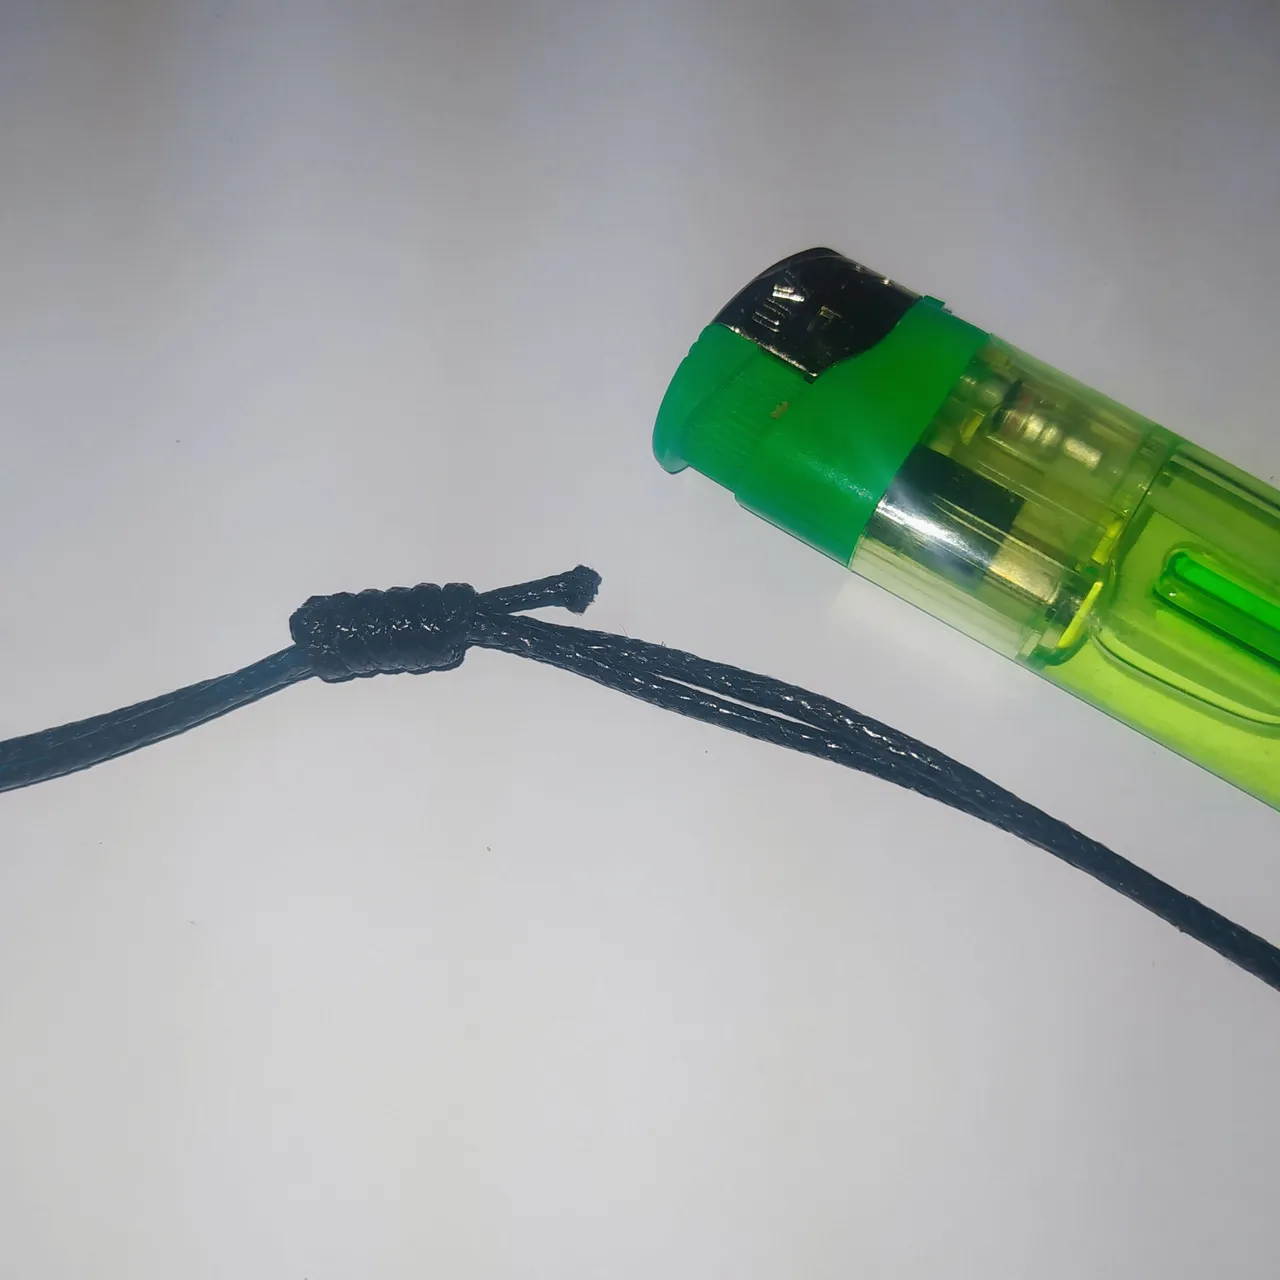
- Then we burn the tips to seal, very carefully and taking into account that we must do it with the blue part of the flame.
- Then with the same tinder we press the tips to seal well.
- Recortamos el excedente de hilo.
- Luego quemamos las puntas para sellar, con mucho cuidado y tomando en cuenta que lo debemos hacer con la parte azul de la llama.
- Luego con el mismo yesquero presionamos las puntas para sellar bien.
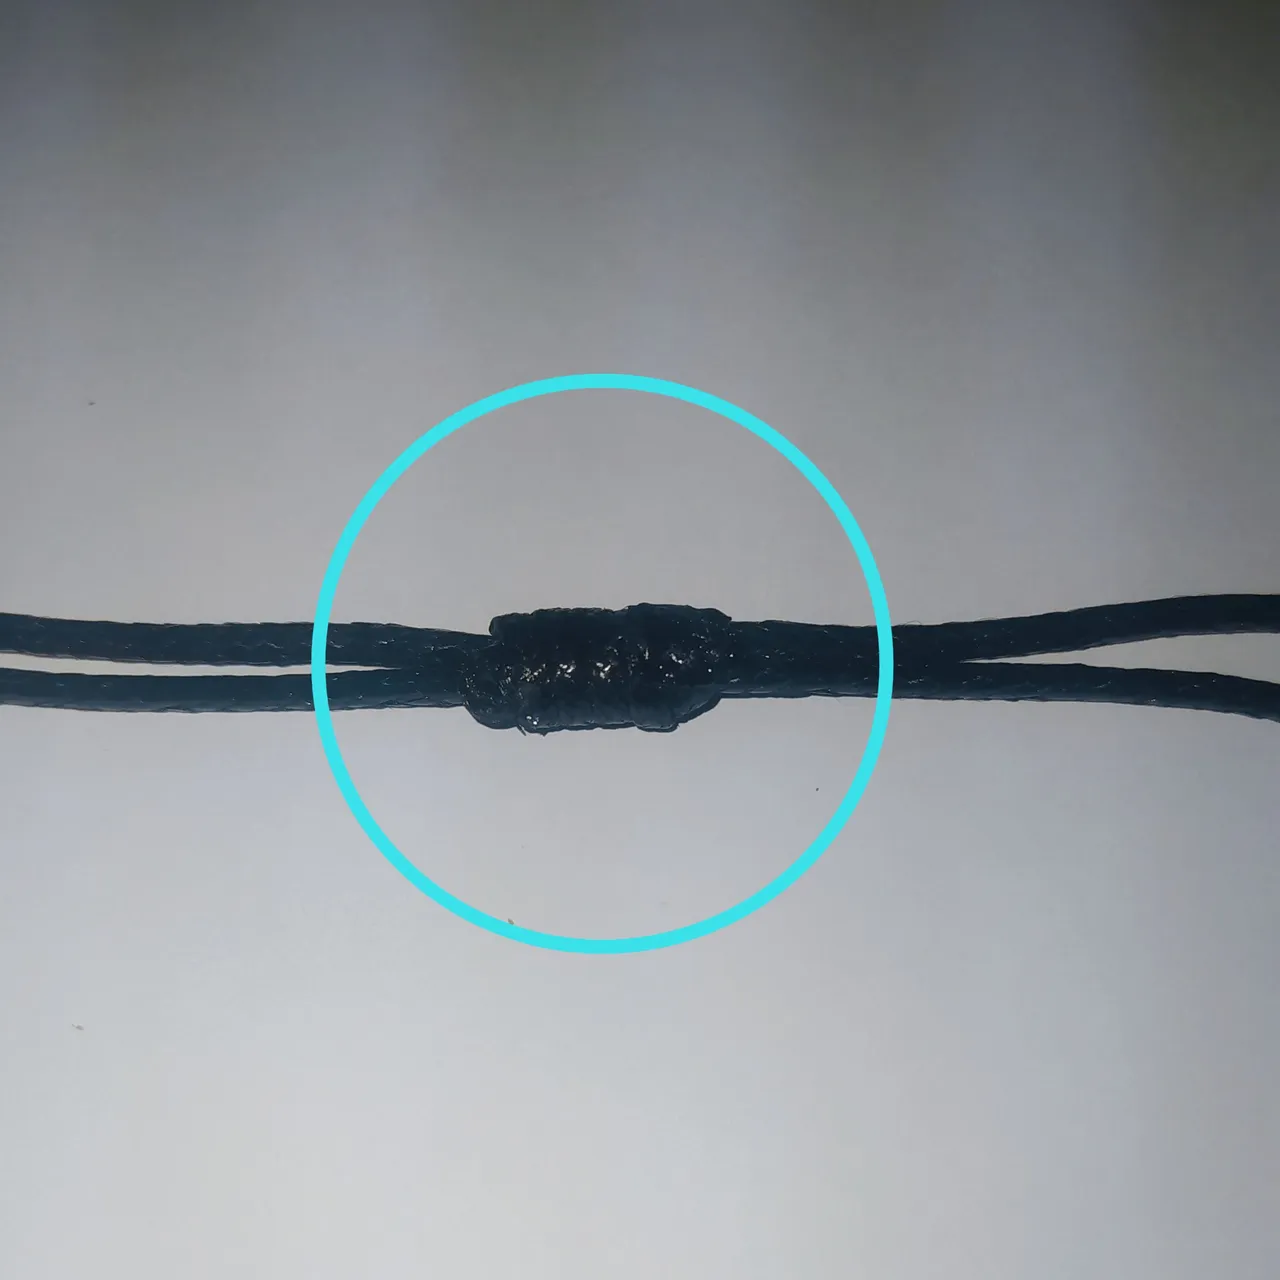
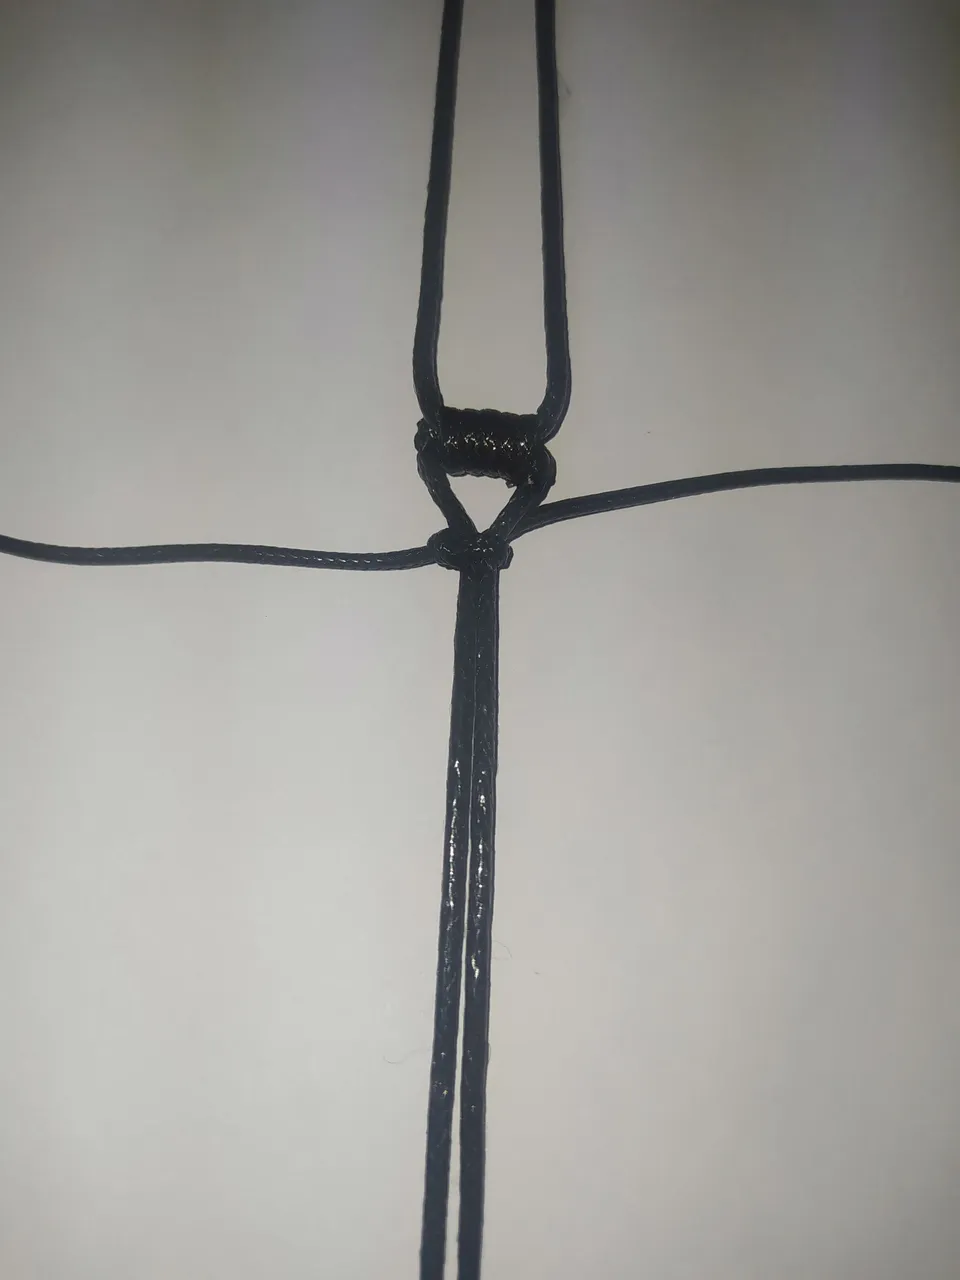
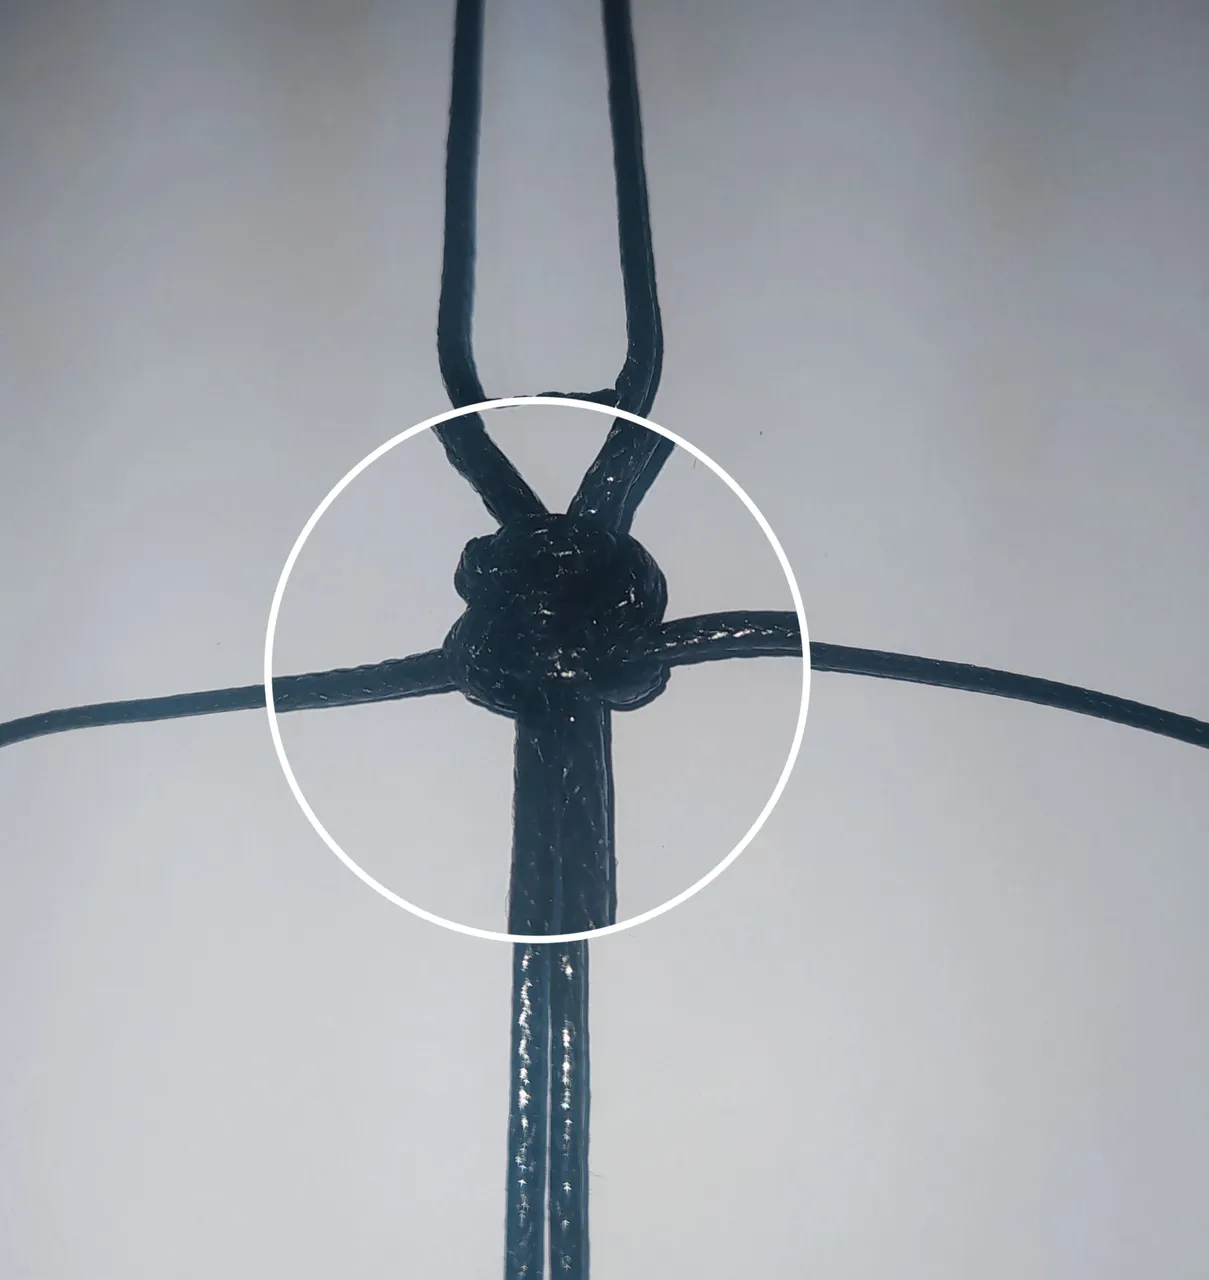
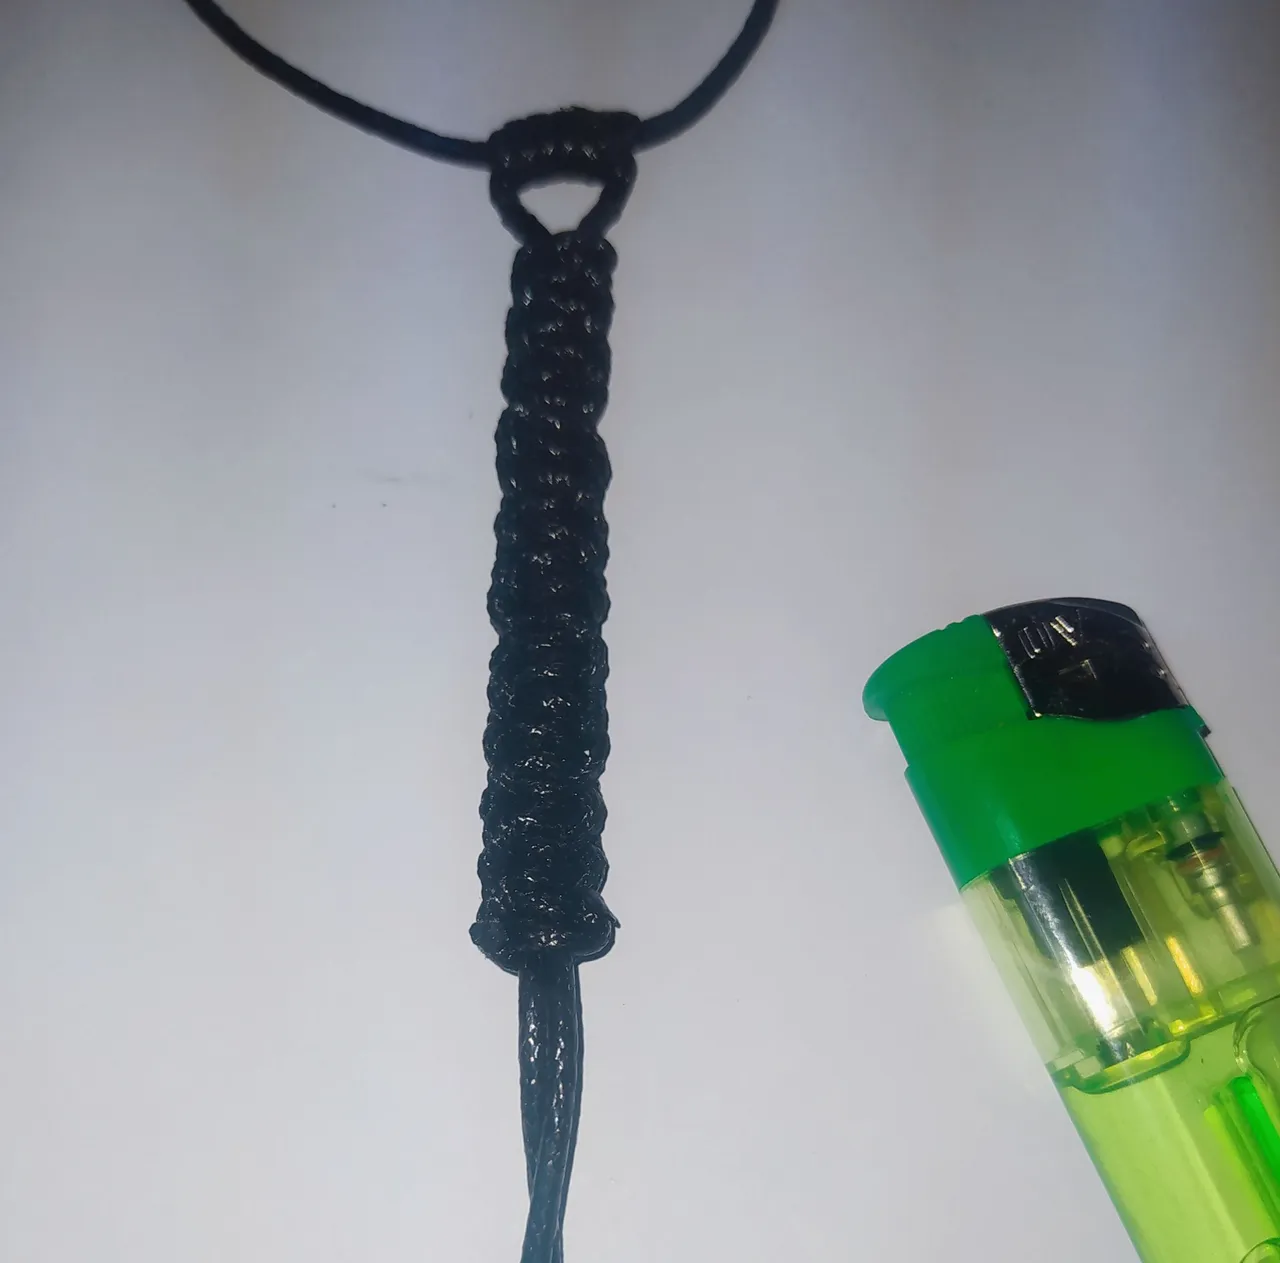
- This beautiful cylinder shape completes our central knot.
- De esta linda forma de cilindro queda terminado nuestro nudo central.
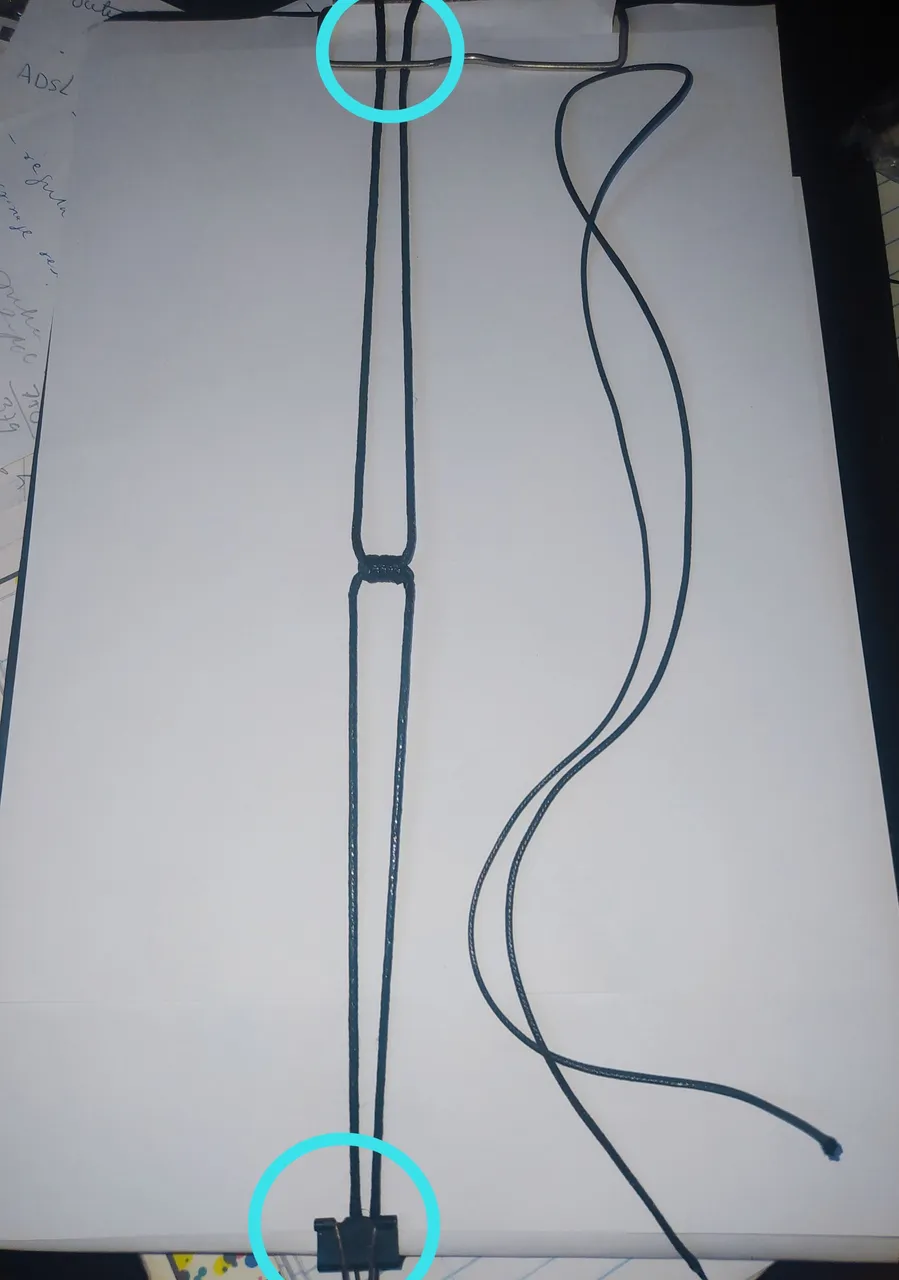
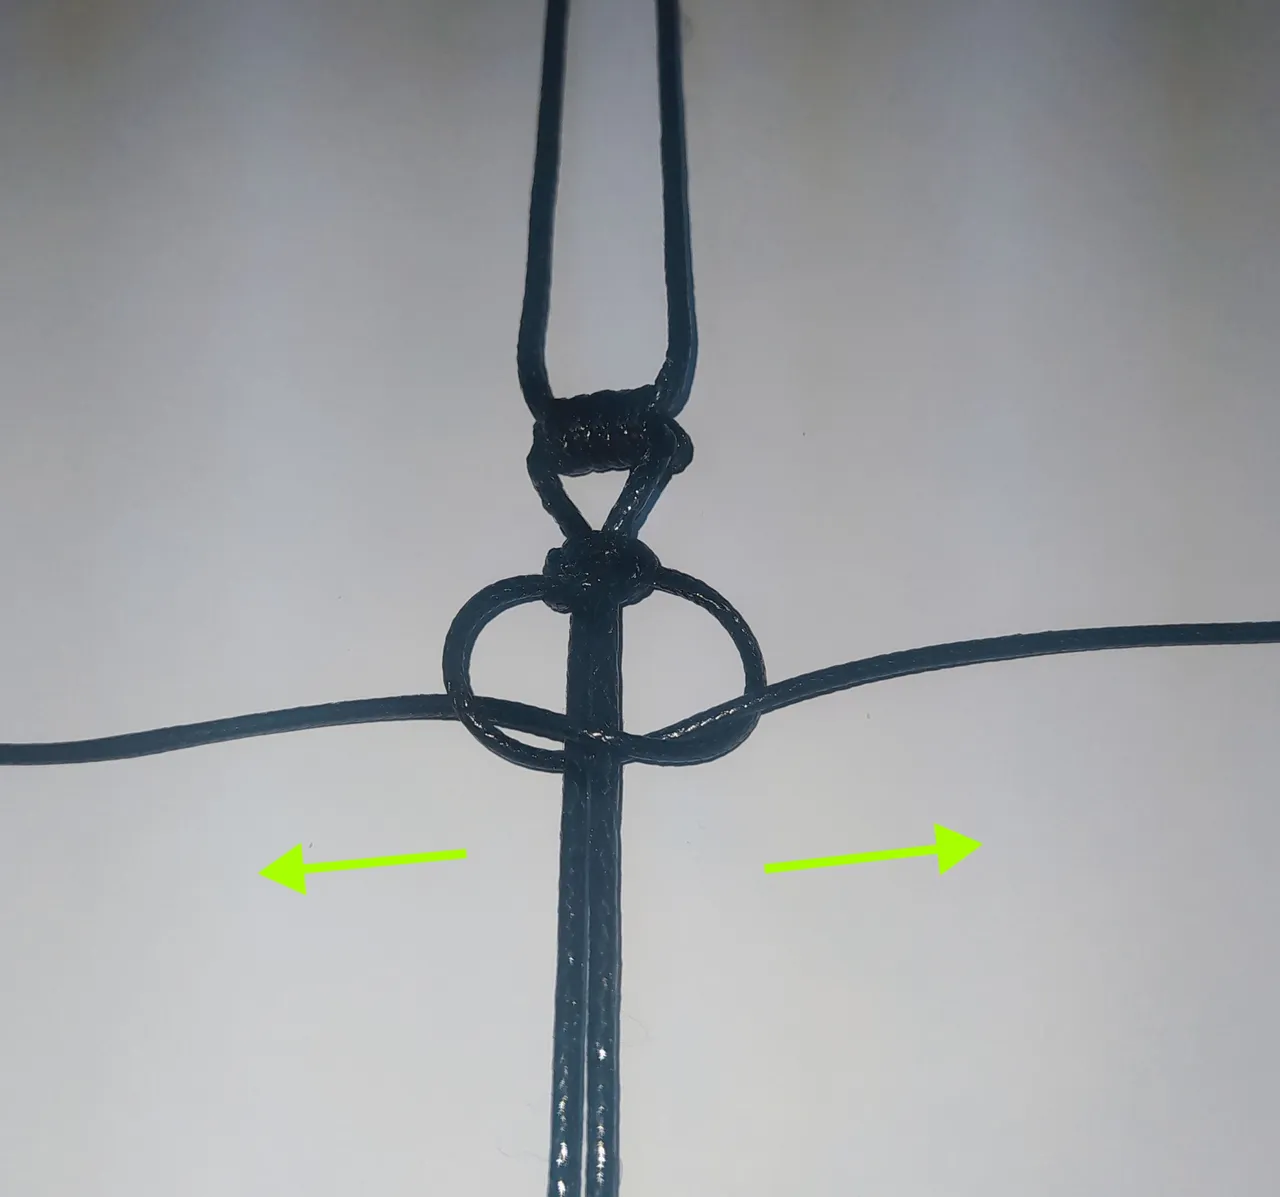
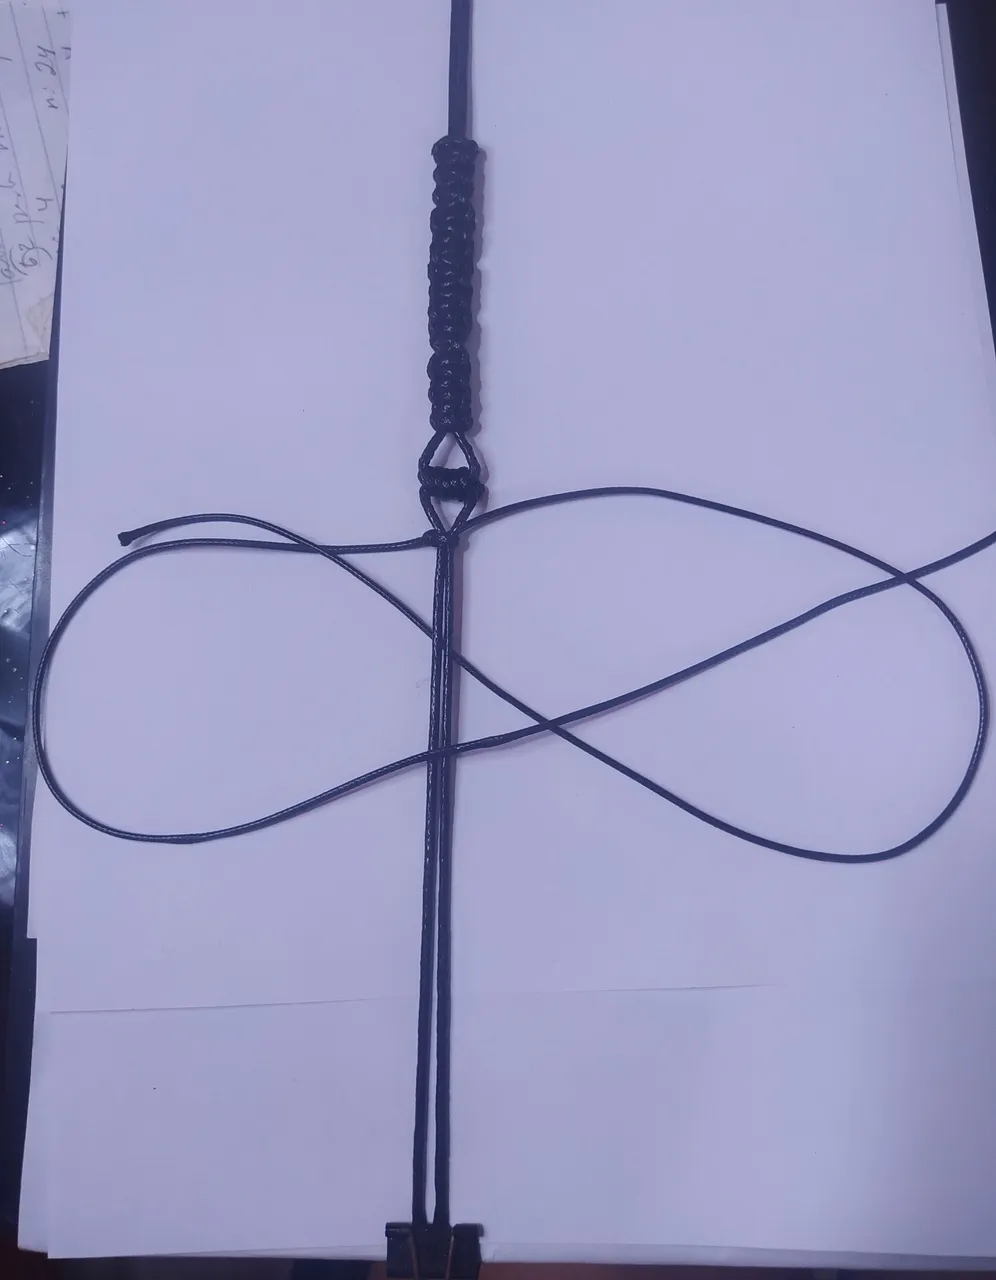
- Take the two ends of the strands of the bracelet and bring them to both ends and secure them with the clamps at both ends of the board, as shown in the picture.
- Tomamos la dos puntas de los hilos de la pulsera y llevamos a ambos extremos y aseguramos con las pinzas en ambos extremos de la tabla, como muestro en la imagen
Let's move on to weaving the sides of the bracelet where we will be using the flat knot technique.
Pasemos a realizar el tejido de los lados de la pulsera donde estaremos empleando la técnica de el nudo plano.
The technique to make this bracelet seems a bit tangled but it is all a matter of being careful on which side we place the thread as it is always repeating the same technique used on both sides, until you reach the desired size of the bracelet.
La técnica para realizar esta pulsera parece un poco enredada pero todo es cuestión de poner cuidado en qué lado vamos colocando el hilo ya que se trata de repetir siempre la misma técnica empleada en ambos lados, hasta llegar al tamaño deseado de la pulsera.
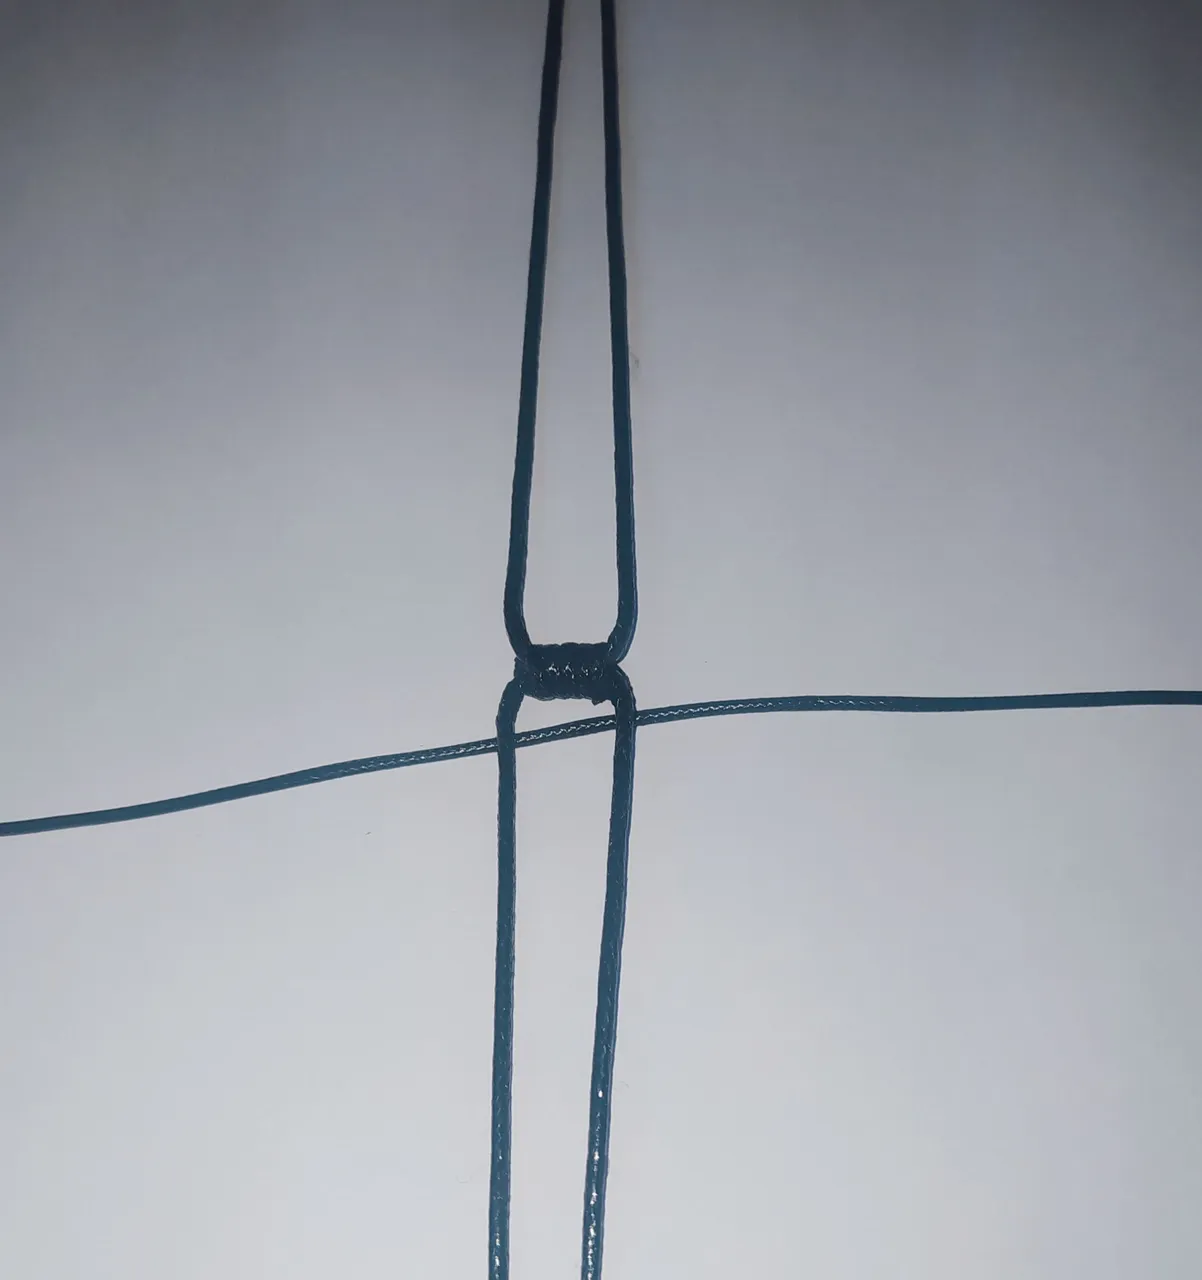
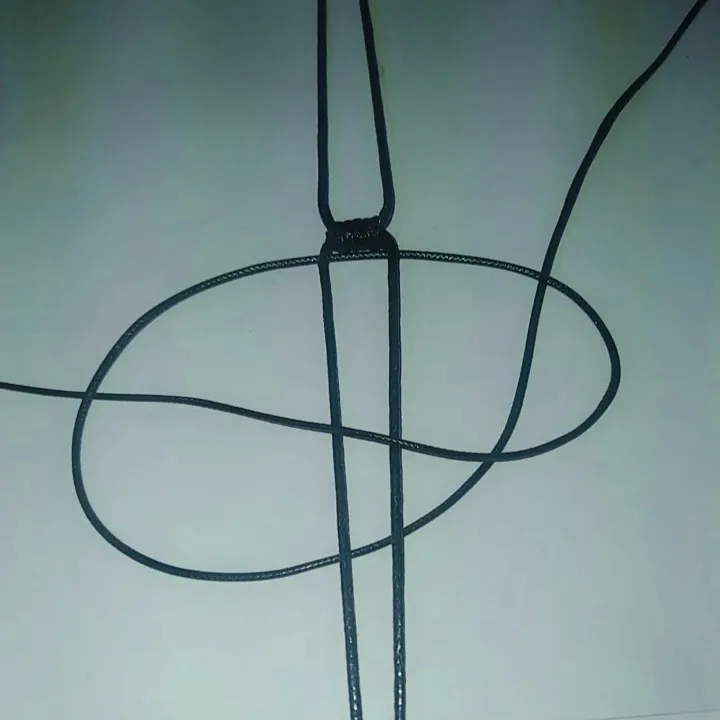
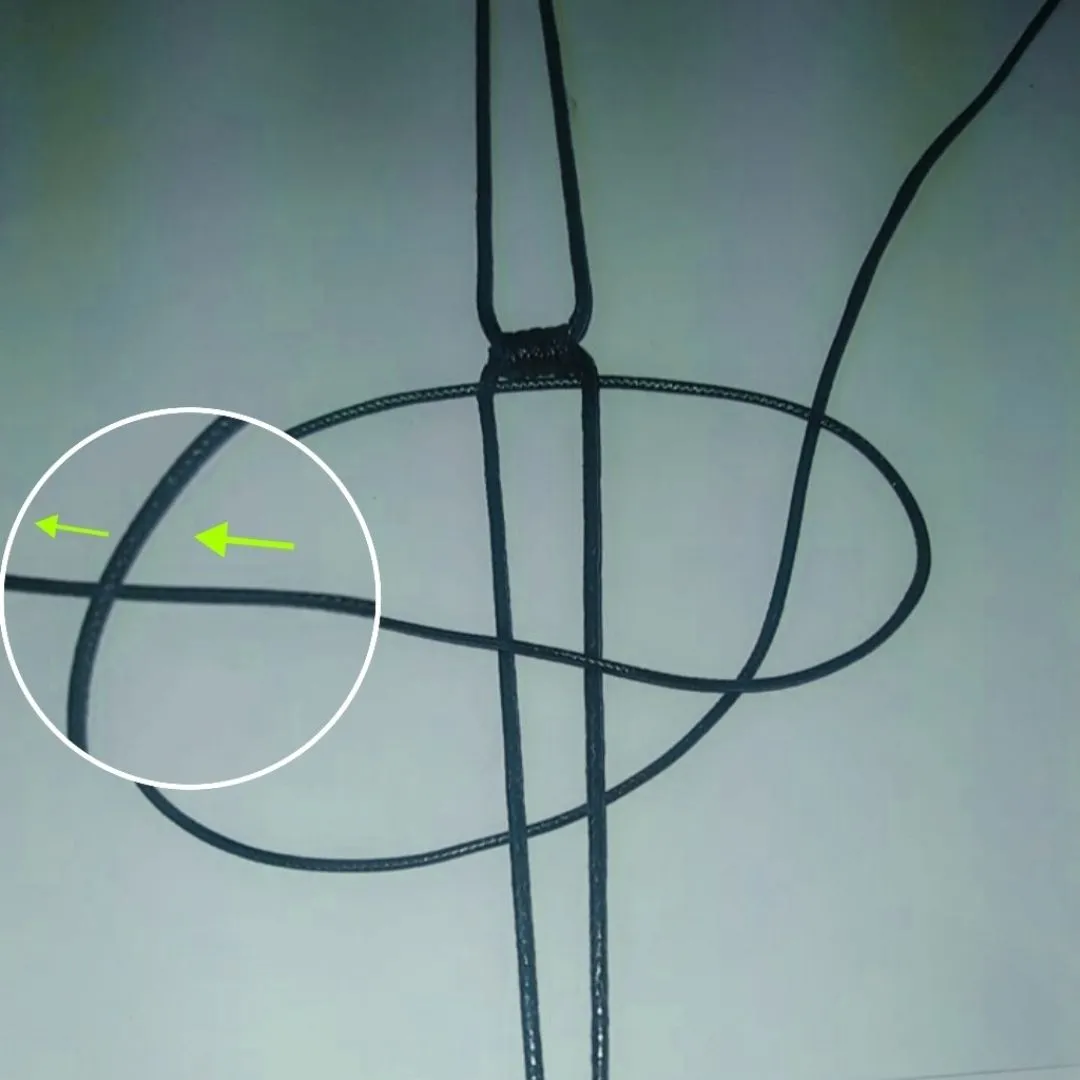
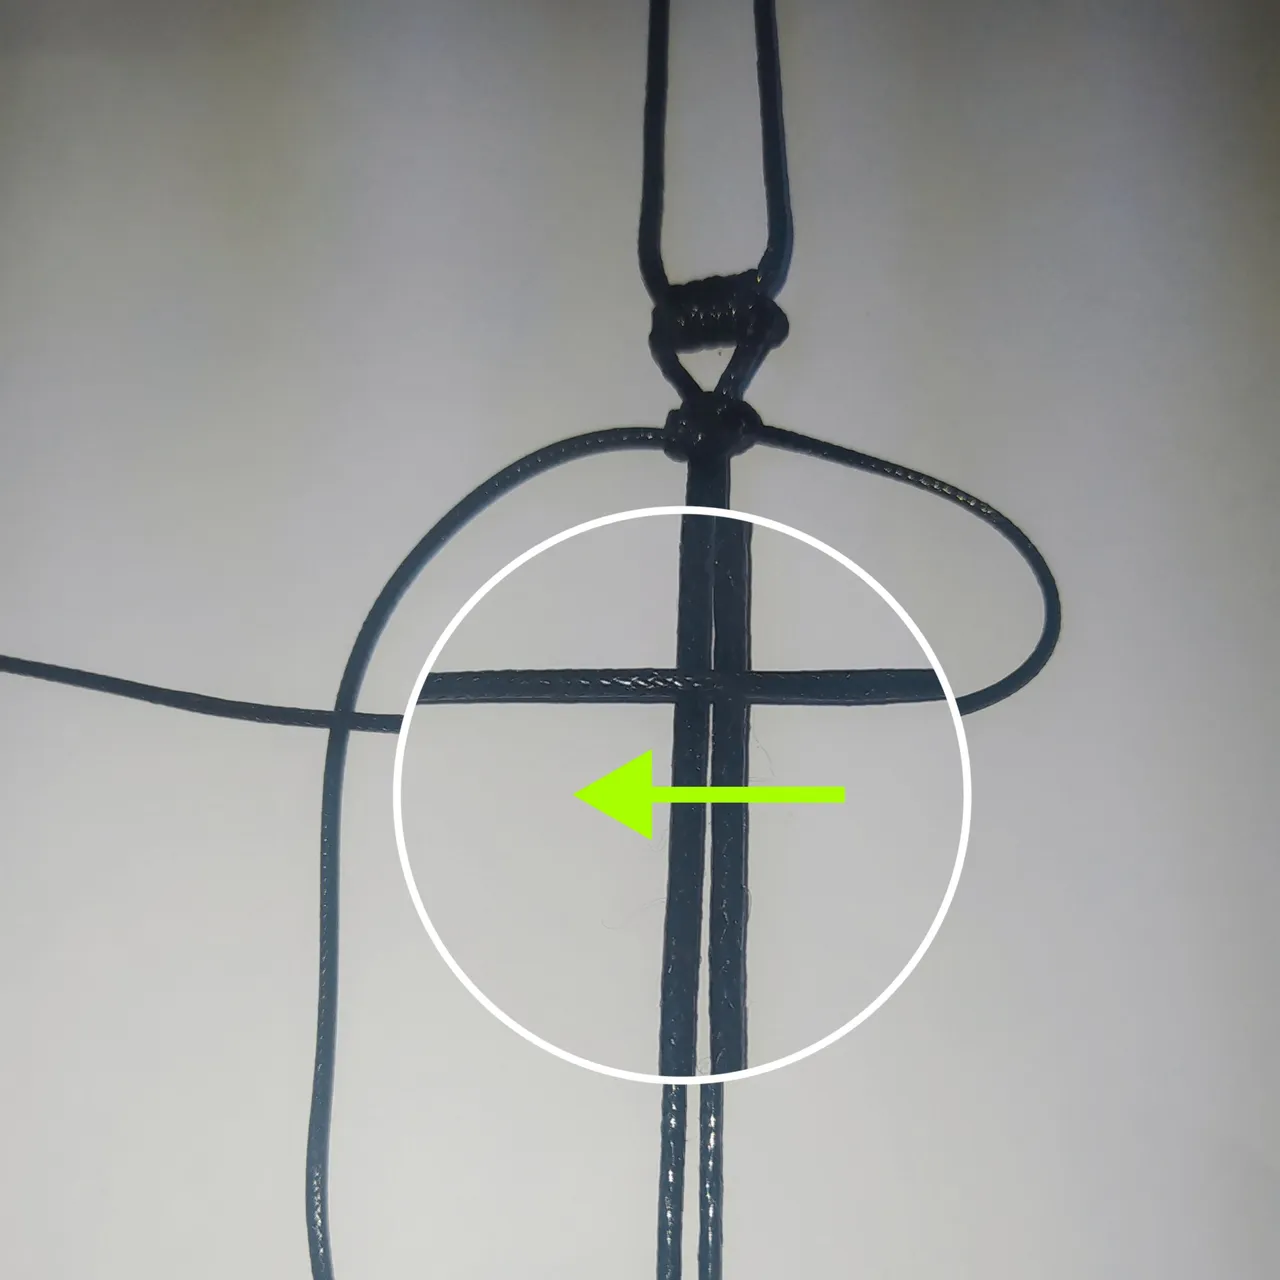
- We take a 80 cm thread, we pass it through the bottom part of our thread and we center it in the middle.
- Tomamos un hilo cuerina de 80 cm Pasamos por la parte de abajo nuestro hilo y centramos a la mitad.
 |  |
|---|
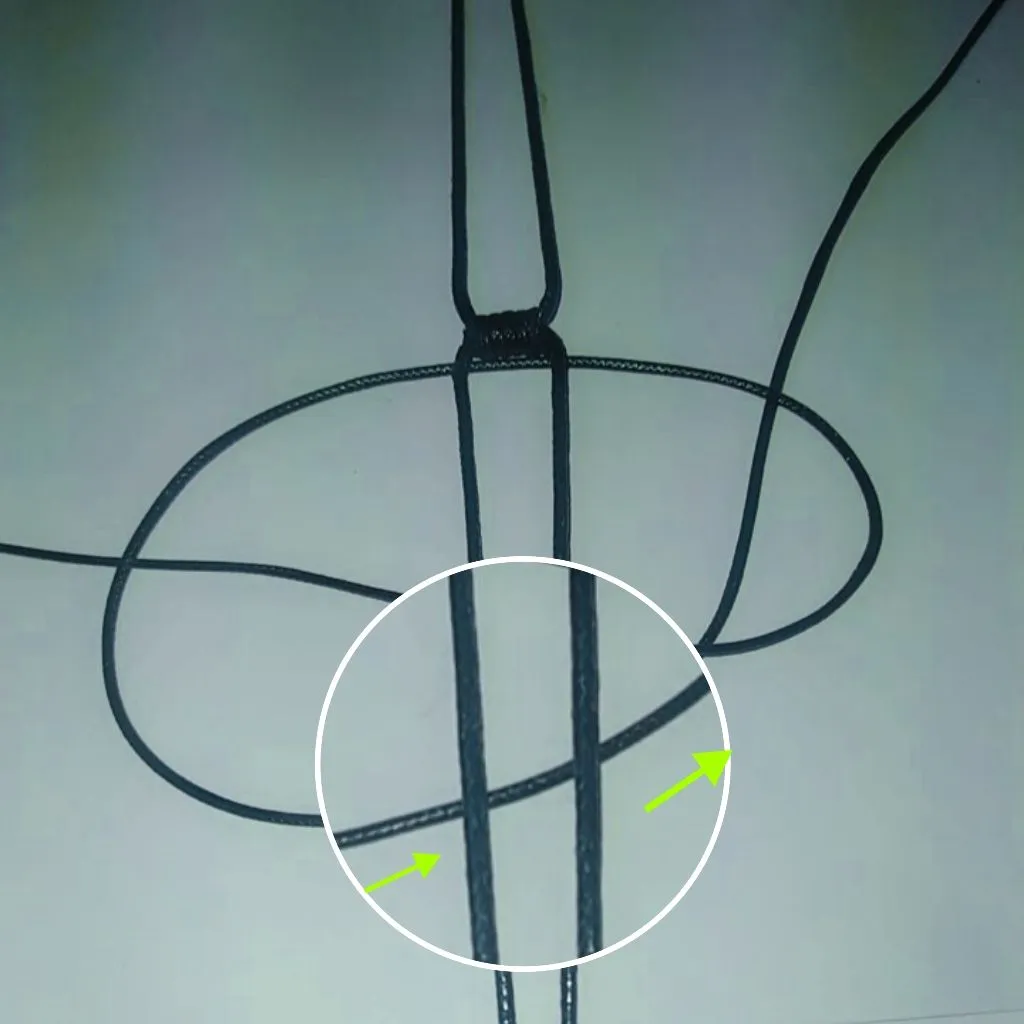
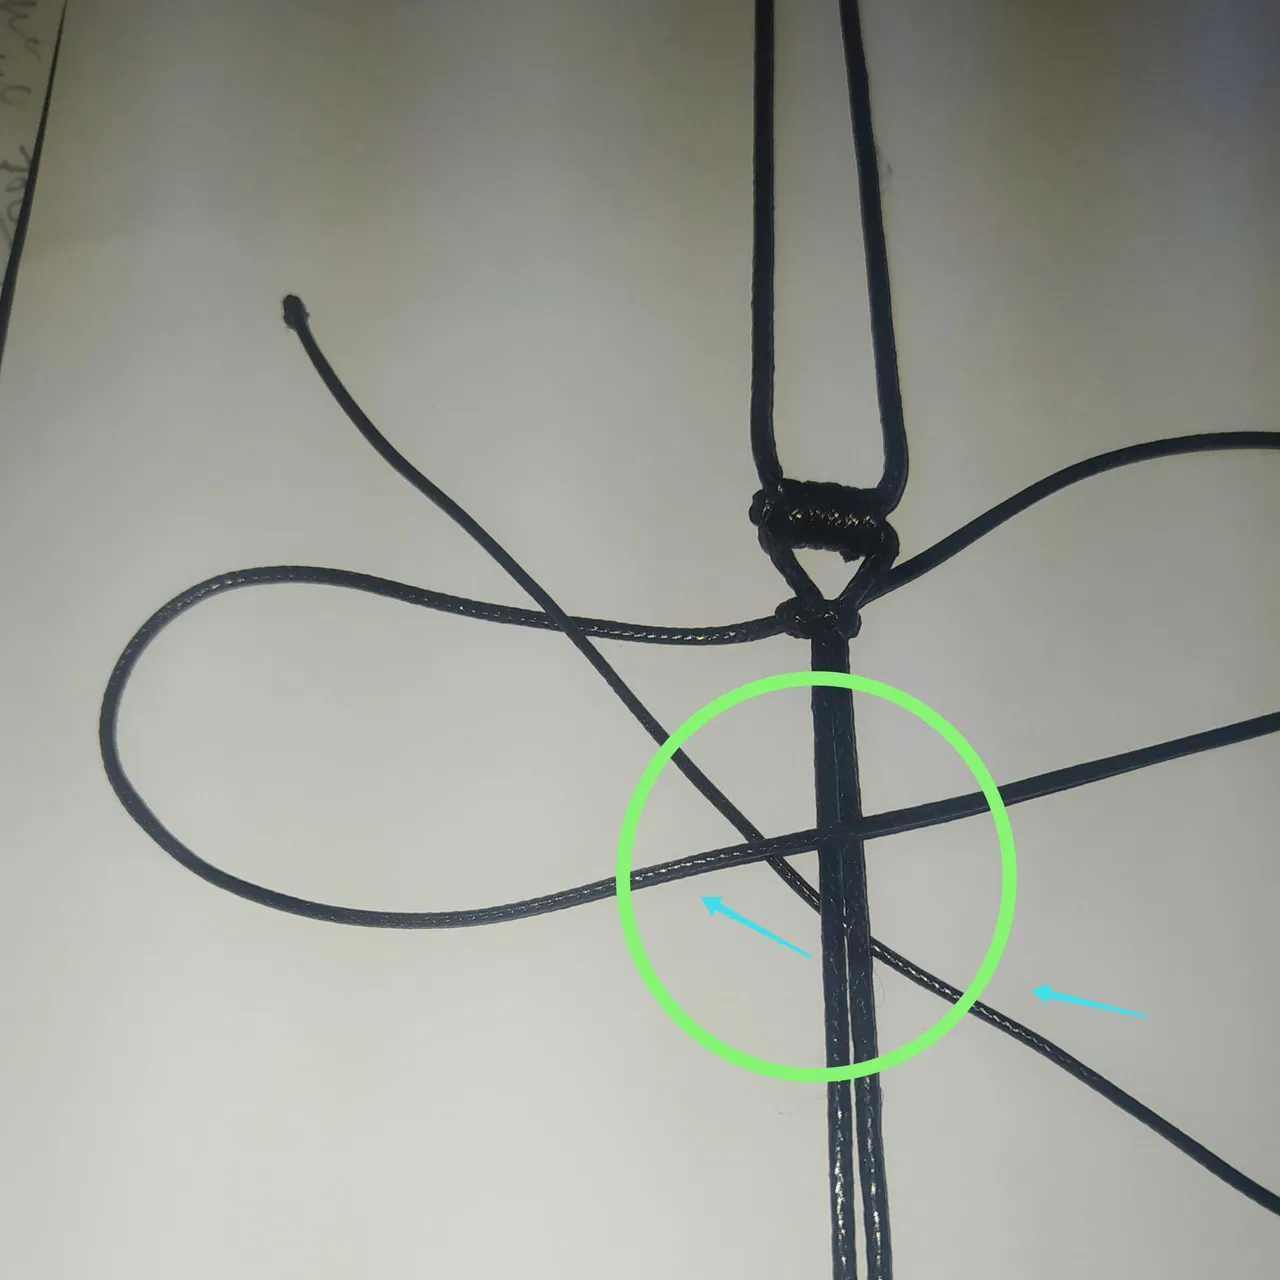
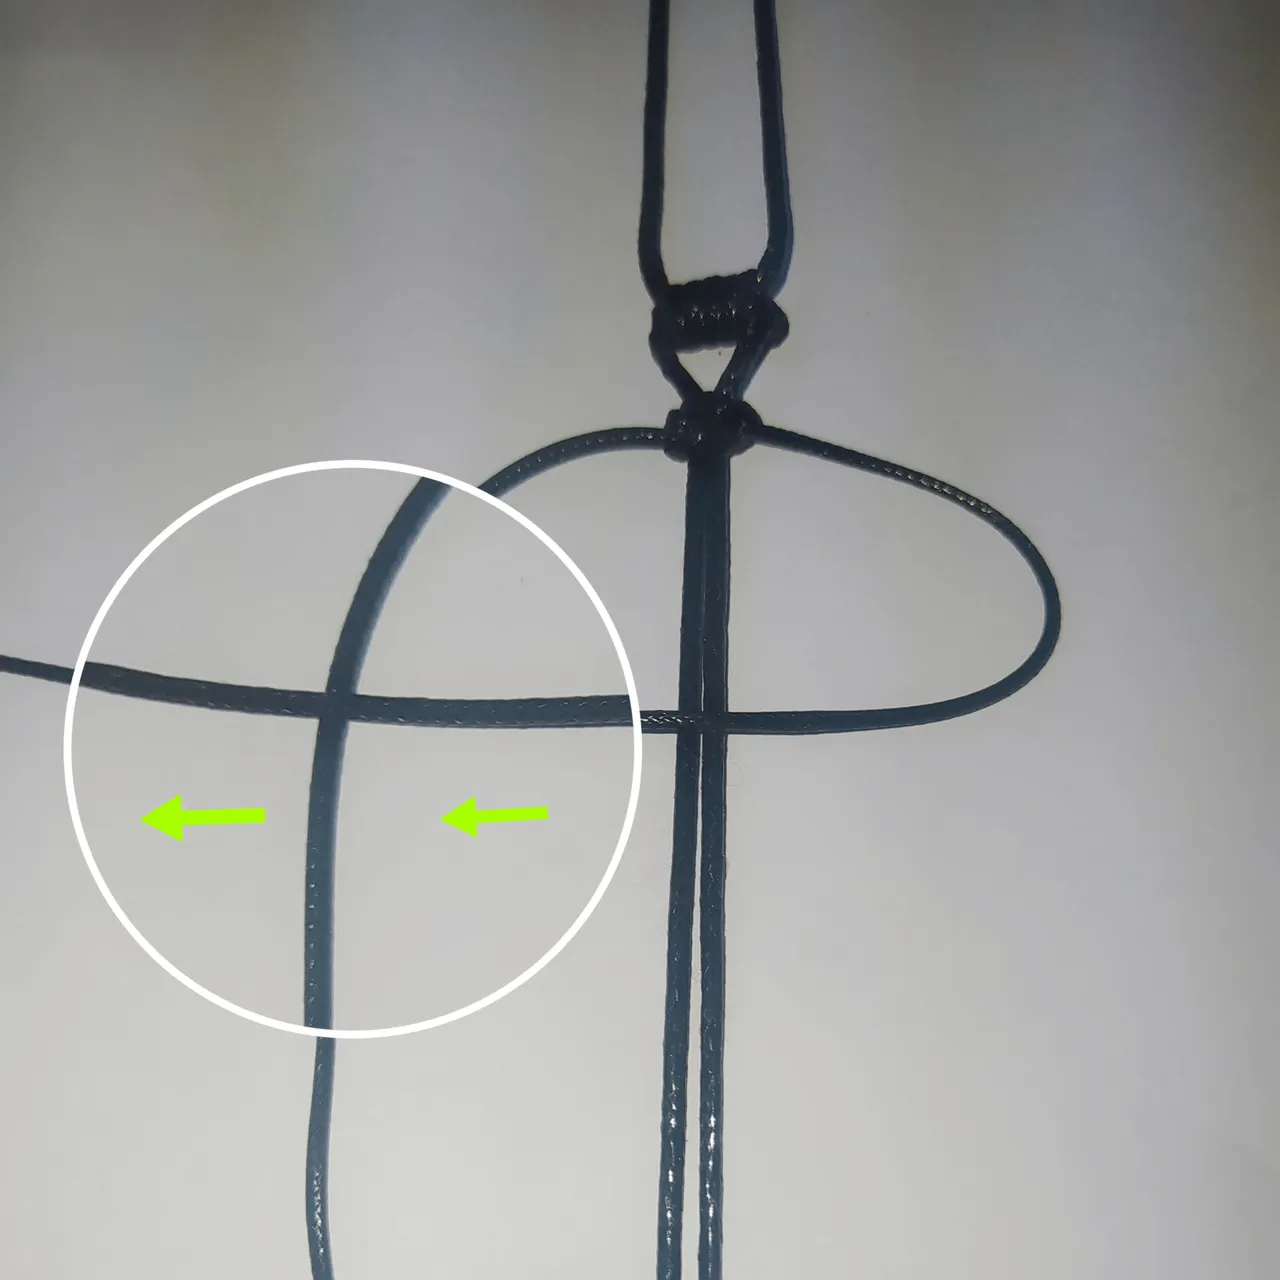
- Then the yarn on the left side is passed under the central yarns to the right side.
- Luego el hilo que está del lado izquierdo lo pasamos por debajo de los hilos centrales hacia el lado derecho.
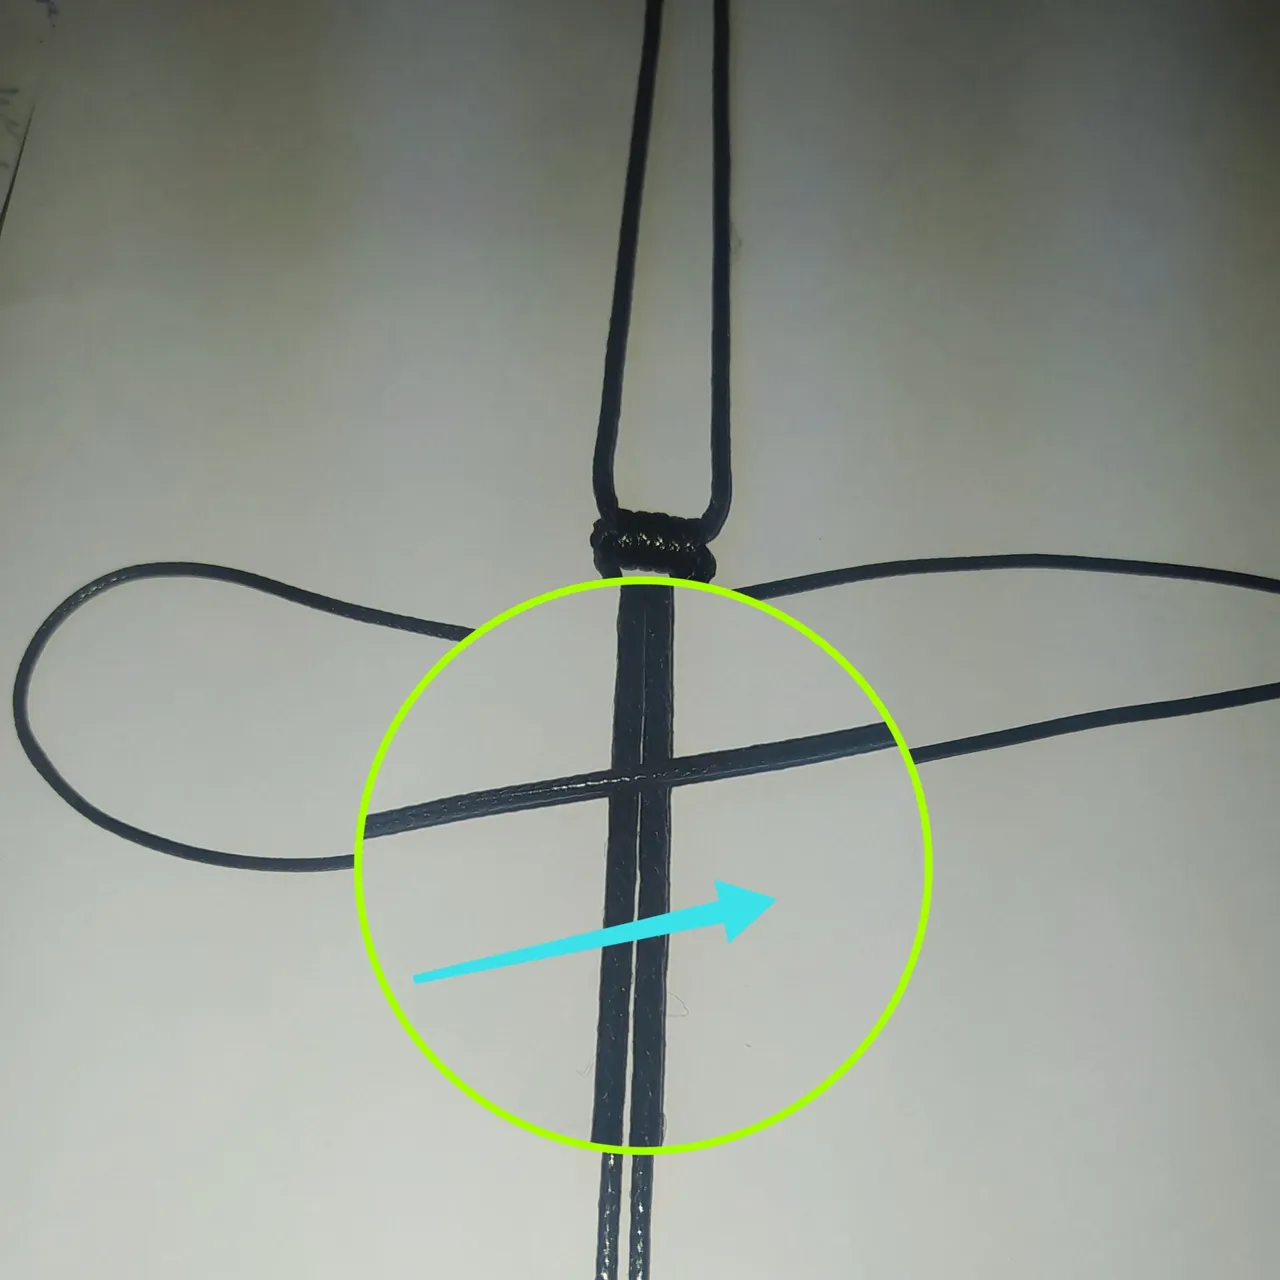
- And in turn we pass it over the thread on the right side.
- Y a su vez lo pasamos por encima del hilo del lado derecho.
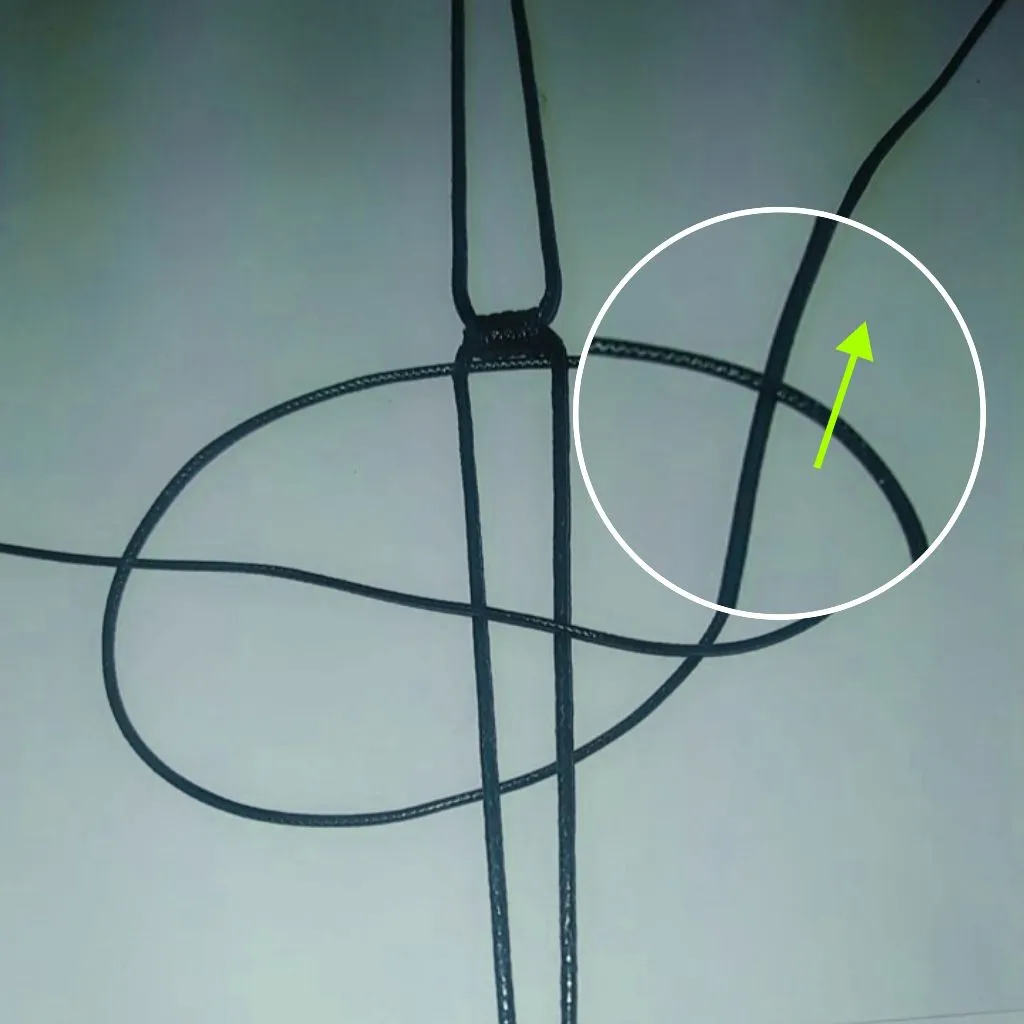
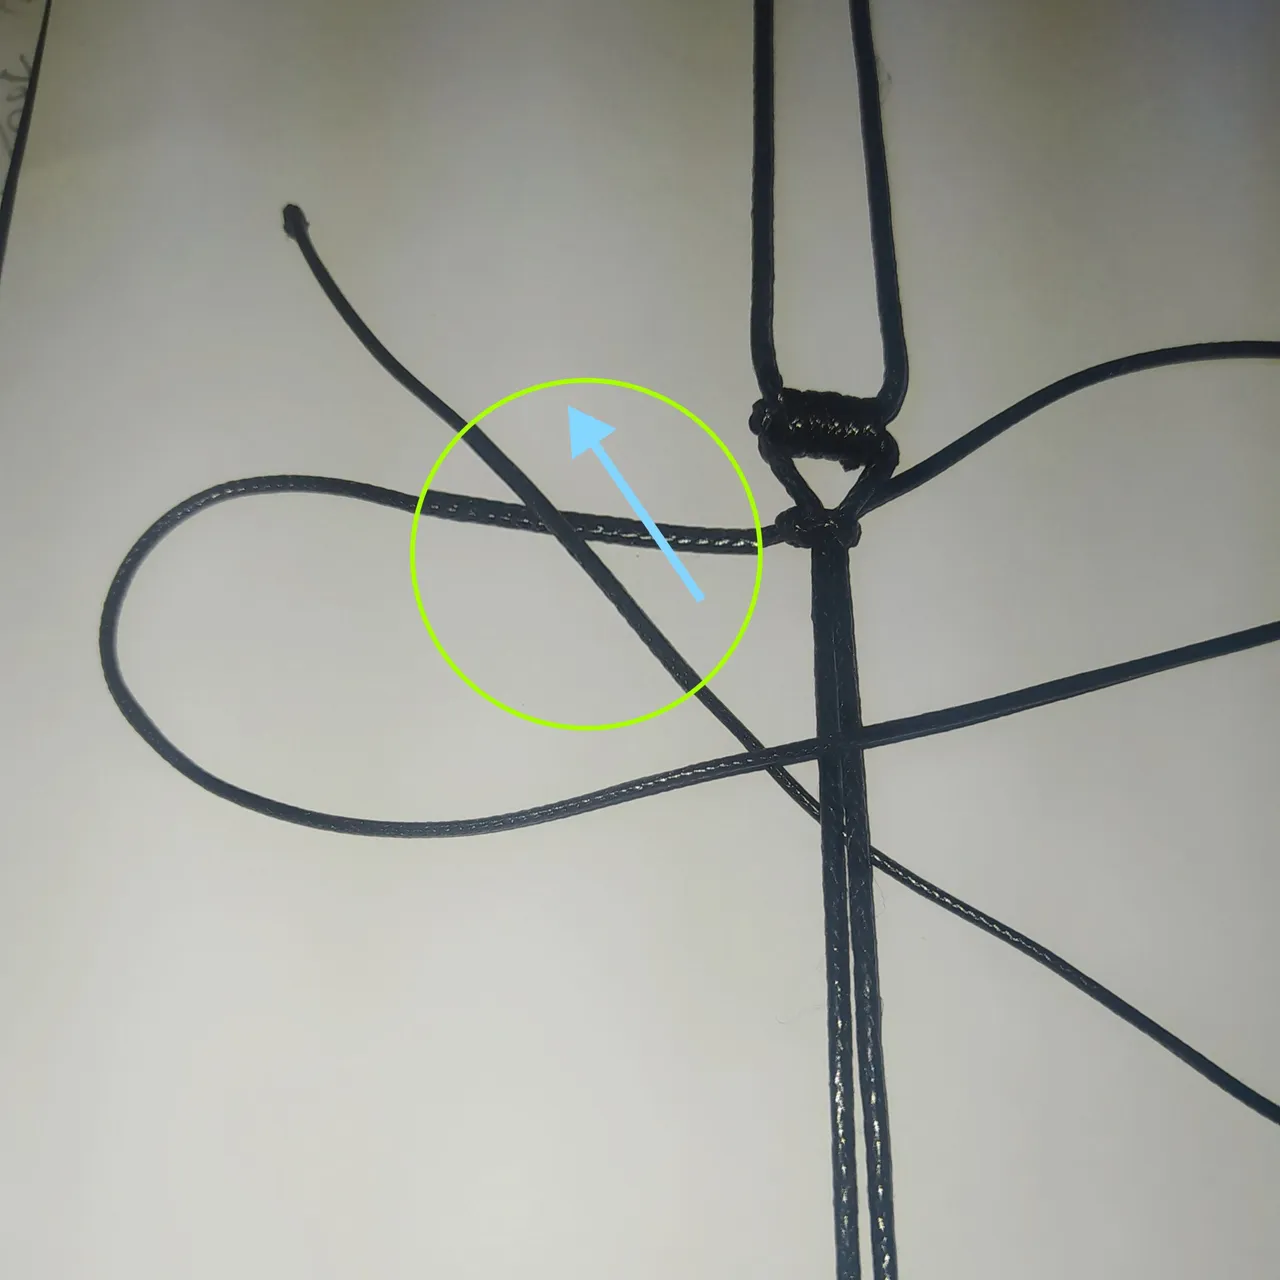
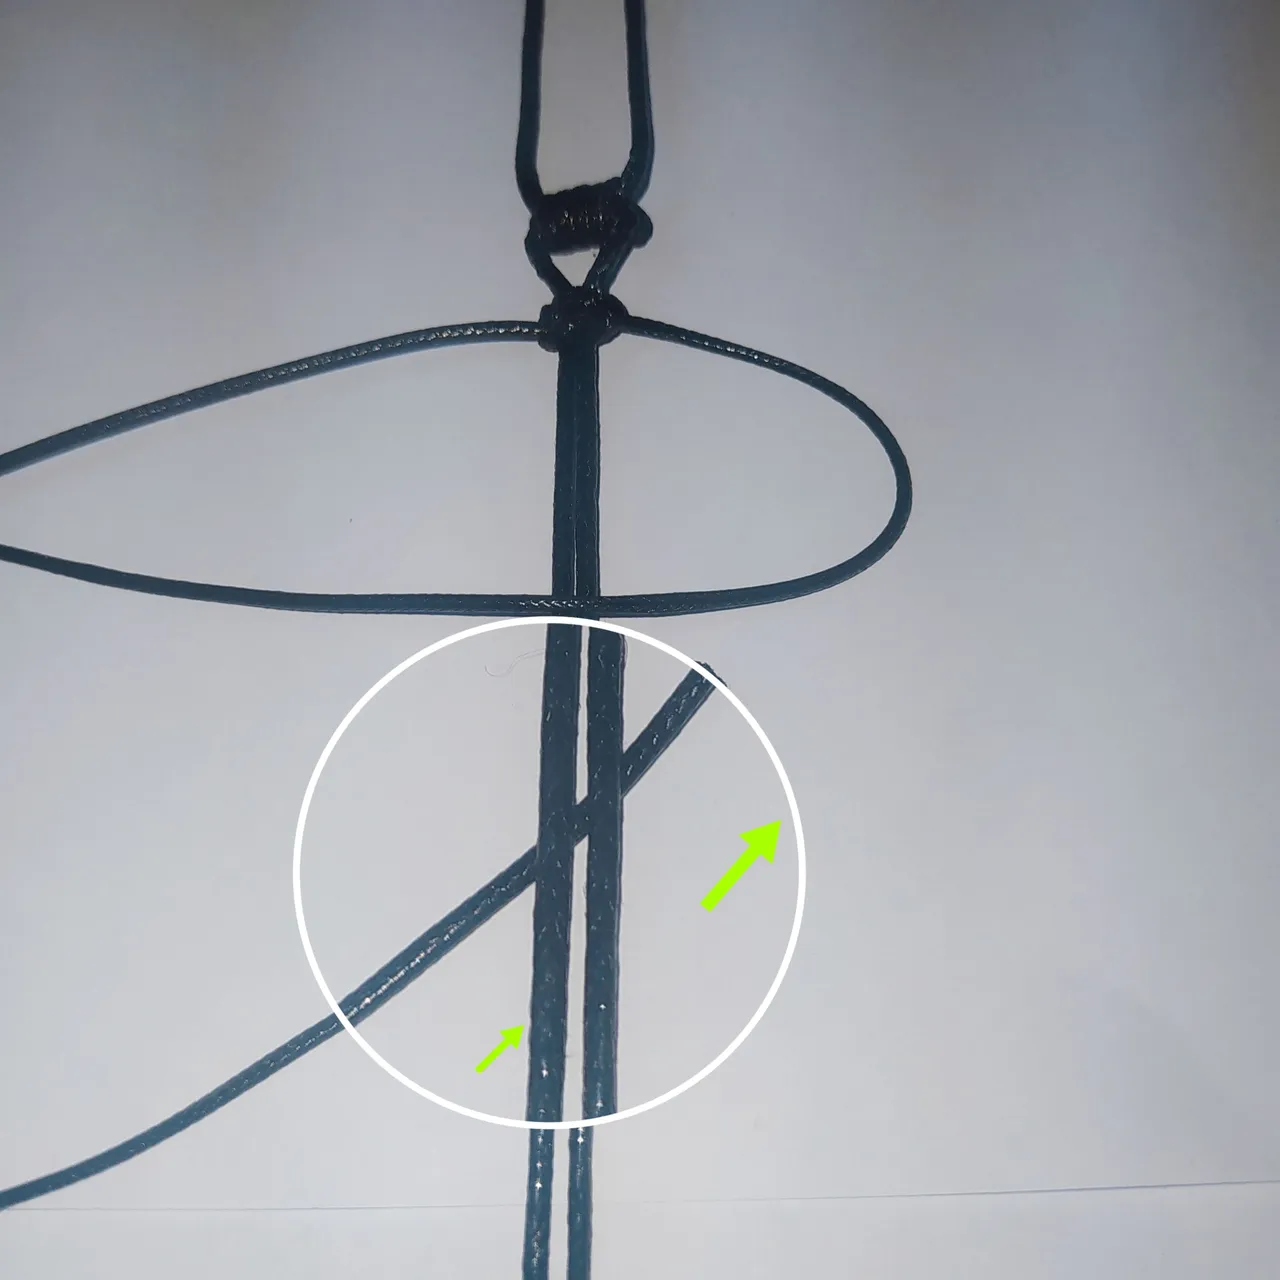
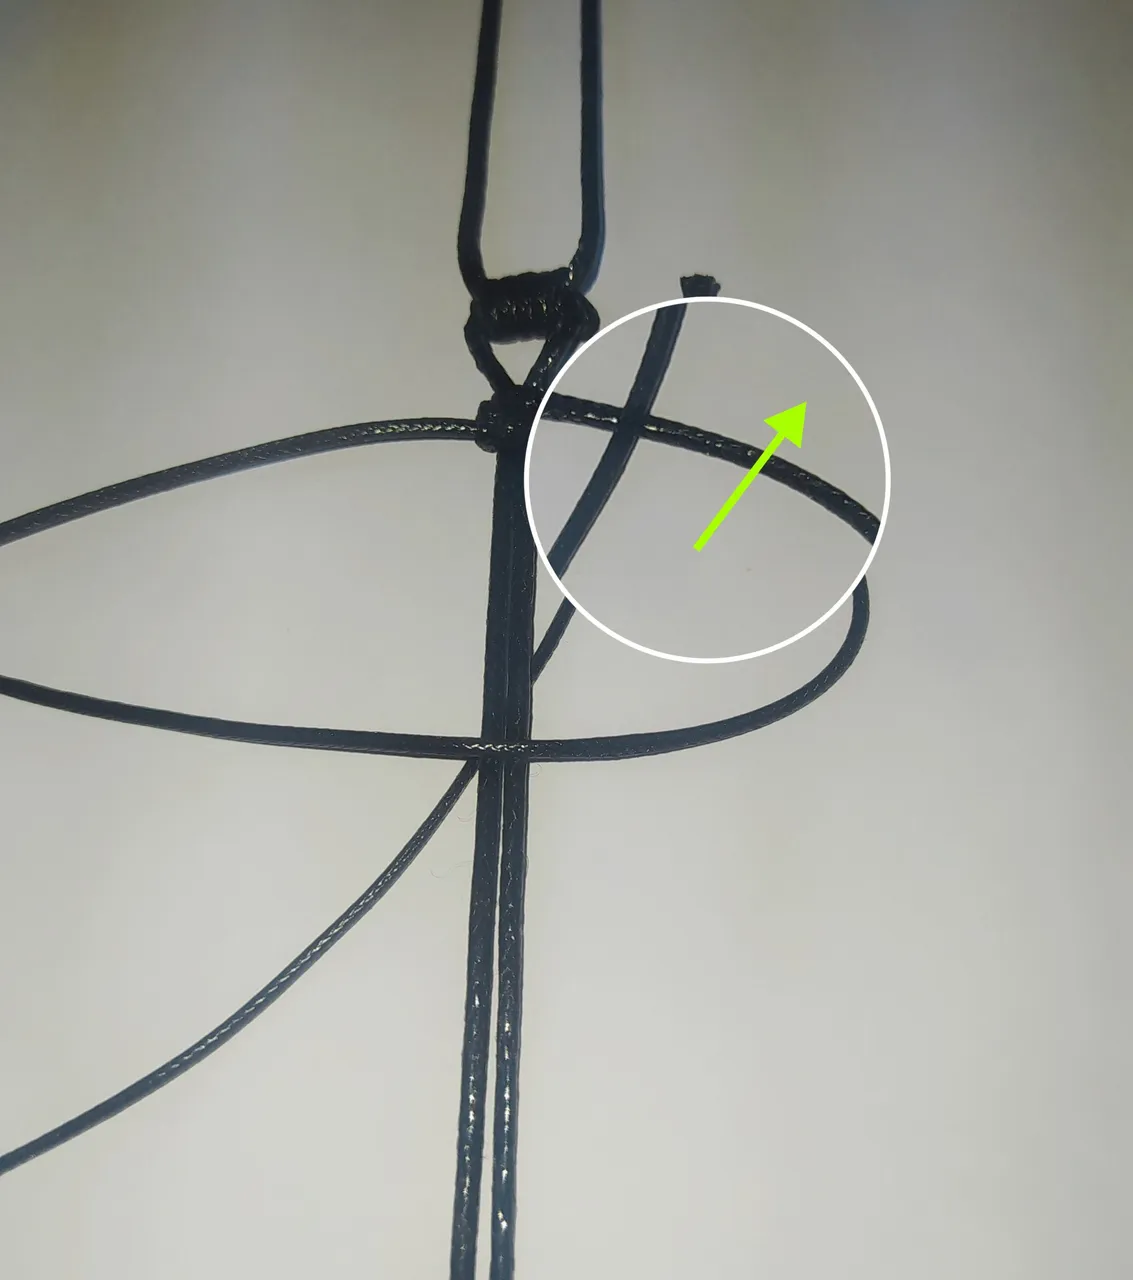
- With the yarn on the right side we form a letter P by passing the yarn over the yarn on the left side and then over the central yarns and pass it to the left side as shown in the picture.
- Con el hilo del lado derecho formamos una letra P pasando el hilo por encima del hilo del lado izquierdo y luego por encima de los hilos centrales y lo pasamos hacia el lado izquierdo como muestro en la imagen.
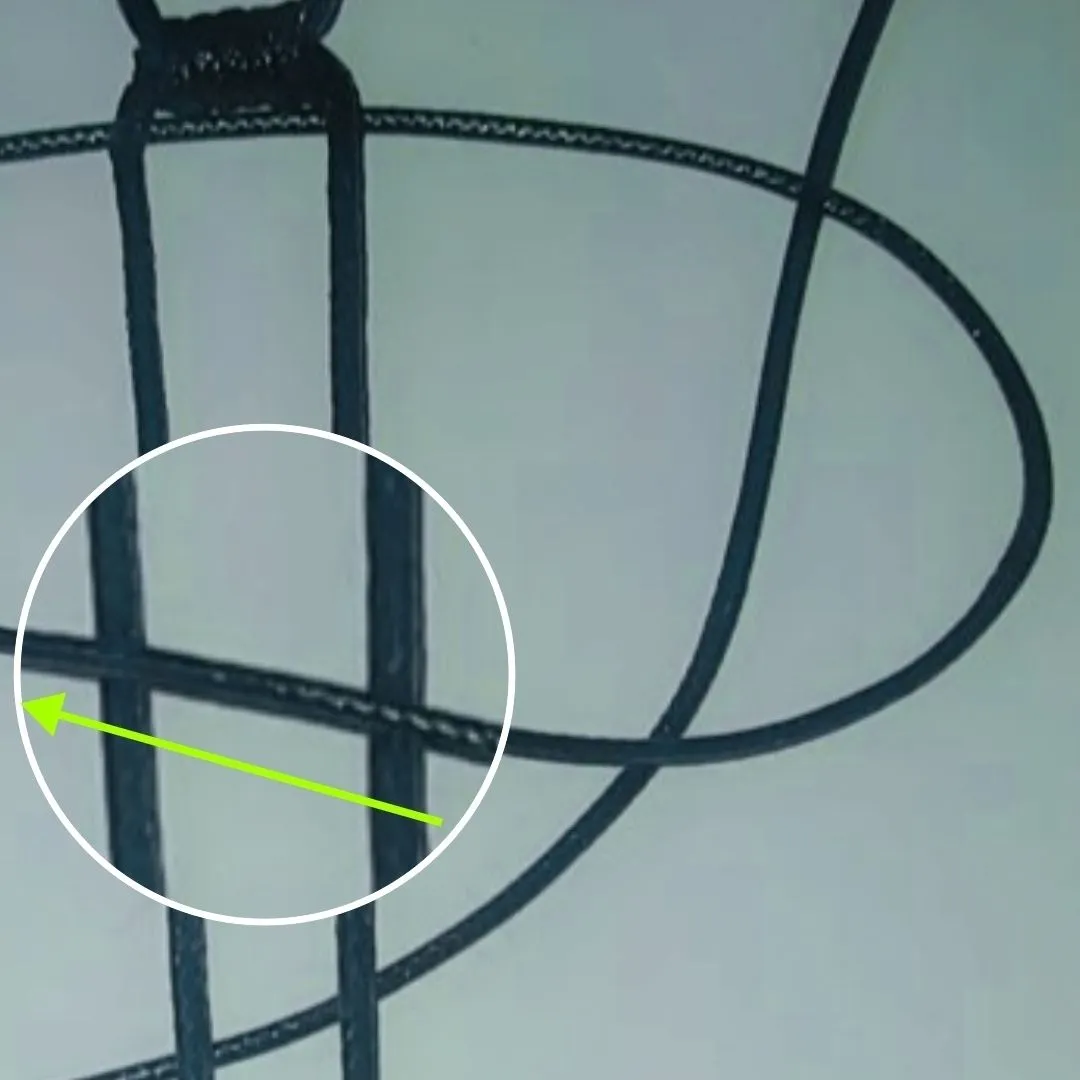
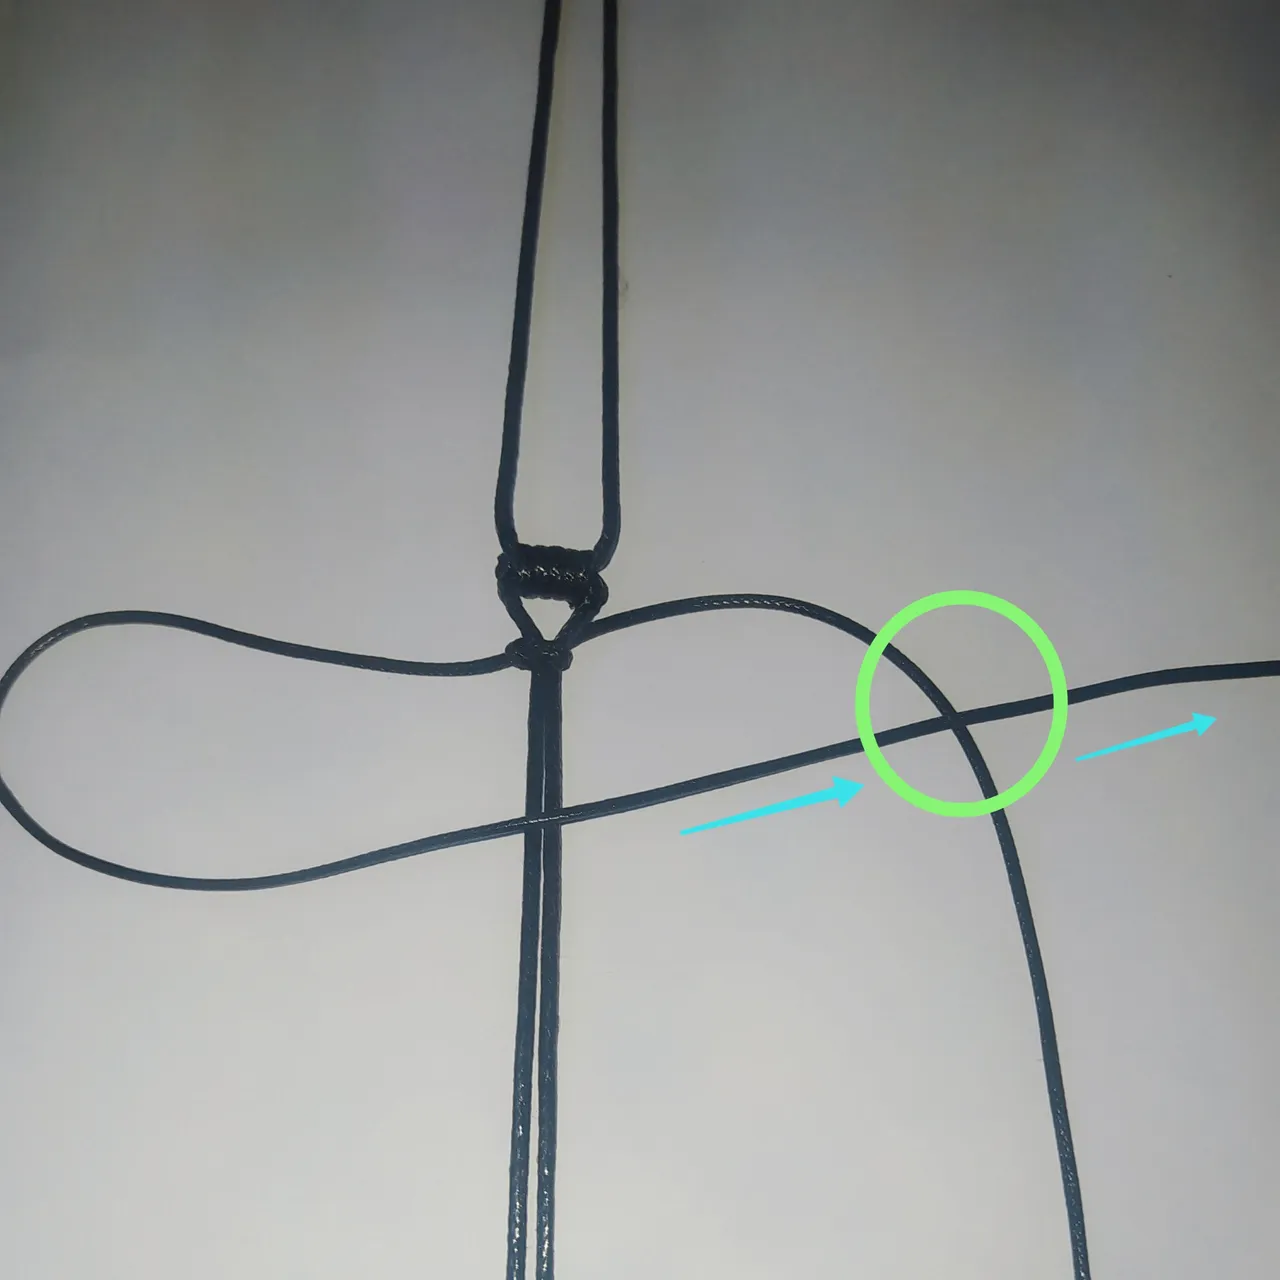
- Then we pass it under the thread on the left side.
- Luego lo pasamos por debajo del hilo del lado izquierdo.
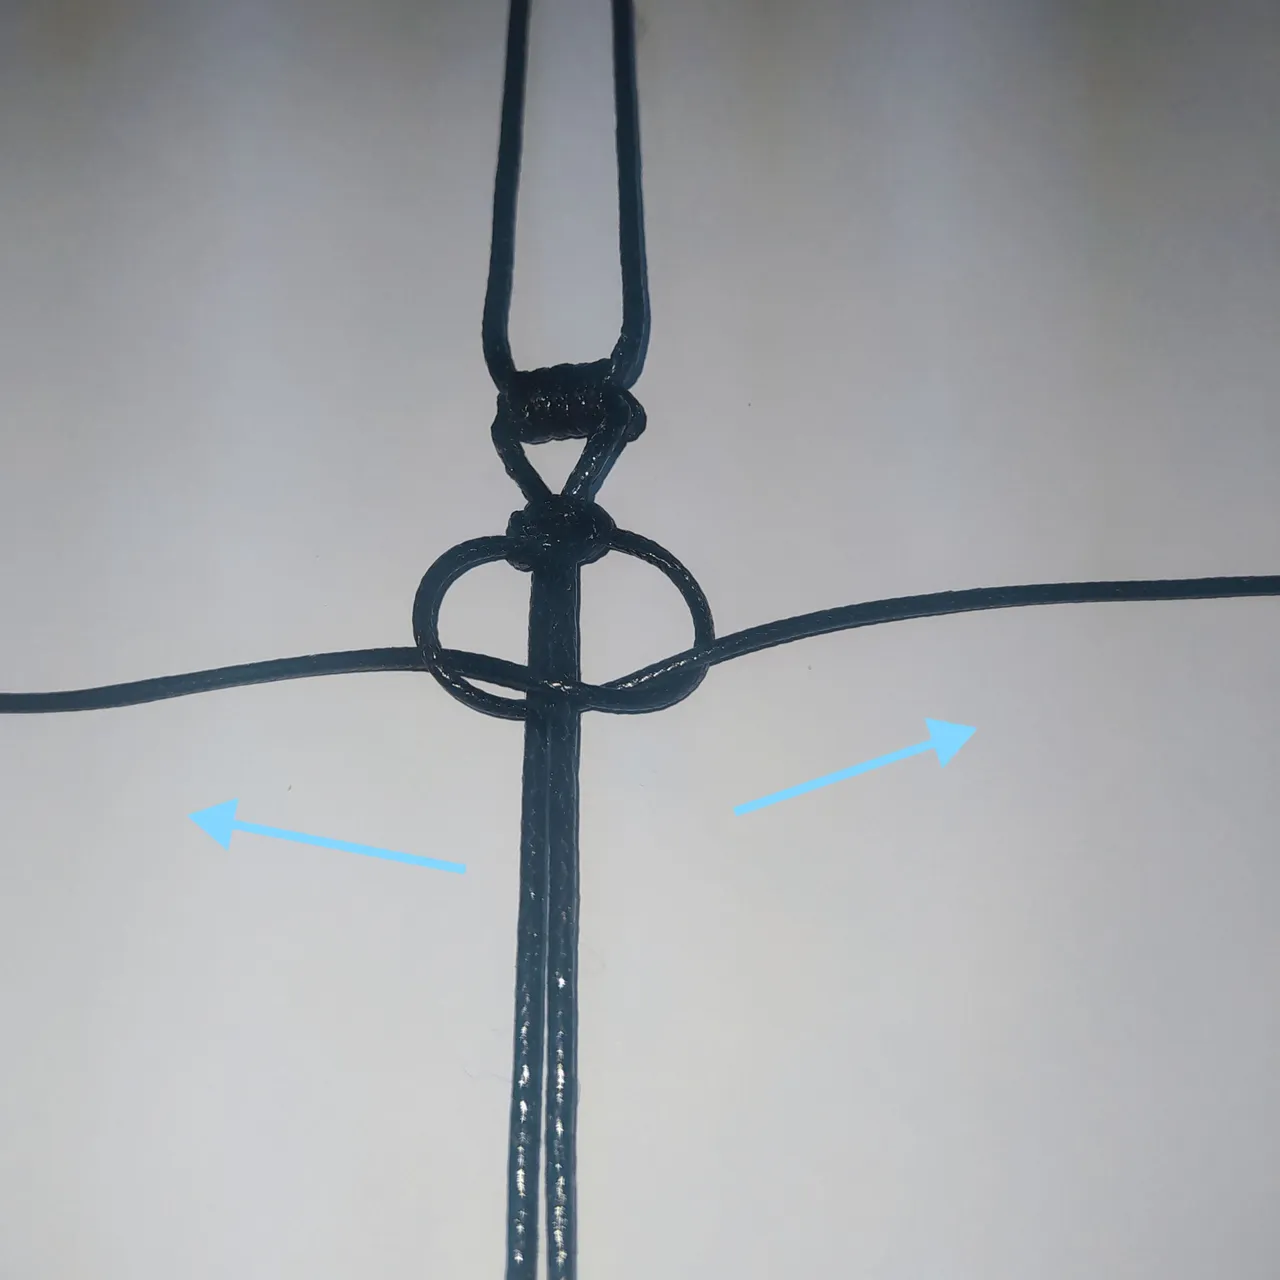
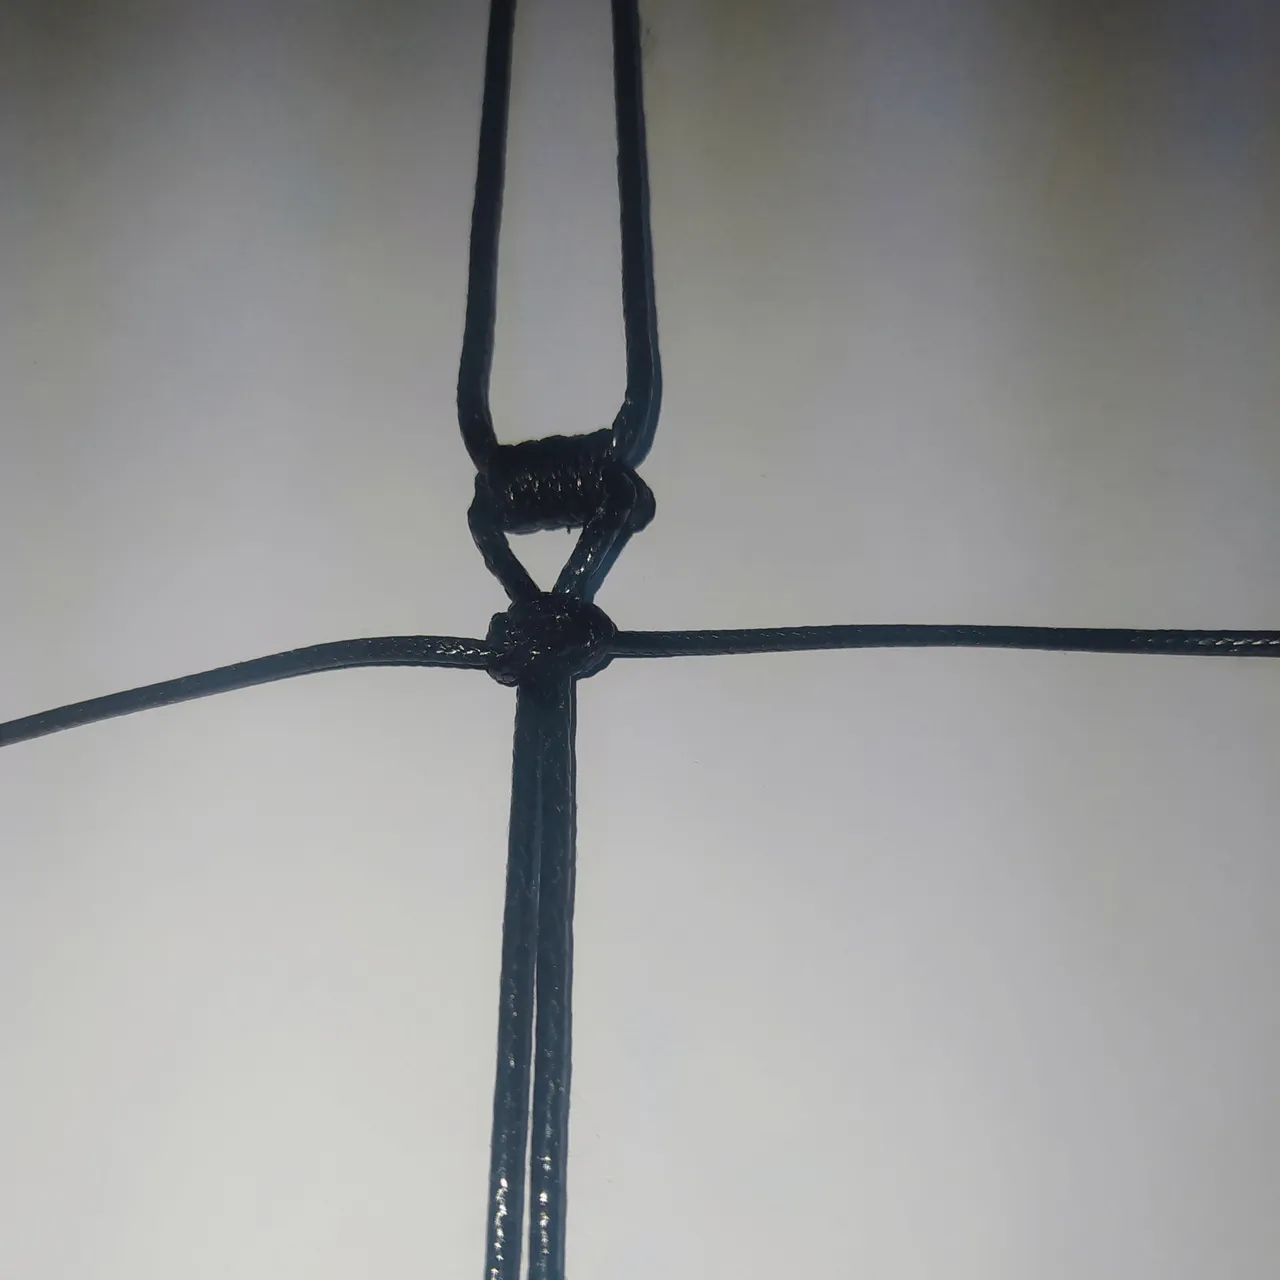
- Tighten both threads and tie the first knot.
- We roll upwards, near the central knot.
- Apretamos ambos hilos y realizamos el primer nudo.
- Rodamos hacia arriba, cerca del nudo central.
Second knot
Segundo nudo
- We pass the yarn on the left side over the central yarns.
- Pasamos el hilo de el lado izquierdo por encima de los hilos centrales.
- Then underneath the thread on the right side.
- Luego por debajo del hilo del lado derecho.
- The yarn on the right side is passed under the central yarns.
- El hilo del lado derecho lo pasamos por debajo de los hilos centrales.
- And in turn above the thread on the left side.
- Y a su vez por encima del hilo del lado izquierdo.
- Then we pull the ends from both sides.
- Luego tiramos de las puntas de ambos lados.
- In this way we make our second knot.
- De esta forma realizamos nuestro segundo nudo.
third flat knot
tercer nudo plano
- We form the P again and pass our yarn over the center yarns.
- Formamos nuevamente la P y pasamos nuestro hilo por encima del los hilos del centro.
- We pass the thread on the right under the thread on the left.
- Pasamos el hilo de la derecha por debajo del hilo de la izquierda.
- Then the left yarn is passed under the center yarns.
- Luego el hilo de la izquierda lo pasamos por debajo de los hilos del centro.
- And in turn above the thread on the right.
- Y a su vez por encima del hilo de la derecha.
- We take the two ends of the thread and pull it.
- Tomamos las dos puntas del hilo y la halamos
- And in this way we form a third knot.
- Y de esta forma ya formamos un tercer nudo.
- And so we keep repeating successively until we reach the desired length of the bracelet.
- Y así seguimos repitiendo sucesivamente hasta alcanzar el largo deseado de la pulsera.
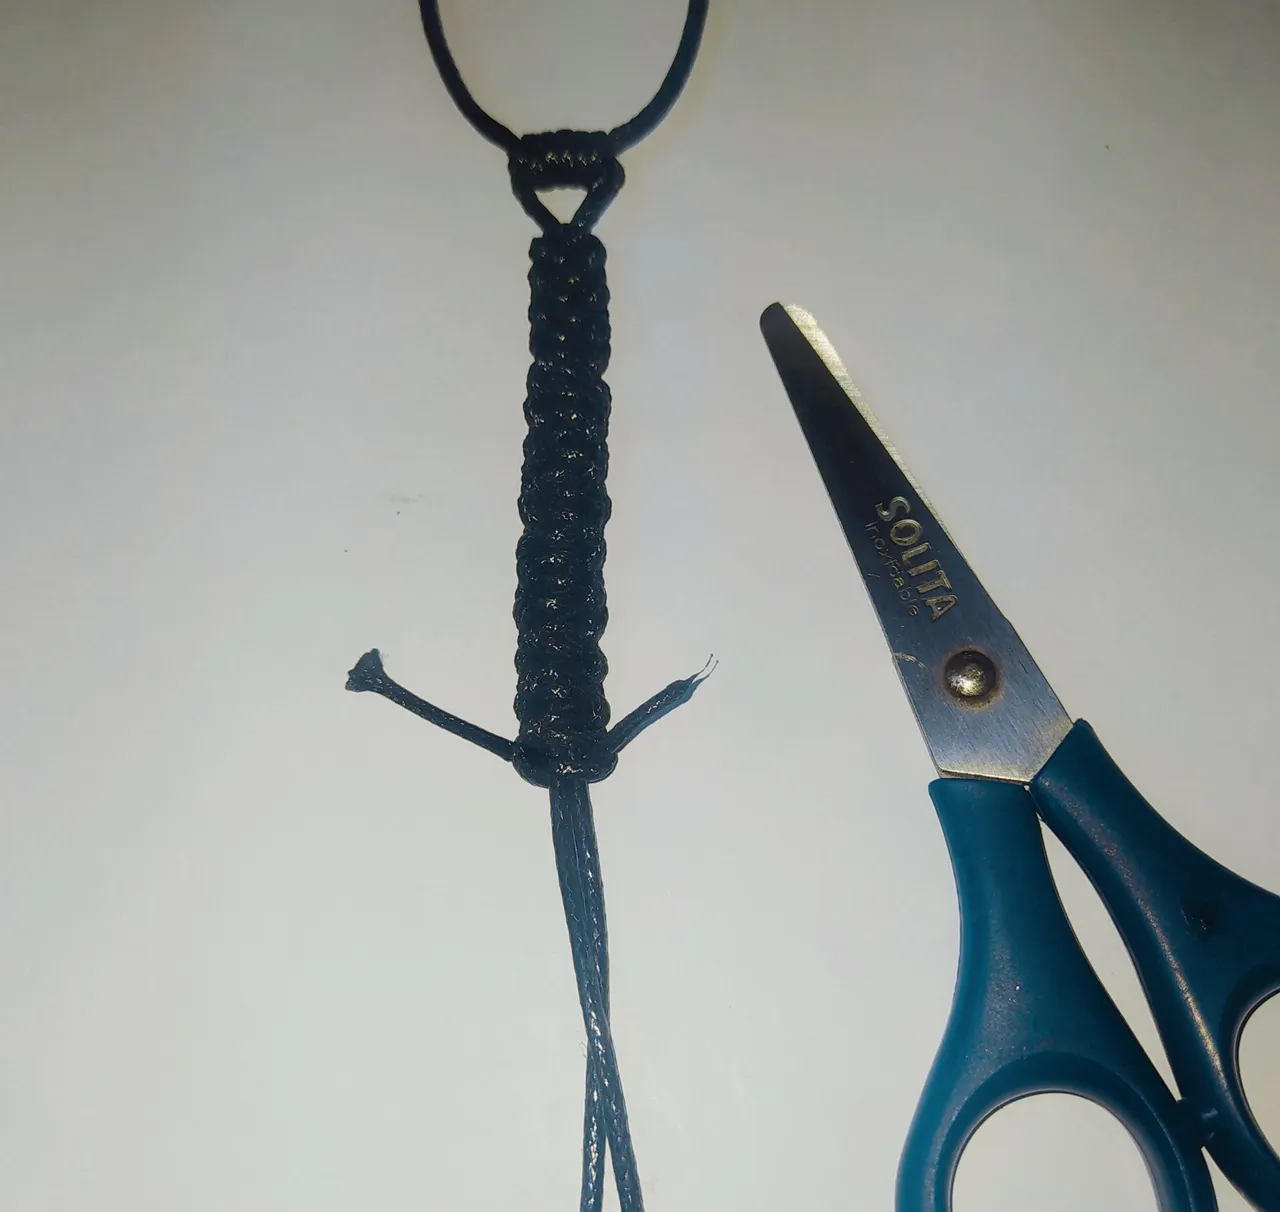
- Then we cut the leftover thread.
- Luego recortamos lo que nos sobró de hilo.
- We burn both ends and with the same tinder we make pressure to seal and secure very well.
- Quemamos ambas puntas y con el mismo yesquero le hacemos presión para sellar y asegurar muy bien.
We flip our board over to make the second side of the bracelet.
Volteamos nuestra tabla para realizar el segundo lado de la pulsera.
 |  |
|---|
 |  |
|---|
- Repeat the same procedure as at the other end.
- Repetimos el mismo procedimiento que realizamos en el otro extremo.
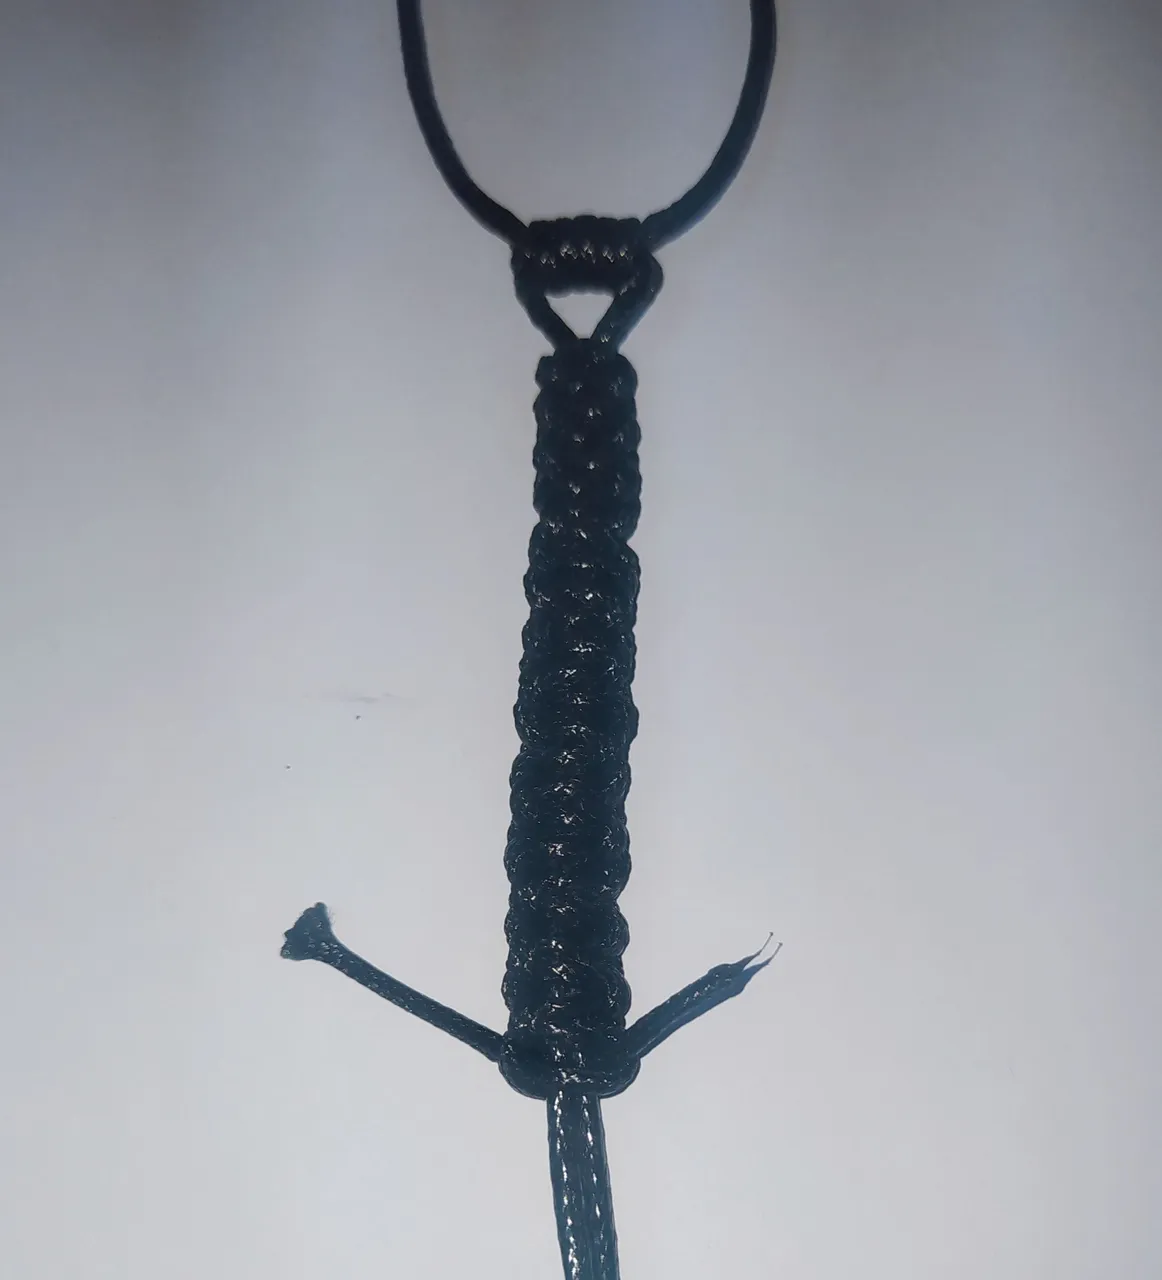
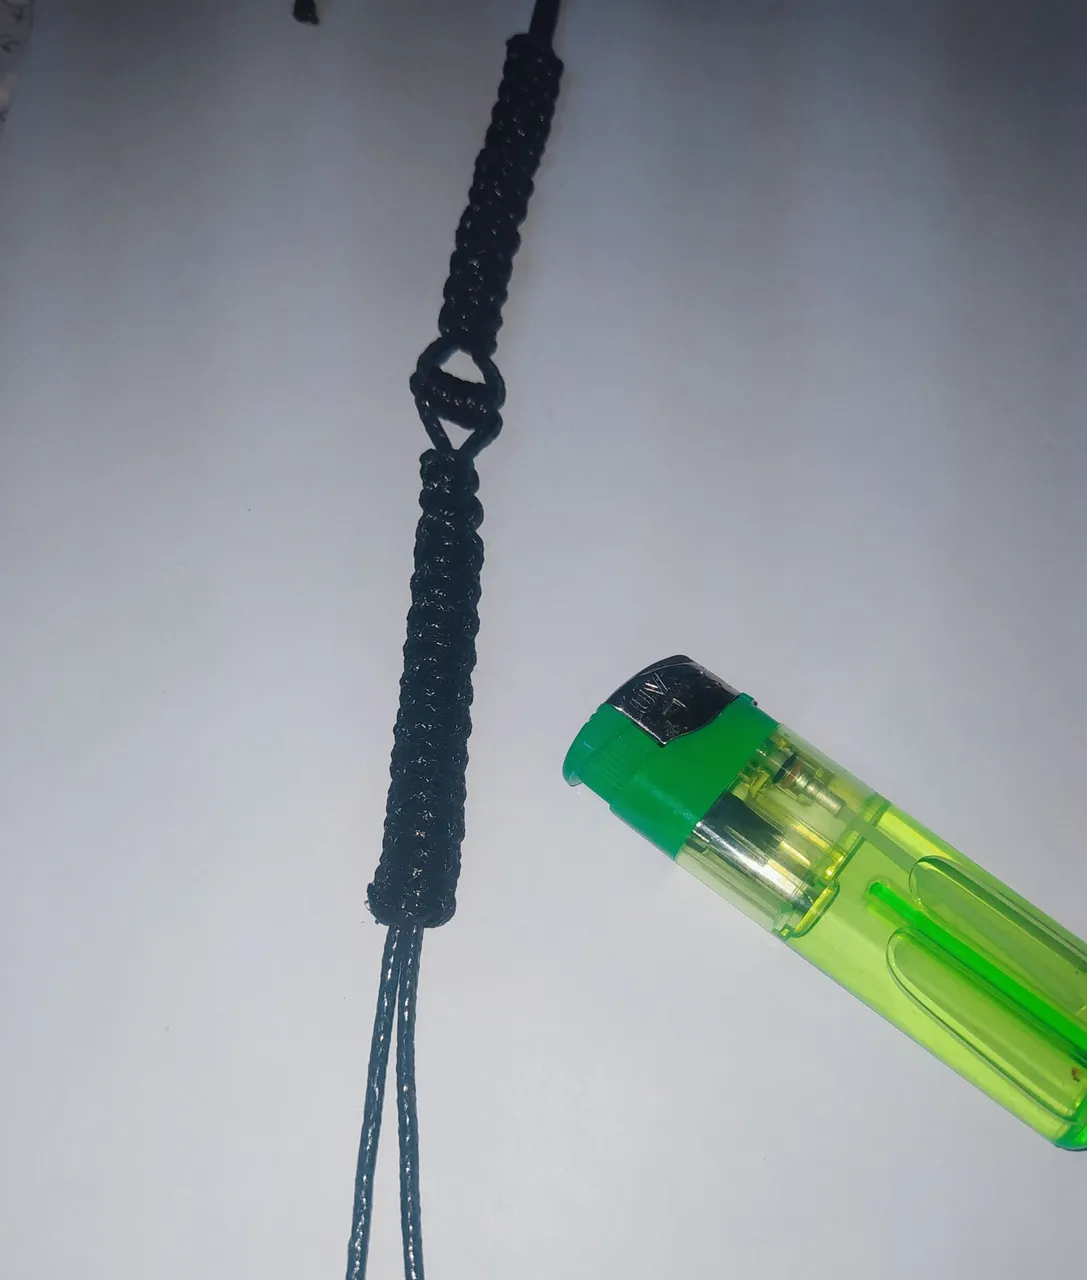
- Here we have both sides of the bracelet ready.
- Ya aquí tenemos lista ambos lados de la pulsera.
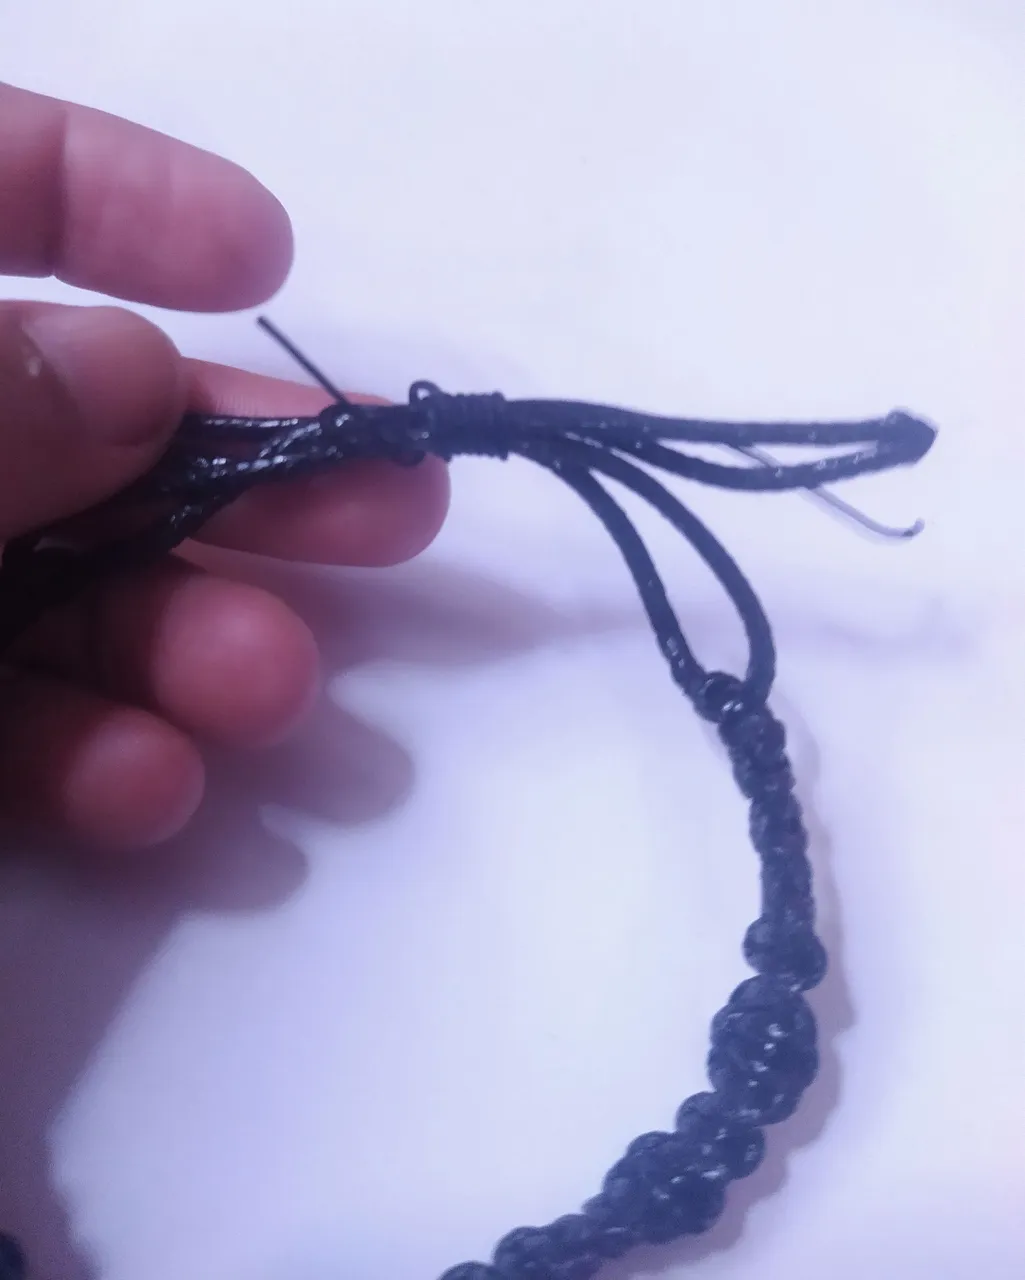
We are going to make the clasp for our bracelet.
Vamos a realizar el cierre de nuestra pulsera.
- We will use the Franciscan knot technique that we used for the center of the bracelet.
- Realizaremos la técnica del nudo Franciscano que realizamos para el centro de la pulsera
- We are going to cross the threads at the end of the bracelet.
- Then we take the 20 cm Chinese thread and we fold it, we make a loop leaving a longer end and we place it on top of the other threads.
- With the longest end of the loop we make several turns to all the threads, directed to the left side, very tight.
- Lift the loop and pass the thread through the hole from the bottom to the top.
- We hold the other shorter end and thread the other end to secure the loop.
- Then we cut off the excess yarn and seal by burning the ends.
- Vamos a cruzar los hilos del final de la pulsera.
- Luego tomamos el hilo chino de 20 cm y lo doblamos, hacemos un bucle dejando una punta más larga y la colocamos encima de los otros hilos.
- Con la punta mas larga del bucle le dos varias vueltas a todos los hilos, dirigida hacia el lado izquierdo, bien apretadita.
- Levantamos el bucle y pasamos el hilo por el orificio de abajo hacia arriba.
- Sujetamos y hablamos el otro extremo más corto para asegurar el bucle.
- Luego cortamos los excedentes de hilo y sellamos quemando las puntas.
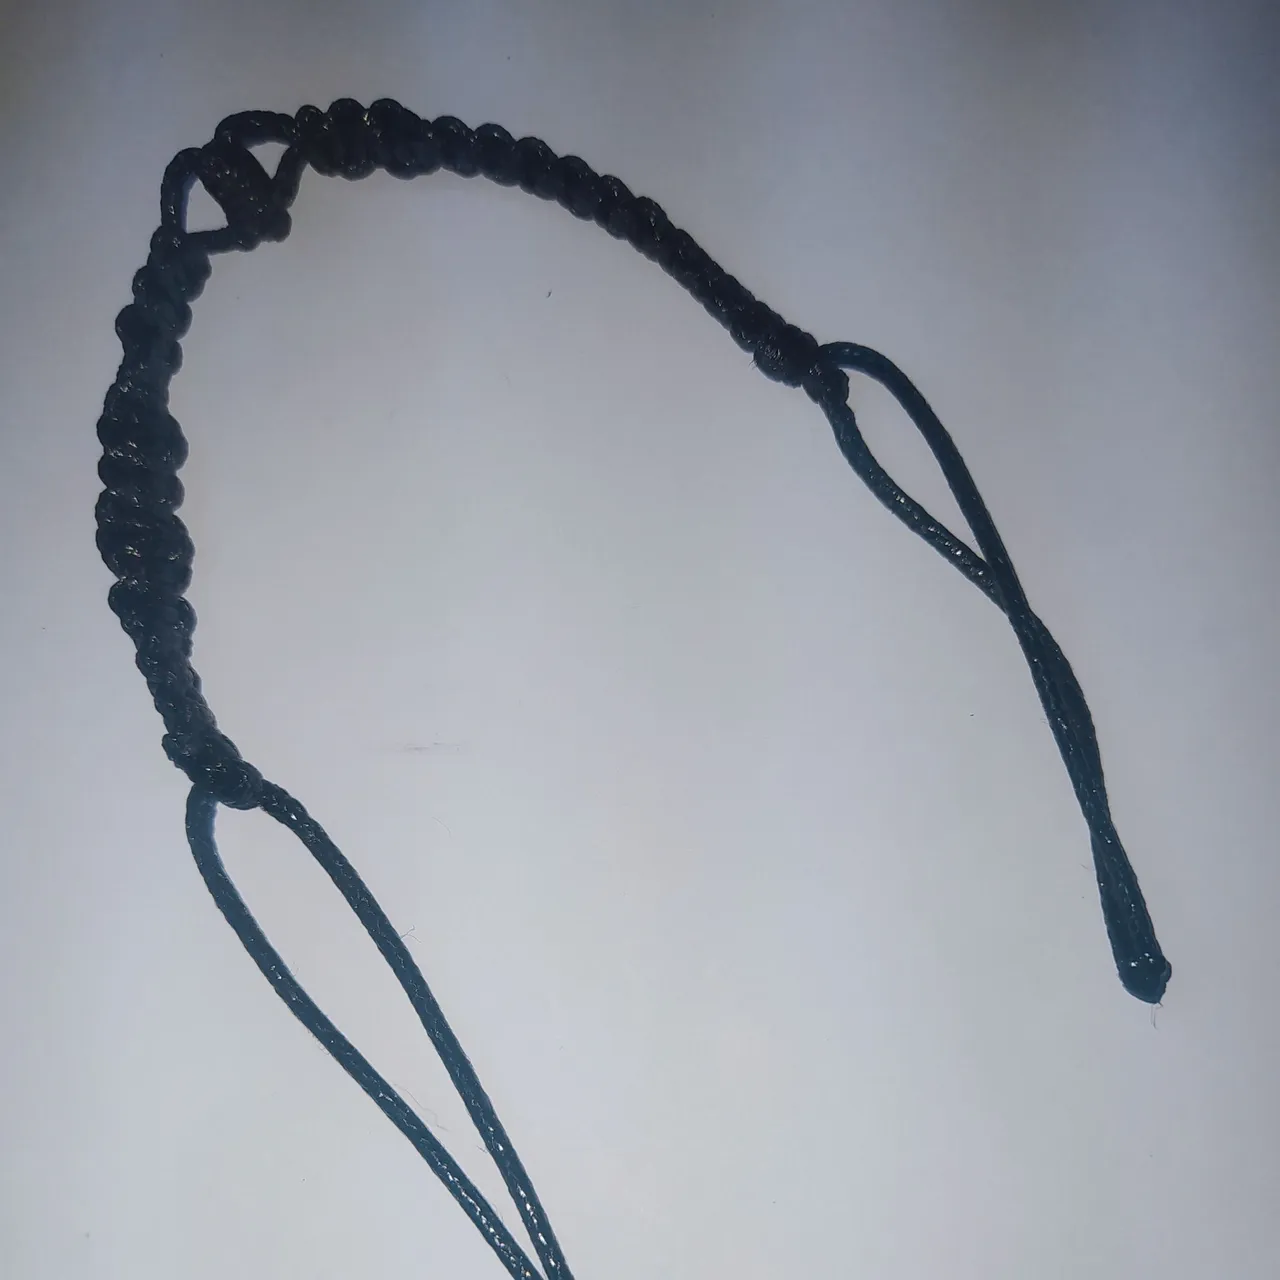
- Remember that at the moment of burning to seal the knot, the flame must be away from the strands of the bracelet so that it can slide.
- Pull the strands from the sides of the bracelet to make sure they slide.
- Debe quedar de esta manera recuerden que al momento de quemar para sellar el nudo, la llama debe quedar lejos de los hilos de la pulsera para que pueda deslizarse.
- Halamos los hilos de los lados de la pulsera para asegurar que se deslicen.
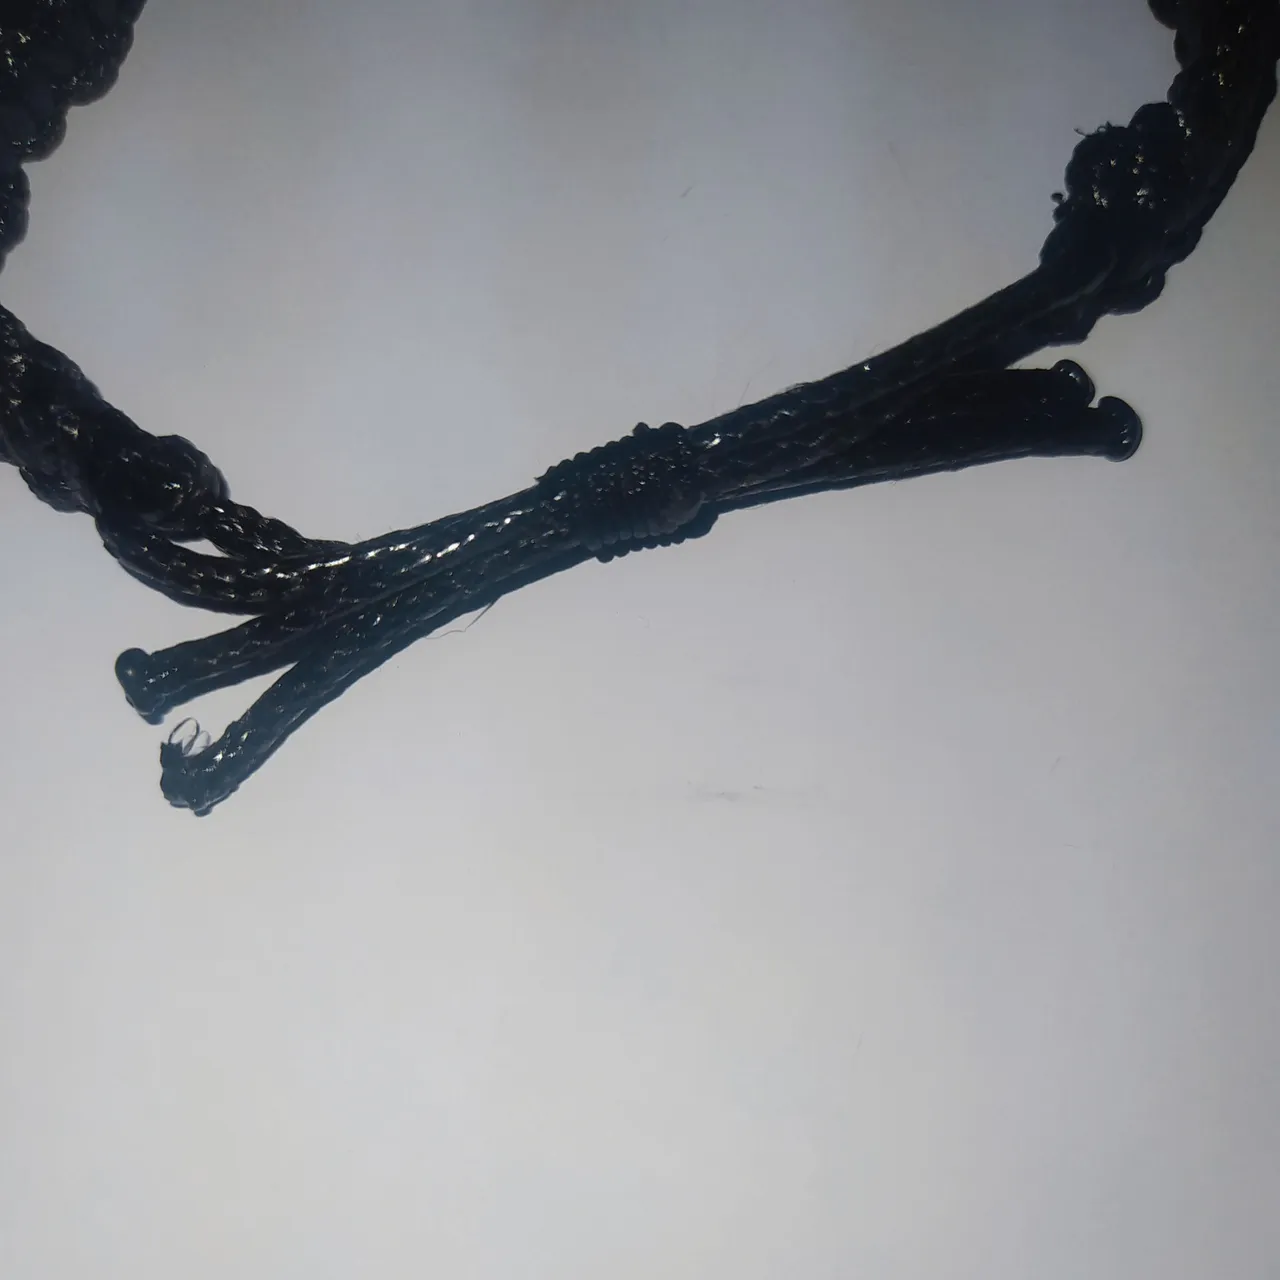
- In this way we have already finished our beautiful Bracelet for Gentlemen.
- De esta forma ya tenemos terminada nuestra hermosa Pulsera para Caballeros.
Thank you for joining me until the end, I would love to know your opinion about the result of this beautiful accessory that we can give to the gentleman, to make him look handsome, or you my dear friend who is reading me, tell me if you liked it.
Gracias por acompañarme hasta el final, me encantaría saber tu opinión acerca del resultado de este accesorio tan bonito que podemos obsequiar a los caballero, para que luzcan bien guapos, o tu mi querido amigo que me estás leyendo dime si te ha gustado.
Banner made in PicsArt, Meitu.
Translator Deepl.
Fotos de mi propiedad tomadas con teléfono Xiaomi redmi note 8.
Banner realizado en PicsArt, Meitu.
Traductor Deepl.