
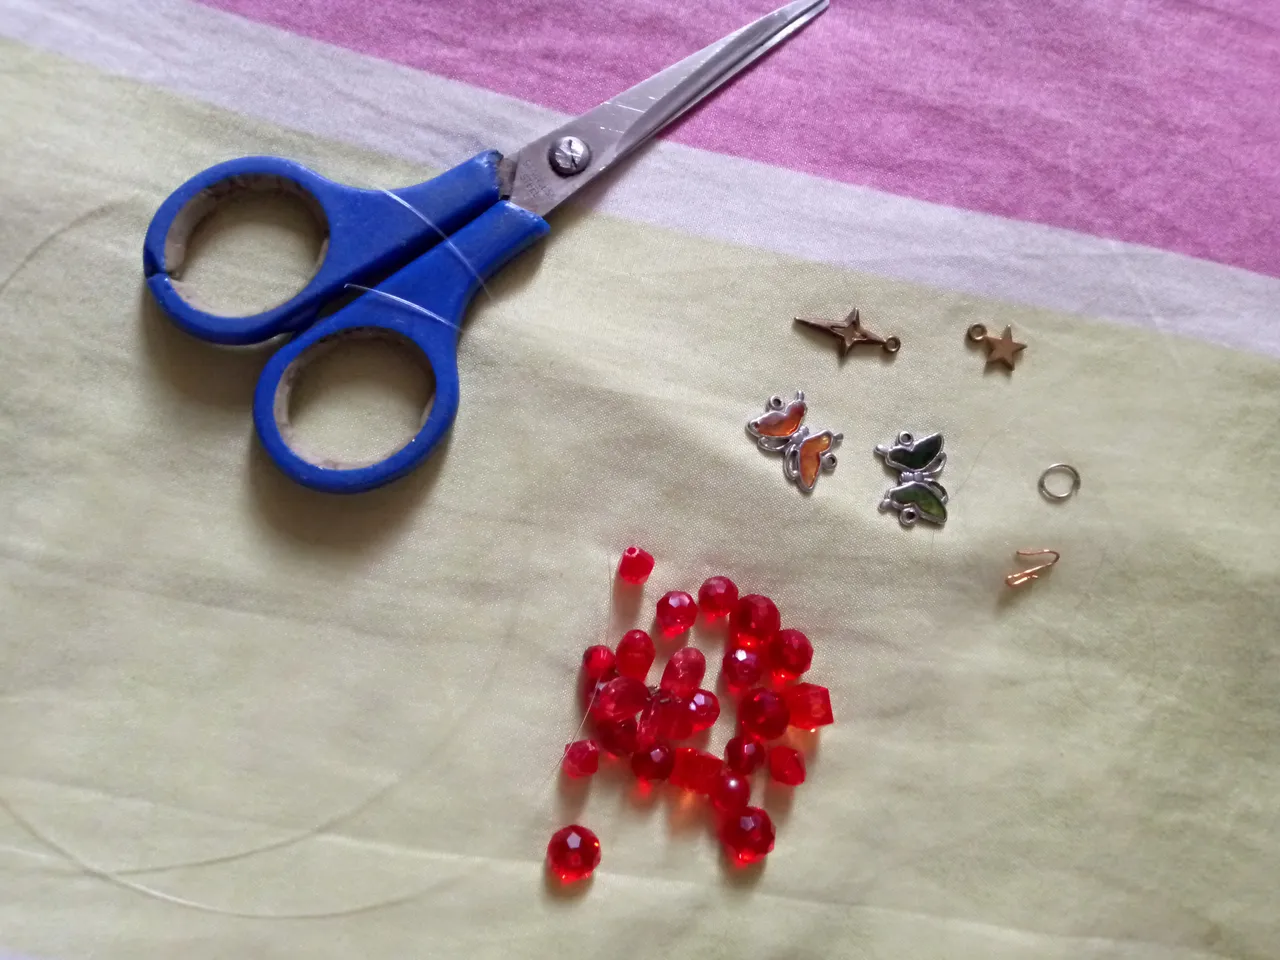
Quisiera que vieran este modelo de brazalete que realice para todos ustedes y que puedan hacer mis tutoriales .
Los materiales que utilice para la elaboración del brazalete fueron los siguientes :
🦋 Nailon
🦋 tijera
🦋 perlas rojas
🦋 diamantes rojos
🦋 sharoskis transparente grandes
🦋 sharoskis rojos pequeños
🦋Biconos grandes rojos
🦋Aro
🦋 Cuenta de Mariposa
🦋 Perlas grandes Blancas
Paso 1
Lo primero que vamod a hacer es tomar doble el nailon de esta manera lo vamos a medir y debe quedar un poco mas largo para el brazalete esto es oara que pueda quedar doble el nailon .
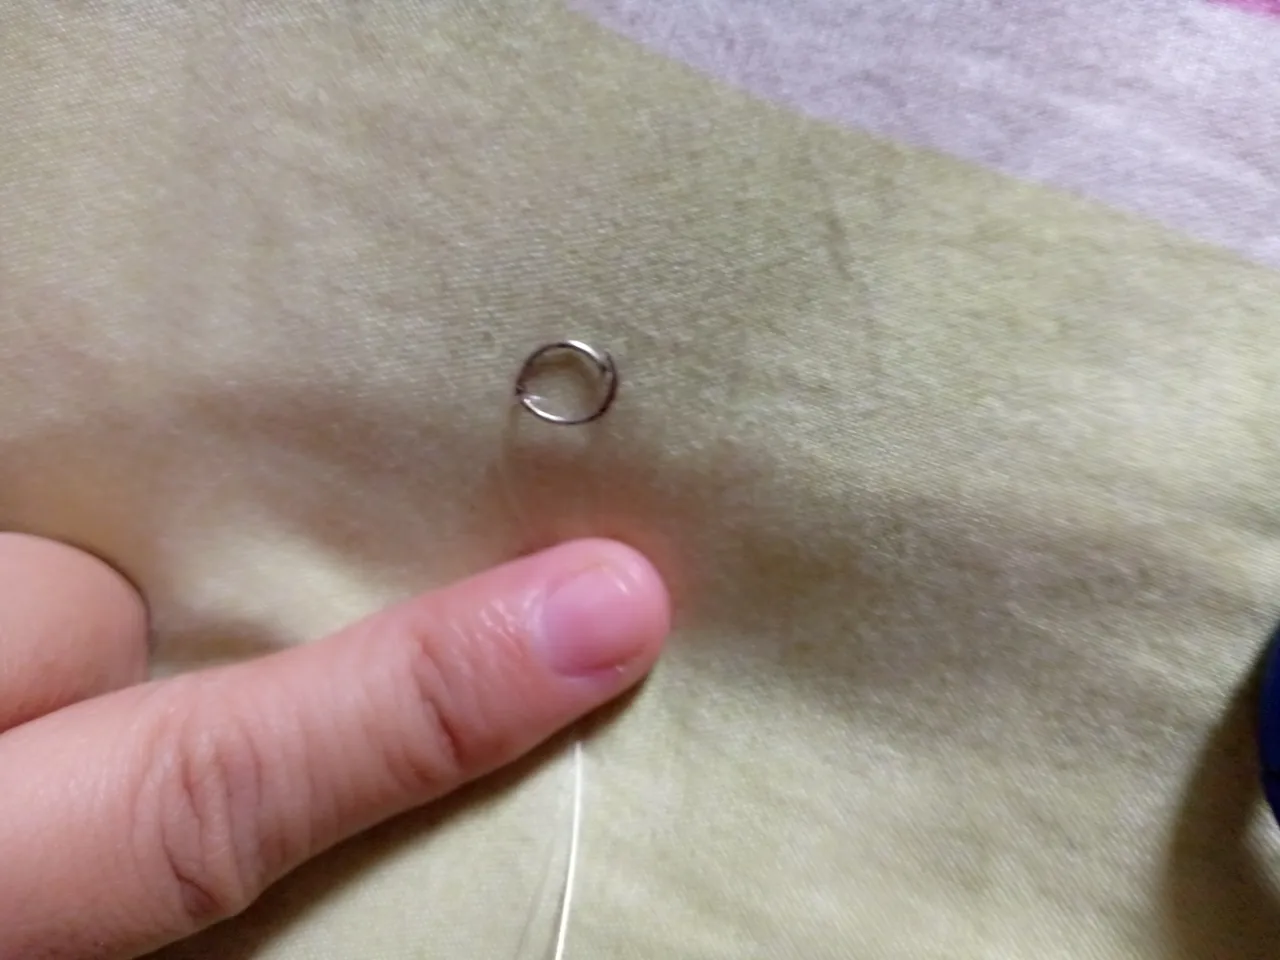
Paso 2
Ahora despues de tener el nailon doble listo solo vamos a tomar el aro y lo vamos a poner en el medio asi de esta forma y luego tomamos el aro con el nailon y le hacemos un nudo que va a permitir que quede estable y no pueda rodarse .

Paso 3
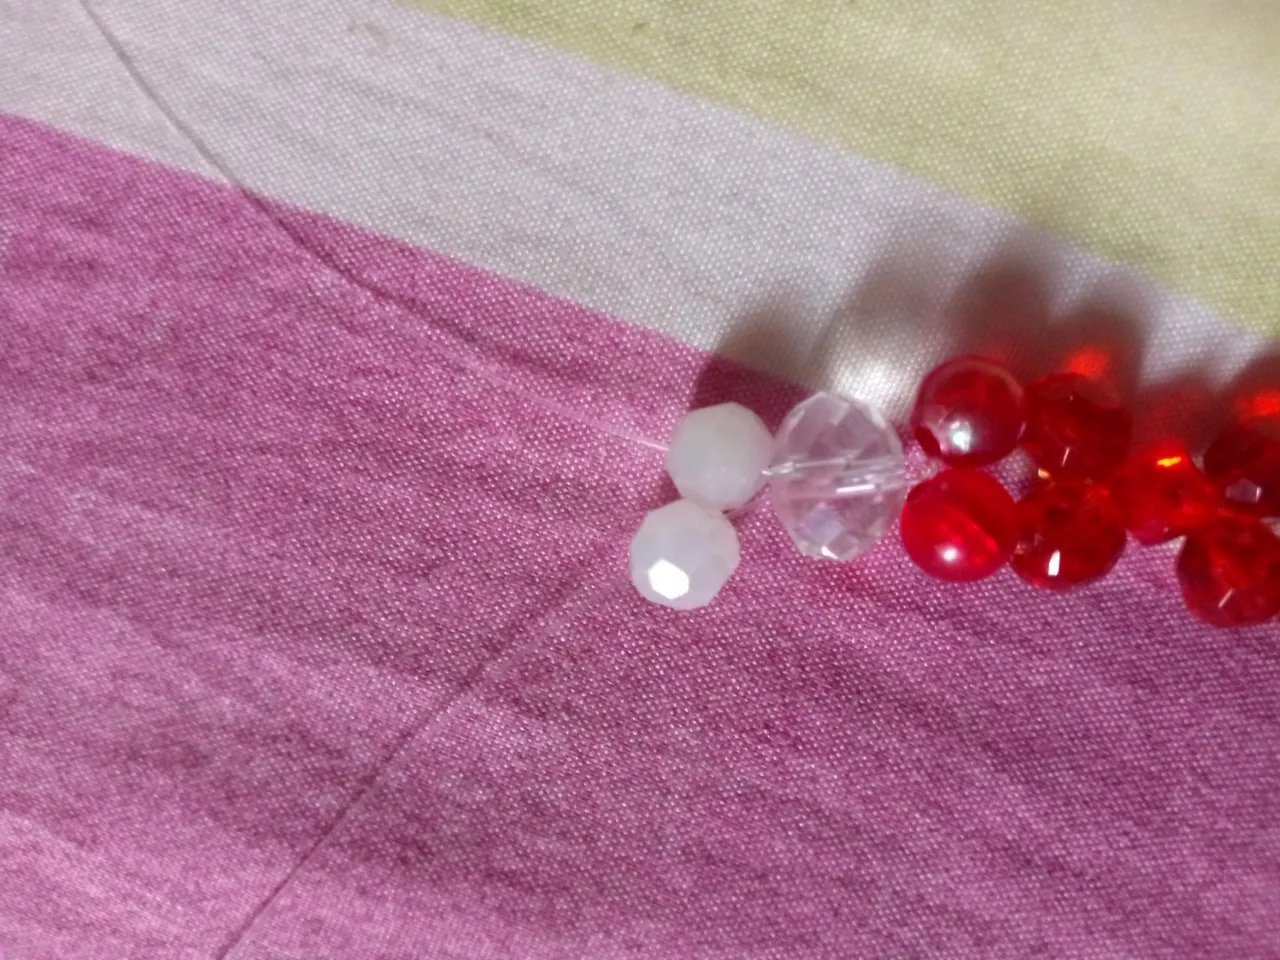
Vamos a tomar dos piedras rojas redondas o pueden ser tambien si quieren los biconos pueden ser las piedras que ustedes tengan en casa .
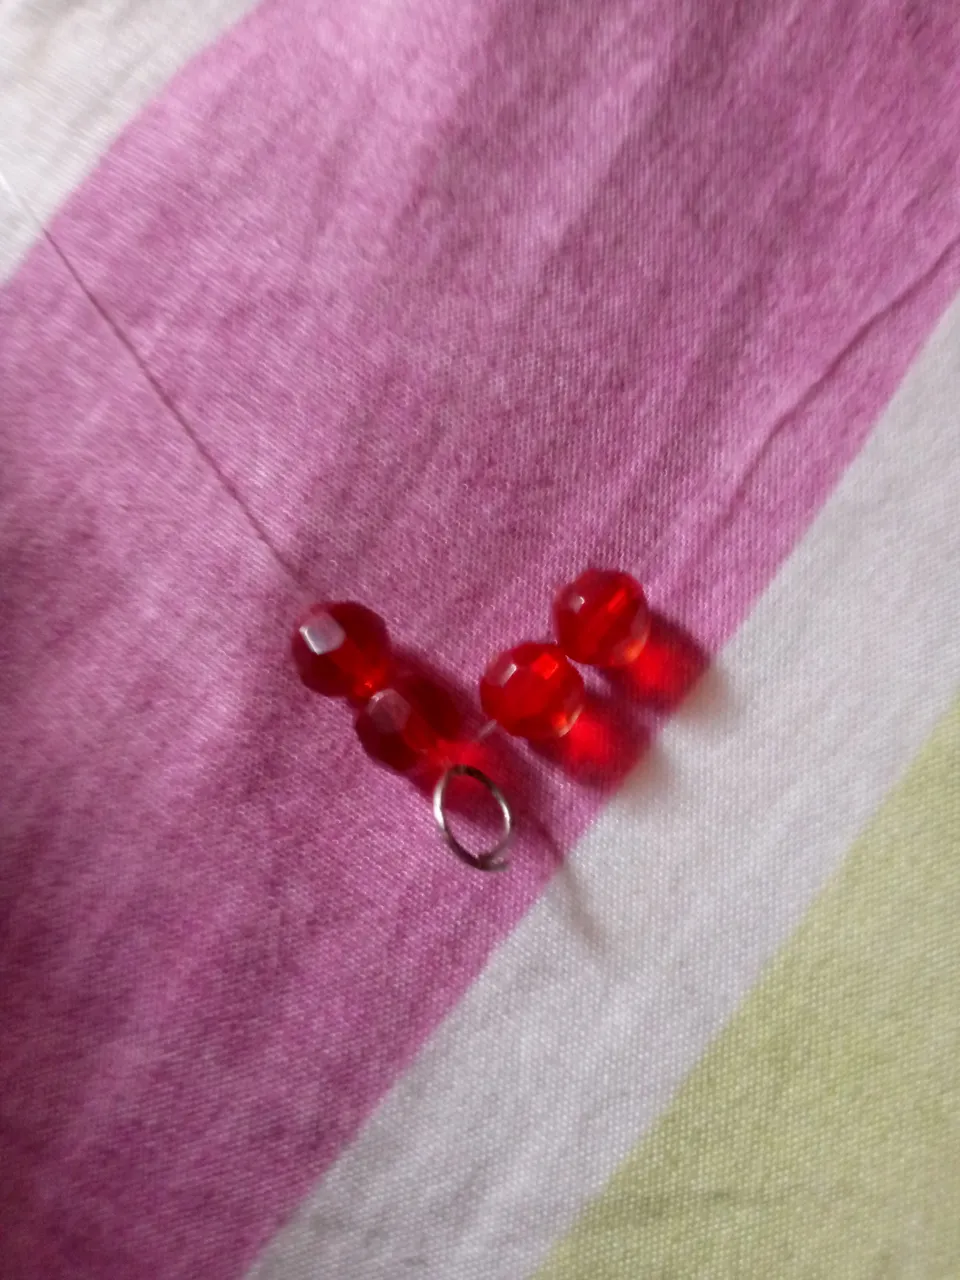
Luego de estas en el otro lado dos piedras igualmente, en total seran 4 piedras puestas en el nailon asi de esta manera
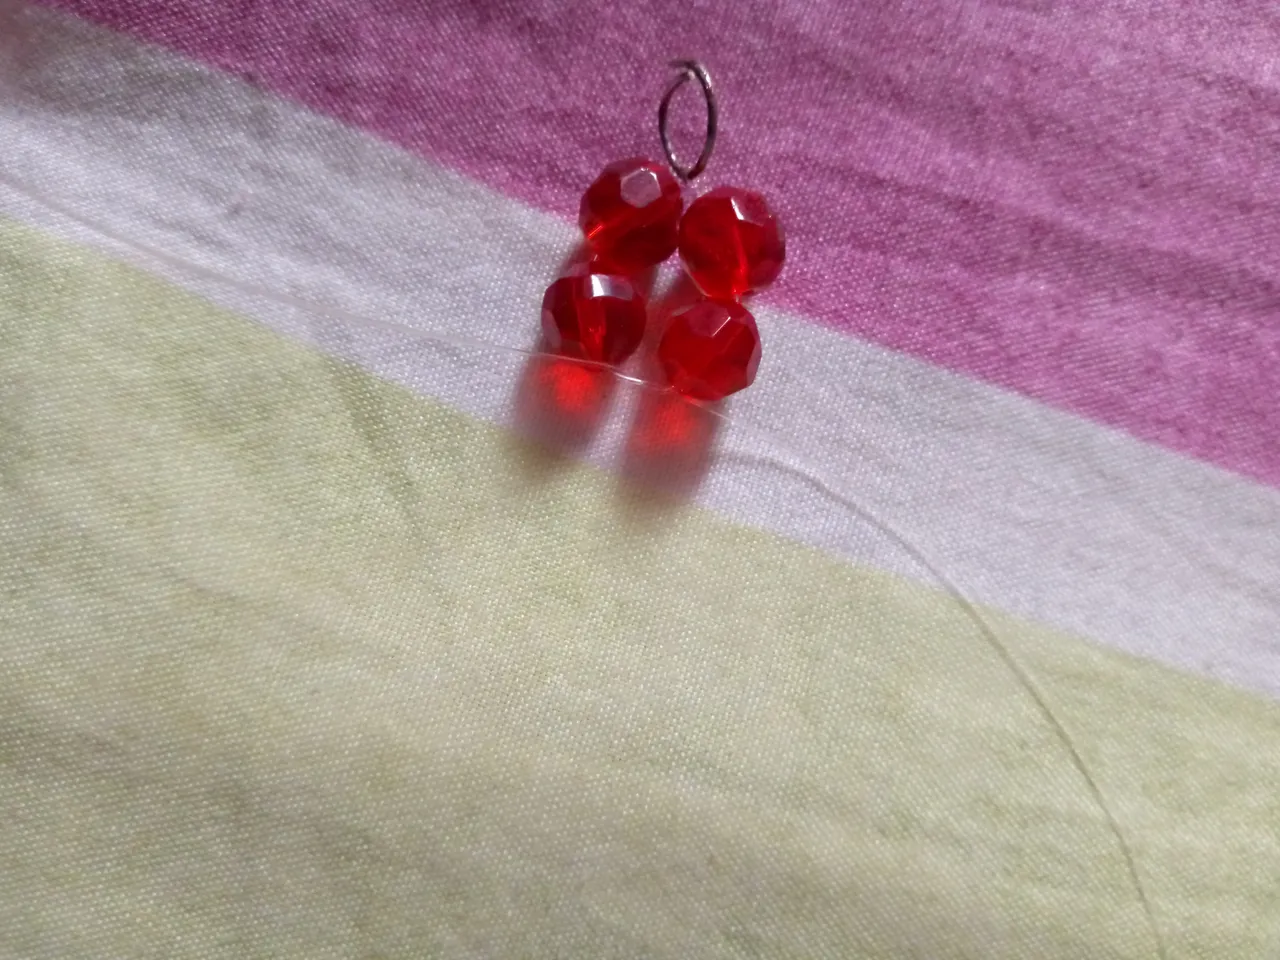
Paso 4
Luego despues de tener los biconos listo solo vamos a juntarlos y asi vamos a realizar un nudo muy facil de hacer solo vamos a hacerle dos nudos y luego apretamos despues asi de esta manera ira quedando .
Paso 5
Ahora vamos a tomar el diamante pequeño rojo y este lo vamos a ir poniendo como separador siempre debemos tener en cuenta que tenemos que hacer el nudo pars que pueda quedar en un solo sitio .

Paso 6
Bueno ahora vamos a hacer el mismo procedimiento que el paso anterior y los biconos luego despues de tener las 4 piedras volvemos a hacer los nudos asi de esta manera .

Paso 7
Ahora lo que vamos a hacer es poner la piedra sharoskis grande y s estas volvemos a hacer el nudo y asi se vera .

Paso 8
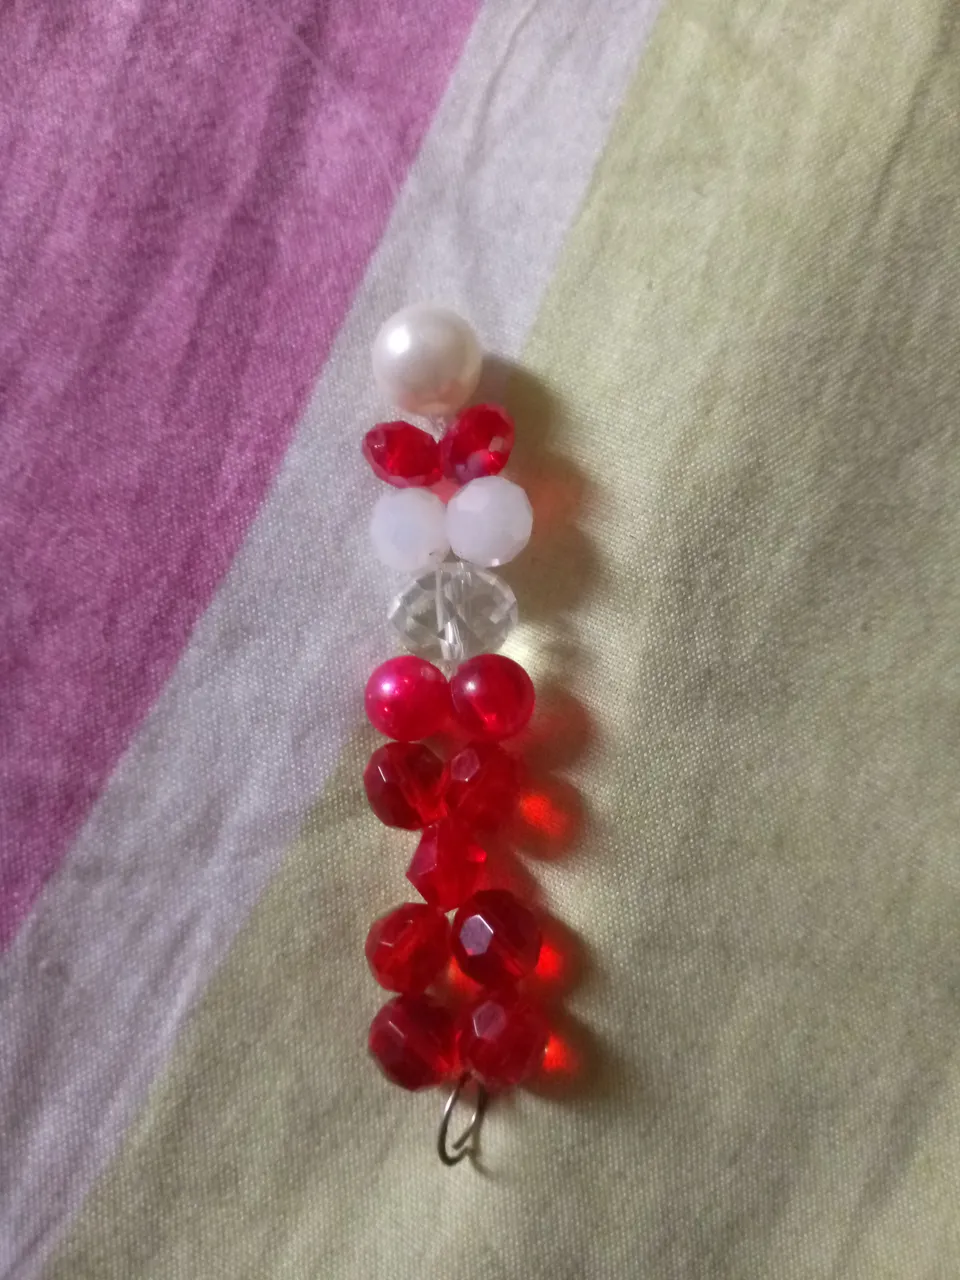
Vamos a tomar dos piedras perlas blancas y la vamos a ir introduciendo en cada nailon asi ,
Luego tomamos los sharoskis que son dos en cada nailon y despues de esta asi se ira dando un toque mas delicado y elegante a me encanta el color rojo es un tono que llama mucho la atención de las personas y pues en mi lugar me encantan las cosas que tenga brillo sean elegante y sean de modelo unico .

Paso 9
Ahora vamos a tomar una perla blanca de estas y vamos a introducir asi de esta manera .
Paso 10
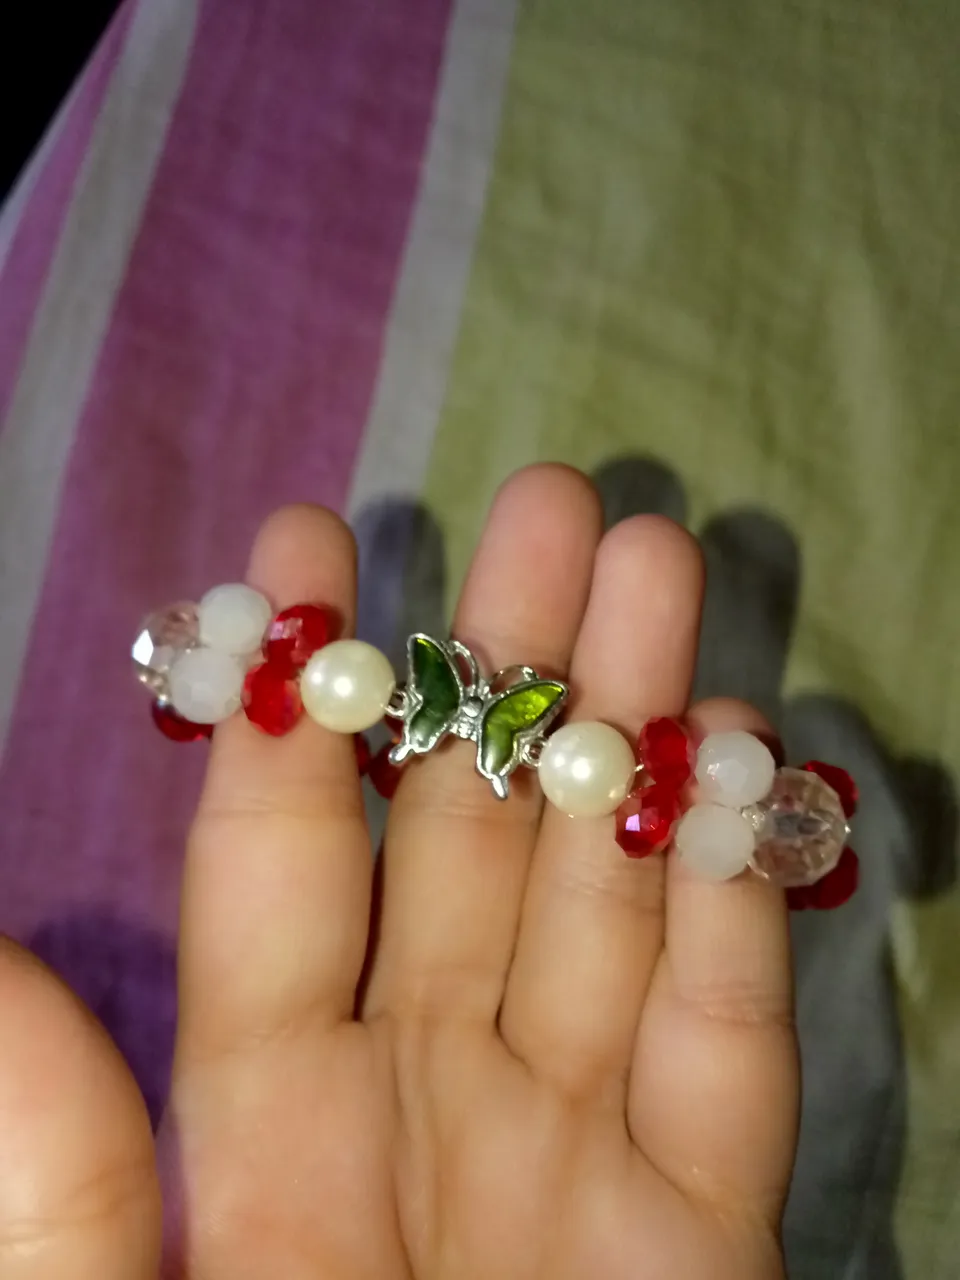
Bueno amigos lo siguiente que vamos a colocarle a nuestro brazalete sera la piedra en forma de mariposa esta me encanto pues tengo muchas de ellas y queria hacer algo con algunas y pues este es el resultado un hermoso Brazalete con una mariposa linda en color verde oscuro .
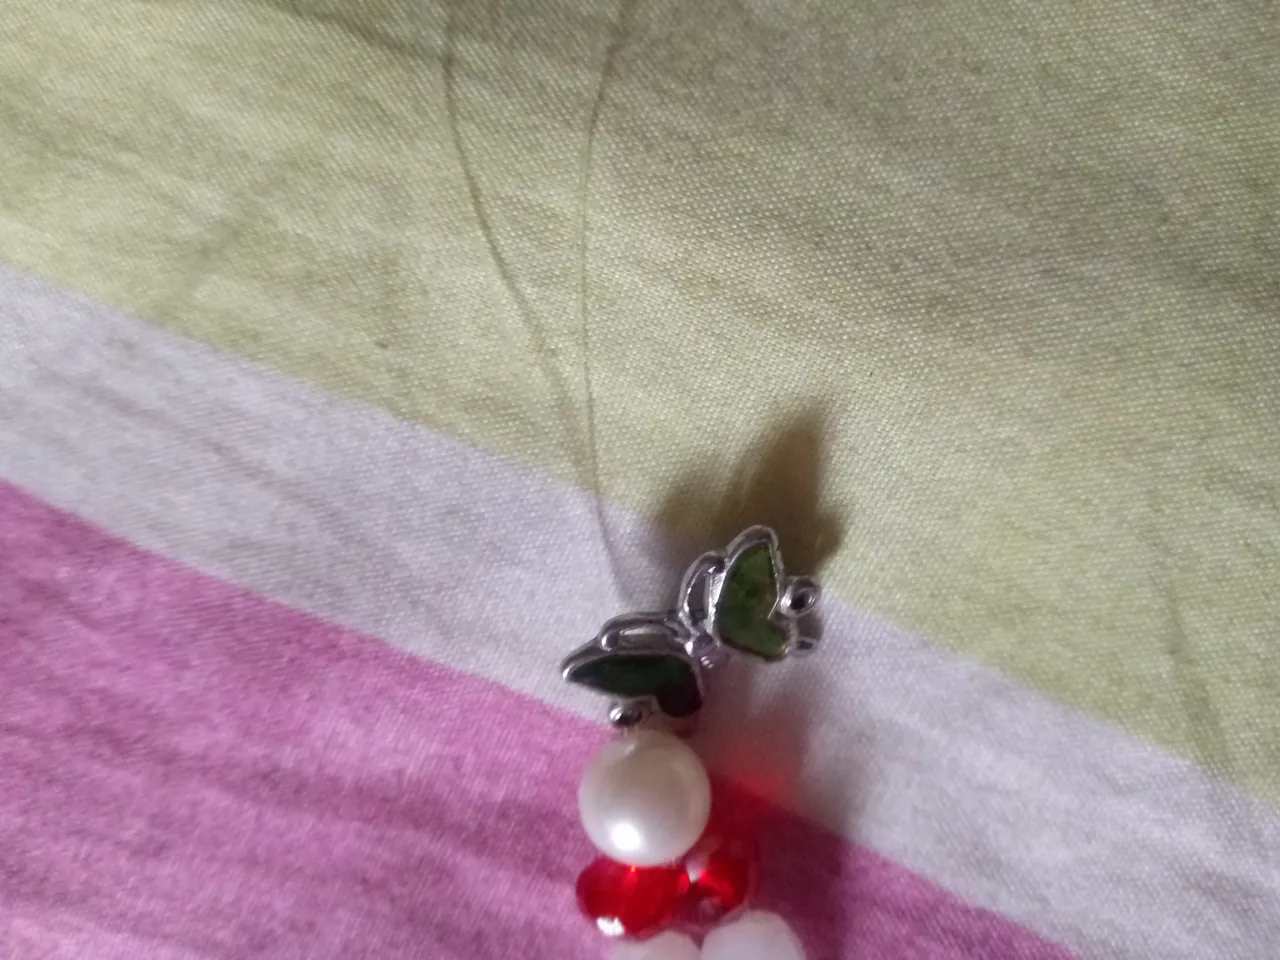

Esta la vamos a poner en el centro y ya ternerla lista de igual manera le haremos el nudo .
Asi quedara de esta forma .
Paso 11
Luego de estos solo vamos a armar la otra parte de el brazalete es muy facil porque lo vamos a hacer desde el principio pero en forma de terminar el brazalete de lados iguales.
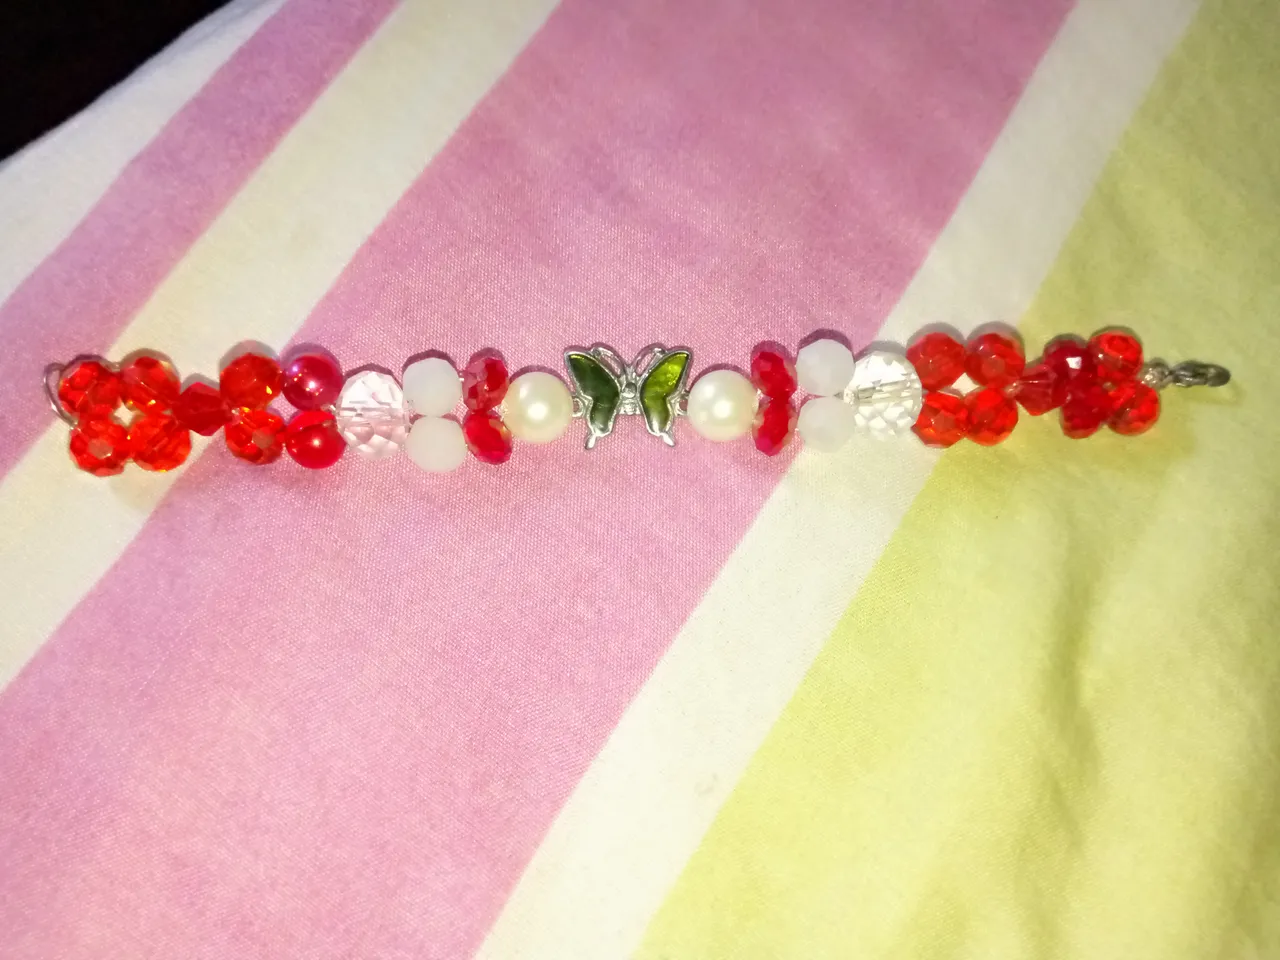
Es facil solo haremos los primero pasos en el procedimiento y listo
Paso 12
Solo faltaría poner el trancadero de manera que es un seguro para poder ponerme el brazalete y sea facil quitarmelo.


Las imagenes son de mi propiedad y fueron tomadas por mi telefono tecno spark Go 2023
Traductor utilizado :Deelp
Las imagenes son editadas mediante la aplicacion editor de fotos polish .
I would like you to see this bracelet model that I made for all of you and that you can do my tutorials.
The materials I used to make the bracelet were the following:
🦋 Nylon
🦋 scissors
🦋 red pearls
🦋 red diamonds
🦋 large transparent sharoskis
🦋 small red sharoskis
🦋Big red sharoskis
🦋Ring
🦋 Butterfly bead
🦋 Large white pearls
Step 1
The first thing we are going to do is to take double the nylon so we are going to measure it and it should be a little bit longer for the bracelet, this is so that the nylon can be doubled.
Step 2
Now after we have the double nylon ready we are only going to take the ring and we are going to put it in the middle like this and then we take the ring with the nylon and we make a knot that will allow it to be stable and can not roll.
Step 3
We are going to take two round red stones or they can be also if you want the bicones can be the stones that you have at home.
After these on the other side two stones likewise, in total there will be 4 stones placed on the nylon like this
Step 4
Then after having the bicones ready we are only going to put them together and we are going to make a knot very easy to make, we are only going to make two knots and then we tighten it after this way it will be like this.
Step 5
Now we are going to take the small red diamond and we are going to put it as a separator, we must always keep in mind that we have to make the knot so that it can stay in one place.
Step 6
Well now we are going to do the same procedure as the previous step and the bicones, then after we have the 4 stones we return to make the knots in this way.
Step 7
Now what we are going to do is to put the big sharoskis stone and we will make the knot again and this way it will be seen.
Step 8
We are going to take two white pearl stones and we are going to introduce them in each nylon like this,
Then we take the sharoskis, which are two in each nylon and after this we will give a more delicate and elegant touch. I love the color red is a tone that attracts a lot of attention from people and in my place I love things that have shine and are elegant and are of a unique model.
Step 9
Now we are going to take one of these white pearls and we are going to introduce it in this way.
Step 10
Well friends the next thing we are going to place to our bracelet will be the butterfly shaped stone. I love this one because I have many of them and I wanted to do something with some of them and this is the result a beautiful bracelet with a beautiful butterfly in dark green color.
We are going to put it in the center and then we are going to tie the knot.
It will look like this .
Step 11
After these we are only going to assemble the other part of the bracelet is very easy because we are going to do it from the beginning but in a way to finish the bracelet with equal sides.

It's easy, just do the first steps in the procedure and you're done.
Step 12
The only thing left to do is to put the locking device so that I can put on the bracelet and it is easy to take it off.
The images are my property and were taken by my tecno spark Go 2023 phone.
Translator used :Deelp
The images are edited using polish photo editor application.