Butterfly tendrils made of wire 🦋✨ / Zarcillos de mariposa hechos con alambre 🦋✨ (ENG/ESP)

mariposa.png

Hola a todos💗✨

Hello everyone✨💗

Aquí estoy de nuevo en esta comunidad de Jewelry,💎💍muchas gracias a todas las personas que dan vida y nunca paran de crear, que siempre están buscando mejorar e innovar. Me he fijado que cada quien tiene un estilo distinto a la hora de crear, poco a poco viendo cada publicación, uno aprende algo distinto cada día.✨

Here I am again in this Jewelry community,💎💍thank you so much to all the people who give life and never stop creating, who are always looking to improve and innovate. I have noticed that everyone has a different style when creating, little by little watching each publication, one learns something different every day.✨

mari.png

Me alegra mucho observar que muchas de las publicaciones de esta comunidad, hay bastante uso de materiales en su mayoría reciclados, ♻️ me parece muy bien tomar cosas que podemos encontrar fácilmente en nuestros hogares y crear accesorios con estos ya que de esta manera podemos contribuir así sea con un granito de arena para reciclar.♻️

I am very happy to observe that many of the publications of this community, there is enough use of materials mostly recycled, ♻️ I think it is very good to take things that we can easily find in our homes and create accessories with these as in this way we can contribute even with a grain of sand to recycle.♻️

mari.png

Me encuentro aquí nuevamente para mostrarles mi invento del fin de semana, son zarcillos de mariposa que he elaborado con alambre de cobre, en cuál saqué del interior de unos pedazos de cable que están en mi casa, 🔌 tenía un montón y ya lo he ido gastando poco a poco en mis inventos mientras aprendo poco a poco sobre alambrismo.

I am here again to show you my invention of the weekend, they are butterfly tendrils that I have made with copper wire, which I took from the inside of some pieces of wire that are in my house, 🔌 I had a lot and I have already been spending it little by little in my inventions while I learn little by little about wiring.

Empecemos✨🦋

Let's start ✨🦋

Materiales que necesitasMaterials you need
• Alambre• Wire
• Esmalte de uñas• Nail polish
• Pegamento• Glue
• Brillantina• Glitter
• Base para zarcillos• Bases for tendrils

1- Primero elaboré en un papel el diseño del ala, cuando estube conforme pasé la plantilla a la cartulina y luego con el alambre que medía veintinueve centímetros repliqué la forma lo mejor que pude.🦋

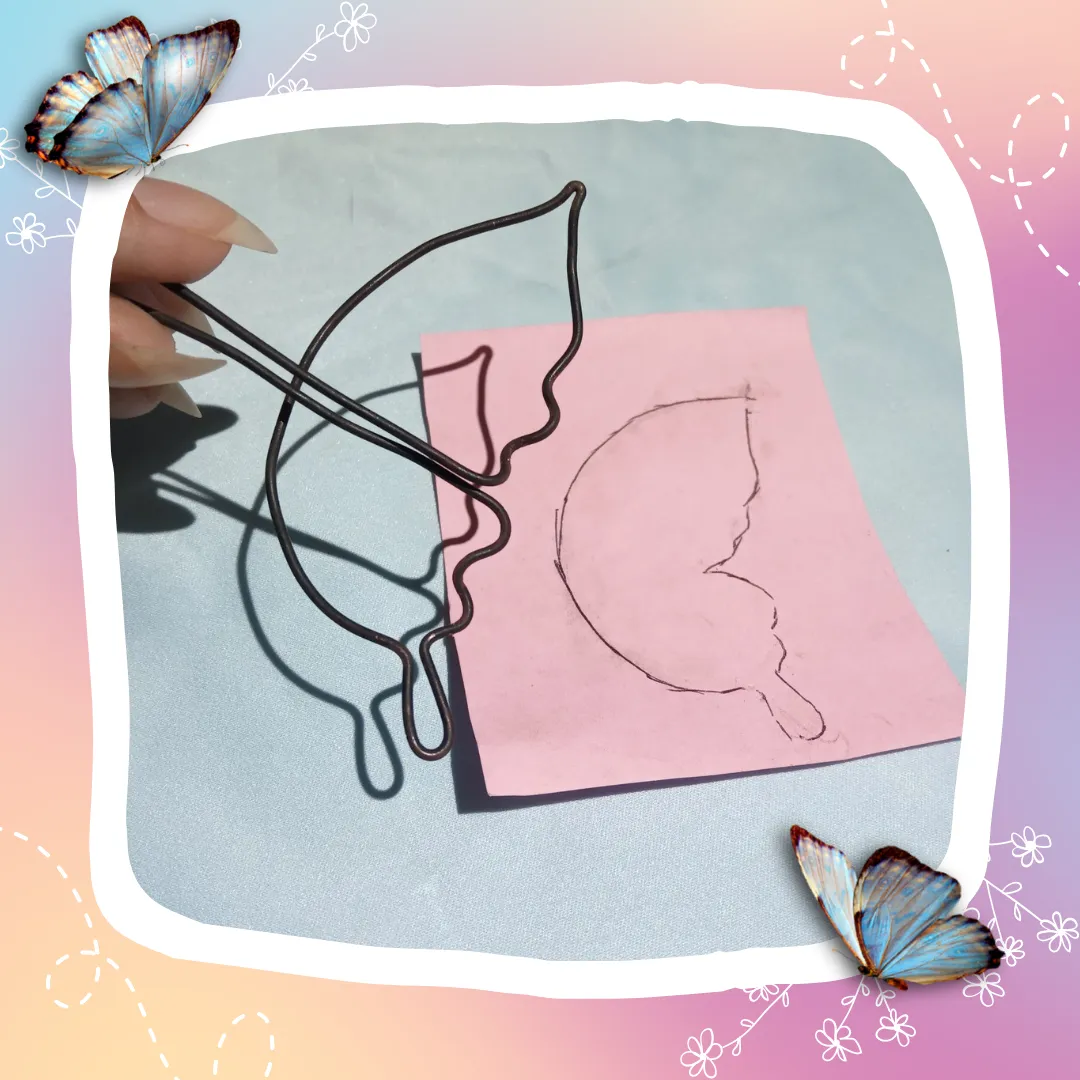
1- First I drew the design of the wing on a piece of paper, when I was satisfied I transferred the template to the cardboard and then with the wire measuring twenty-nine centimeters I replicated the shape as best as I could.

Copia de catrina (7).png

2- Con un alambre de cobre mas fino ajusté las alas para que no de desarmara y luego doblé cada extremo del alambre en forma de espiral.🍥

2- With a thinner copper wire I adjusted the wings so that it would not fall apart and then I bent each end of the wire in a spiral shape.🍥

mariposa (2).png

mariposa (3).png

3- Elaboré una pieza más pequeña para rellenar el espacio vacío dentro de las alas, con dos espirales. 🍥🍥

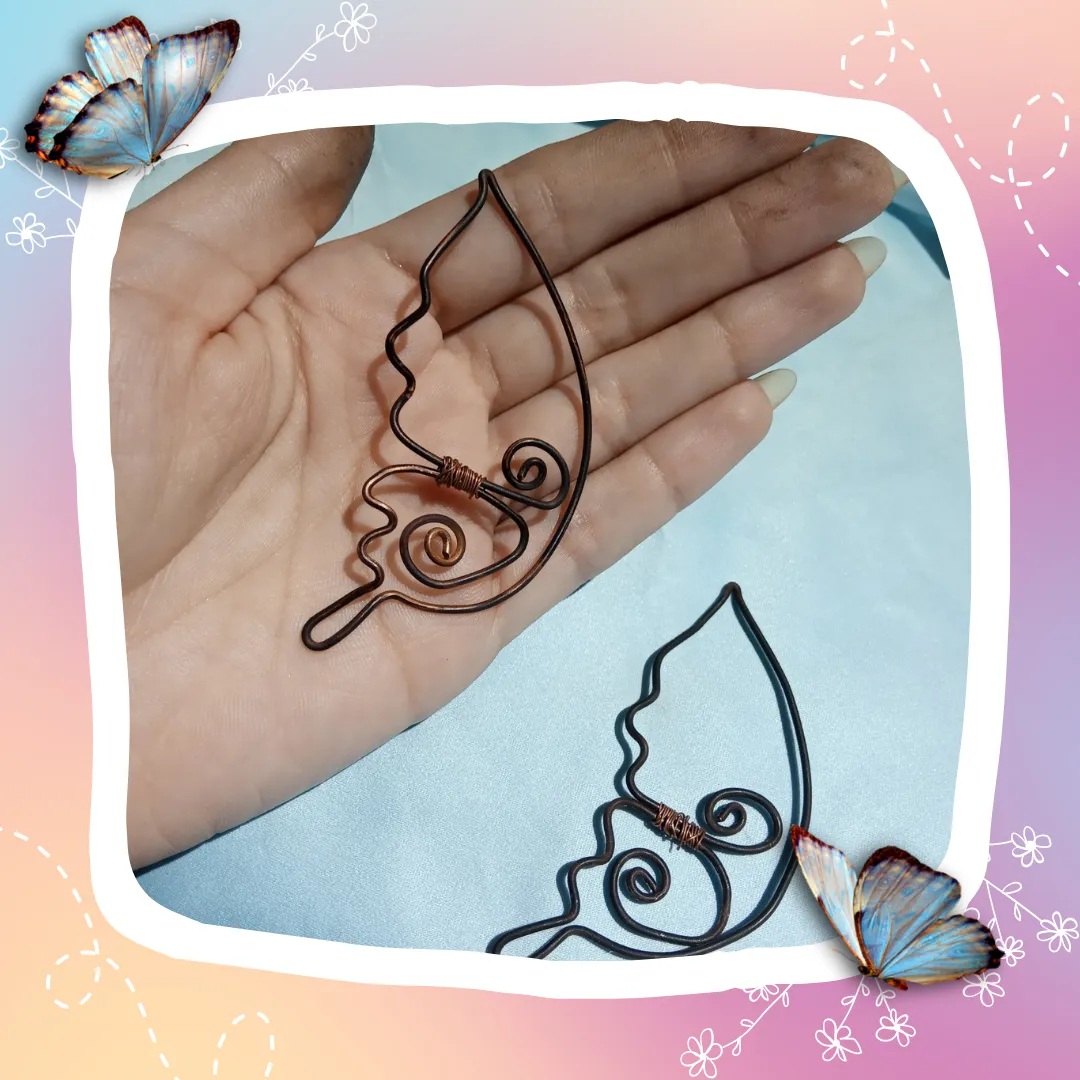
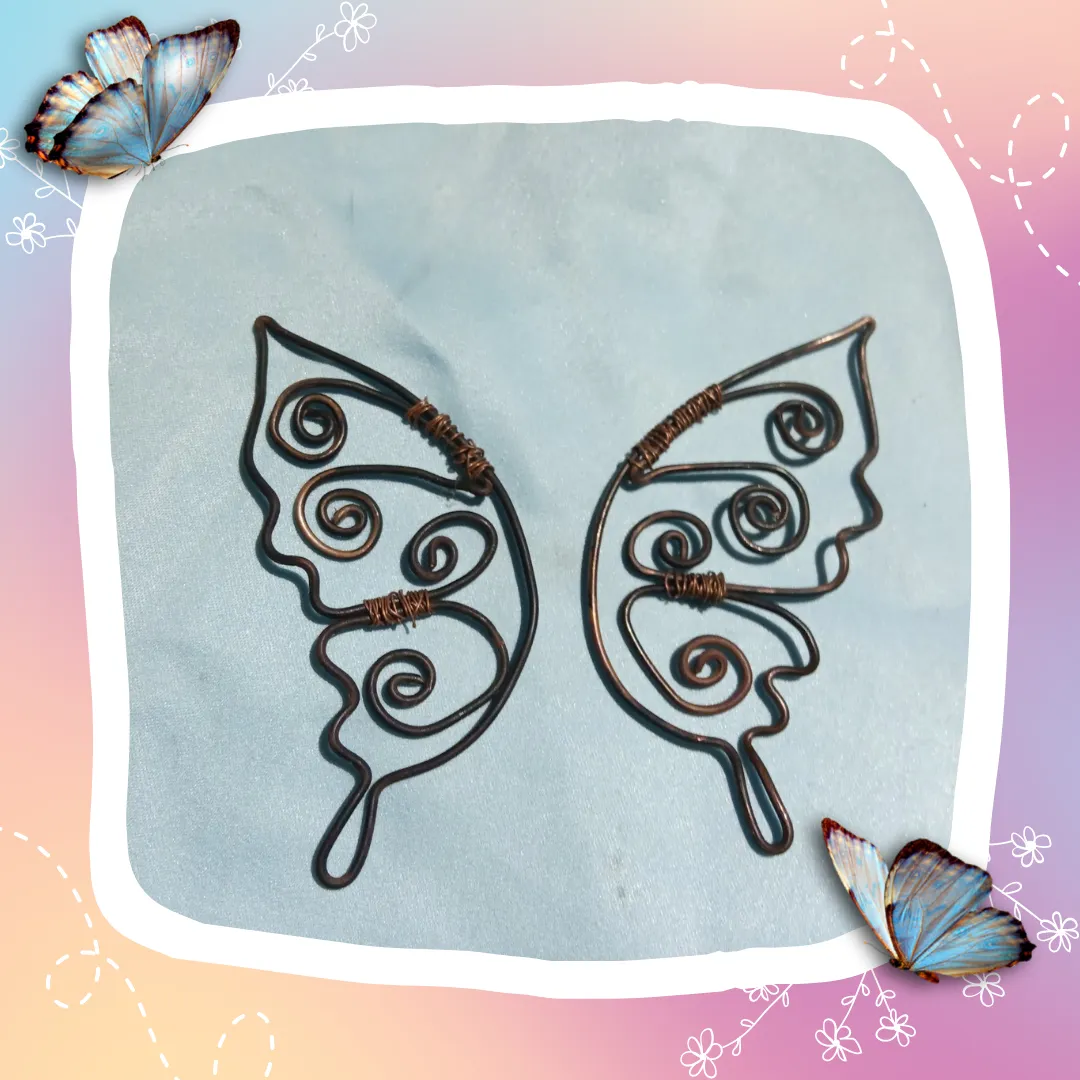
3- I crafted a smaller piece to fill the empty space inside the wings, with two spirals. 🍥🍥

mariposa (4).png

4- Ajusté las piezas de las alas con alambre de cobre como había hecho anteriormente. Luego las pinté de color negro con esmalte de uñas y las dejé secar alrededor de media hora. ⏳

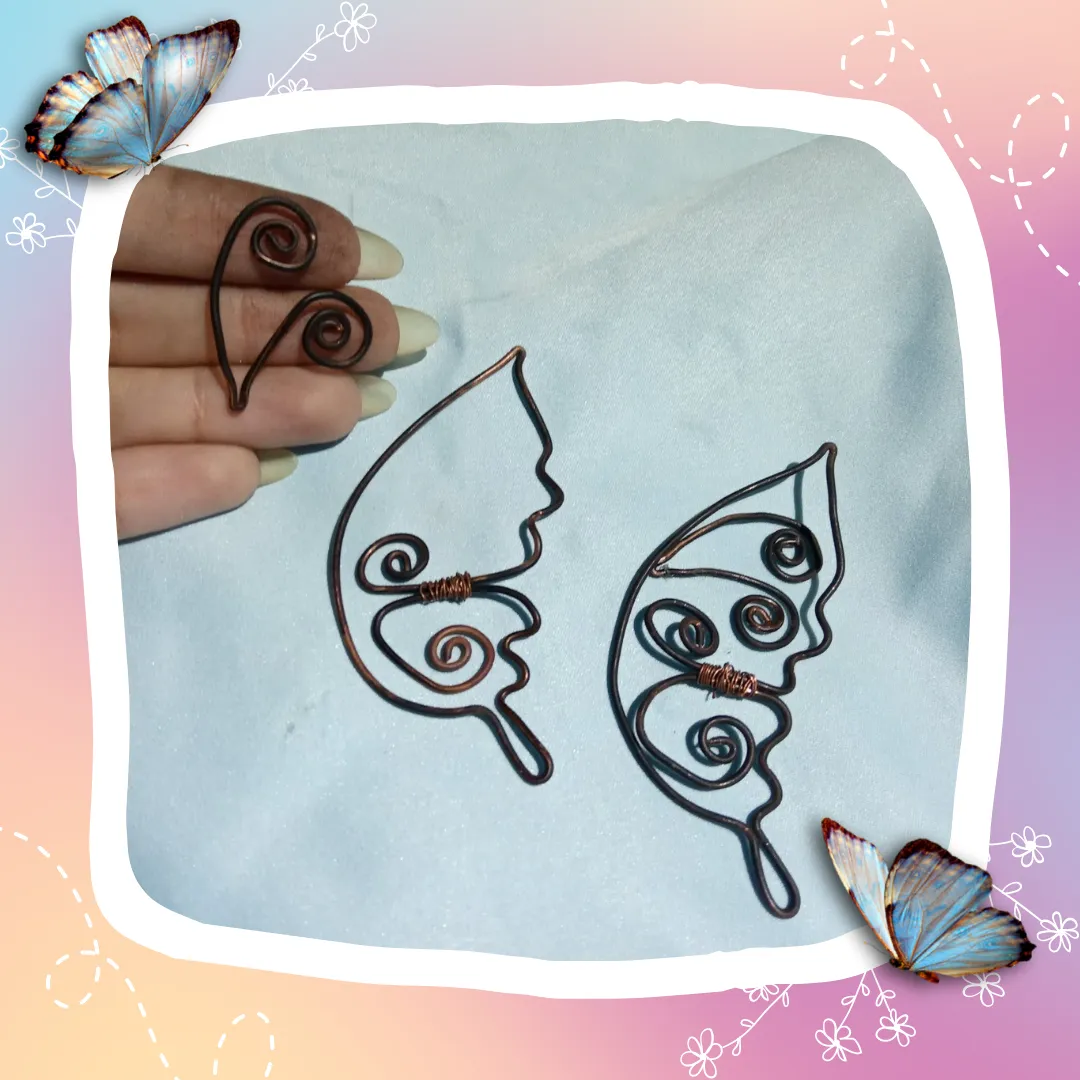
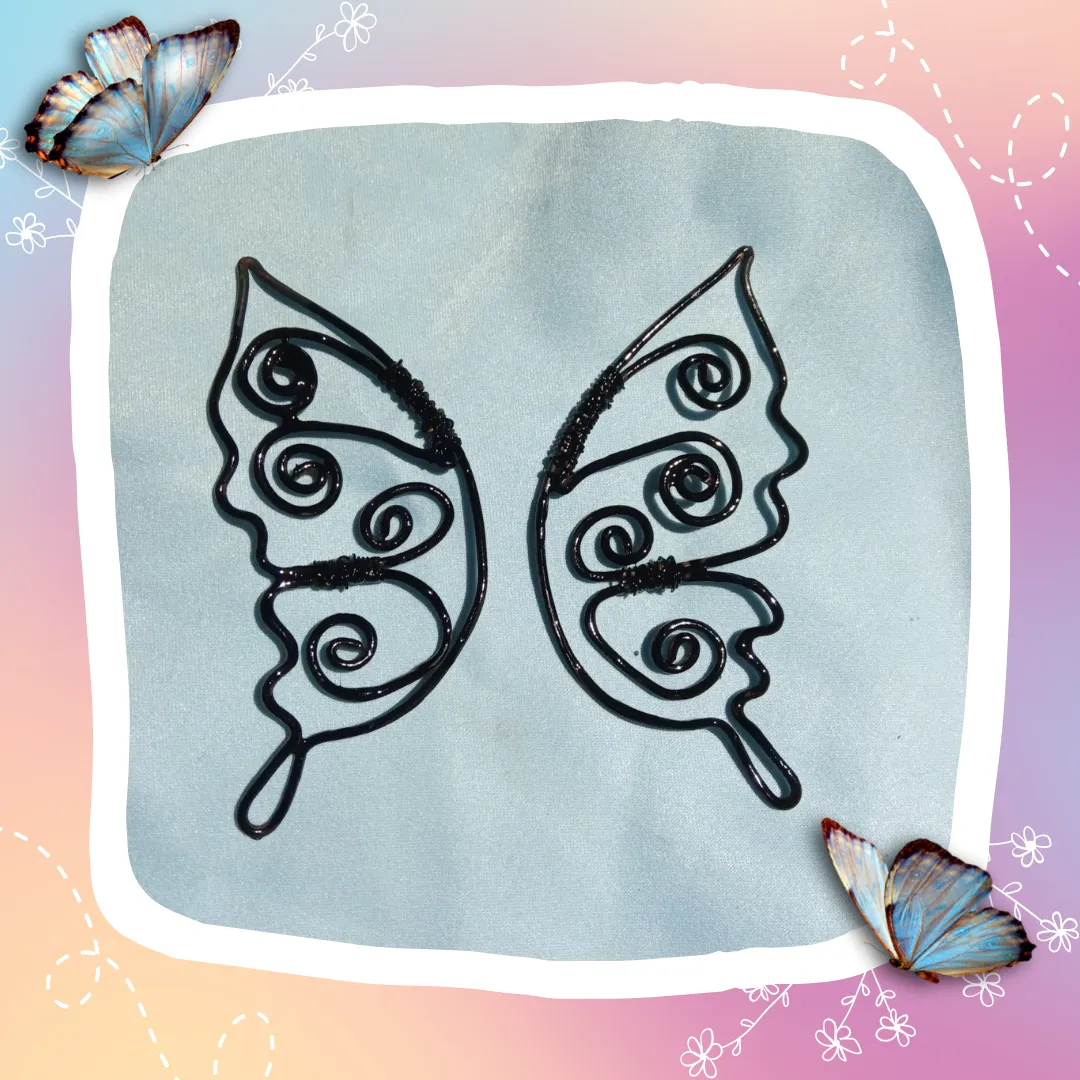
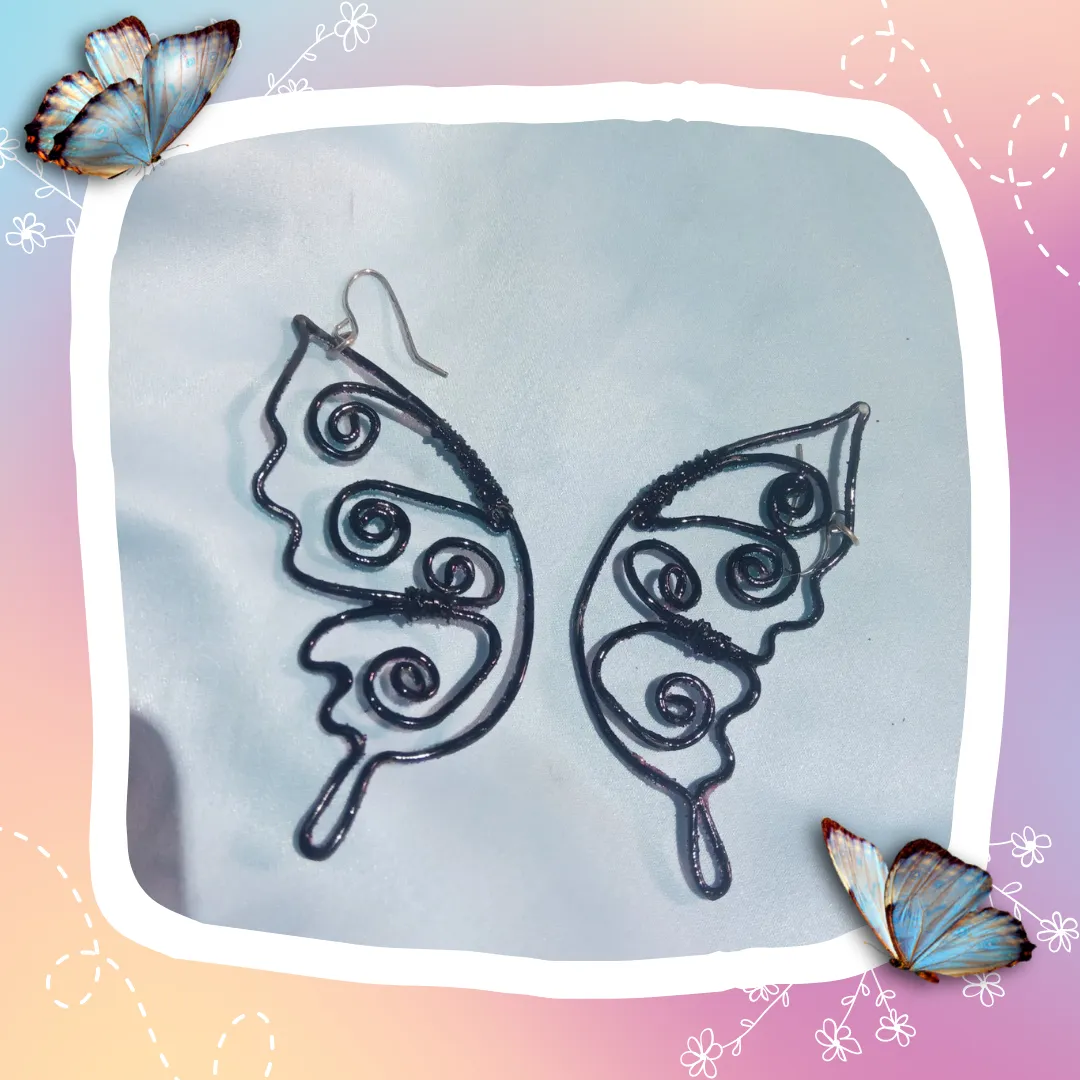
4- I adjusted the wing pieces with copper wire as I had done before. Then I painted them black with nail polish and let them dry for about half an hour. ⏳

mariposa (6).png

5- Apliqué la brillantina con un pincel y pegamento, inicié con el color fucsia, luego con el color azul, seguido de morado y fucsia al final.✨ Lo dejé secar alrededor de una hora para asegurarme que no se desprendiera la brillantina y apliqué barniz para sellar (también puedes usar pegamento).

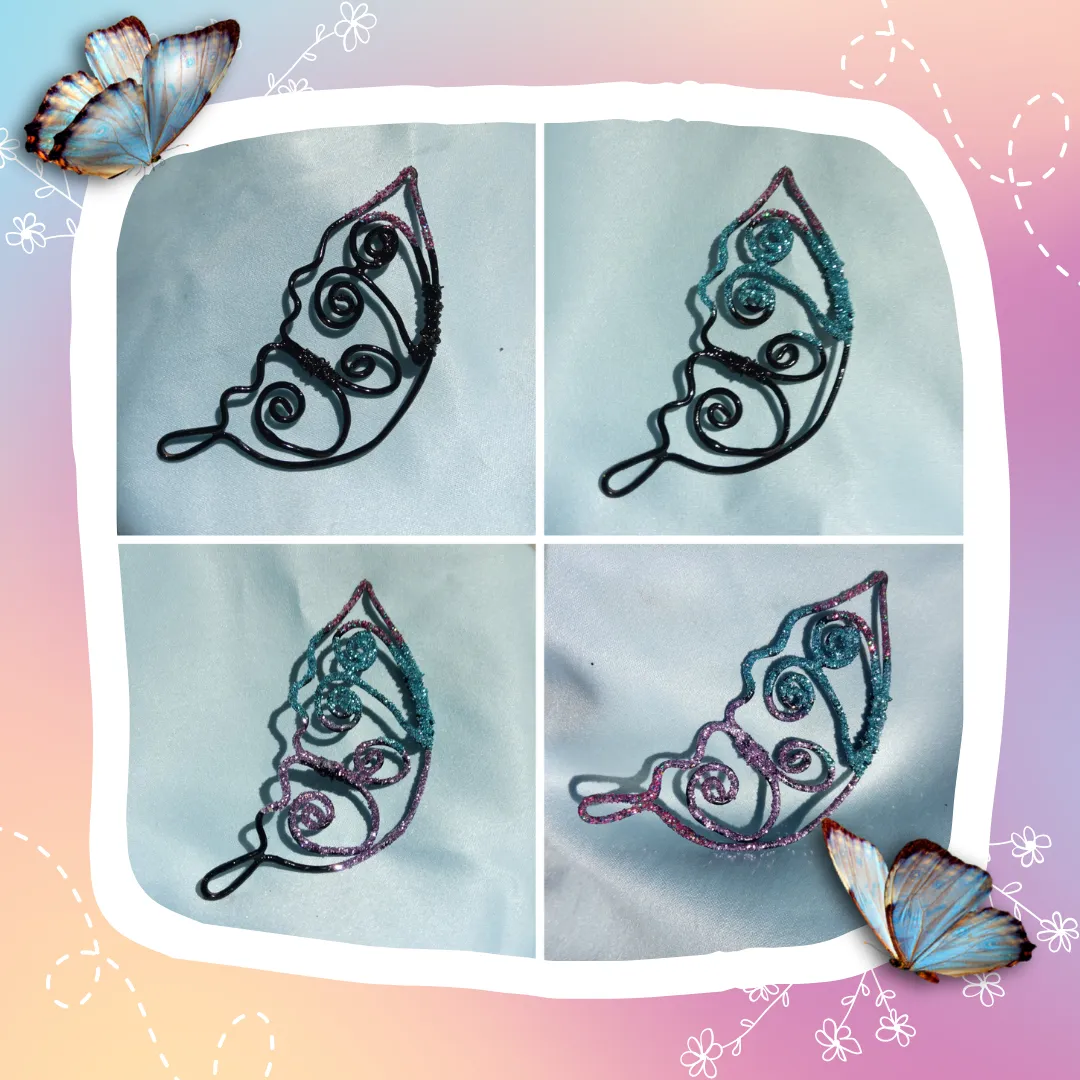
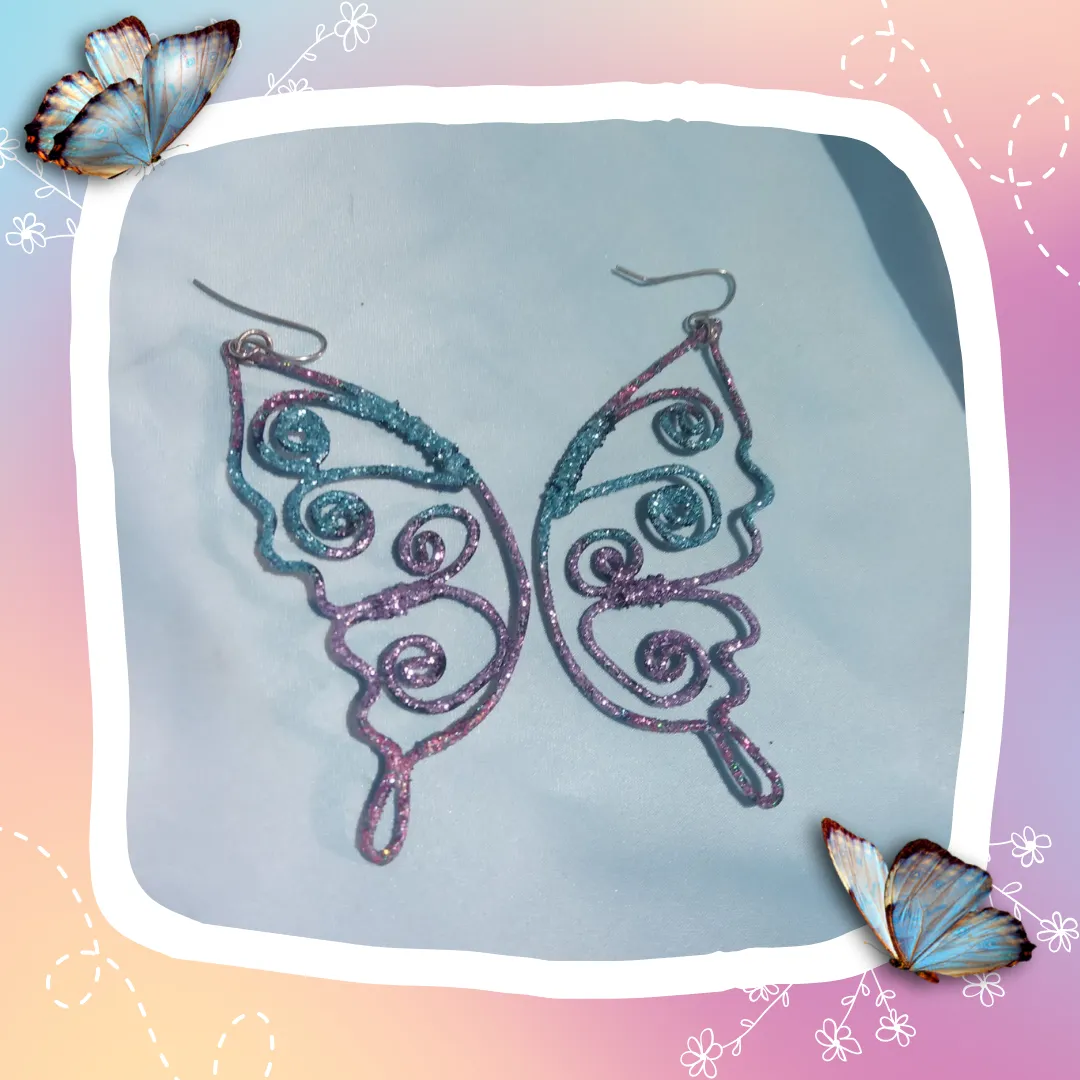
5- I applied the glitter with a brush and glue, I started with fuchsia, then blue, followed by purple and fuchsia at the end.✨ I let it dry for about an hour to make sure the glitter didn't come off and applied varnish to seal (you can also use glue).

mariposa (5).png

6- Finalmente puse las bases de los zarcillos en las puntas de las alas de mariposa cuidadosamente.🦋

6- Finally I placed the bases of the tendrils on the tips of the butterfly wings carefully.🦋
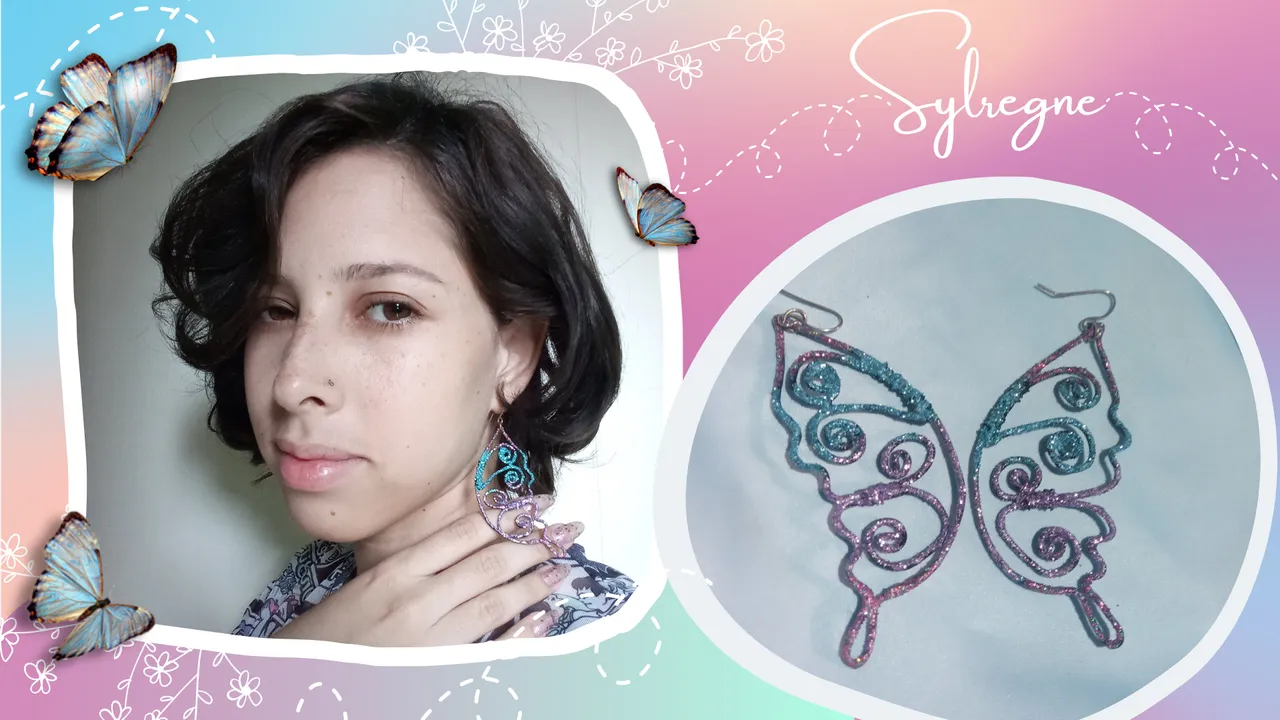
mariposa (8).png

Resultado final✨✨✨

Final result✨✨✨

mariposa (7).png

mariposa (9).png

Mi idea original era cubrir ambas partes de cada zarcillo con la brillantina pero cuando los pinté de negro también me gustó mucho la forma en la que de veía,🖤 entonces solo cubrí un lado de cada zarcillo con brillantina.✨ Aunque ahora que lo pienso mejor, simplemente podría hacer hecho otros zarcillos, talvez en una nueva ocasión les presente algo similar.🦋✨

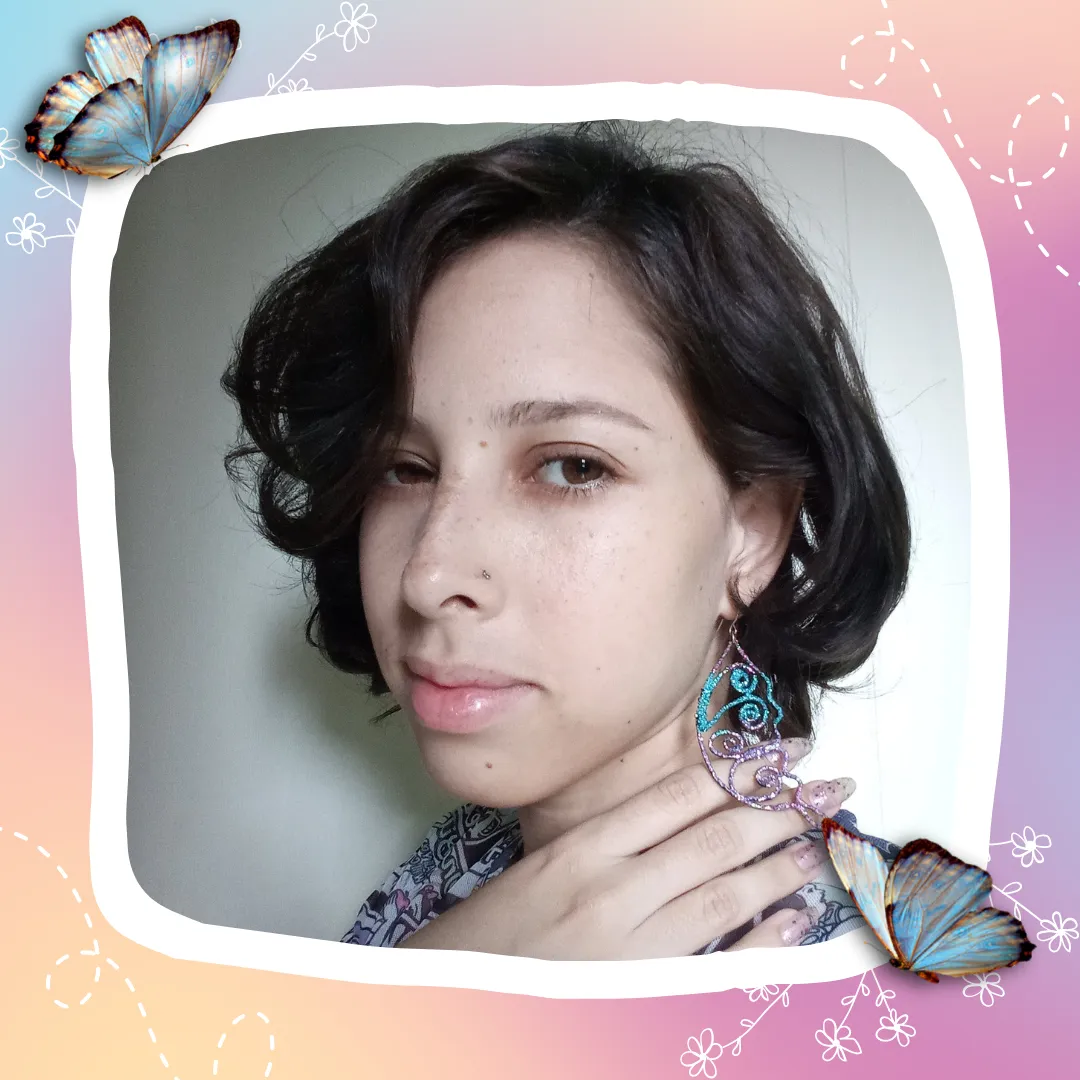
My original idea was to cover both sides of each tendril with the glitter but when I painted them black I also really liked the way it looked,🖤 so I just covered one side of each tendril with glitter.✨ Although now that I think about it better, I could simply make made other tendrils, maybe in a new occasion I will present you something similar.🦋

mari.png

Espero te haya gustado este pequeño invento recuerda que puedes hacer cosas igual de bonitas e incluso mejores que esta, cada quien tiene una imaginación distinta y puede que a ti se te ocurra una mejor manera de hacer estos zarcillos.💗

I hope you liked this little invention remember that you can make things just as nice and even better than this one, everyone has a different imagination and maybe you can come up with a better way to make these tendrils.💗

mari.png

¡Tu puedes crear todo lo que te propongas, no te detengas!💗✨🦋

¡Nos vemos pronto!✨

You can create anything you set your mind to, don't stop!💗🦋✨

See you soon!✨

Copia de Copia de Copia de Copia de Copia de Copia de Copia de Divertido fondo de pantalla gato kawaii rosa (2).png

H2
H3
H4
3 columns
2 columns
1 column
10 Comments
Ecency