
Cuando estamos en verano y queremos en ir de vacaciones a la playa o piscina , pensamos en llevar las toallas , sombreros, lentes de sol, bolsos y lo que complementará los outfits de nuestros trajes de baño o pareos como son las pulseras, zarcillos y collares. Y es que sin duda alguna estos accesorios que generalmente son elaborados con varios materiales como la madera, conchas de coco, conchas de mar, perlas, plástico y semillas son los imprecisdibles para elevar nuestro outfits playeros.
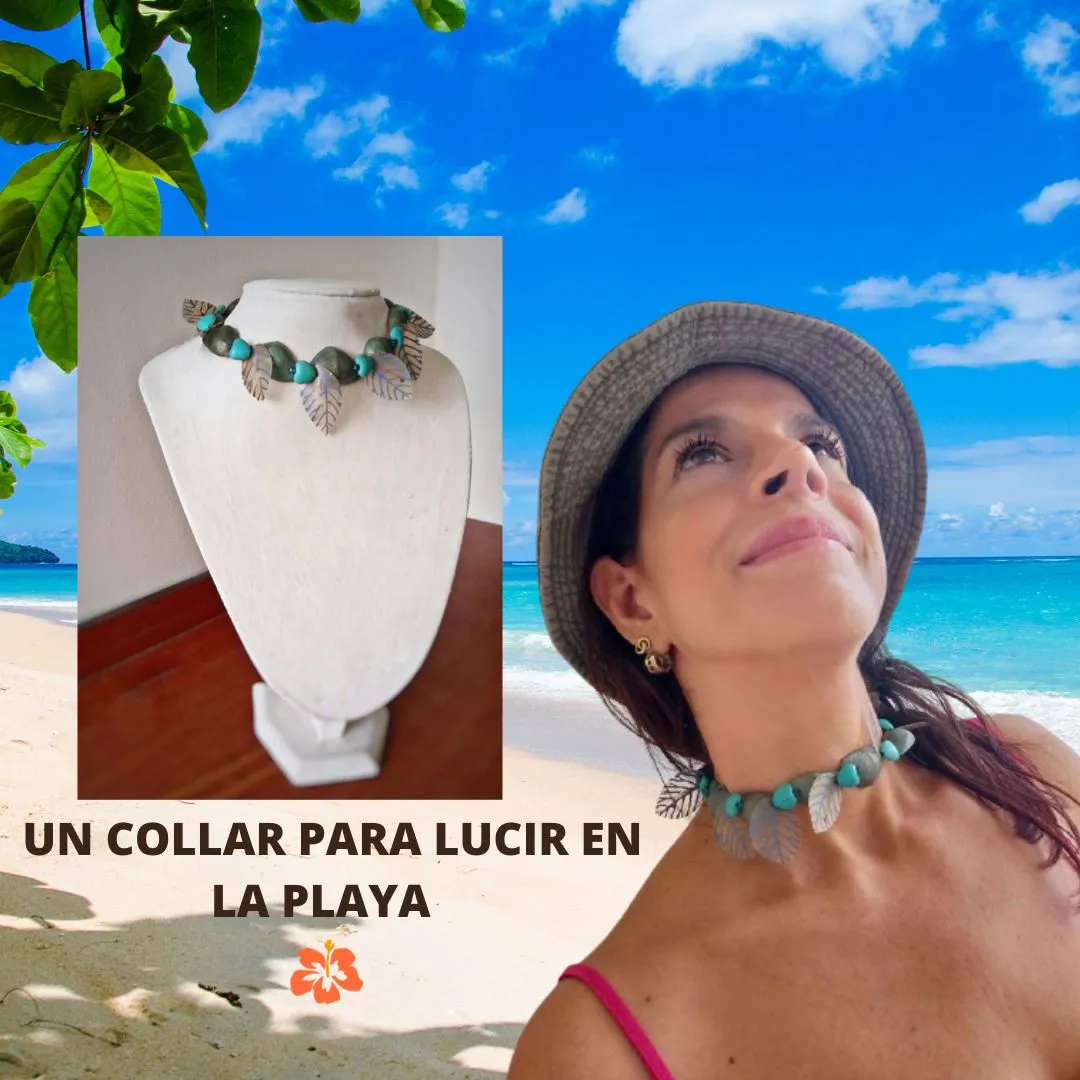
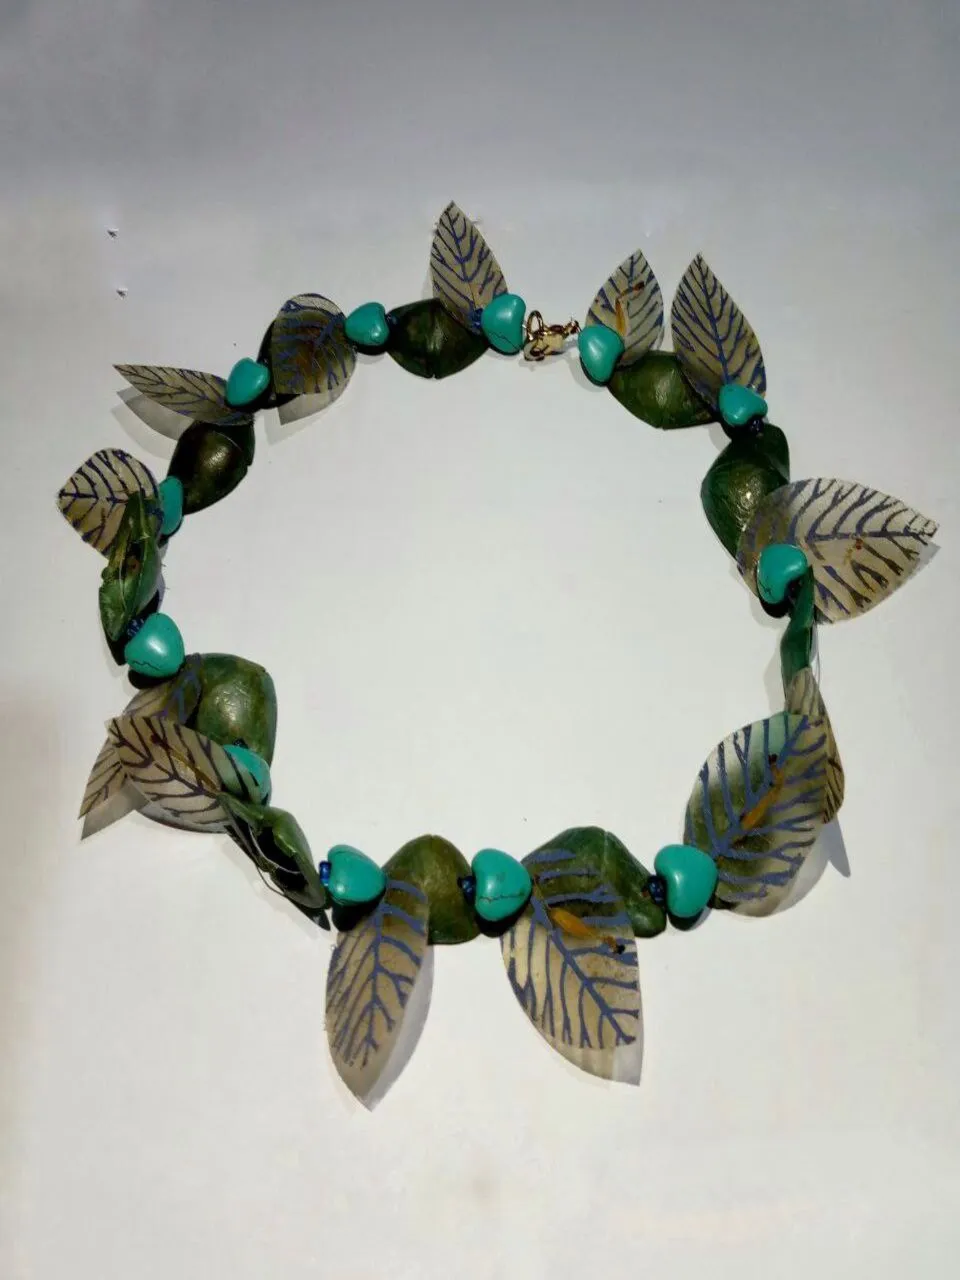
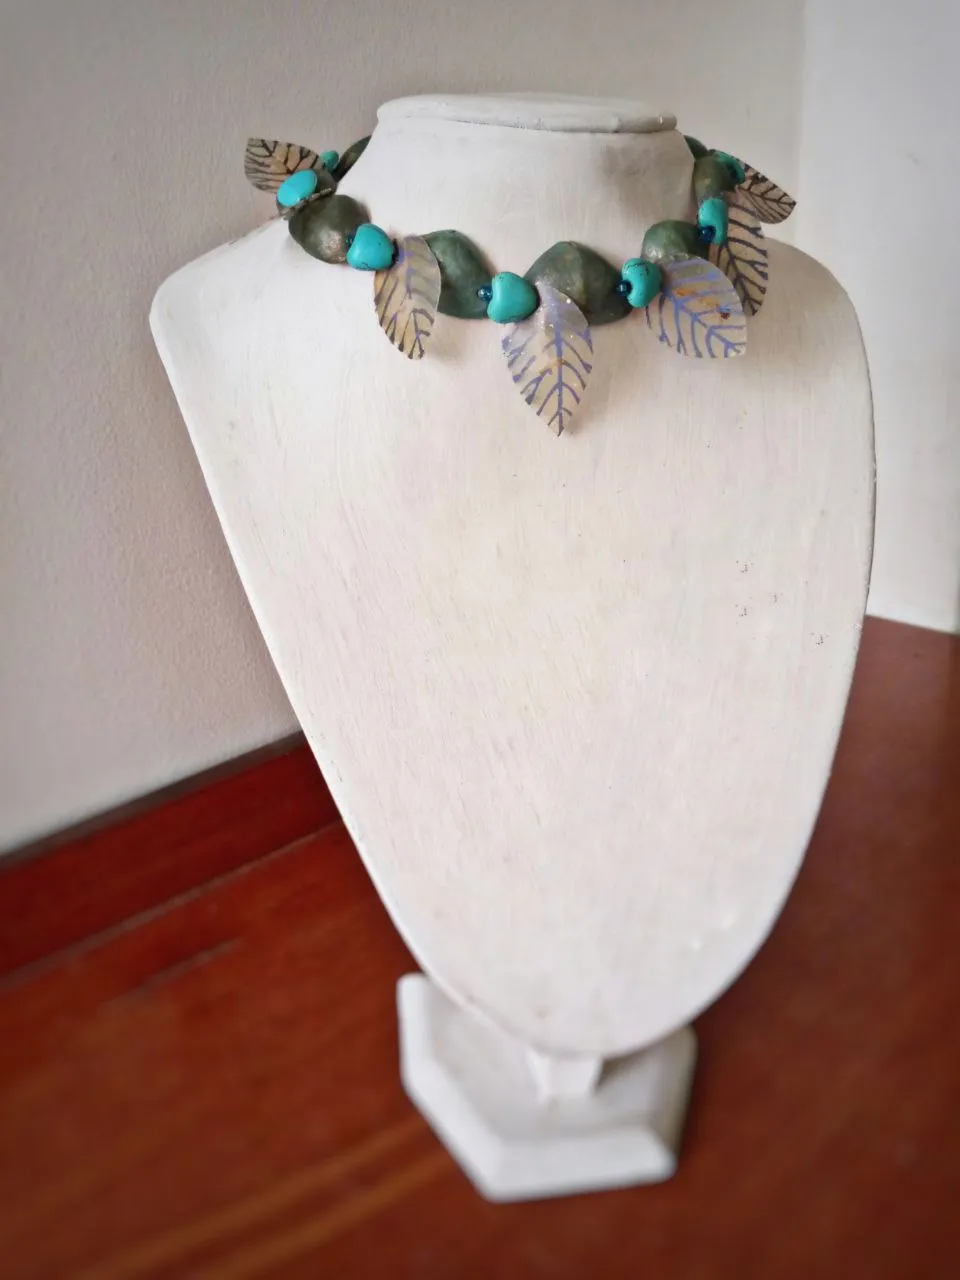
Para participar en este concurso con este collar me inspiré en los colores del mar, en esas tonalidades entre verde y azul. Tenía guardadas unas cuantas piezas de semillas, unos corazones de turquesa, algunas mostacillas y unas hojitas plásticas que me parecieron perfectas para darle aún más ese toque diferente porque fueron pintadas con detalles en un lindo color azul claro. Para esta ocasión lo hice corto más tipo gargantilla, pero largo para darle varias vueltas quedaría también hermoso.
Aprovecho de invitar a las amigas @rlathulerie @dayadam y @jennyzer a participar en este concurso y a suscribirse a esta hermosa comunidad @jewelry
When we are in summer and we want to go on holiday to the beach or pool, we think about taking towels, hats, sunglasses, bags and what will complement the outfits of our swimming costumes or sarongs such as bracelets, earrings and necklaces. And there is no doubt that these accessories, which are generally made with various materials such as wood, coconut shells, seashells, pearls, plastic and seeds, are essential to elevate our beach outfits.
To participate in this contest with this necklace I was inspired by the colours of the sea, in those shades of green and blue. I had saved a few pieces of seeds, some turquoise hearts, some beads and some plastic leaves that I thought were perfect to give it even more of a different touch because they were painted with details in a nice light blue colour. For this occasion I made it short, more like a choker, but long enough to give it several turns, it would also be beautiful.
I take this opportunity to invite friends @rlathulerie @dayadam y @jennyzer to participate in this contest and to subscribe to this beautiful community @jewelry.
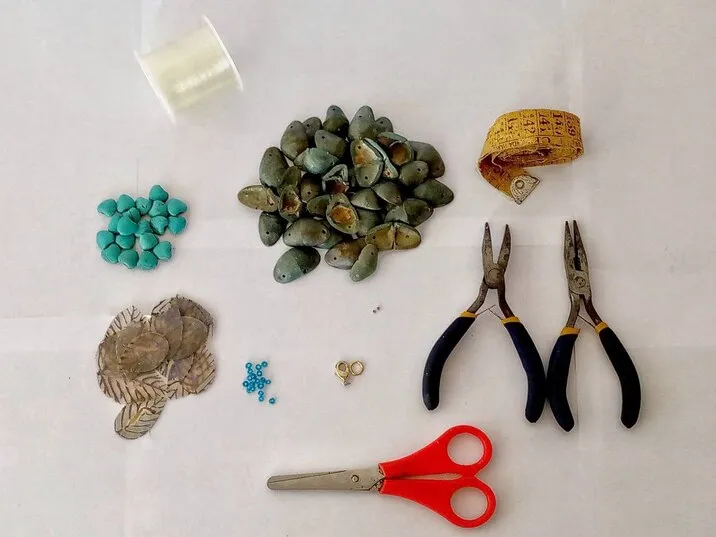
Ahora si nos vamos con los materiales que utilicé para este tutorial de bisutería:
Now let's move on to the materials I used for this costume jewellery tutorial:
- Cuentas de semillas
- Piezas en forma de corazón
- Piezas plásticas en forma de hoja
- Mostacillas
- Nylon
- 2 cuentas de aplastamiento
- 1 argolla dorada
- 1 broche pico de loro dorado
- Pinzas de bisuteria
- Tijera
- Cinta métrica
- Seed beads
- Heart-shaped pieces
- Plastic leaf-shaped pieces
- blue beads
- Nylon
- 2 crushing beads
- 1 ring
- 1 parrot's beak clasp
- Jewellery tweezers
- Scissors
- Tape measure
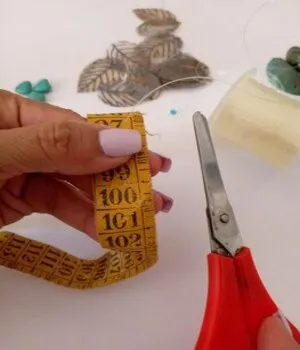
PASO 1 : Lo primero que tienes que hacer es medirte el cuello para calcular el largo del collar. Hay que tener en cuenta que hay que añadir unos centímetros más para la argolla y el broche.
Con la ayuda de una cinta métrica corté el nylon a la longitud deseada.
STEP 1 : The first thing you need to do is to measure your neck to calculate the length of the necklace. Keep in mind that you have to add a few extra centimetres for the ring and the clasp.
With the help of a tape measure I cut the nylon to the desired length.
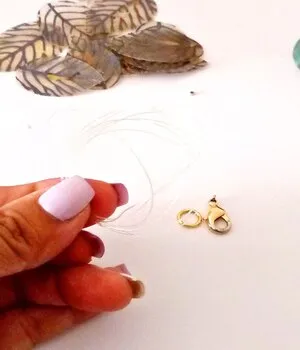
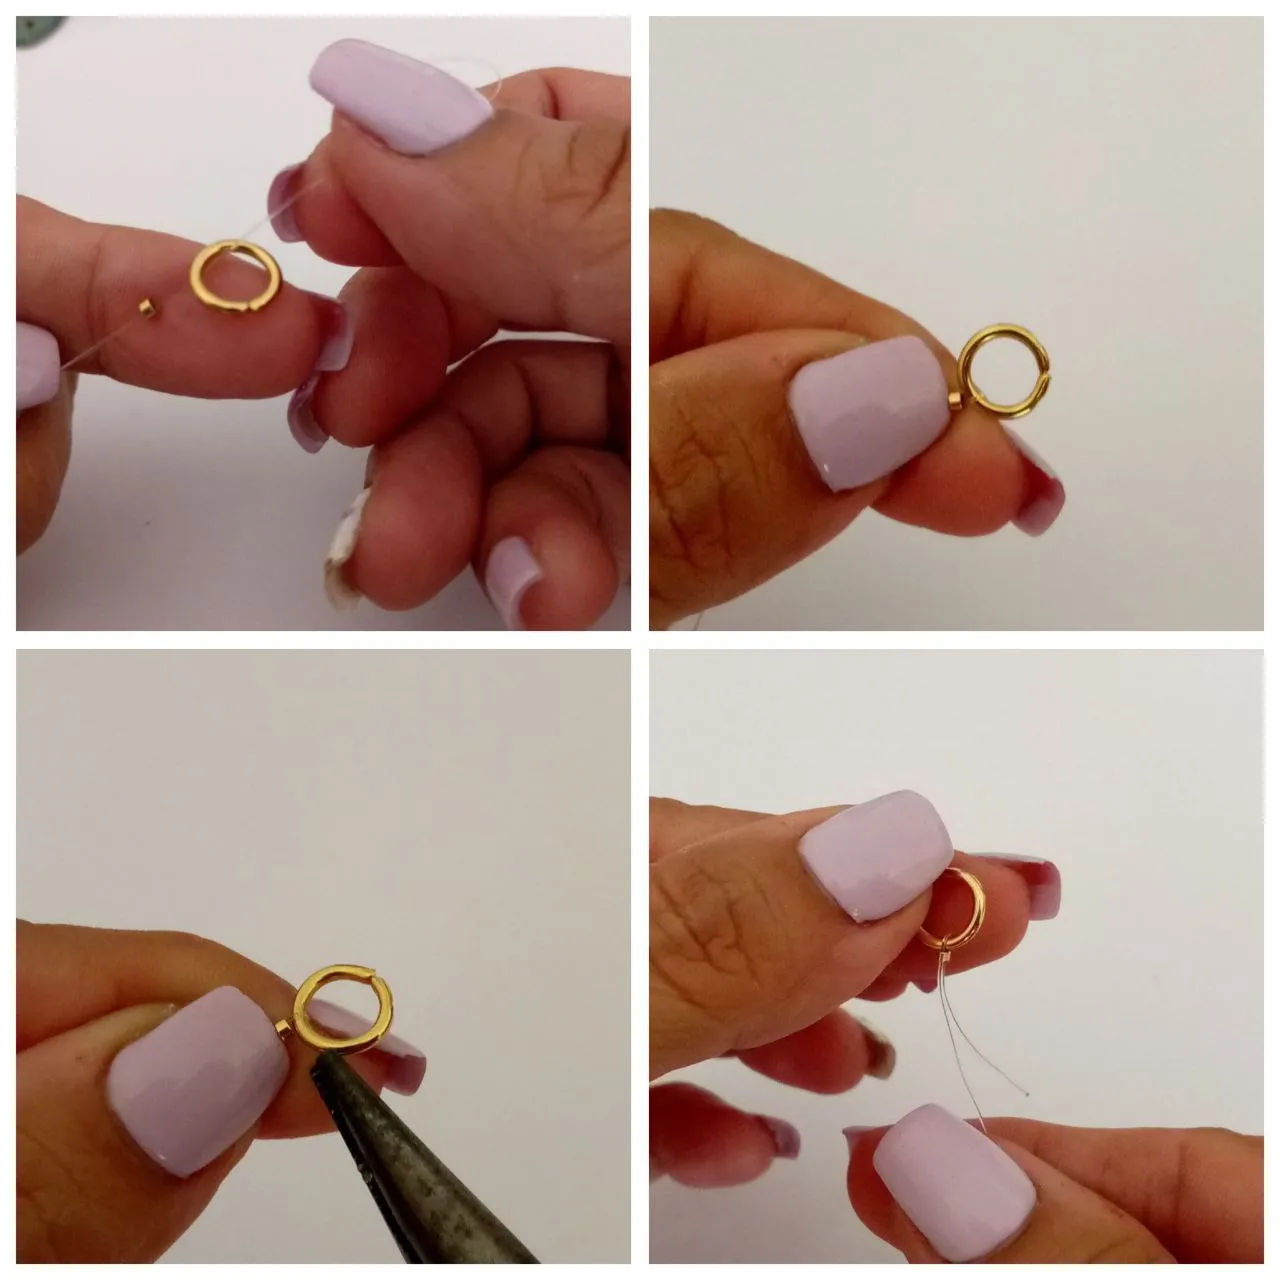
PASO 2: Vamos con el montaje del collar, para ello tomamos el nylon, introducimos una cuenta de aplastamiento y la argolla, pasamos la punta del nylon por la misma cuenta de aplastamiento y pegamos a la argolla para que quede todo bien apretado y no se suelte. Con la ayuda de la pinza apretamos la cuenta de aplastamiento.
STEP 2: Let's go to the assembly of the necklace,To do this we take the nylon, insert a crush bead and the ring, pass the tip of the nylon through the same crush bead and glue it to the ring so that everything is tight and does not come loose. With the help of the pliers we tighten the crush bead.
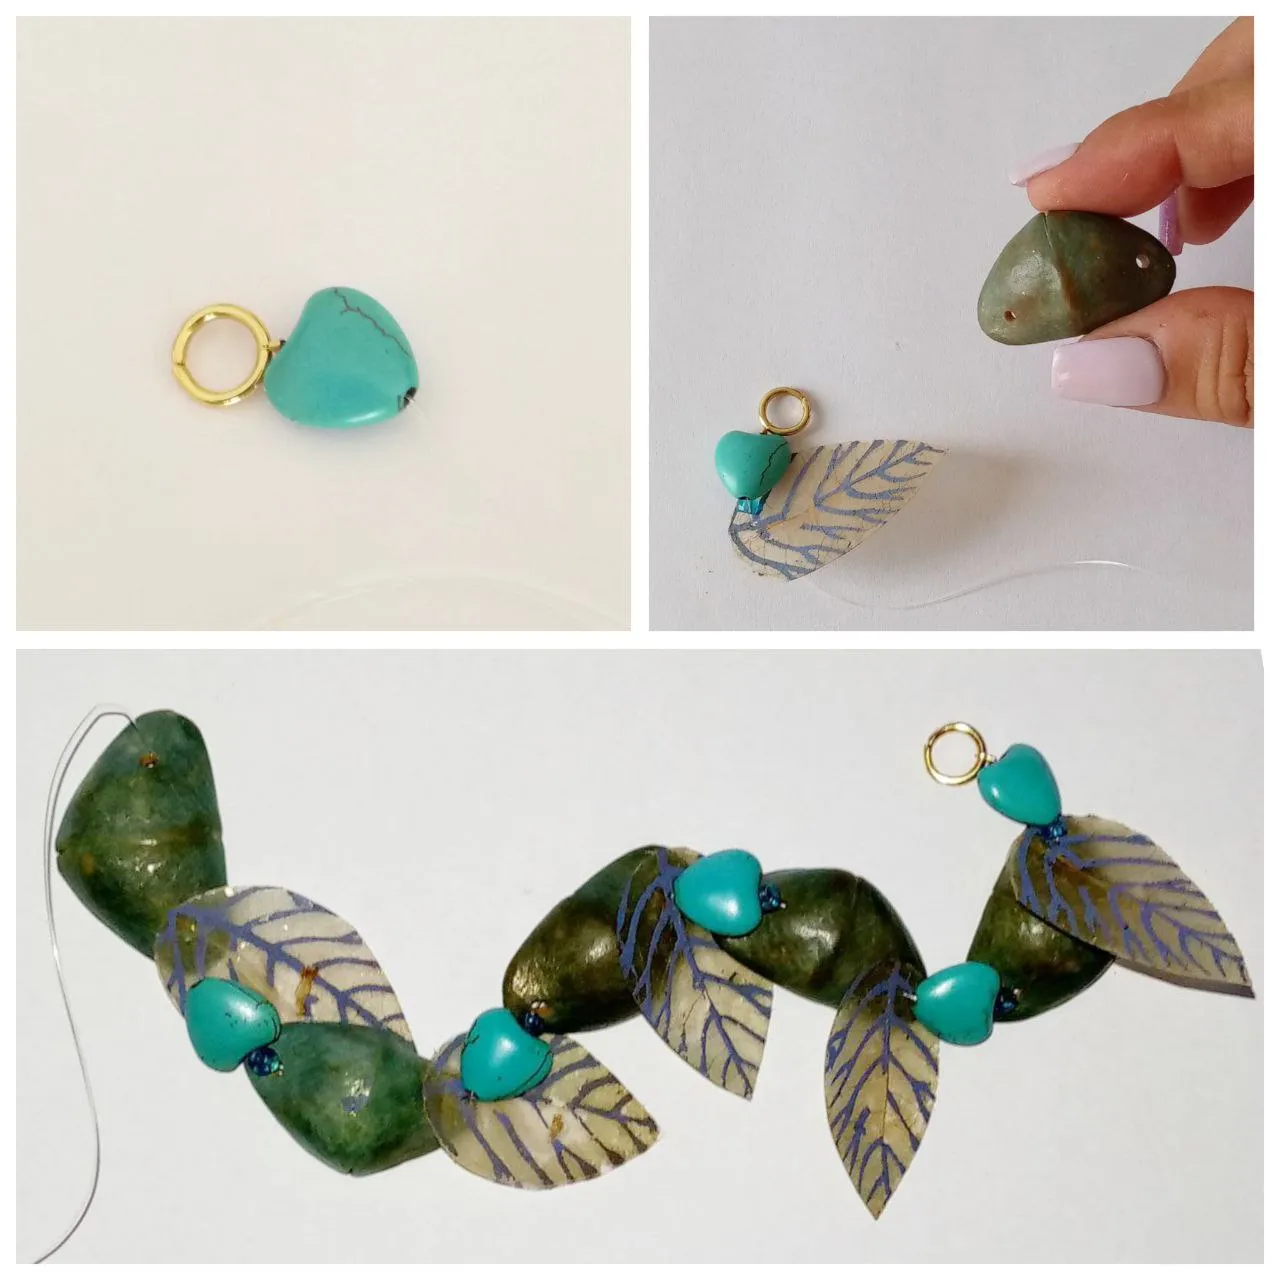
PASO 3: Es una buena idea esbozar previamente el orden de las piezas , para así tener una visión de como quedará el resultado final. Mi orden sería primero el corazón, luego la mostacilla, la hoja y por ultimo la semilla. Asi sucesivamente fui ingresando las piezas en el nylon.
STEP 3: It is a good idea to sketch the order of the pieces beforehand, so that you can have an idea of what the final result will look like. My order would be the heart first, then the mustard, the leaf and finally the seed. In this way I successively inserted the pieces into the nylon.
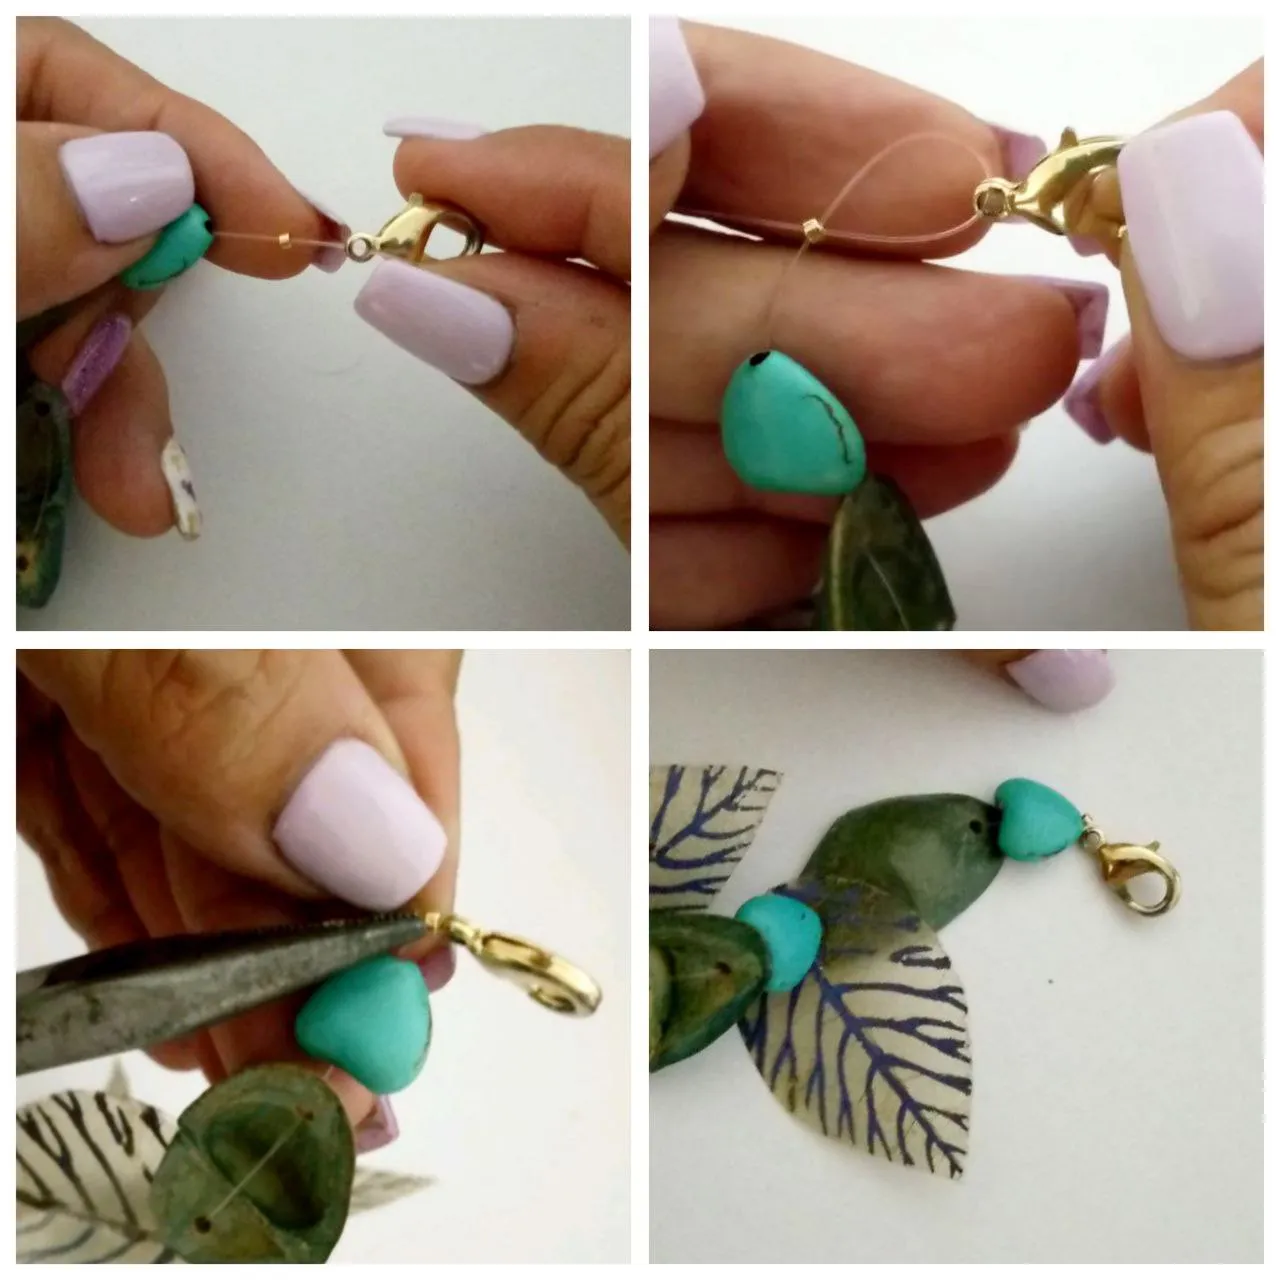
PASO 4: Una vez colocadas todas las piezas, es el momento de colocar el broche, así que coloqué la cuenta de aplastamiento restante en el nylon, luego el broche, y pasamos el resto del hilo por la cuenta de aplastamiento hasta que quede ajustado al broche, y con la pinza apretamos la cuenta, el resto del hilo lo pasamos por las piezas para ocultarlo.
STEP 4: Once all the pieces are placed, it's time to place the brooch, so I place the remaining crush bead on the nylon, then the brooch, and we pass the rest of the thread through the crush bead until it is tight to the brooch, and with the plier we tighten the bead, the rest of the thread we pass it through the pieces to hide it.
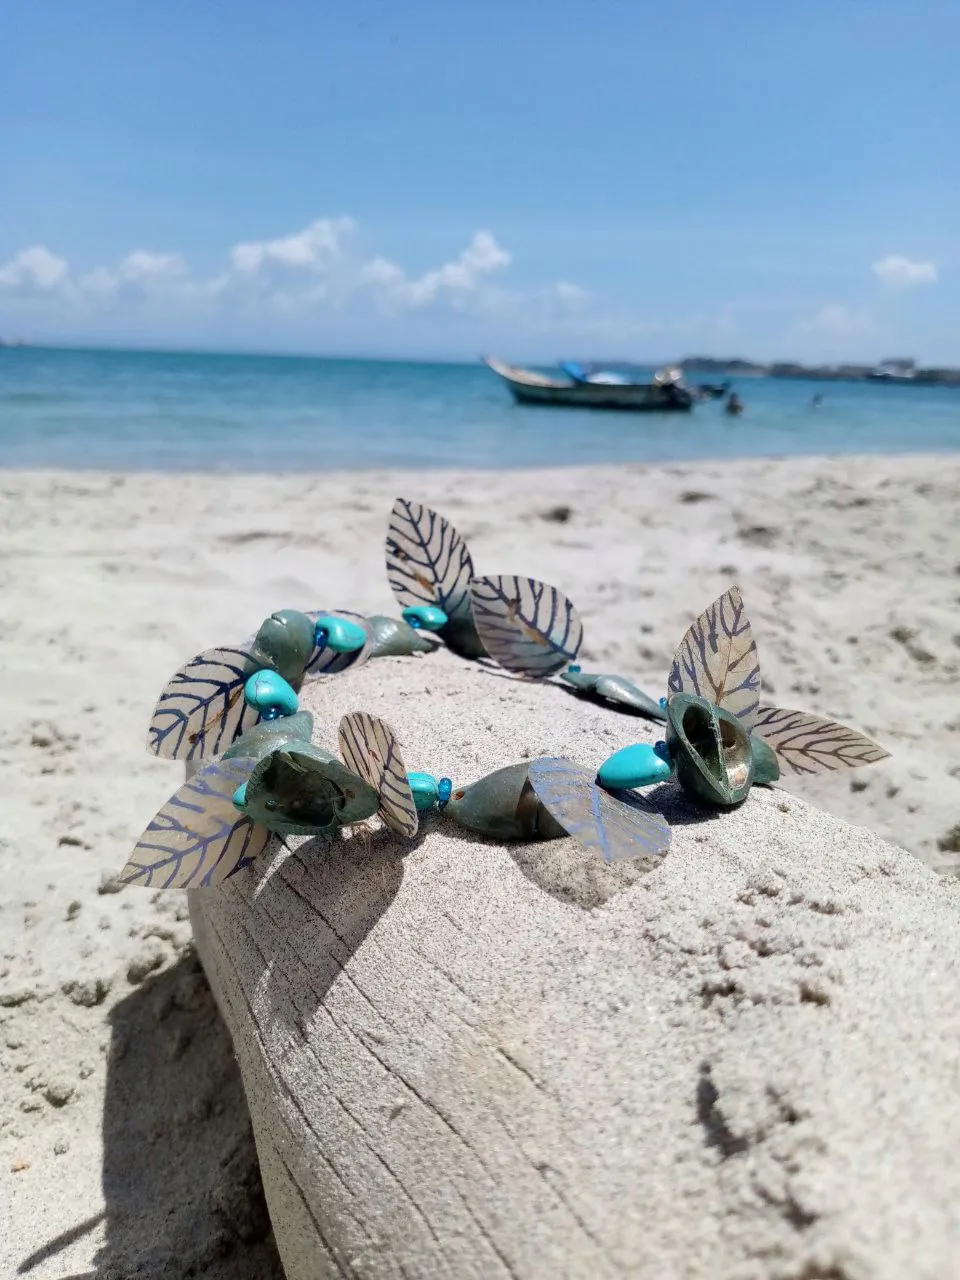
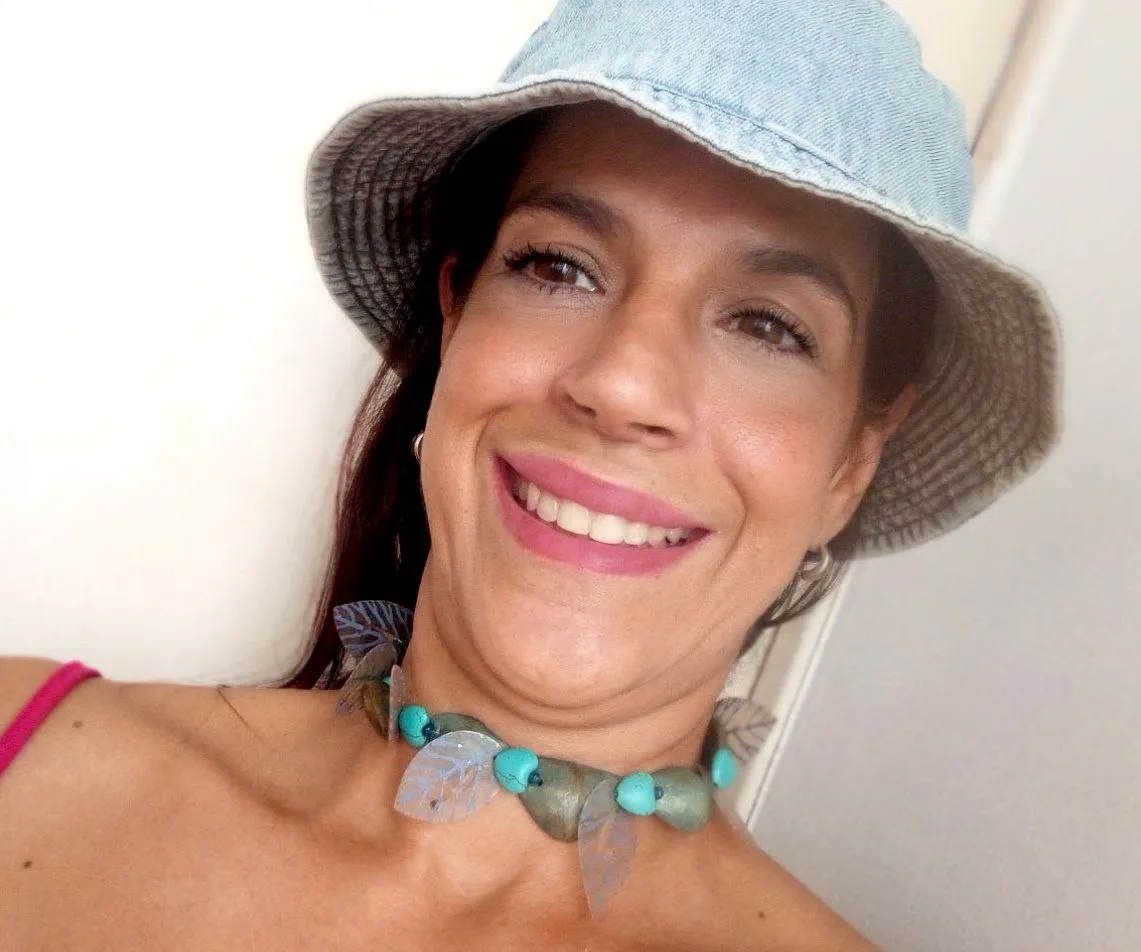
Y así fue como se creó este hermoso collar que va perfecto con el cielo y el mar. El día que hice la foto fui a la playa y estaba disfrutando tanto del proceso de hacer la foto del collar que se me olvidó que yo era la modelo jajaja esa fue la anécdota del día y terminé haciendo la foto en casa con mi collar puesto.
And that's how this beautiful necklace was created that goes perfectly with the sky and the sea. The day I took the picture I went to the beach and I was enjoying so much the process of taking the picture of the necklace that I forgot that I was the model hahaha that was the anecdote of the day and I ended up taking the picture at home with my necklace on.
Gracias por acompañarme en este tutorial, esperando sea de tu agrado. Tus sugerencias y comentarios siempre son bienvenidos.
Con cariño...
Mercedes 💜
Thank you for joining me in this tutorial, I hope you like it. Your suggestions and comments are always welcome.
With love...
Mercedes 💜

Todas las fotografías fueron tomadas con mi telefóno móvil // All photos were taken with my mobile phone.
Collages realizados en App GridArt y Portada editada en Canva // Collages made in App GridArt and Cover edited in Canva
Separadores realizados en Canva // Dividers made in Canva
Traducción realizada con www.deepl.com // Translation made with www.deepl.com
