Queridos amigos y seguidores de este blog de Joyas, Me uno a la iniciativa en este camino de aprendizaje, creatividad y pasión por las joyas en el primer año de aniversario de la comunidad de Jewelry.
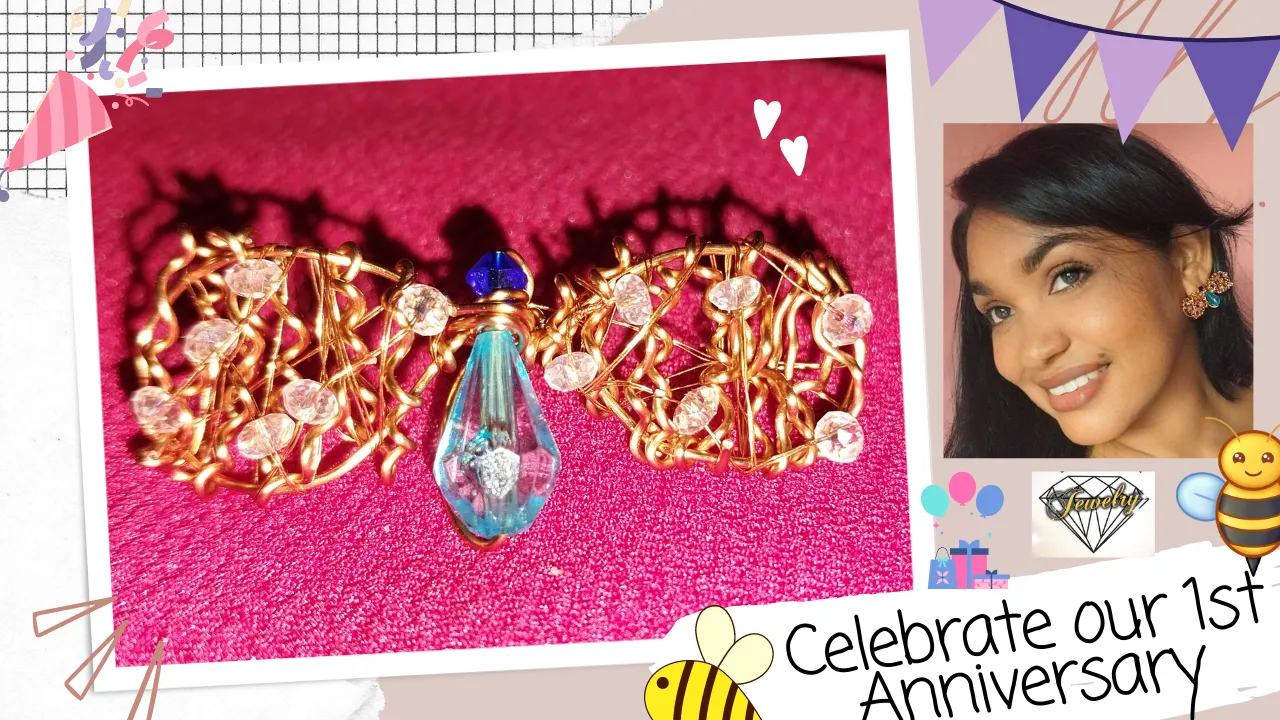
Para celebrar, hoy quiero presentarles unos aretes de abeja, una maravillosa pieza inspirada en estos zumbadores trabajadores y amigables que nos hacen recordar la belleza de las flores y el dulce sabor de la miel.
Espero no sea tarde para unirme al concurso, Pero vaya, que rapido pasan los días y hoy ya es el cierre del concurso! Lo más importante es poder compartir esta creación y desearle un feliz Cumpleaños a mi comunidad consentida @Jewelry.
Paso a Paso
1
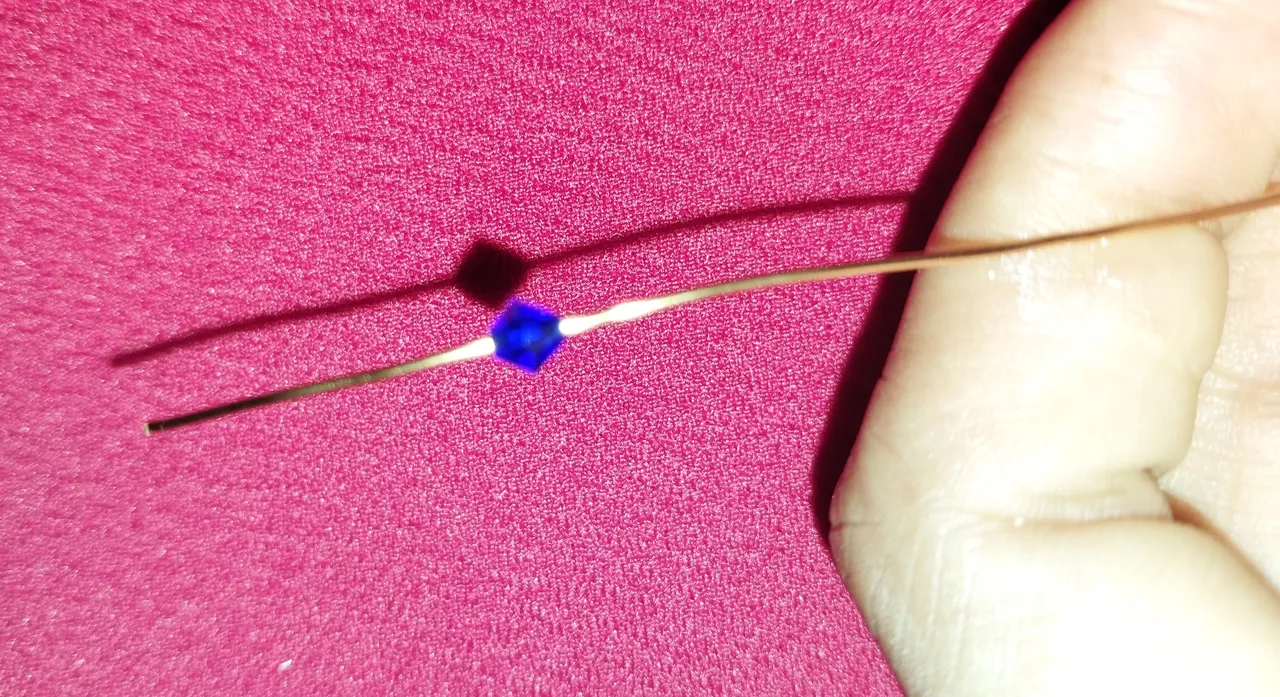
Se debe introducir el cristal azul en el alambre de cobre, dejando un espacio de 4 cm desde el extremo del alambre hasta el cristal.
2
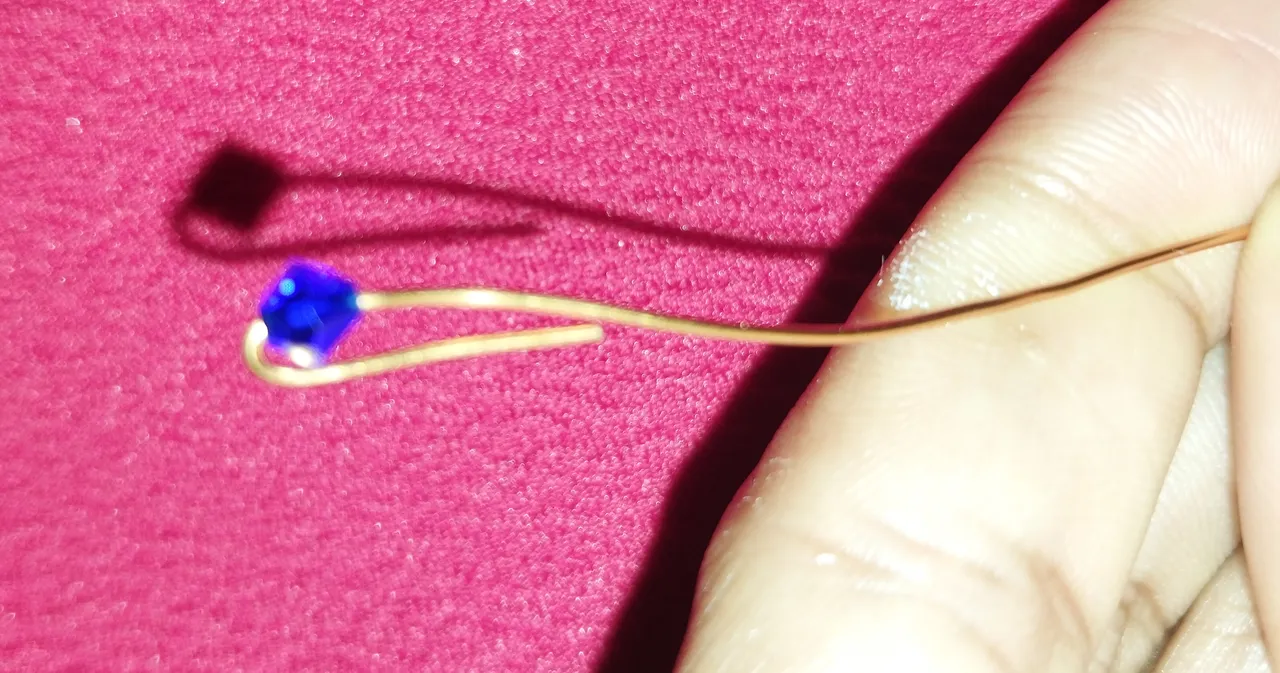
Luego se debe doblar el extremo del alambre de cobre.
3
Depues se debe tomar el extremo que se ha doblado hacia abajo y direccionar el alambre hacia abajo del cristal que se ha introducido, asi como pueden apreciar la imagen.
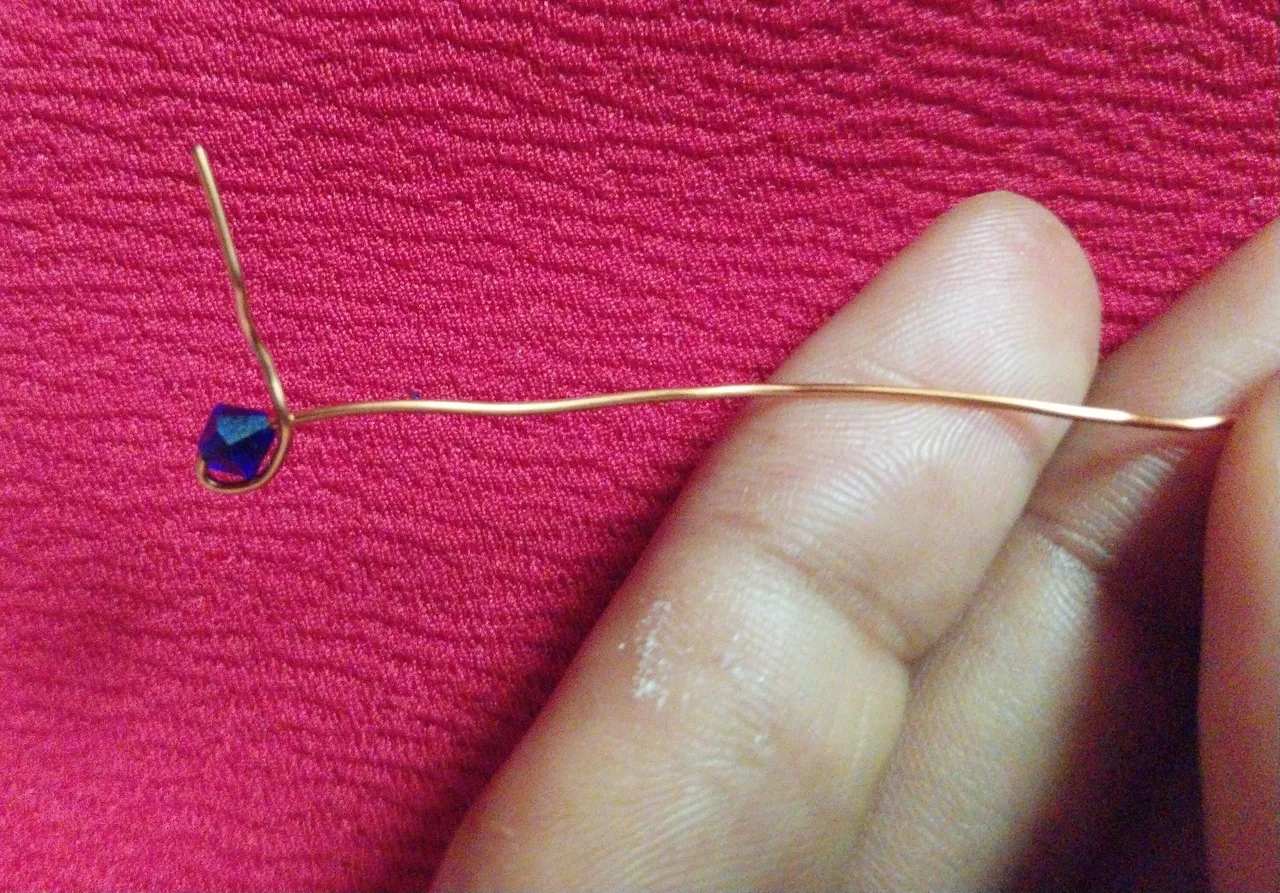
4
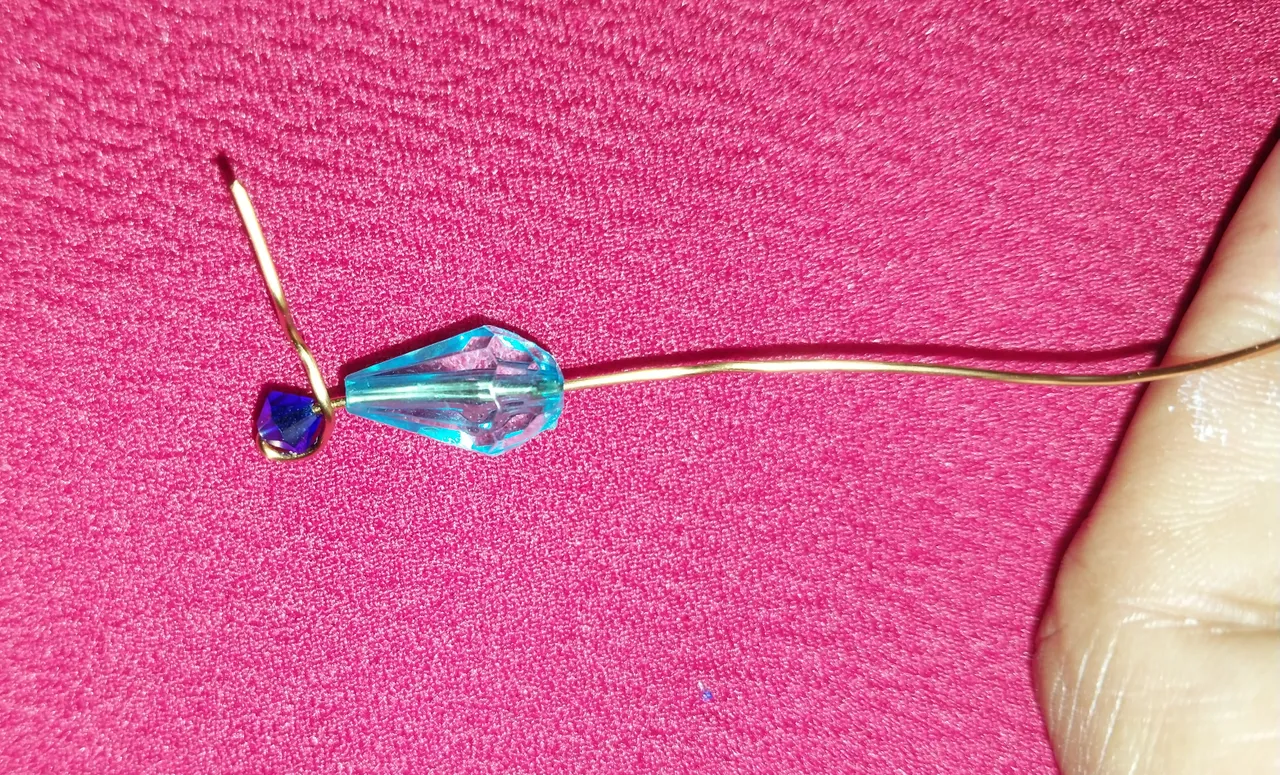
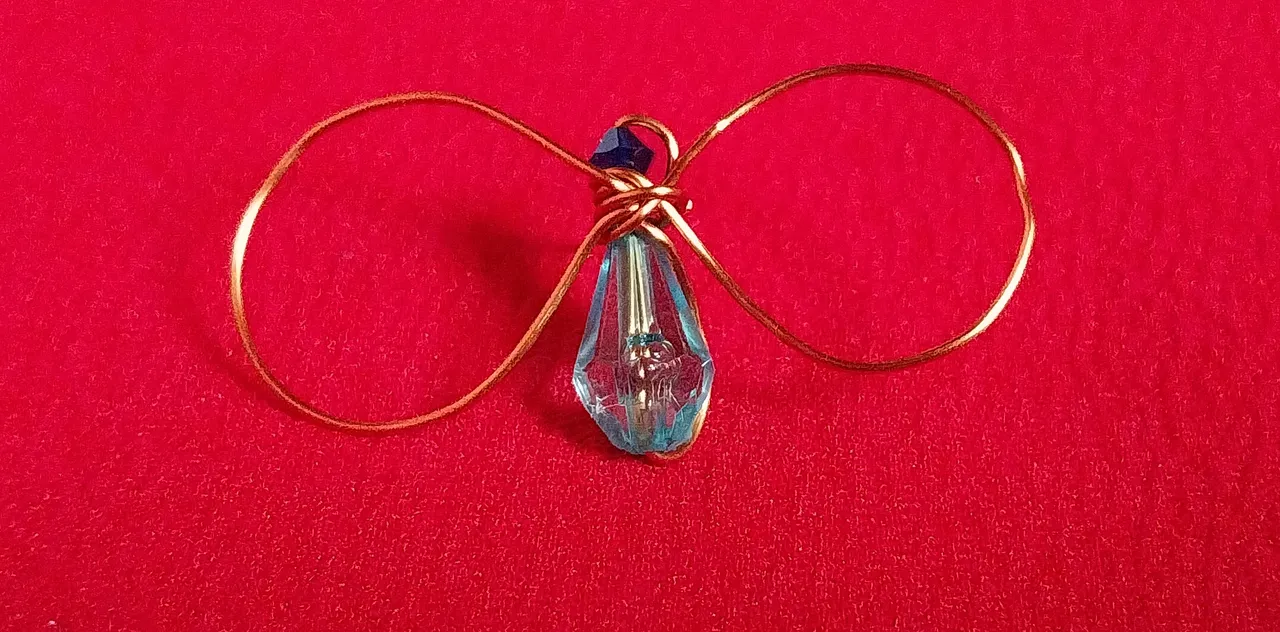
Luego se debe introducir el cristal en forma de hota, en particular he elegido uno de color azul claro, para combinarlo con el cristal azul claro.
5

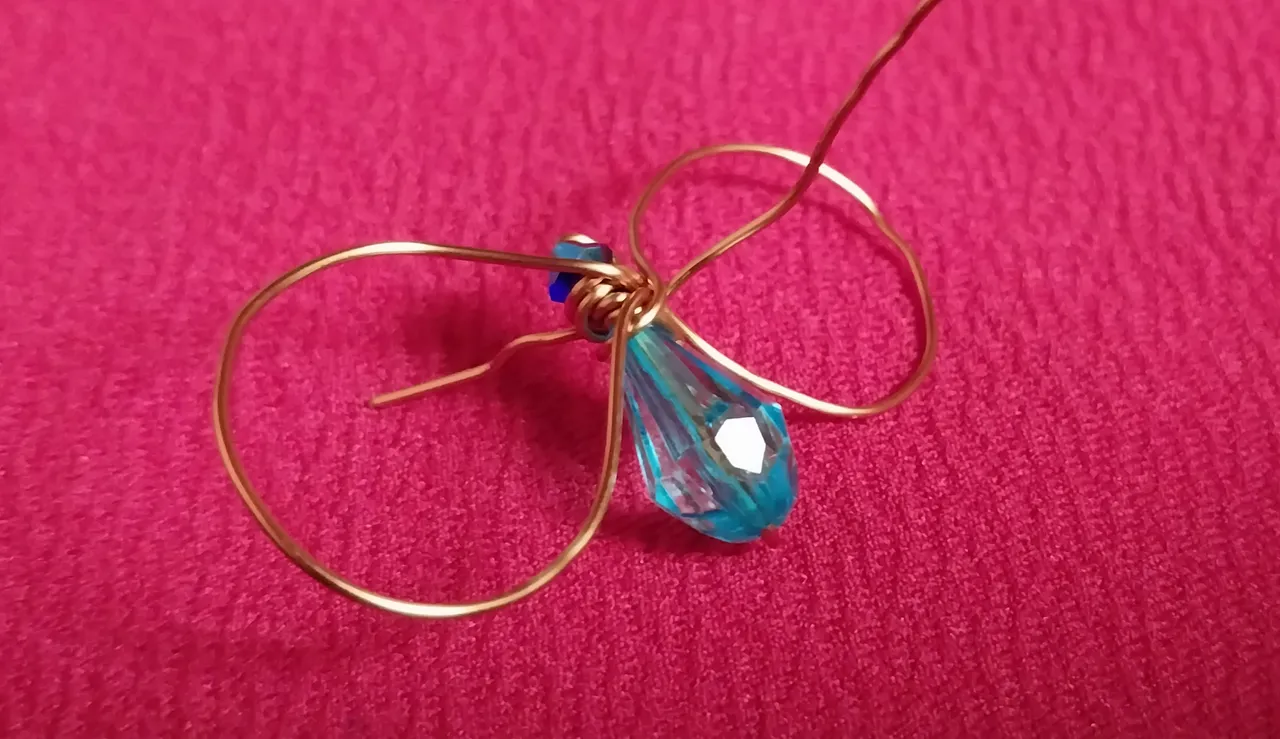
Una vez que el alambre de cobre sale de la perla se procede a doblar hacia ariba el alambre de cobre y luego en el extremo superior se hacen dos vueltas entre el cristal pequeño y el cristal azul más grande.
6
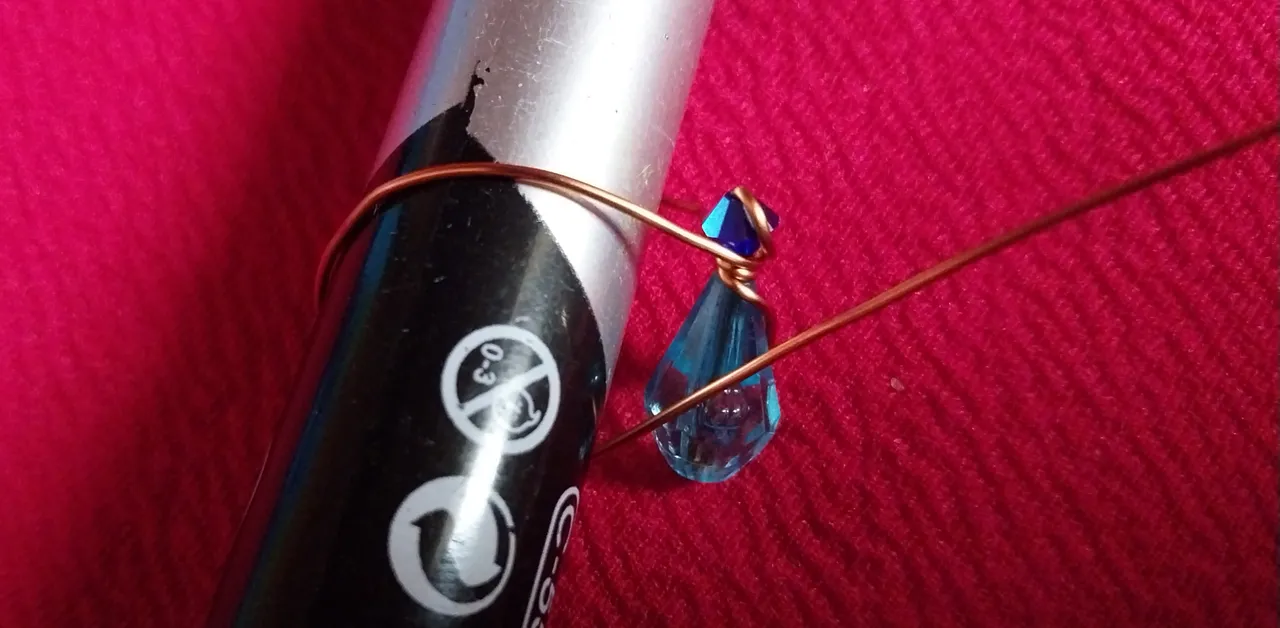
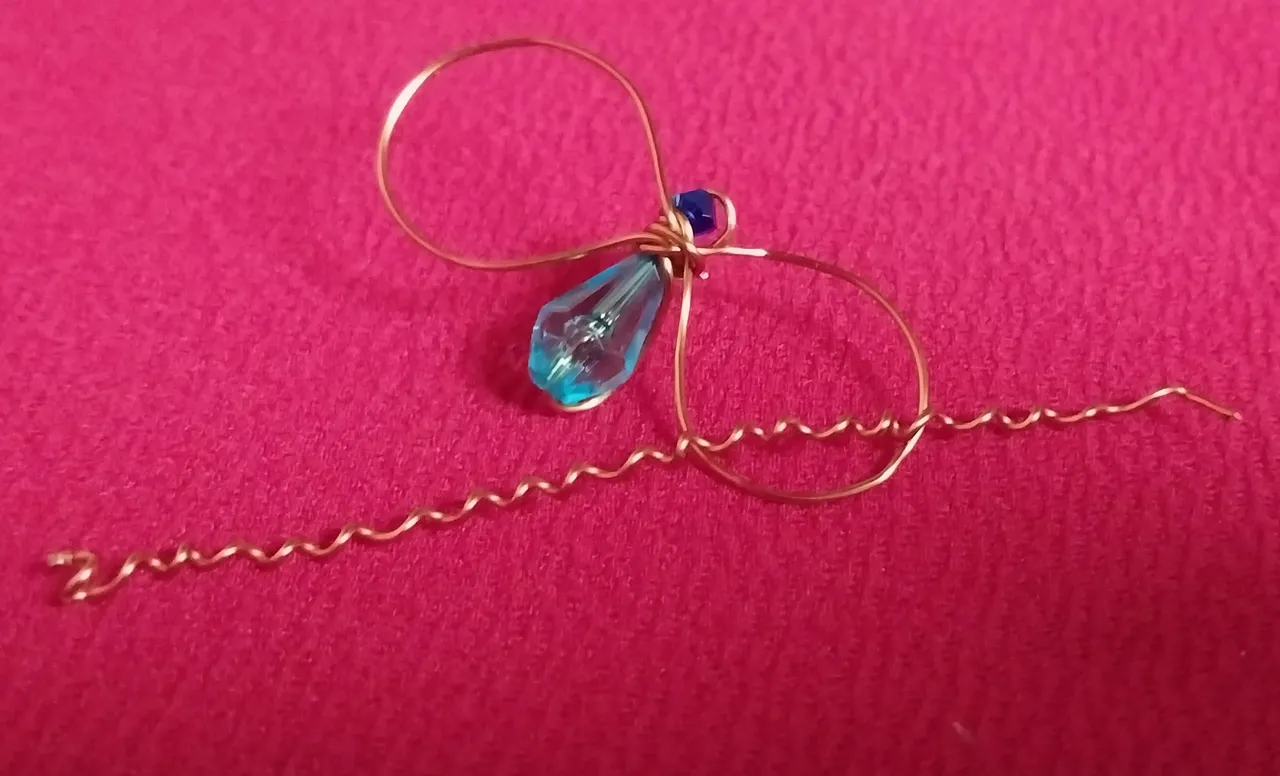
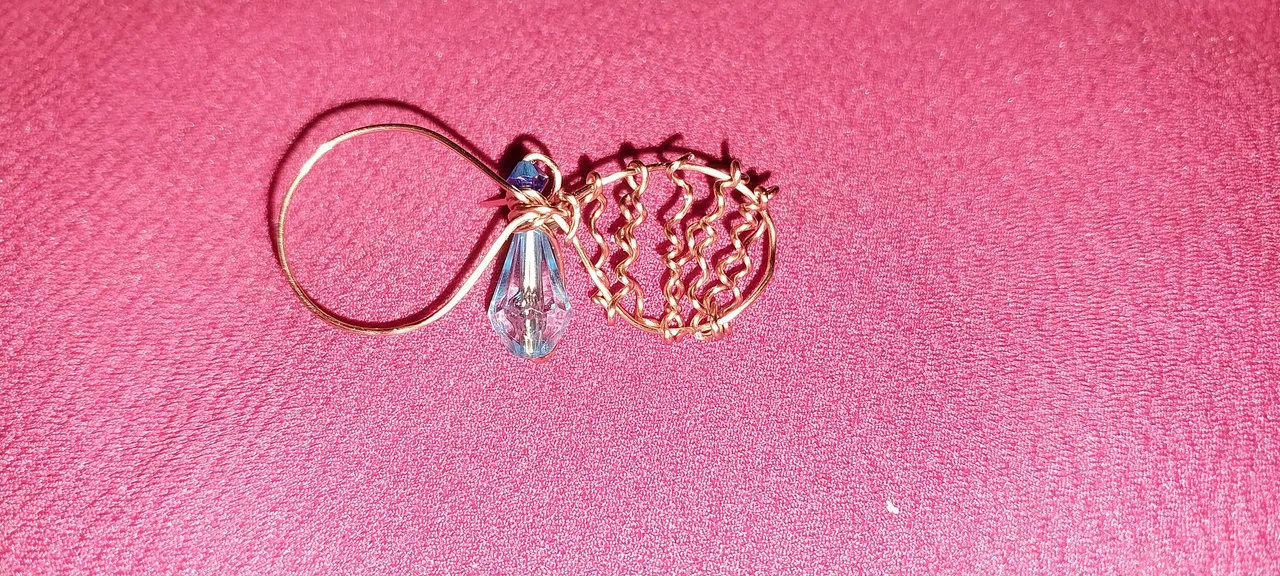
Luego se toma el marcador y alrededor de este se va a enrollar el alambre de cobre para formar la alas de nuestra abejita. como pueden apreciar en la imagen.
7
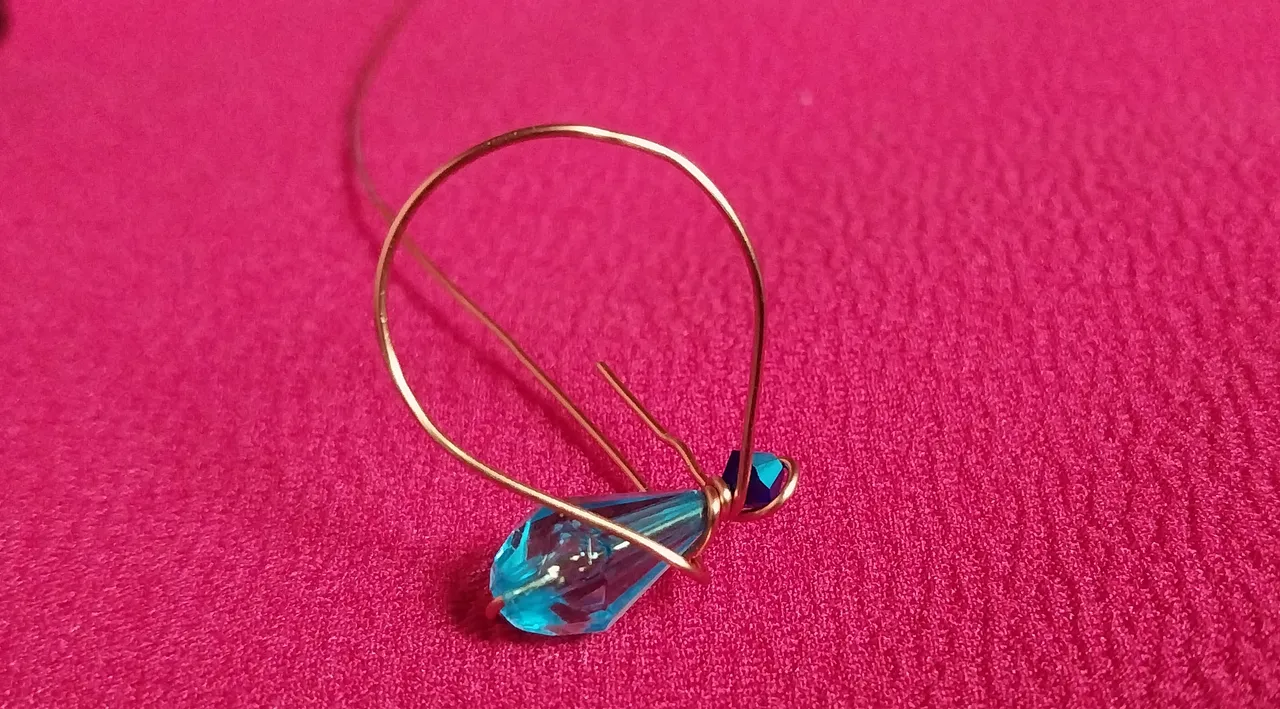
Luego se saca el marcador y el extremo del alambre se enrolla en la zona centrla entre las dos perlas.
8

Luego para formar la otra ala de lambre se utiliza el mismo procedimiento. Se enrolla el alambre en el marcador una unica vez y luego se saca el marcador.
De esta manera se van formando las alas de nuestra abeja!
9
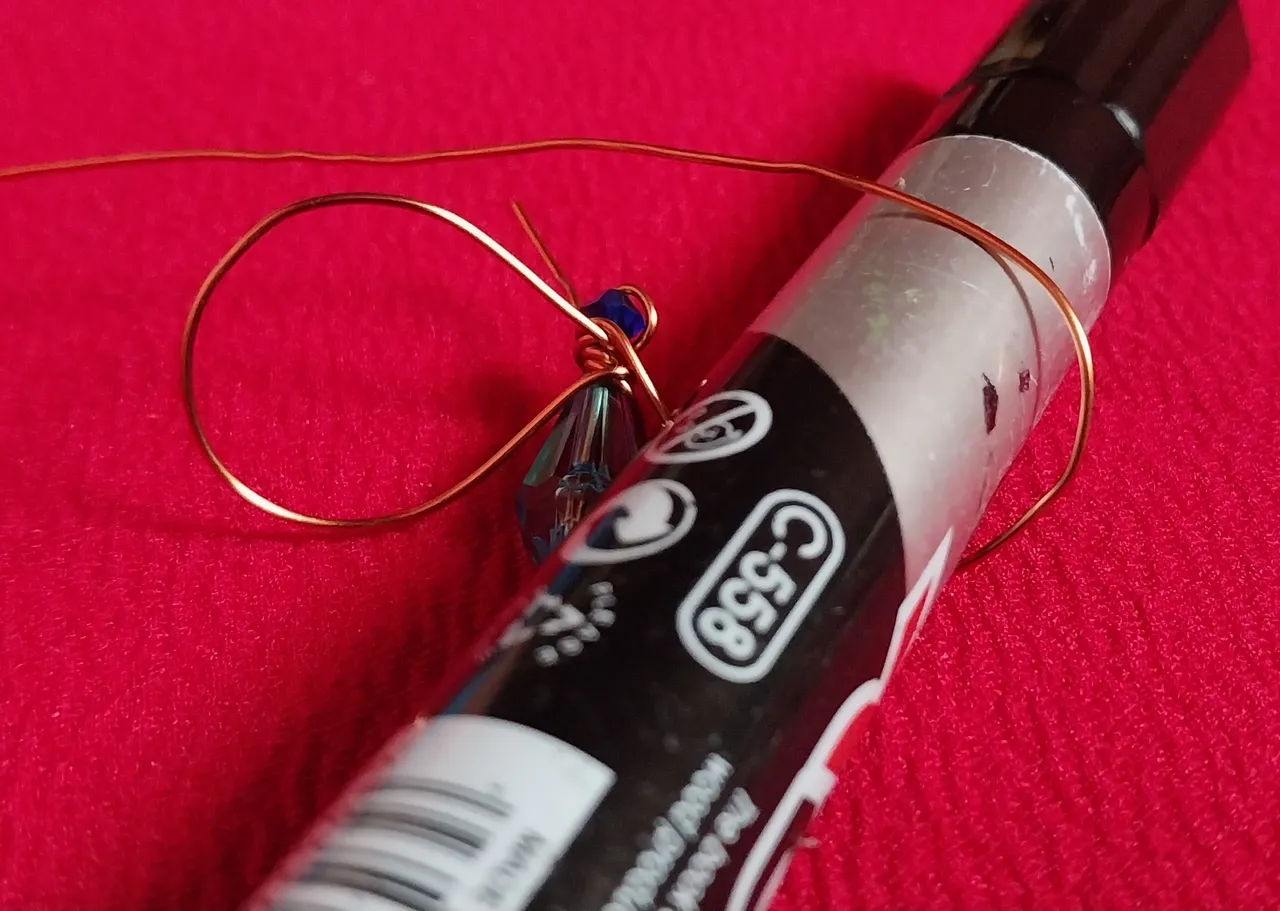
De esta manera quedaran formada las alas, solo se debe cortar el extremo del alambre de cobre.
10
Luego se debe enrollar uno de los alambres de cobre de forma de resorte alrededor de las alas de alambre.
11
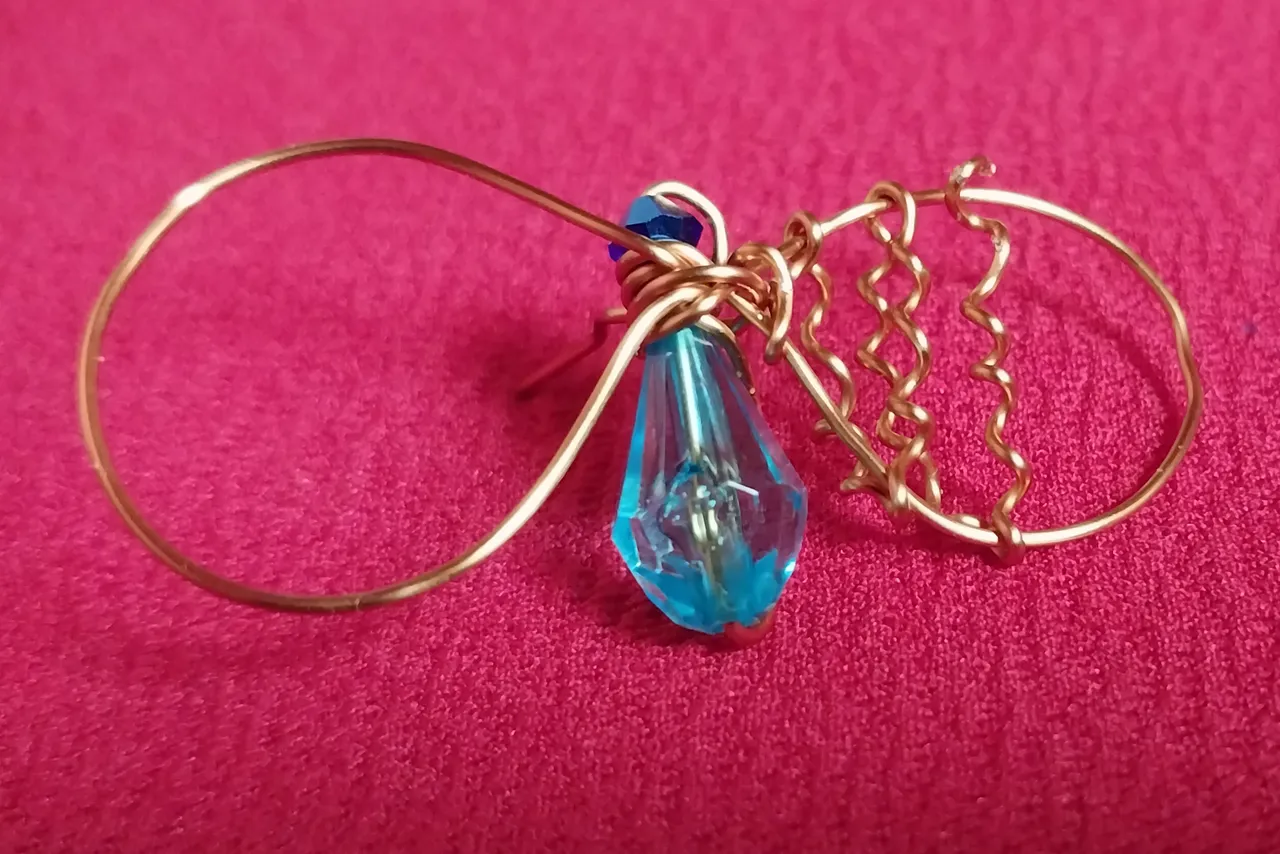
Esta es la forma en la que se debe colocar el alambre de cobre tipo resorte en las alas.
12
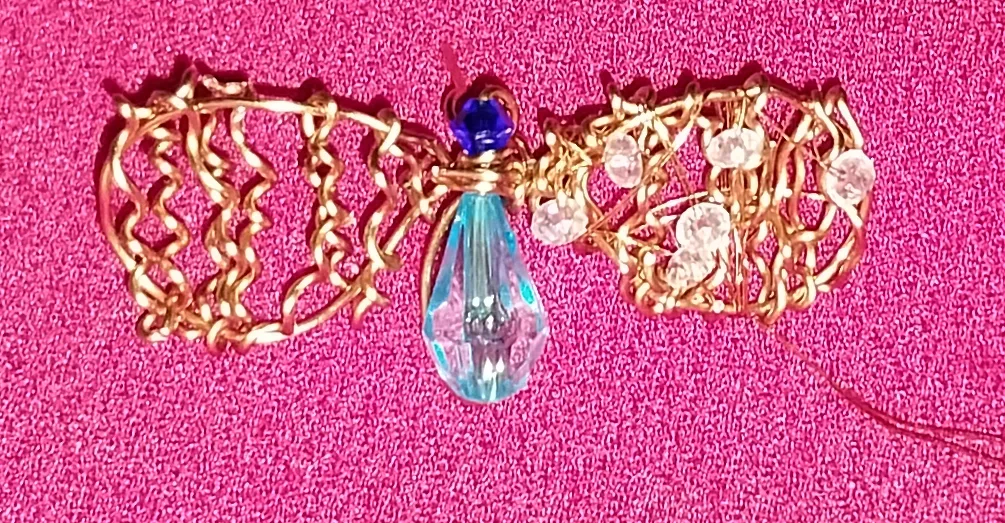
Al culminar de enrollar el alambre de cobre sobre las alas se procede a insertar los cristales con la ayuda del alambre fino. Es muy facil realizar este proceso con el alambre de cobre fino. En cada ala se va a insertar 6 cristales de color rosa.
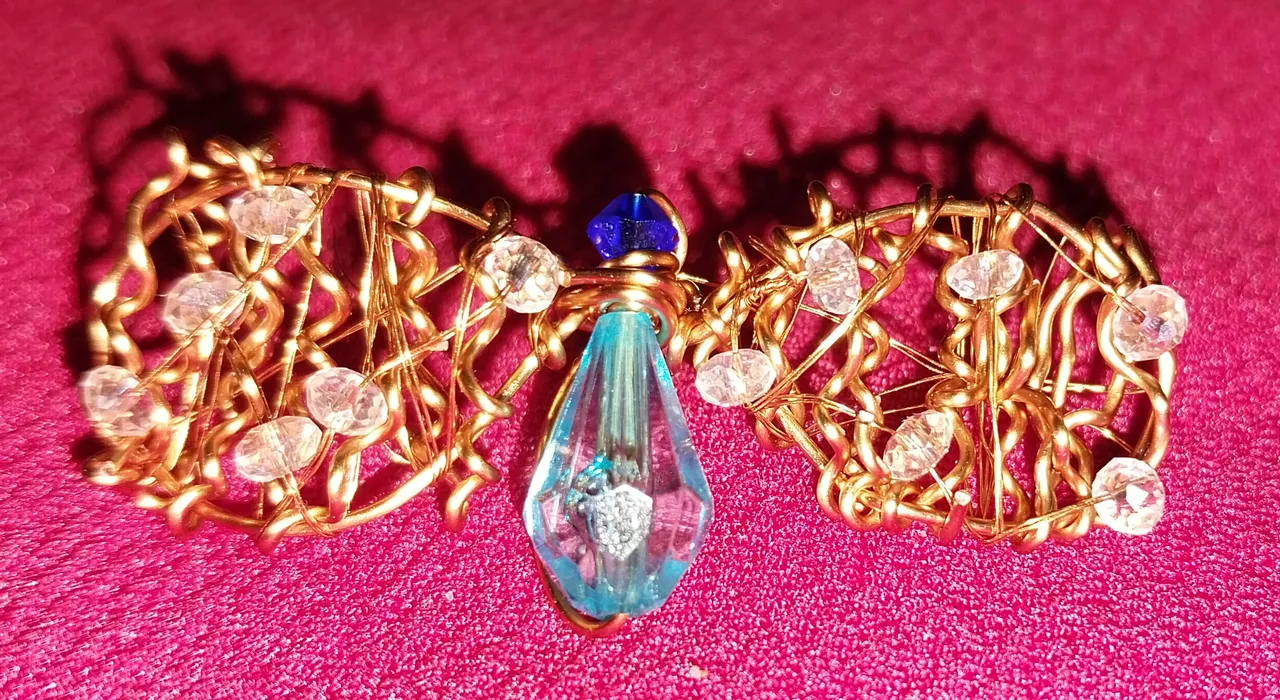
Esta es la forma en la que debe quedar el arete. Insertamos los cristales en la otra ala para culminar los aretes.

Saludos amigos! Espero que les guste la propuesta, Exitos y prosperidad para todos y que nuestra queridad comunidad de @Jewelry siga cumpliendo muchos años más.
Felicidades
Dear friends and followers of this Jewelry blog, I join the initiative in this path of learning, creativity and passion for jewelry in the first anniversary year of the Jewelry community.
To celebrate, today I want to introduce you to some bee earrings, a wonderful piece inspired by these hardworking and friendly buzzers that remind us of the beauty of flowers and the sweet taste of honey.
I hope it's not too late to join the contest, but wow, how fast the days go by and today is already the closing of the contest! The most important thing is to be able to share this creation and wish a happy Birthday to my spoiled community @Jewelry.
Step by Step
1
Insert the blue crystal into the copper wire, leaving a space of 4 cm from the end of the wire to the crystal.
2
Then bend the end of the copper wire.
3
Then take the end that has been bent down and direct the wire down the glass that has been inserted, as you can see in the picture.
4
Then you have to insert the crystal in the shape of a leaf, in particular I have chosen a light blue one, to combine it with the light blue crystal.
5
Once the copper wire comes out of the bead proceed to bend upwards the copper wire and then at the top end make two turns between the small crystal and the larger blue crystal.
6
Then take the marker and wrap the copper wire around it to form the wings of our little bee, as you can see in the image.
7
Then take out the marker and wind the end of the wire in the center area between the two beads.
8
Then the same procedure is used to form the other wing of the lambret. The wire is wrapped around the marker once and then the marker is removed.
In this way the wings of our bee are formed!
9
In this way the wings will be formed, just cut the end of the copper wire.
10
Then wrap one of the copper wires in a spring form around the wire wings.
11
This is the way the spring form copper wire should be placed on the wings.
12
When you have finished winding the copper wire on the wings, proceed to insert the crystals with the help of the fine wire. It is very easy to do this process with the fine copper wire. In each wing you are going to insert 6 pink crystals.
This is how the earring should look like. Insert the crystals in the other wing to finish the earrings.
Greetings friends! I hope you like the proposal, Success and prosperity to all and that our dear community of @Jewelry continues to meet many more years.
Congrats