(ENG)
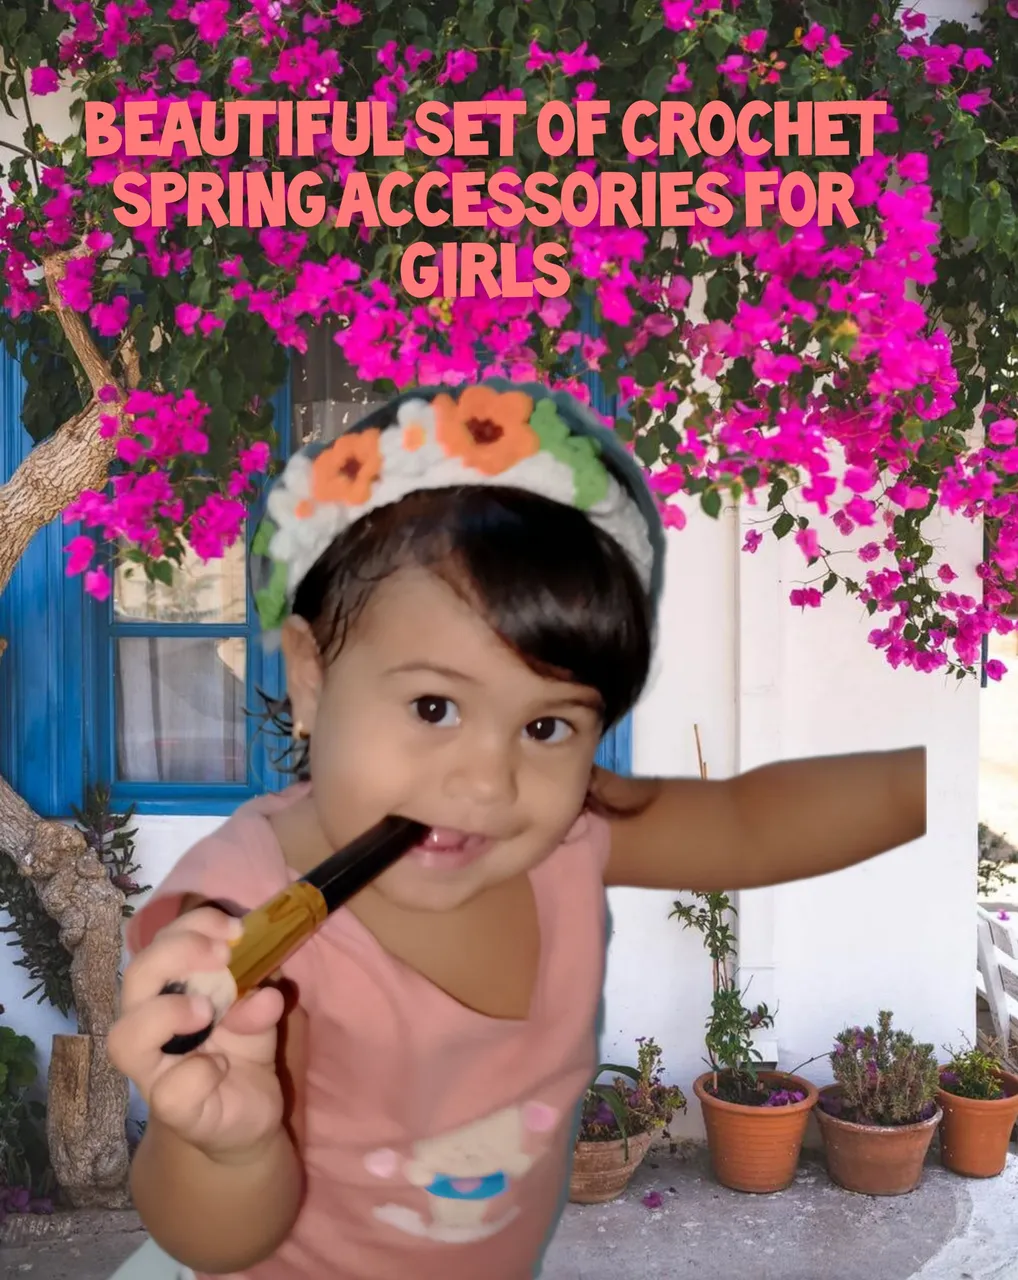
Hello everyone, I hope you are feeling very well, delighted with your participation in this new @jewelry contest, I am not joining you, and for this, I have created a beautiful Accessories Set, where I use the technique of crochet, it is very simple to do and the result is incredible. Just using the basic points of the technique. Before starting to explain the steps I want to extend the invitation to: @lupasbra21, @pacienciia and @arolita, many blessings for all. Without further ado, I'll show you the process of making this tender being of accessories.
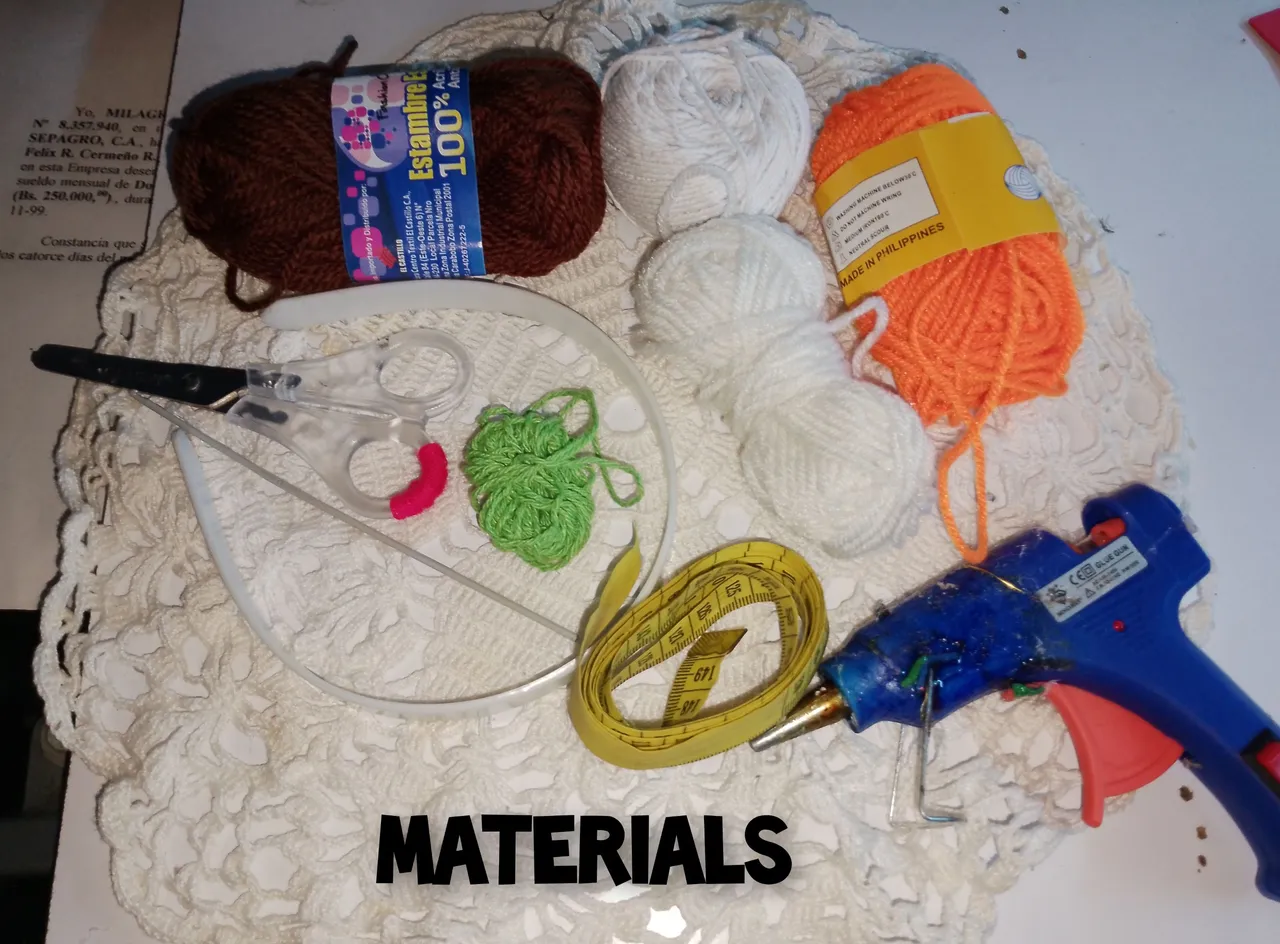
Materials:
. Yarn for knitting, colors (green and white)
. Worsted yarn for knitting, colors (orange, brown, white).
. Knitting needle.
. Measuring tape. Plastic headband. . Hot silicone.
. Scissors.
Steps:
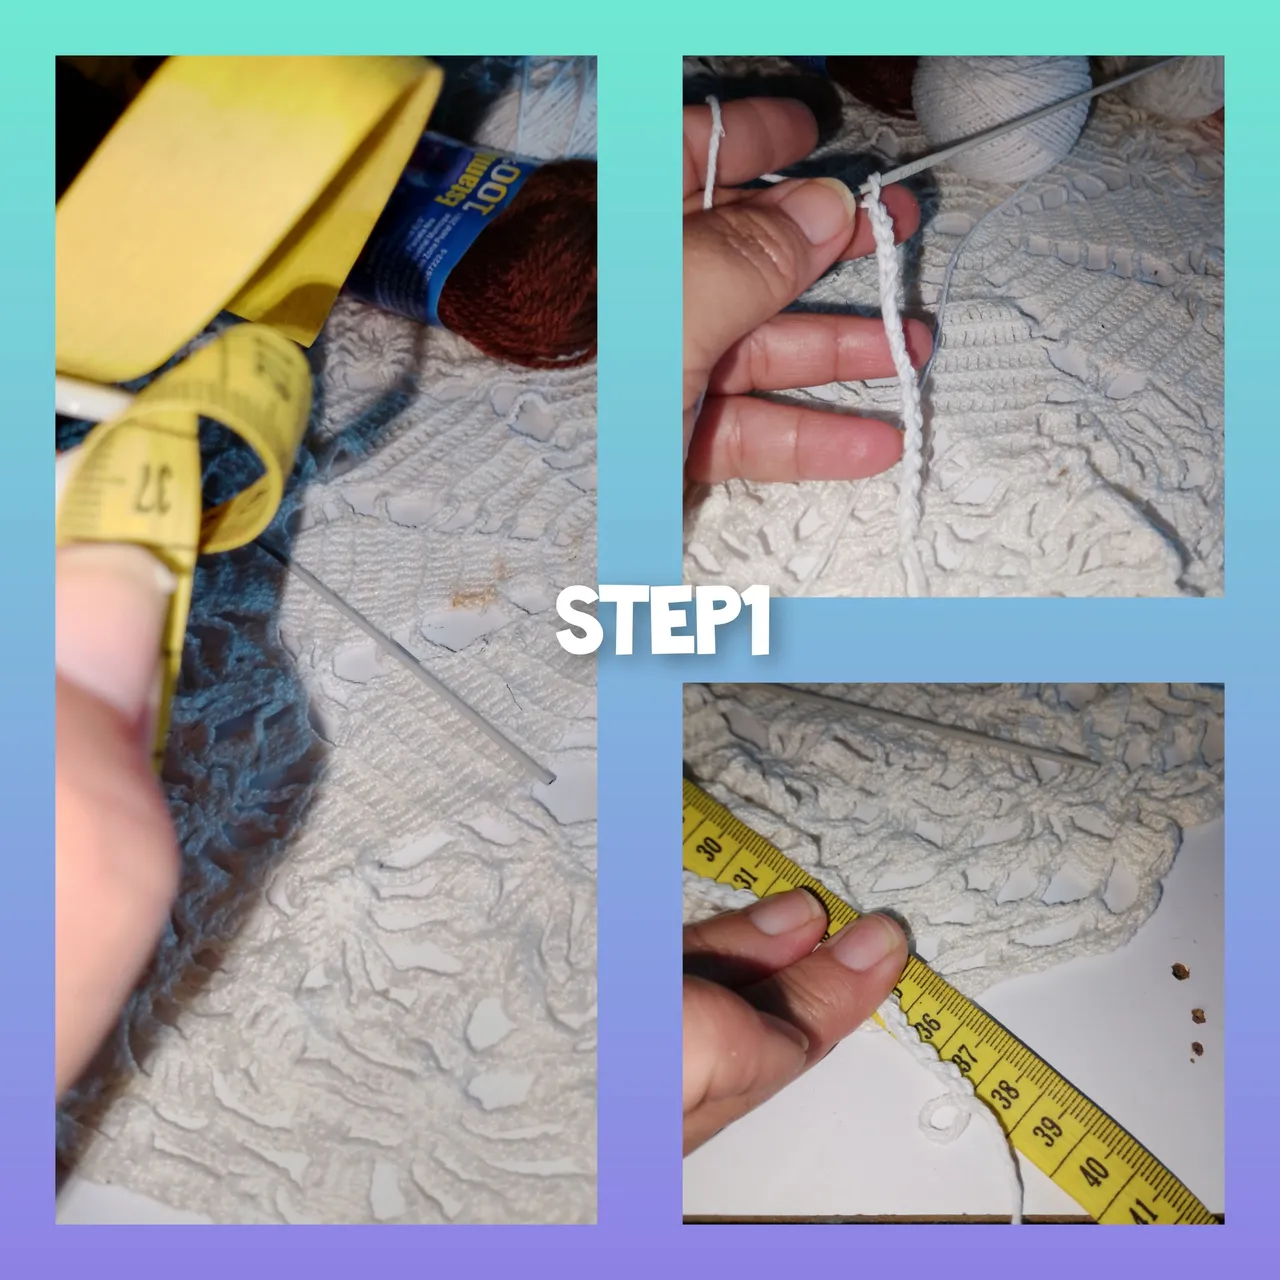
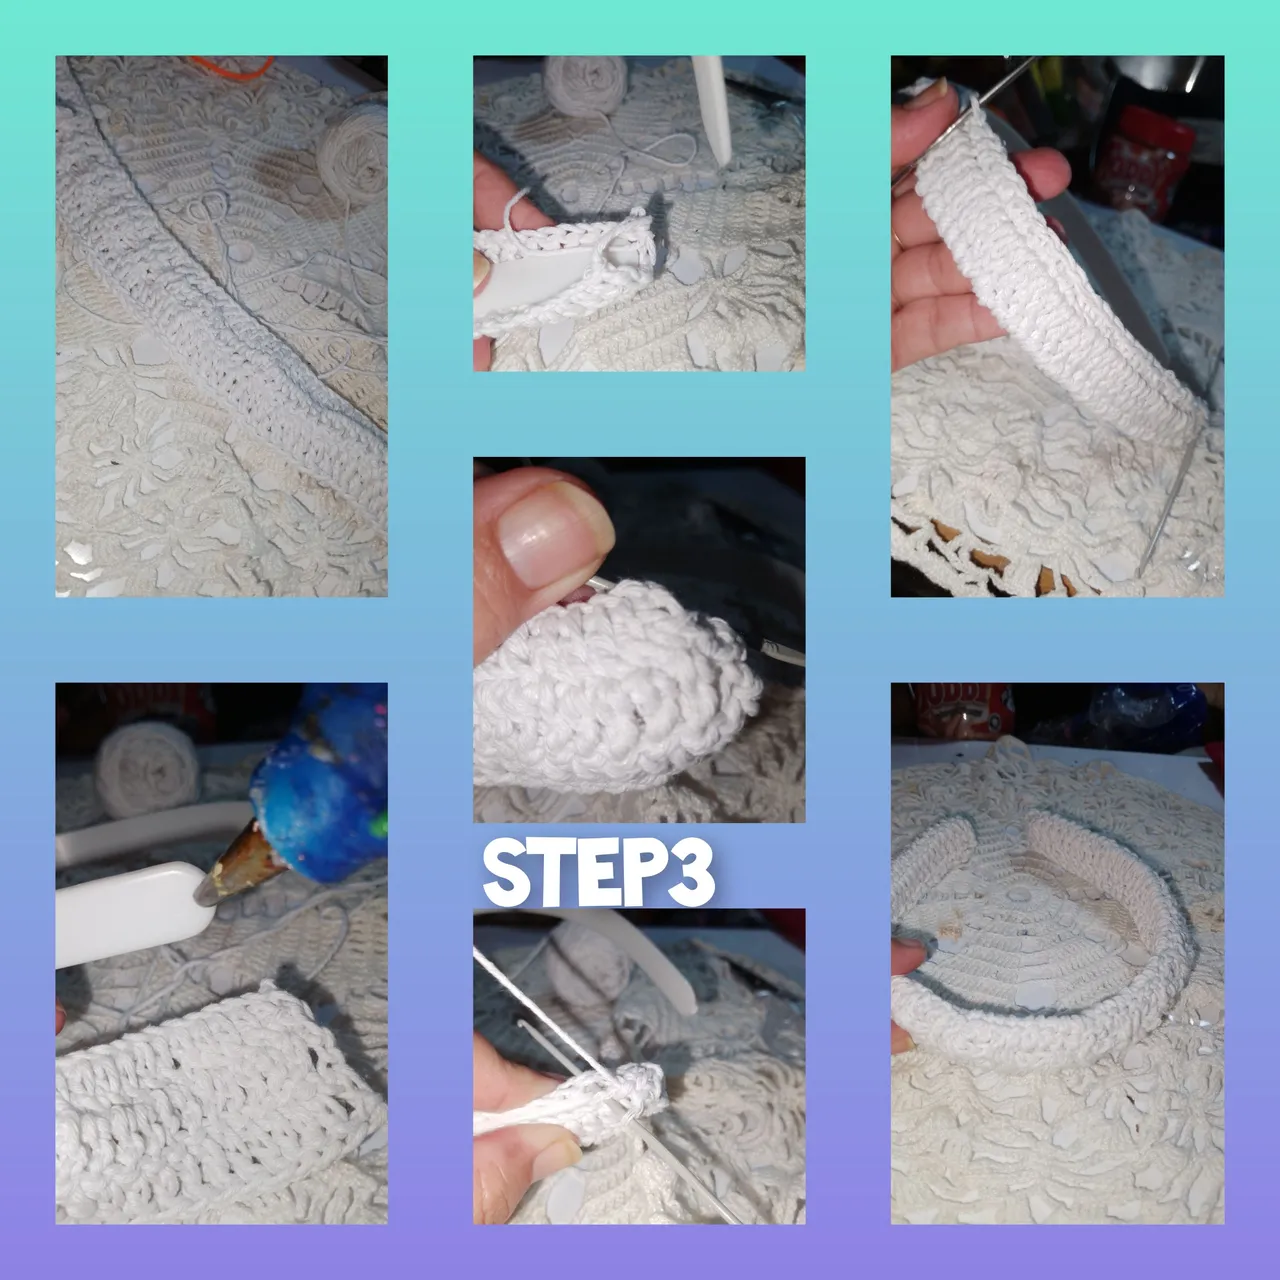
1.) After measuring the length of the plastic headband, with the tape measure, I begin by lifting 37cm in chain stitches.
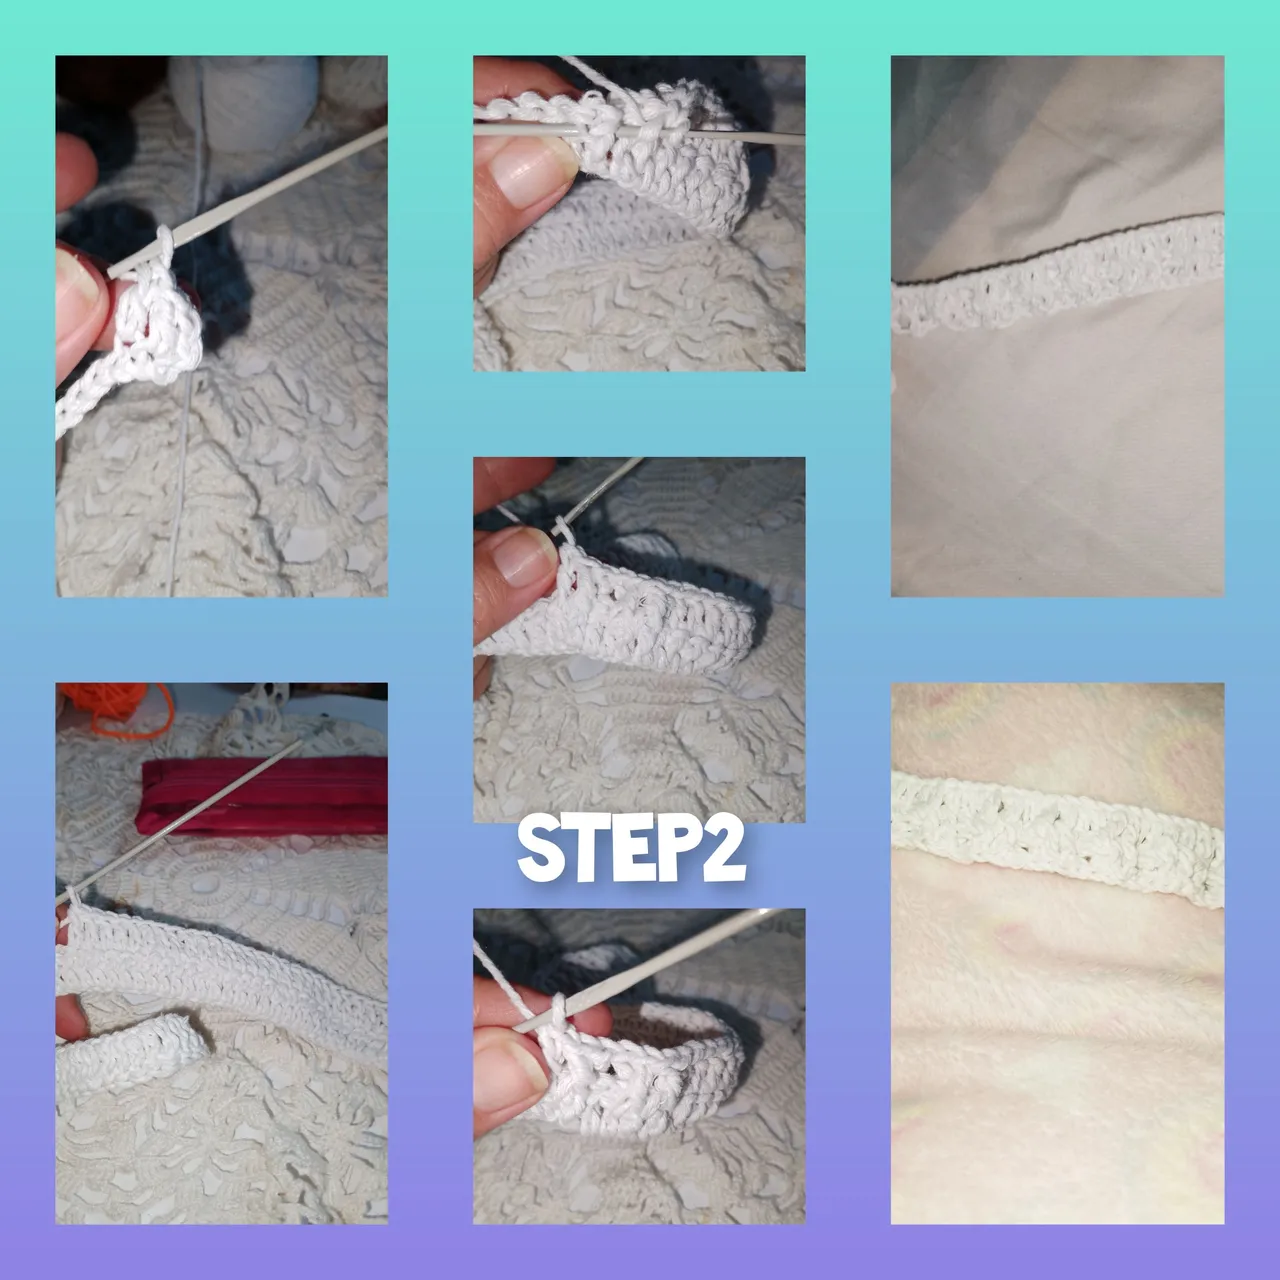
2.) I lift three chain stitches equivalent to a double crochet, and I begin in the next chain to lift a double crochet, until I complete the entire route. Once the route is ready, I return, with three chain stitches and repeat, knitting a double crochet in each double crochet, from the previous pass. After a little more than half of the double crochets, I begin to knit, double crochets, but taking a slightly degraded effect and completing the route, with two double crochets on the inside and two on the outside. The next pass will be just double crochets, I finish off and cut the thread.
3.) The next thing to do will be to cover the plastic headband. To start, I place a silicone stitch on one of the ends and stick the woven tape, continuing, weaving each point of the woven tape, with slipped stitches, like this. , I completely cover the headband.
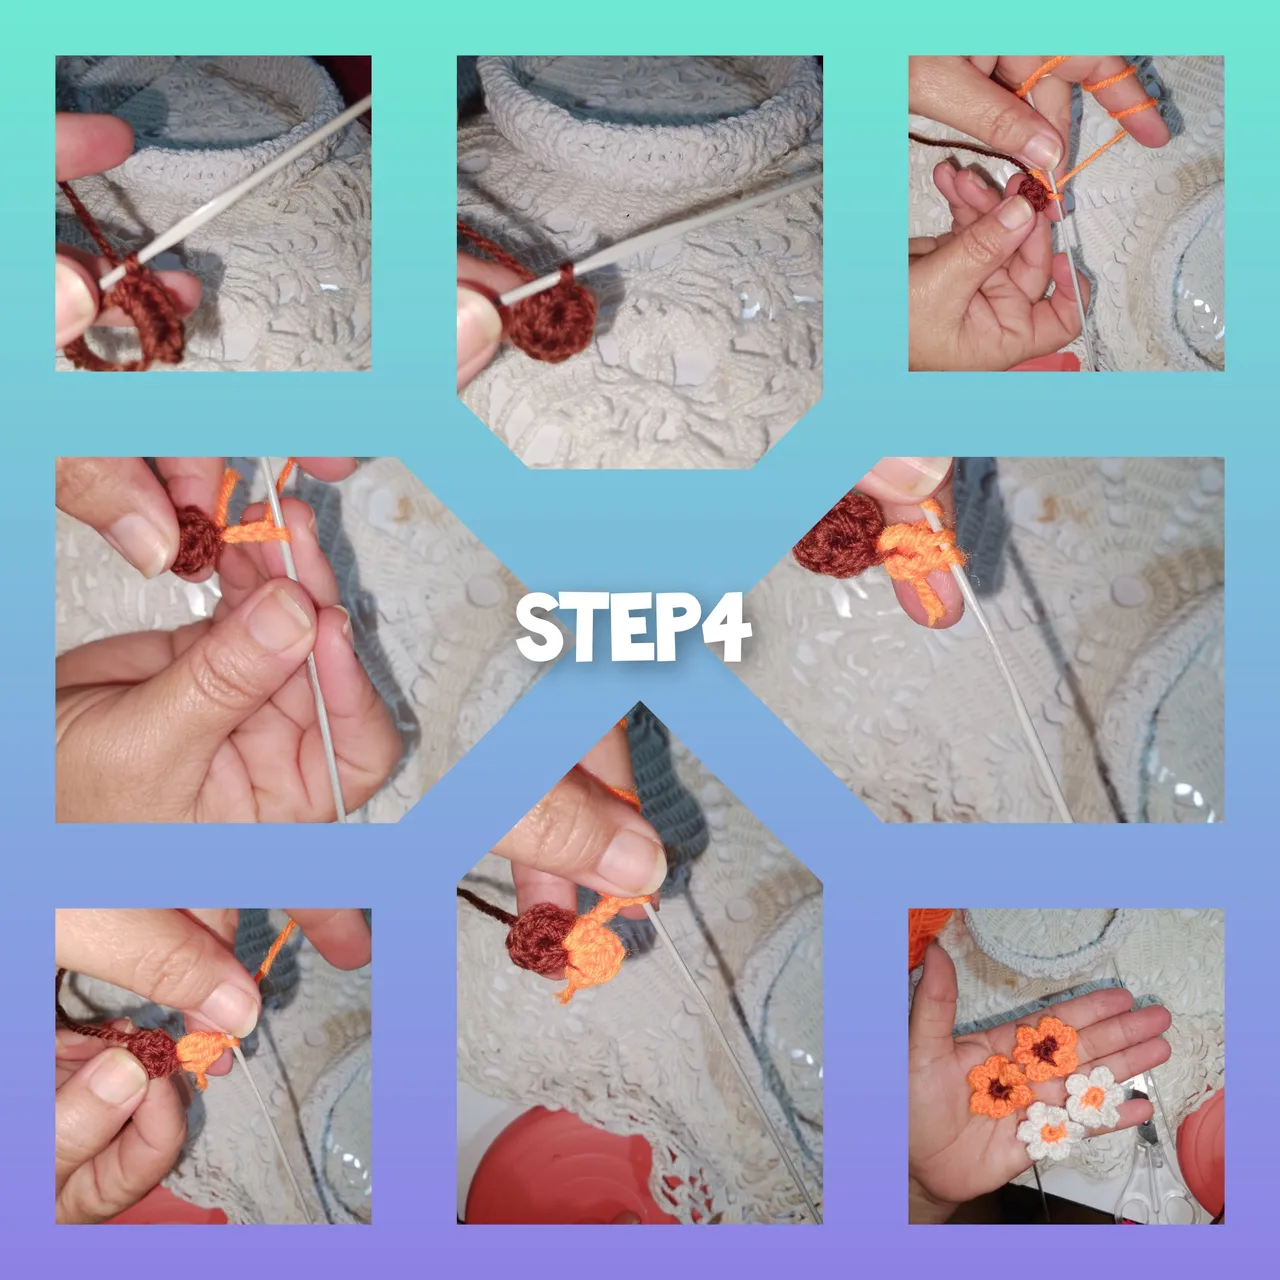
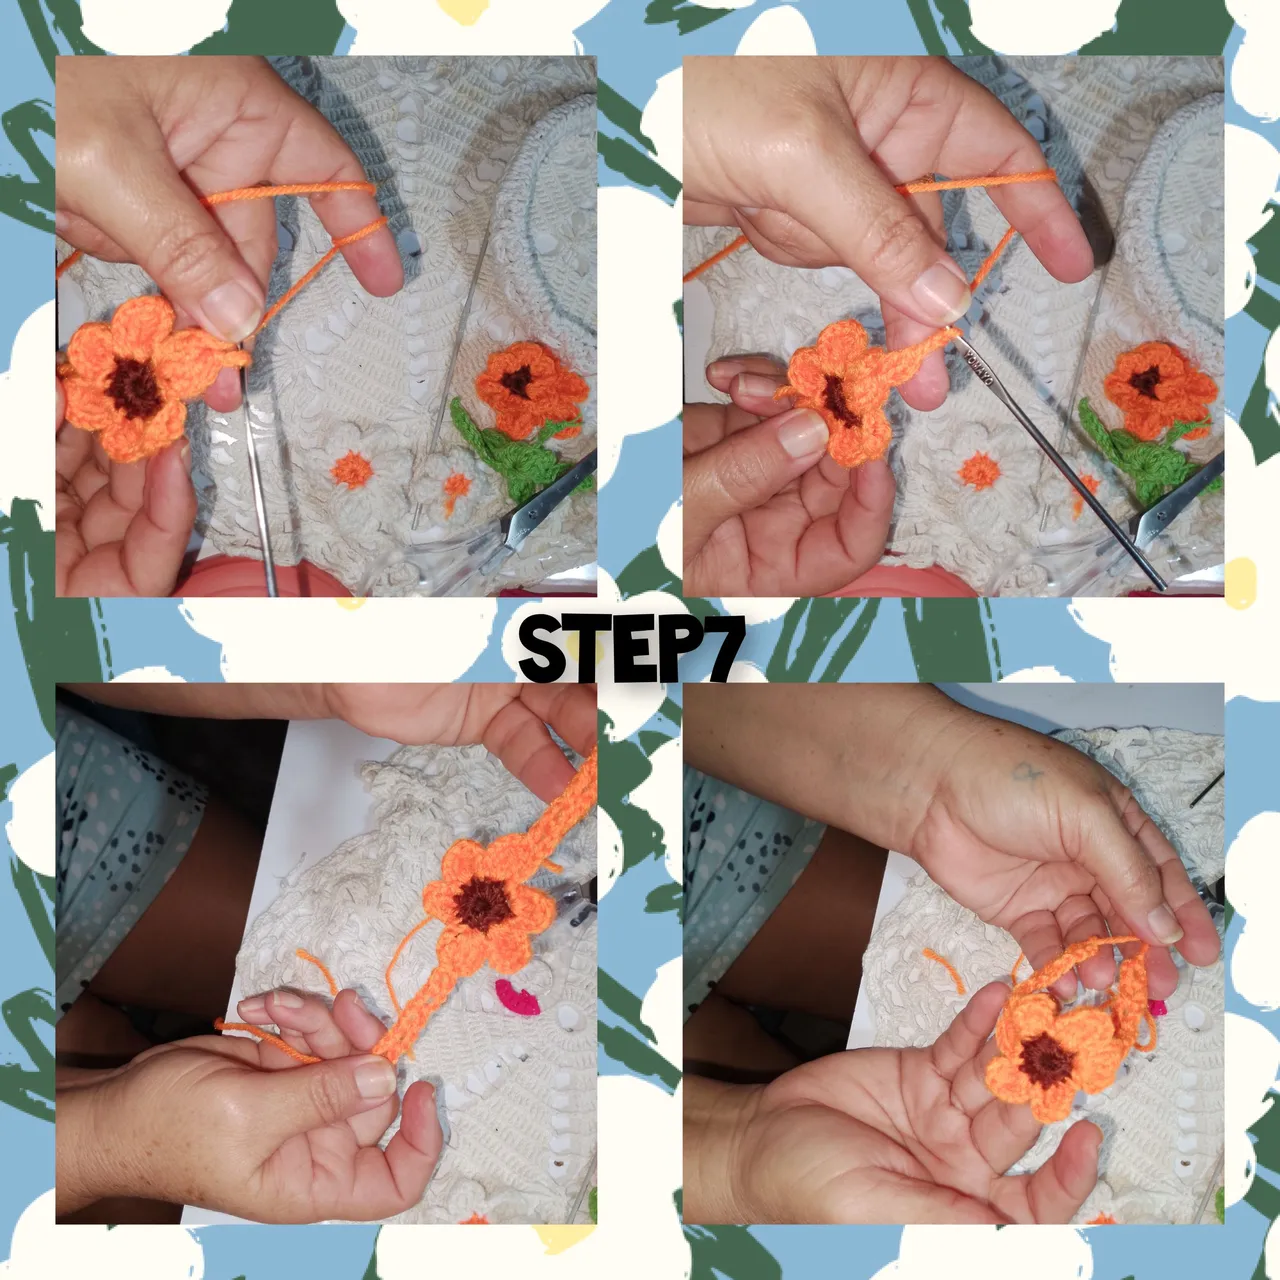
4.) In a magic ring, with the yarn, brown, I knit six half stitches, I close the magic ring and change the color of the thread, I will use the orange one, I raise three chain stitches, I take yarn and go down to it. starting place, I take out thread and repeat two more times, to close together and make a small petal, then I knit three chain stitches and go down to knit slip stitch. I repeat five more times until I go around the small circle, resulting in a very pretty and delicate flower. In this way I repeat, alternating the colors, and knit four of the same size but different colors.
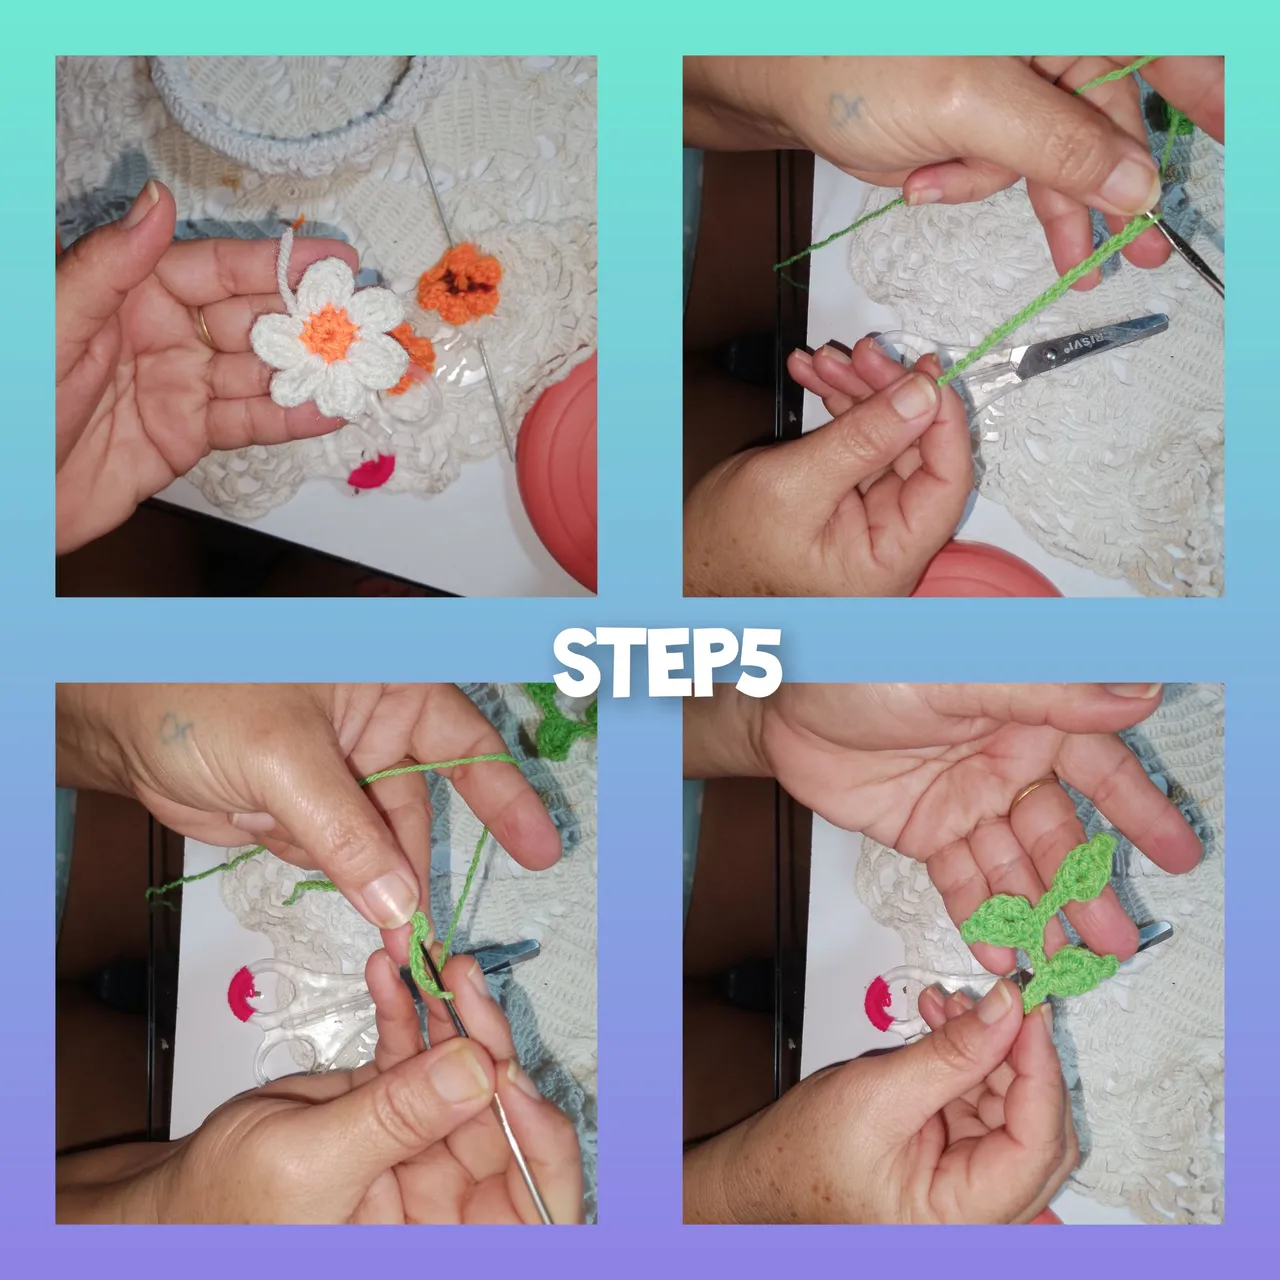
5.) On this occasion, I will knit two flowers, but larger than the previous ones, knitting six double half stitches, in the magic ring, and knitting four triple stitches, closed together. I also knit two sprigs of leaves with the green wick thread.
6.) I decorate the headband, I start by gluing the largest flower, and then the small ones, one followed by the other, and the largest.He applied a little more silicone and glued a crocheted twig on each side. 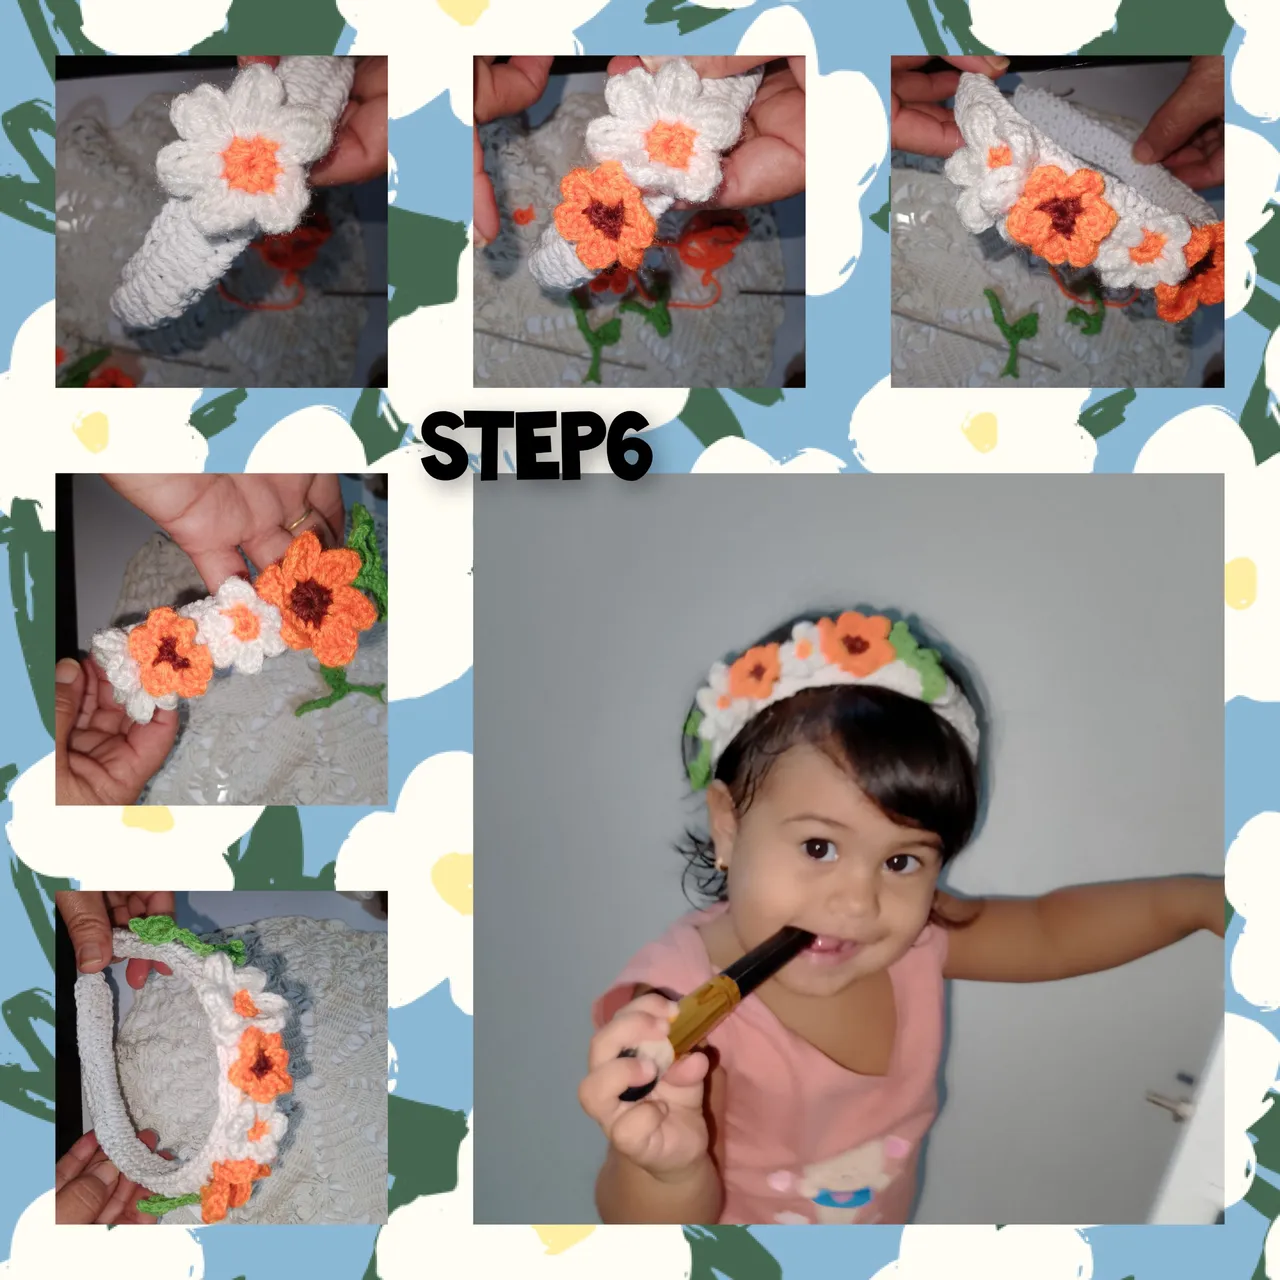
- for the bracelet, I knit following the same process of making the largest flower, I place myself on one of the petals, and I knit two double crochets, I turn and repeat four more times, when I finish, I leave a strand of thread considerable. I repeat on the next side and thus, I finish making the bracelet.
And finally, I'm done, satisfied with the final result. I hope you liked it.
. All photos are my property, taken with my smartphone. .
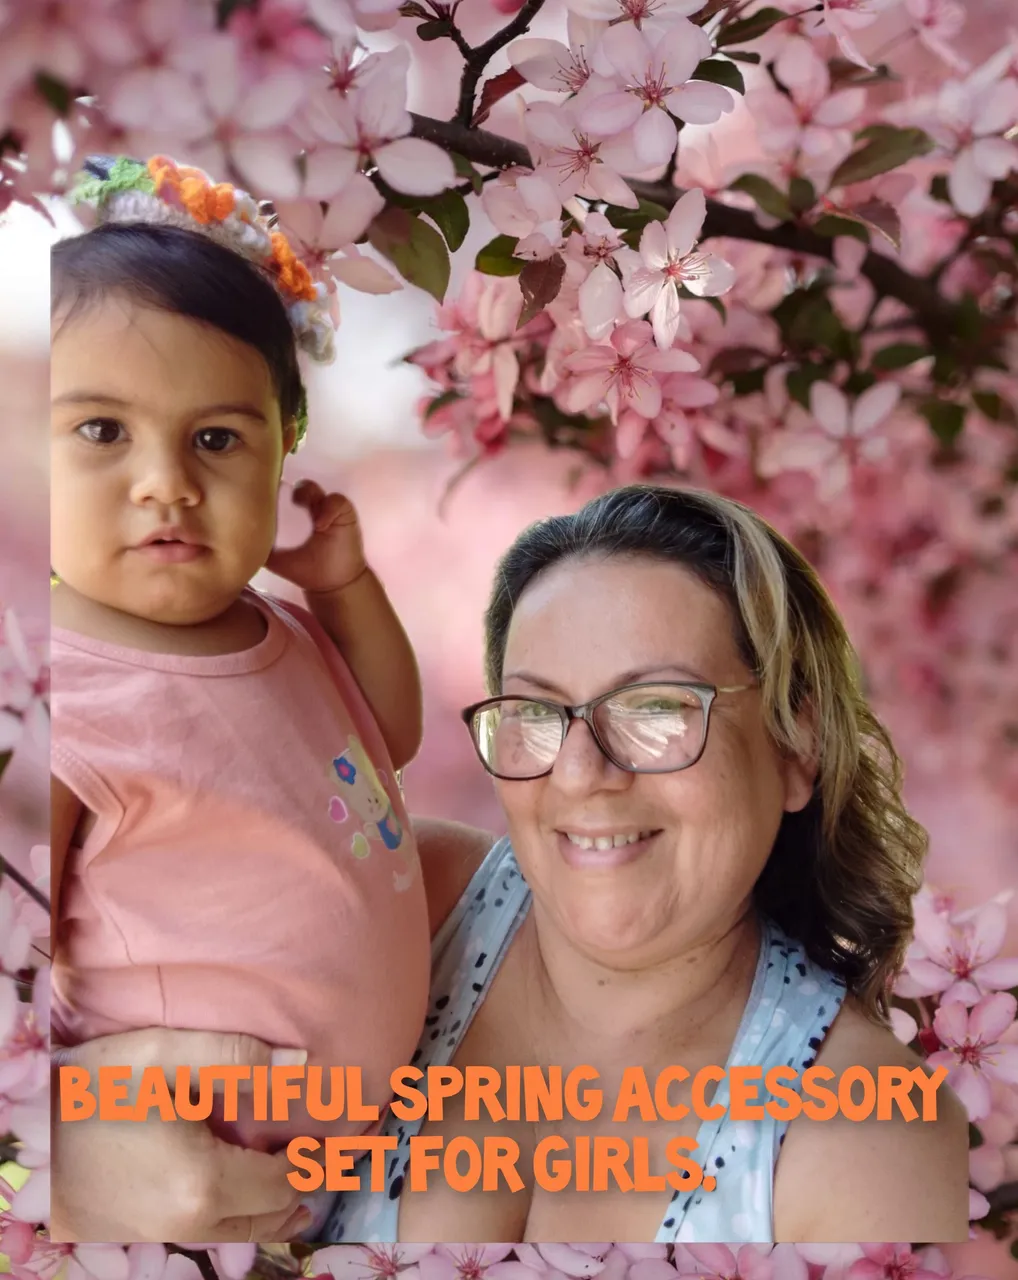
Use incollage to show the steps and one of your spring templates to see the cover look in tune. . Use language translator. Grateful for your visit to my blog, it is always a pleasure to see you here. Until an early opportunity.
(ESP)
Hola a todos, deseo se encuentren muy bien, encantada con, la participación de ustedes en este, nuevo concurso de @jewelry, no me uno a ustedes, y para ello, he creado un hermoso, Set de Accesorios, dónde use la técnica de crochet, es muy sencillo de hacer y su resultado, es increíble. Solo usando los puntos básicos de la técnica. Antes de comenzar a explicar los pasos quiero hacer extensiva la invitación a: @lupasbra21, @pacienciia y @arolita, muchas bendiciones para todos.
Sin más les muestro, el proceso de elaboración de este tierno ser de accesorios.
Materiales:
. Hilo para tejer, colores ( verde y blanco)
. Hilo estambre para tejer, colores ( anaranjado, marrón, blanco).
. Aguja par tejer.
. Cinta métrica. Cintillo plástico.
. Silicón caliente.
. Tijeras.
Pasos:
1.) luego de medir, el largo de el cintillo plástico,.con la cinta métrica, comienzo levantando 37cm en puntos cadenas.
2.) levanto, tres puntos cadenas equivalentes a un punto alto, y comienzo en la siguiente cadena , a levantar un puntos altos, hasta completar, todo el recorrido. Listo el recorrido, me devuelvo, con tres puntos cadenas y repito tejiendo un punto alto en cada punto alto, de la pasada anterior. Pasado un poco más de la mitad en puntos altos, comienzo a tejer, puntos altos, pero tomando un efecto par degradar y completo el recorrido, con dos puntos altos por dentro y dos por fuera. La siguiente pasada, serán solo puntos altos, remato y corto el hilo.
3.) lo siguiente en hacer, será forrar el cintillo plástico, coloco para iniciar, una puntada de silicón en uno de los extremos y pego la cinta tejida, continuo, tejiendo cada punto de la cinta tejida, con puntos deslizados, de esta manera, cubro completamente el cintillo.
4.) En un anillo mágico,con el estambre, de color marrón,tejo seis medios puntos, cierro el anillo mágico y cambio el color de el hilo, usaré el de color naranja, levanto tres puntos cadenas, tomo lazada y bajo a el lugar de inicio, saco hilo y repito dos veces más, para cerrar juntos y hacer un pequeño pétalo, luego tejo tres puntos cadenas y bajo para tejer punto deslizado. Repito cinco veces más hasta, recorrer el pequeño círculo, dando como resultado una muy bonita y delicada flor. De est manera repito alternando los colores, y tejo cuatro de mismo tamaño pero diferentes colores.
5.) En esta oportunidad, tejere dos flores, pero de mayor tamaño que las anteriores, tejiendo seis medios puntos dobles, en el anillo mágico, y tejiendo cuatro puntos triples, cerrados juntos. Tejo además con el hilo pabilo de color verde, dos ramitos de hojas.
6.) Decoro el cintillo, comienzo pegando, la flor de mayor tamaño, y luego las pequeñas, una seguida de la otra, y la más grande. Aplicó un poco más de silicón y pego en cada lado un ramito tejido a crochet.
- para la pulsera, tejo siguiendo el mismo proceso de elaboración de la flor de mayor tamaño, me ubico en uno de los pétalos, y tejo dos puntos altos, doy vuelta y repito cuatro veces más, al terminar, dejo una hebra de hilo considerable. Repito en el siguiente lado y así, termino la elaboración de la pulsera.
Y finalmente, he terminado, satisfecha con el resultado final. Espero les haya gustado.
. Todas las fotos son de mí propiedad, tomadas con mí teléfono inteligente.
. Use incollage, para mostrar los pasos y uno de sus plantillas de primavera, para ver lucir a tono, la portada.
. Use traductor lenguaje.
Agradecida por su visita a mí blog, siempre es un gusto, verlos por acá. Hasta un pronta oportunidad.