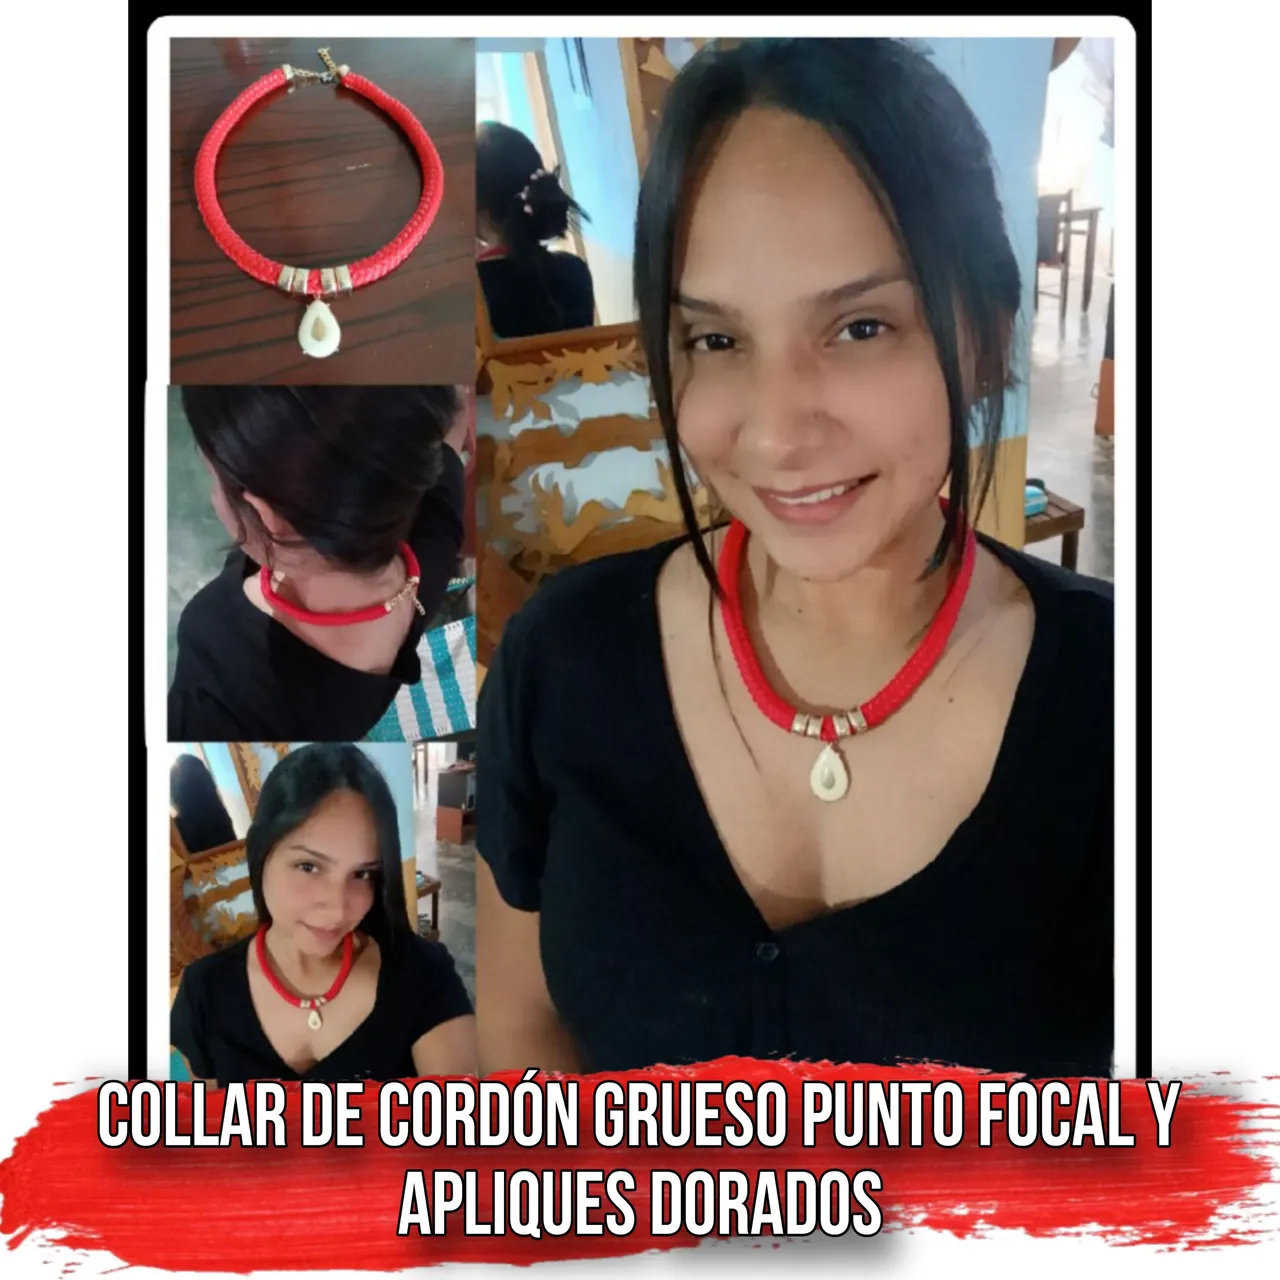
Hola, hola qué tal amigos joyeros, artesanos y ofebreros amantes de los accesorios ornamentales, les saluda su amiga @kathelopez77, Es un gusto de estar de nuevo por acá con todos ustedes en esta creativa comunidad de #Jewery; Hoy les traigo un tutorial bastante fácil de realizar pero con un hermoso resultado; se trata de la fábricación de un collar de cordón grueso punto focal y apliques dorados, éste tipo de collar, de cordón único grueso te ofrece un estilo único y elegante, capaz de transformar un atuendo casual en uno más formal, o simplemente aportar estilo a cualquier atuendo. Ahora si, aquí te muestro el paso a paso.
Hello, hello how are you friends jewelers, artisans and ofebreros lovers of ornamental accessories, greetings your friend @kathelopez77, It's a pleasure to be back here with all of you in this creative community of #Jewery; Today I bring you a fairly easy tutorial to perform but with a beautiful result; This is the making of a thick cord necklace focal point and gold appliques, this type of necklace, single thick cord offers a unique and elegant style, able to transform a casual outfit into a more formal one, or simply bring style to any outfit. Now, here is the step by step.


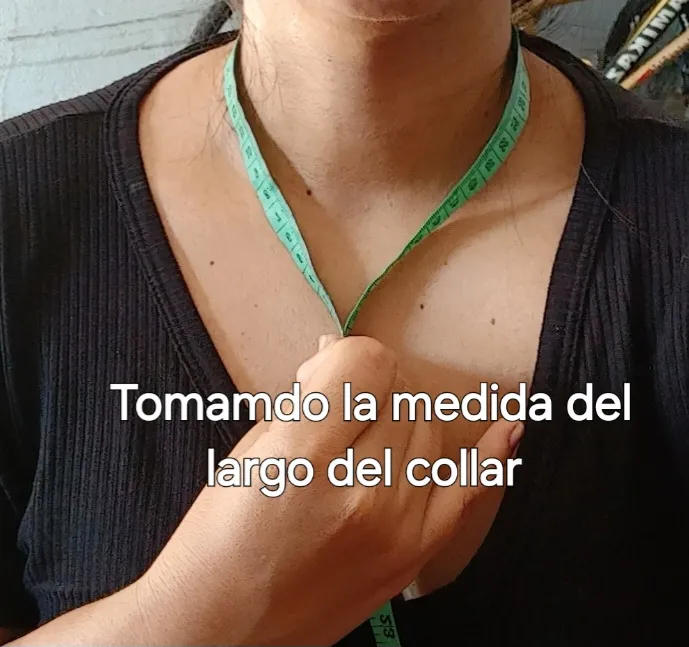
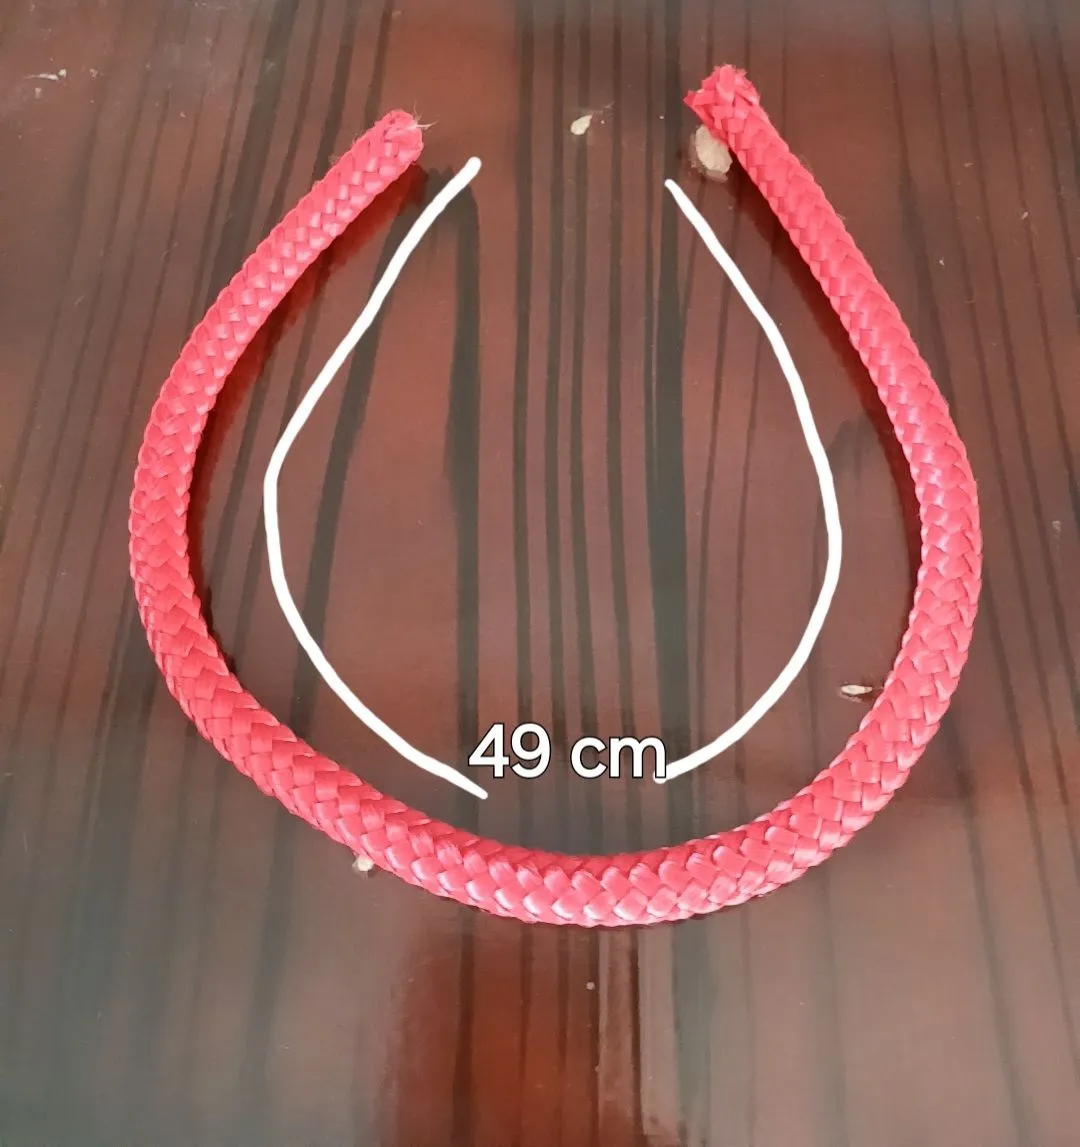
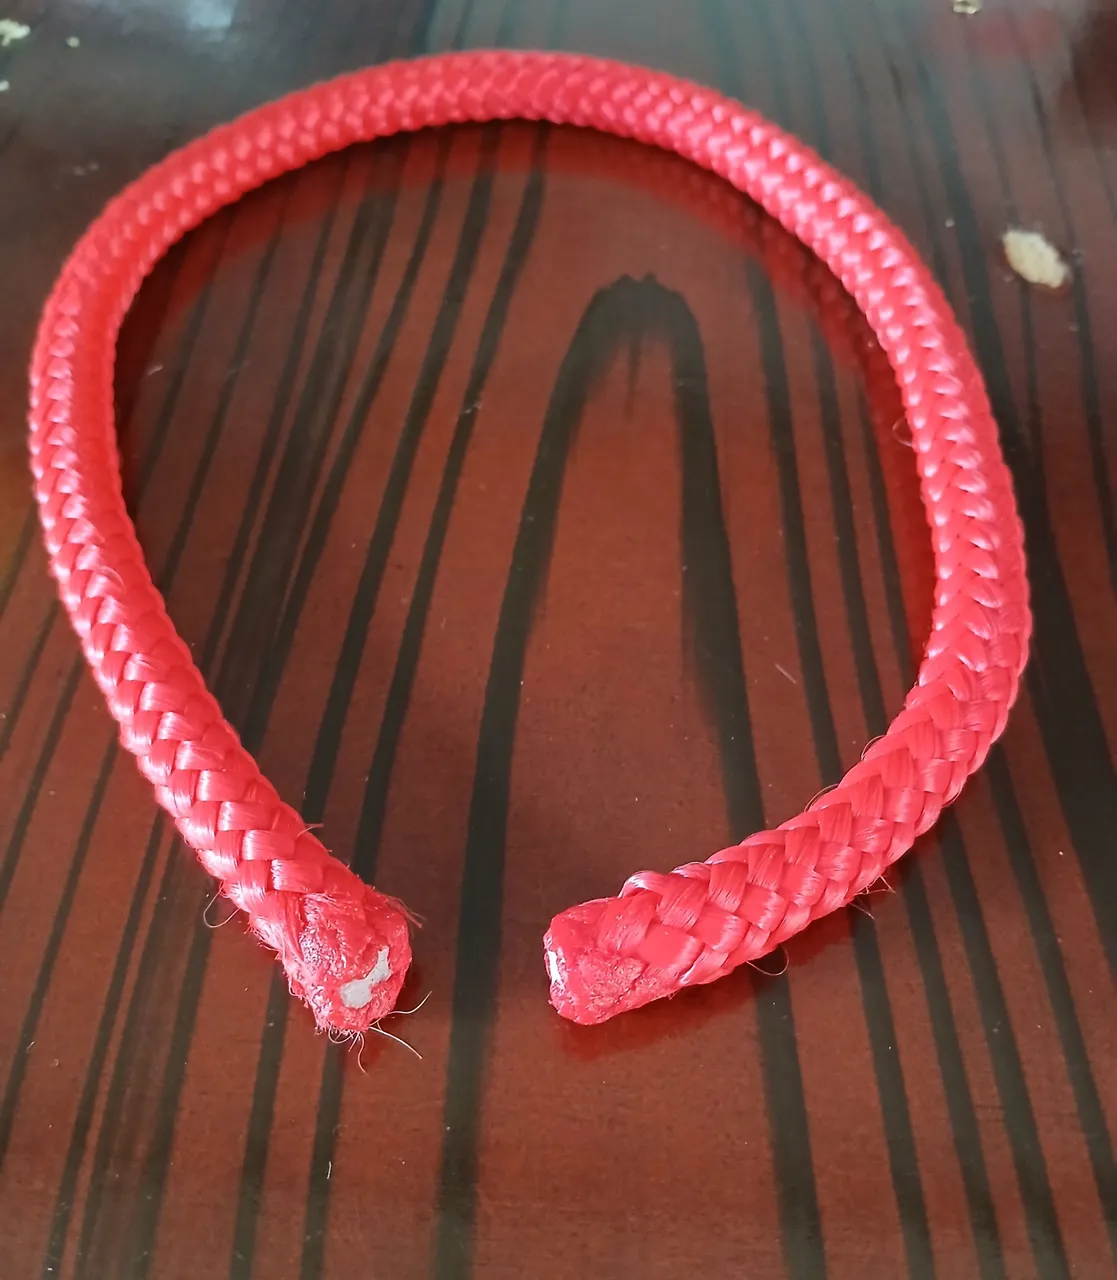
Para comenzar con la fabricación de éste collar, lo primero que hice fue tomar la medida del largo deseado, en éste caso, el cordón midió 49 cm.
To start making this necklace, the first thing I did was to measure the desired length, in this case, the cord measured 49 cm.
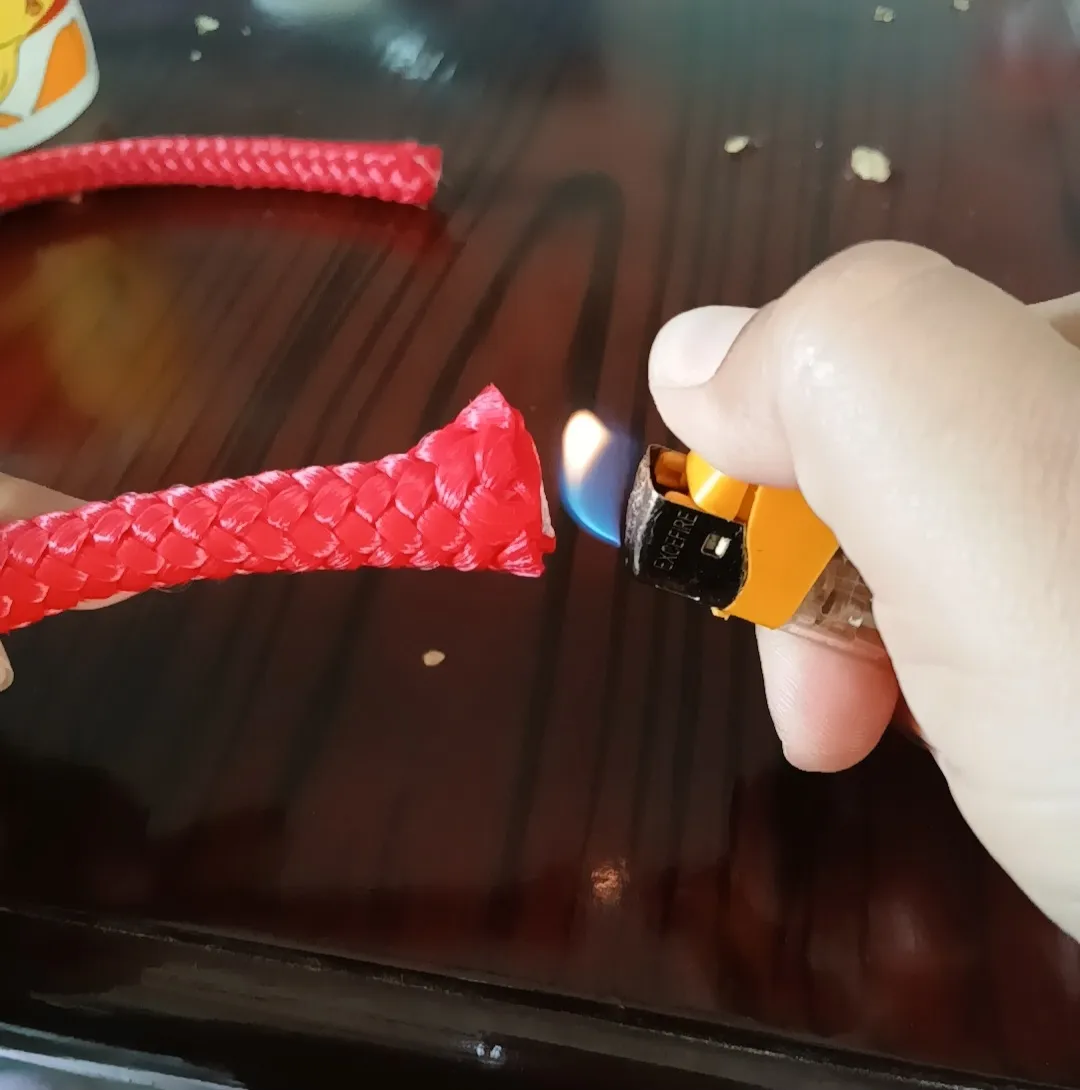
Después de obtener la medida total del collar procedí a quemar con un encendedor sus puntas para que no se suelte el tejido del cordón.
After obtaining the total measurement of the necklace, I proceeded to burn its ends with a lighter so that the weave of the cord would not come loose.
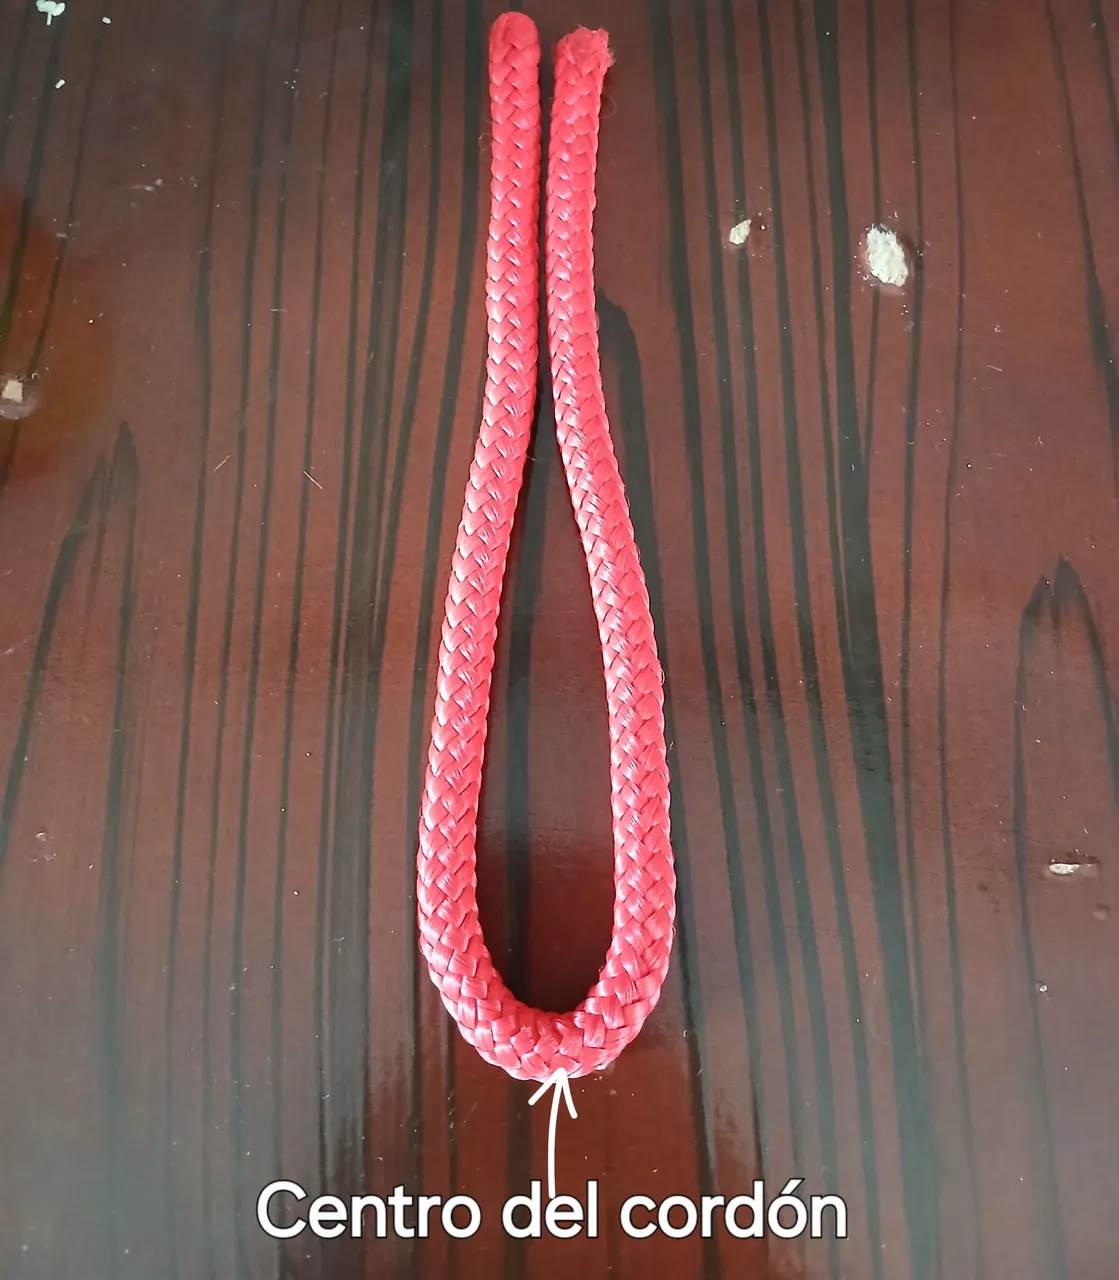
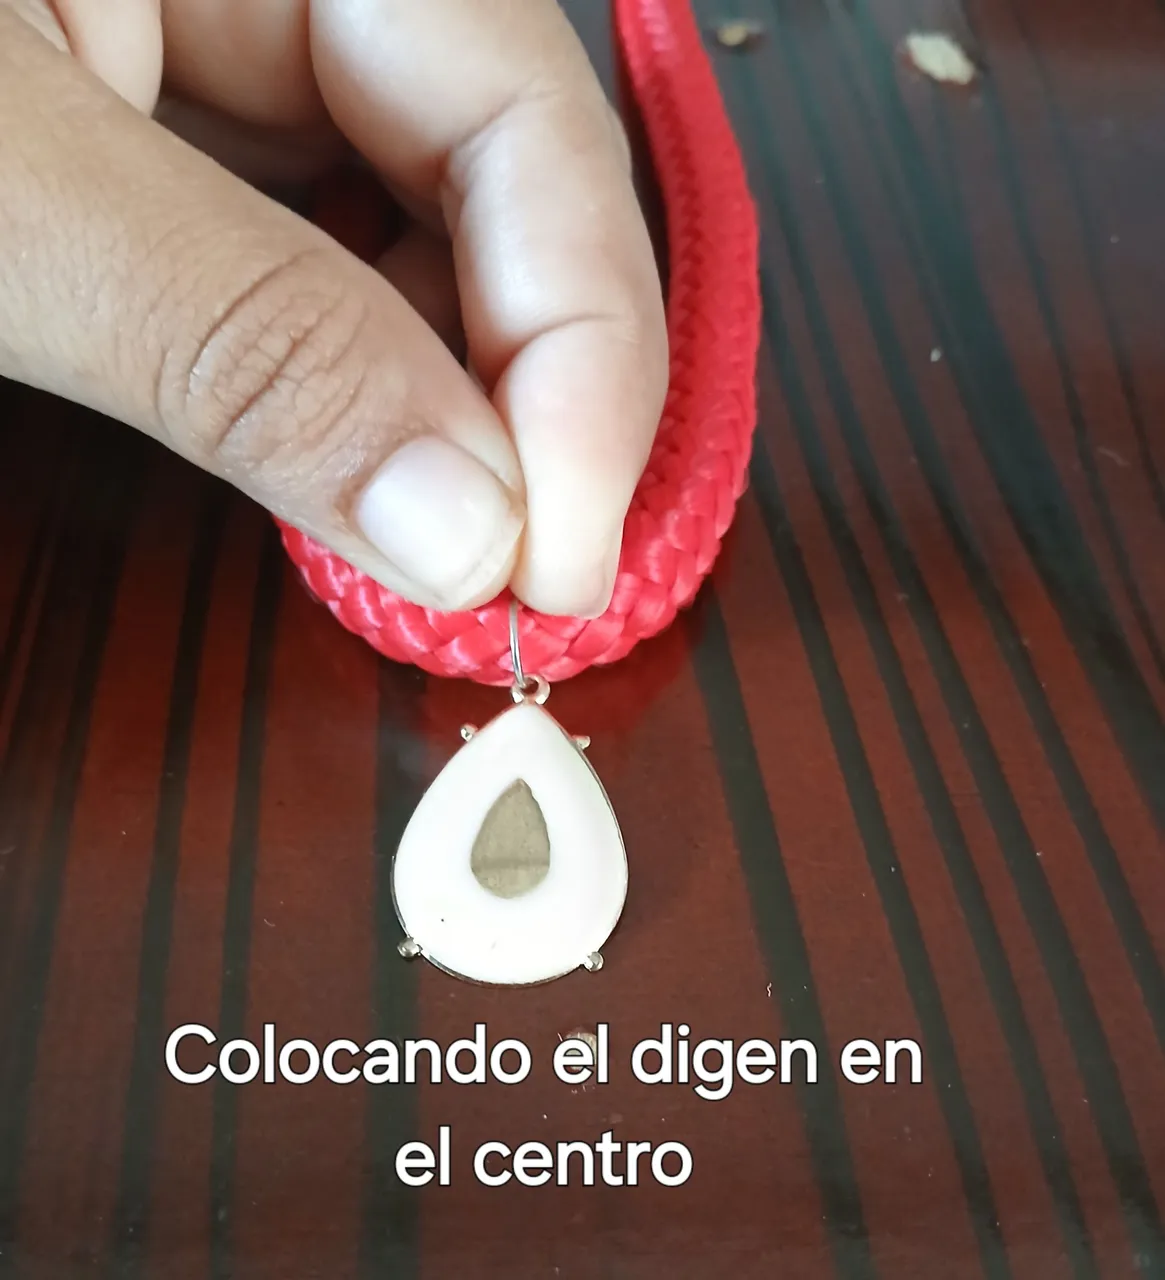
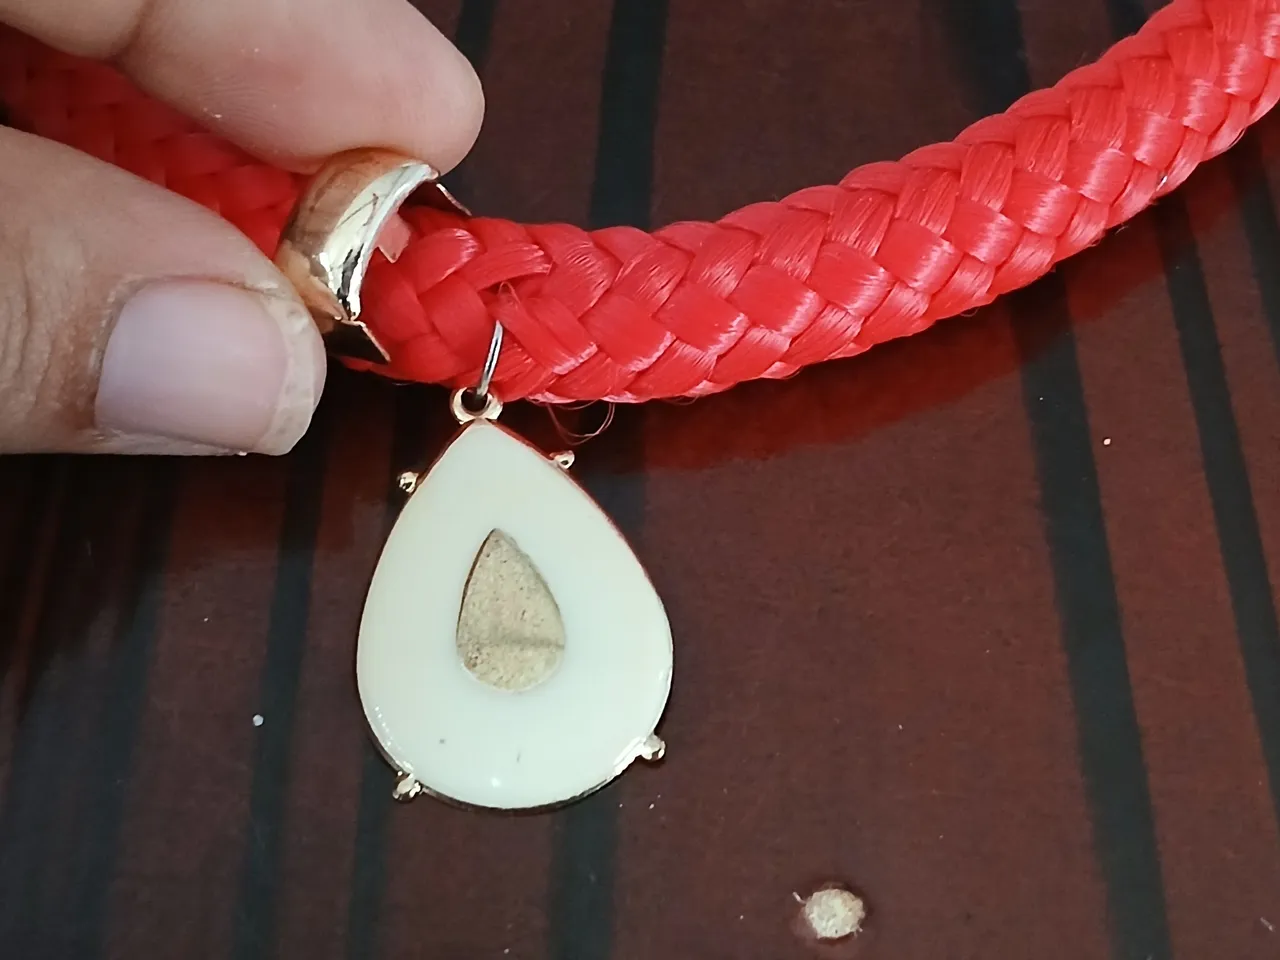
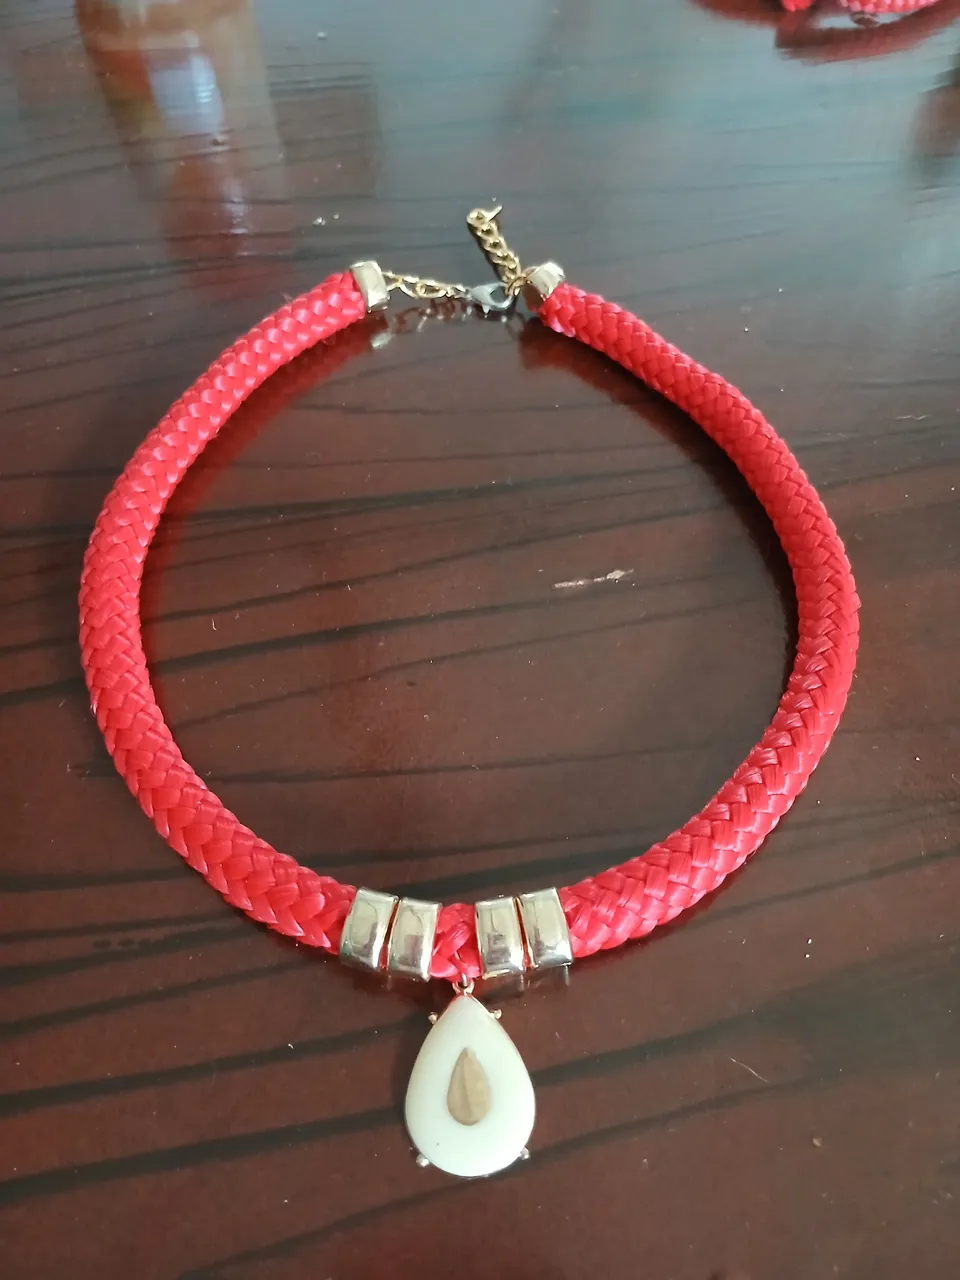
Luego doblé el cordón por la mitad, para marcar el centro y coloqué allí él digen.
Then I folded the cord in half, to mark the center and placed the digen there.
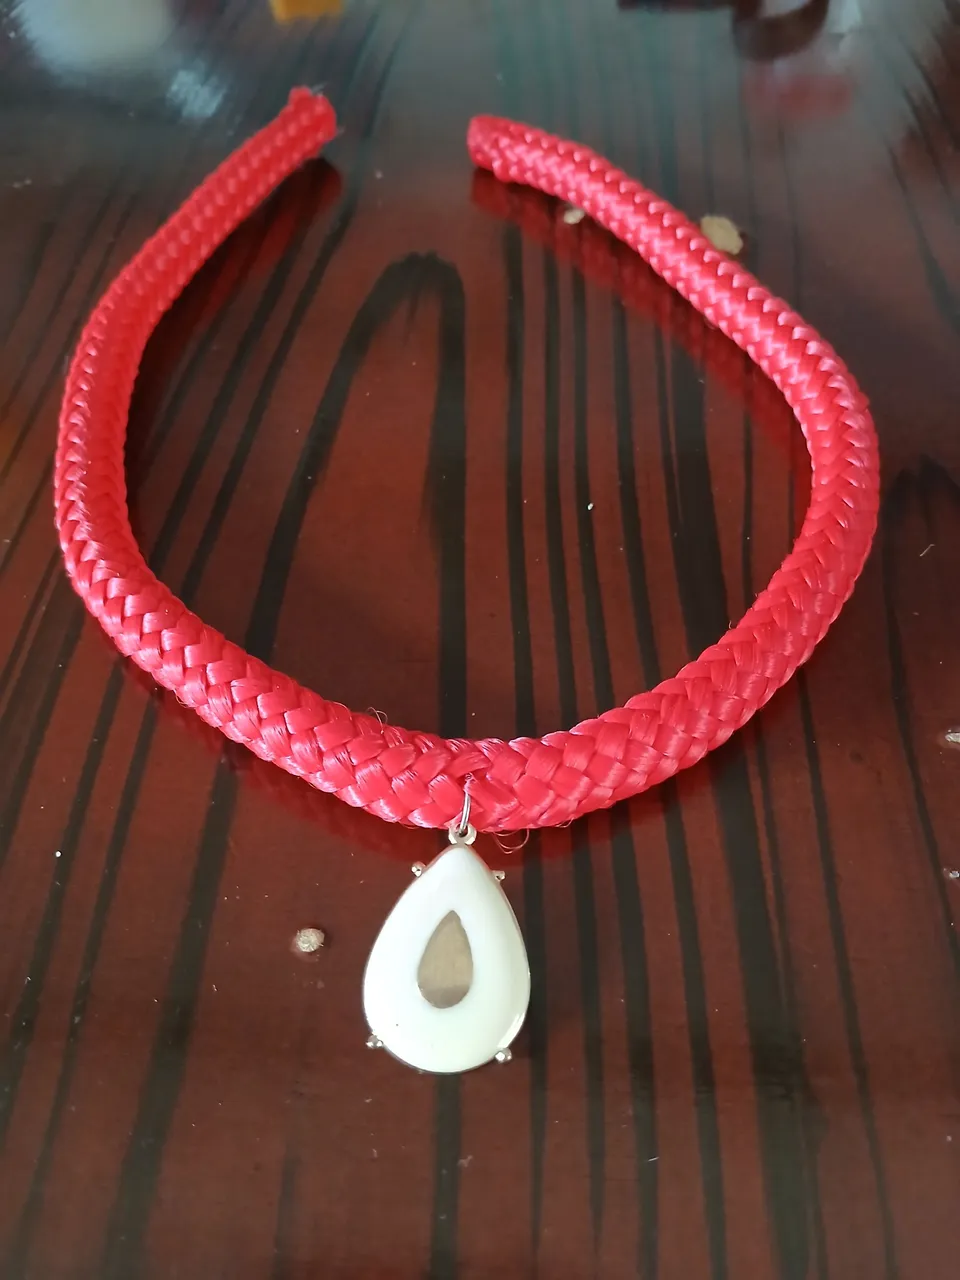
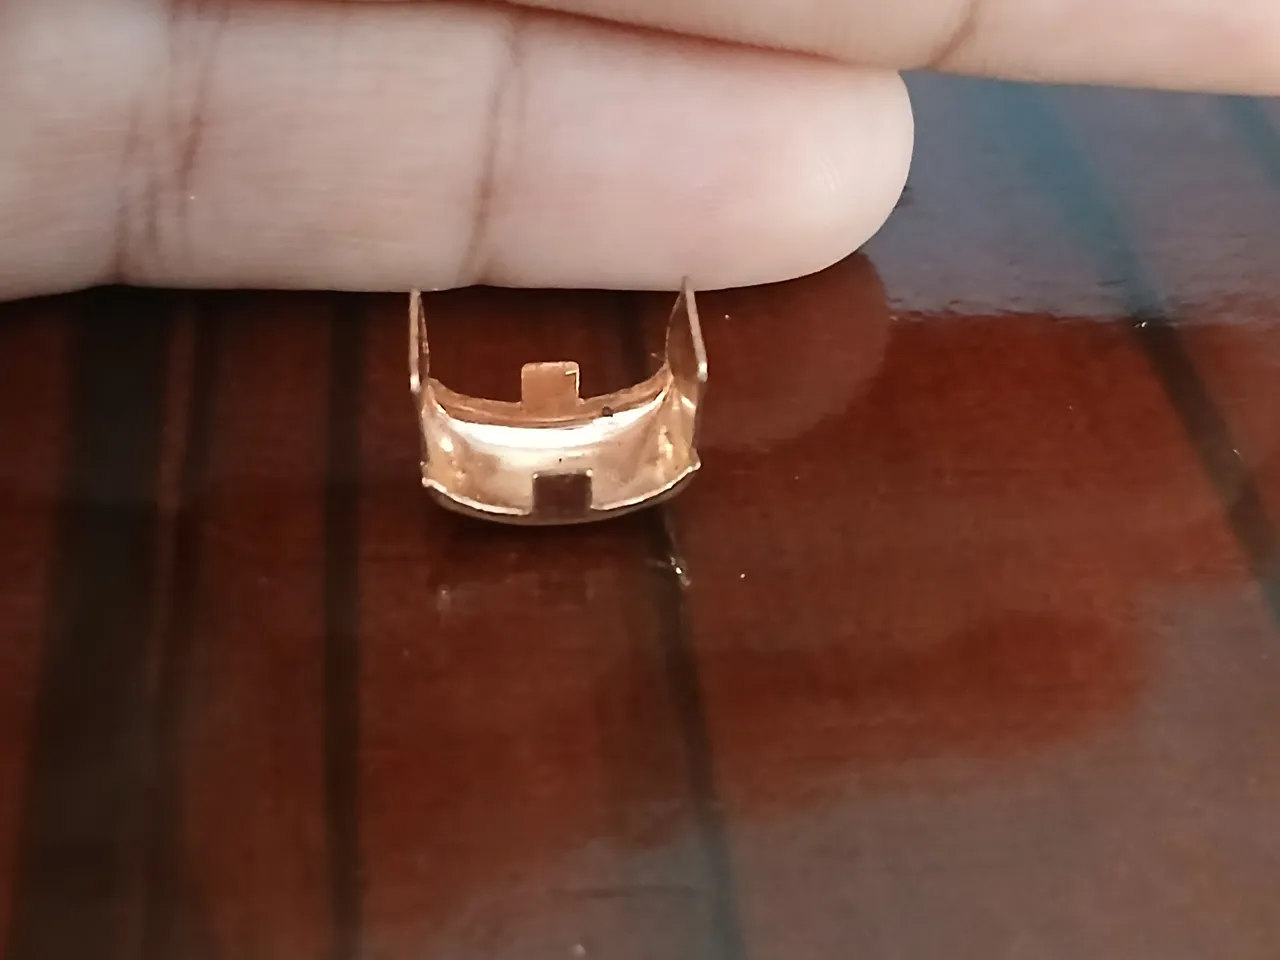
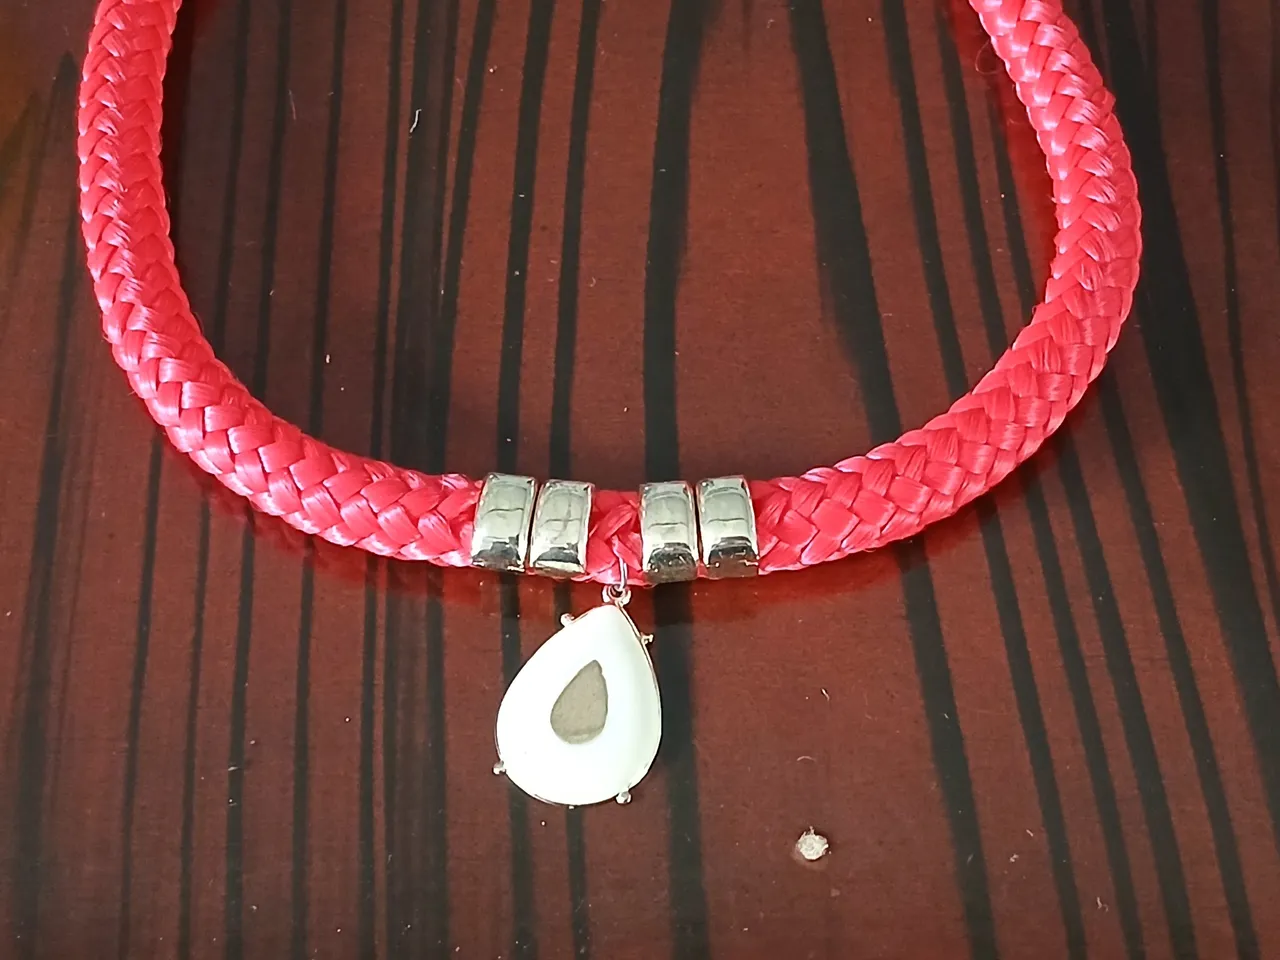
Posteriormente procedí a colocar los apliques, dos a cada lado del digen, para esto abrí los clics que éstos traen y los apreté envolviendo el cordón.
Then I proceeded to place the appliqués, two on each side of the digen, for this I opened the clicks that they bring and tightened them wrapping the cord.
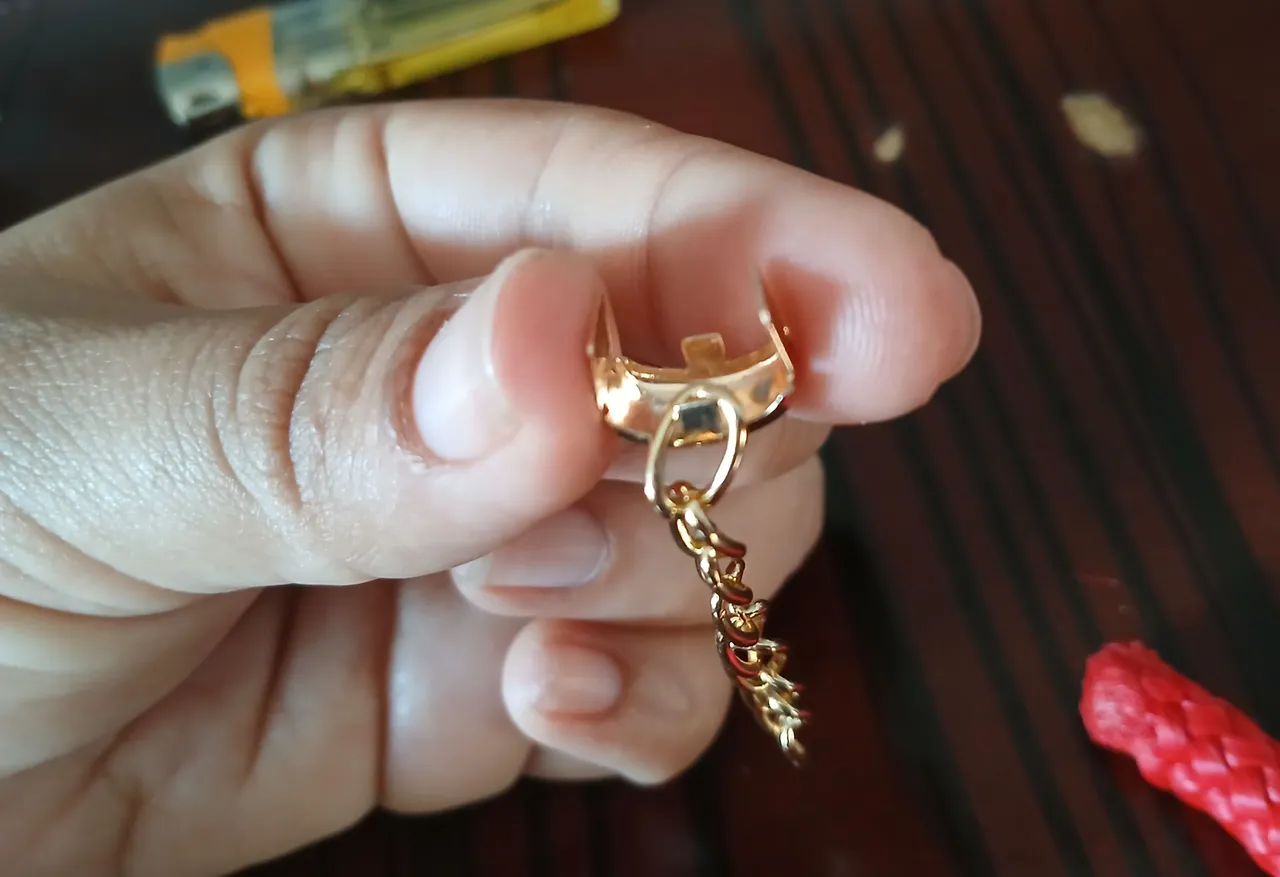
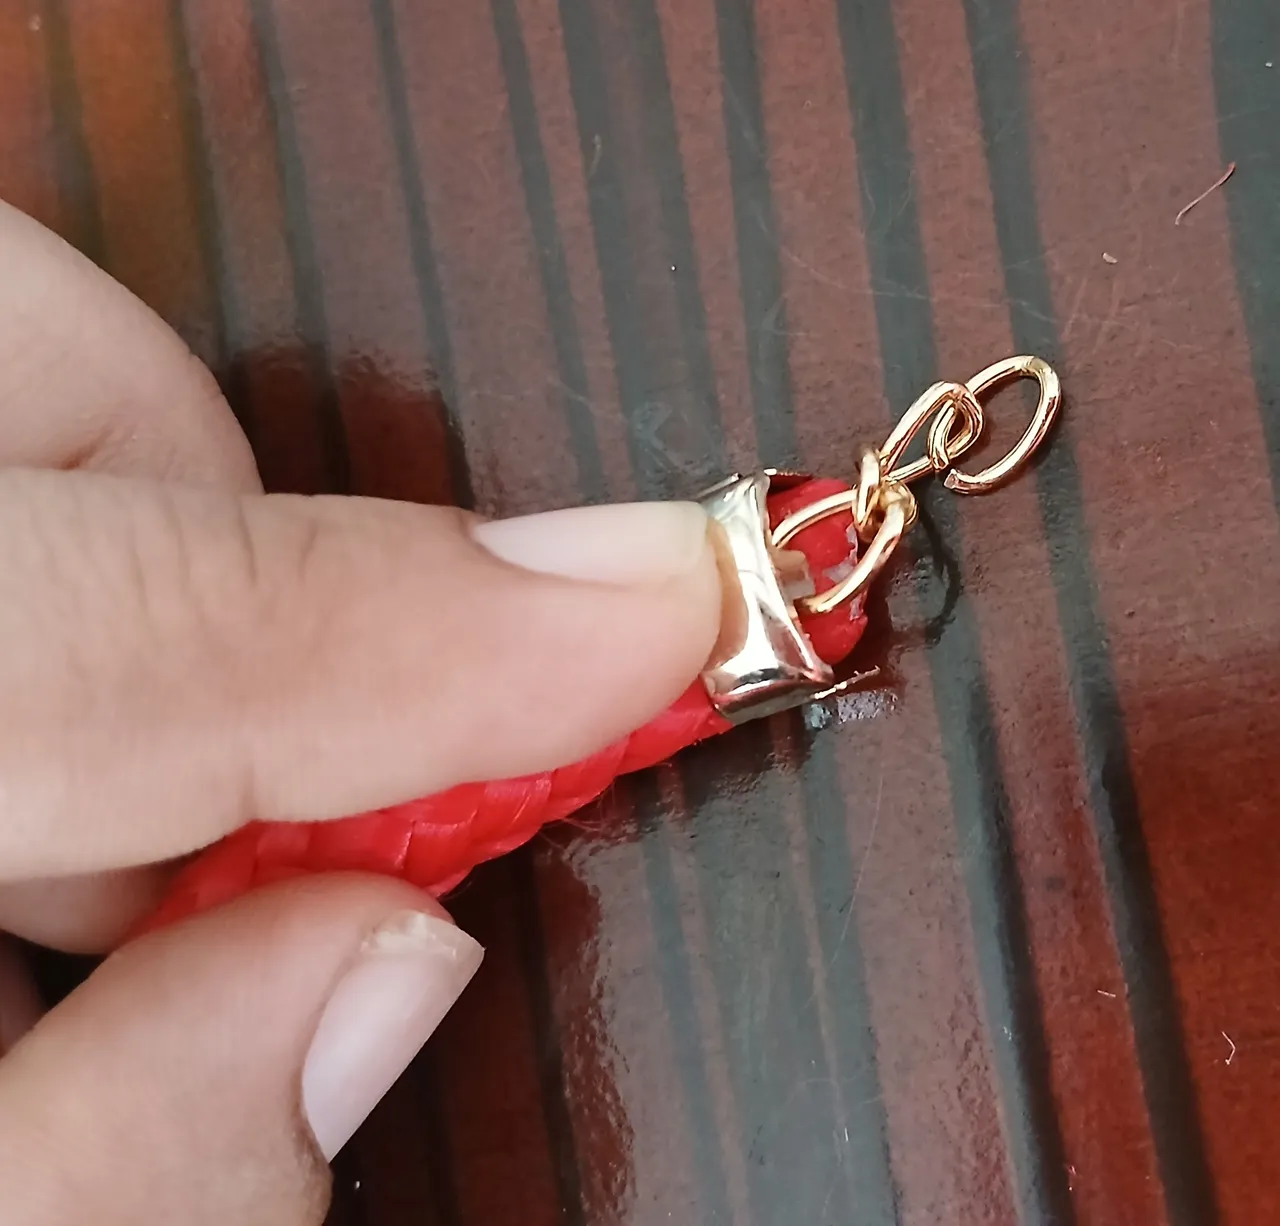
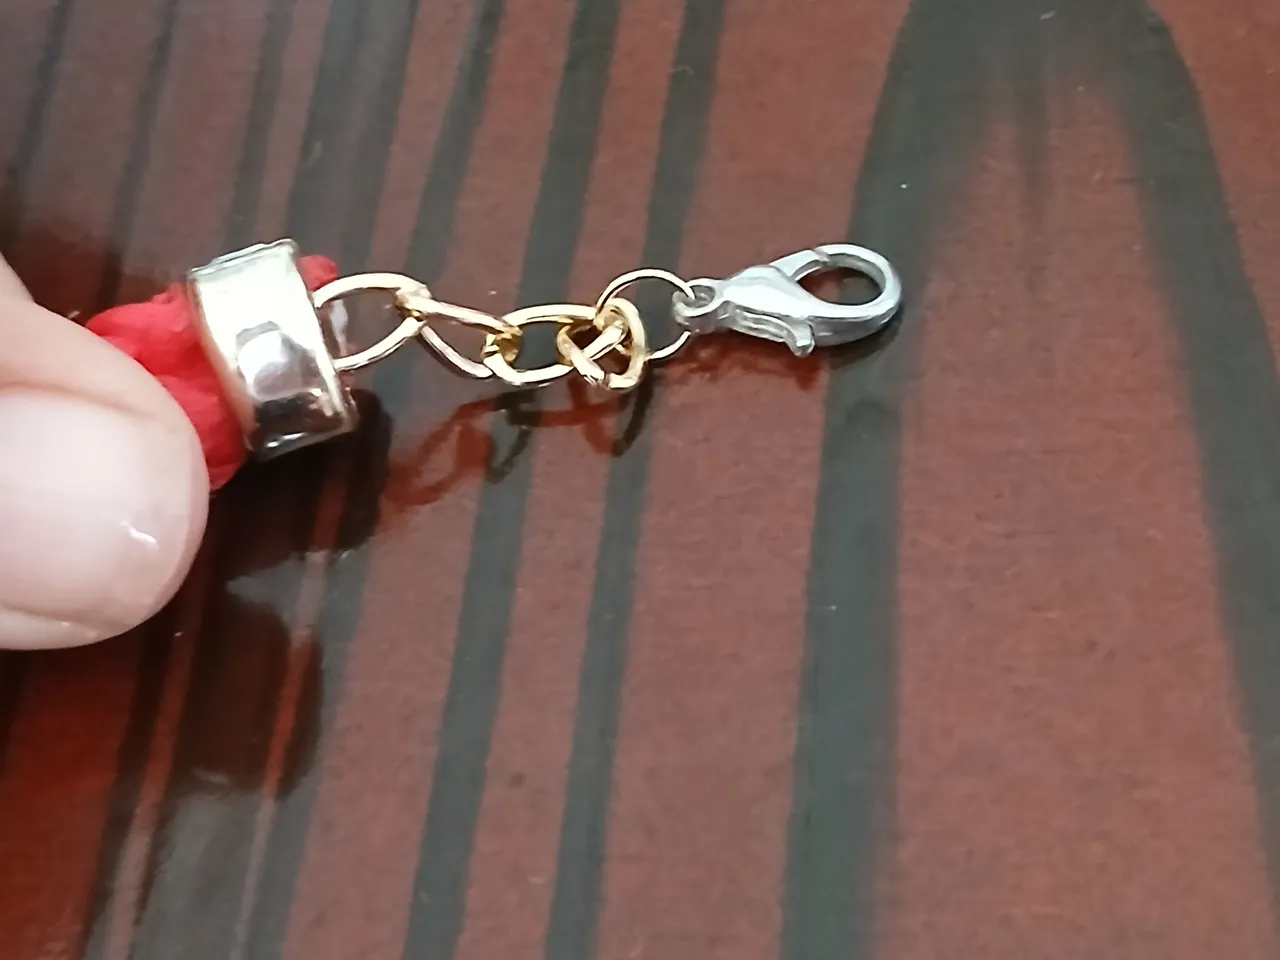
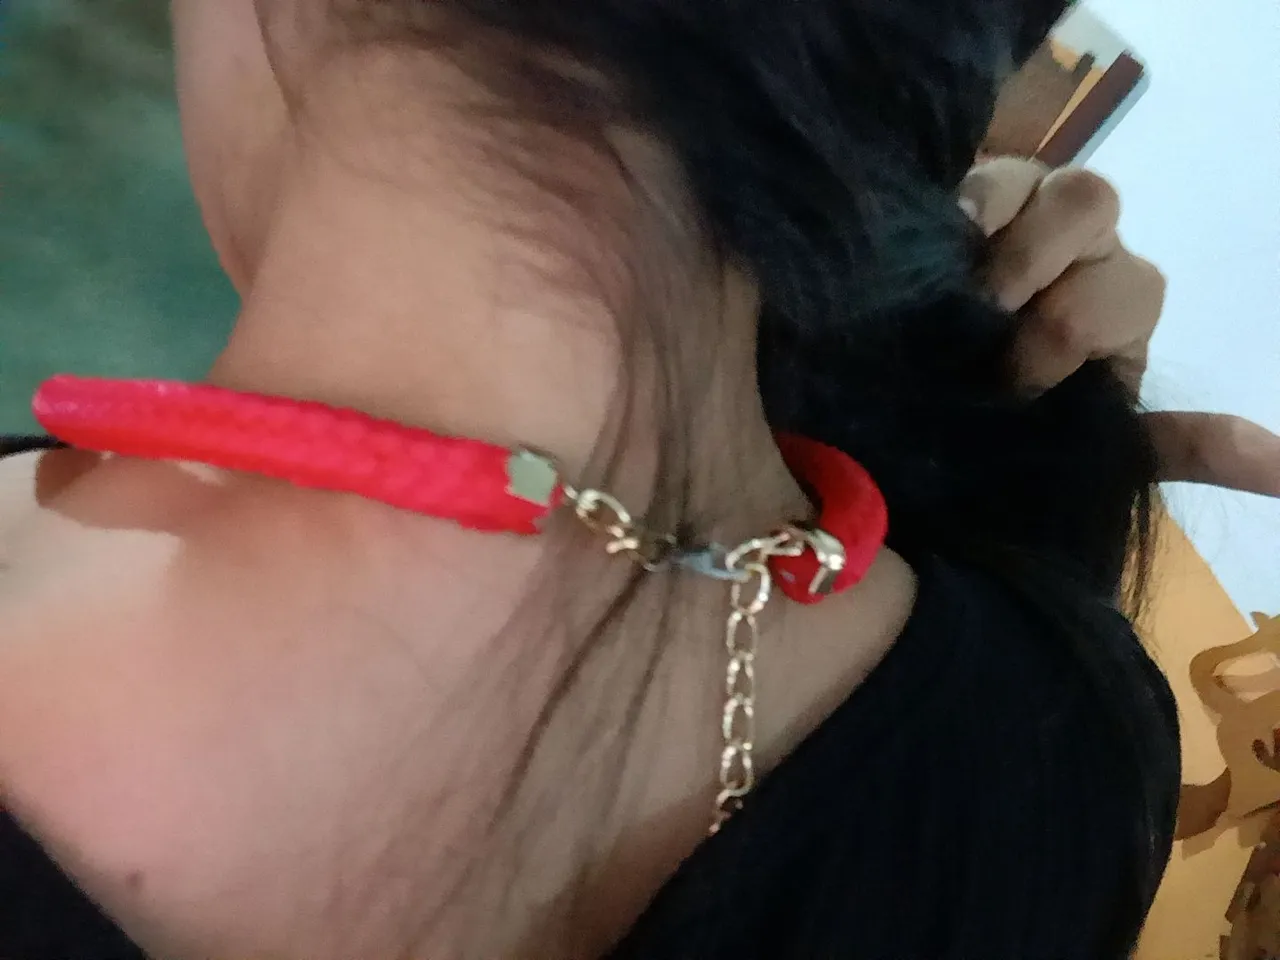
Estos mismos apliques los coloqué en las puntas de los extremos del cordón, para sujetar la cadena y colocar el cierre de langosta. Para éste proceso, abrí los clics e introduje la argolla de la cadena en un pequeño ganchillo que éstos tienen en el centro, para sujetarse con más fuerza a las superficies.
I placed these same appliqués on the ends of the ends of the cord, to hold the chain and place the lobster clasp. For this process, I opened the clicks and introduced the ring of the chain in a small crochet hook that they have in the center, to hold more strongly to the surfaces.


Éste ha sido el tutorial de hoy, espero que te haya gustado el resultado tanto como a mi, y puedas aplicarlo en tus próximos proyectos. Feliz y bendecido día amigos 🙏🏻🙂.
This has been today's tutorial, I hope you liked the result as much as I did, and you can apply it in your next projects. Happy and blessed day friends 🙏🏻🙂.