English Version:
Greetings to all this talented Jewelry community! Today, I want to make my presentation of a hand weaving of a thread bracelet. I decided to make this bracelet as a gift for my son, since he really likes this kind of bracelets.
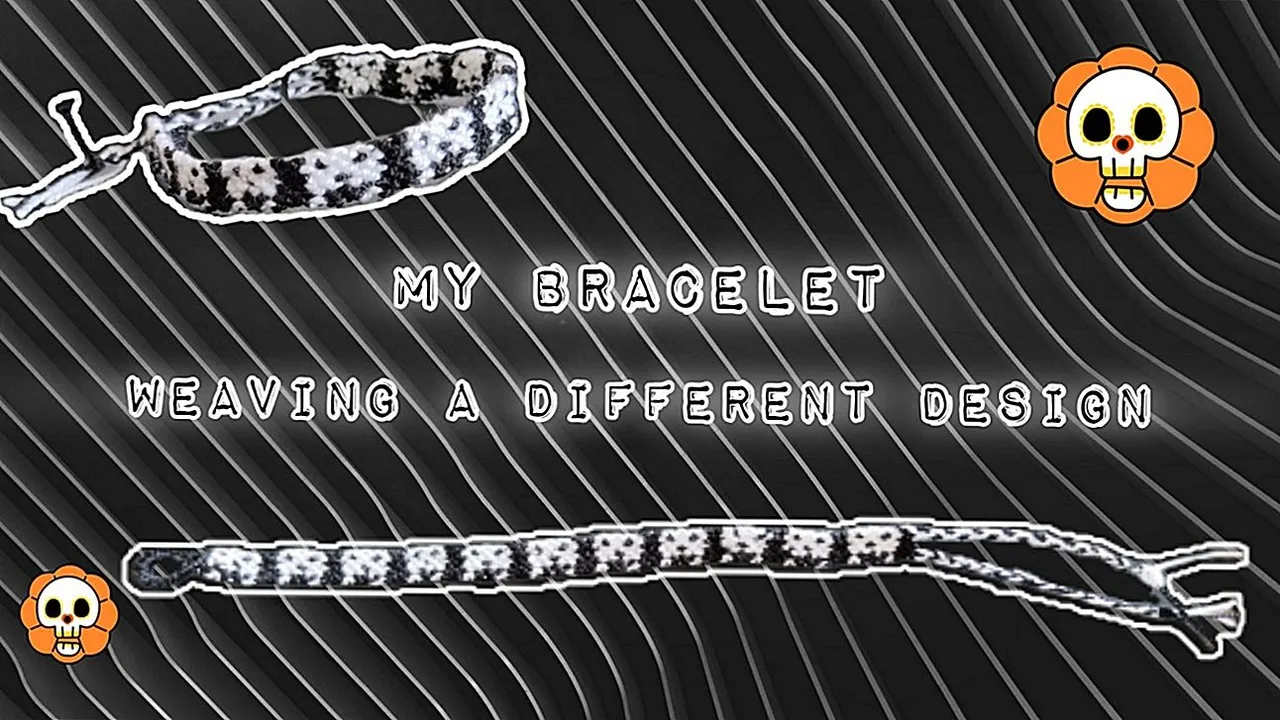
For this, I used the macramé technique, with a decorative design in the shape of skulls. The design was made following a pattern of twelve lines of different knots combined to the right, to the left, right - left and left - right.
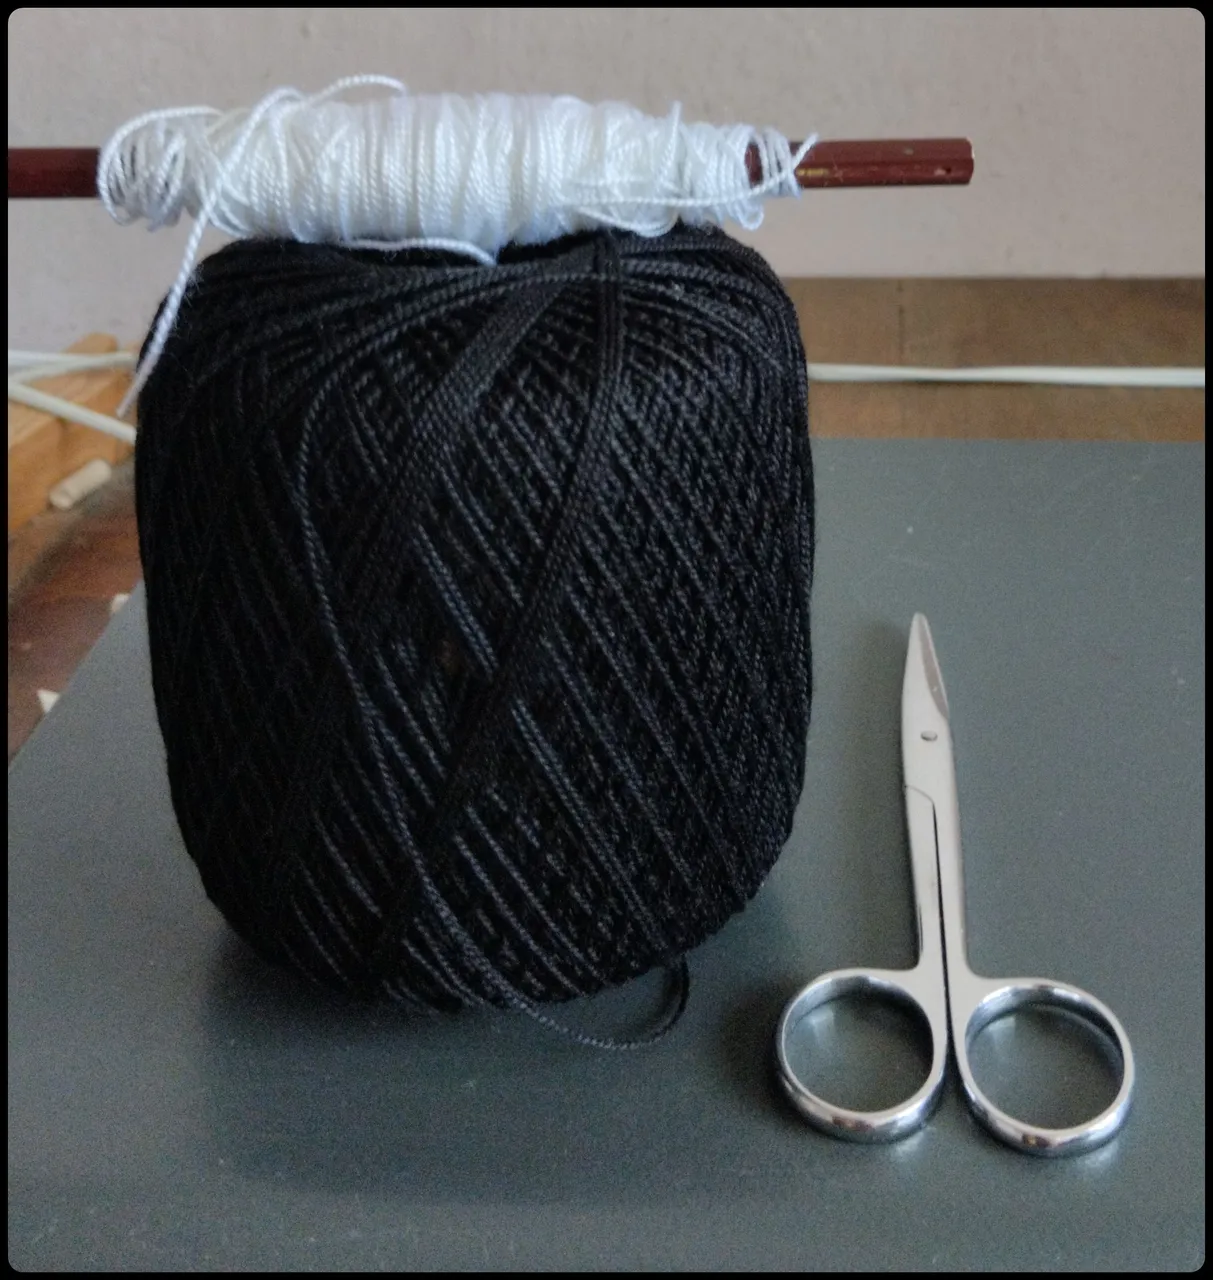
The materials used were:
- Crochet acrylic yarn in black and white.
- Scissors
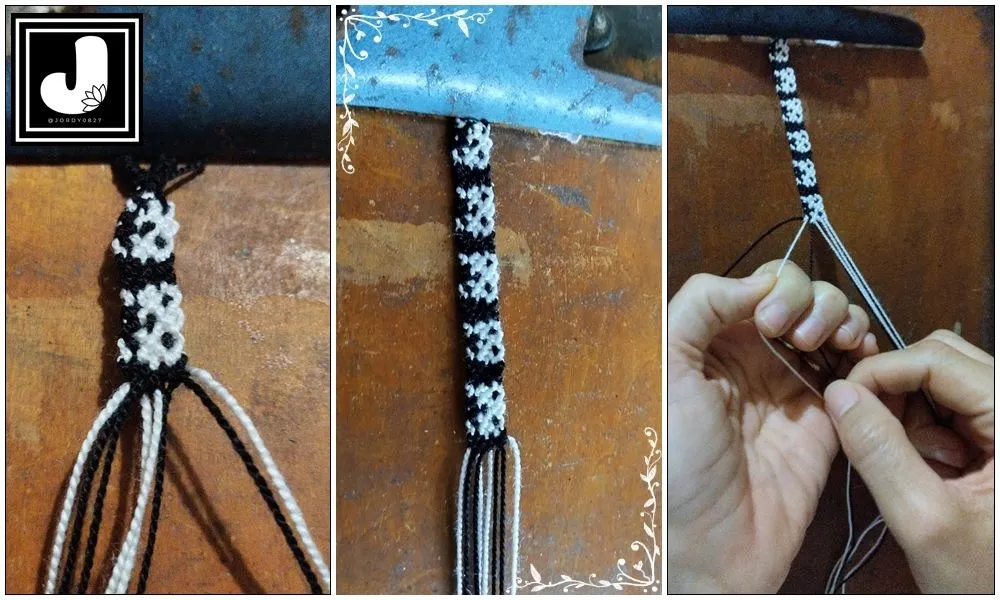
The first thing I wove was the eyelet, I like to do it because it makes the bracelet look more elegant.
Buttonhole process:
I chose a black thread and with it I tie a lark's knot over half of the threads that I am going to use in the bracelet. With this I divide the group of threads into two parts. I start on one of the halves by passing the eyelet thread in the shape of a P above the group of threads, pulling it out from underneath and passing its end through the center. I tighten to make the knot. Then, I repeat this same step in the opposite direction, this time passing the P-shaped buttonhole thread underneath the skein of yarns. I repeated these steps fourteen times on each side. I then folded the threads in half and began the process of weaving the bracelet, having the eyelet at one end.

Below, I describe the steps I followed to weave the lines that make up the design of the bracelet, made with simple knots. I used 8 strands of black and white yarn, each 80 cm long, and separated them into four pairs, alternating the colors between black and white.
First row: I started by knotting yarns 1 and 2 of the first pair with a knot to the left in black. I repeated this same step with the second and third pair of yarns. With the Fourth pair I did the same, but to the right.
Second row: Yarn 1 of the first pair is left loose, I knotted yarn 2 with yarn 1 of the second pair, left-right in black color. I knotted yarn 2 of the second pair with yarn 1 of the third pair right-left in white. I knotted thread 2 of the third pair with thread 1 of the fourth pair to the right in white. Yarn 2 of the fourth pair is left loose.
Third row: This row is made the same as the first row, except for the second pair which is made left-right. All knots in white.
Fourth row: Yarn 1 of the first pair is left loose, I knotted yarn 2 to yarn 1 of the second pair to the right in black. I knotted yarn 2 of the second pair to yarn 1 of the third pair to the right in white. I knotted thread 2 of the third pair to thread 1 of the fourth pair to the right in black. Thread 2 of the fourth pair is loose.
Fifth row: I knotted yarns 1 and 2 of the first pair to the left - right in black. I knotted yarns 1 and 2 of the second pair to the left - right. I knotted yarns 1 and 2 of the third pair to the right. I knotted the threads 1 and 2 of the fourth pair to the left - right. The knots of the last three pairs in white.
Sixth row: Yarn 1 of the first pair is loose. I knotted yarn 2 of the first pair with yarn 1 of the second pair to the right - left in black. I knotted yarn 2 of the second pair to yarn 1 of the third pair to the left - right in black. I knotted thread 2 of the third pair to thread 1 of the fourth pair to the right - left in white. Yarn 2 of the fourth pair remains loose.
Seventh row: Same as the fifth row, except the third pair goes to the left.
Eighth row: Same as the fourth row.
Ninth row: This is the same as the third row in pairs one and two, but pairs three and four are made to the right and left respectively. All in white.
Tenth row: This is the same as the second row.
Eleventh row: Same as the first row, but the knots of the first, second and third pairs go to the right and the fourth pair to the left.
Twelfth row: Same as the second row, except for the knots of yarns 2 and 1 of the first and second pair, which go to the right - left. All knots are black.
To complete the bracelet I repeated this process eleven times.
Finally, separate the end strands into two parts and braid them together, knotting them at the end to make it easier to thread them through the eyelet.

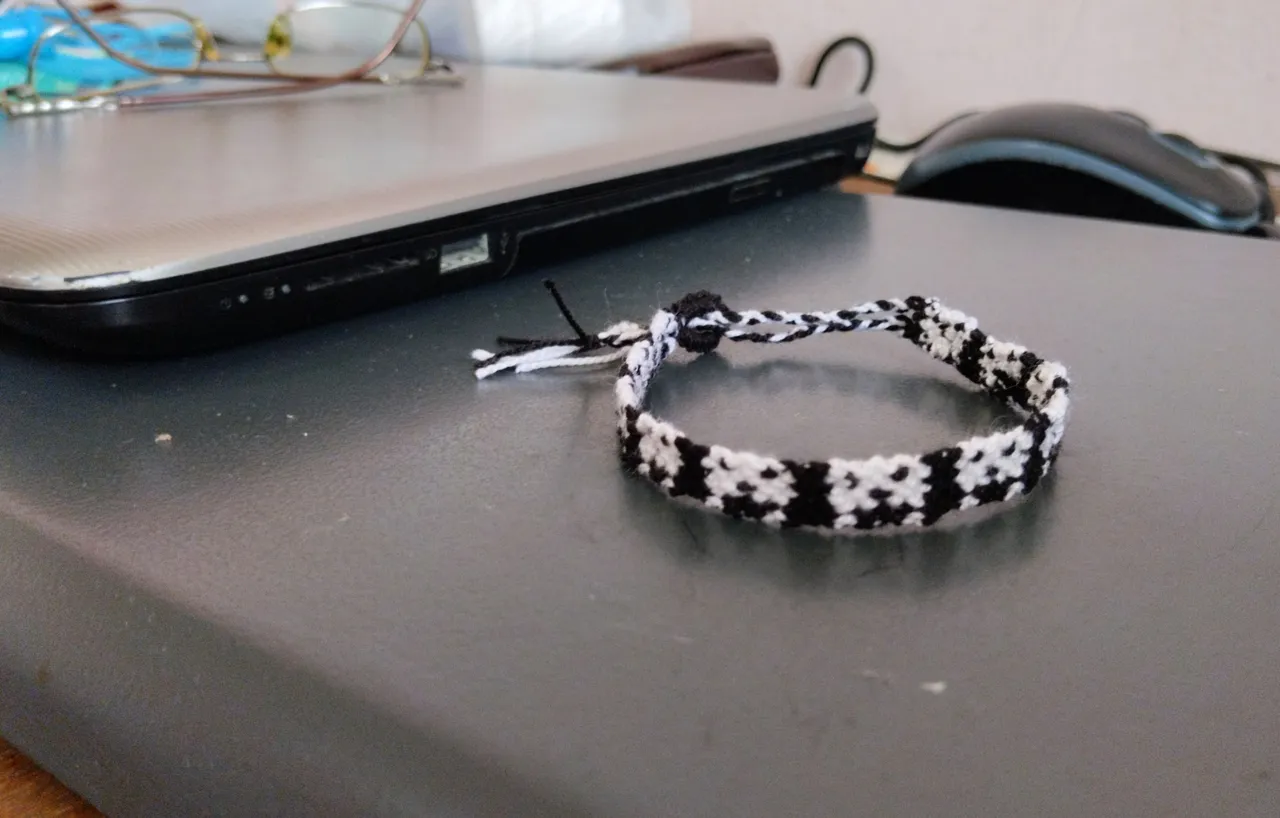
And.... That's it, this is the way this skull pattern is made. it's easier to do it than to explain it 😄! In this 👉 link you can see the pattern I just described to you.

VERSION en Español
¡Un Saludo a toda esta talentosa comunidad de Joyas! Hoy, quiero hacer mi presentación de un tejido manual de una pulsera de hilos. Decidí hacer esta pulsera para regalársela a mi hijo, ya que a él le gustan mucho este tipo de brazaletes.
Para ello, utilicé la técnica de macramé, con diseño decorativo en forma de calaveras. El diseño lo hice siguiendo un patrón de doce líneas de diferentes nudos combinados hacia la derecha, hacia la izquierda, de derecha - izquierda y de izquierda - derecha.
Los materiales utilizados fueron:
-Hilo acrílico para crochet de color negro y blanco.
-Tijeras
Lo primero que tejí fue el ojal, me gusta hacerlo ya que así la pulsera luce más elegante.
Proceso del ojal:
Elegí un hilo de color negro y con él realizo un nudo tipo alondra sobre la mitad de los hilos que voy a usar en la pulsera. Con esto divido el grupo de hilos en dos partes. Comienzo en una de las mitades pasando el hilo del ojal en forma de una P por encima del grupo de hilos, sacándolo por debajo y pasando su extremo por el centro. Aprieto para realizar el nudo. Luego, repito este mismo paso en sentido contrario, esta vez pasando el hilo del ojal en forma de P por debajo de la madeja de hilos. Repetí estos pasos catorce veces en cada lado. Después doblé los hilos por la mitad y comencé el proceso de tejer la pulsera, quedando el ojal en un extremo.
A continuación, describo los pasos que seguí para tejer las líneas que conforman el diseño de la pulsera, elaborada con nudos simples. Utilicé 8 hebras de hilo de color blanco y negro, cada una de 80 cm de largo, y las separé en cuatro pares alternando los colores entre blanco y negro.
Primera hilera: Comencé anudando los hilos 1 y 2 del primer par con un nudo hacia la izquierda de color negro. Este mismo paso lo repetí con el Segundo y Tercer par de hilos. Con el Cuarto par se hace lo mismo, pero hacia la derecha.
Segunda hilera: El hilo 1 del primer par queda suelto, se anuda el hilo 2 con el hilo 1 del segundo par, de izquierda-derecha en color negro. Anudé el hilo 2 del segundo par con el hilo 1 del tercer par de derecha-izquierda en color blanco. Anudé el hilo 2 del tercer par con el hilo 1 del cuarto par hacia la derecha en color blanco. El hilo 2 de del cuarto par queda suelto.
Tercera hilera: Esta hilera se hace igual que la primera, menos el segundo par que se realiza hacia izquierda-derecha. Todos los nudos en color blanco.
Cuarta hilera: El hilo 1 del primer par queda suelto, anudé el hilo 2 al hilo 1 del segundo par hacia la derecha en color negro. Anudé el hilo 2 del segundo par al hilo 1 del tercer par hacia la derecha en color blanco. Anudé el hilo 2 del tercer par al hilo 1 del cuarto par hacia la derecha en color negro. El hilo 2 del cuarto par queda suelto.
Quinta hilera: Anudé los hilos 1 y 2 del Primer par hacia izquierda - derecha en color negro. Anudé los hilos 1 y 2 del segundo par hacia izquierda - derecha. Anudé los hilos 1 y 2 del tercer par hacia la derecha. Anudé los hilos 1 y 2 del cuarto par hacia izquierda - derecha. Los nudos de los últimos tres pares en color blanco.
Sexta hilera: El hilo 1 del primer par queda suelto. Anudé el hilo 2 del primer par con el hilo 1 del segundo hacia derecha - izquierda en color negro. Anudé el hilo 2 del segundo par al hilo 1 del tercer par hacia izquierda - derecha en color negro. Anudé el hilo 2 del tercer par al hilo 1 del cuarto par hacia derecha - izquierda en color blanco. El hilo 2 del cuarto par queda suelto.
Séptima hilera: Se realiza igual que la quinta, menos el tercer par que va hacia la izquierda.
Octava hilera: Se realiza igual que la cuarta.
Novena hilera: Esta es igual a la Tercera fila en los pares uno y dos, pero los pares tres y cuatro se hacen hacia derecha, izquierda respectivamente. Todos en color blanco.
Décima hilera: Se realiza igual a la segunda fila.
Oncena hilera: Es igual a la primera, pero los nudos de los pares primero, segundo y tercero van hacia la derecha y el cuarto par hacia la izquierda.
Doceava hilera: Es igual a la segunda hilera, menos en los nudos de los hilos 2 y 1 del primer y segundo par que se hacen hacia derecha – izquierda. Todos los nudos son en color negro.
Para completar la pulsera repetí este proceso once veces.
Por último, separe en dos partes los hilos de los extremos y los trencé, anudándolos al final para que de esta manera sea más fácil pasarlos por el ojal.
Y.... Esto es todo, está es la manera en que se realiza este patrón de calavera. ¡es más fácil hacerlo que explicarlo 😄! En este 👉 enlace pueden ver el patrón que les acabo de describir.