Hello everyone... ✨
Hello to my dear Hiver and the dear community of artists #Jewelry, as always very pleased to be here again, showing you my work made with love and especially for you.
Beyond making this publication just a craft and create a nice accessory to wear on any occasion, I wanted to focus it on the @Talents initiative today, which is entitled "from thought to action".
Talking about thinking is complex, since as humans it is an act that we carry out in every instant of our lives, we can focus it to our positive dreams, to the beautiful thing we want to happen, those are pleasant moments since they transmit us joy thinking how what we really want to live can look like.
Now, in my case there is another point in the part of the thought, since as a creative mind that every day is generating ideas to elaborate something beautiful, my head most of the time looks for inspiration, imagines shapes, designs, colors, and when that load of thoughts flows in the right way, my body goes and runs to perform tests to organize that explosion of ideas and materialize them, from there derives the action of executing all that I see, through a beautiful handicraft.
For me, thinking is a fundamental part of my manual and daily work, since it gives me a vision and a thousand ideas to create.
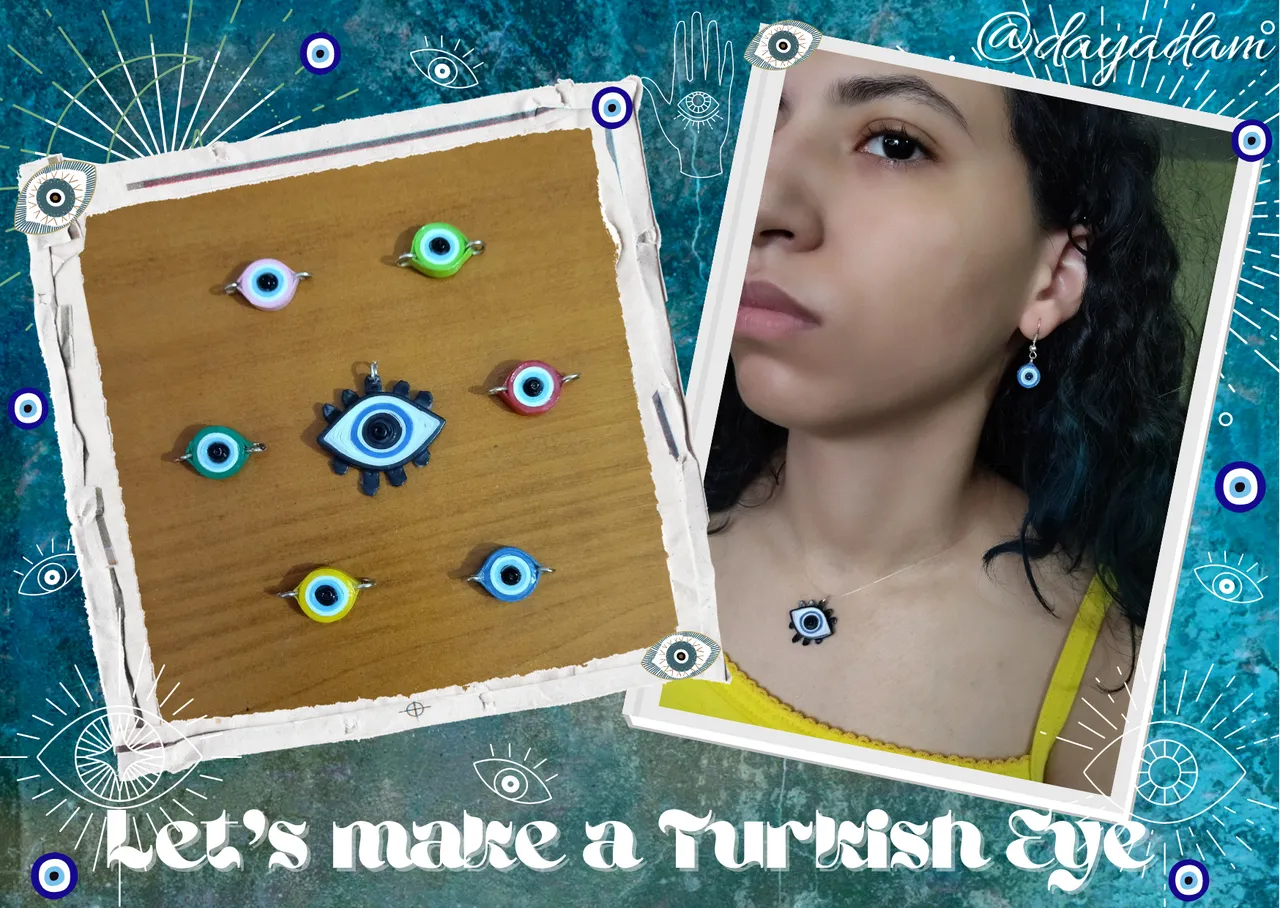
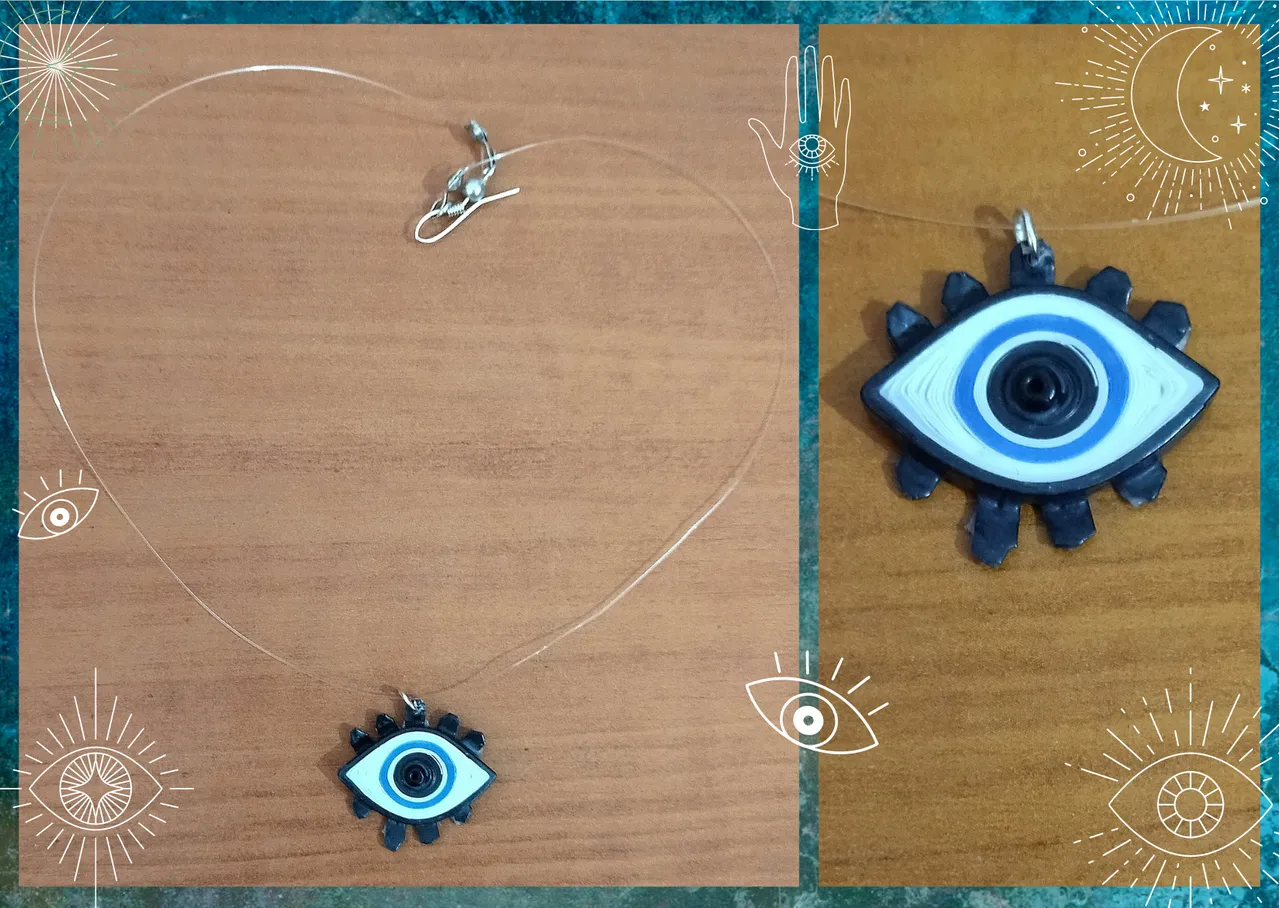
A few months ago I made some simple Turkish eyes, explaining the meaning of their colors and keeping in mind that many people are attracted to wear them feeling lucky and protected, so today I wanted to bring you another "Turkish Eye" charm but this time a little more complex and elaborate, with mixed materials in the paper quilling technique. If you want to see the post of the first Turkish eyes here is the link.
Hoping it will be to your liking, without further ado, I leave you with my latest creation, the one that flowed from my thoughts:
Let's get started:😃

Hola a todos... ✨
Hola a mis queridos Hiver y a la querida comunidad de artistas #Jewelry, como siempre muy complacida de encontrarme por acá nuevamente, mostrándole mi trabajo hecho con mucho amor y especialmente para ustedes.
Más allá de hacer esta publicación solo una manualidad y crear un lindo accesorio para lucirlo en cualquier ocasión, quise enfocarla en la iniciativa de @Talentos de hoy día, que se titula “Del Pensamiento a la Acción”.
Hablar de pensamiento es complejo, ya que como humanos es un acto que llevamos a cabo en cada instante de nuestras vidas, podemos enfocarlo a nuestros sueños positivos, a lo bonito que deseamos que suceda, esos son momentos placenteros ya que nos trasmiten alegría pensando cómo puede verse lo que realmente queremos vivir.
Ahora bien, en mi caso hay otro punto en la parte del pensamiento, ya que como mente creativa que cada día está generando ideas para elaborar algo bonito, mi cabeza la mayoría del tiempo busca inspiración, se imagina formas, diseños, colores, y cuando esa carga de pensamientos fluye de manera correcta, mi cuerpo va y corre a realizar pruebas para organizar esa explosión de ideas y materializarlas, de allí deriva la acción de ejecutar todo eso que veo, a través de una bonita manualidad.
Para mi el pensamiento es parte fundamental en mi trabajo manual y cotidiano, ya que me da una visión, y mil ideas para crear.
Hace unos meses elaboré unos sencillos ojos turcos, explicando el significado de sus colores y teniendo presente que a muchas personas les llama la atención usarlos sintiéndose afortunados y protegidos, por ello para hoy quise traerles otro dije de “Ojo Turco” pero esta vez un poco más complejo y elaborado, con materiales mixtos en la técnica de paper quilling. Si desean ver el post de los primeros ojos turcos por acá les dejo el link.
Esperando que sea de su agrado, sin más preámbulos, les dejo mi última creación, aquella que fluyo de mis pensamientos:
Comencemos:😃

• Quilling de 3mm de ancho color: negro, blanco, azul oscuro. (o los colores de tu preferencia).
• Aguja para quilling.
• Pega blanca extra fuerte (de carpintería).
• Regla de diversas medidas de circunferencia.
• Trozo de hoja blanca.
• Lápiz.
• Trozo de plástico transparente de botella de refresco.
• Aguja punta media.
• Tijera punta fina.
• Canutillo negro (opcional).
• Argolla mediana de bisutería.
• Pincel.
- Quilling of 3mm wide color: black, white, dark blue (or the colors of your preference).
- Quilling needle.
- Extra strong white glue (carpentry glue).
- Ruler of different circumference measures.
- Piece of white paper.
- Pencil.
- Piece of transparent plastic from a soda bottle.
- Medium point needle.
- Fine-pointed scissors.
- Black piping bag (optional).
- Medium size costume jewelry ring.
- Paintbrush.

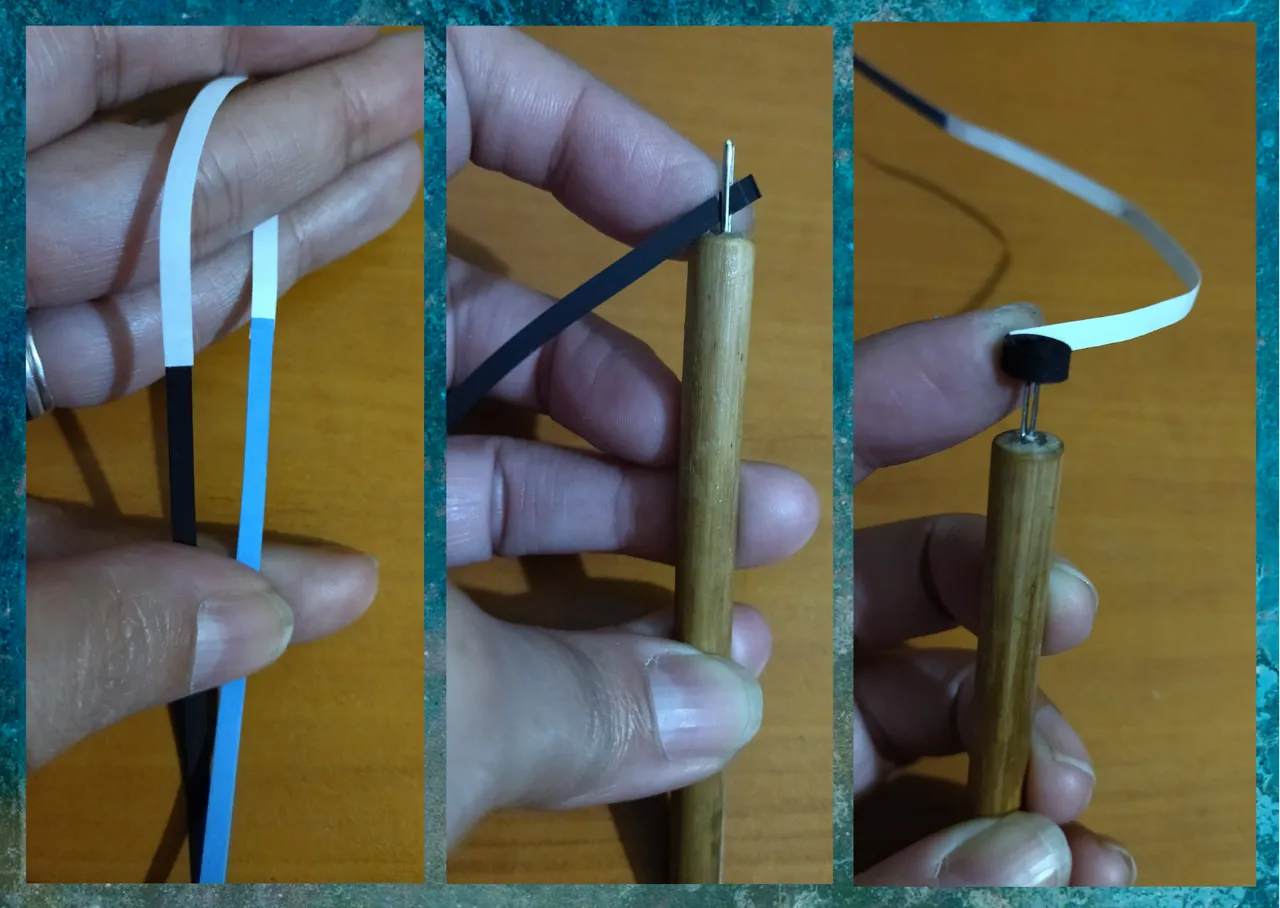
- We are going to start by taking a piece of black ribbon 3mm wide x 25cms long, a white one 3mm wide x 12.5cms long and another dark blue one 3mm wide x 25cms long, and we are going to join all the ribbons with a touch of white glue, in the order previously mentioned (black, white, dark blue), to form a single ribbon.
- We take the quilling needle and we are going to roll the ribbon starting with the black ribbon until culminating with the blue ribbon, we seal with a touch of glue, we are going to obtain a closed circle, this must remain tucked in the needle.

• Vamos a iniciar tomando un trozo de cinta negra de 3mm de ancho x 25cms de largo, uno blanco de 3mm de ancho x 12,5cms de largo y otro azul oscuro de 3mm de ancho x 25cms de largo, y vamos a unir todas las cintas con un toque de pega blanca, en el orden nombrado anteriormente (negro, blanco, azul oscuro), para formar una sola cinta.
• Tomamos la aguja para quilling y vamos enrollar la cinta comenzando por la cinta negra hasta culminar con la cinta azul, sellamos con un toque de pega, vamos a obtener un círculo cerrado, este debe permanecer metido en la aguja.


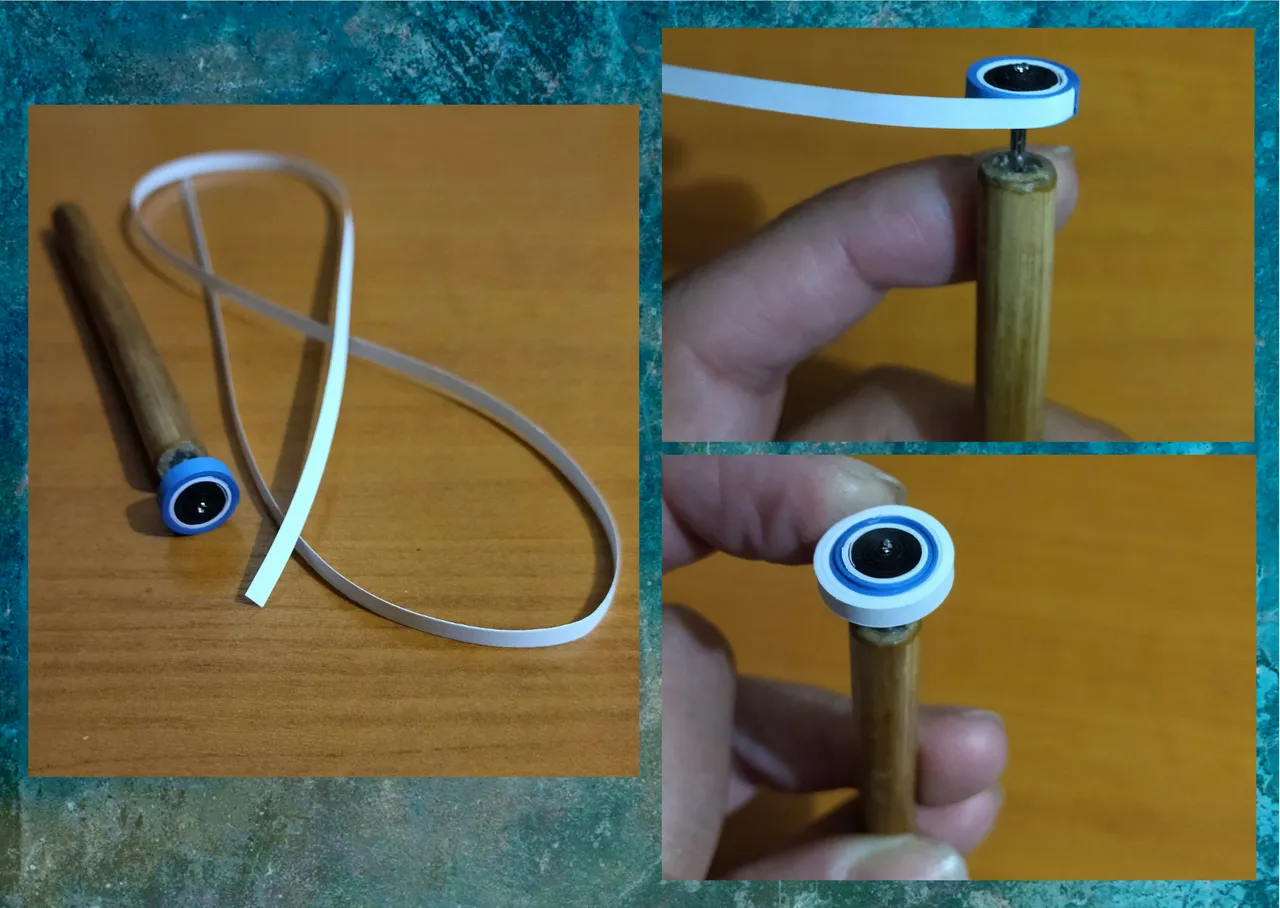
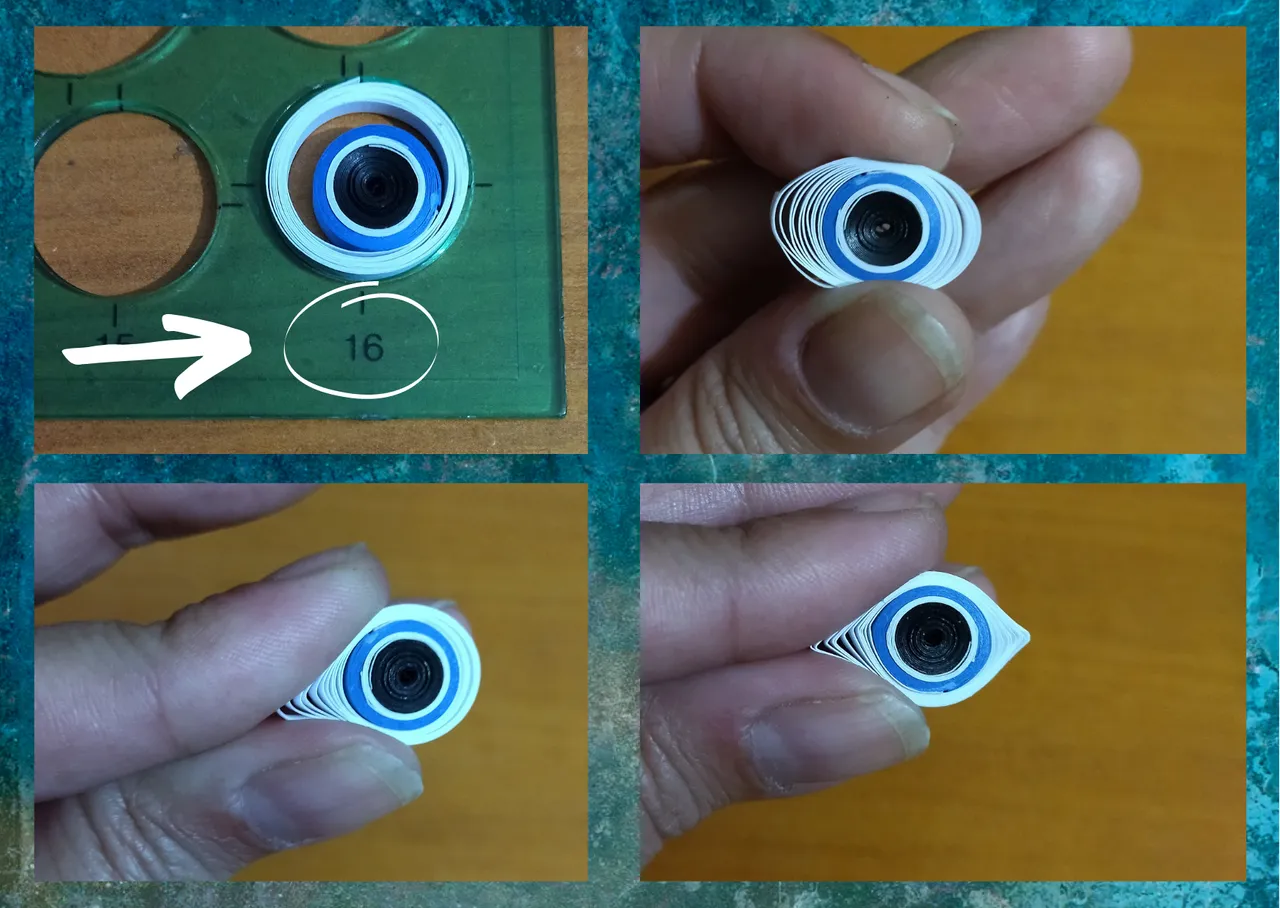
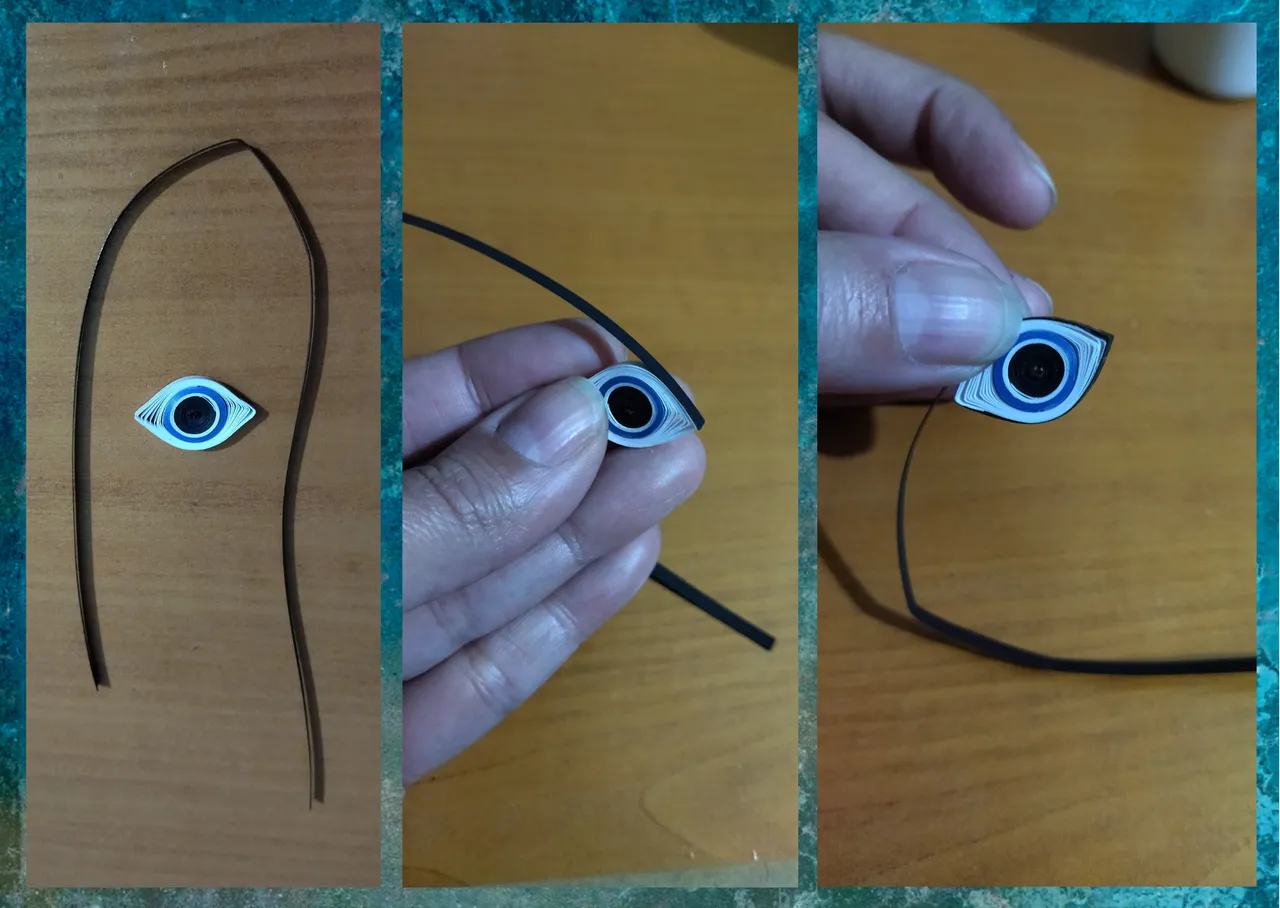
- Now we take a white ribbon of 3mm wide x 50cms long and we are going to join with a touch of glue to the circle that we had previously made and remains on the needle, we are going to roll until we finish with all the white ribbon, we take it off the needle and place it on the ruler with different circumference measures in the circle number 16, we take it off the ruler and seal it with a touch of glue. We will get a closed circle in the center and the white ribbon will be open or looser around it.
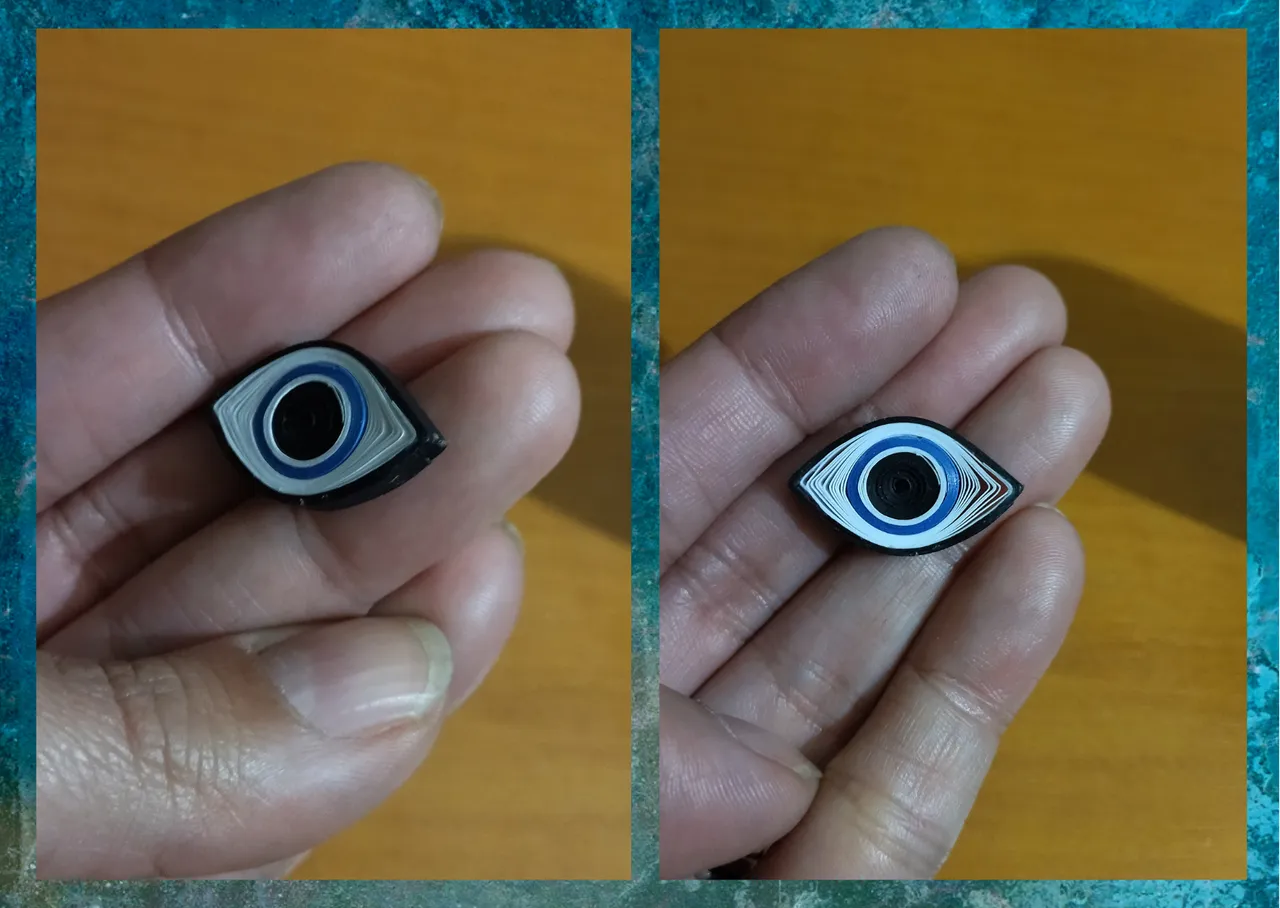
- We are going to shape the eye, pinching both sides of the circle with our fingers, then we will take a piece of black ribbon 3mm wide x 25cms long, we will stick with a glue dot of the white ribbon, and we will pass around the eye without losing the shape of it.
• Ahora tomamos una cinta blanca de 3mm de ancho x 50cms de largo y vamos a unir con un toque de pega al círculo que previamente habíamos realizado y permanece en la aguja, vamos a enrollar hasta finalizar con toda la cinta blanca, sacamos de la aguja y colocamos en la regla con diversas medidas de circunferencia en el círculo número 16, sacamos de la regla y sellamos con un toque de pega. Vamos a obtener un círculo cerrado en el centro y la cinta blanca estará abierta o más suelta alrededor de este.
• Vamos a darle forma al ojo, pellizcando ambos lados del circulo con nuestros dedos, luego tomaremos un trozo de cinta negra de 3mm de ancho x 25cms de largo, pegaremos con un punto de pega de la cinta blanca, y pasaremos alrededor del ojo sin dejar perder la forma del mismo.
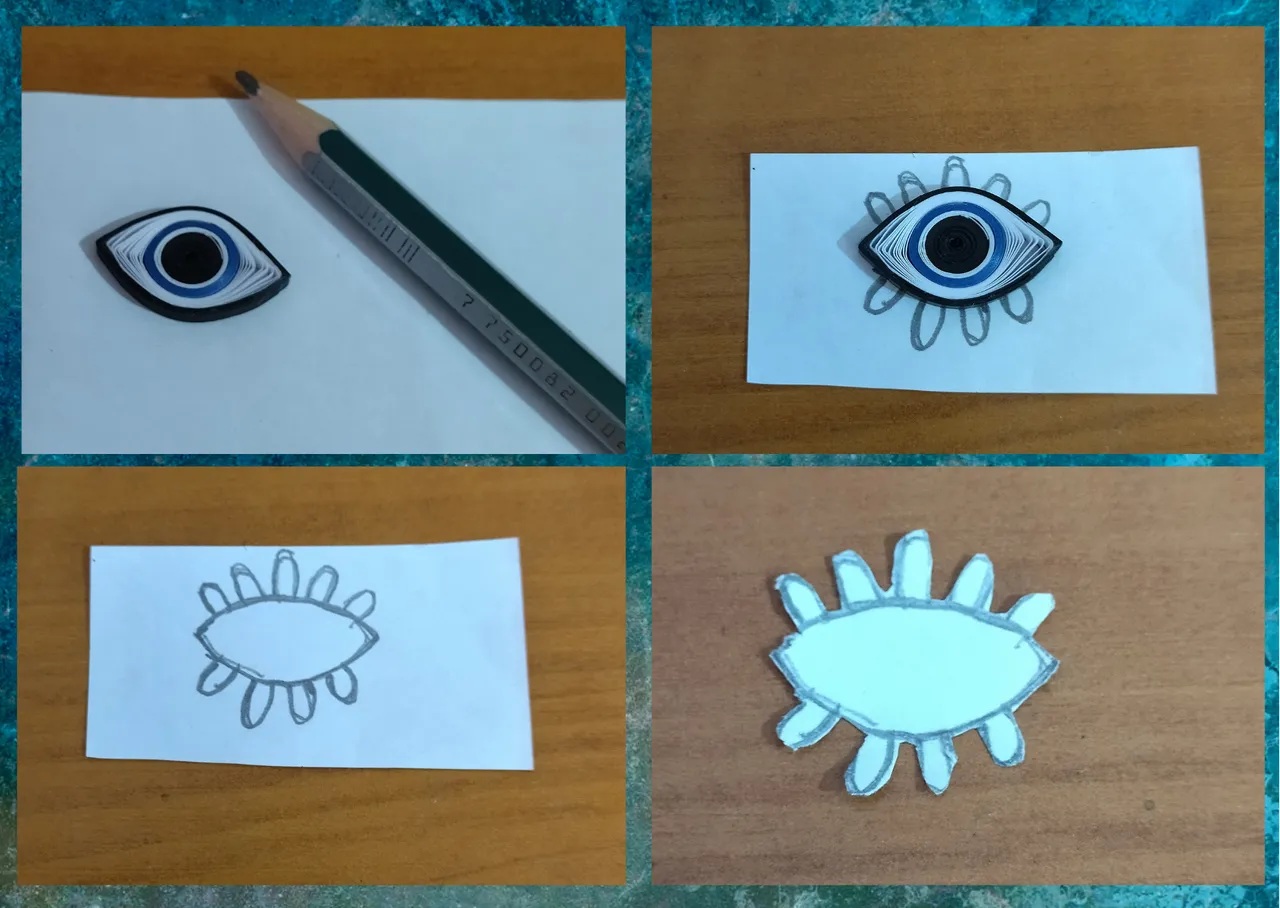
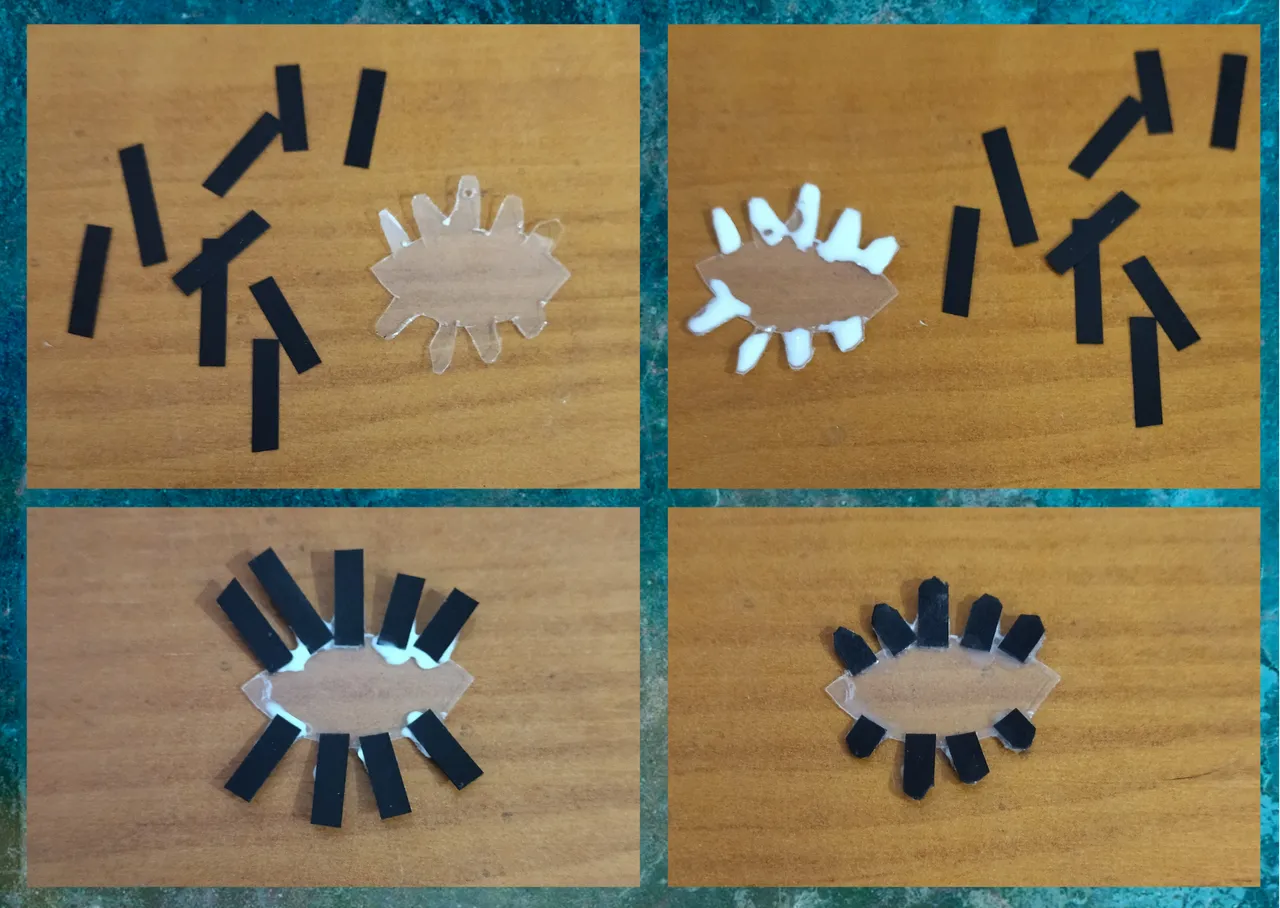
- Once the eye is finished we are going to make a template to be able to add the eyelashes to it, we take a piece of white paper and we are going to draw with a pencil the silhouette of the eye that we made to obtain the right size, in that paper we will draw the eyelashes, we cut it out.
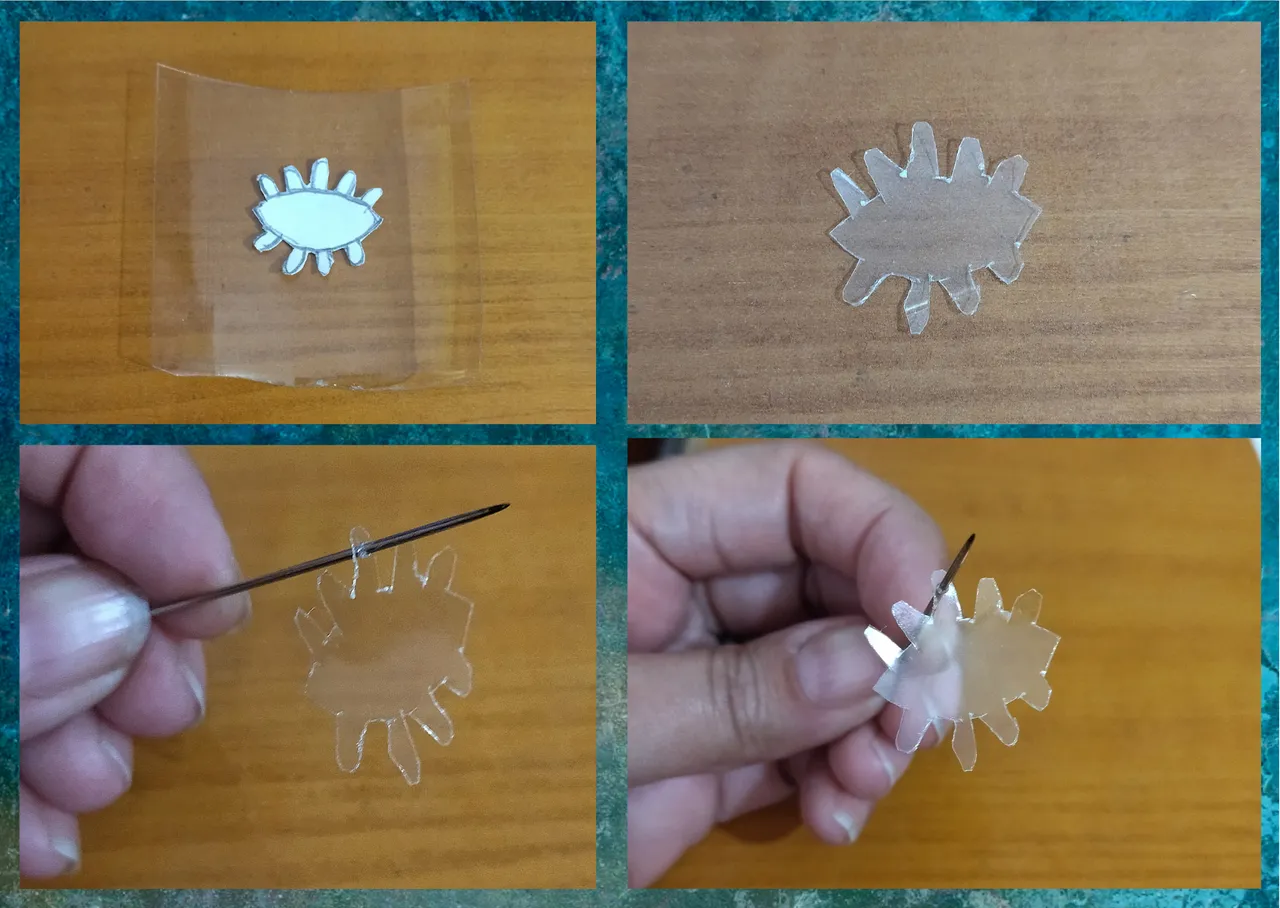
- We take a piece of acetate or plastic from a transparent soda bottle that we have at hand, we will cut out the figure that we obtained on the paper.
- With a fine-pointed needle we will open a hole in the central tab of the upper part.
• Una vez terminado el ojo vamos a realizar una plantilla para poder añadir las pestañas al mismo, tomamos un trozo de hoja blanca y vamos a dibujar con un lápiz la silueta del ojo que realizamos para obtener el tamaño adecuado, en esa hoja dibujaremos las pestañas, recortamos.
• Tomamos un trozo de acetato o plástico de alguna botella de refresco transparente que tengamos a la mano, recortaremos la figura que obtuvimos en el papel.
• Con una aguja punta fina vamos a abrir un agujero en la pestaña central de la parte de arriba.
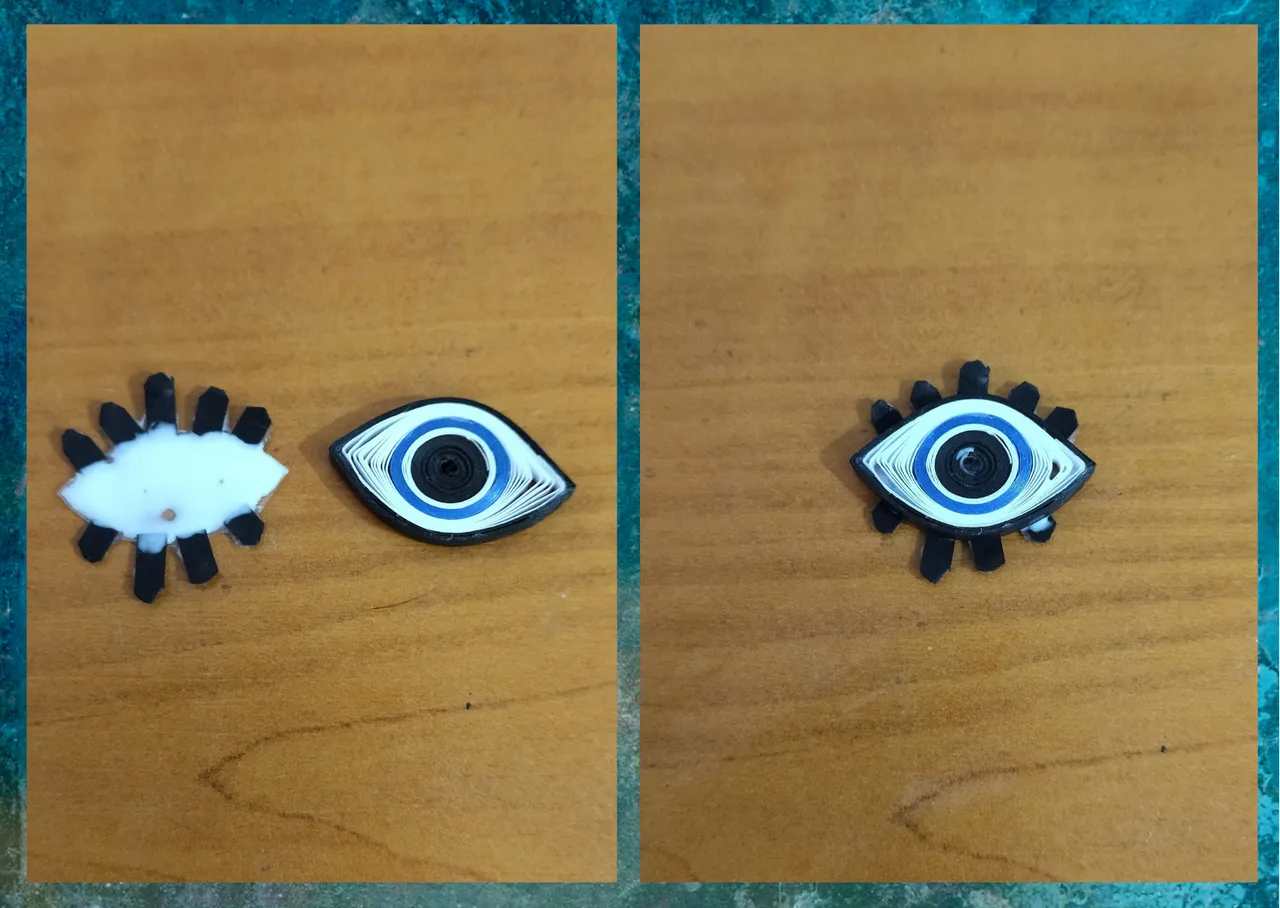
- We are going to take small pieces of black tape 3mm wide, and proceed to paste on the tabs of the plastic, we wait for it to dry and then with a scissors we cut the excess.
- We proceed to glue in the central part with extra strong white glue the eye we made and let it dry very well.
• Vamos a tomar pequeños trozos de cinta negra de 3mm de ancho, y procederemos a pegar en las pestañas del plástico, esperamos que seque y luego con una tijera recortamos los excedentes.
• Procedemos a pegar en la parte central con pega blanca extra fuerte el ojo que realizamos dejamos secar muy bien.
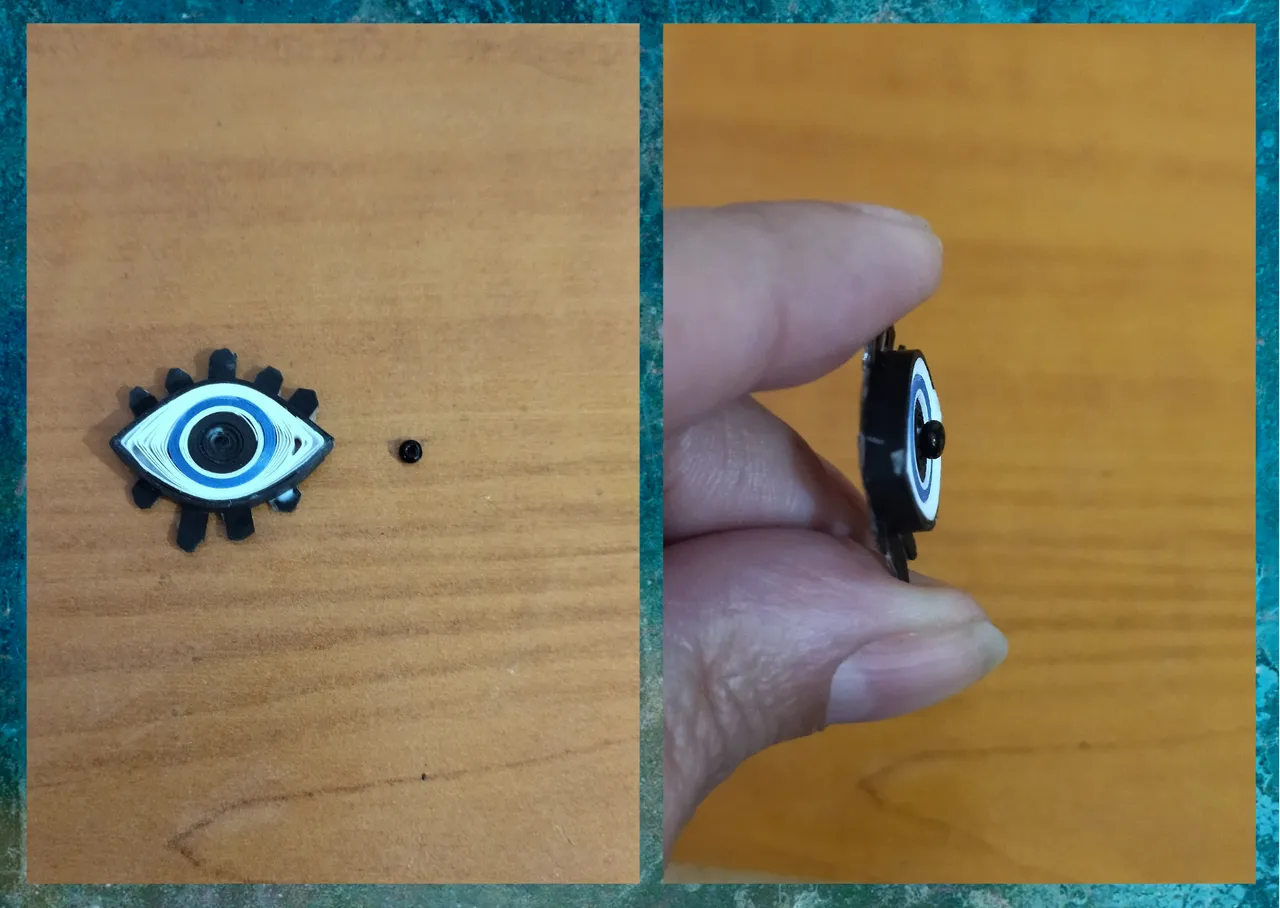
- Optionally, we can place a black bead in the central part of the eye, that is to say in the iris, to make it stand out even more and give detail to the piece, but if you wish you can leave it as it is.
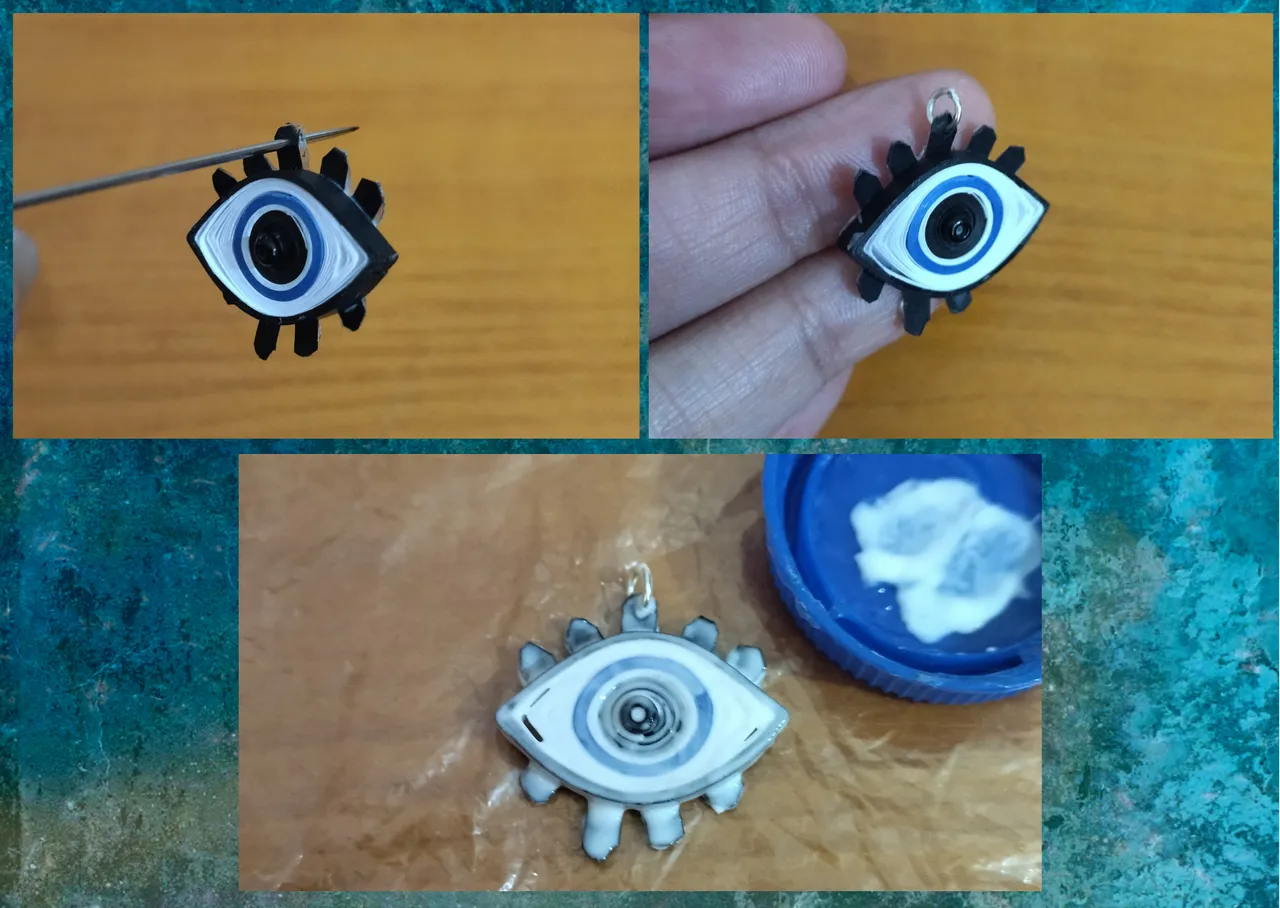
- The hole that we had previously opened in the central tab at the top of the piece we reopen it, and through there we introduce a medium size costume jewelry ring.
- Finally we are going to protect and plasticize our pendant, we apply several layers of extra strong white glue (carpentry), letting dry between one layer and another.
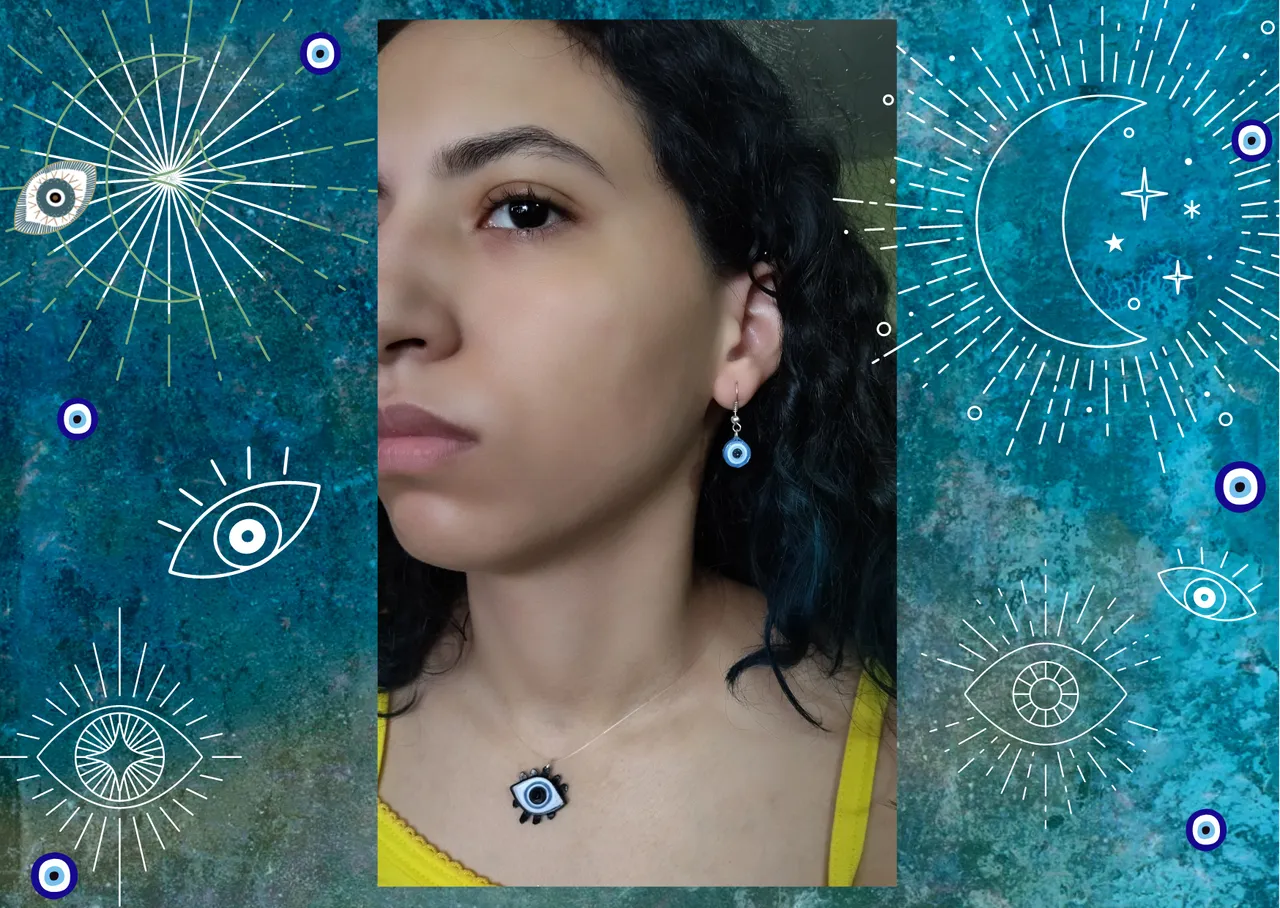
In this way we already have ready the other model that I wanted to make of a "Turkish Eye", we can place our pendant in the necklace of your preference, in my case I wanted to place it in a ghost necklace, so that it looks as if it is superimposed on our neck.✨
• De manera opcional podemos colocar en la parte central del ojo es decir en el iris, un canutillo negro, para que resalte aún más y le de detalle a la pieza, pero si lo desean lo pueden dejar como esta.
• El hoyo que habíamos abierto con antelación en la pestaña central de arriba de la pieza lo volvemos a abrir, y por allí introducimos una argolla mediana de bisutería.
• Por ultimo vamos a proteger y plastificar nuestro dije, aplicamos varias capas de pega blanca extra fuerte (de carpintería), dejando secar entra una capa y otra.
De esta manera ya tenemos listo el otro modelo que les quise realizar de un “Ojo Turco”, podemos colocar nuestro dije en el collar de su preferencia, en mi caso lo quise colocar en un collar fantasma, para que luzca como si esta sobrepuesto en nuestro cuello. ✨


What did you think, did you like it?
I hope you did, I hope you liked my explanation, procedure and photos, I made them with love for you.
"Let out that muse that inspires you, and let your imagination fly".
Thank you all, see you next time. 🐾🐱💕
¿Que les pareció, les gustó?
Espero que sí, que les haya gustado mi explicación, procedimiento y fotos, los hice con mucho cariño por y para ustedes.
"Deja salir esa musa que te inspira, y deja volar tu imaginación".
Gracias a todos, nos vemos en la próxima. 🐾🐱💕
Los invito que apoyen a "La Colmena", dale tu voto ✨
 Vote la-colmena for witness By @ylich
Todas las fotos usadas en este post son de mi autoría y han sido sacadas en mi celular personal un Redmi 9T y editadas Canva Banner y separador hecho por mí en Canva Traducido con la ayuda de DeepL
