Hello everyone... 🐱🐾💕
Hello my dear Hiver, and especially to the #Jewelry community. A special greeting to all those in charge of this community and many congratulations for the great growth they have had every day, all the success in the world and continue to multiply, thank you for the work you do every day.
For today I bring you a simple work, but I'm sure you will love the final result, the way it looks.
I tell you that this work that I am about to present, was inspired by another post previously made by a wonderful artist belonging to Hive, who is the friend @zullyarte, she made a heart-shaped door hanger with recyclable material, when I looked at her creation, which was very simple, but wonderful, my mind began to fly and immediately I went to the comments and I mentioned that I imagined her creation turned into some tendrils and I said for necklace, this way I will do it placing my personal touch, inclining the work to the part of costume jewelry, and of course making another figure, although I could not fail to do as a sample the one she presented.
I invite you to visit this friend, because you will get wonders created by her. Here is the link to the work that inspired me to see the step by step of the realization of her beautiful heart: Door hanger with cardboard
Let's get started:😃

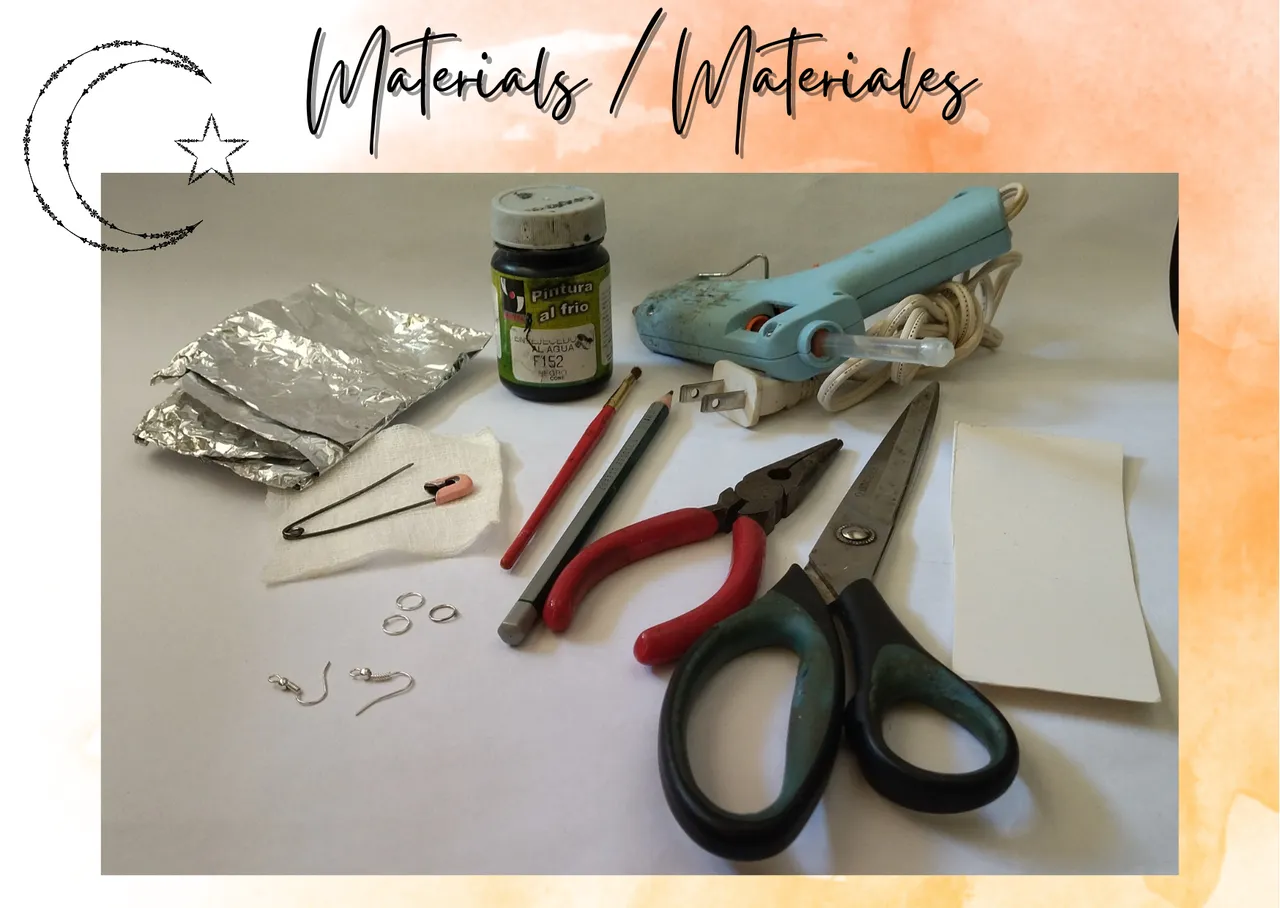
- Cardboard you have leftover at home, (must be thin cardboard).
- Pencil.
- Scissors.
- Silicone gun and silicone sticks.
- A piece of aluminum foil.
- Pin. Hook or thick needle.
- A piece of dry cloth.
- Black paint or antiquing agent.
- Fine brush.
- Base for hanging tendrils (hooks).
- Medium size costume jewelry earrings.
- Fine-nosed pliers.

Hola a todos... 🐱🐾💕
Hola mis queridos Hiver, y sobre todo a la comunidad de #Jewelry. Un saludo especial a todos los encargados de esta comunidad y muchas felicidades por el gran crecimiento que han tenido día a día, todo el éxito del mundo y que sigan multiplicándose, gracias por la labor que realizan día a día.Para hoy les traigo un sencillo trabajo, pero estoy segura que les va a encantar el resultado final, por la manera en que luce.
Les cuento que este trabajo que estoy por presentar, fue inspirado en otro post previamente realizado por una maravillosa artista perteneciente a Hive, que es la amiga @zullyarte, ella realizo un colgante para puerta en forma de corazón con material reciclable, cuando mire su creación, la cual fue muy sencilla, pero maravillosa, mi mente comenzó a volar e inmediatamente me fui a los comentarios y le mencione que me imaginaba su creación convertida en unos zarcillos y dije para collar, de esta manera lo hare colocando mi toque personal, inclinando el trabajo a la parte de bisutería, y por su puesto realizando otra figura, aunque no pude dejar de hacer como muestra la que ella presento.
Los invito a visitar a esta amiga, porque van a conseguir maravillas creadas por ella. Por acá les dejo el link del trabajo que me inspiro para que vean el paso a paso de la realización de su bello corazón: Colgante para puerta con cartón
Comencemos:😃

• Cartón que tengas sobrante en casa, (debe ser cartón fino).
• Lápiz.
• Tijera.
• Pistola y barras de silicona.
• Un trozo de papel de aluminio.
• Alfiler. gancho o aguja gruesa.
• Un trozo de tela seca.
• Pintura o envejecedor color negro.
• Pincel fino.
• Base ara zarcillos colgantes (anzuelos).
• Argollas medianas de bisutería.
• Alicate punta fina.

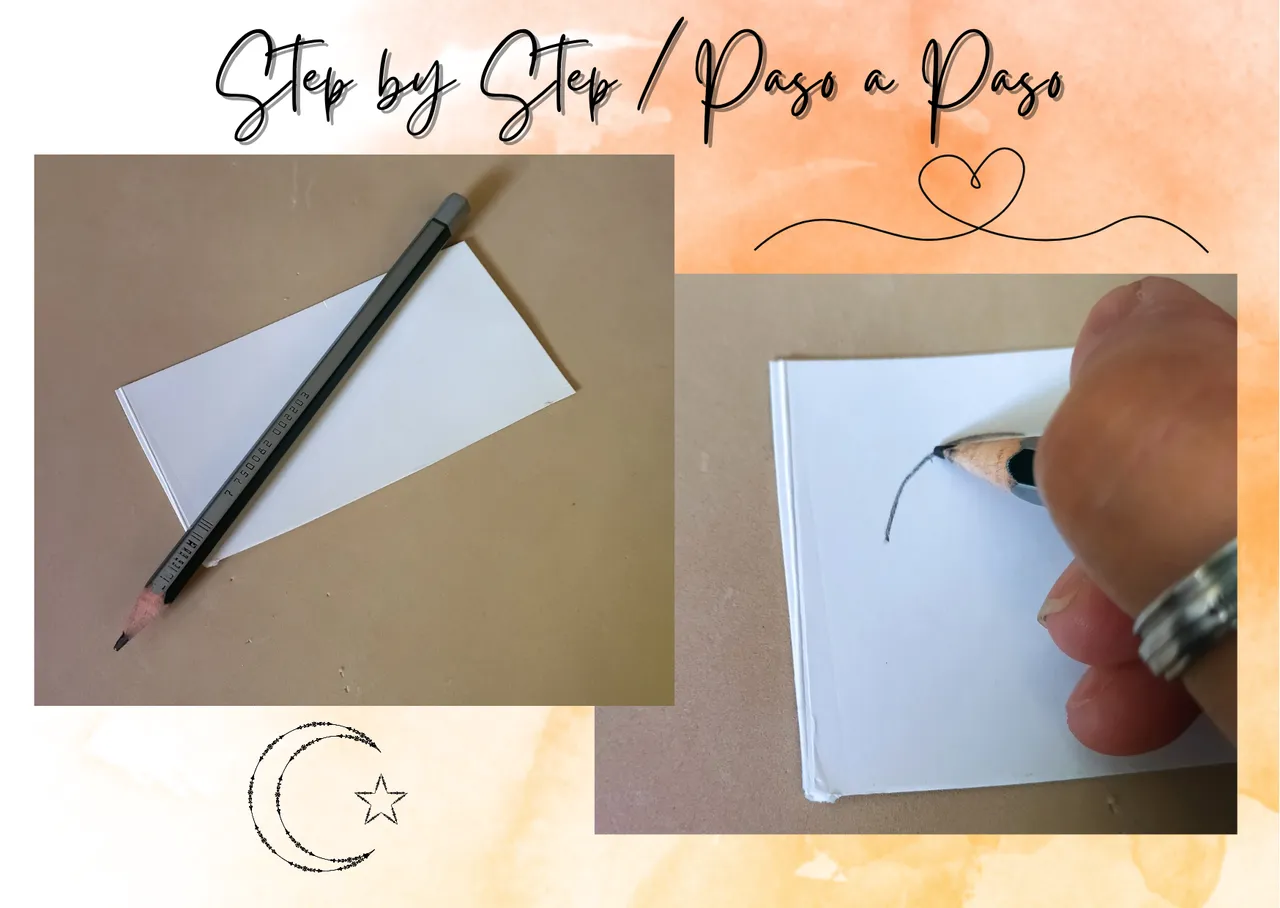
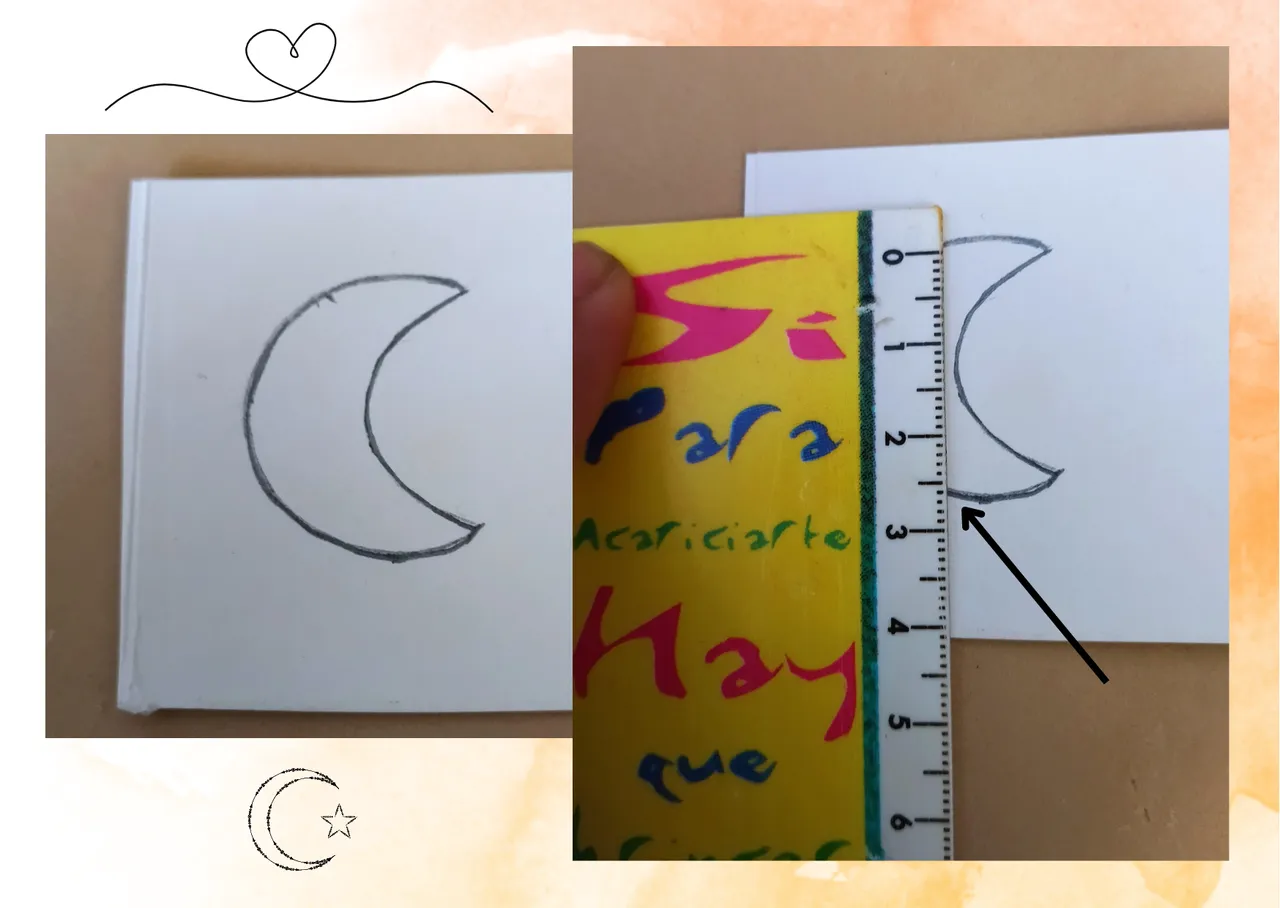
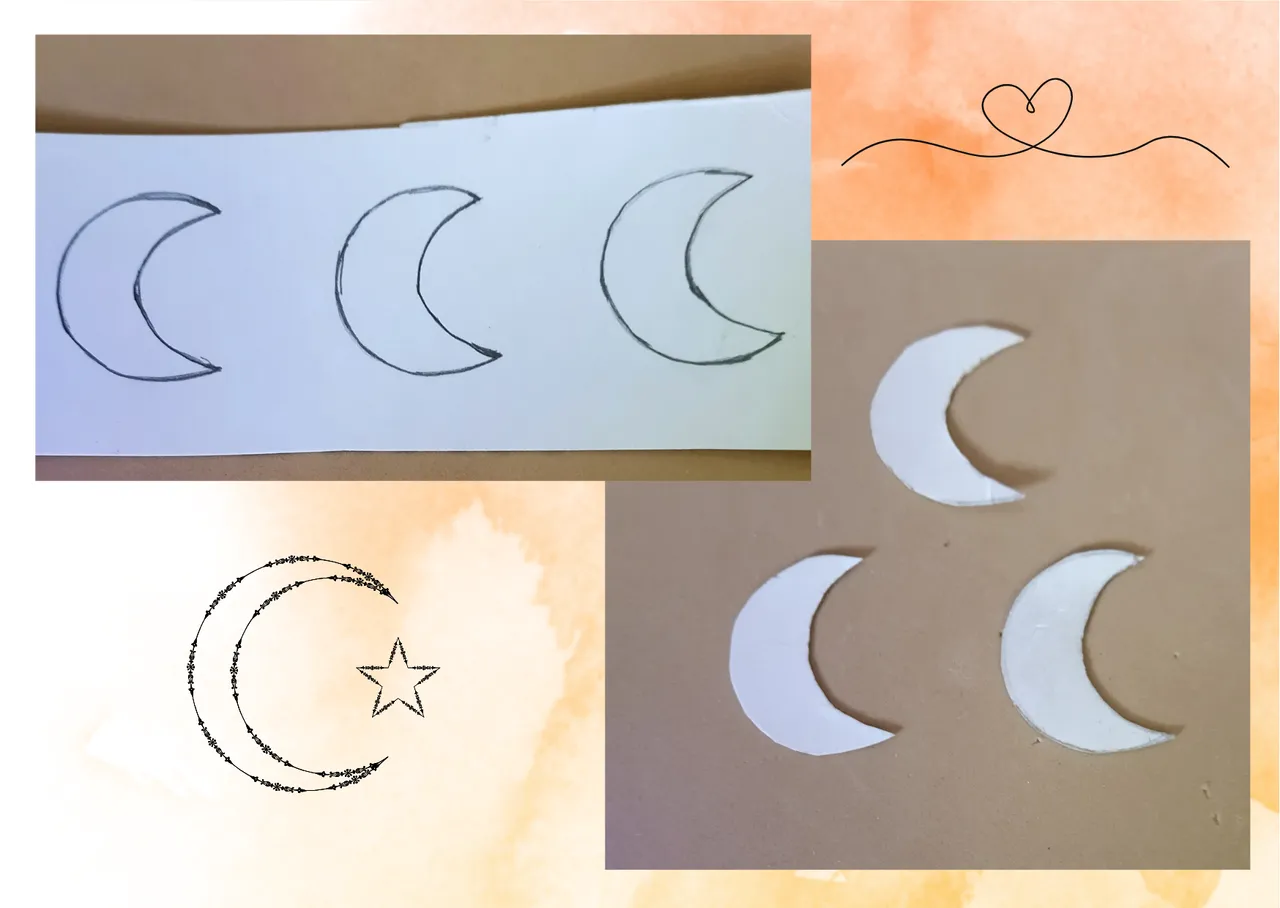
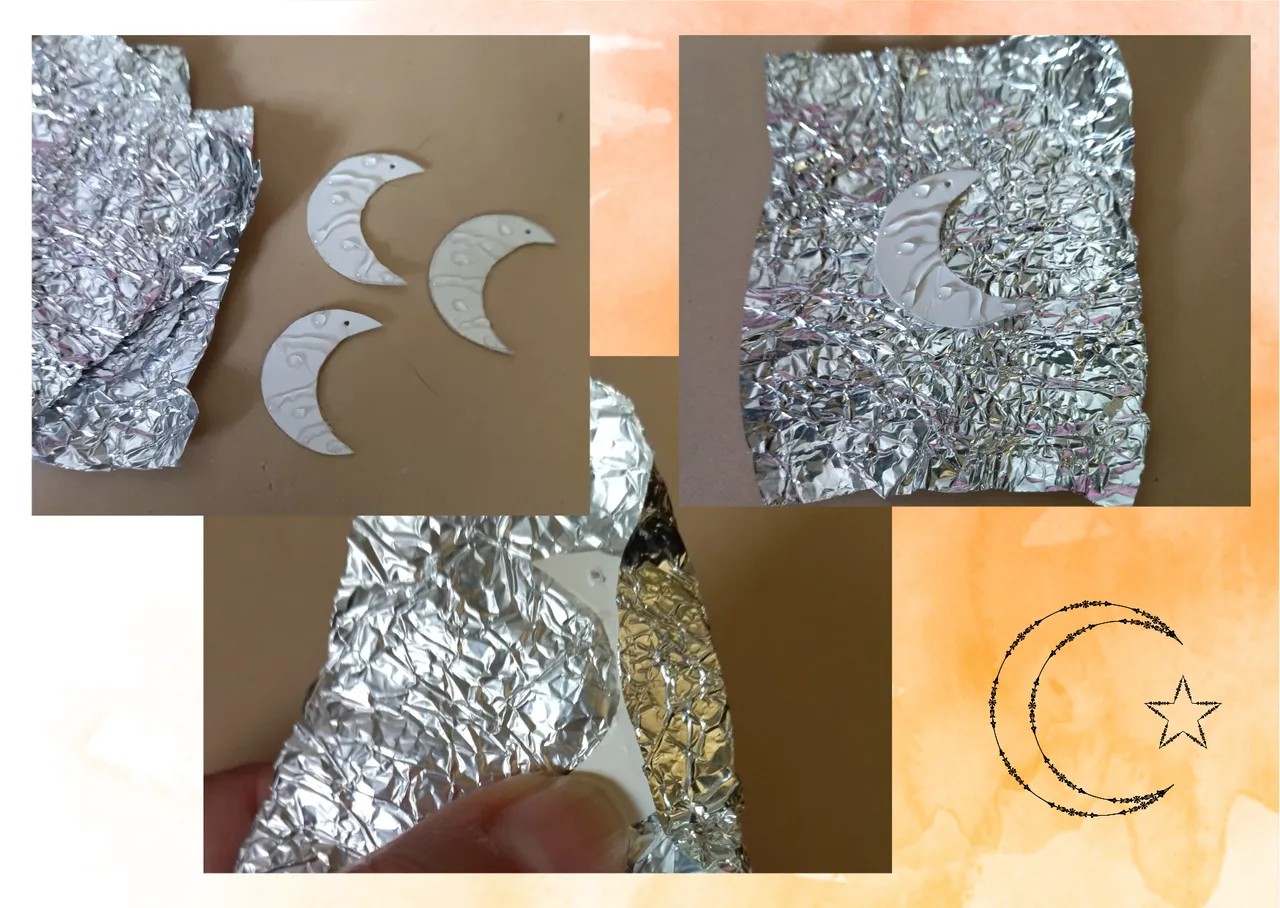
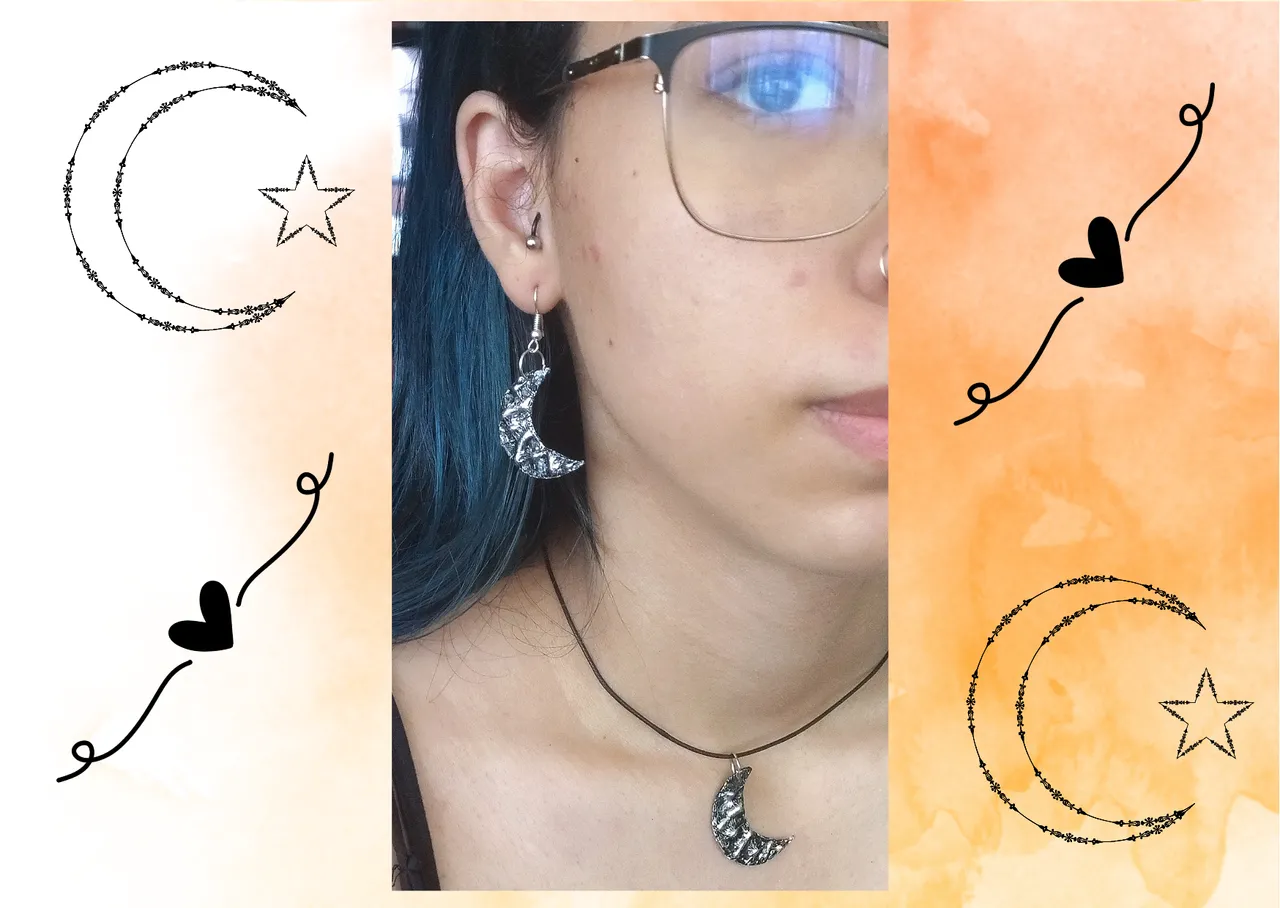
- We start by taking a piece of thin white cardboard to make the bases of the charms, with a pencil we paint the figure of our preference, in my case I made the figures of moons with a pencil, you can make the size you like as you want your charms to be, I made them approximately 2.5cms high. As you can see I made three, since I am going to use two for a pair of earrings, and one for a pendant for a necklace. Once the bases are drawn we cut them out with the scissors.

• Comenzamos tomando un trozo de cartón fino blanco para realizar las bases de los dijes, con un lápiz pintamos la figura de nuestra preferencia, en mi caso realice las figuras de unas lunas con un lápiz, la pueden hacer del tamaño que más les guste según deseen que queden sus dijes yo los hice de aproximadamente 2,5cms de altura. Como verán realice tres, ya que voy a usar dos para un par de pendientes, y una para un dije para collar. Una vez dibujadas las bases recortamos con la tijera.
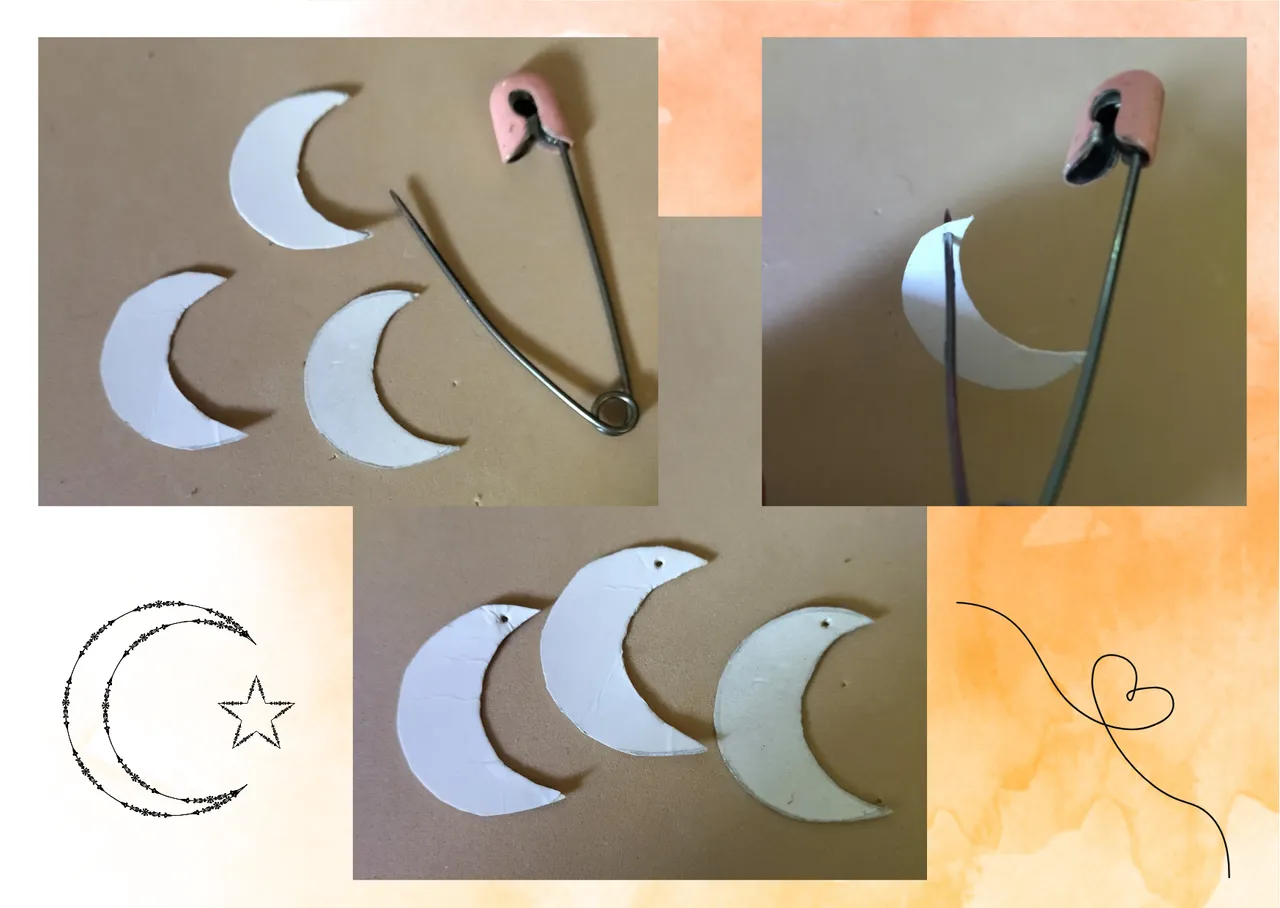
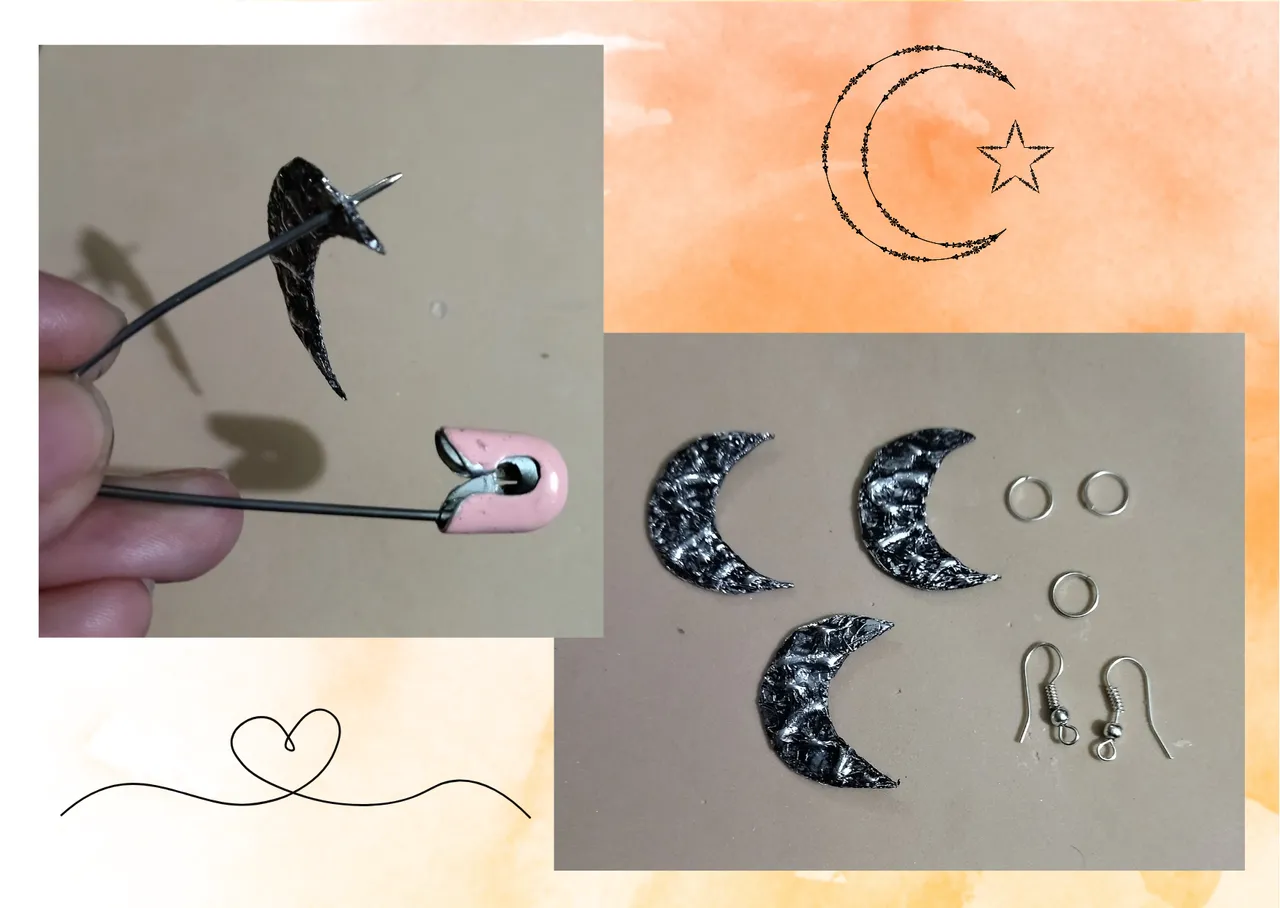
We are going to take the pin and we are going to open a small hole in the top of the cardboard base, this is to make it easier to open it again when we line the base and to be able to place the costume jewelry ring. We will do this very carefully so as not to break the cardboard.
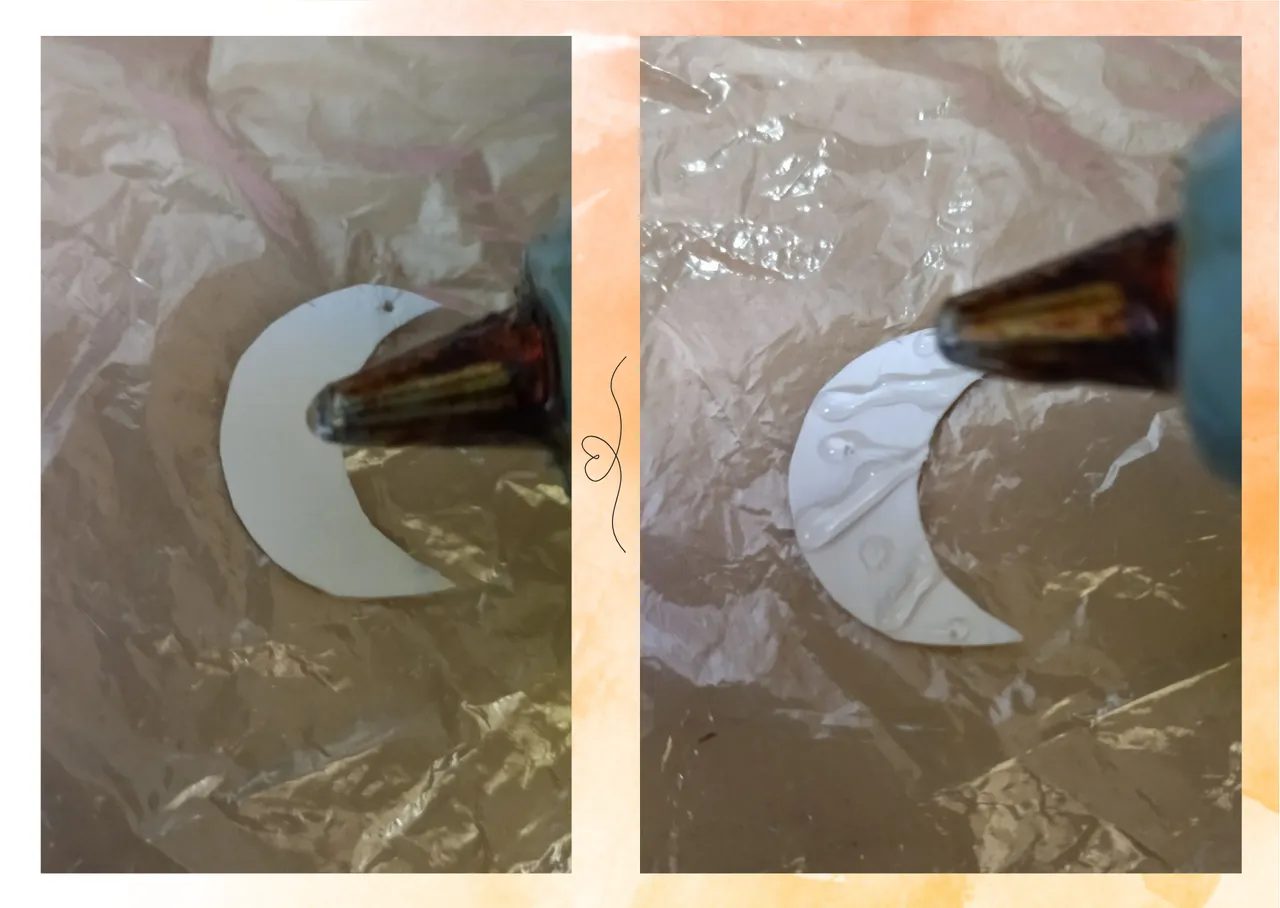
Now we are going to take the silicone gun, with it we will make some little figures to give relief to the cardboard base, you can do whatever you want, they do not necessarily have to be the same, we are working on a fairly small base and it will not be so easy to create a specific figure, the important thing is to create relief, so that our final result is beautiful, and highlight the piece.
• Vamos a tomar el alfiler y vamos a abrir un hoyito en la parte de arriba de la base de cartón, esto es para facilitar abrirlo nuevamente cuando forremos la base y poder colocar la argolla de bisutería. Esto lo haremos con sumo cuidado para no romper el cartón.
• Ahora vamos a tomar la pistola de silicón, con ella haremos algunas figuritas para darle relieve a la base de cartón, puedes hacer lo que desees no necesariamente deben quedar iguales, estamos trabajando sobre una base bastante pequeña y no será tan fácil crear una figura específica, lo importante es crear relieve, para que nuestro resultado final quede bonito, y resalte la pieza.
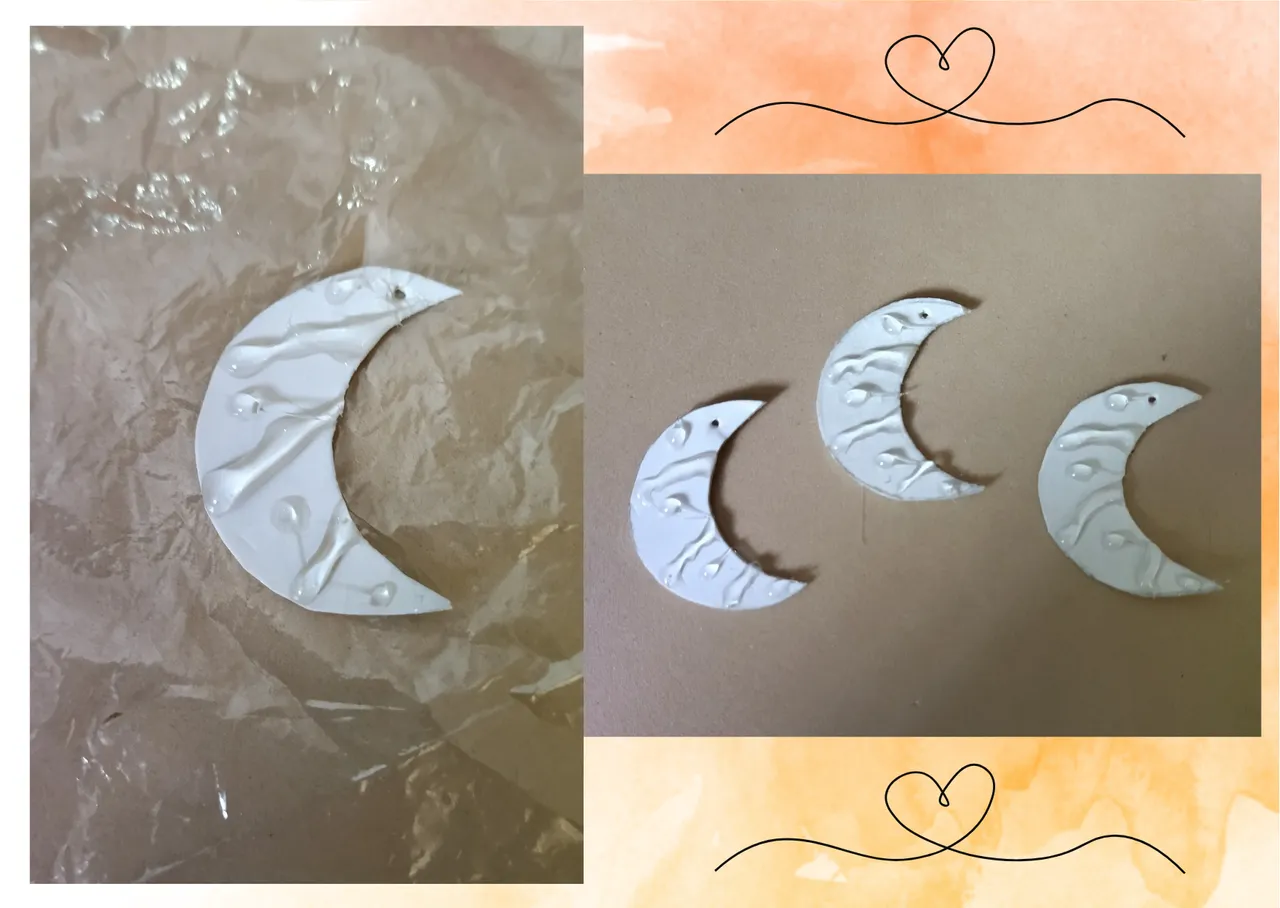
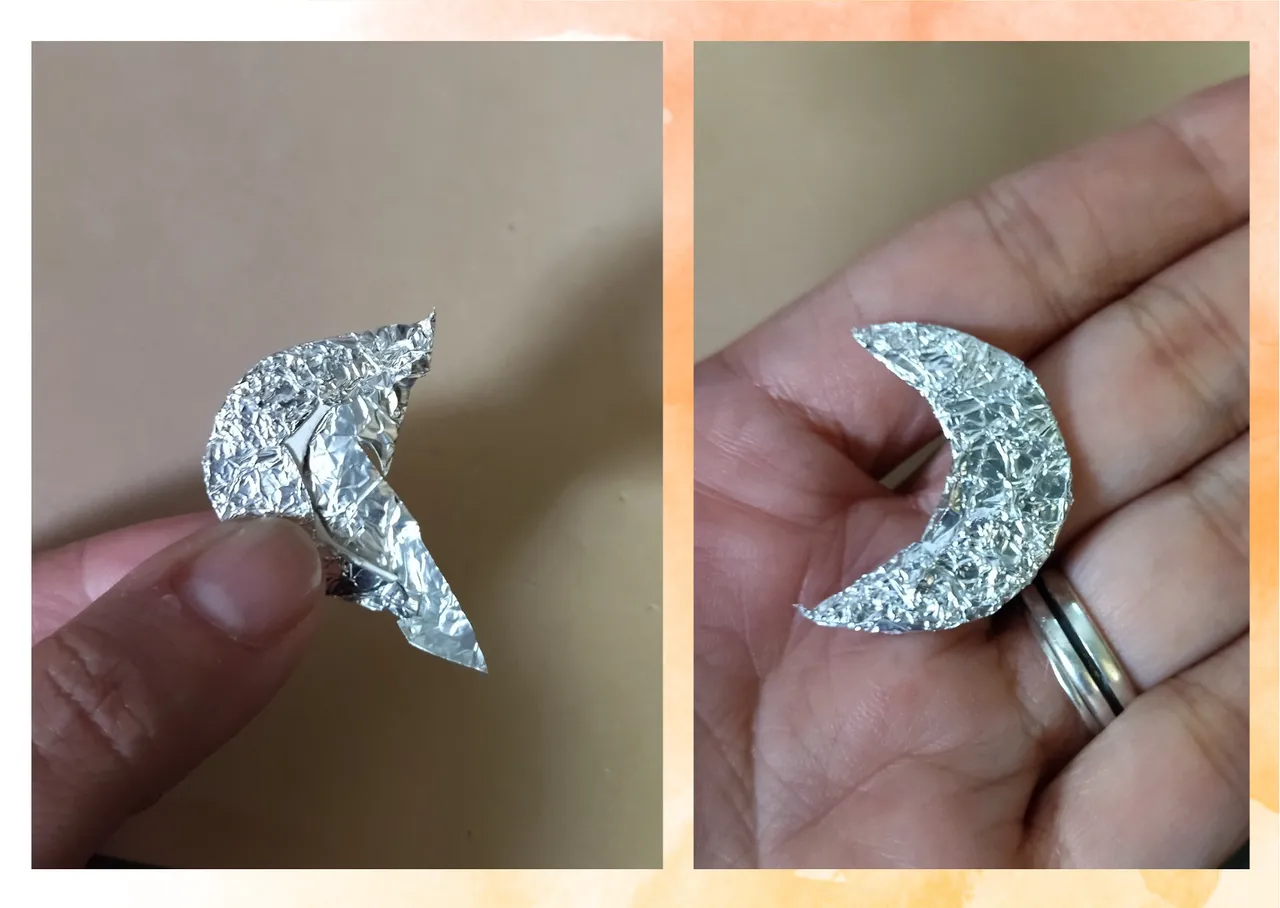
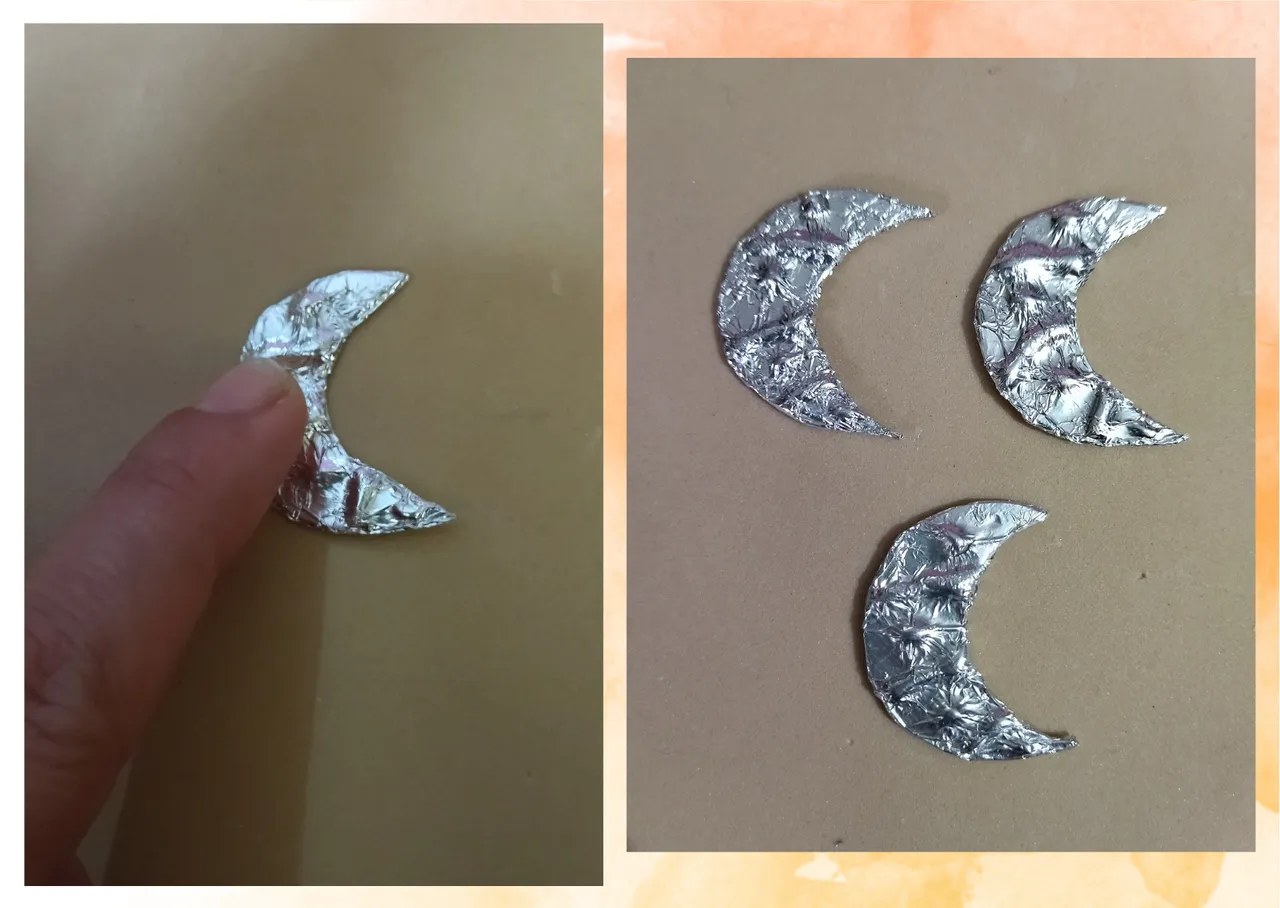
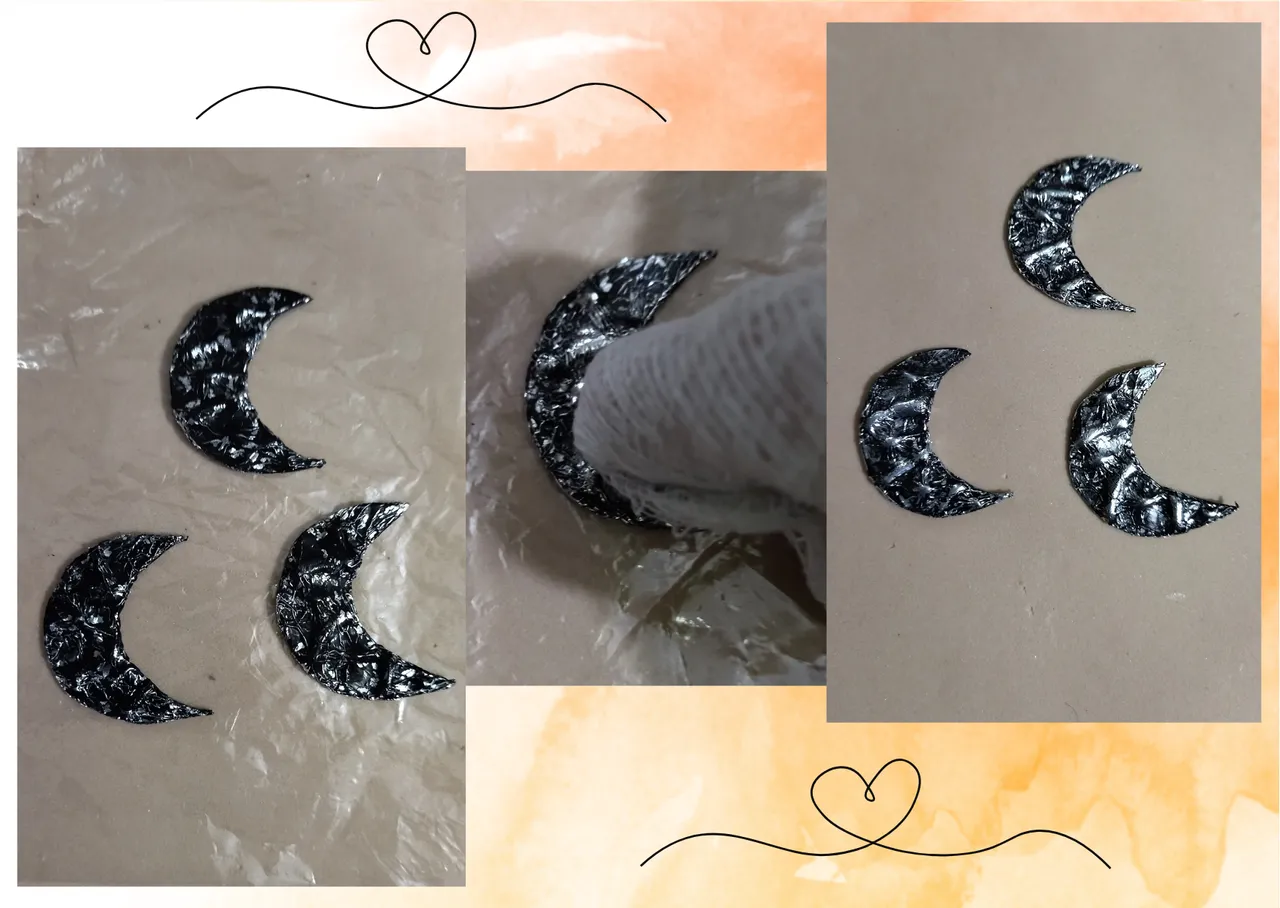
Now we are going to take aluminum foil, we chop pieces that we calculate cover the entire piece, I had some leftover pieces that were wrinkled, if you take it out of the roll and it is smooth, try to wrinkle a little being careful not to break it, with this piece we will cover the piece in its entirety molding it with your fingers, once we finish covering it we will pass our fingers gently through the part where we place the decoration with silicone so that the figures are seen and stand out.
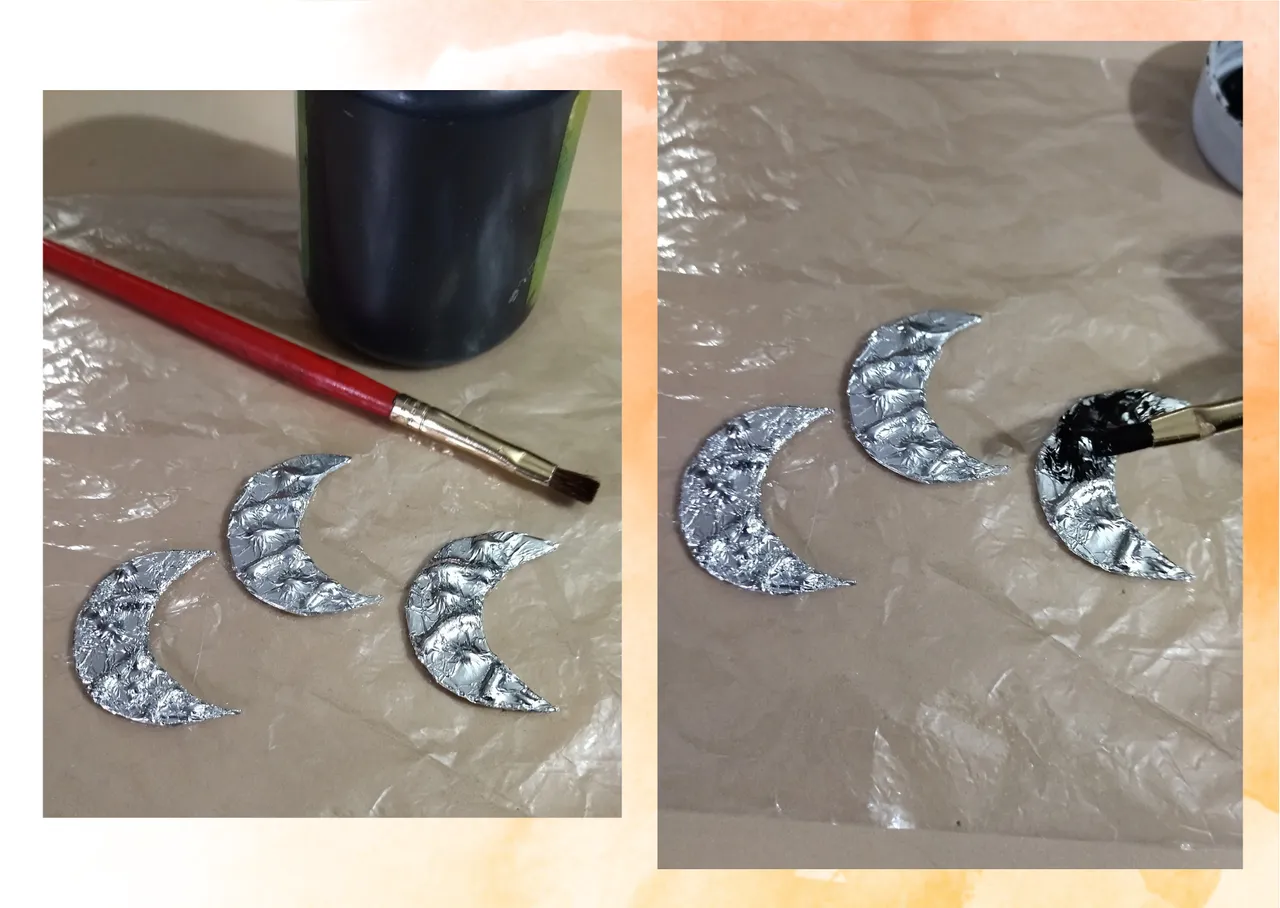
Take the black paint and apply it to all parts of the pieces both front and back with a brush, when finished we take a cloth and pass right through the relief that we made as if we were polishing the piece, this is to highlight the relief, let it dry.
• Ahora vamos a tomar papel de aluminio, picamos trozos que calculemos cubran la pieza completa, yo tenía algunos trozos sobrantes que estaban arrugados, si ustedes lo sacan del rollo y esta liso, traten de arrugar un poco teniendo cuidado de no romperlo, con este trozo vamos a cubrir la pieza en su totalidad moldeando con los dedos, una vez que terminemos de cubrirla vamos a pasar los dedos suavemente por la parte donde colocamos la decoración con silicona para que se vean las figuras y resalten.
• Tomemos la pintura negra y por todas las partes de las piezas tanto por delante como por detrás aplicamos con un pincel, al terminar tomamos un trapito y pasamos justo por el relieve que realizamos como si estuviéramos puliendo la pieza, esto es para que resalte dicho relieve, dejamos secar.
We are going to reopen again the hole we had made in the piece, take the pin and pass it through the same place where we had previously opened it.
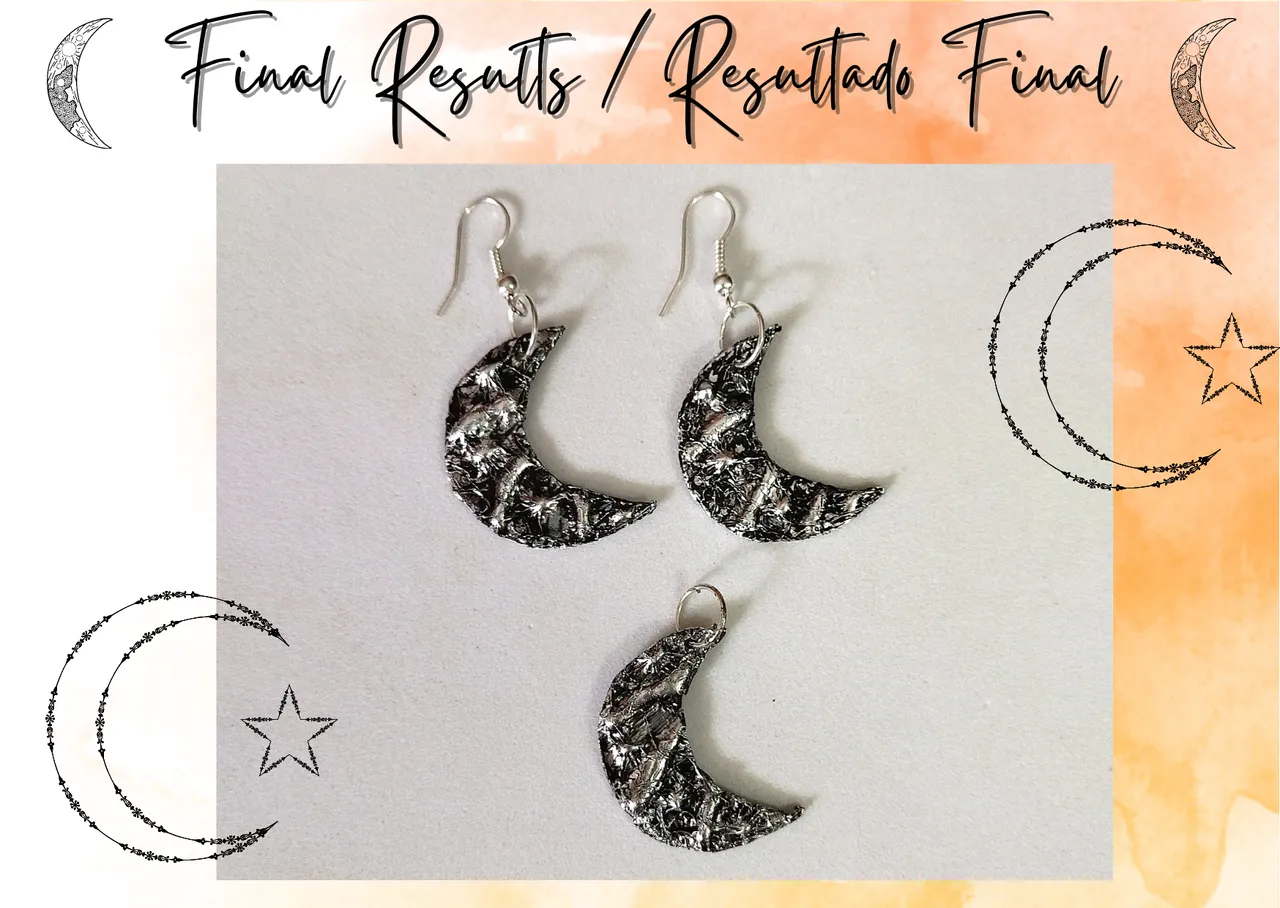
Now let's attach the rings to the pieces and the bases for hanging tendrils (hooks), and in this way we will have our earrings and necklace pendant ready to be used.
• Vamos a reabrir nuevamente el hoyito que le habíamos hecho a la pieza, tomamos el alfiler y lo pasamos por el mismo lugar en el que habíamos abierto previamente.
• Ahora coloquemos las argollas a las piezas y las bases para zarcillos colgantes (anzuelos), y de esta manera tendremos nuestros pendientes y dije para collar listos para ser usados.


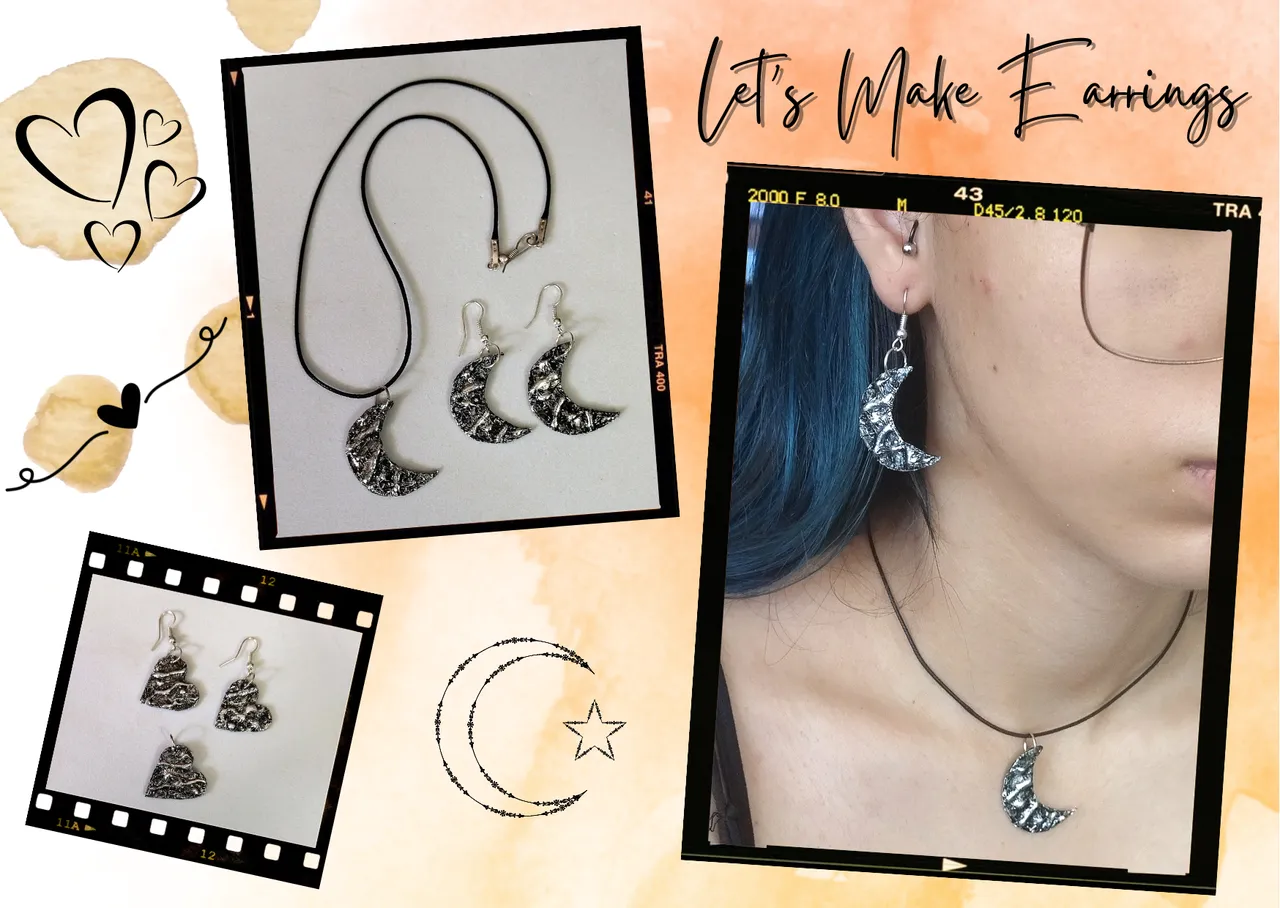
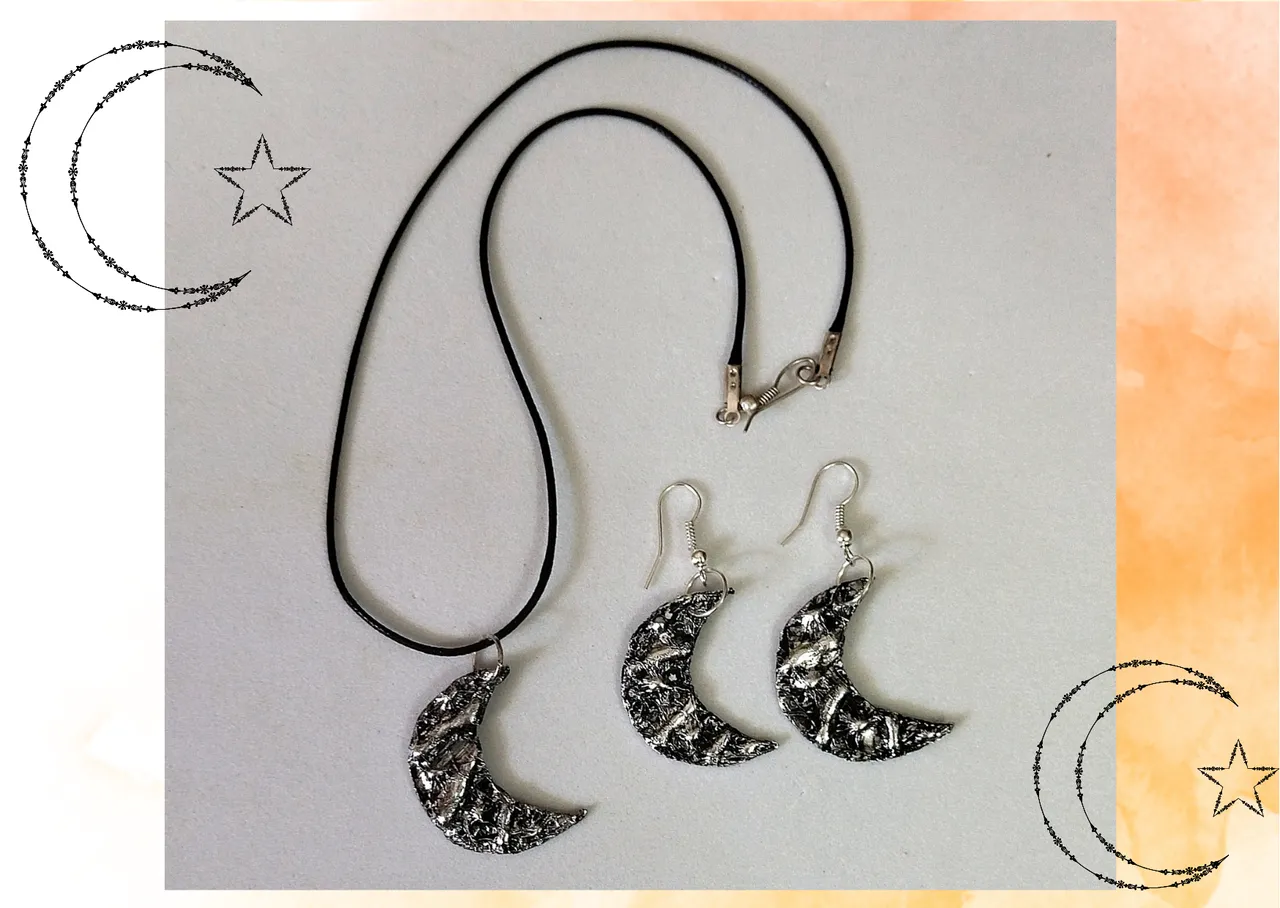
You can place your charm on the necklace you have available, I will place it on a simple thin snakeskin necklace. I love these pieces because they simulate a beautiful metallic effect and when you wear them you can't imagine what material they were made with.
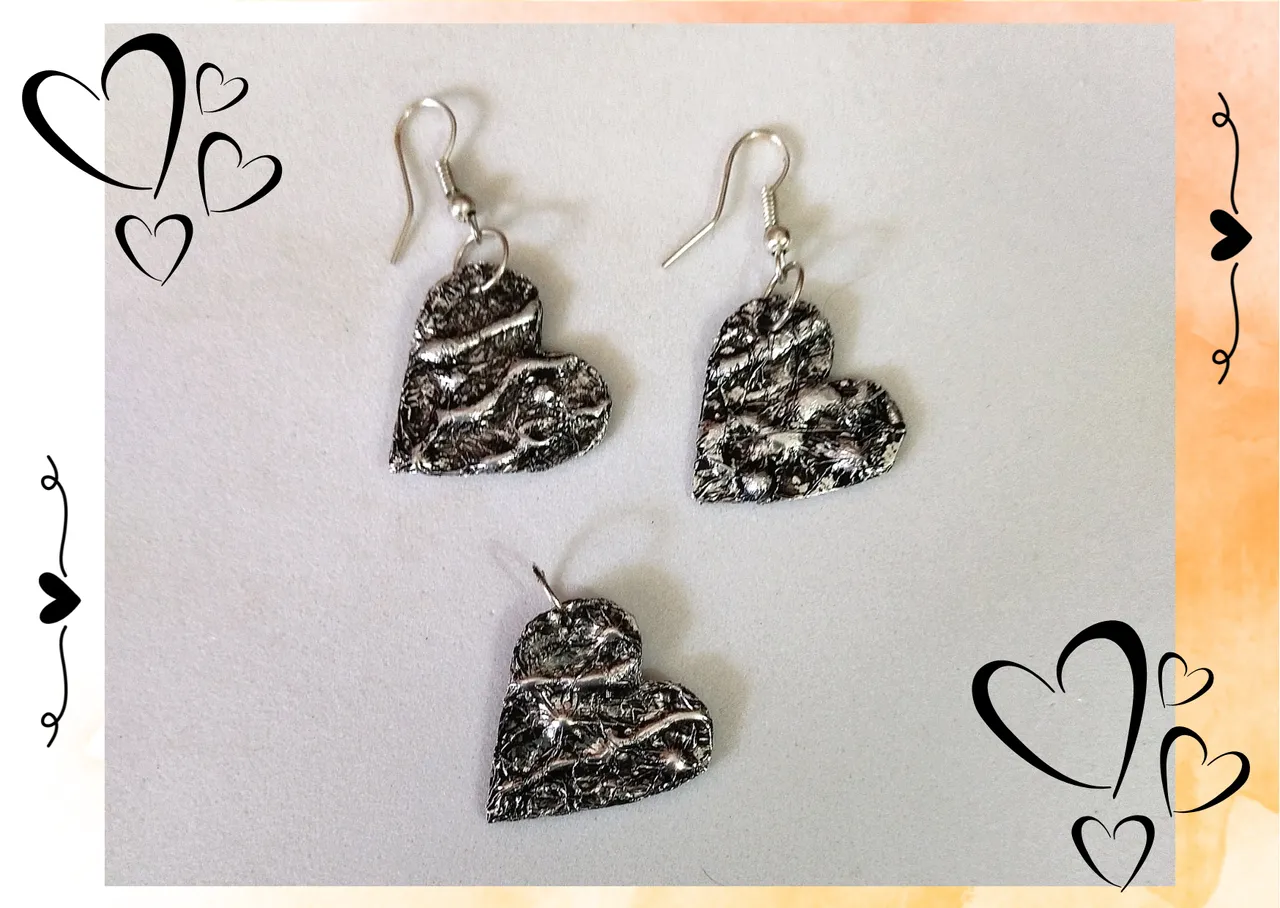
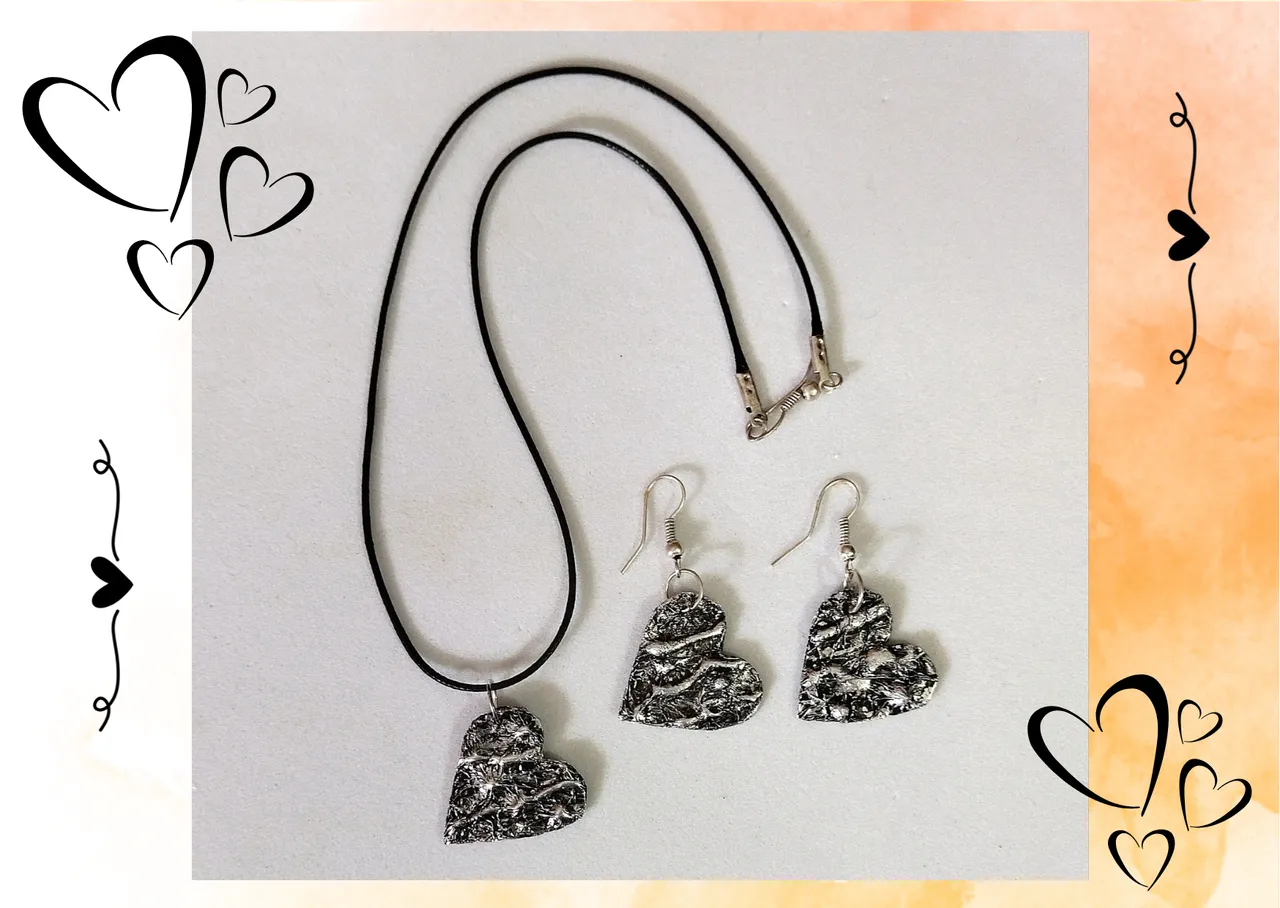
I leave you the moons that I made in the step by step, but also some hearts that I couldn't resist to make so you can see how they look turned into a set of necklace and tendrils.

Pueden colocar su dije en el collar que tengan disponible, yo lo colocare en un sencillo collar de piel de serpiente fino. Me encantan estas piezas porque simulan un bello efecto metalizado y al tenerlas puestas nadie se imagina con que material fueron hechas.
Les dejo las lunas que realicé en el paso a paso, pero también unos corazones que no me resistí a elaborar para que vean como lucen convertidos en un juego de collar y zarcillos.
What did you think, did you like it?
I hope you did, I hope you liked my explanation, procedure and photos, I made them with love for you.
"Let out that muse that inspires you, and let your imagination fly".
Thank you all, see you next time. 🐾🐱💕
¿Que les pareció, les gustó?
Espero que sí, que les haya gustado mi explicación, procedimiento y fotos, los hice con mucho cariño por y para ustedes.
"Deja salir esa musa que te inspira, y deja volar tu imaginación".
Gracias a todos, nos vemos en la próxima. 🐾🐱💕
Todas las fotos usadas en este post son de mi autoría y han sido sacadas en mi celular personal un Redmi 9T y editadas Canva Banner hecho por mí en Paint Tool Sai Traducido con la ayuda de DeepL
