Hello everyone... ✨
Hello to my dear Hivers and the beloved community of artists #Jewelry, as always very pleased and excited to be here again, showing you my work made with love and especially for you.
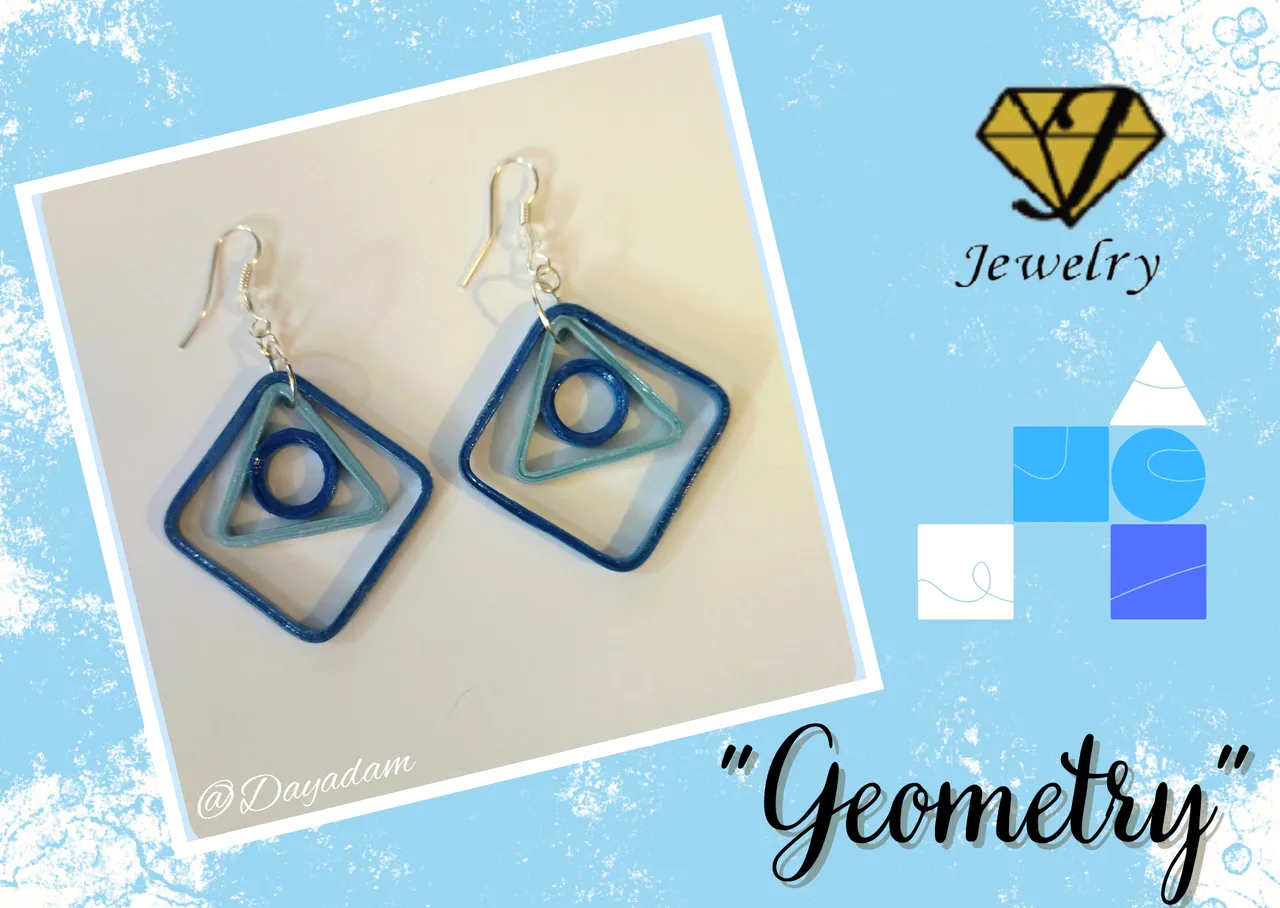
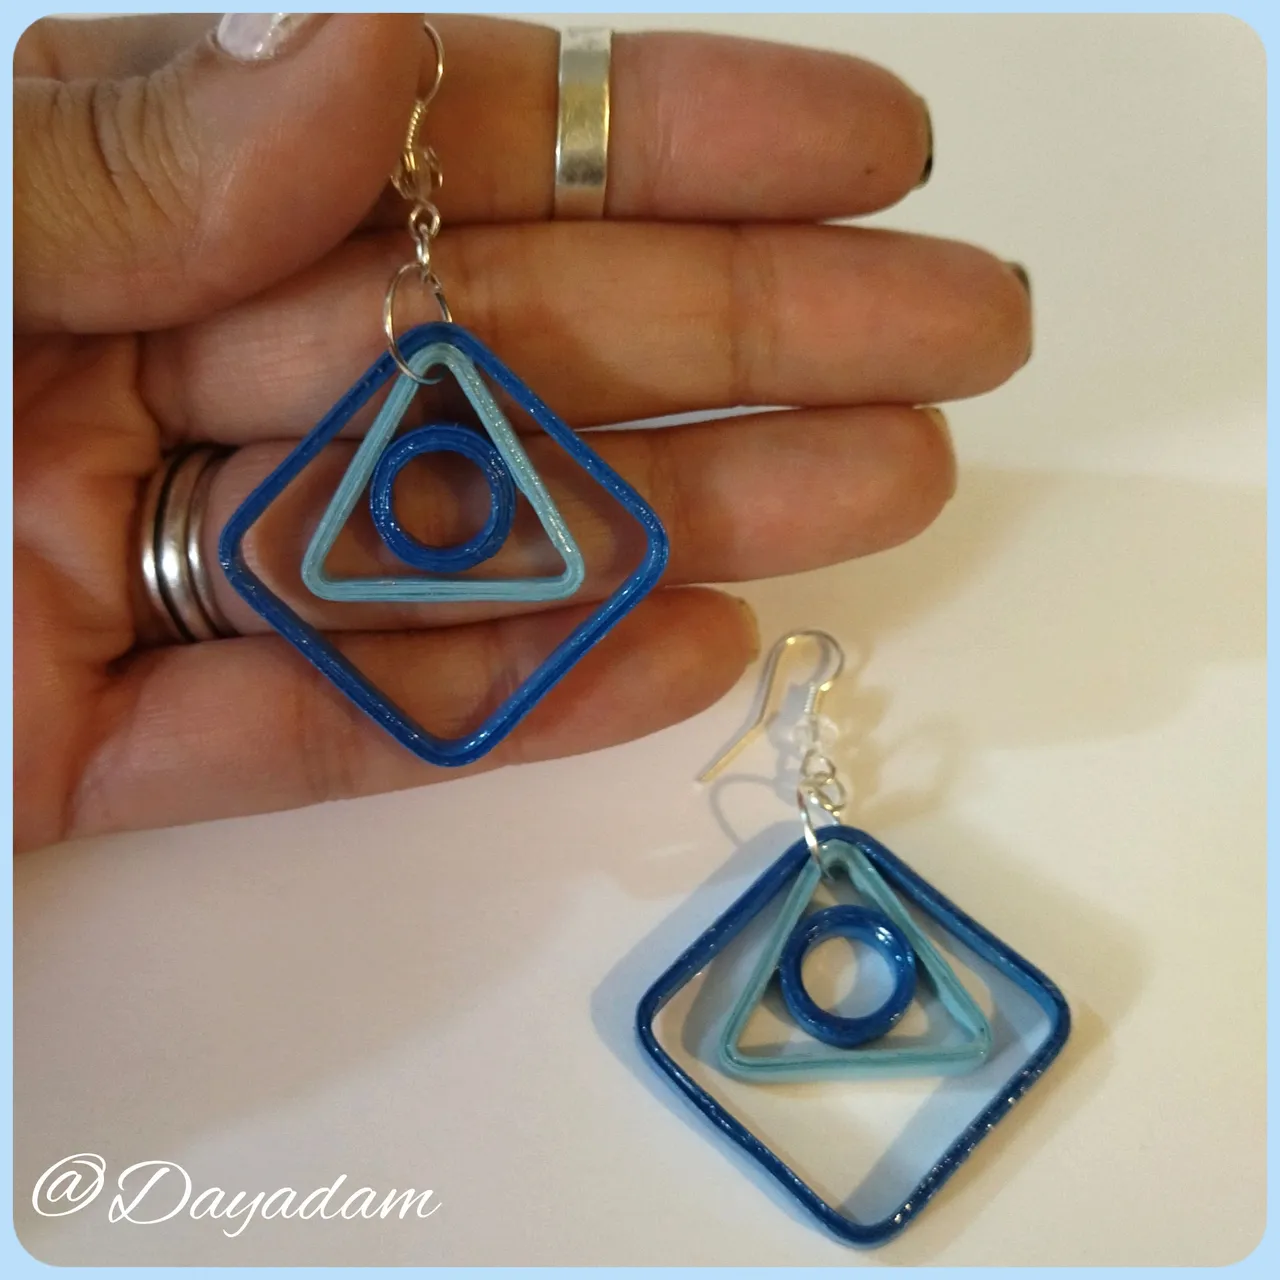
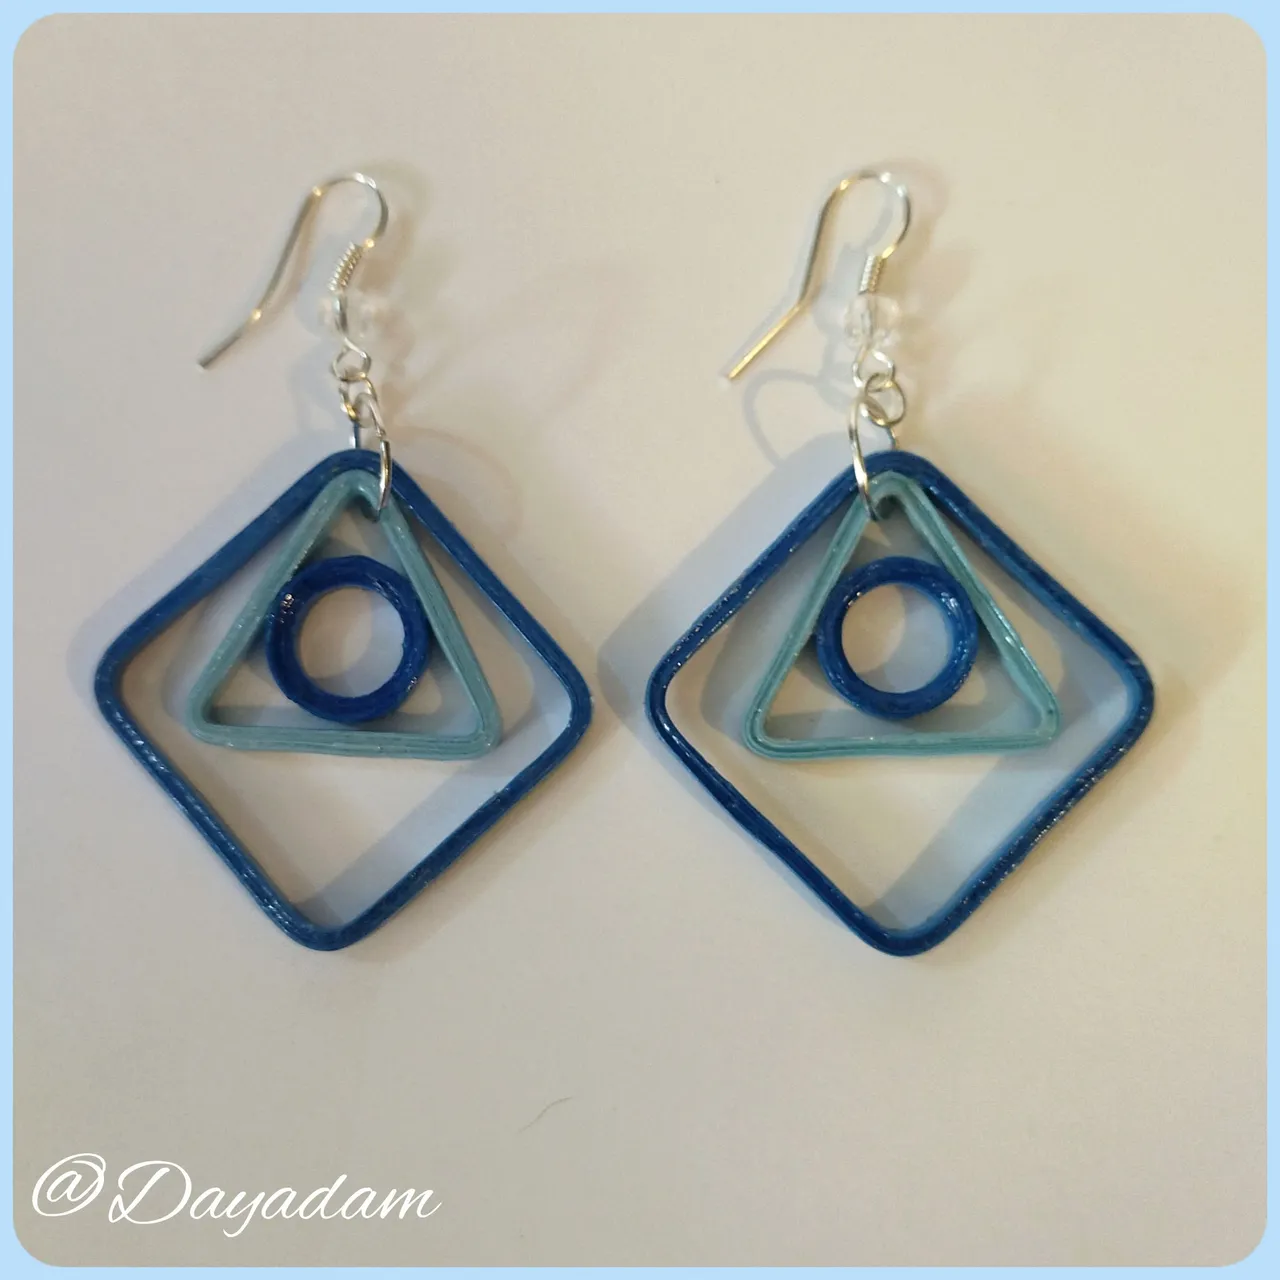
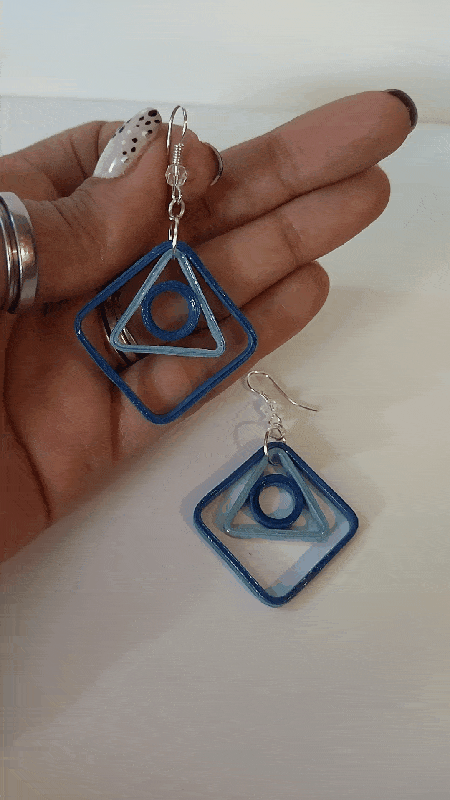
Today I bring you a very simple and basic tutorial, it consists of hanging earrings in the quilling technique based on three geometric shapes, 1 square, 1 triangle and a circle. It is very easy, we can do it quickly and in a very short time we will be able to wear beautiful and very casual earrings.
The point is that I always wanted to experiment with this type of figures and did not have the right molds or templates to do so, but today, thanks to a nice gift that the beautiful @ninaeatshere gave me, a suitcase with many implements to work my precious quilling technique, I am experimenting with each of the little things it contains, to show you much more. In the case of the molds that I will use today as I said before I will show you something basic, but later I will make different combinations in shapes, sizes and colors with them.
In previous works I have already used some things, and I'm going for more, I'm still investigating the uses of certain things. Although today I used it for something very simple, it has a lot of value because it helps me to make my work neater. Thank you for this blessing, God bless you with many beautiful things for your life.
Hoping you like it, I leave you my creative process:
Let's get started:😃

Hola a todos... ✨
Hola a mis queridos Hivers y a la querida comunidad de artistas #Jewelry, como siempre muy complacida y emocionada de encontrarme por acá nuevamente, mostrándole mi trabajo hecho con mucho amor y especialmente para ustedes.
Para hoy les traigo un tutorial muy sencillo y básico, consta de unos zarcillos colgantes en la técnica de quilling realizados en base a tres figuras geométricas, 1 cuadrado, 1 triangulo y un circulo. Es muy fácil, lo podemos llevar a cabo rápidamente y en muy poco tiempo podremos lucir unos bonitos pendientes muy casuales.
El punto es que siempre quise experimentar con este tipo de figuras y no contaba con los moldes o plantillas adecuadas para hacerlo, pero hoy día, gracias a un lindo regalo que me realizo la bella @ninaeatshere, una maleta con muchos implementos para trabajar mi preciada técnica de quilling, estoy experimentando con cada una de las cositas que contiene, para mostrarles mucho más. En el caso de los moldes que utilizare hoy como dije anteriormente les mostrare algo básico, pero posteriormente hare combinaciones diversas en formas, tamaños y colores con ellos.
Ya en trabajos anteriores he utilizado algunas cosas, y voy por más, aún sigo investigando los usos de ciertas cosas. Aunque hoy lo use para algo muy sencillo, tiene mucho valor porque me sirve para que el trabajo sea más prolijo. Gracias por esta bendición, Dios te lo retribuya en muchísimas cosas hermosas para tu vida.
Esperando que sea de su agrado, les dejo mi proceso creativo:
Comencemos:😃

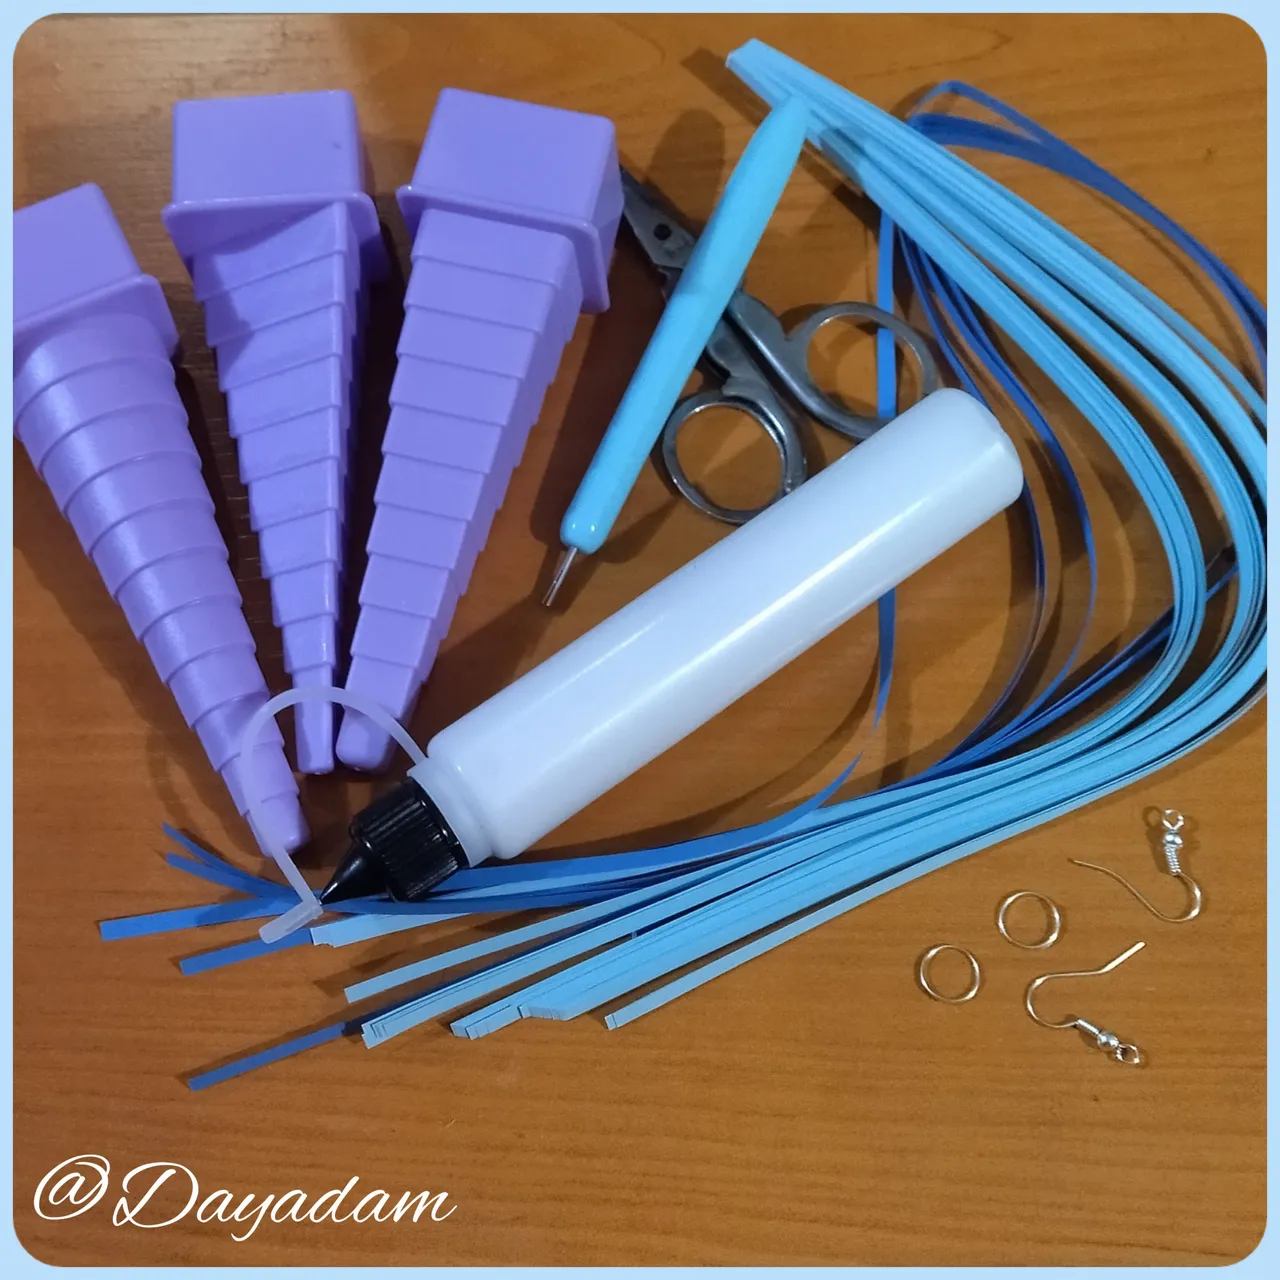
• Cintas de quilling de 3mm de ancho Azul oscuro y Azul claro.
• Plantillas o moldes para hacer cuadrados, triángulos, y círculos.
• Pega blanca extra fuerte (de carpintería).
• Bases para zarcillos colgante (anzuelos).
• Argolla pequeña u mediana de bisutería.
• Cristales checos de bisutería pequeño.
• Tijera.
• Pinza punta fina
• Pincel.
- Quilling ribbons 3mm wide Dark Blue and Light Blue.
- Templates or molds to make squares, triangles, and circles.
- Extra strong white glue (woodworking glue).
- Bases for hanging tendrils (hooks).
- Small or medium size costume jewelry earrings.
- Small Czech costume jewelry crystals.
- Scissors.
- Fine tip tweezers
- Brush.

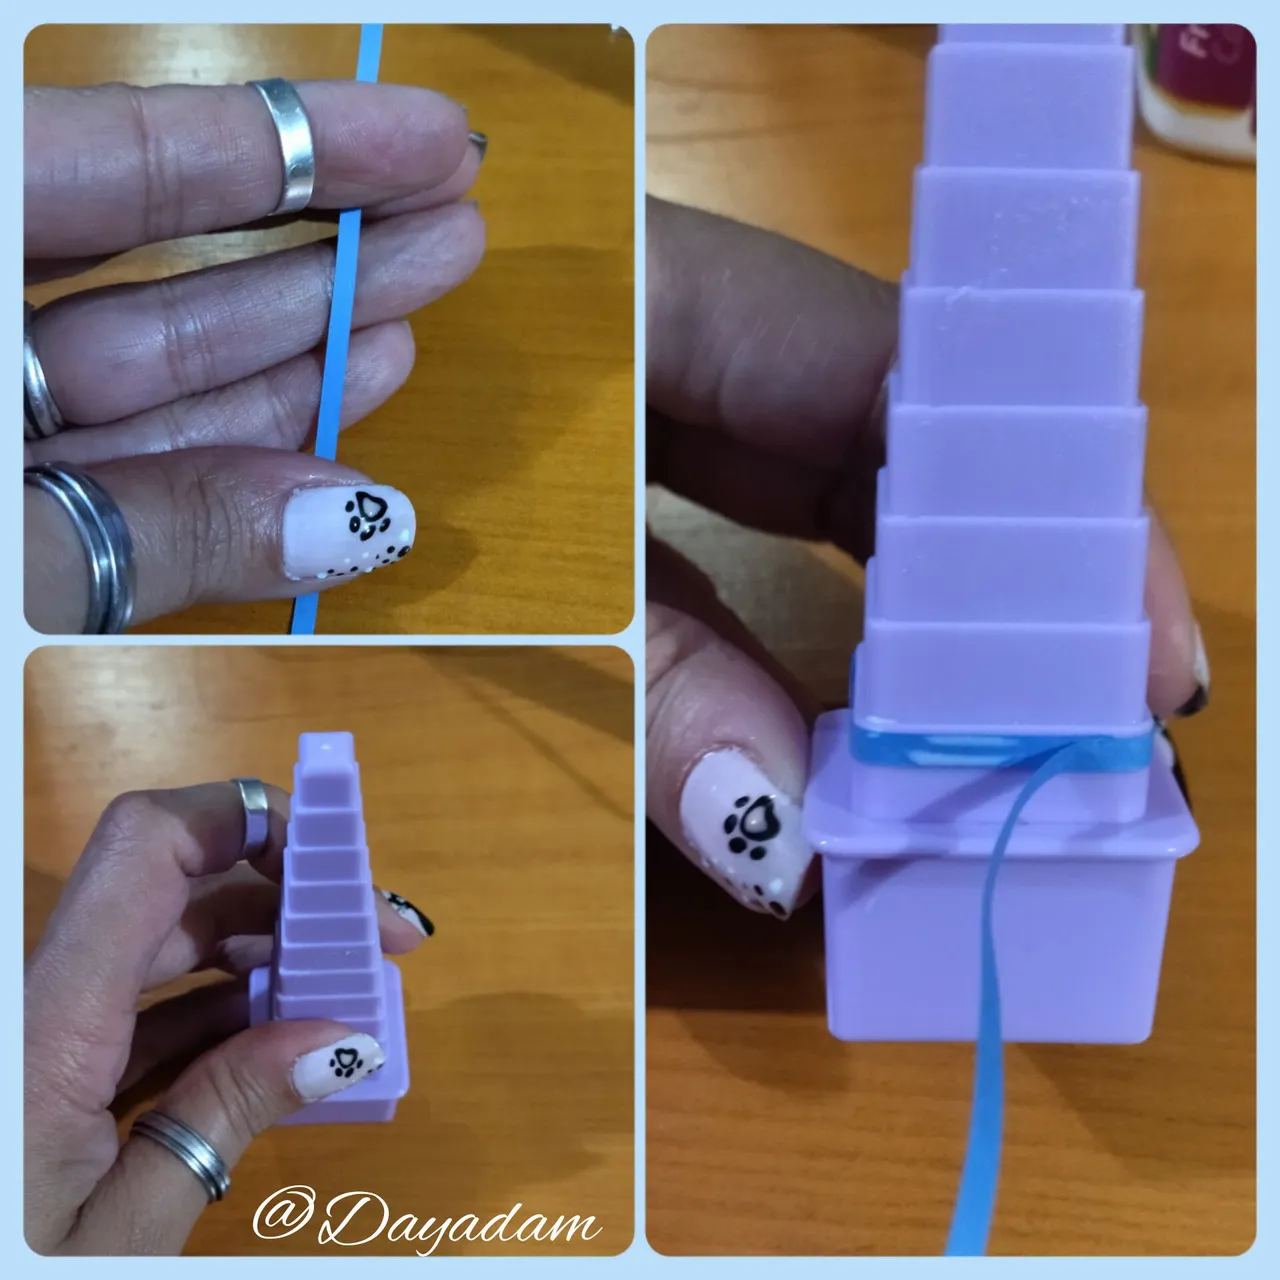
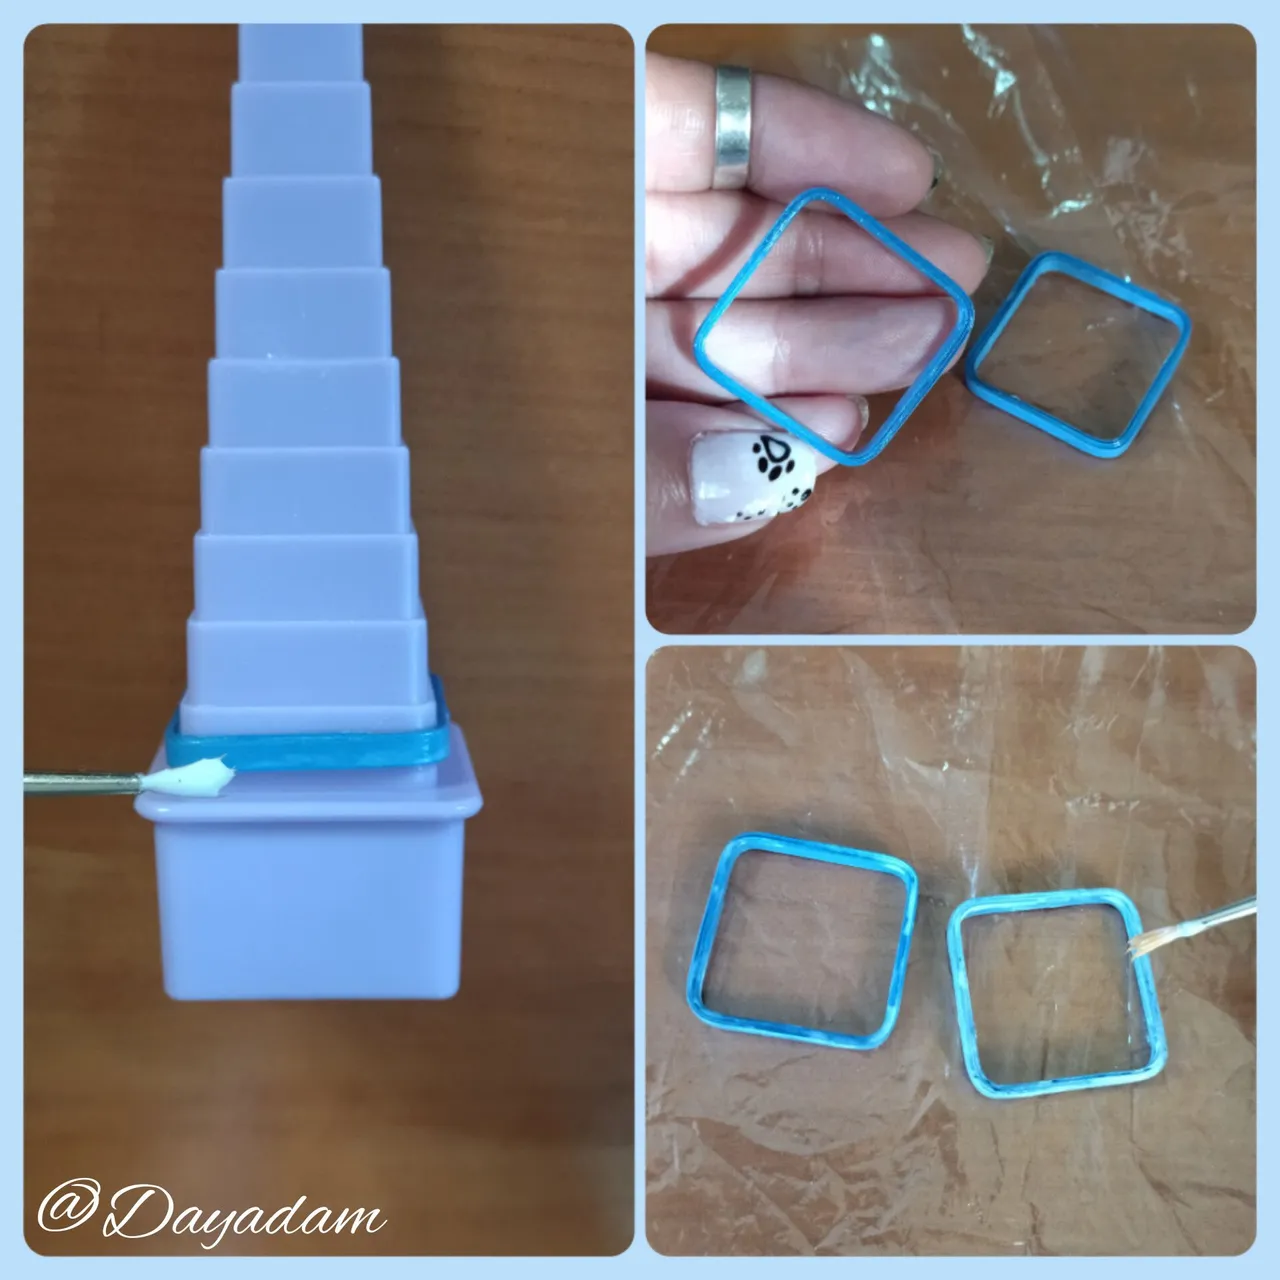
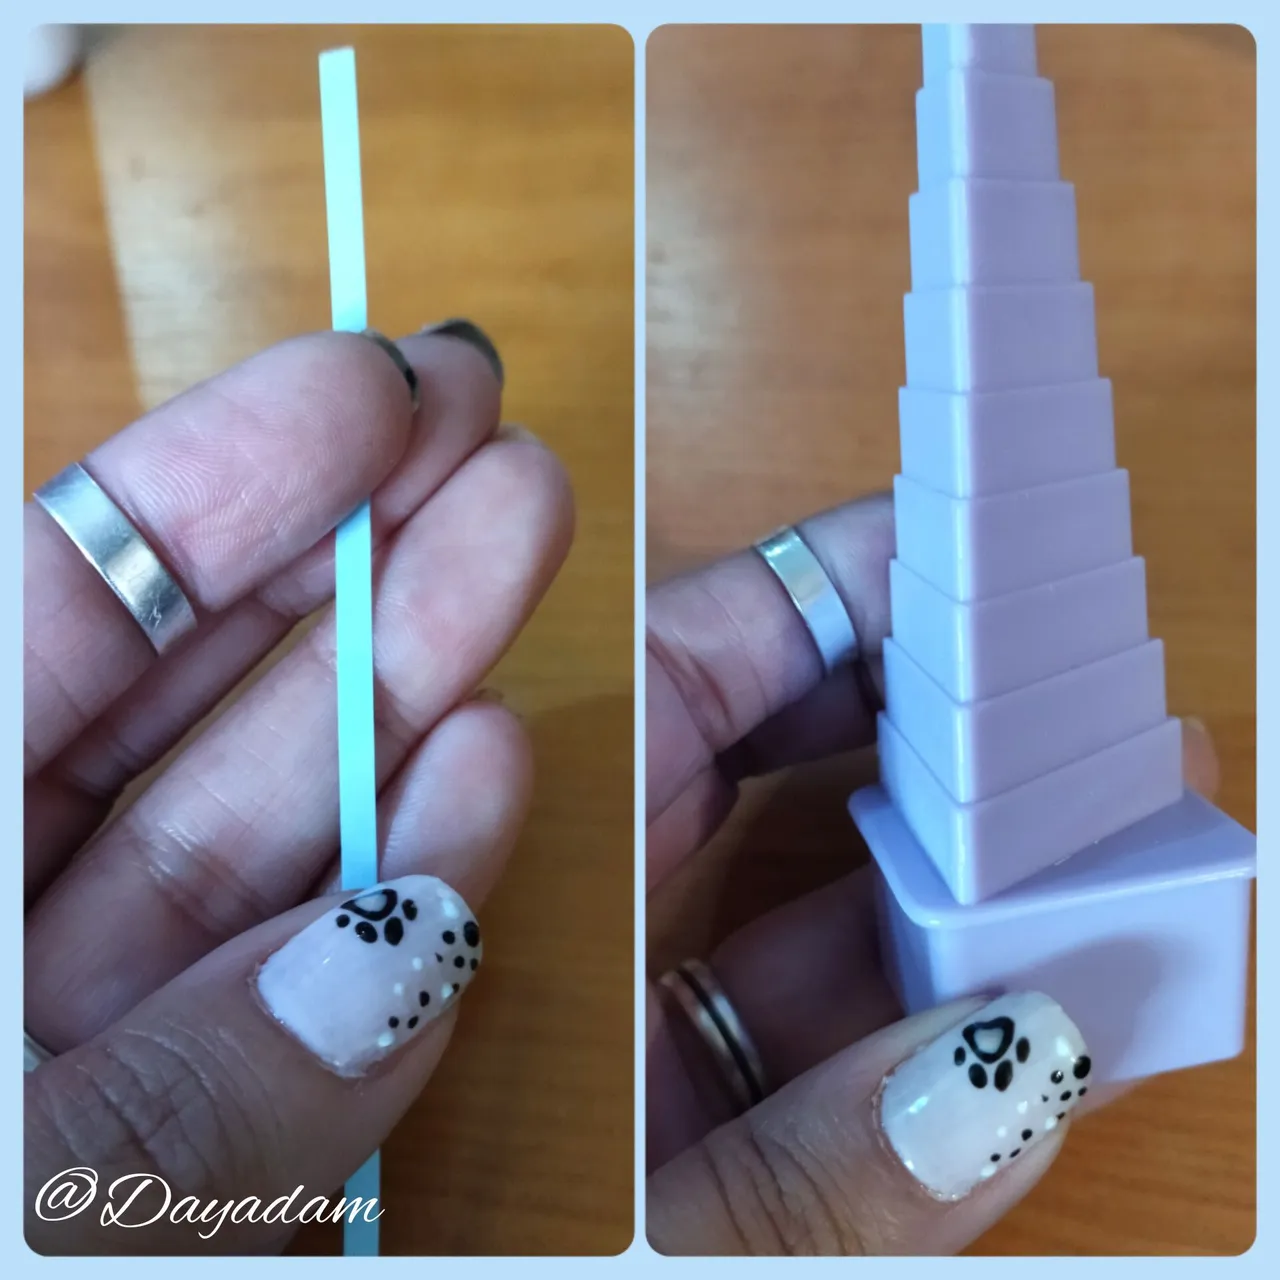
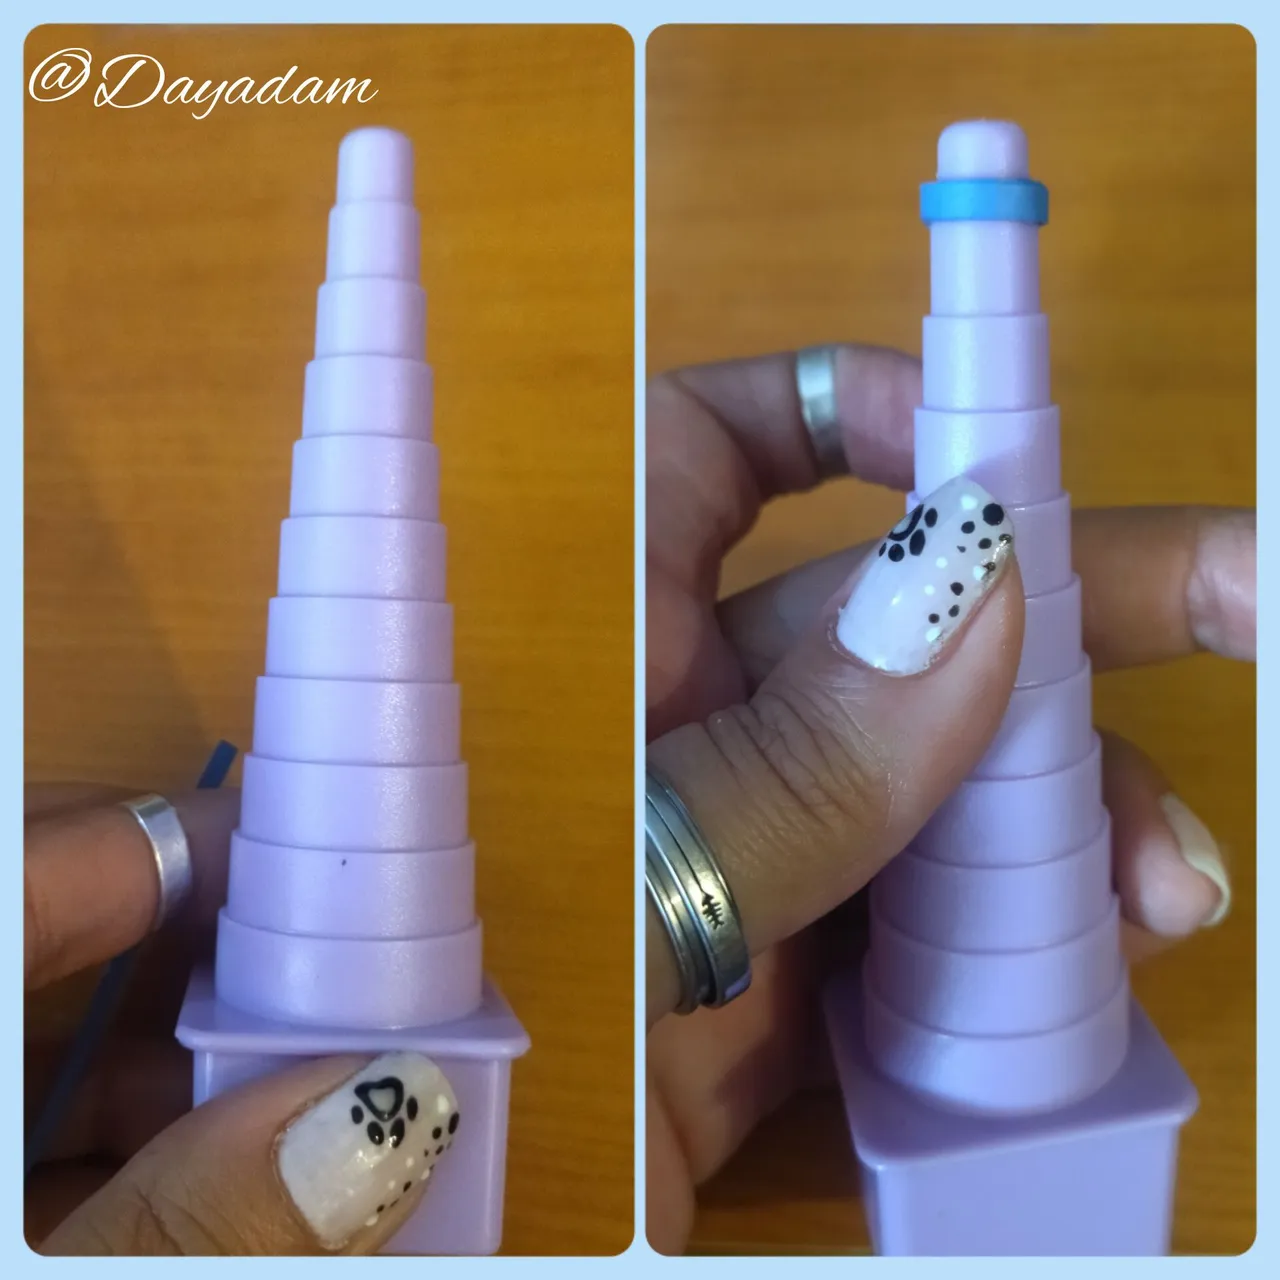
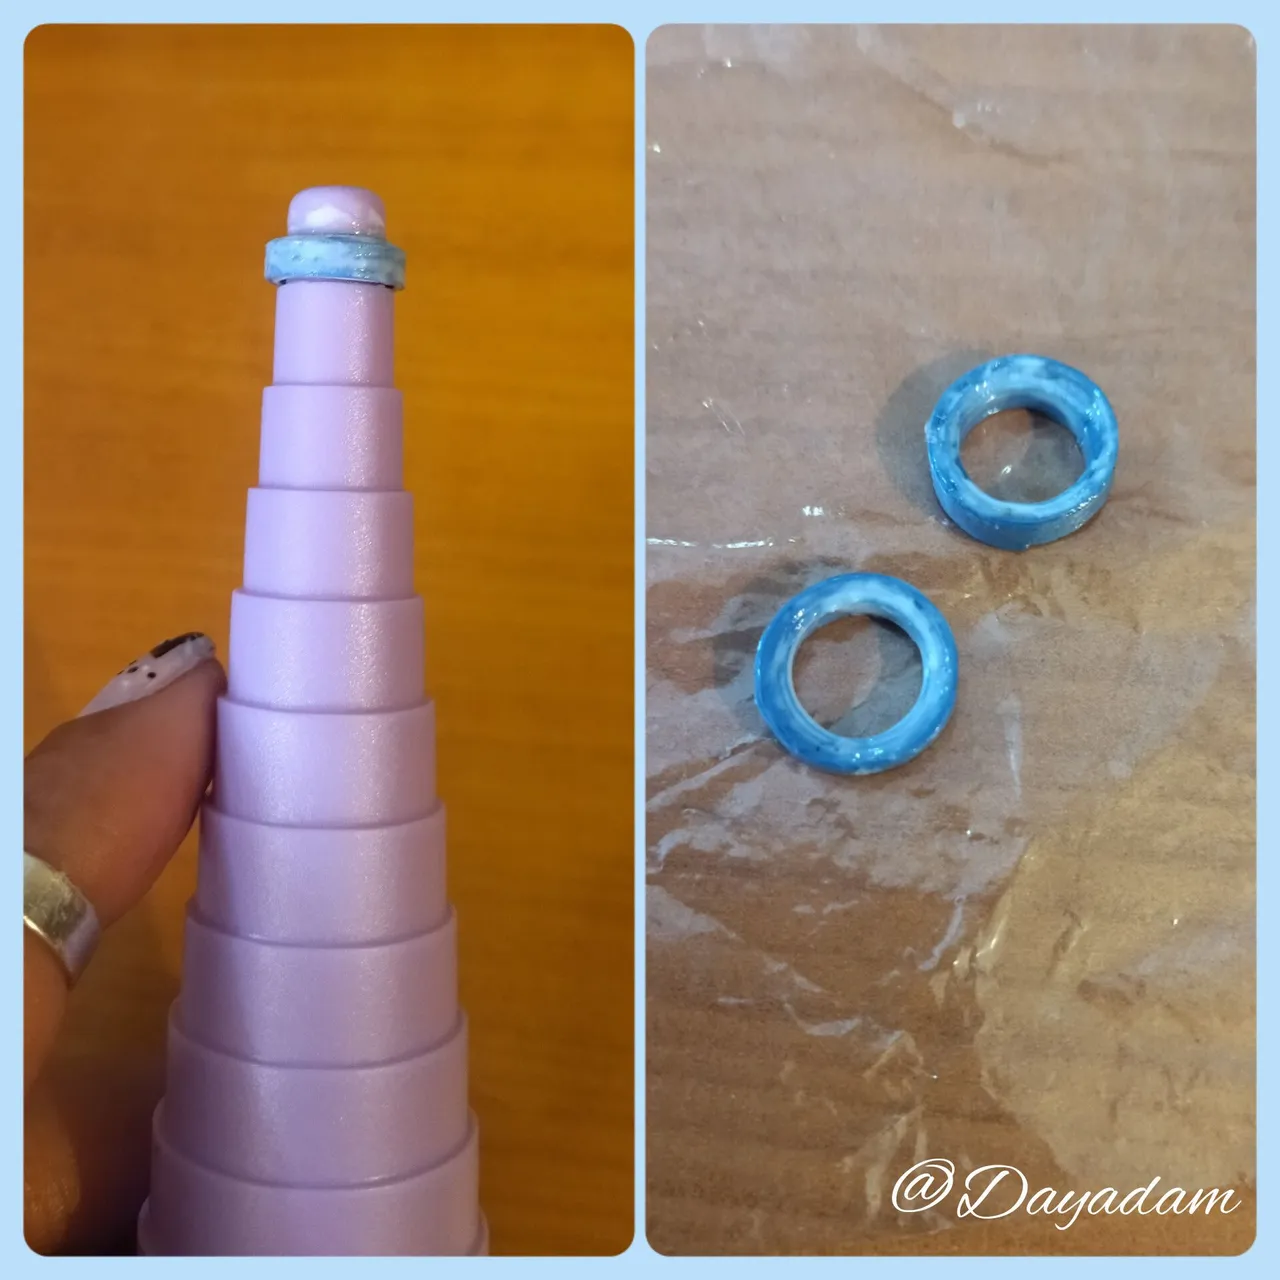
- Let's start by taking a dark blue quilling tape 3mm wide x 100cms long, in a square molding template in the last section the largest, we will roll little by little adding small amounts of extra strong white glue to finish with all the tape, once ready we will add glue around to give protection, plasticized and that the piece we made becomes hard and resistant. Let it dry very well, take it out of the mold and apply glue on the internal parts. We will make 2 equal ones.

• Vamos a comenzar tomando una cinta para quilling color azul oscuro de 3mm de ancho x 100cms de largo, en una plantilla para moldear cuadrada en el último tramo el más grande, enrollaremos poco a poco añadiendo pequeñas cantidades de pega blanca extra fuerte hasta finalizar con toda la cinta, una vez listo añadiremos pega alrededor para darle protección, plastificado y que la pieza que hicimos se ponga dura y resistente. Dejamos secar muy bien, sacamos del molde y aplicamos pega en las partes internas. Haremos 2 iguales.

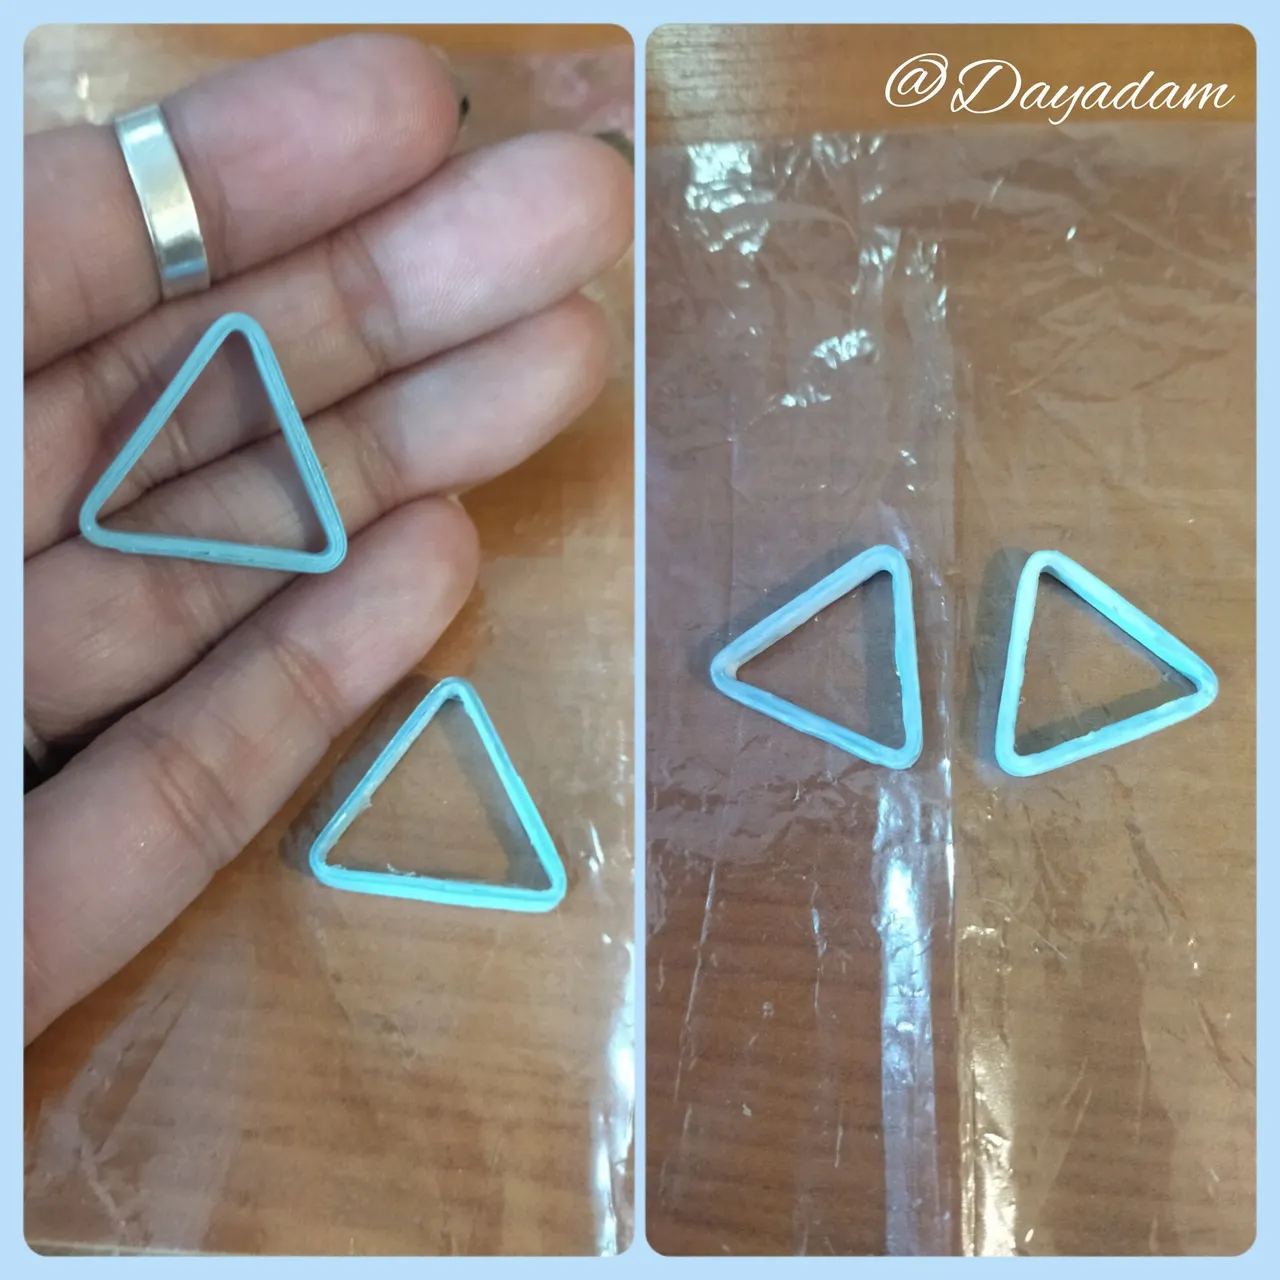
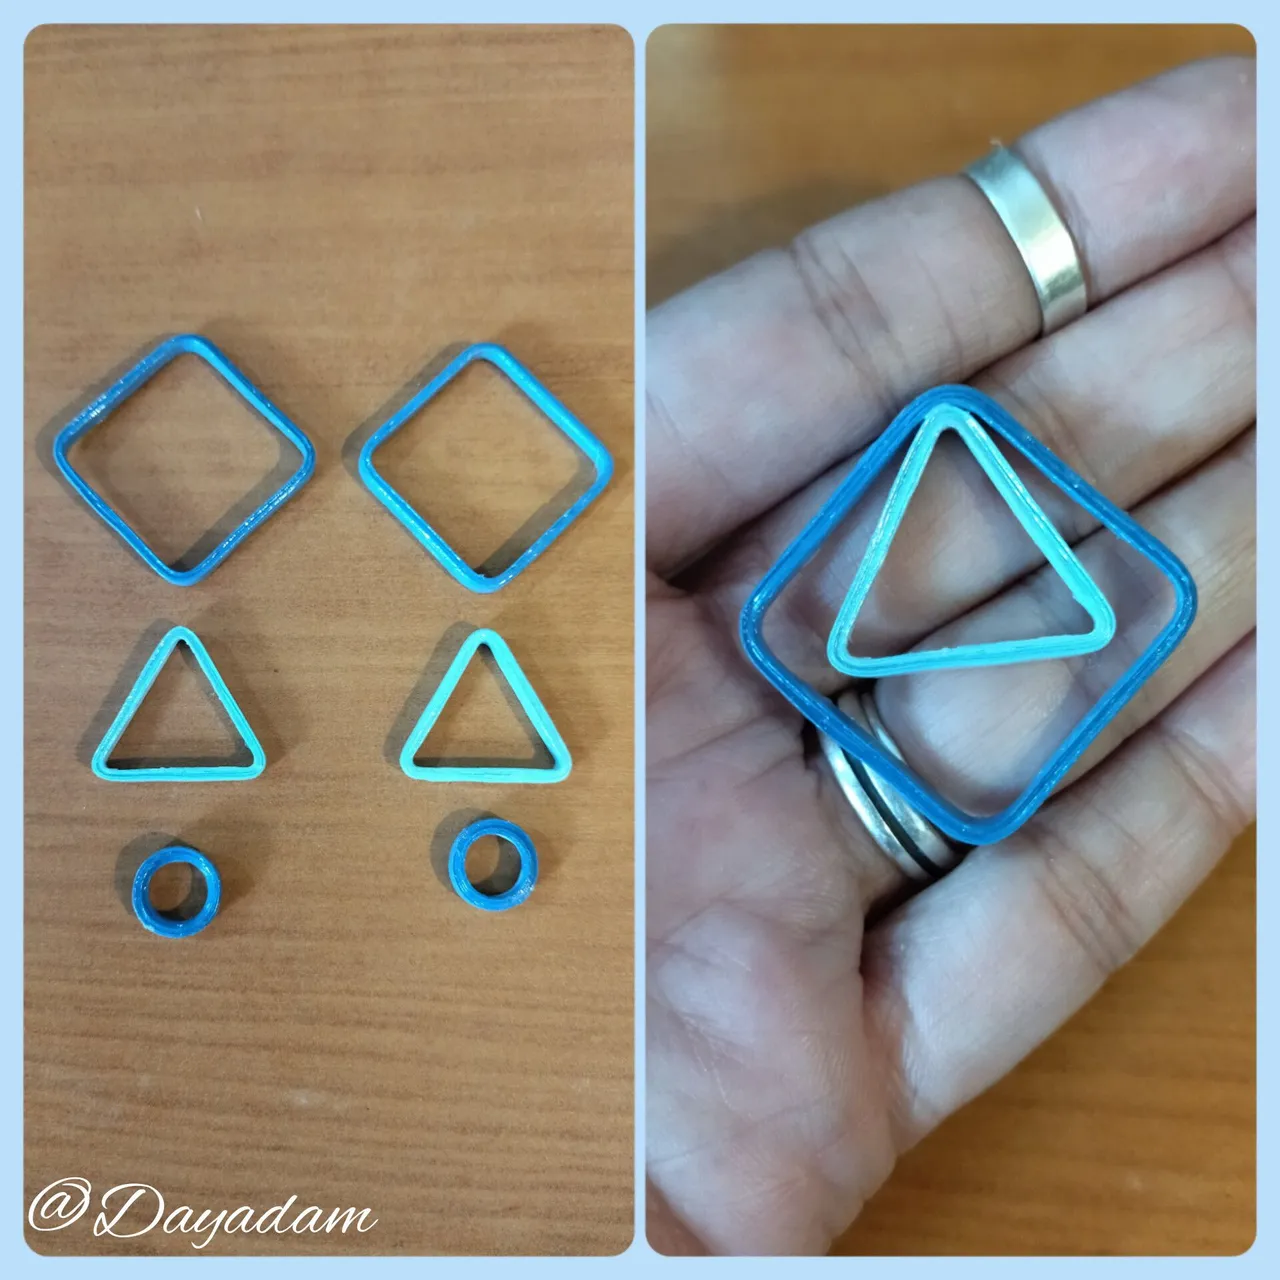
- We are going to perform the same procedure as above with some differences, this time with a light blue quilling tape 3mm wide x 75cms long, we will use a triangular mold in one of the central measures, we will need 2 equal as the previous squares.
• Vamos a realizar el mismo procedimiento anterior con algunas diferencias, esta vez con una cinta para quilling color azul clara de 3mm de ancho x 75cms de largo, utilizaremos un molde triangular en una de las medidas centrales, necesitaremos 2 iguales tal como los cuadrados anteriores.
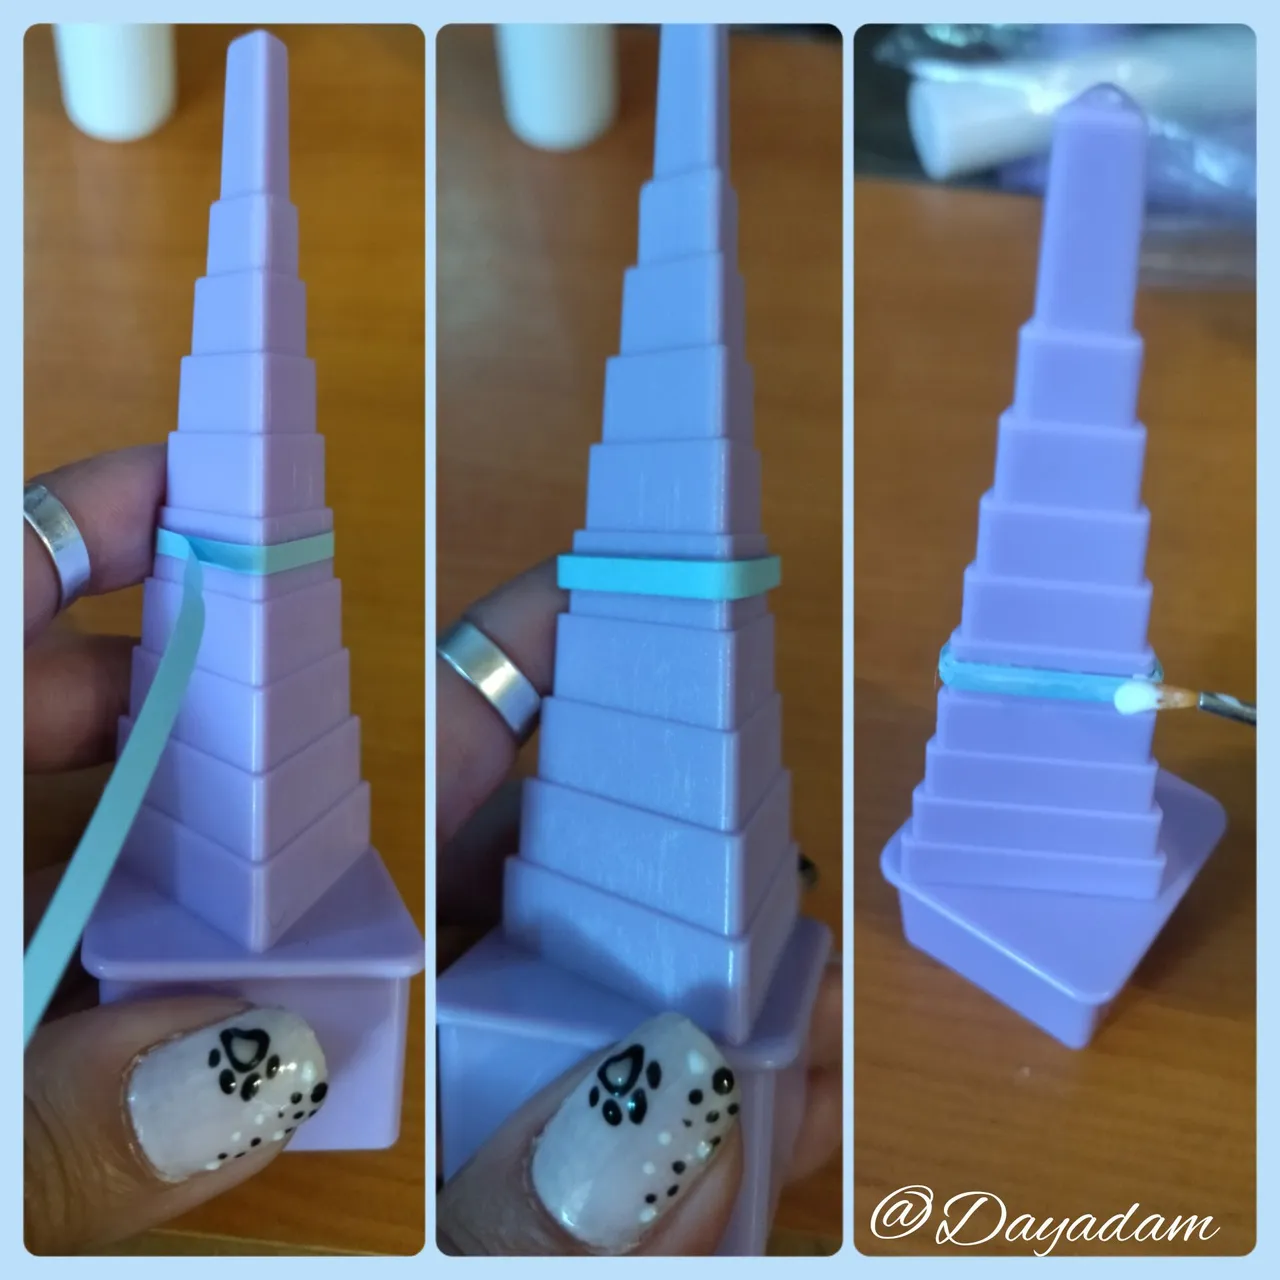
- Now we will make the third and last piece of our tendrils, this time with a round mold in one of its smaller sections, with a dark blue quilling tape 3mm wide x 50cms long, we will repeat all the previous process.
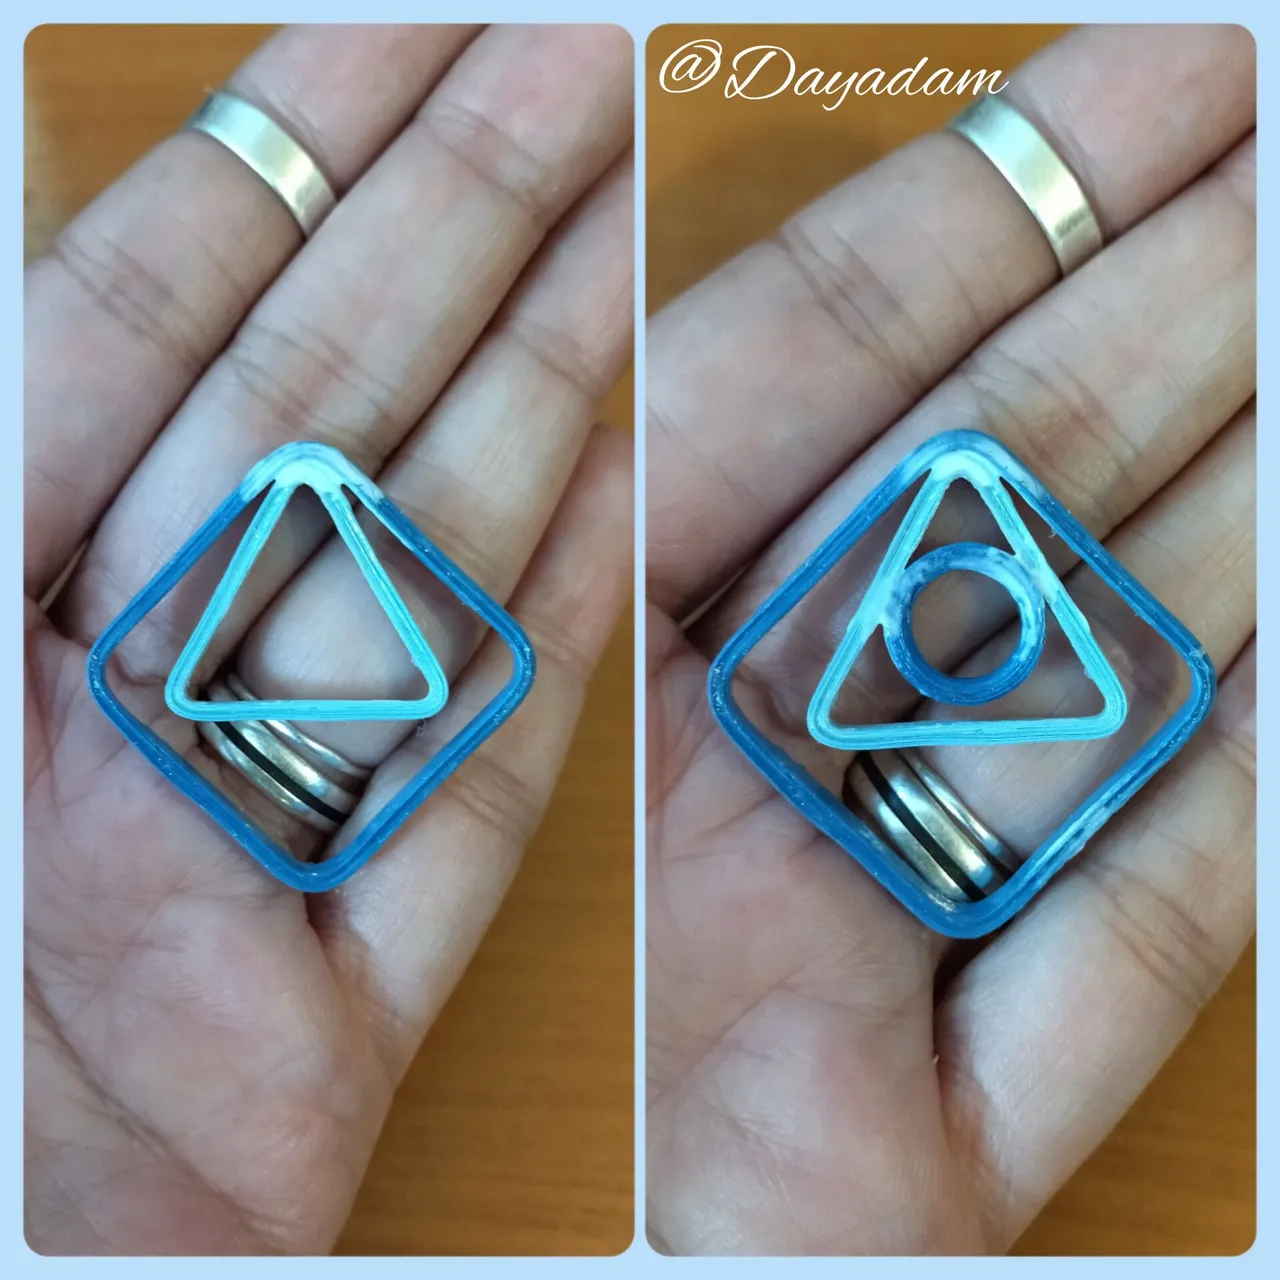
- Once all the figures are ready and dry, we will join them with a touch of extra strong white glue, as shown in the images.
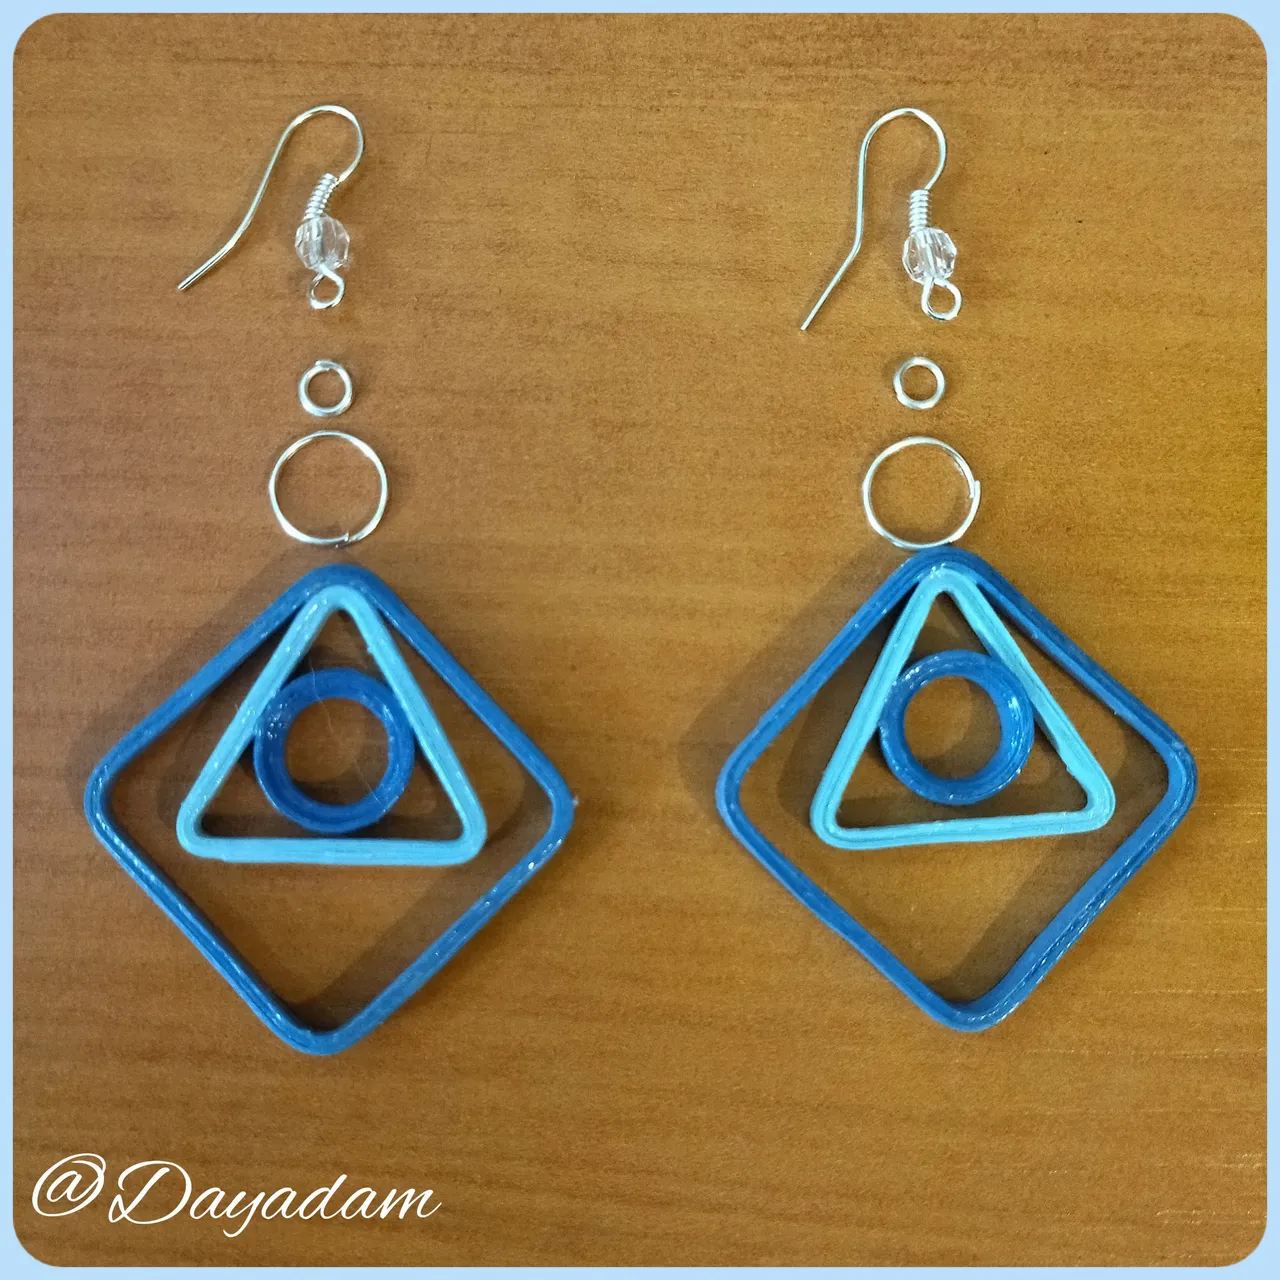
- To finish, we will place the costume jewelry ring and a base for hanging tendrils (hook), to which I previously placed a transparent Czech glass to make it more attractive.
This way we have a pair of simple earrings ready for use. We can make many combinations of colors and sizes.
• Ahora realizaremos la tercera y última pieza de nuestros zarcillos, esta vez con un molde redondo en uno de sus tramos más pequeños, con una cinta para quilling de color azul oscuro de 3mm de ancho x 50cms de largo, repetiremos todo el proceso anterior.
• Listas y secas todas las figuras, las uniremos con un toque de pega blanca extra fuerte, como lo indican las imágenes.
• Para finalizar le colocaremos su argolla de bisutería y una base para zarcillos colgante (anzuelo), a la que previamente le coloque un cristal checo transparente para darle más vistosidad.
De esta manera tenemos un par de aretes sencillos listos para su uso. Podemos hacer muchas combinaciones de colores y tamaños.

What did you think, did you like it?
I hope you did, I hope you liked my explanation, procedure and photos, I made them with love for you.
"Let out that muse that inspires you, and let your imagination fly".
Thank you all, see you next time.💙
¿Que les pareció, les gustó?
Espero que sí, que les haya gustado mi explicación, procedimiento y fotos, los hice con mucho cariño por y para ustedes.
"Deja salir esa musa que te inspira, y deja volar tu imaginación".
Gracias a todos, nos vemos en la próxima.💙
Todas las fotos usadas en este post son de mi autoría y han sido sacadas en mi celular personal un Redmi 9T y editadas en Canva y en Inshot Banner y separador hecho por mí en Canva Traducido con la ayuda de DeepL
