
Hello everyone... ✨
Hello to my dear Hivers and the dear community of artists Jewelry, as always very pleased and excited to be here again, showing you my work made with love and especially for you.
Greetings to the Splinterlands community, and everyone who lives there, I'm here to join the Splinterlands Social Media Challenge!.
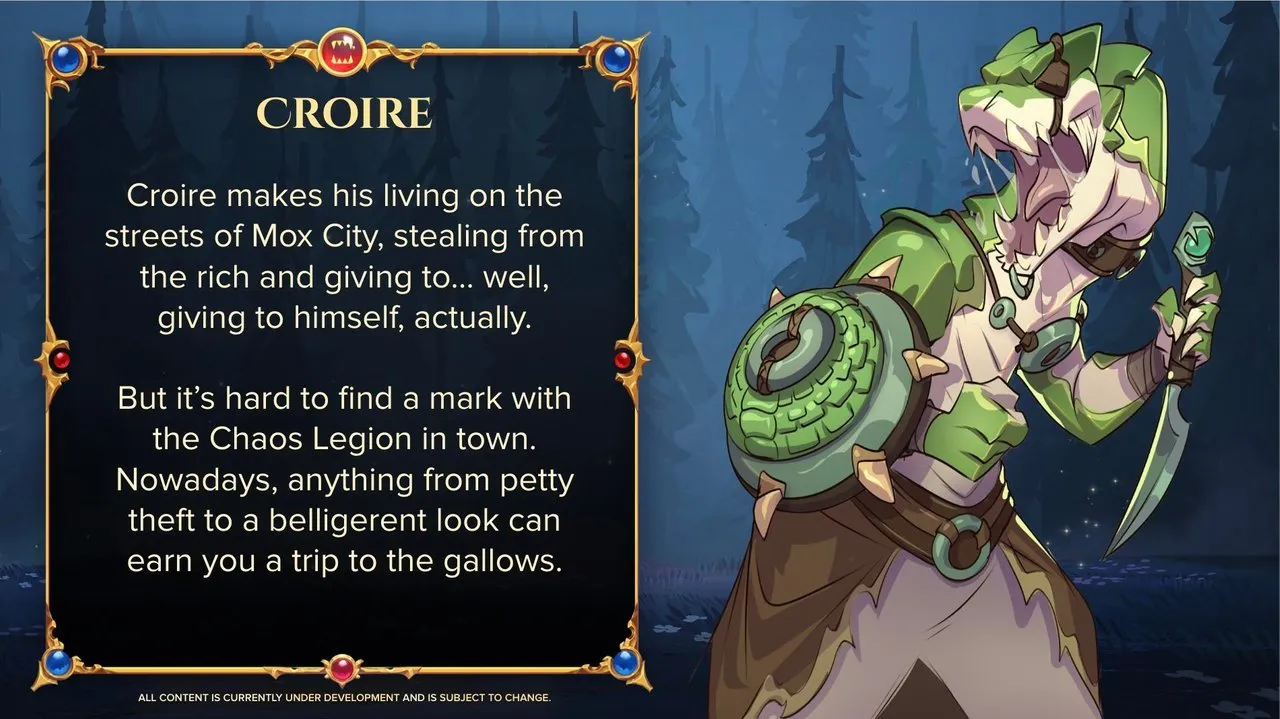
For today I tell you that seeing some shares of social media I got a beautiful drawing in the Zentangle technique of the beloved artist @chacald.dcymt, since I started drawing in this way I have loved it, I made a fant.art of the prospect card of the Rebellion pack of Splinterlands called Croire, once I saw it I fell in love with one of the elements which was the shield that has between its claws, because of this I wanted to materialize it in a pendant for necklace in 3D in the quilling technique.
Here is the post by @chacald.dcymt, which I used as a source of inspiration and there you can find the letter "Croire"
If you want to know more about the game, I leave you my reference link to enter it and navigate through this wonderful world: https://splinterlands.com?ref=dayadam
Hoping you like my work, without further ado, I leave you with my creative process.
Let's start:😃

Hola a Todos...✨
Hola a mis queridos Hivers y a la querida comunidad de artistas Jewelry, como siempre muy complacida y emocionada de encontrarme por acá nuevamente, mostrándole mi trabajo hecho con mucho amor y especialmente para ustedes.
Un saludo para la comunidad de Splinterlands, y todos los que hacen vida por allí, estoy por acá para unirme al reto Splinterlands Social Media Challenge!.
Para el día de hoy les cuento que viendo algunas participaciones del social media me conseguí con un hermoso dibujo en la técnica Zentangle de la querida artista @chacald.dcymt, desde que inicio dibujando de esta manera me ha encantado, realizo un fant.art de la carta prospecto del pack Rebellion de Splinterlands llamada Croire, una vez que la observe me enamore de uno de los elementos el cual fue el escudo que tiene entre sus garras, pues por esto quise materializarlo en un dije para collar en 3D en la técnica de quilling.
Por acá les dejo el post que realizo @chacald.dcymt, el cual utilice como fuente inspiratoria y allí se encuentra la carta "Croire"
Si quieren saber más con respecto al juego les dejo mi enlace de referencia para que ingresen en él, y naveguen por este maravilloso mundo: https://splinterlands.com?ref=dayadam
Esperando les guste mi trabajo, sin más preámbulos, les dejo mi proceso creativo.
Comencemos:😃

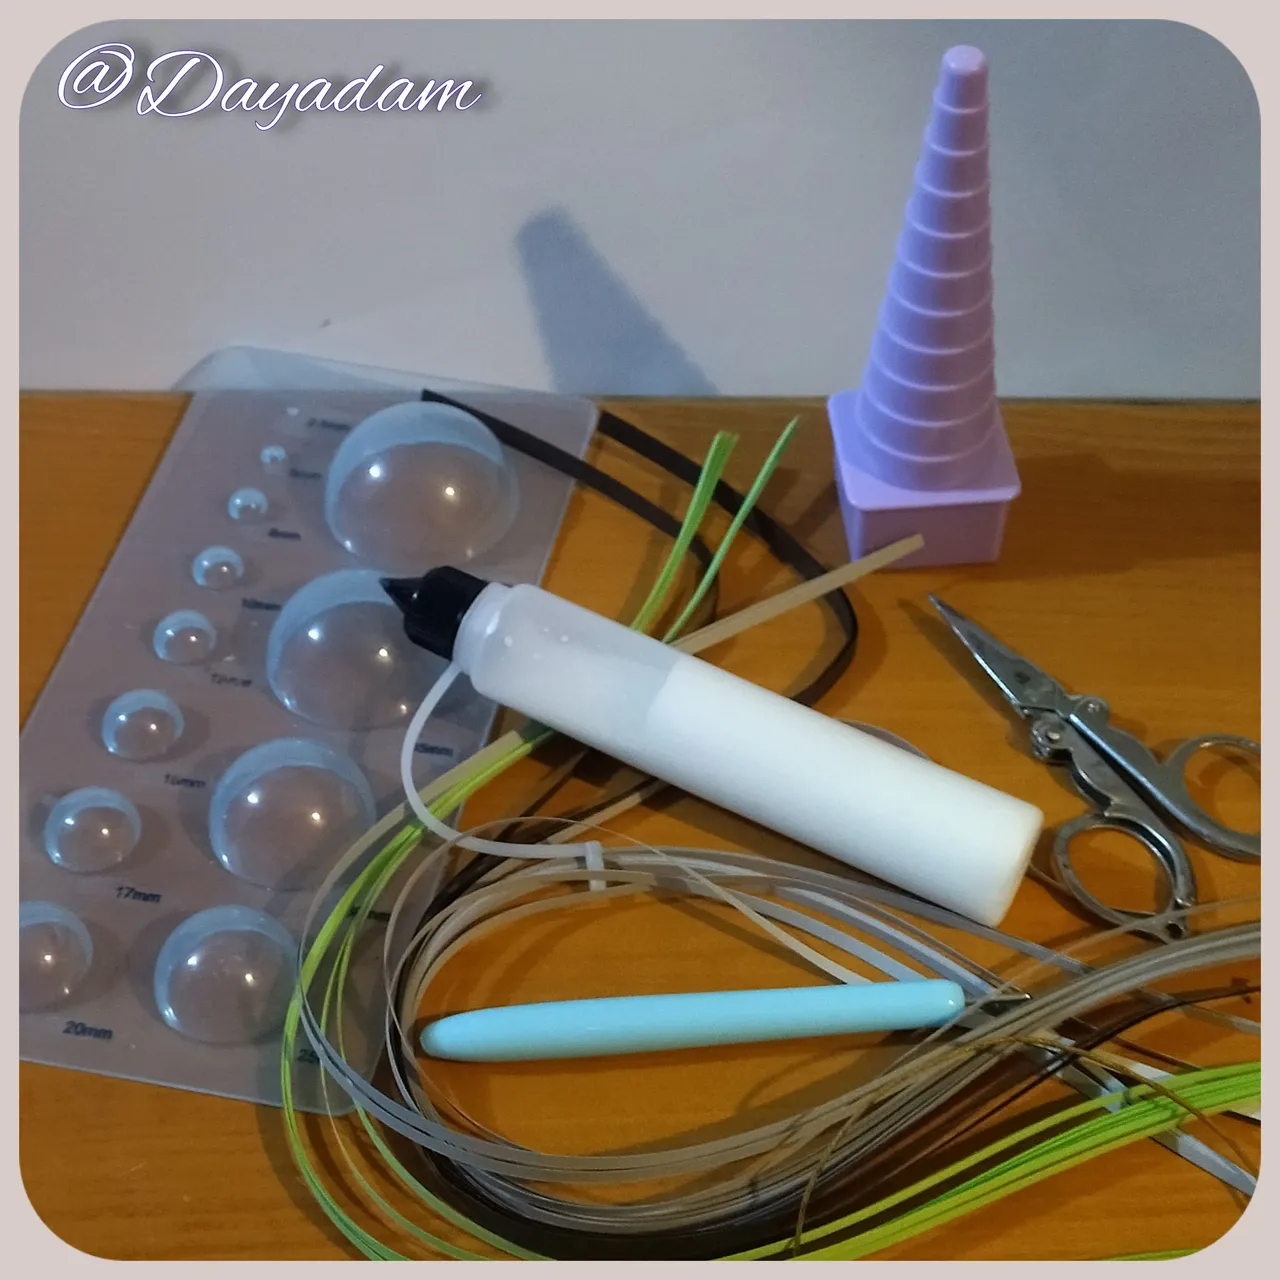
• Cintas de quilling de diversos colores.
• Aguja para quilling.
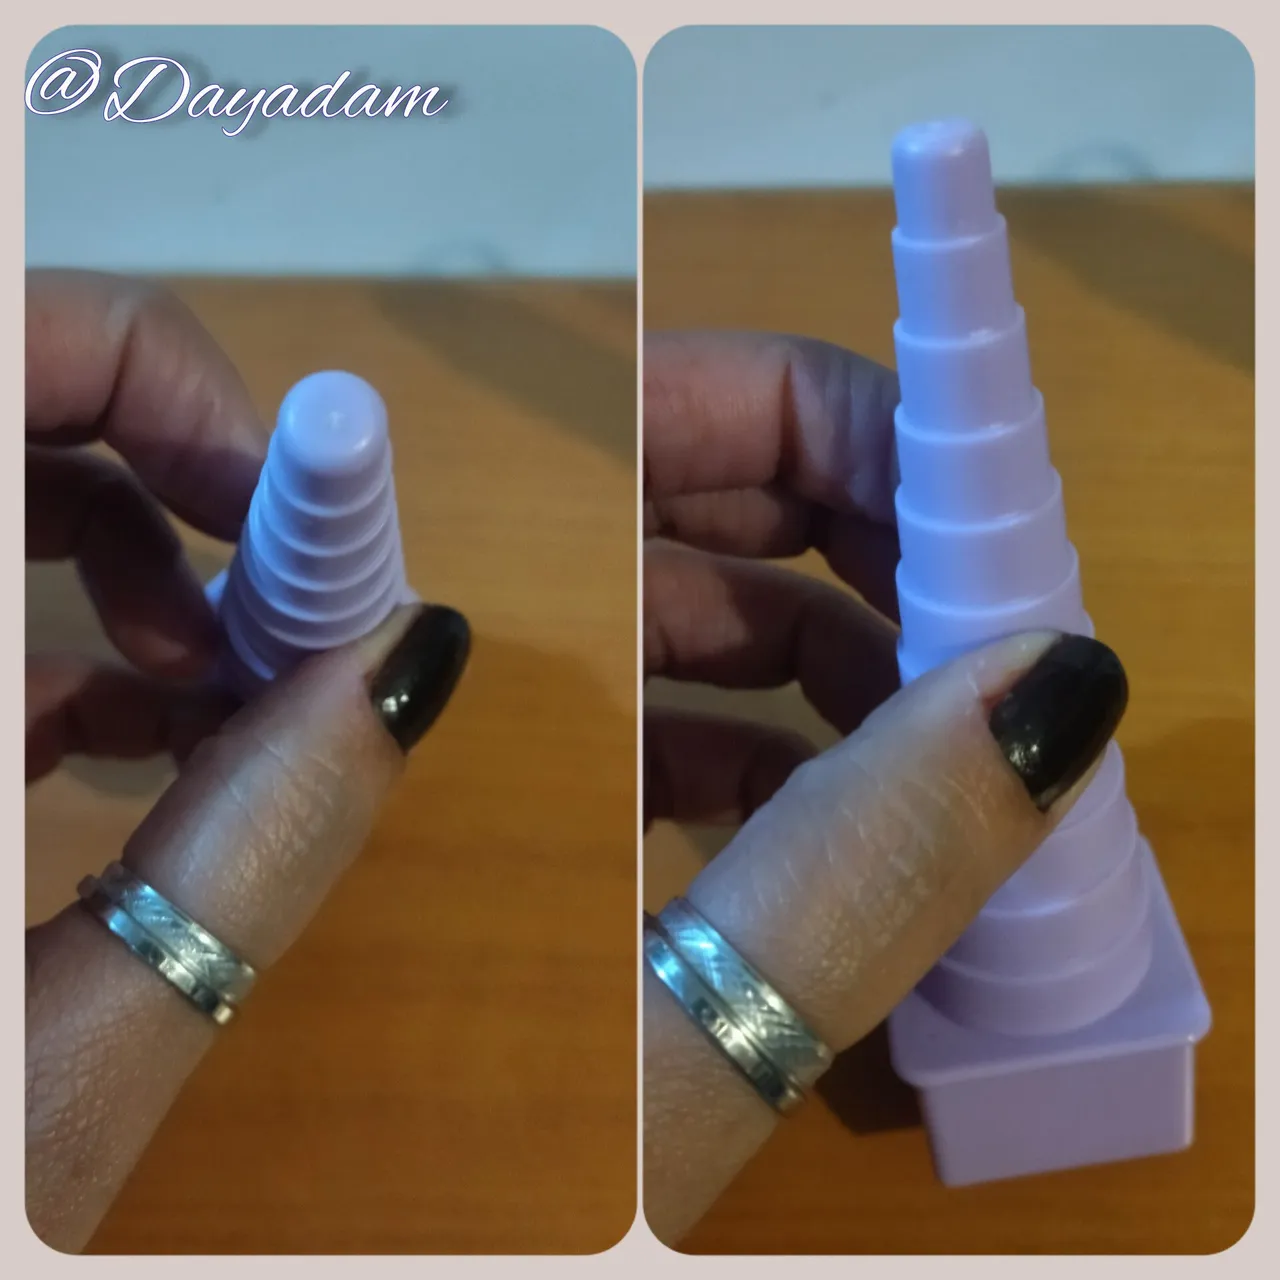
• Plantilla para moldear círculos.
• Molde circular.
• Pega blanca extra fuerte (de carpintería).
• Tijera.
• Pincel.
• Argolla mediana de bisutería.
• Hilo chino fino color marrón.
- Quilling ribbons of different colors.
- Quilling needle.
- Template to mold circles.
- Circular mold.
- Extra strong white glue (carpentry glue).
- Scissors.
- Paintbrush.
- Medium size costume jewelry ring.
- Thin brown Chinese thread.

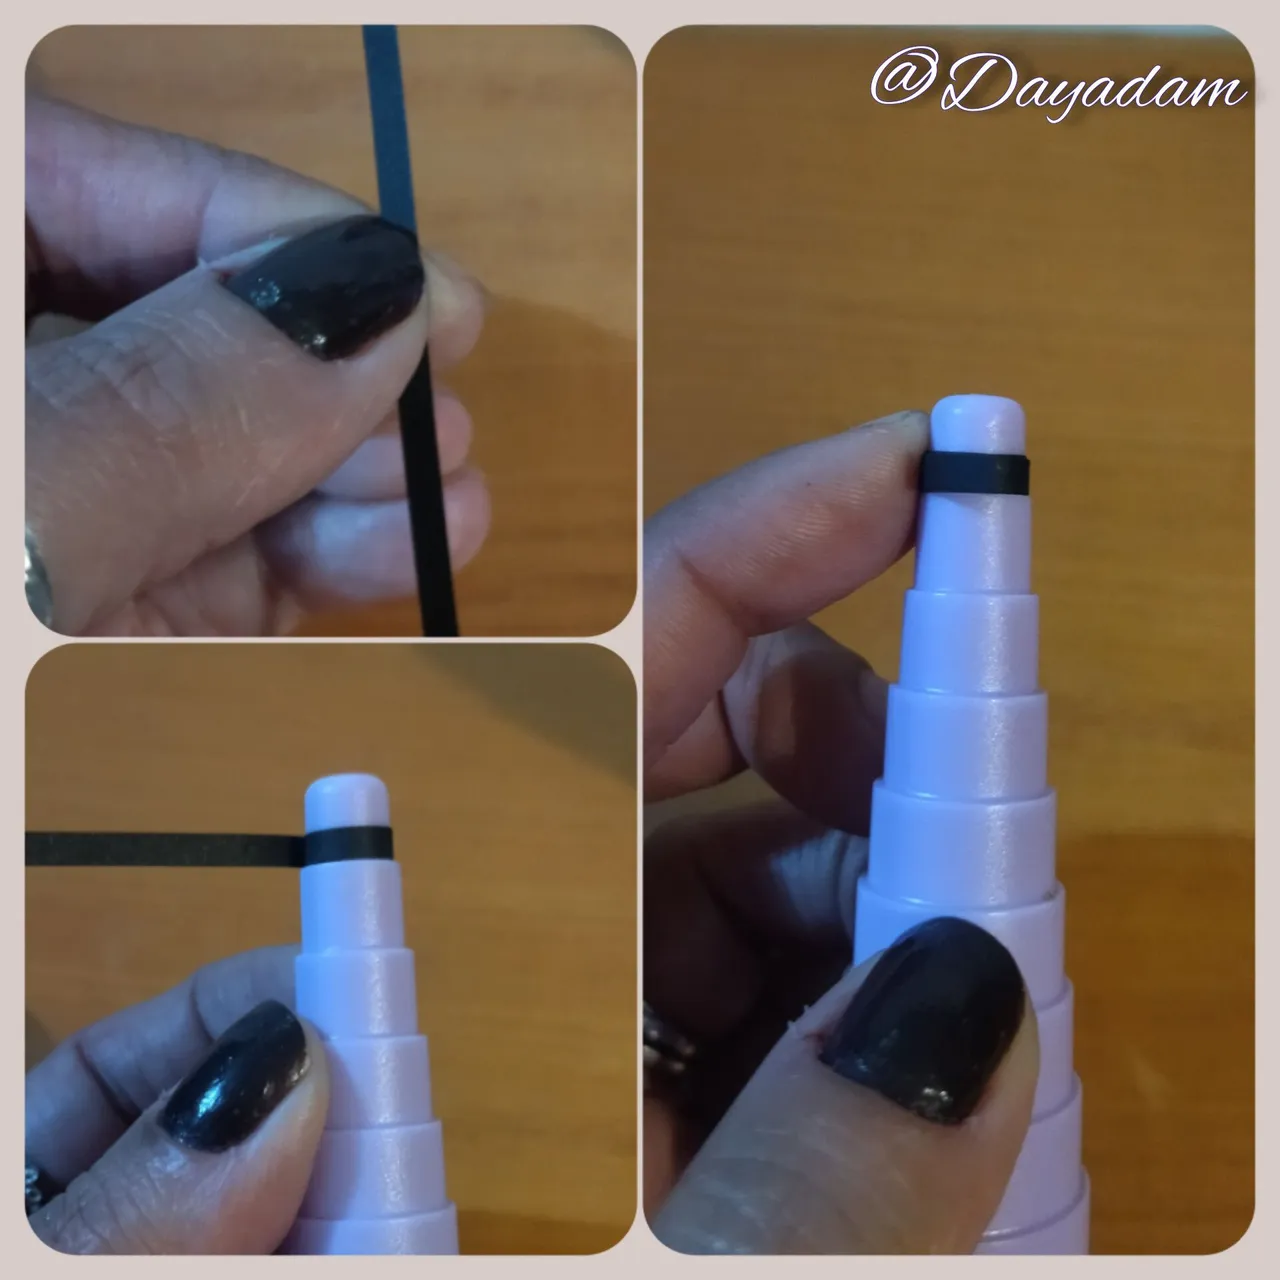
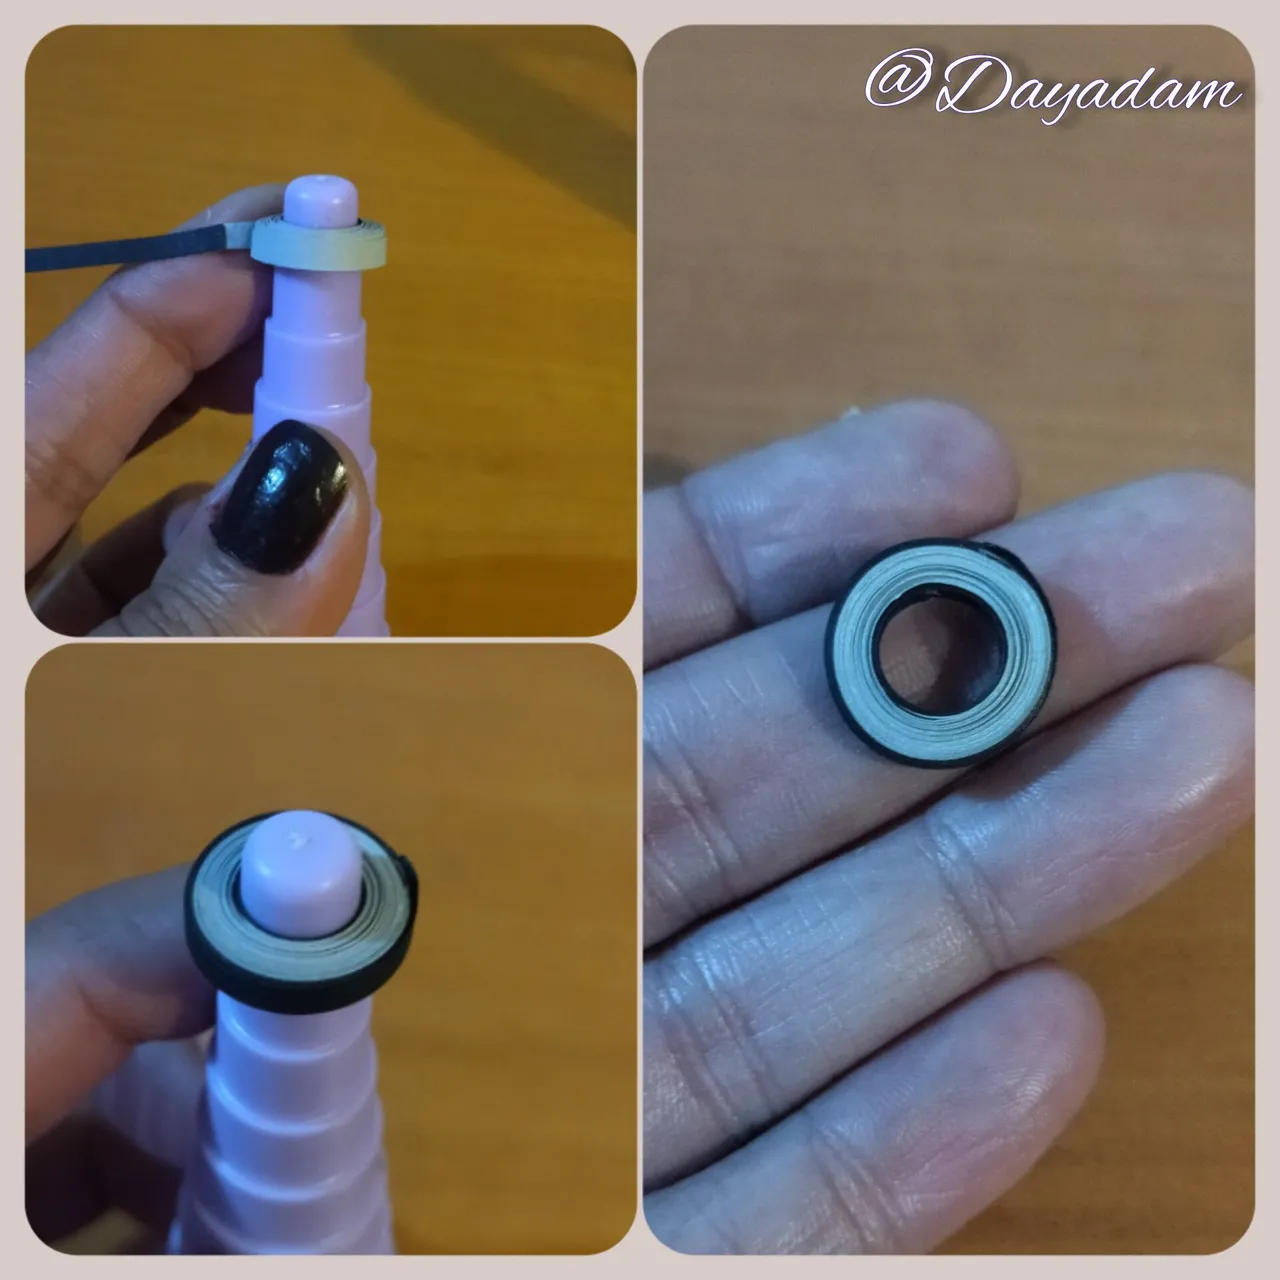
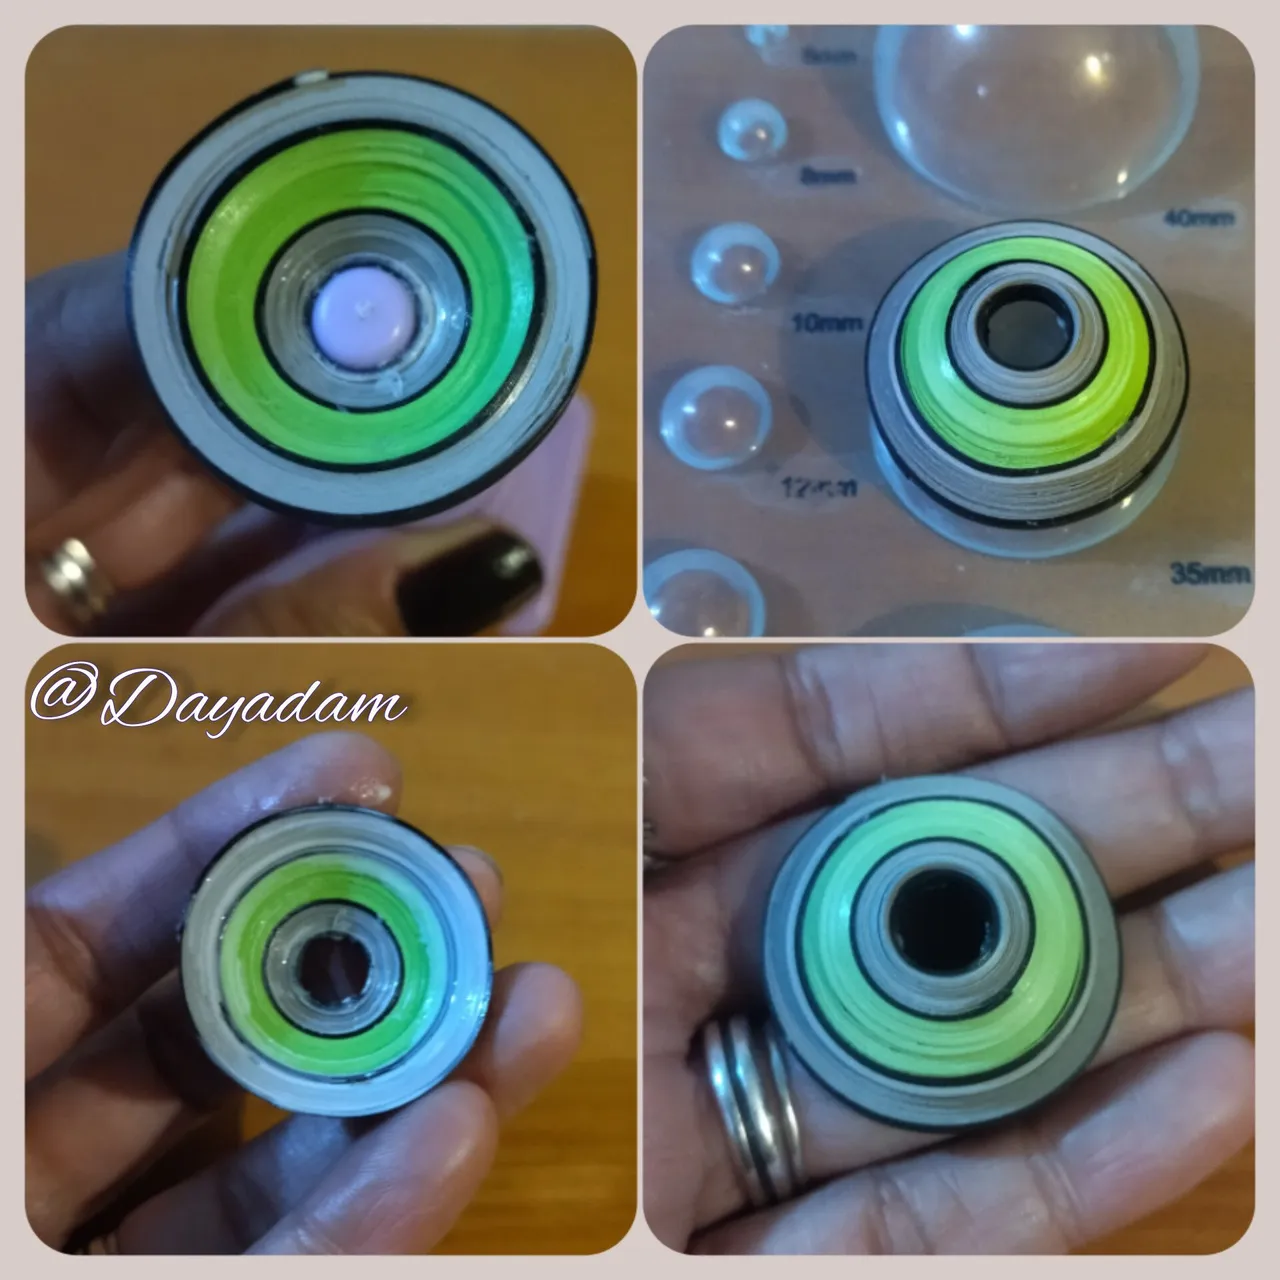
- Primarily we will need a circle mold, we will take a piece of quilling ribbon 3mm wide x 10cms long and we will roll it in the first measure of the mold until we finish with the ribbon.
- We will take a light gray ribbon 3mm wide x 40cms long and we will join it to the black one and we will continue rolling it until we finish with the same one.
- Then we will take a black ribbon 3mm wide x 20cms long, we will join it to the gray one and we will continue with the rolling process, when we finish we seal it with glue, we take it out of the template and we will mold it in one of the measures of the circle mold to give it a 3D effect, we take it out and apply glue in the hollow part, to avoid the ribbon to move.

• Primordialmente necesitaremos un molde para círculos, tomaremos un trozo de cinta para quilling negra de 3mm de ancho x 10cms de largo y la enrollaremos en la primera medida del molde hasta finalizar con la misma.
• Tomaremos una cinta de color gris claro de 3mm de ancho x 40cms de largo uniremos a la negra y seguiremos enrollando hasta finalizar con la misma.
• Luego tomaremos una cinta color negro de 3mm de ancho x 20cms de largo uniremos a la gris y seguiremos con el proceso de enrollar, al finalizar sellamos con pega, sacamos de la plantilla y moldearemos en un de las medidas del molde de círculos para darle un efecto 3D, sacamos y aplicamos pega en la parte hueca, para evitar que se mueva la cinta.
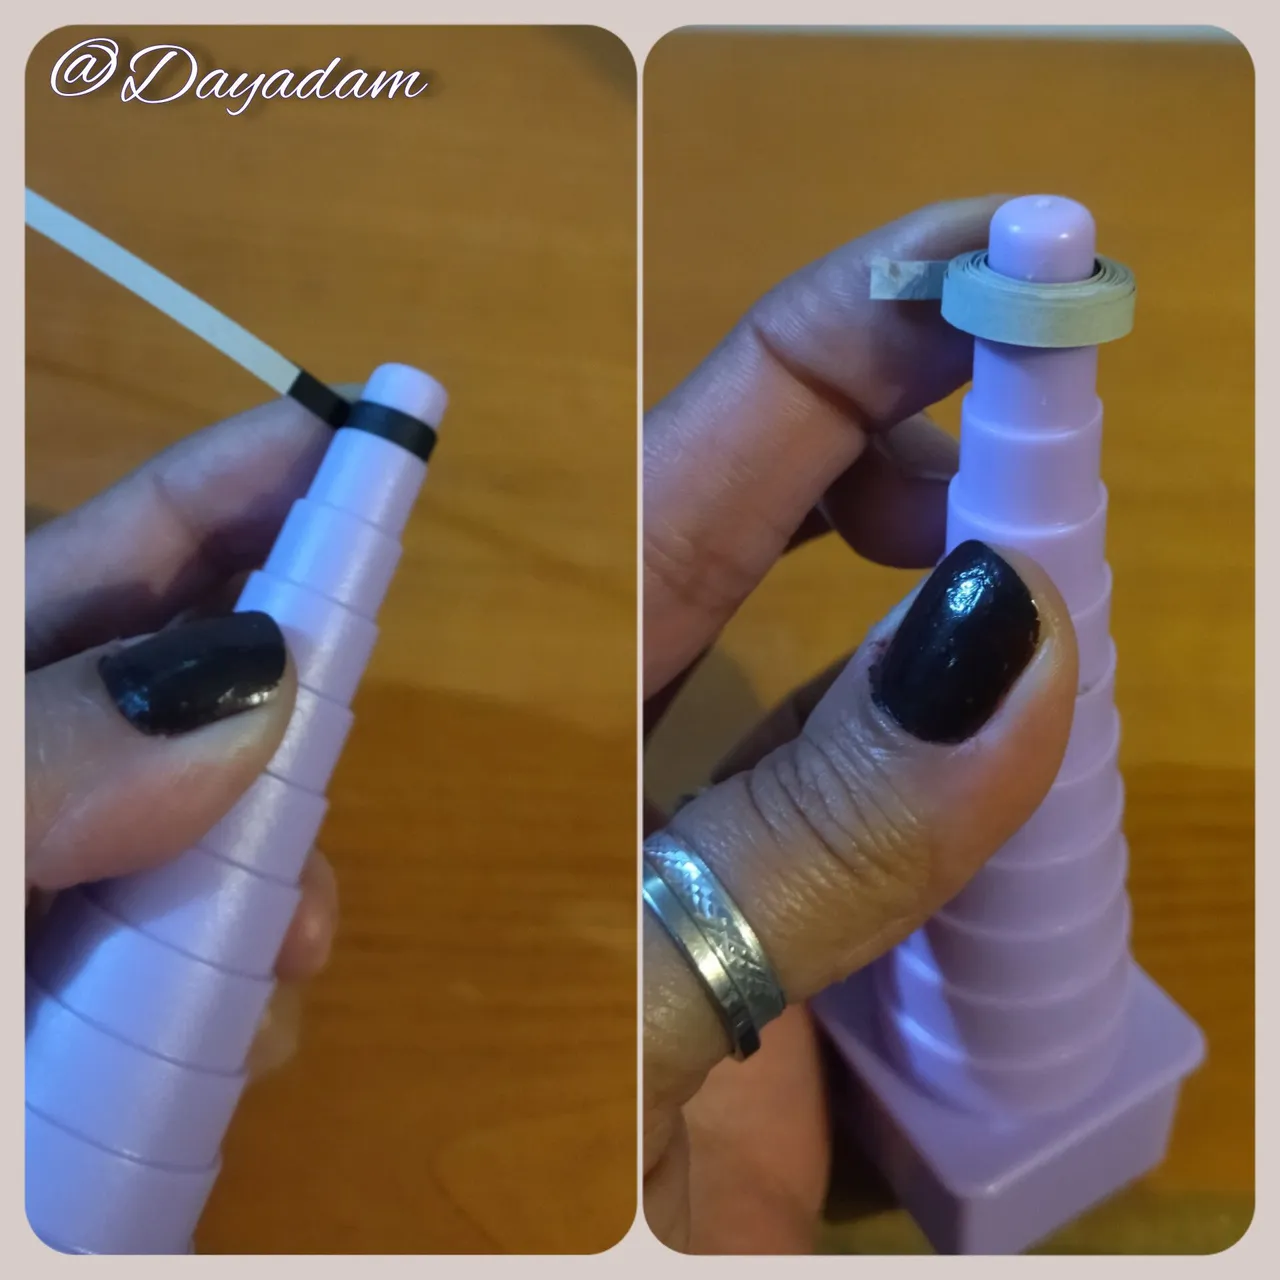
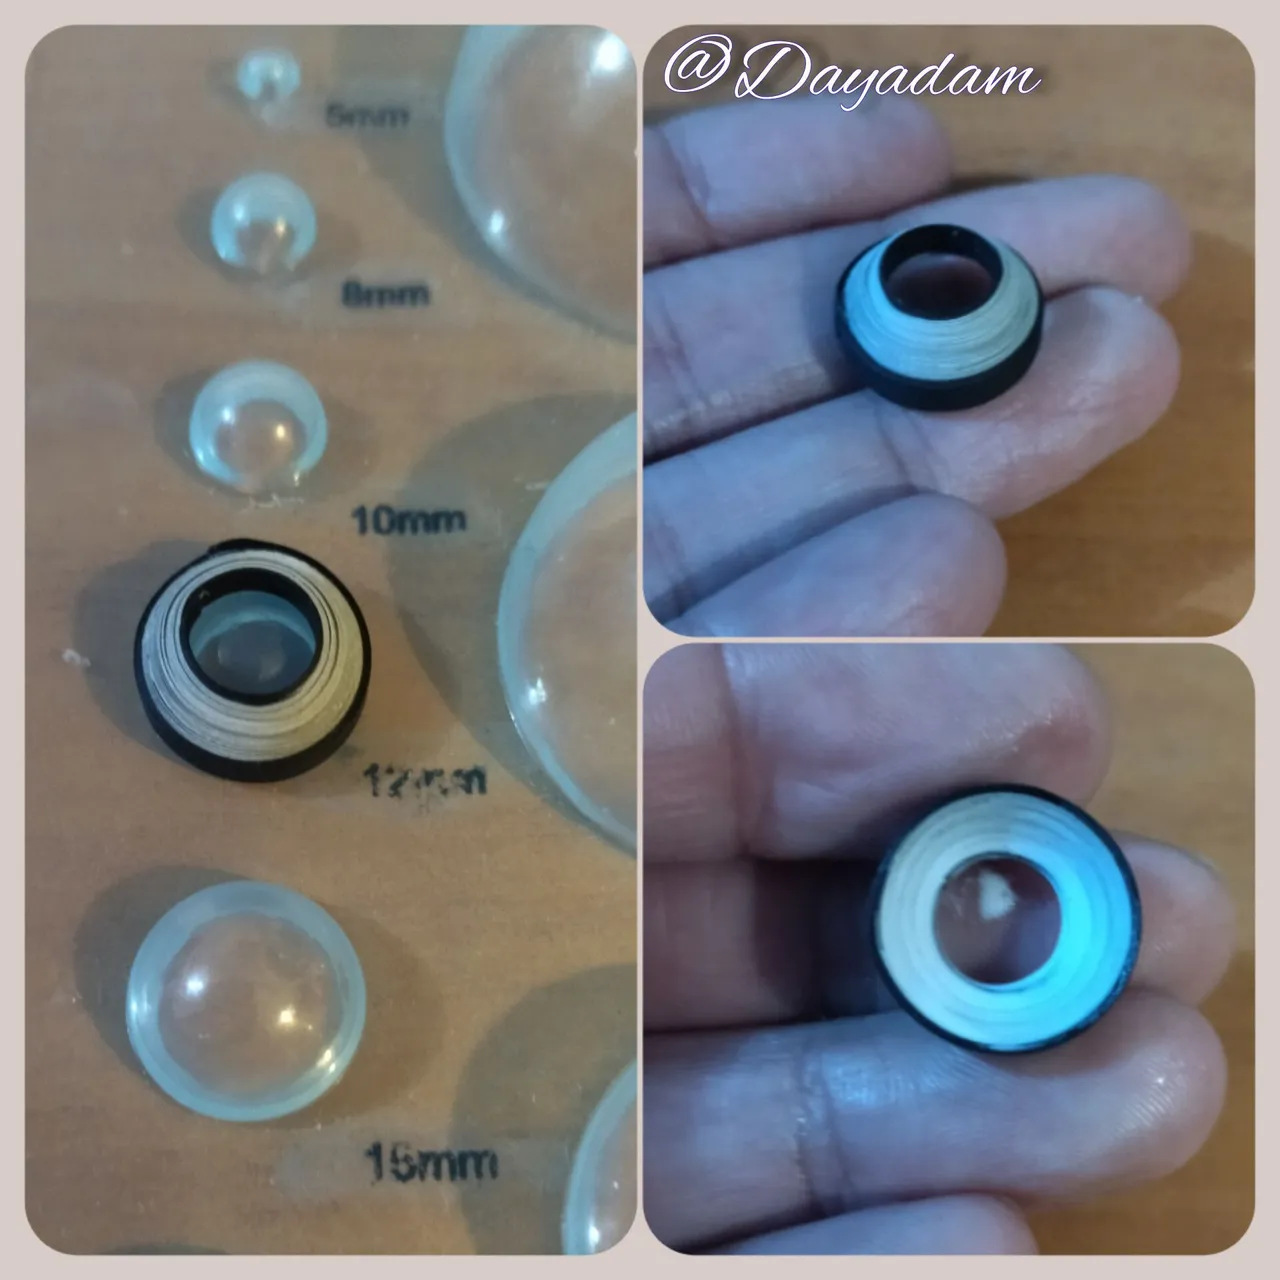
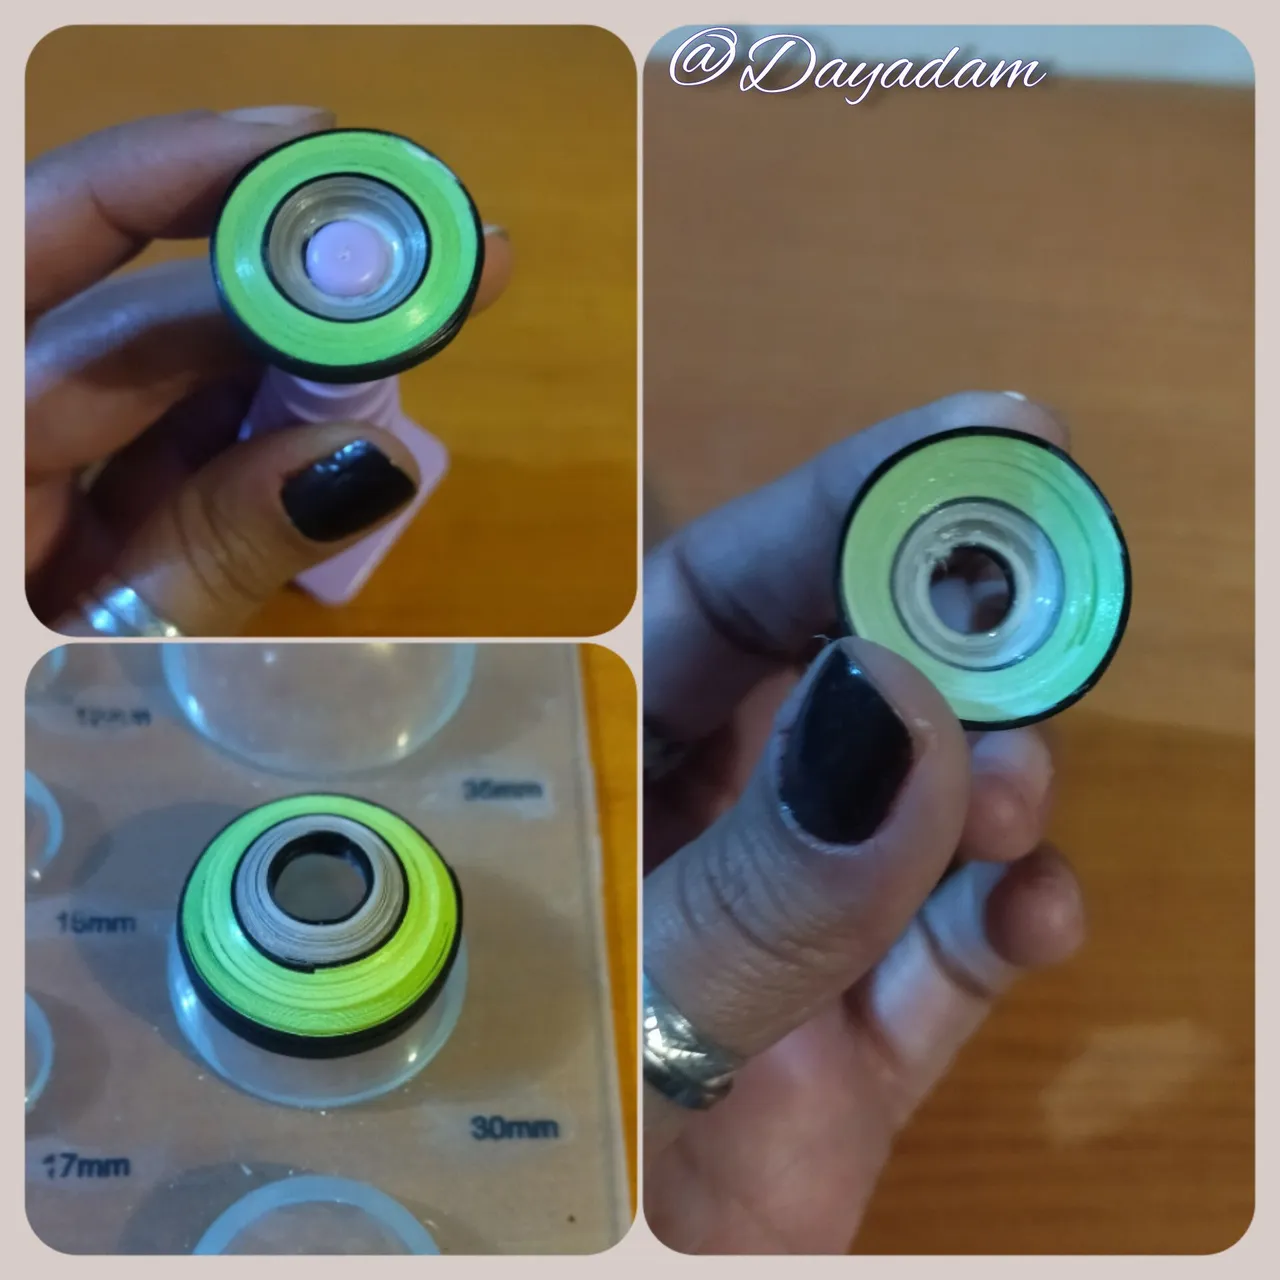
- We are going to take a 3mm wide x 120cms light green ribbon, we will put the black piece with gray to the circle template and we will begin to roll the green ribbon until we finish with it, followed by a 3mm wide x 40cms long black one, we will pass it around the light green one and when we finish, we seal it with glue, we take it out of the template and we will mold it in the circle template, we will apply glue again in the internal part so the piece does not deform, we let it dry.
- We will continue incorporating ribbons to the charm, this time we will continue with a gray 3mm wide x 120cms long, followed by a black 3mm wide 40cms long. We take out of the template and mold in the mold for circles, we apply glue again on the back.
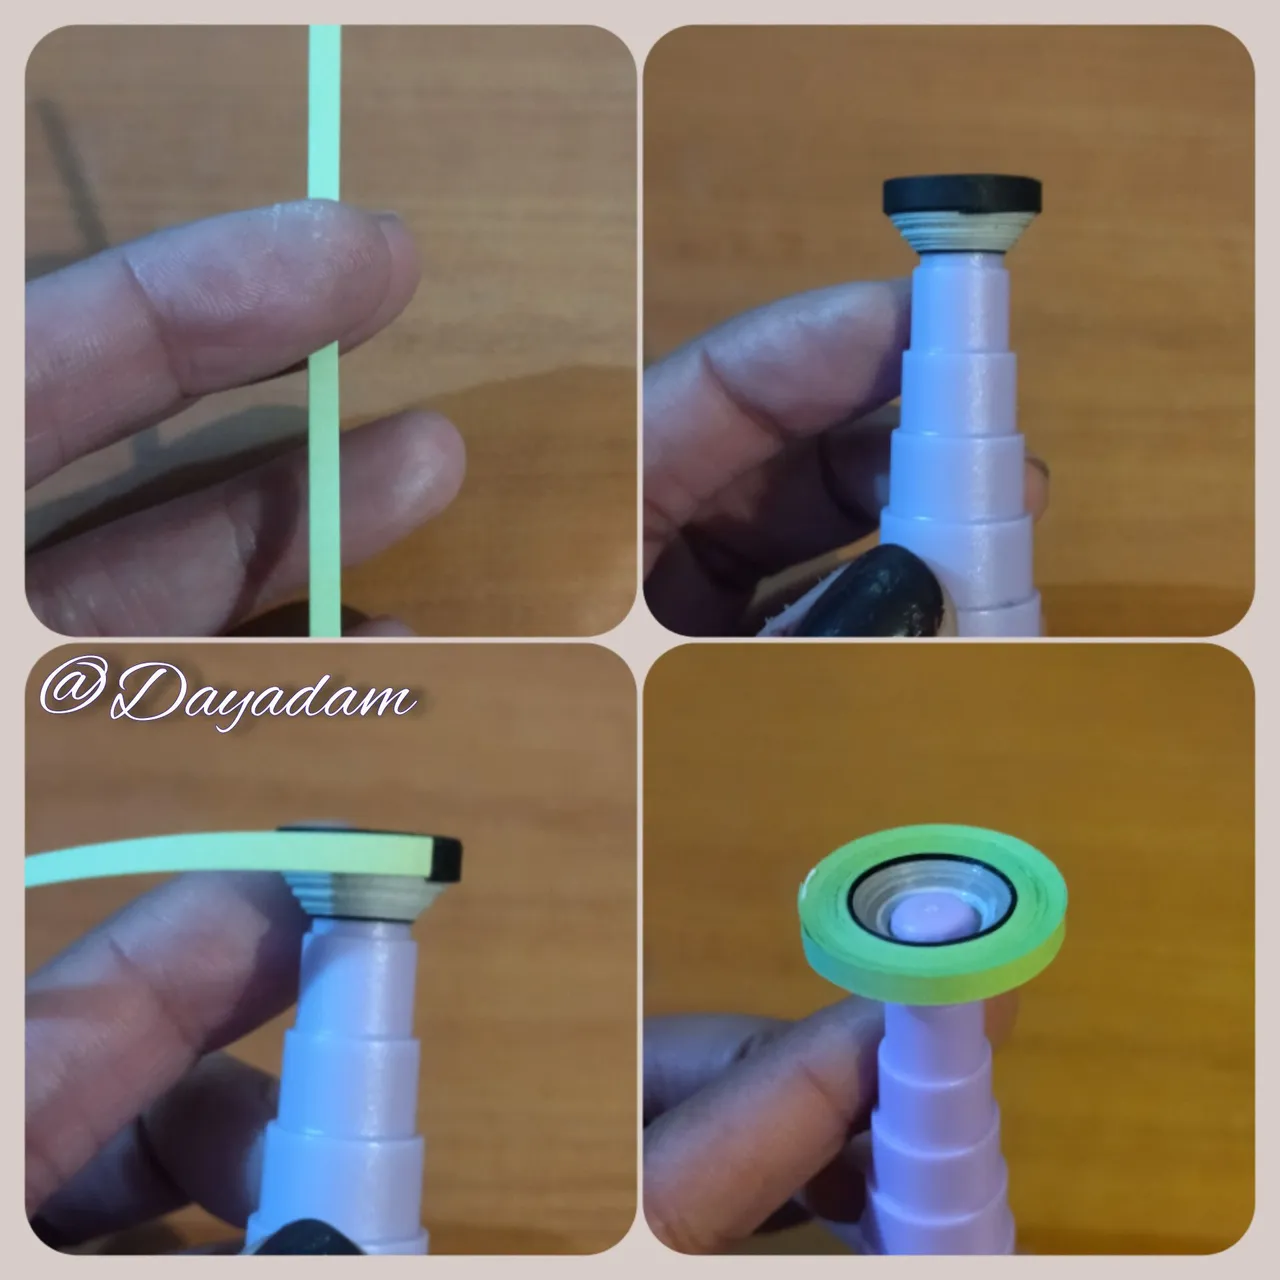
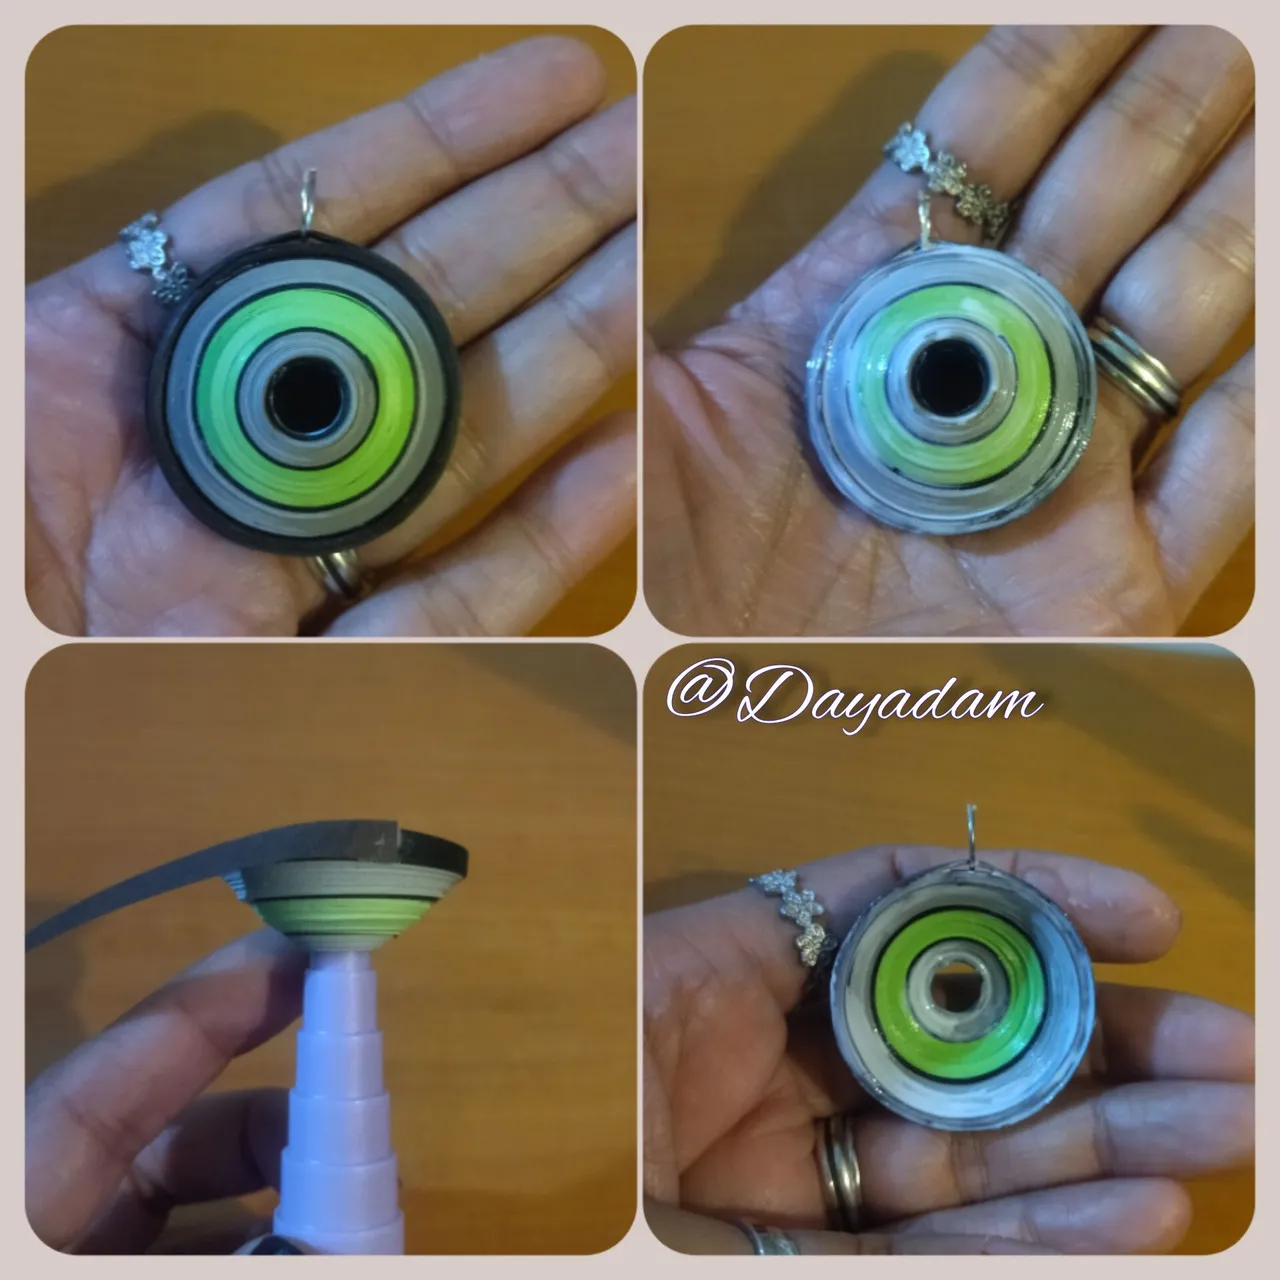
- We will continue with dark brown quilling tape 6mm wide x 40cms long, we will put the pendant back into the template and we will roll the brown tape around it, before finishing with all the tape we will place a ring of costume jewelry, we finish rolling at the end with the tape we seal with glue and take out of the template, we apply another layer of glue on the back when dry we apply a capar on the front to seal and laminate.
• Vamos a tomar cinta de 3mm de ancho x 120cms color verde claro, meteremos la pieza negra con gris a la plantilla de círculos y comenzáremos a enrollar la cinta color verde hasta finalizar con la misma, seguido a esto tomaremos una negra de 3mm de ancho x 40cms de largo la pasaremos alrededor de la verde claro y al finalizar, sellamos con pega, sacamos de la plantilla y moldearemos en el molde para círculos, aplicaremos pega nuevamente en la parte interna para que no se deforme la pieza, dejamos secar.
• Vamos a seguir incorporando cintas al dije, esta vez seguiremos con una gris de 3mm de ancho x 120cms de largo, seguida de una negra de 3mm de ancho 40cms de largo. sacamos de la plantilla y moldeamos en el molde para círculos, volvemos a aplicar pega por la parte de atrás.
• Continuaremos con cinta para quilling de color marrón oscuro de 6mm de ancho x 40cms de largo volveremos a meter el dije el la plantilla y enrollaremos la cinta marrón alrededor, antes de finalizar con toda la cinta colocaremos una argolla de bisutería, terminamos de enrollar al finalizar con la cinta sellamos con pega y sacamos de la plantilla, aplicamos otra capa de pega en la parte de atrás al secar aplicamos una capar en la parte delantera para sellar y plastificar.
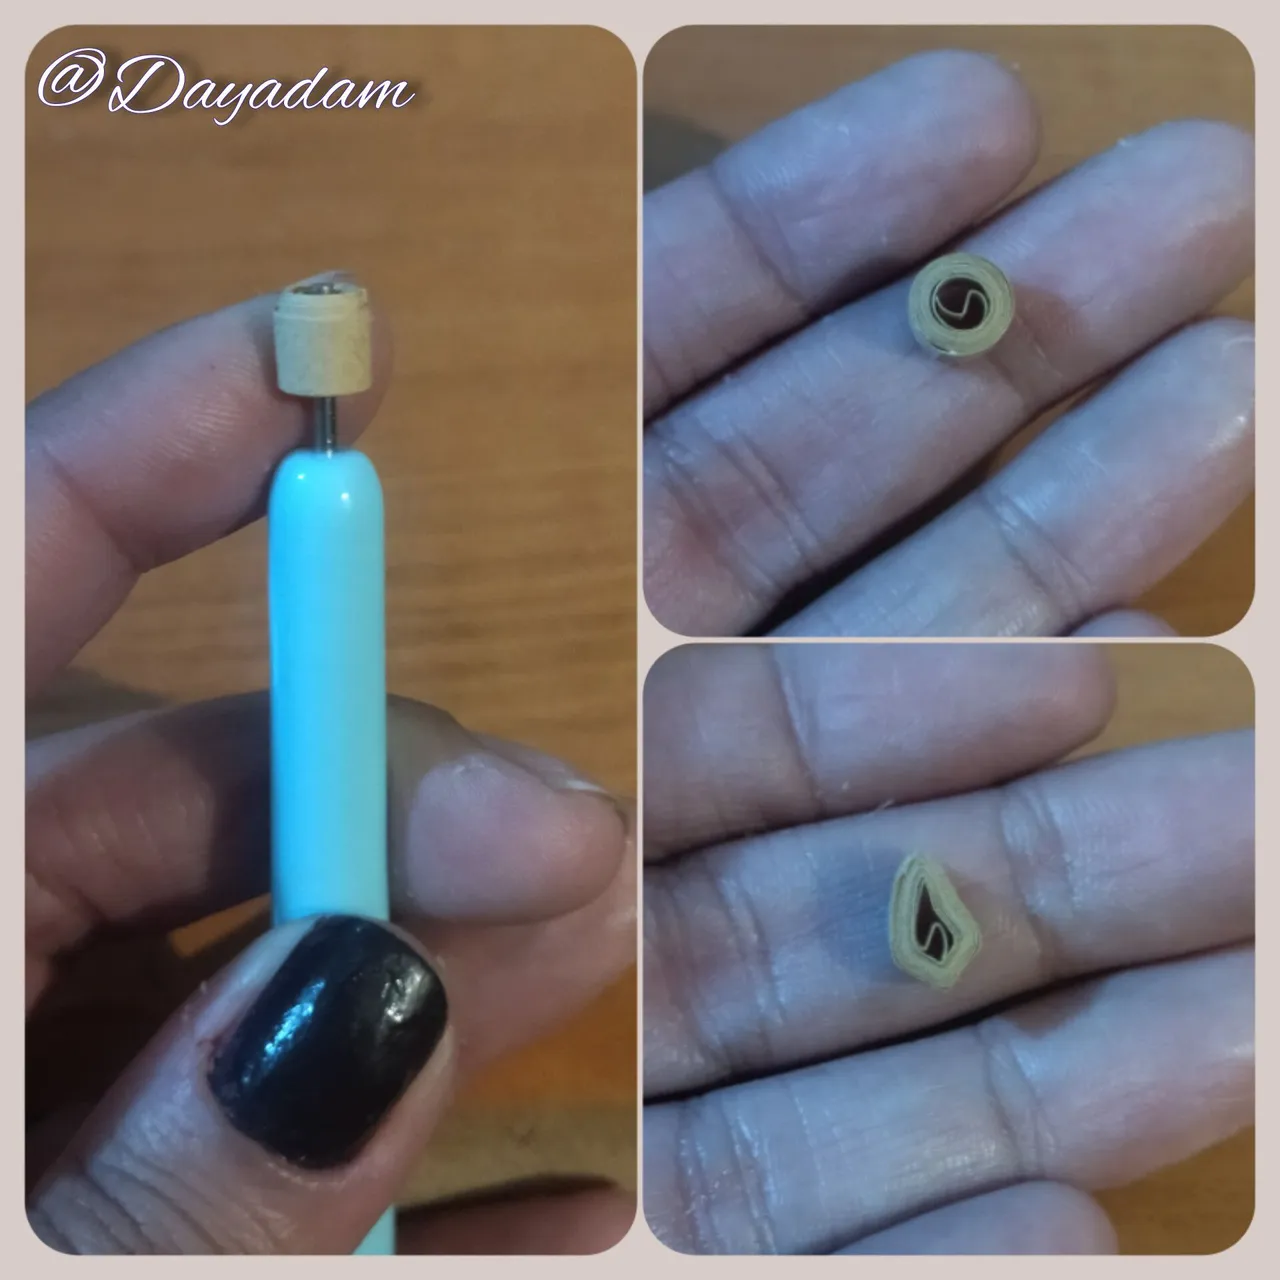
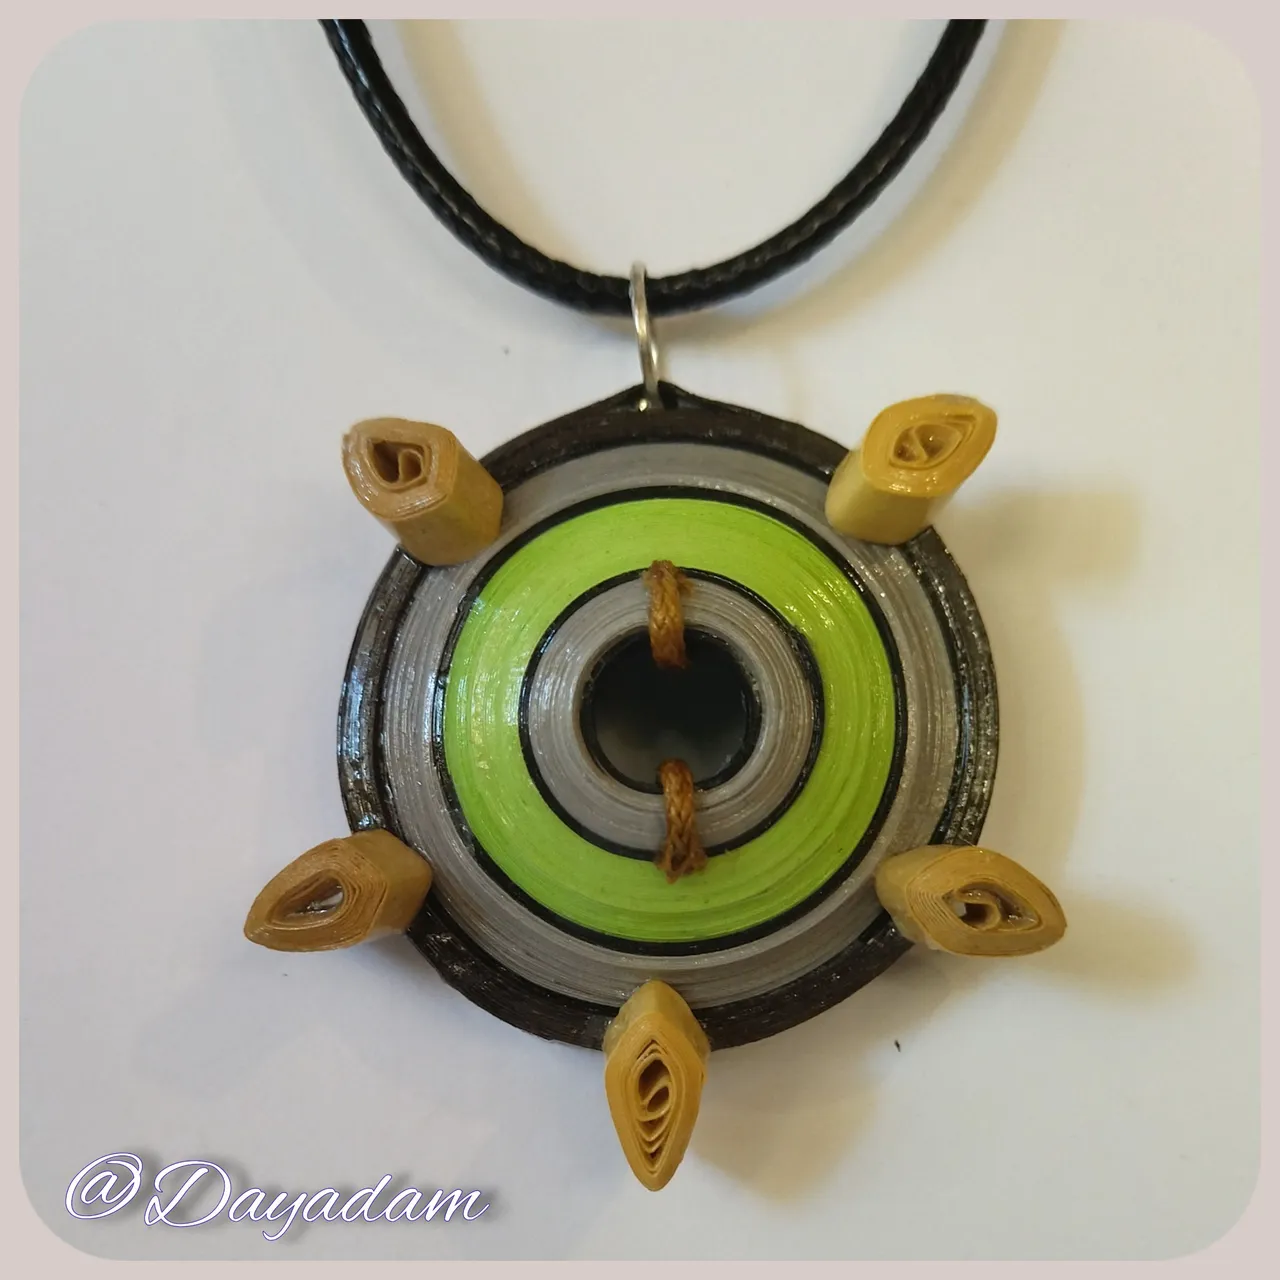
- Take a small piece of light brown ribbon and roll it with the quilling needle, loosen it a little to form an open circle, seal it with glue and mold it as you can see in the image as a kind of triangle with spikes.
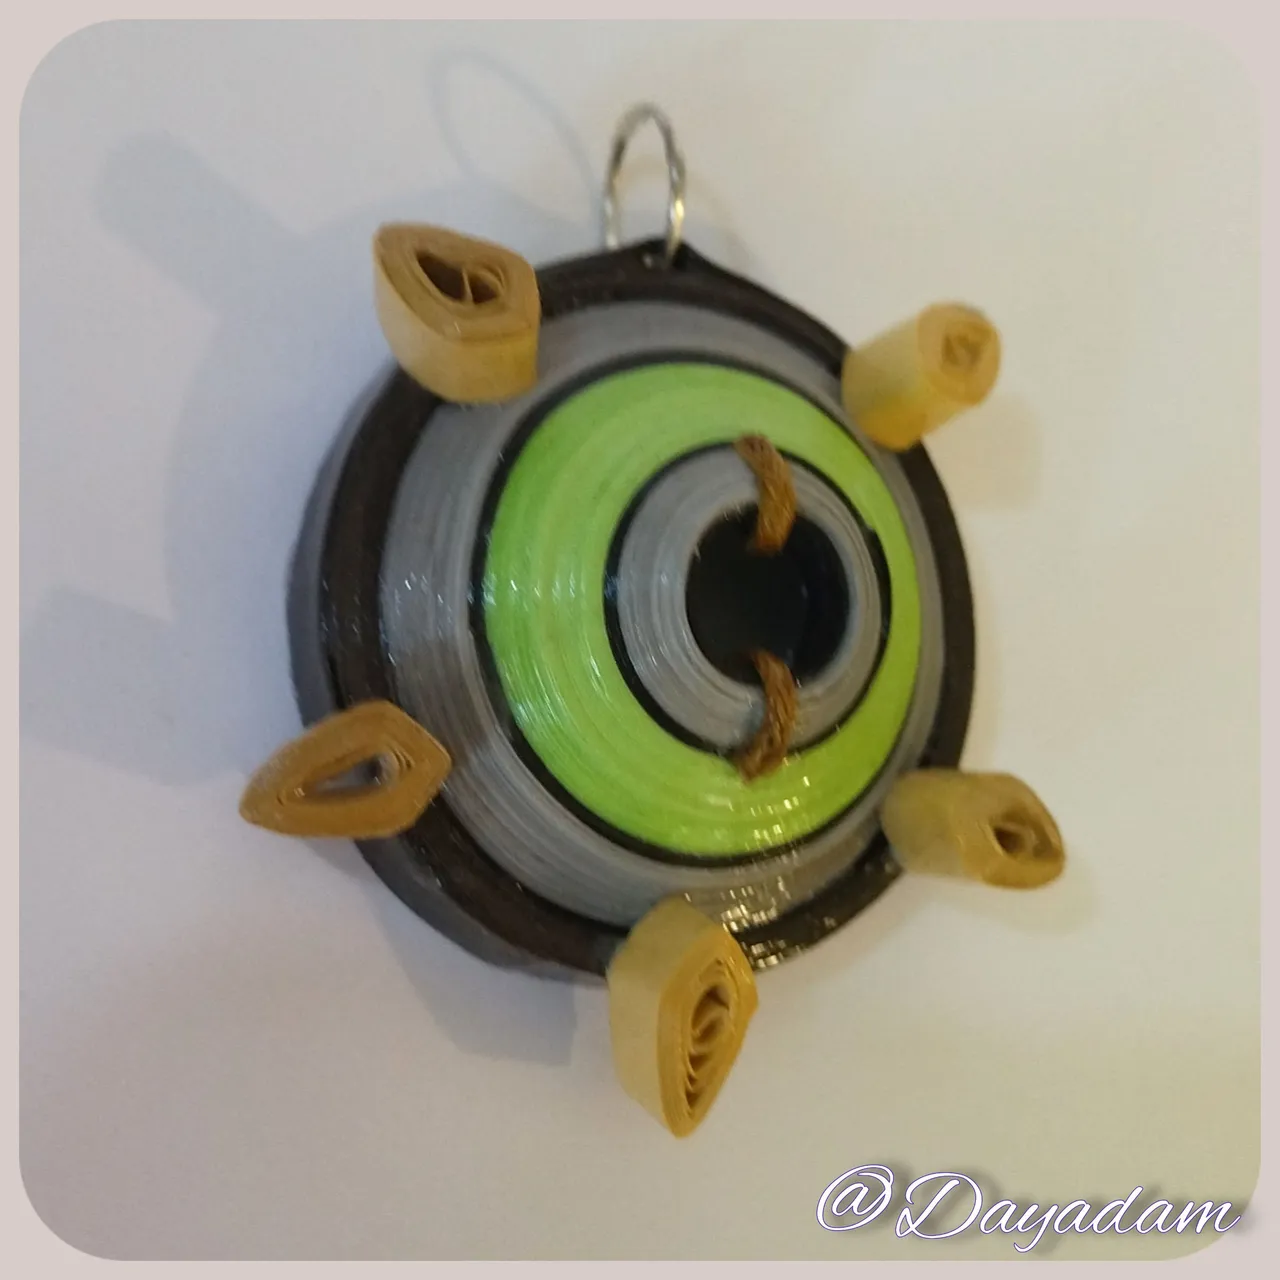
- We will glue the triangular pieces around the round one between the last gray and brown section.
- We are going to take 2 pieces of thin brown Chinese thread and glue them to the first gray part of the pendant vertically.
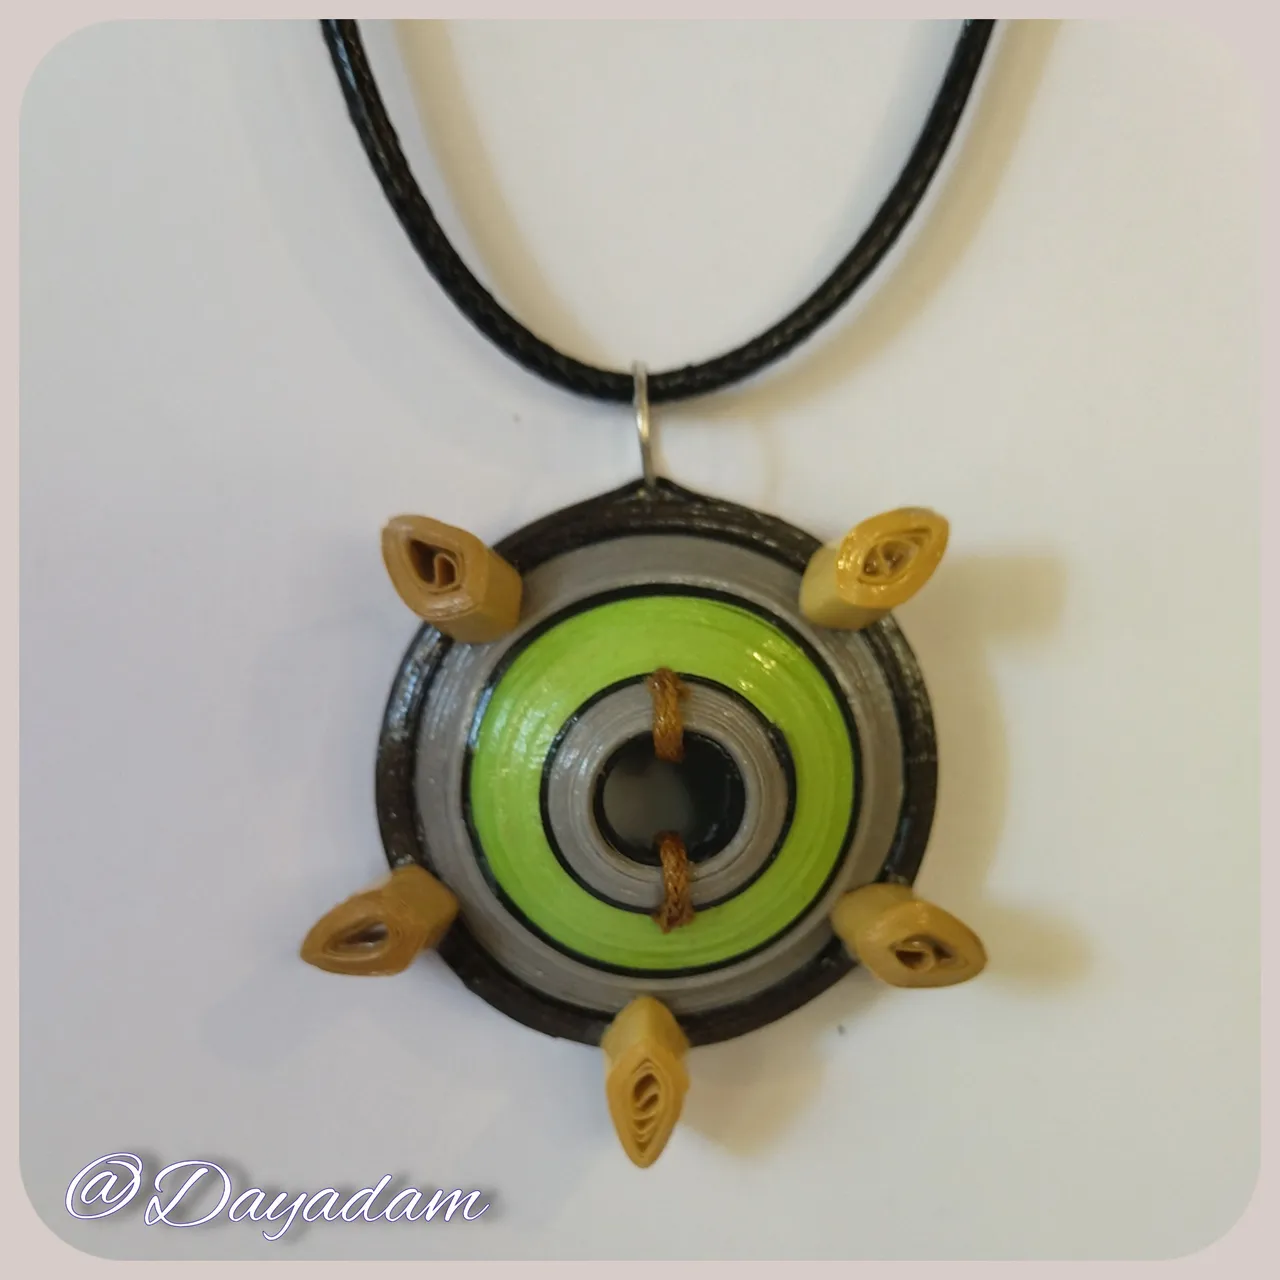
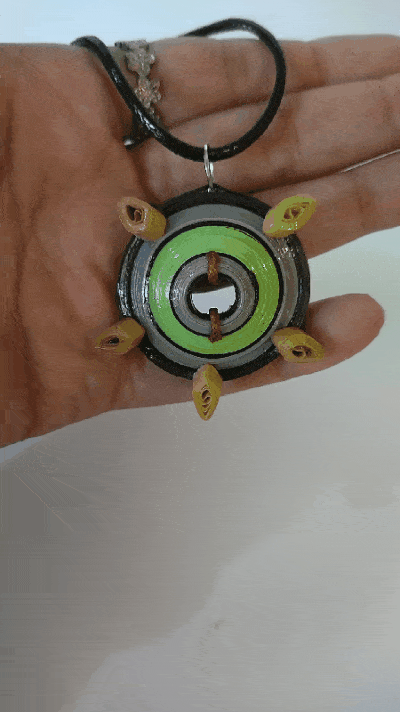
- Finally we apply a layer of glue on the remaining parts to protect and plasticize the pendant.
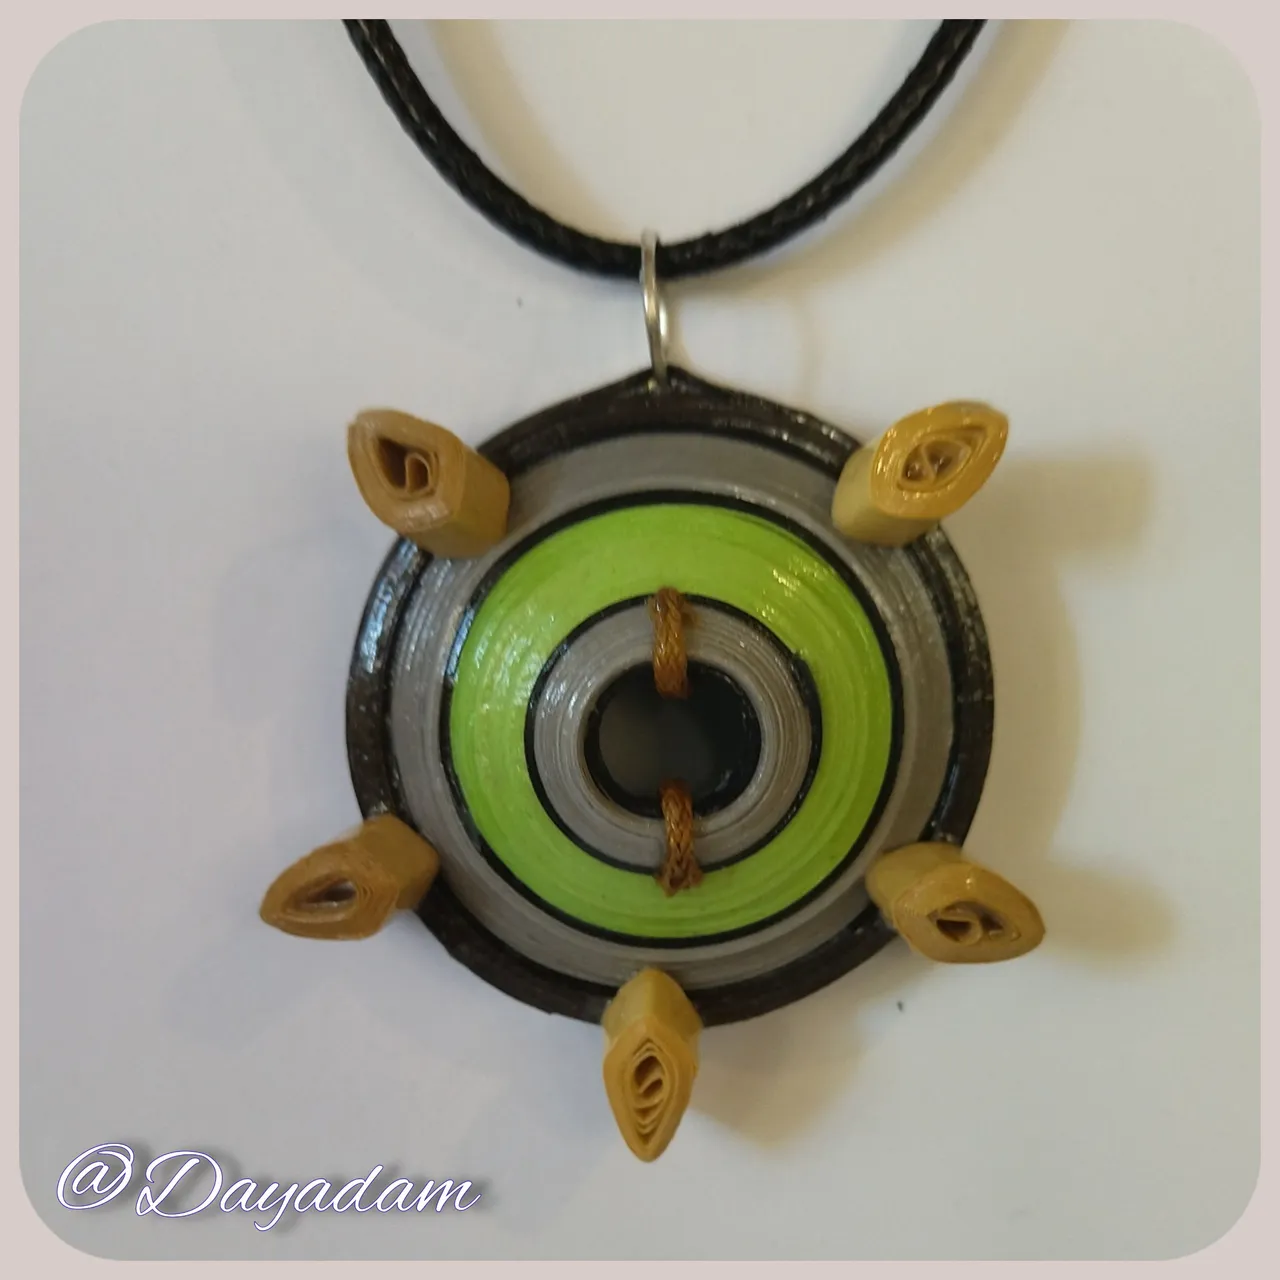
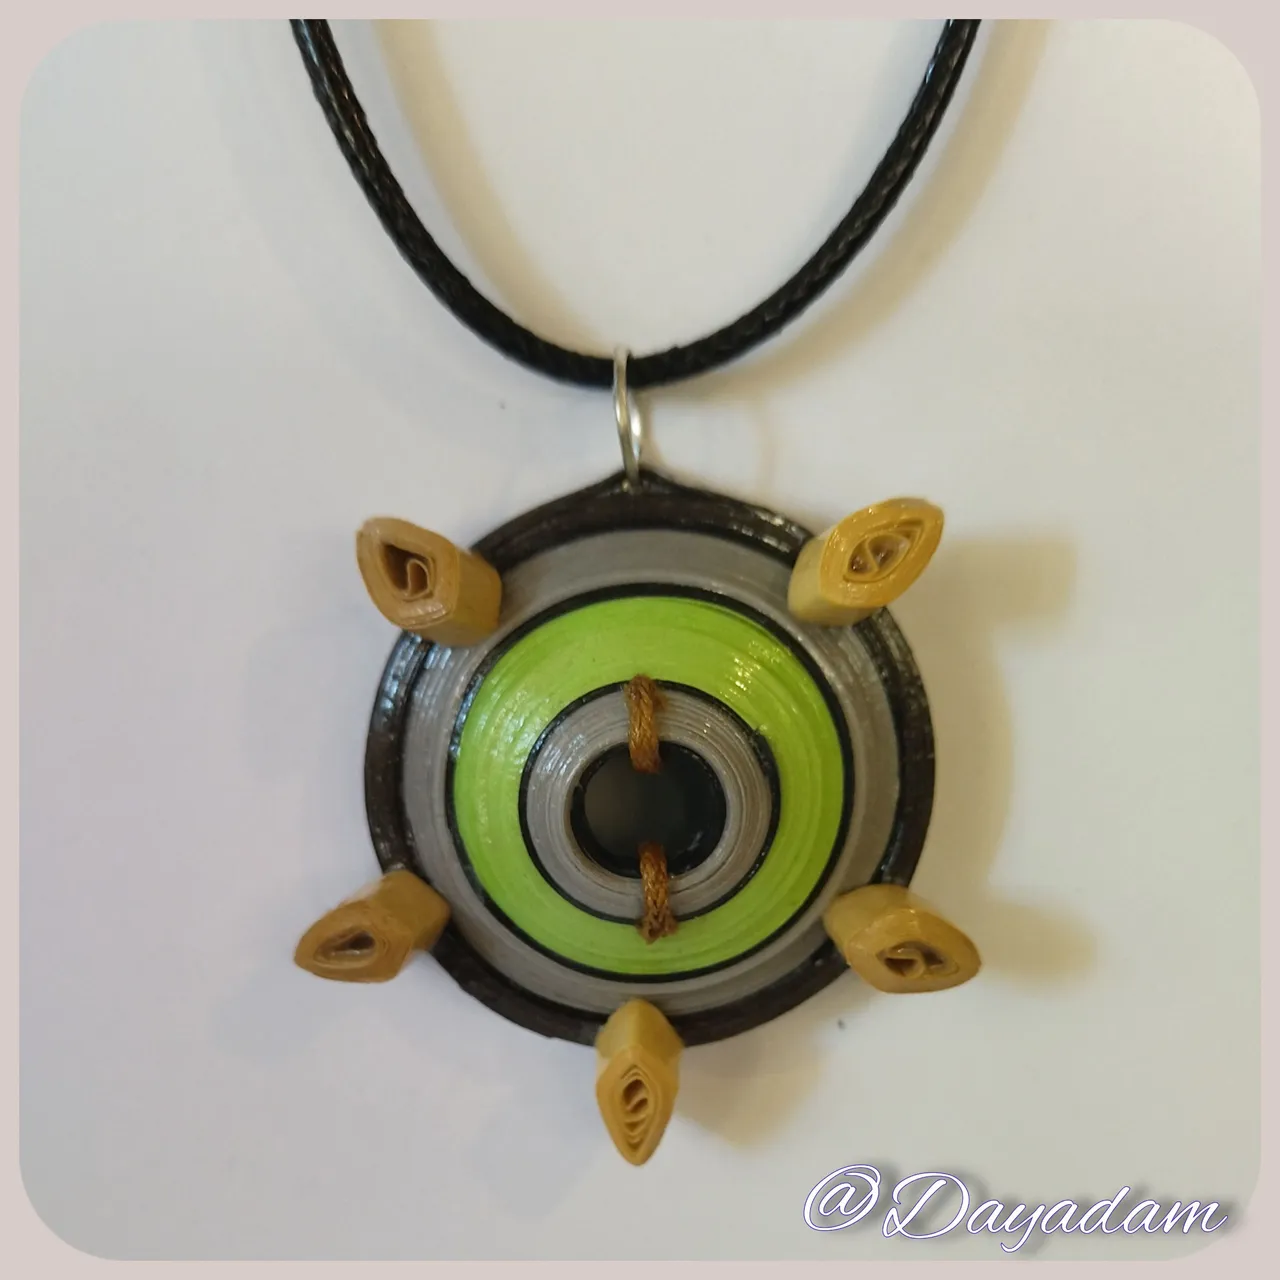
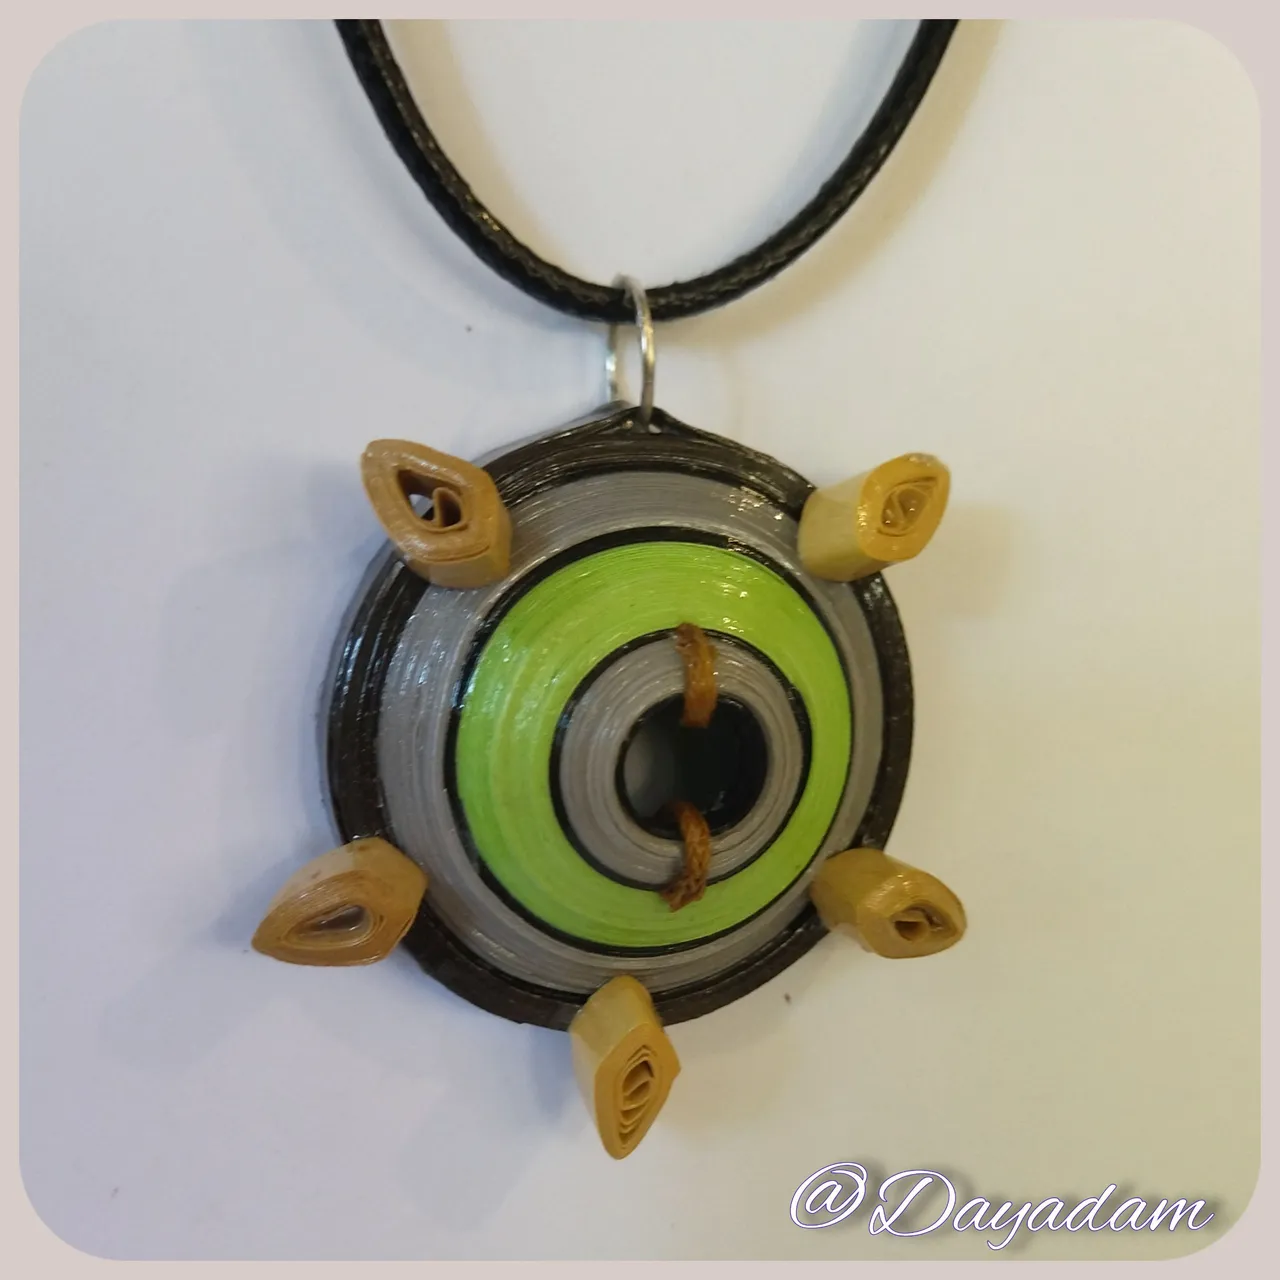
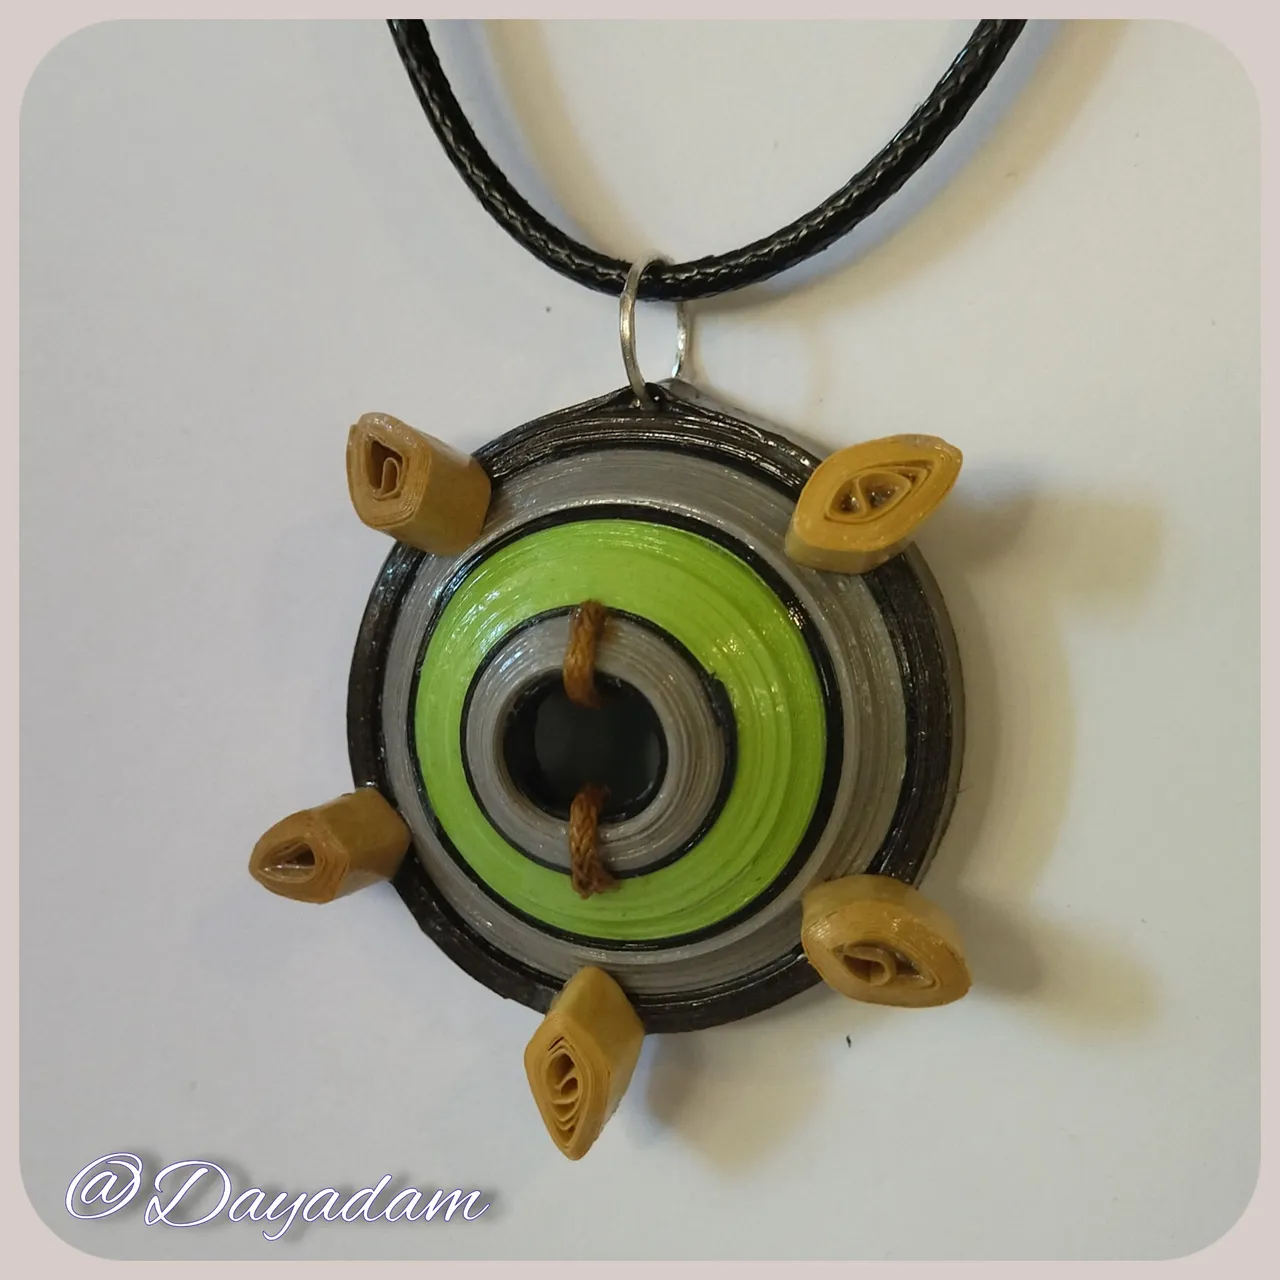
- In this way we have ready this pendant for necklace that materializes inspired by the shield of the Croire letter.
• Tomaremos un pequeño trozo de cinta marrón claro enrollaremos con la aguja para quilling soltamos un poco para forma un circulo abierto, sellamos con pega y moldeamos como lo pueden ver en la imagen como una especie de triangulo con picos.
• Pegaremos las piezas triangulares alrededor de la redonda entre el ultimo tramo gris y el marrón.
• Vamos a tomar 2 trozos de hilo chino fino color marrón y pegaremos en la primera parte gris del dije de manera vertical.
• Para finalizar aplicamos una capa de pega en las partes restantes para proteger y plastificar, el dije.
• De esta manera tenemos listo este dije para collar que materialice inspirado en el escudo de la carta Croire.


What did you think, did you like it?
I hope you did, I hope you liked my explanation, procedure and photos, I made them with love for you.
"Let out that muse that inspires you, and let your imagination fly".
Thank you all, see you next time.
¿Que les pareció, les gustó?
Espero que sí, que les haya gustado mi explicación, procedimiento y fotos, los hice con mucho cariño por y para ustedes.
"Deja salir esa musa que te inspira, y deja volar tu imaginación".
Gracias a todos, nos vemos en la próxima.
