Hello everyone... 💙✨
Hello to my dear Hivers and the dear community of artists #Jewelry, as always very pleased and excited to be here again, showing you my work made with love and especially for you.
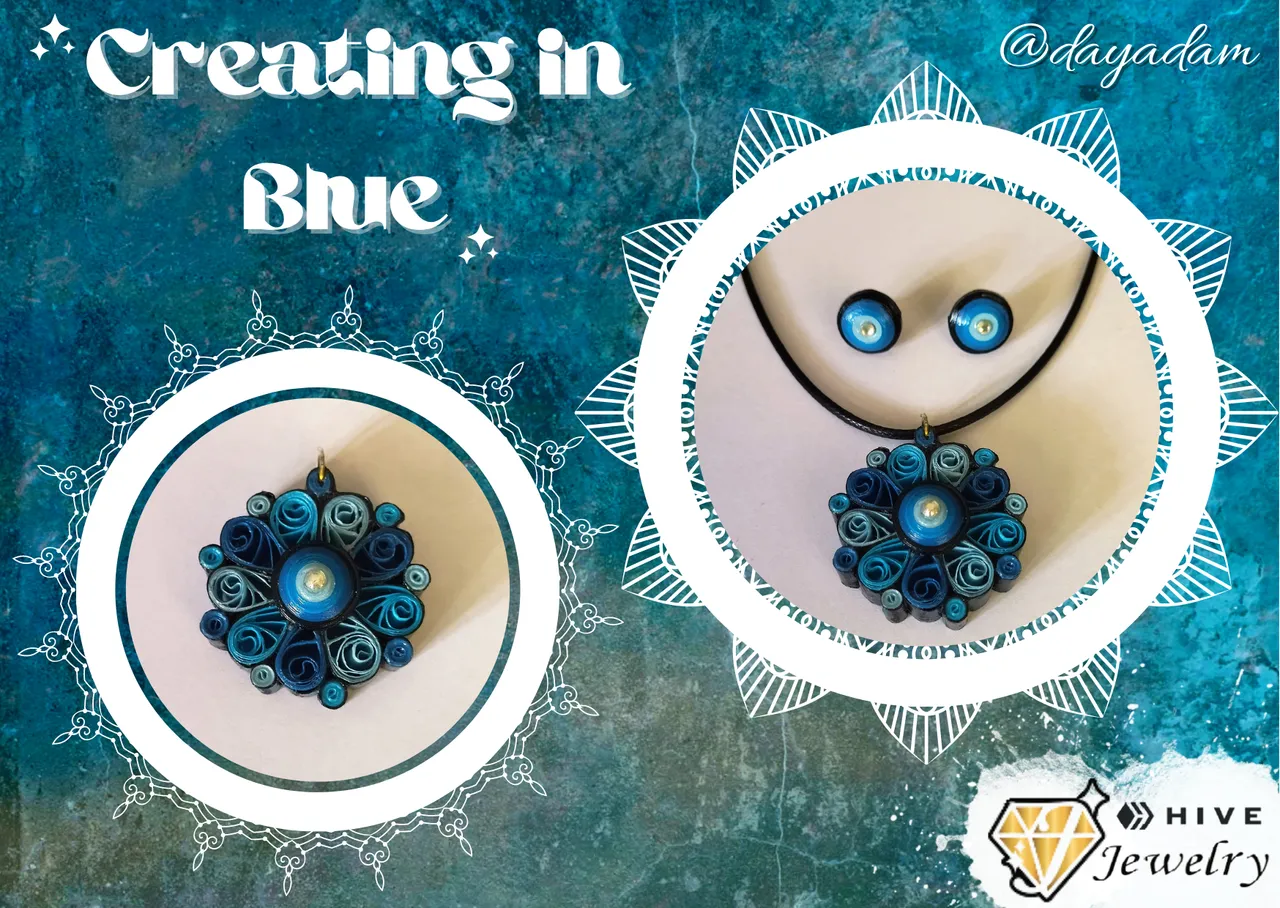
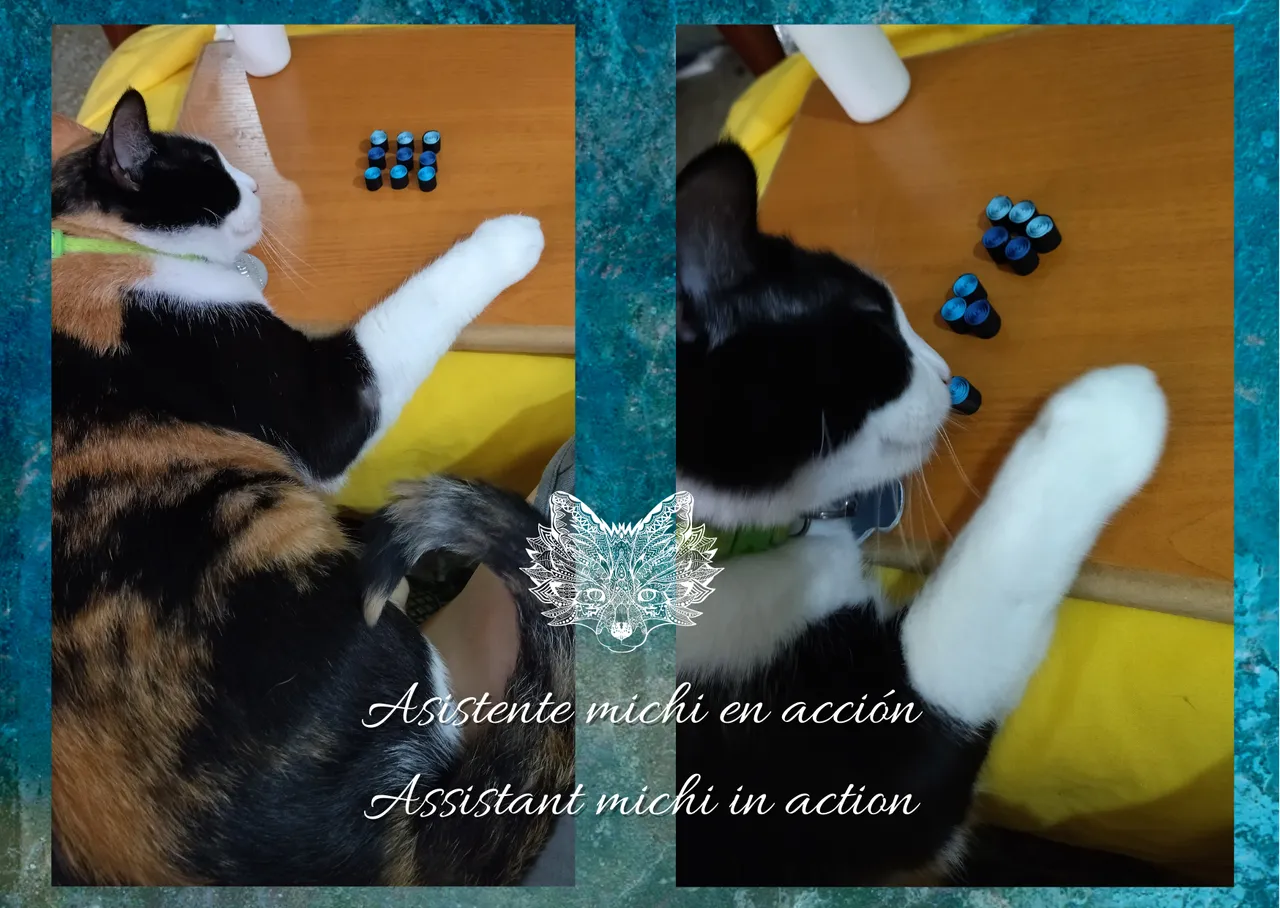
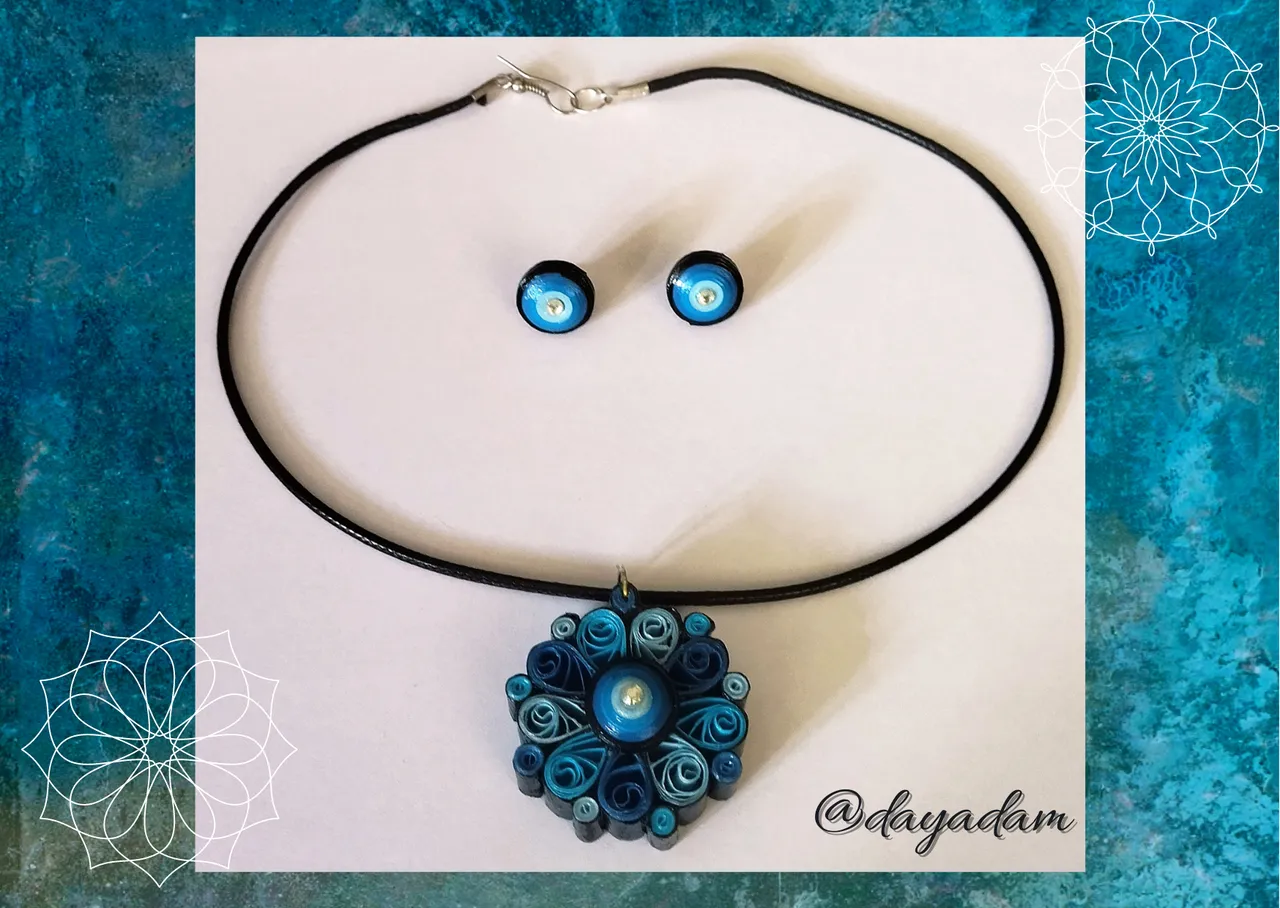
For today I bring you a 3D creation with the quilling technique, which arose spontaneously, just take ribbons, glue them, I was making circles, molding shapes, and the end result a pendant for necklace medallion type with a combination in blue tones and bordered with black.
I hope you like it:
Let's begin:😃

Hola a todos... 💙✨
Hola a mis queridos Hivers y a la querida comunidad de artistas #Jewelry, como siempre muy complacida y emocionada de encontrarme por acá nuevamente, mostrándole mi trabajo hecho con mucho amor y especialmente para ustedes.
Para hoy les traigo una creación en 3D con la técnica de quilling, que surgió de forma espontánea, simplemente tome cintas, las pegue, fui realizando círculos, moldeando formas, y el resultado final un dije para collar tipo medallón con una combinación en tonalidades azules y bordeado con negro.
Esperando sea de su agrado:
Comencemos:😃

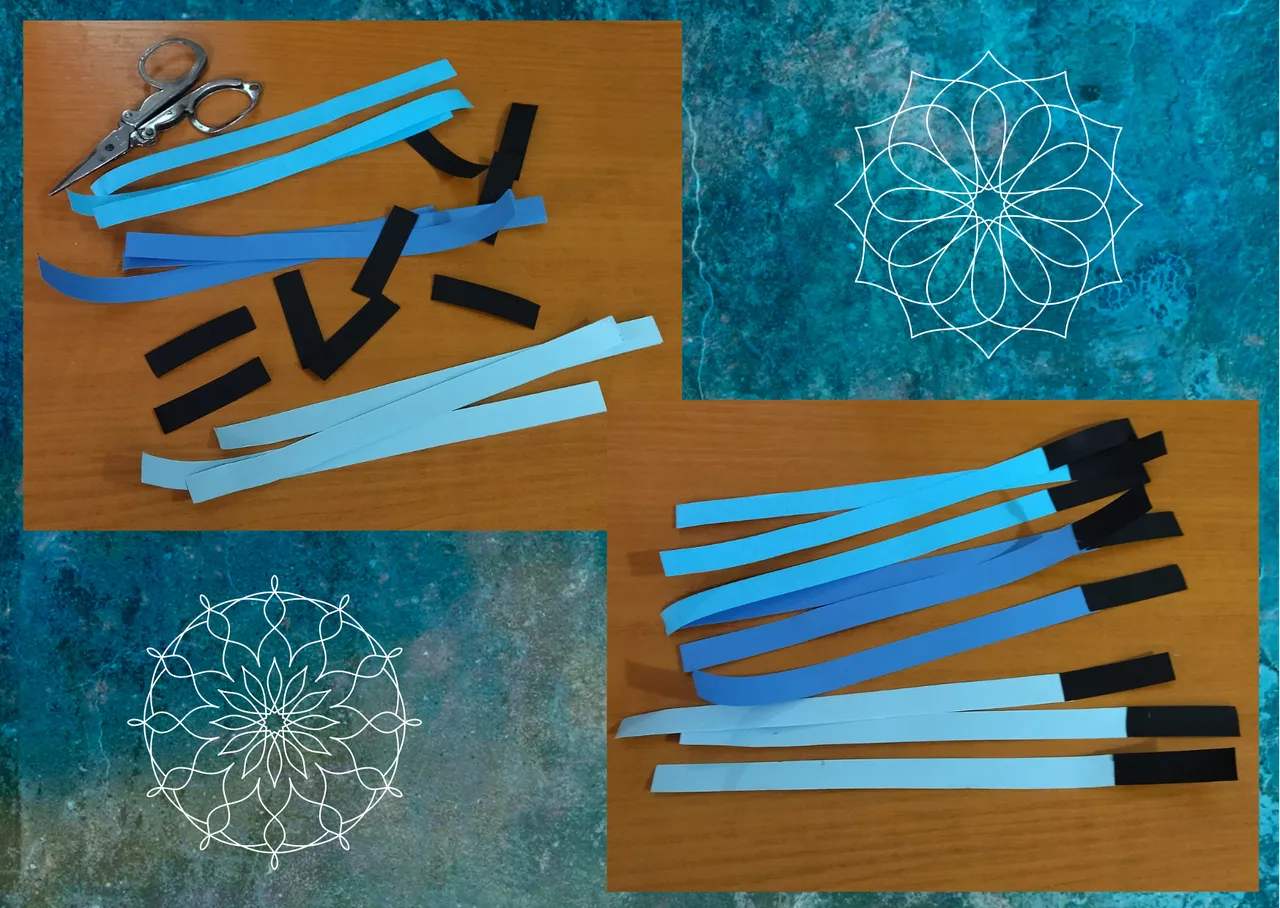
• Cintas de quilling de 9, 3 y 1.5mm de ancho azules en varias tonalidades, y negras (o del color de tu preferencia).
• Regla con diversas medidas de circunferencia.
• Pega blanca extra fuerte (de carpintería).
• Tijera.
• Argolla mediana de bisutería.
• Cristal de bisutería.
• Pincel.
• Alicate punta fina.
• Pinza punta fina.
• Collar de tu preferencia.
- 9, 3 and 1.5mm wide quilling ribbons in various shades of blue and black (or the color of your choice).
- Ruler with different circumference measurements.
- Extra strong white glue (carpentry glue).
- Scissors.
- Medium size costume jewelry ring.
- Costume jewelry glass.
- Paintbrush.
- Fine-nosed pliers.
- Tweezers fine tip.
- Necklace of your choice.

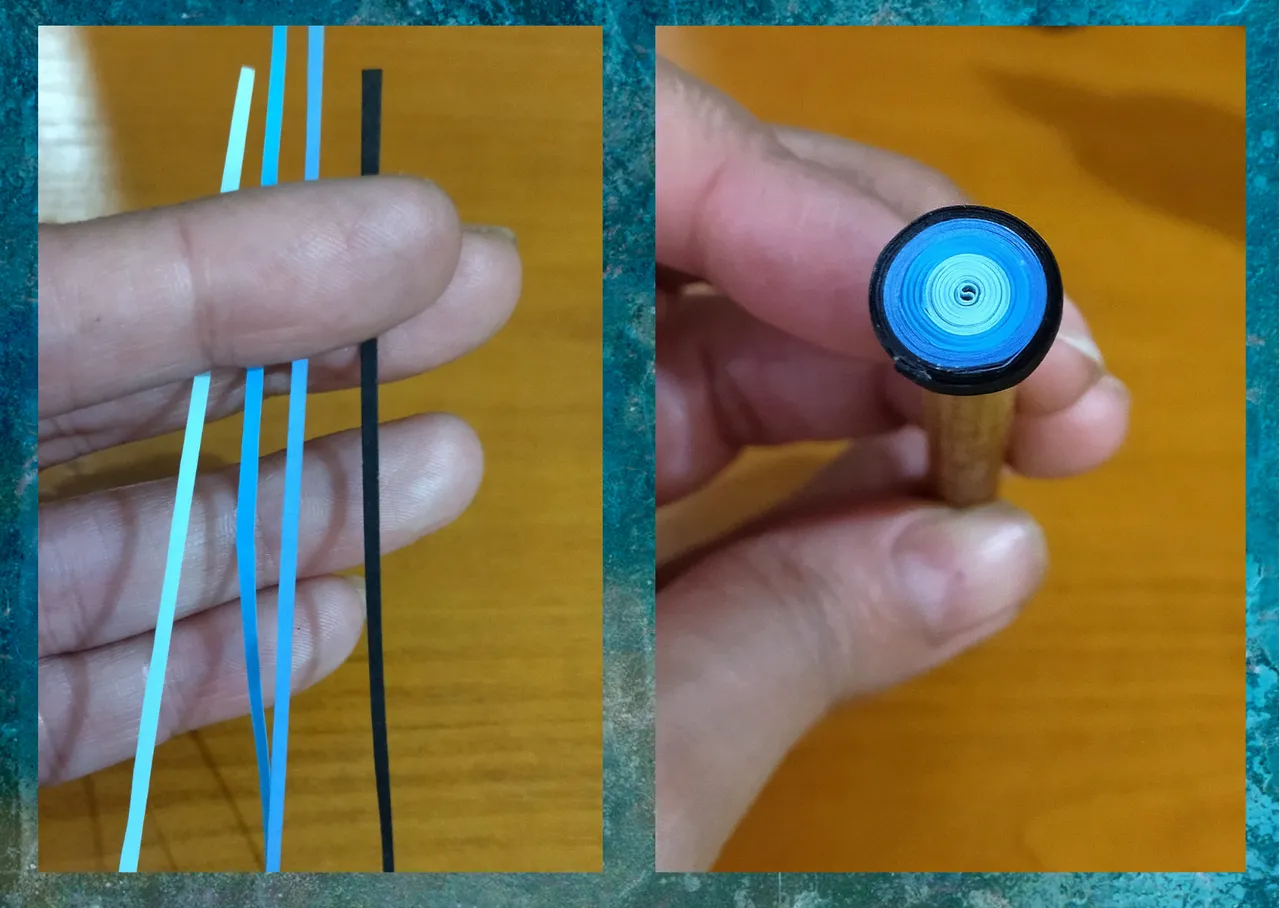
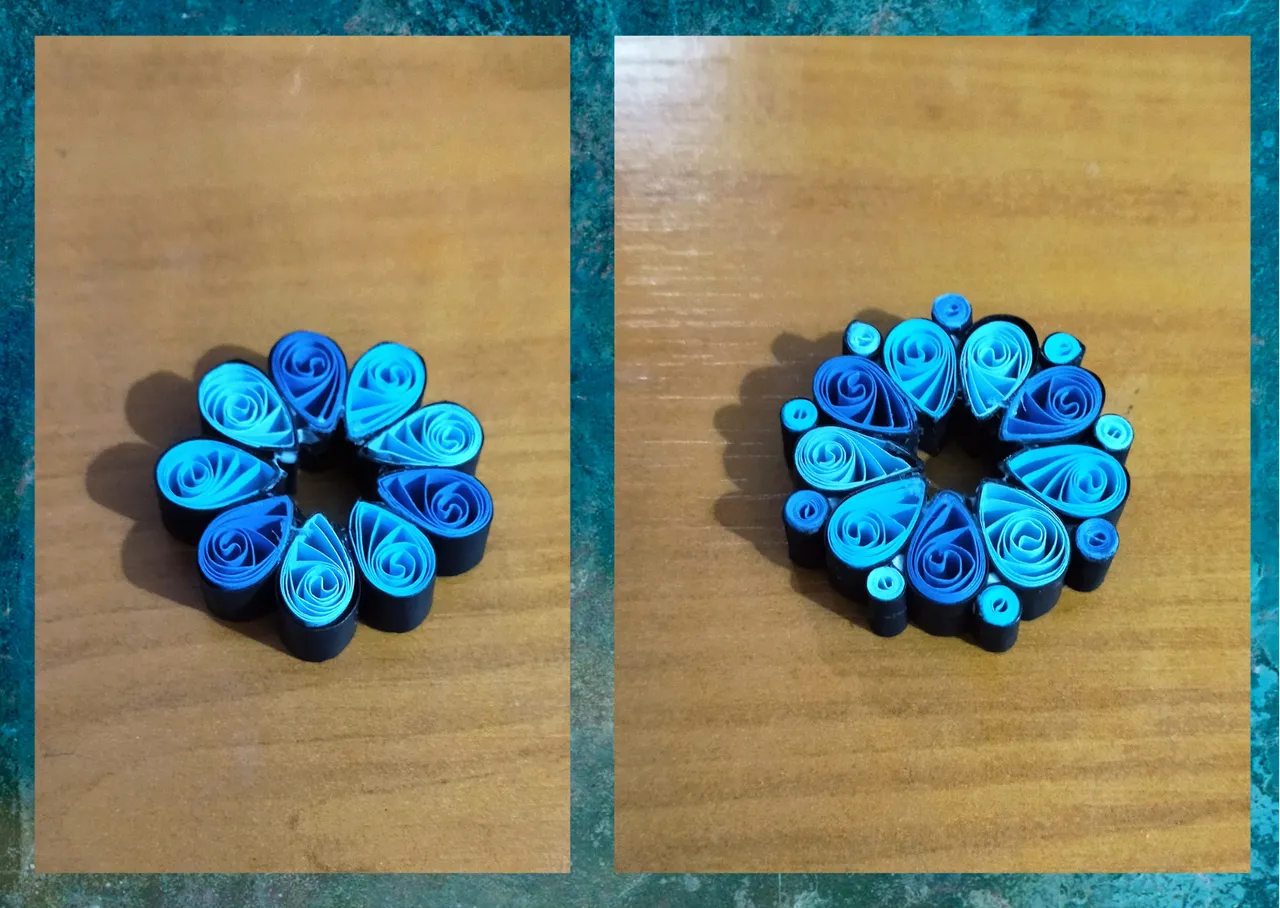
- We start by taking ribbons of various shades of blue, I chose three different blues, cut 3 strips of each 9mm wide x 14cms long, then I took 9 pieces of black ribbon 9mm wide x 7cms long, and joined them with a touch of extra strong white glue to each of them, to form a single ribbon.
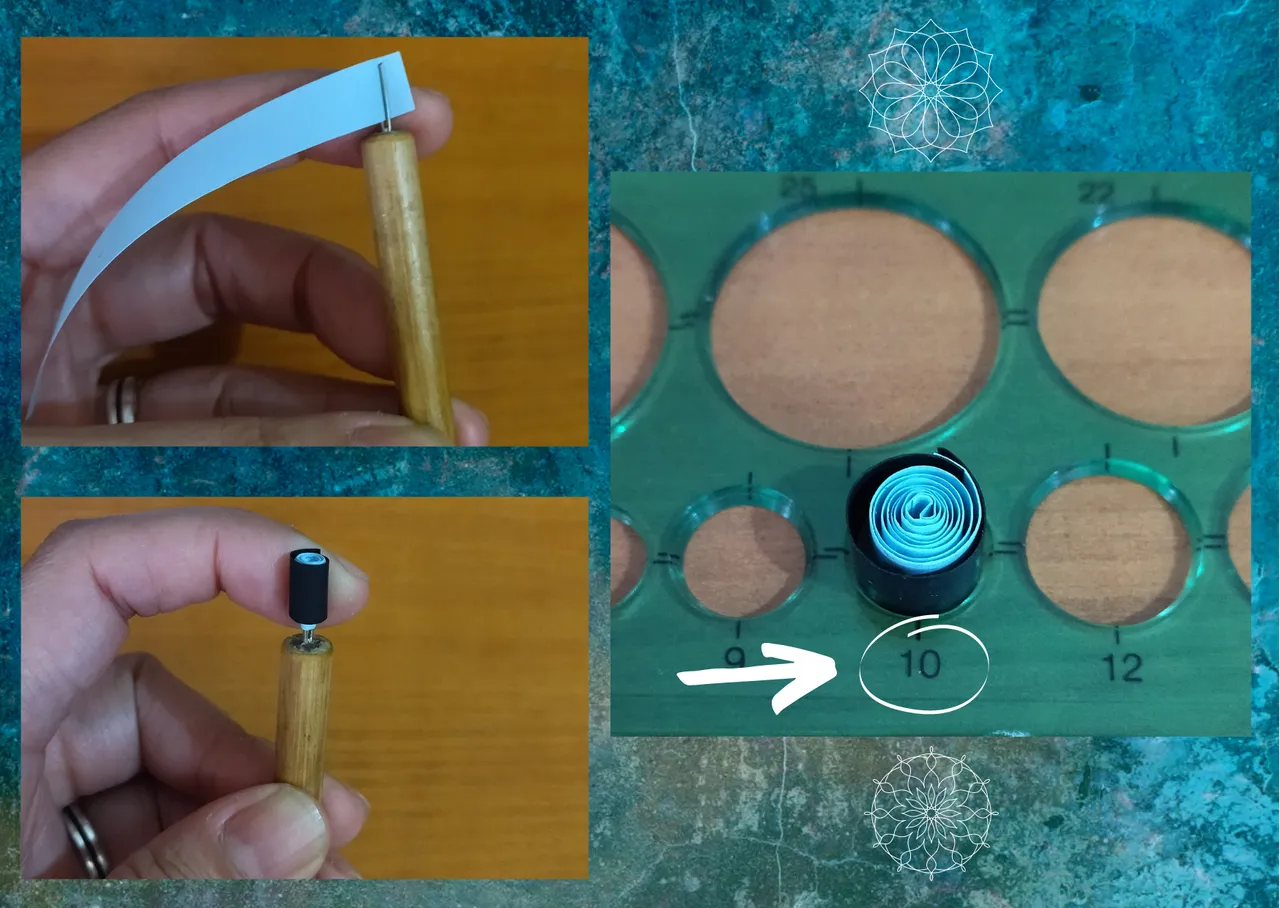
- Then we are going to roll each one of them with the quilling needle, starting with the blue side and ending with the black, we take out of the needle and measure on the ruler of various circumference measures in the circle number 10, we take out of the ruler and seal with glue, we will get an open circle.
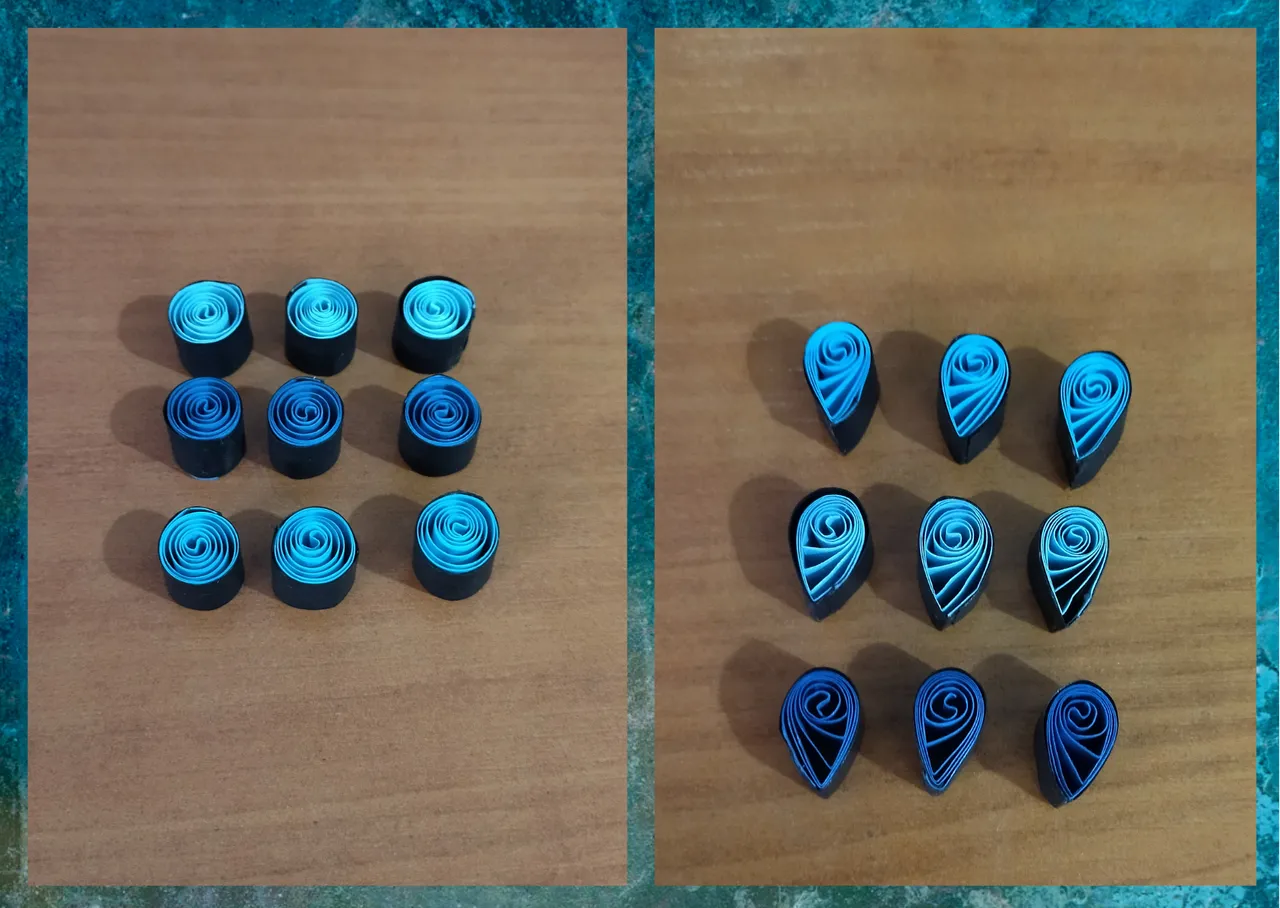
- We are going to give shape to our circles, I decided to give it a drop shape by pinching with my finger on one side of the ribbon, we will obtain 9 drops with different shades of blue in combination with black (we reserve).

• Comenzamos tomando cintas de varias tonalidades de azul, escogí tres azules diferentes, corte 3 tiras de cada una de 9mm de ancho x 14cms de largo, luego tomé 9 trozos de cinta negra de 9mm de ancho x 7cms de largo, y las uní con un toque de pega blanca extra fuerte a cada una de ellas, para formar una sola cinta.
• Luego vamos a enrollar cada una de ellas con la aguja para quilling, comenzando por el lado azul y culminando con el negro, sacamos de la aguja y medimos en la regla de diversas medidas de circunferencia en el círculo número 10, sacamos de la regla y sellamos con pega, vamos a obtener un circulo abierto.
• Vamos a darle forma a nuestros círculos, decidí darle forma de gota pellizcando con el dedo en un costado de la cinta, obtendremos 9 gotas con diversas tonalidades de azul en combinación con negro (reservamos).
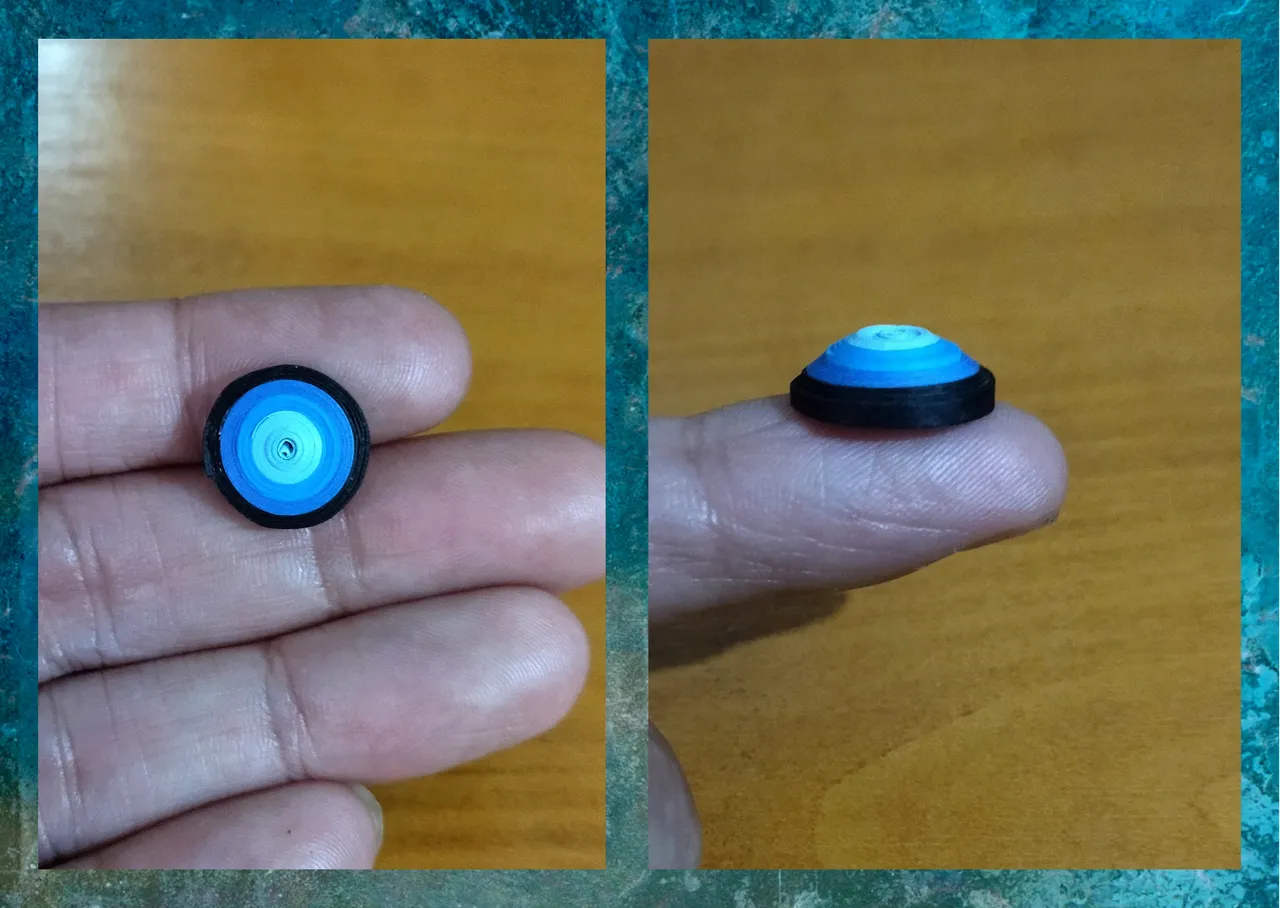
- Now we take 4 quilling strips, three in the shades of blue that I had already used, and one black 1.5mm wide x 28cms long, we will join the 4 strips to form one, starting with the lightest blue to the darkest and finally the black, we roll with the quilling needle starting with the light blue, at the end we remove the needle and seal with glue, we will get a closed circle that will be like a kind of multicolor button, we push it out a little with our fingers to give it a 3D effect.
- With 9 mm wide x 7 cm long ribbon in the three shades of blue make 3 small closed circles, 3 of each color, and at the end pass a small piece of black ribbon around it.
• Ahora tomamos 4 cintas de quilling tres en las tonalidades de azul que ya había usado, y una negra de 1.5mm de ancho x 28cms de largo, vamos a unir las 4 tiras para formar una sola, empezando por el azul más claro hasta el más oscuro y para finalizar el negro, enrollamos con la aguja para quilling comenzando por el azul claro, al finalizar sacamos de la aguja y sellamos con pega, vamos a obtener un círculo cerrado que será como una especie de botón multicolor, lo empujamos un poco hacia afuera con los dedos para darle un efecto 3D.
• Con cinta de 9 mm de ancho x 7cms de largo en las tres tonalidades de azules realice 3 pequeños círculos cerrados, 3 de cada color, y al finalizar pase un pedacito de cinta negra a su alrededor.
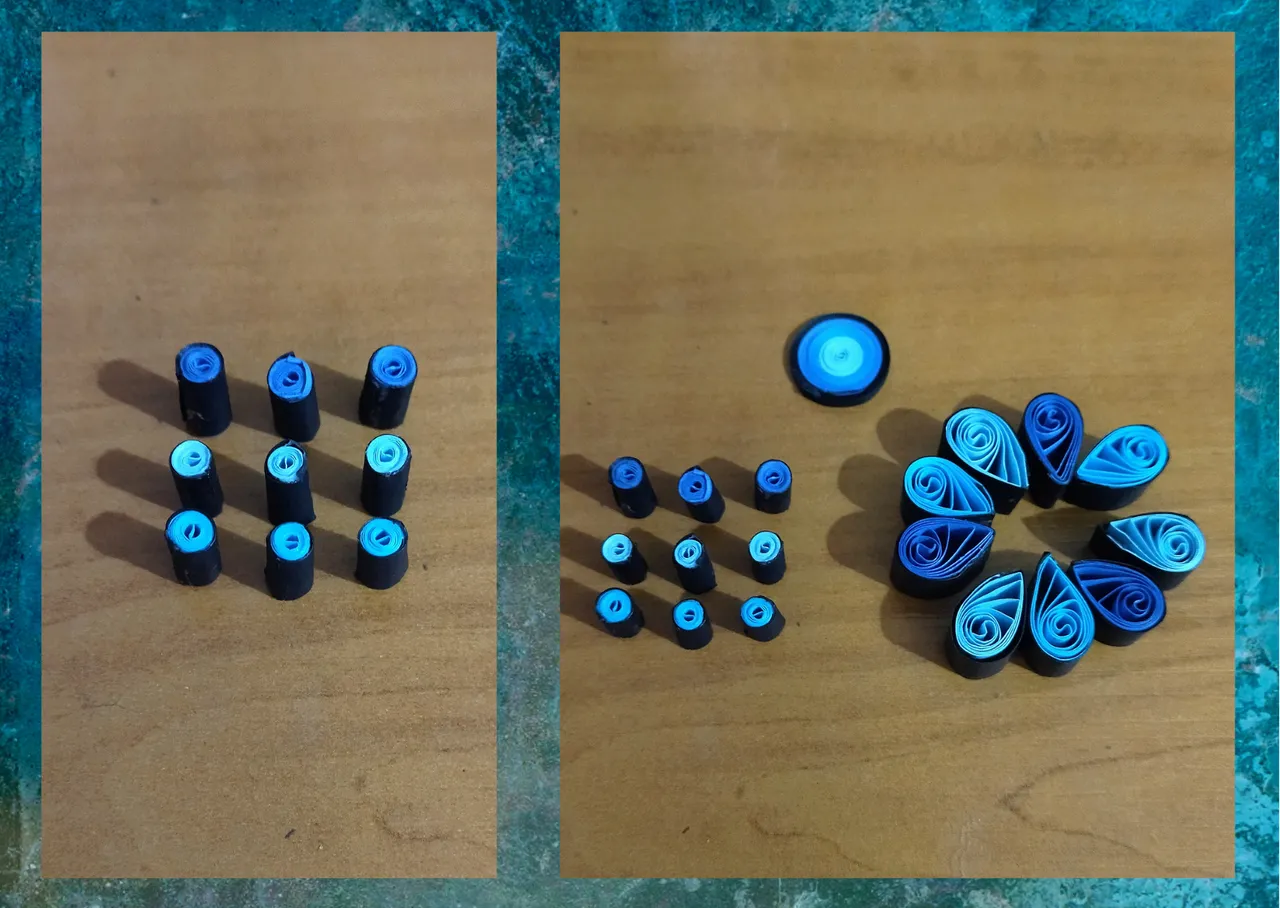
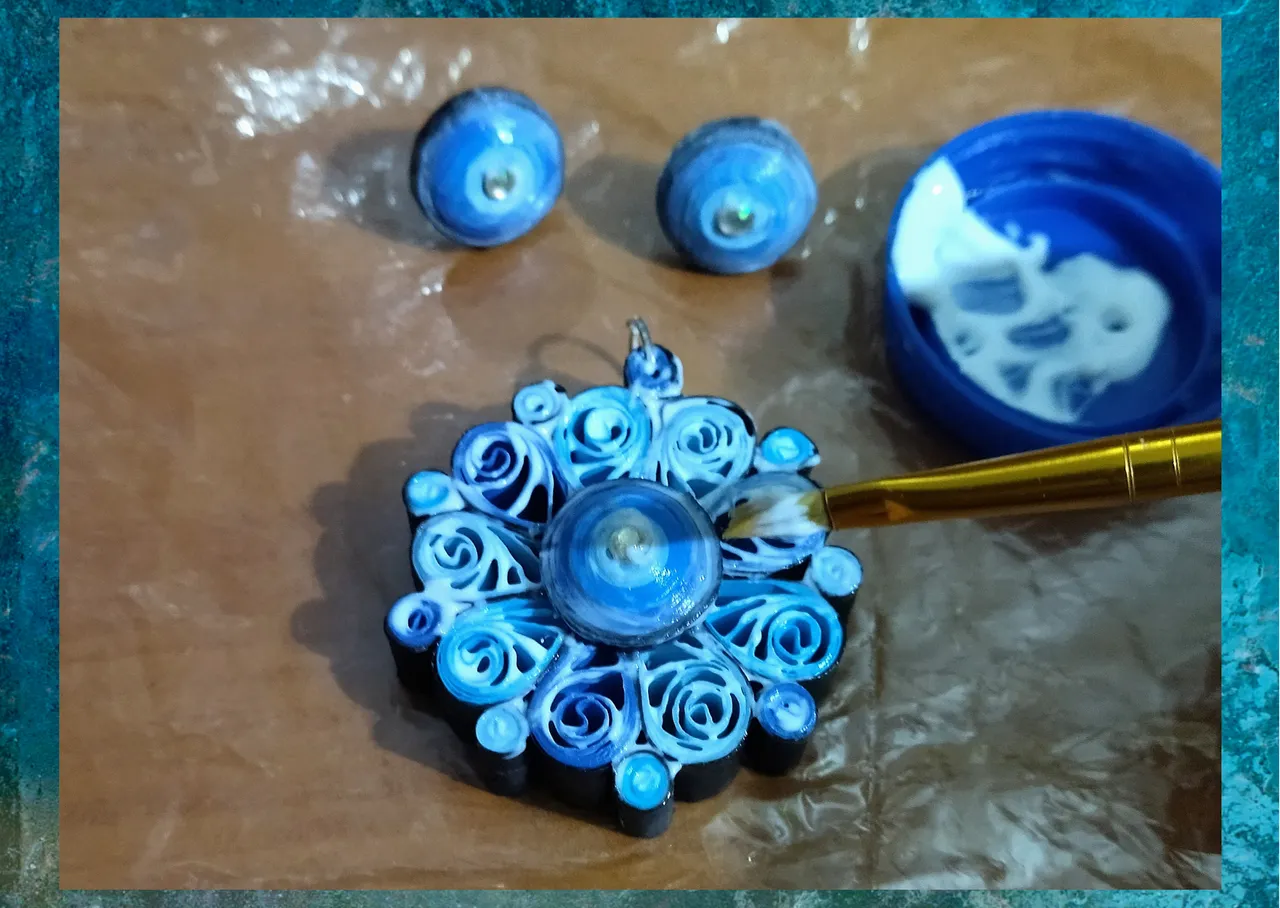
- We are going to form our pendant, we will join with white glue the drops in a harmonic way interspersing the blue colors to form a kind of flower, on the sides we will place the small closed circles, and finally at the top we will place the multicolored button.
- To give it a touch of showiness, I placed a glitter in the center of the button of the pendant.
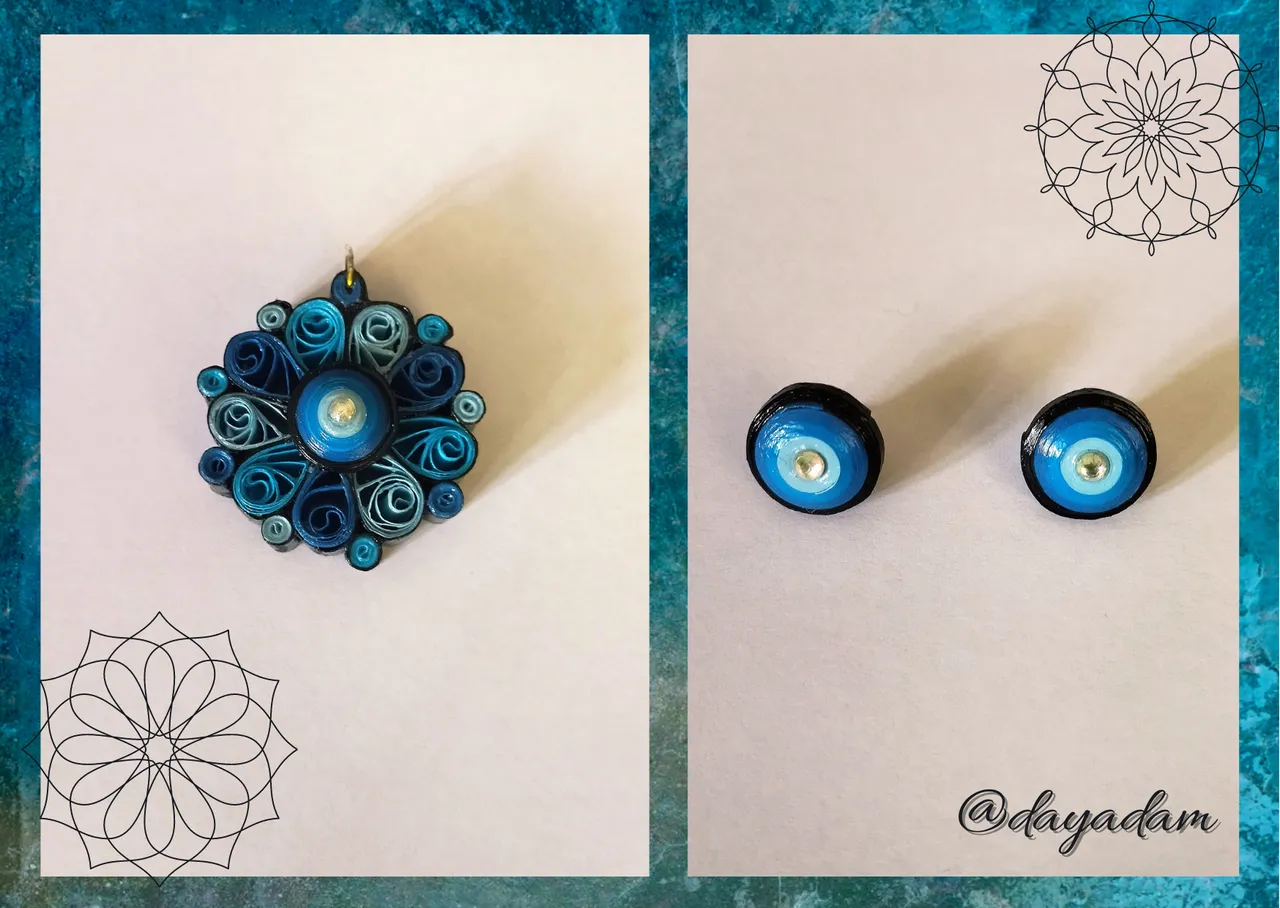
- To finish the pendant, I placed a medium size costume jewelry ring, and applied its liquid protection (plasticized), applying with a brush several coats of extra strong white carpentry glue, letting it dry between one coat and the other.
I wanted to complement the pendant and form the set of accessories, making some simple buttons like the one I placed in the middle of the pendant to use them as tendrils, but I made them with 3mm wide ribbons and placed a fixed base for tendrils.
• Vamos a formar nuestro dije, uniremos con pega blanca las gotas de manera armónica intercalando los colores azules para formar una especie de flor, a los lados vamos colocando los pequeños círculos cerrados, y por último en la parte de arriba colocaremos el botón multicolor.
• Para darle un toque de vistosidad, le coloque un brillo en el centro del botón del dije.
• Para finalizar le coloque al dije una argolla mediana de bisutería, y le coloque su protección liquida (plastificado), aplicando con un pincel varias capas de pega blanca extra fuerte de carpintería dejando secar entre una capa y otra.
Quise complementar el dije y formar el conjunto de accesorios, realizando unos botones sencillos como el que coloqué en el medio del dije para usarlos de zarcillos, pero estos los hice con cintas de 3mm de ancho y le coloqué una base para zarcillos fija.


What did you think, did you like it?
I hope you did, I hope you liked my explanation, procedure and photos, I made them with love for you.
"Let out that muse that inspires you, and let your imagination fly".
Thank you all, see you next time. 💙✨
¿Que les pareció, les gustó?
Espero que sí, que les haya gustado mi explicación, procedimiento y fotos, los hice con mucho cariño por y para ustedes.
"Deja salir esa musa que te inspira, y deja volar tu imaginación".
Gracias a todos, nos vemos en la próxima. 💙✨
Los invito que apoyen a "La Colmena", dale tu voto ✨
 Vote la-colmena for witness By @ylich
Todas las fotos usadas en este post son de mi autoría y han sido sacadas en mi celular personal un Redmi 9T y editadas Canva Banner y separador hecho por mí en Canva Traducido con la ayuda de DeepL
