Hello everyone... 🌈
Hello to my dear Hiver and the dear community of artists #jewelry, as always very pleased and excited to be here again, showing you my work made with love and especially for you.💕
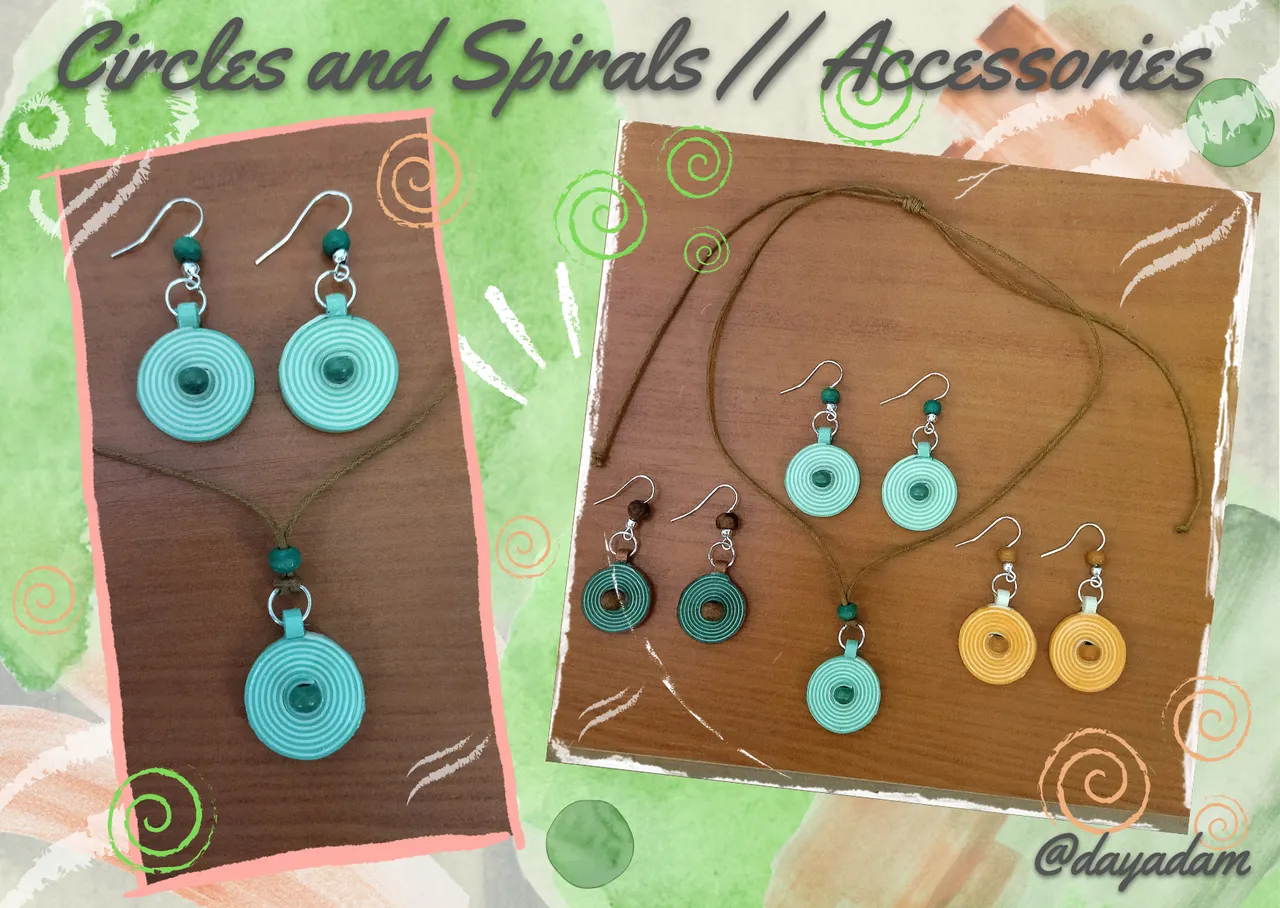
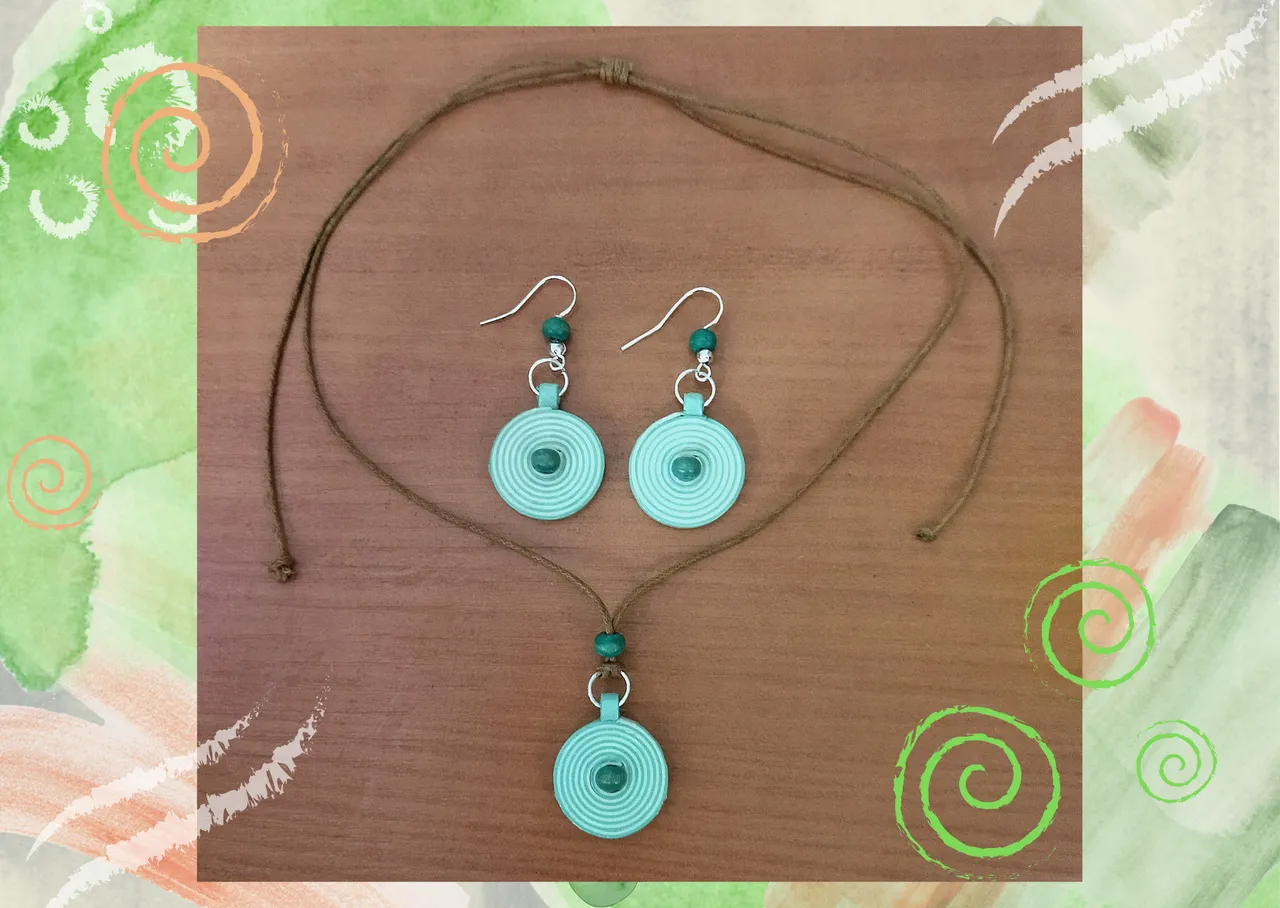
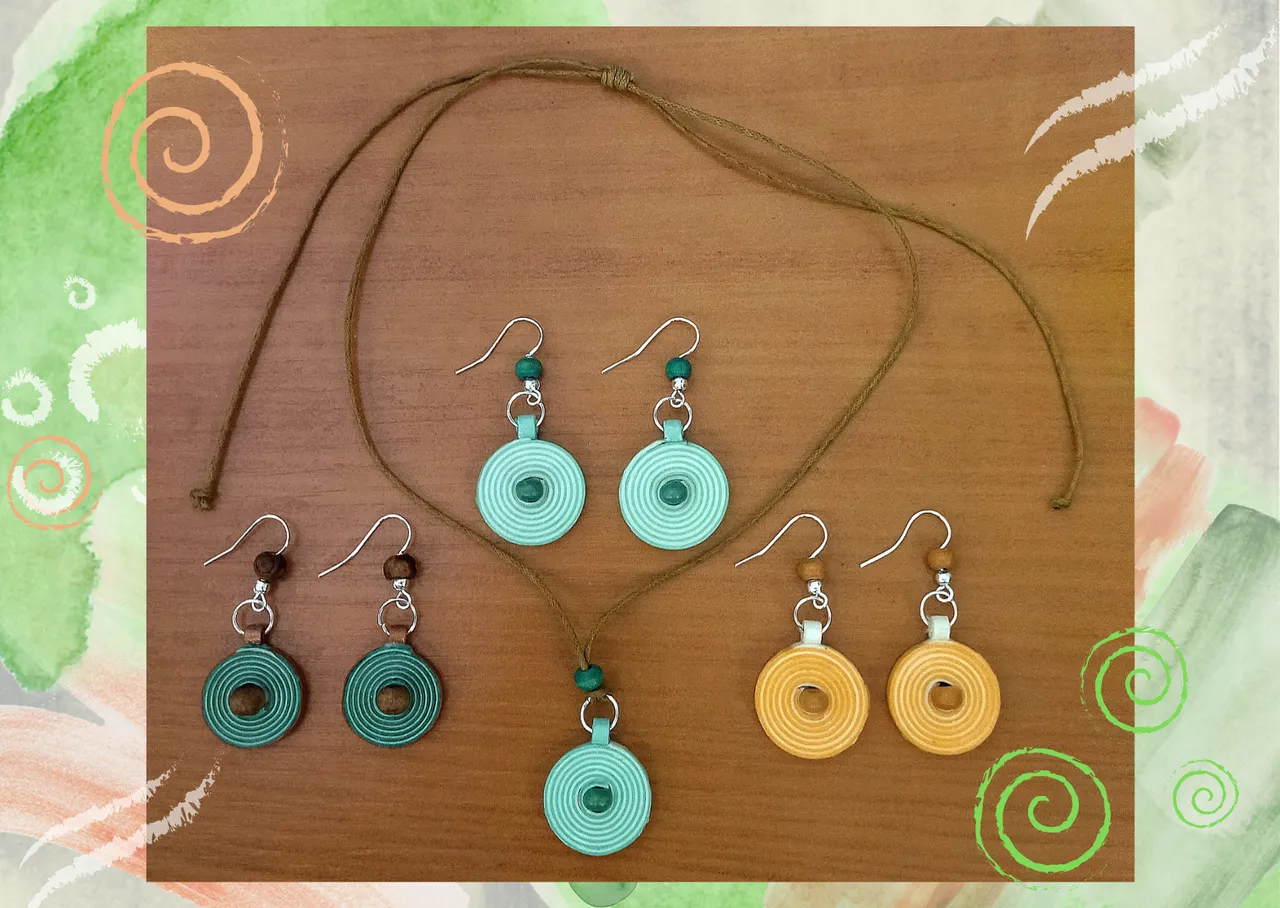
For today I want to present a fairly simple work to do, so I bring you a pair of pendant earrings and a pendant for necklace, in the form of a spiral circle decorated with a central wooden bead, in the technique of quilling art, this way you will get a fairly casual accessory that can be used in your day to day.
Hoping it is to your liking, without further ado:
Let's get started:😃

Hola a todos... 🌈
Hola a mis queridos Hiver y a la querida comunidad de artistas #jewelry, como siempre muy complacida y emocionada de encontrarme por acá nuevamente, mostrándole mi trabajo hecho con mucho amor y especialmente para ustedes.💕
Para el día de hoy quiero presentarles un trabajo bastante sencillo de realizar, por lo cual les traigo un par de pendientes colgante y un dije para collar, en forma de circulo en espiral decorado con una perla de madera central, en la técnica de quilling art, de esta manera obtendrán un accesorio bastante casual que pueden utilizar en su día a día.
Esperando que sea de su agrado, sin más preámbulos:
Comencemos:😃

• Cintas de quilling de 3mm de ancho beige y verdes (o de los colores de tu preferencia).
• Pincel.
• Aguja para quilling.
• Pega blanca extra fuerte (de carpintería).
• Tijera.
• Base para zarcillos colgantes (anzuelos).
• Argollas medianas de bisutería.
• Perlas de madera color verde (o del color de tu preferencia).
• Alicate punta fina.
- 3mm wide beige and green quilling ribbons (or the colors of your choice).
- Paintbrush.
- Quilling needle.
- Extra strong white glue (woodworking glue).
- Scissors.
- Base for hanging tendrils (hooks).
- Medium size costume jewelry earrings.
- Green wooden beads (or the color of your choice).
- Fine-nosed pliers.

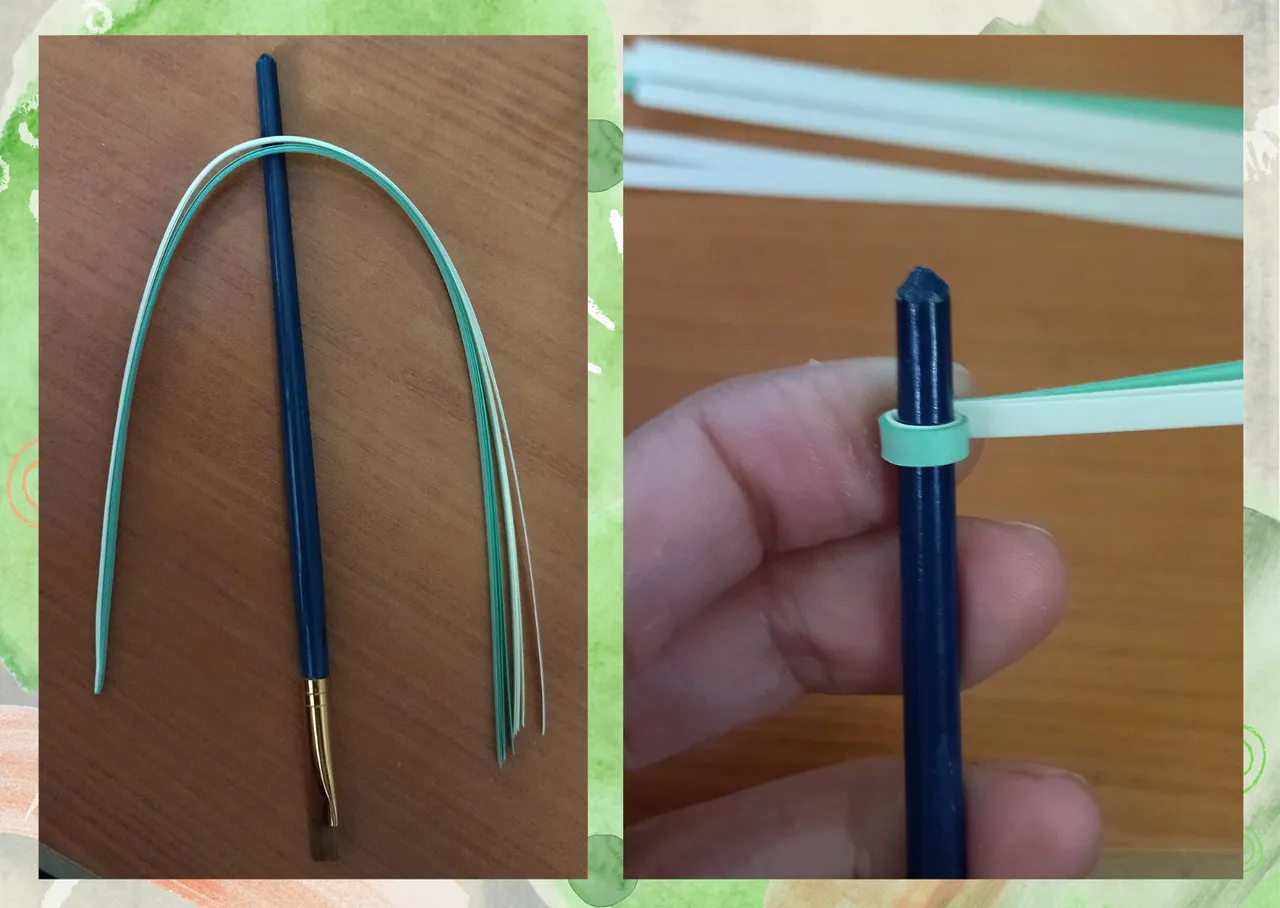
- We are going to start by taking 5 green ribbons of 3mm wide x 25cms long and 5 beige ribbons of 3mm wide x 25cms long, we are going to take all the ribbons and we are going to place them one on top of the other.
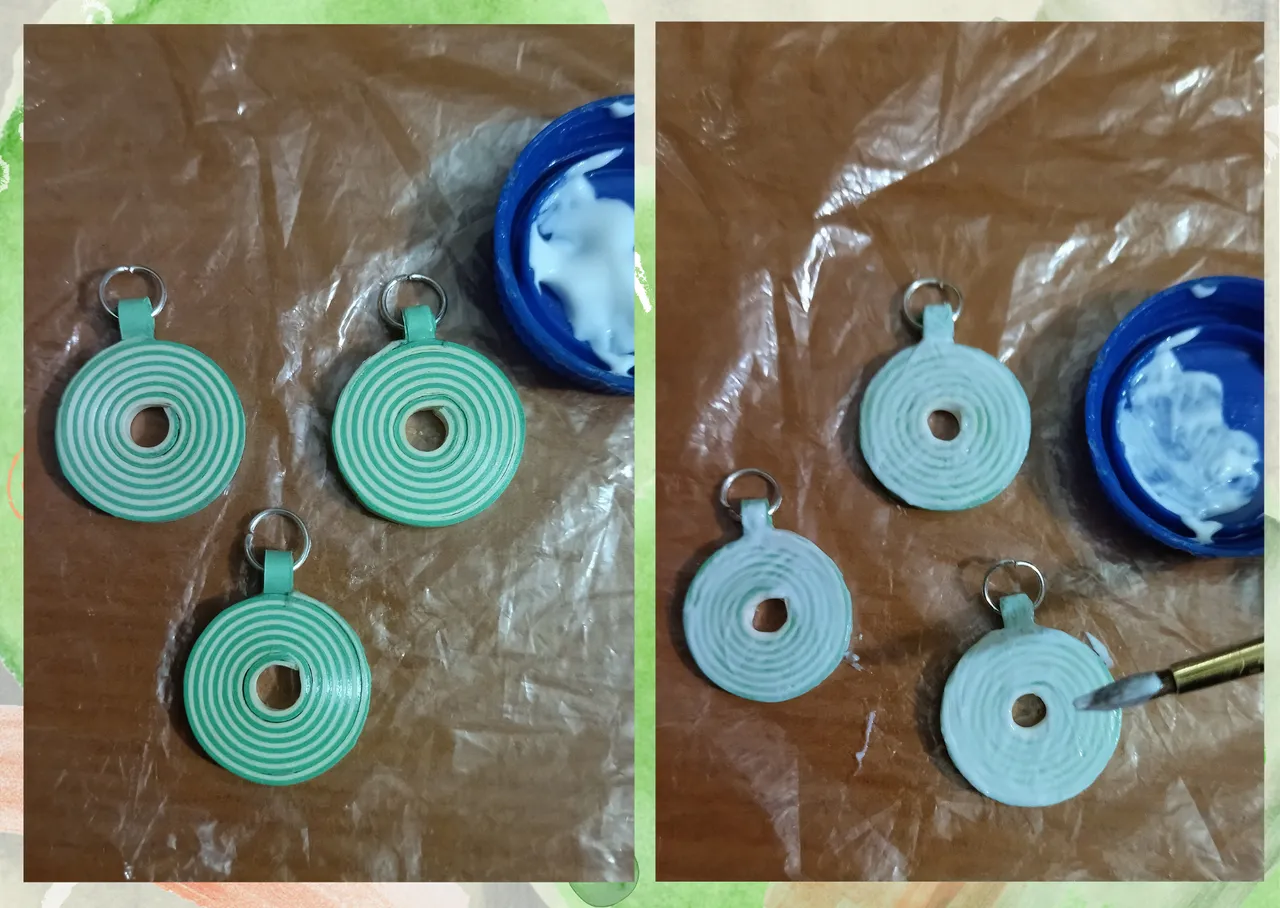
- We take a brush that has a circumference of approximately 4mm, we will roll the ribbons around the brush placing the beige ribbons at the bottom, we will observe that as we roll we will get a spiral-shaped circle by the combination of two different color ribbons (we can combine many more colors 3 or 4 different, everything is in your imagination and taste), we finish rolling, seal with glue and remove the brush. As this piece I will make 3, since I will make a pair of earrings and a pendant for necklace, you can make the number of pieces you want according to the number of accessories you want to make.

• Vamos a comenzar tomando 5 cintas verdes de 3mm de ancho x 25cms de largo y 5 cintas beige de 3mm de ancho x 25cms de largo, vamos a tomar todas las cintas y las vamos a colocar una encima de otra.
• Tomamos un pincel que tenga una circunferencia aproximada de 4mm, vamos a enrollar las cintas alrededor del pincel colocando en la parte de abajo las cintas color beige, vamos a observando que a medida que enrollamos obtendremos un circulo en forma de espiral por la combinación de dos cintas de colores diferentes (podemos combinar muchos más colores 3 o 4 diferentes, todo queda en tu imaginación y gusto), terminamos de enrollar, sellamos con pega y sacamos del pincel. Como esta pieza realizare 3, ya que voy a realizar un par de pendientes y un dije para collar, puedes realizar el número de piezas que deseas según la cantidad de accesorios que quieras hacer.
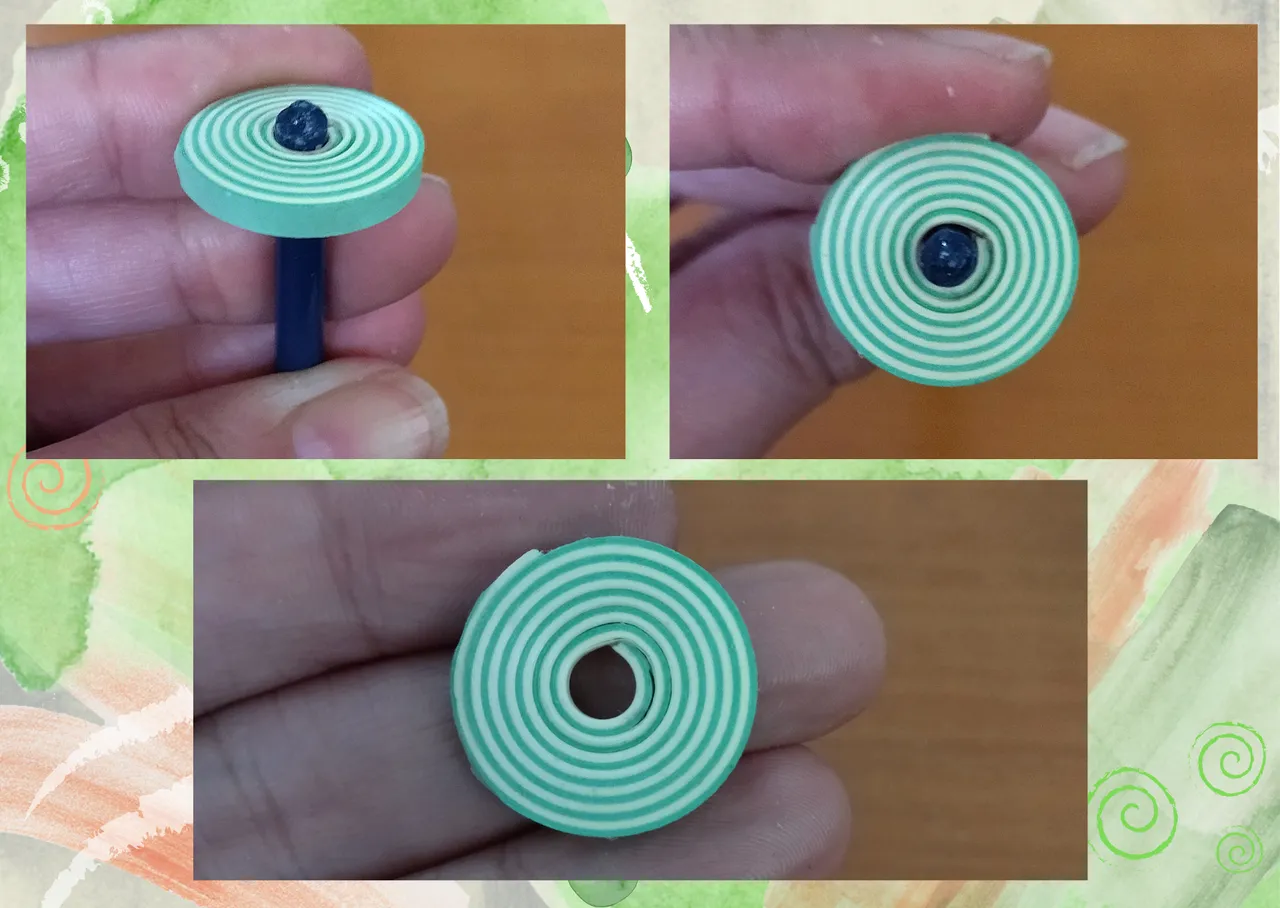
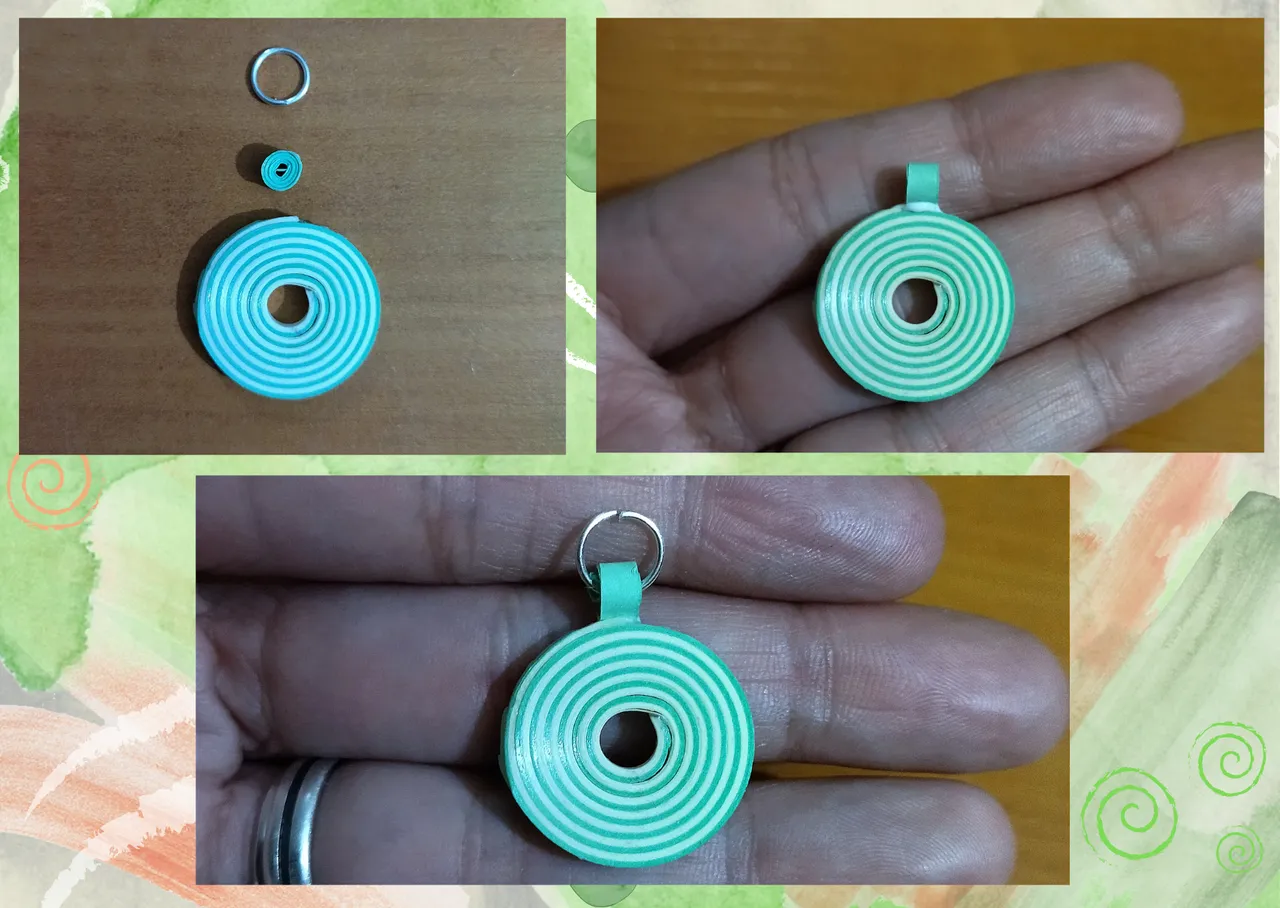
- We will take a small piece of green ribbon 3mm wide x 5cms long, we will roll it with the quilling needle to obtain a small closed circle.
- We will take the spiral circle that we made, and we will glue the small circle on the top of the piece, once dry we will place a medium size costume jewelry ring on the small circle.
• Tomaremos un pequeño trozo de cinta verde de 3mm de ancho x 5cms de largo, enrollamos con la aguja para quilling para obtener un pequeño círculo cerrado.
• Tomaremos el circulo en espiral que realizamos, y pegaremos el pequeño círculo en la parte de arriba de la pieza, una vez seco colocaremos una argolla mediana de bisutería en el pequeño círculo.

- Now we are going to protect our charm by adding several coats of extra strong white glue (woodworking glue), letting it dry between coats. I suggest that you focus especially on laminating the small piece, adding several layers and letting it dry very well before adding the other, so that it adheres completely to the pendant and does not run the risk of peeling off at any time, if you do it correctly it will not break because it will be a thick enough layer.
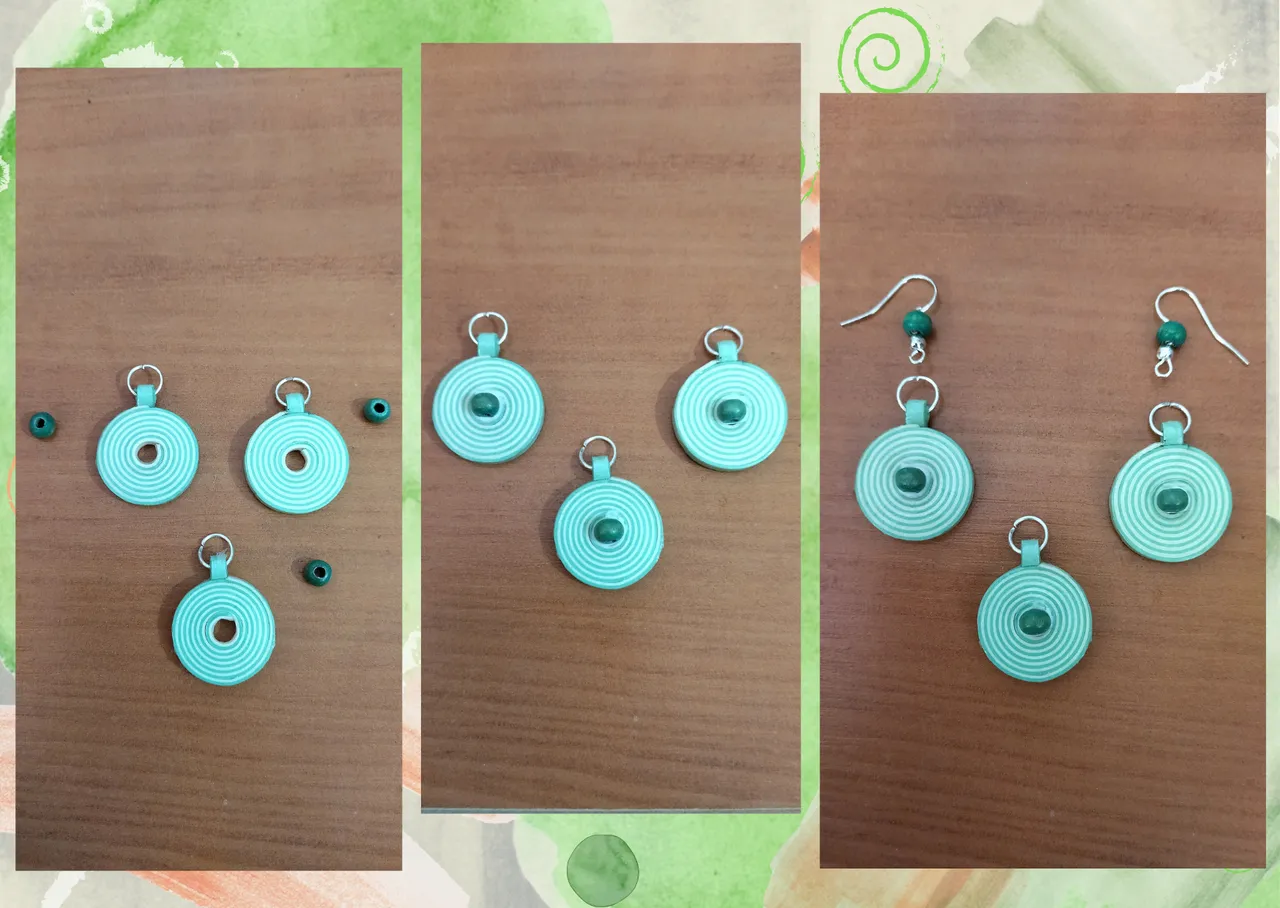
- Once our pendant is protected, plasticized and well dried, we are going to decorate it by placing a green wooden bead (or the color of your preference) in the center of the pendant, that was the purpose of leaving the hollow center.
- To finish we are going to place the bases for hanging tendrils (hooks), to which I previously placed a green wooden pearl to give it more colorfulness.
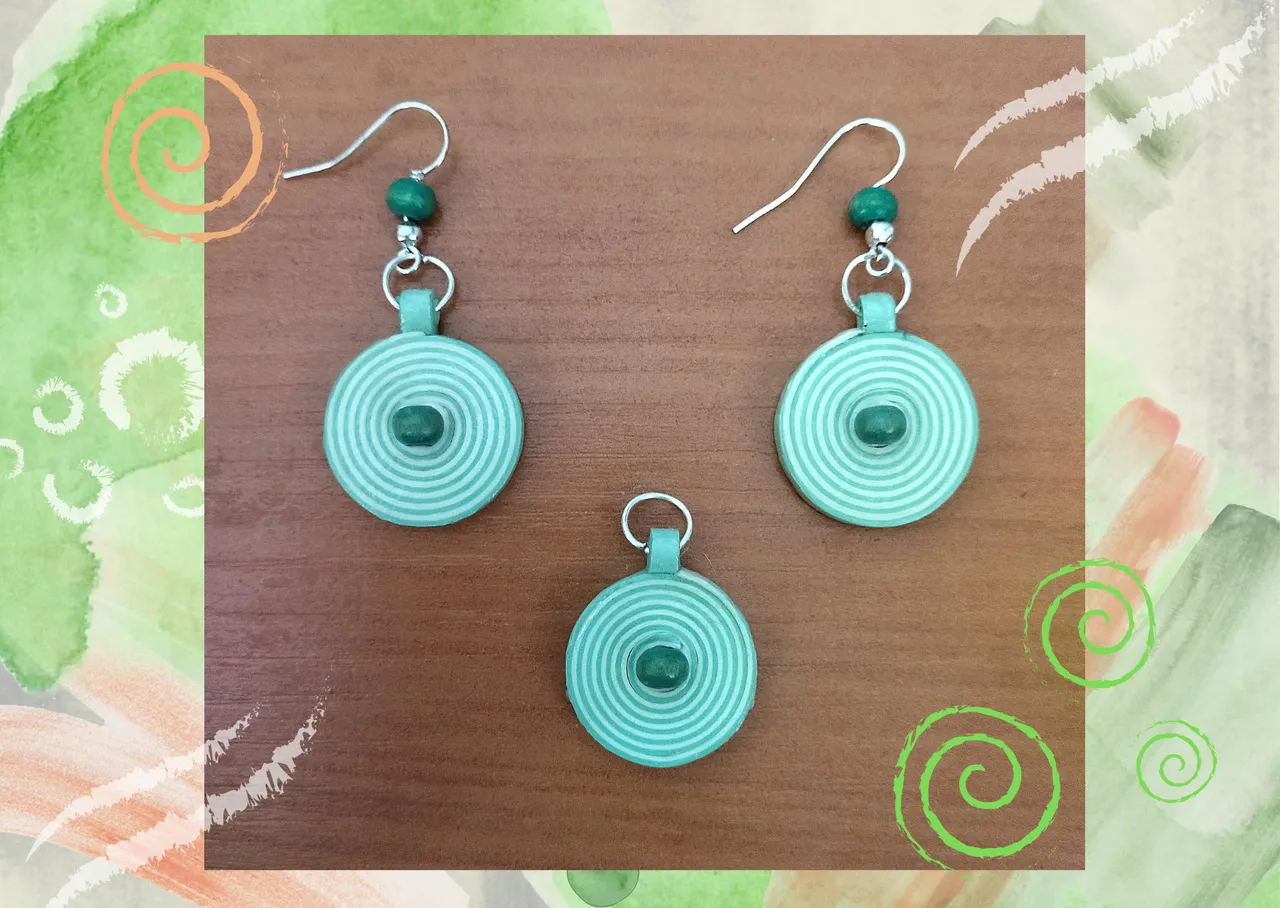
And come, this way we have some very simple dangling earrings and a pendant for necklace in spiral shape decorated with a wooden pearl, quite casual to wear with the outfit of your preference.
I wanted to make another pair of earrings with another combination of 2 colors of ribbons, (orange with beige) and another with 3 colors of ribbons, (light green, dark green and brown), so you can see how they look. If you wish you can make the spiral with more colors of ribbons, everything is in the colors you want to combine, and in using your creativity and inspiration.💚
• Ahora vamos a proteger nuestro dije añadiendo varias capas de pega blanca extra fuerte (de carpintería), dejando secar entre una capa y otra. Les sugiero que se enfoquen de manera especial en plastificar la pieza pequeña, agregando varias capas y dejando secar muy bien antes de agregar la otra, para que se adhiera totalmente al dije y no correr riesgo en ningún momento de despegarse, si lo hacen de manera correcta no se romperá ya que se hará una capa lo suficientemente gruesa.
• Una vez protegido, plastificado y bien seco nuestro dije, vamos a decorar colocando una perla de madera color verde (o del color de tu preferencia) en el centro del dije, esa fue la finalidad de dejar el centro hueco.
• Para finalizar vamos a colocar las bases para zarcillos colgantes (anzuelos), a los cuales previamente le coloque una perla de madera color verde para darle mayor vistosidad.
Y ven, de esta manera tenemos unos muy sencillos pendientes colgantes y un dije para collar en forma de espiral decorados con una perla de madera, bastante casuales para lucir con el outfit de tu preferencia.
Quise realizarles otro par de pendientes con otra combinación de 2 colores de cintas, (naranja con beige) y otro con 3 colores de cintas, (verde claro, verde oscuro y marrón), para que vean como lucen. Si lo desean pueden hacer el espiral con más colores de cintas, todo está en los colores que deseen combinar, y en utilizar su creatividad e inspiración.💚


What did you think, did you like it?
I hope you did, I hope you liked my explanation, procedure and photos, I made them with love for you.
"Let out that muse that inspires you, and let your imagination fly".
Thank you all, see you next time. 🐾🐱💕
¿Que les pareció, les gustó?
Espero que sí, que les haya gustado mi explicación, procedimiento y fotos, los hice con mucho cariño por y para ustedes.
"Deja salir esa musa que te inspira, y deja volar tu imaginación".
Gracias a todos, nos vemos en la próxima. 🐾🐱💕
Los invito que apoyen a "La Colmena", dale tu voto ✨
 Vote la-colmena for witness By @ylich
Todas las fotos usadas en este post son de mi autoría y han sido sacadas en mi celular personal un Redmi 9T y editadas Canva Banner y separador hecho por mí en Canva Traducido con la ayuda de DeepL
