Hello everyone... 💛💙❤️
Hello to my dear Hiver and the dear community of artists #jewelry, as always very pleased and excited to be here again, showing you my work made with love and especially for you.
These days I have been very excited to share with you more creations in the quilling technique which is the one I usually use, I want to make simple, simple things, that are easy to handle by anyone, and you can see how with a few simple steps and in a short time, we can get charms to use as accessories.
Of course I want to show more complex works, I will be interspersed as I have been doing, post with simple designs, intermediate, to the most complicated.
I also want to tell you that I have always liked to make charms with the tricolor of the flag of my beautiful country, and perhaps in this difficult moment, I am a little more directed to make them, because despite the situation I love my country, I have the faith that we will be victorious of these situations and I want to symbolize with this our triumph, and the peace that my heart tells me that we will achieve. That is why I will occasionally create pieces to make a diverse collection of accessories with these colors.
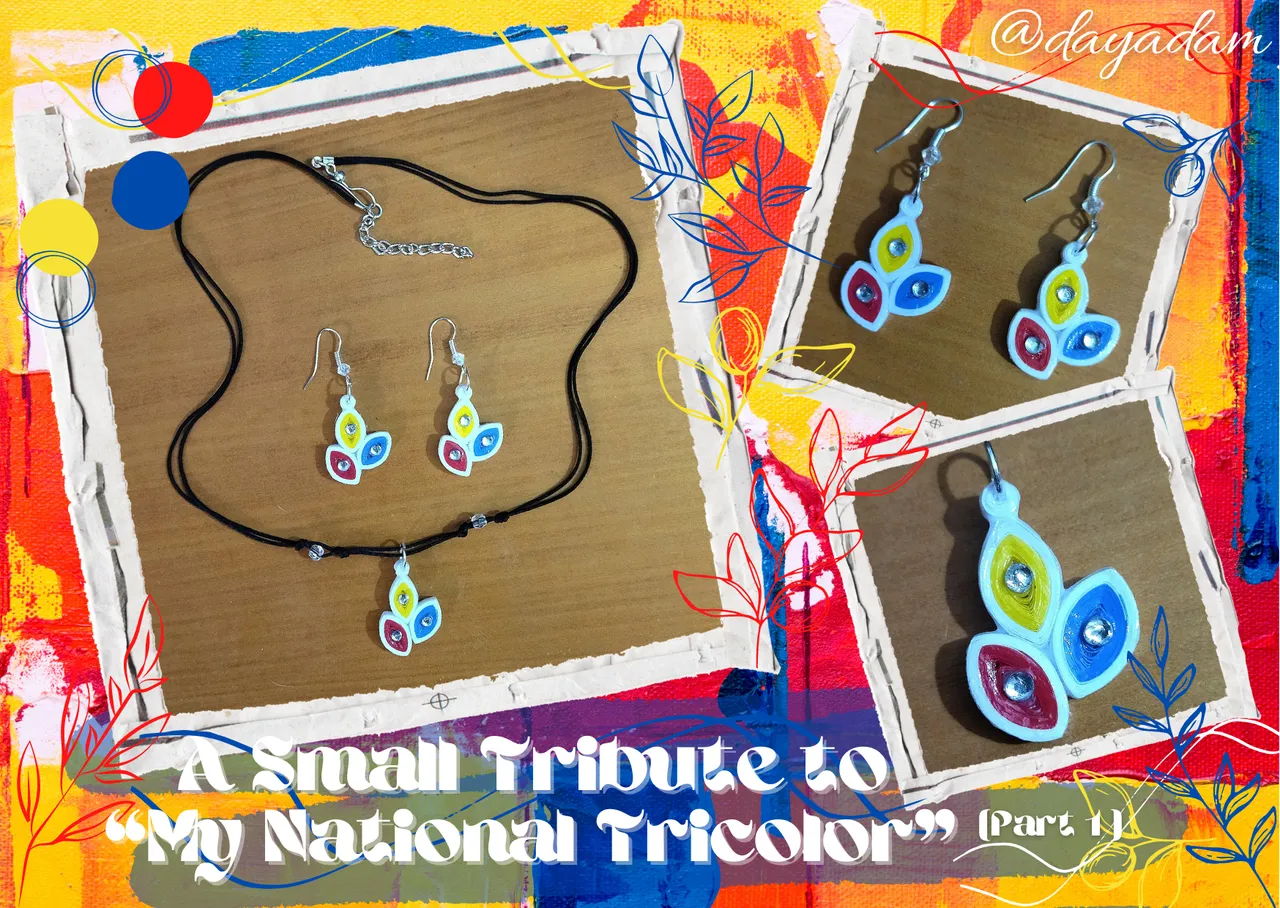
As I have been telling you, for today I am going to make a very simple pendant with only 3 pieces joined together in the shape of a leaf, with which I want to materialize a pair of hanging earrings and a pendant for a necklace.
I hope you like it, without further ado:
Let's begin:😃

Hola a todos... 💛💙❤️
Hola a mis queridos Hiver y a la querida comunidad de artistas #jewelry, como siempre muy complacida y emocionada de encontrarme por acá nuevamente, mostrándole mi trabajo hecho con mucho amor y especialmente para ustedes.
En estos días me he encontrado muy entusiasmada de compartir con ustedes más creaciones en la técnica de quilling que es la que suelo utilizar, quiero hacer cosas simples, sencillas, que sean fáciles de manejar por cualquier persona, y que puedan observar como con unos simples pasos y en poco tiempo, podemos obtener dijes para utilizar como accesorios.
Por supuesto quiero mostrar trabajos más complejos, iré intercalando como lo he vendido haciendo, post con diseños simples, intermedios, hasta los más complicados.
También quiero contarles que siempre me ha gustado realizar dijes con el tricolor de la bandera de mi bello país, y quizás en este momento un poco difícil, estoy un poco más direccionada a realizarlos, ya que pese a la situación amo a mi país, tengo la fe que vamos a salir victoriosos de estas situaciones y quiero simbolizar con esto nuestro triunfo, y la paz que mi corazón me dice que vamos a lograr. Por ello ocasionalmente voy a ir creando piezas, para hacer una diversa colección de accesorios con estos colores.
Como les vengo hablando, para hoy les voy a realizar un dije bien sencillo con solo 3 piezas unidas en forma de hoja, con las cuales quiero materializar un par de zarcillos colgantes y un dije para collar.
Esperando que sea de su agrado, sin más preámbulos:
Comencemos:😃

• Cintas de quilling de 3mm de ancho blancas, amarillo, azul y rojo.
• Regla con diversas medidas de circunferencia.
• Pega blanca extra fuerte (de carpintería).
• Tijera.
• Base para zarcillos colgantes (anzuelos).
• Argollas medianas de bisutería.
• Cristales de bisutería.
• Dos perlas tipo cristal.
• Pincel.
• Alicate punta fina.
• Pinza punta fina.
- 3mm wide quilling ribbons in white, yellow, blue and red.
- Ruler with different circumference measurements.
- Extra strong white glue (carpentry glue).
- Scissors.
- Base for hanging tendrils (hooks).
- Medium-sized costume jewelry earrings.
- Costume jewelry crystals.
- Two glass beads.
- Brush.
- Fine-nosed pliers.
- Fine tip tweezers.

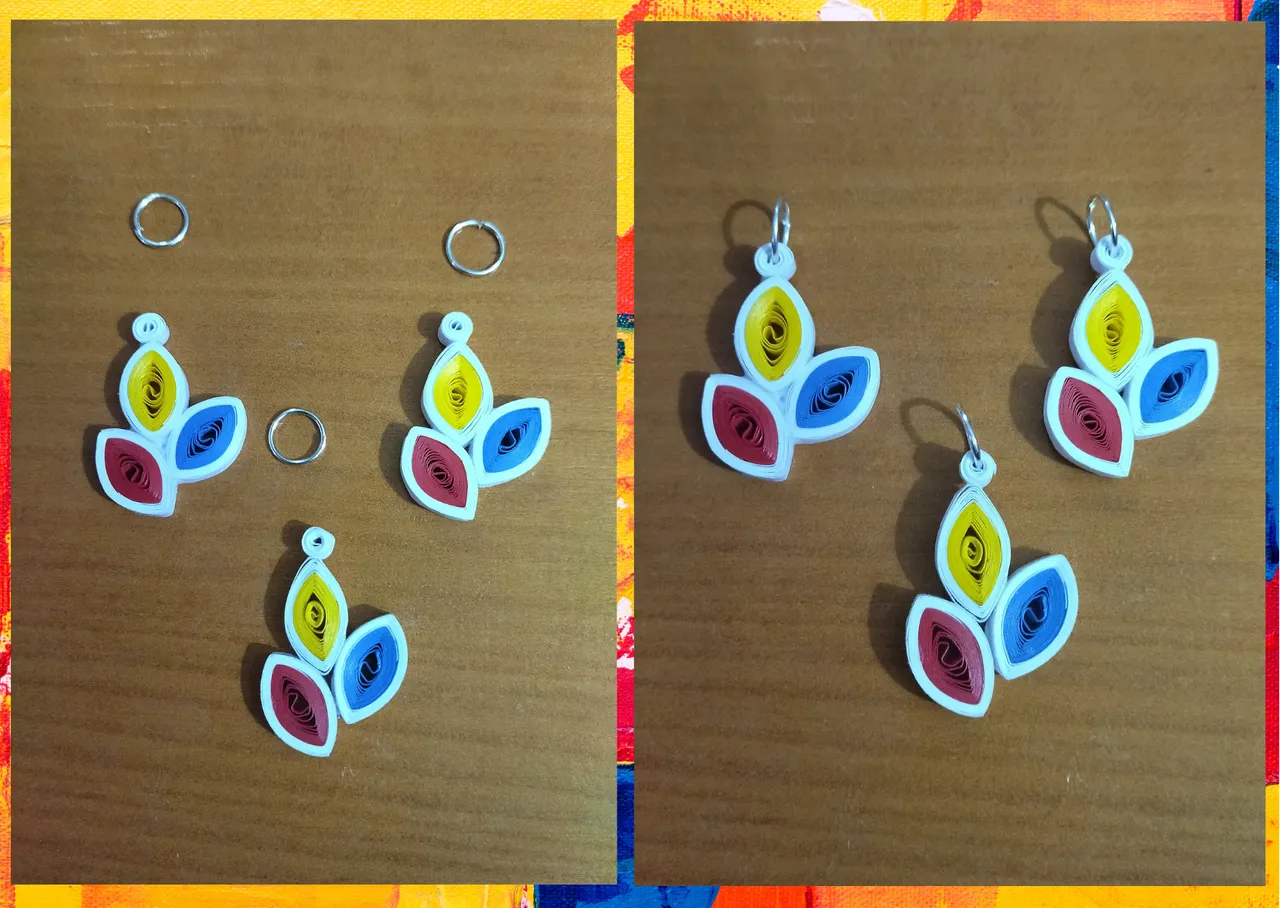
I am going to make a pair of pendant earrings and a pendant for necklace, but I am going to focus the process on a single pendant of which I will need three, at the end when it is convenient I will place the three pieces to assemble the complete set, you will make the necessary pieces to complete the amount of pendants you want. This process is going to be very simple and you will see the beautiful result we are going to obtain.
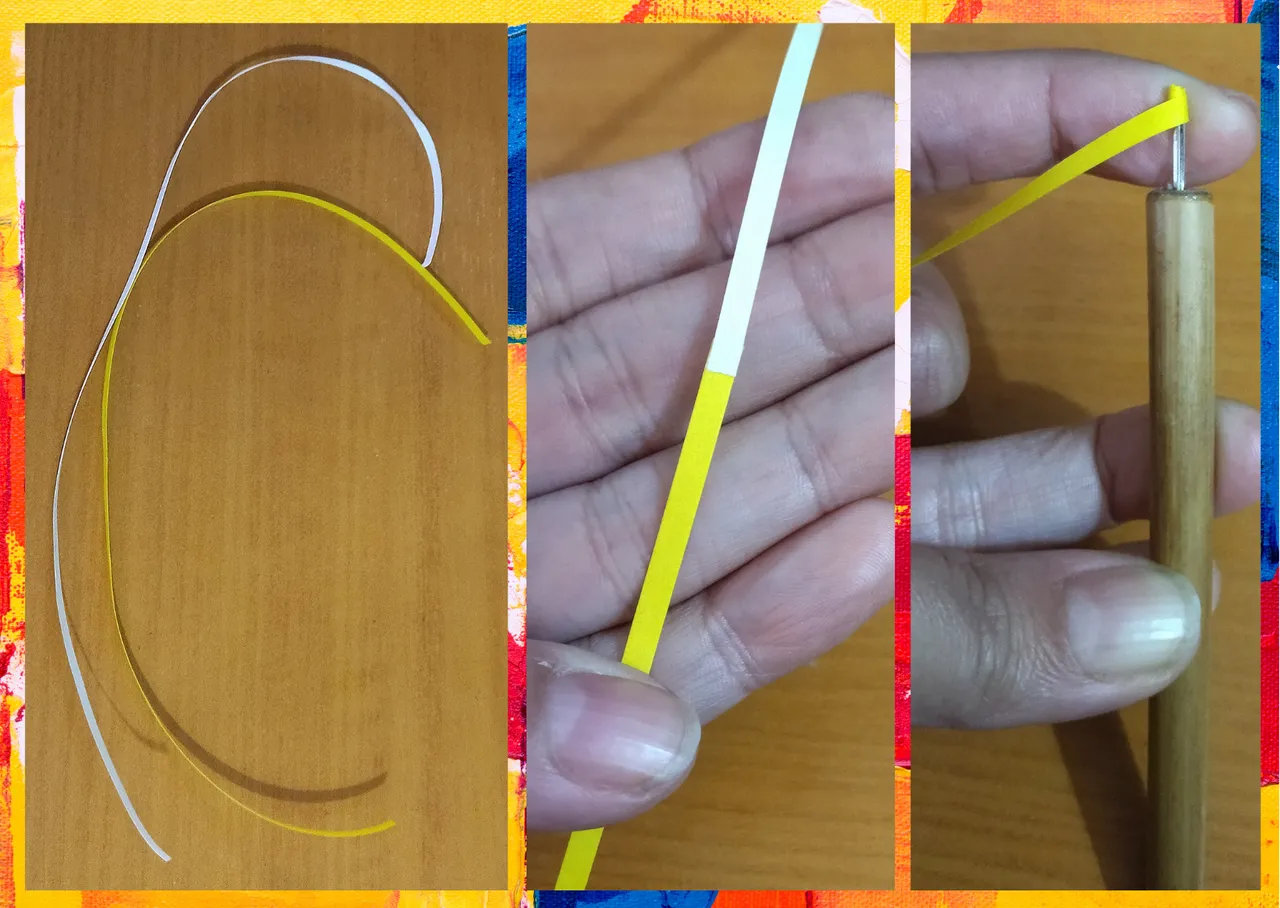
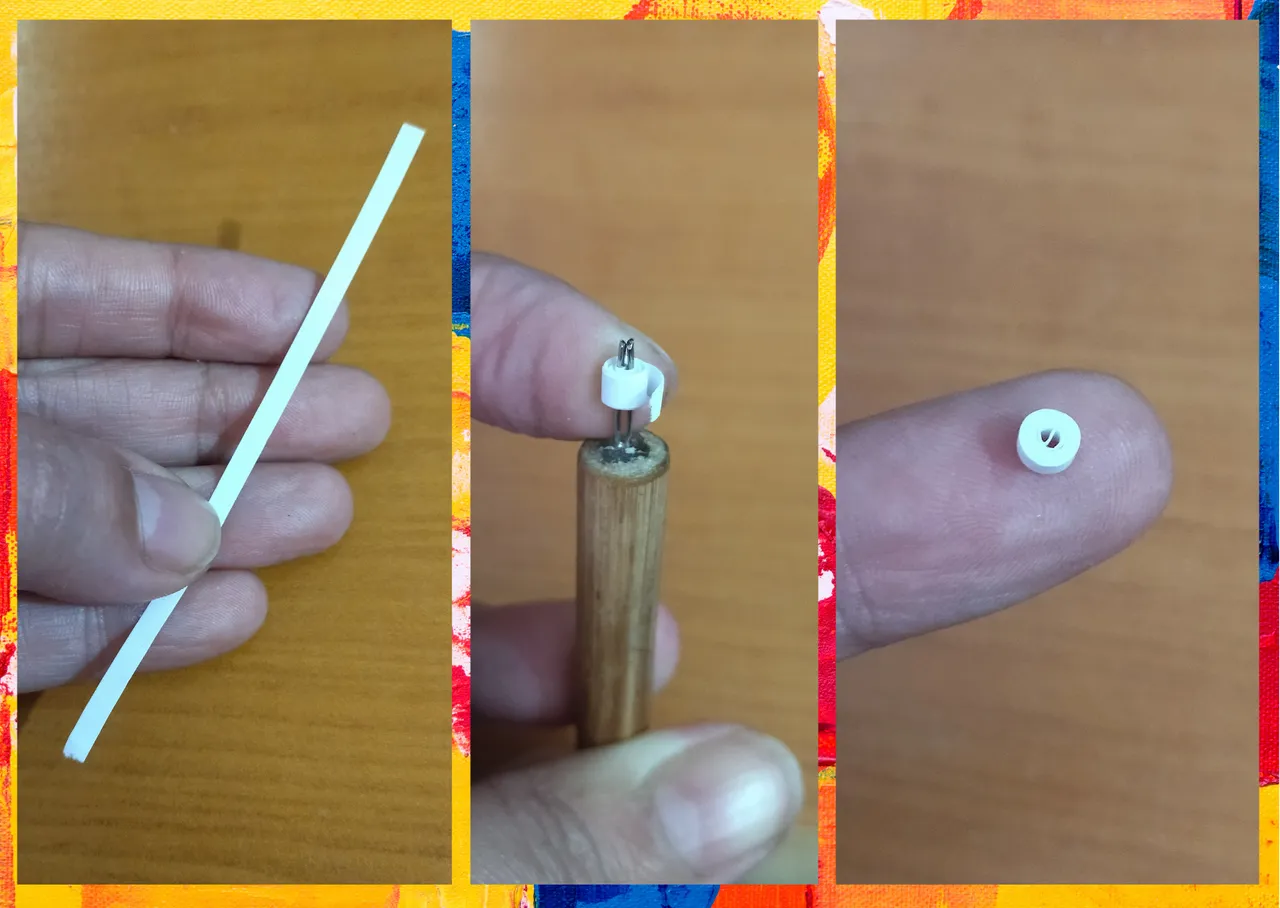
- We will start by taking a white ribbon 3mm wide x 25cms long and a yellow ribbon 3mm wide x 25cms long, both ribbons will be glued together to form a single ribbon.
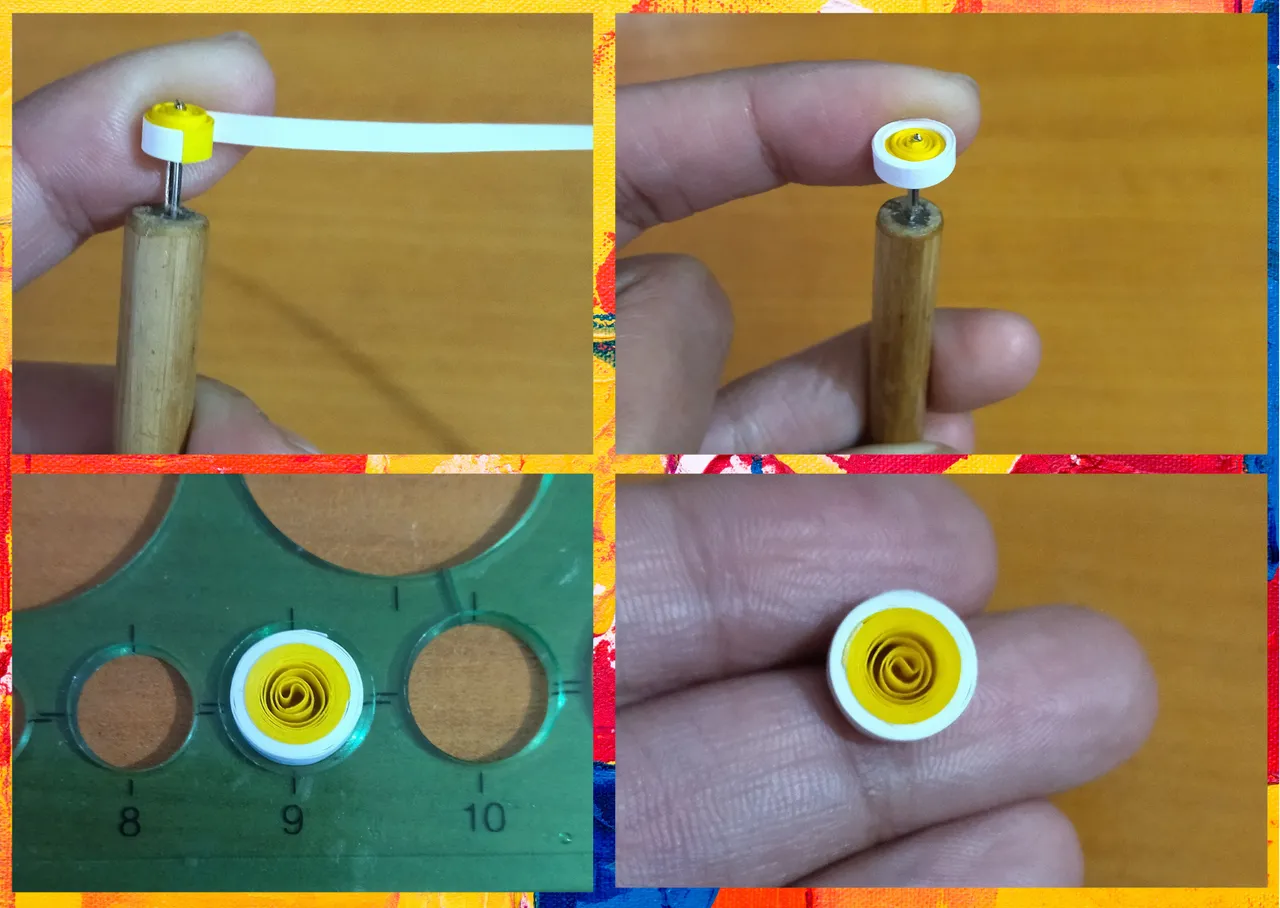
- With the quilling needle we will take the ribbon and we will begin to roll the yellow part until we finish with the white part, we take it out of the needle and we will measure in the circumference ruler in the circle number 9, we take it out of the ruler and we seal it with a little bit of glue.
- We will repeat this same process with a ribbon of the same measurements, white with blue and another white with red. From there we will derive the three pieces that will form our pendant.

Voy a realizar un par de zarcillos colgantes y un dije para collar, pero les voy a enfocar el proceso en un solo dije del cual yo necesitare tres, al final cuando sea conveniente colocare las tres piezas para armar el conjunto completo, ustedes harán las que sean necesarias para completar la cantidad de dijes que deseen. Este proceso va a ser muy sencillo y verán el bonito resultado que vamos a obtener.
• Comenzaremos tomando una cinta blanca de 3mm de ancho x 25cms de largo y una amarilla de 3mm de ancho x 25cms de largo ambas cintas la uniremos con pega para formar una sola.
• Con la aguja para quilling tomaremos la cinta y comenzaremos a enrollar por la parte amarilla hasta finalizar por la parte blanca, sacamos de la aguja y mediremos en la regla de circunferencias en el círculo número 9, sacamos de la regla y sellamos con un poco de pega.
• Vamos a repetir este mismo proceso con una cinta de las mismas medidas, blanca con azul y otra blanca con rojo. De allí derivaran las tres piezas que formaran nuestro dije.

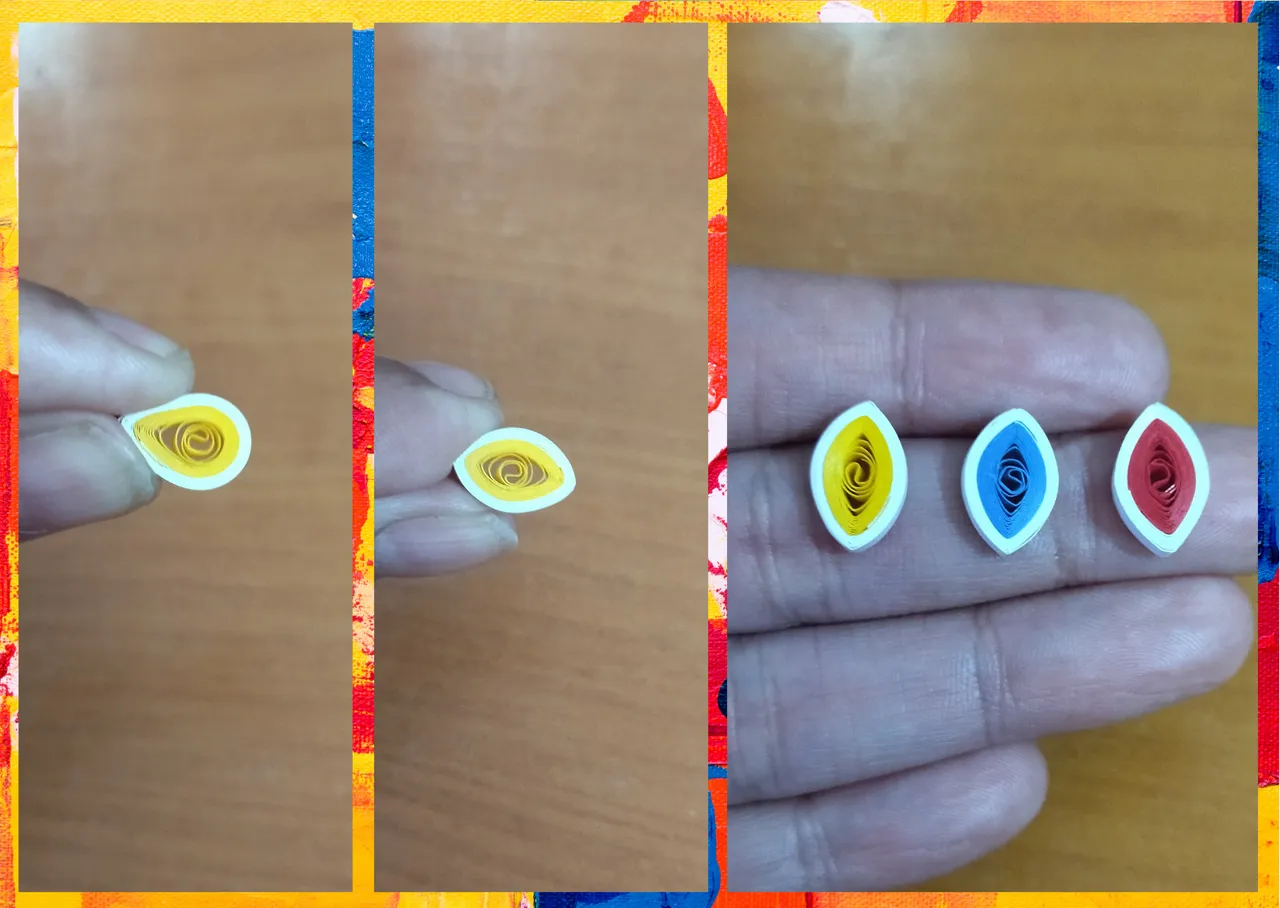
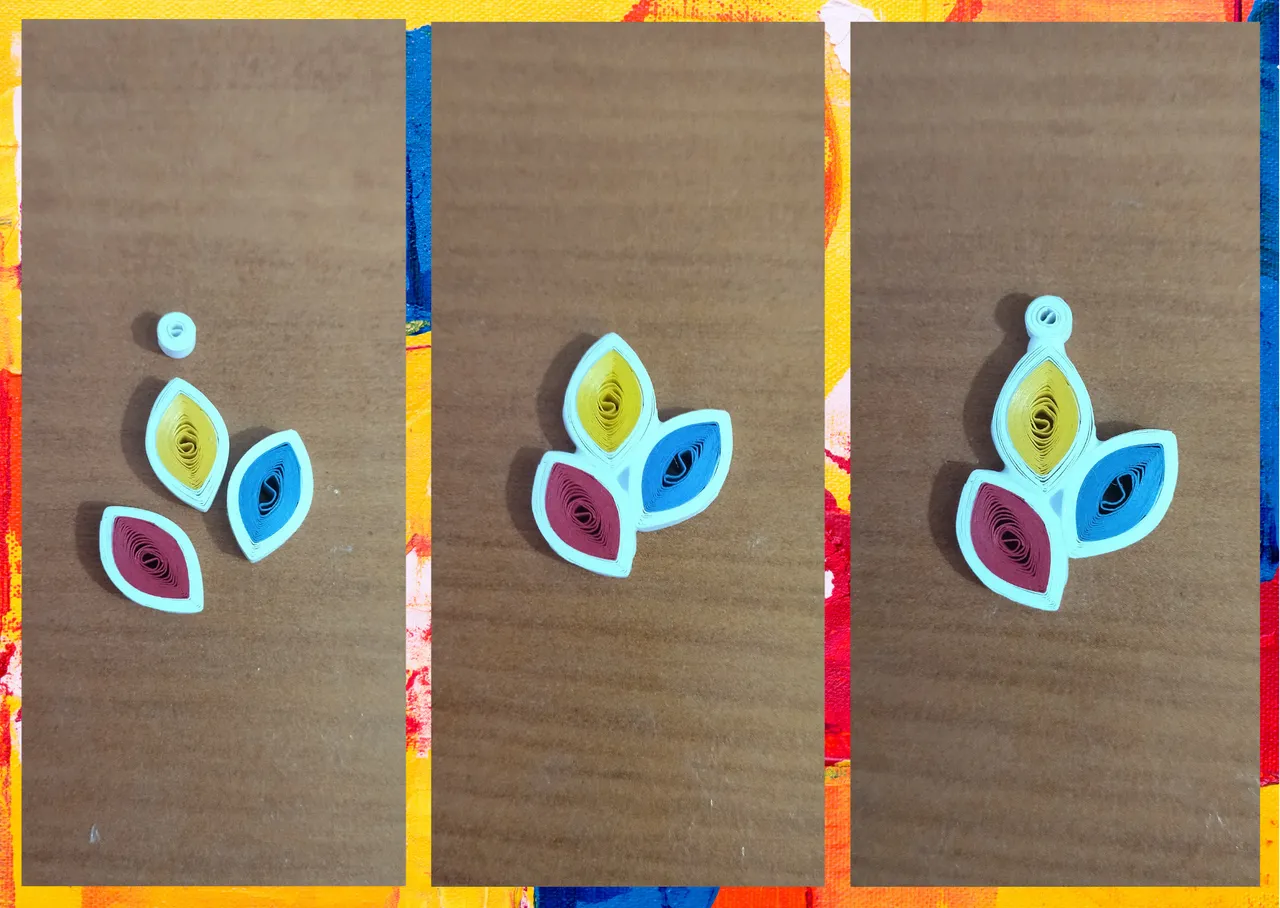
- Once we have our three circles ready, we are going to shape them into leaves, pinching the top and bottom of the circle with our fingers (reserve).
- Now we will make a small circle with a 3mm piece of white ribbon, we will simply roll it with the needle and seal it with glue.
- Now we will form our pendant, we will simply join our leaves to form our pendant, take the pieces and glue them with a touch of extra strong white glue, I did it in a way to create harmony, you can glue your pieces the way you want it is all in your taste and creativity, in the image you will see the way I wanted to join them. We will glue the small remaining circle on the top of the pendant, and when it dries we will place a medium size costume jewelry ring.
• Al tener listos nuestros tres círculos vamos a darle forma de hoja, pellizcando con los dedos el extremo superior e inferior del círculo, (reservamos).
• Ahora haremos un pequeño círculo con un trozo de cinta blanca de 3mm, simplemente enrollaremos con la aguja sacamos de la misma, y sellamos con pega.
• Ahora formaremos nuestro dije, simplemente vamos a unir nuestras hojas para formar nuestro dije, tome las piezas y las pegue con un toque de pega blanca extra fuerte, lo hice de una manera que creara armonía, ustedes pueden pegar sus piezas de la manera que lo deseen todo está en sus gustos y creatividad, en la imagen verán la manera en que yo quise unirlas. El pequeño circulo sobrante lo pegaremos en la parte de arriba del dije, y al secar le colocaremos una argolla mediana de bisutería.
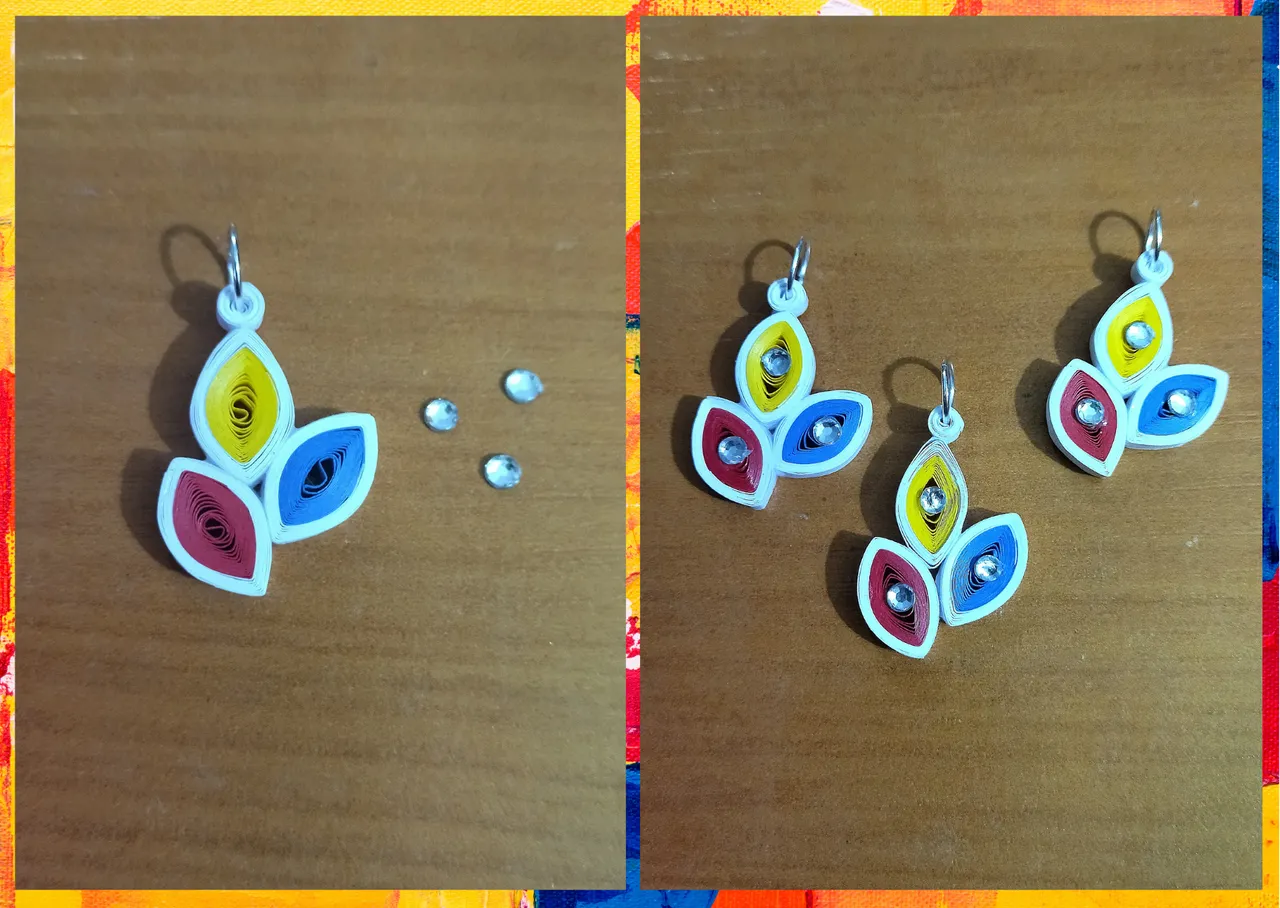
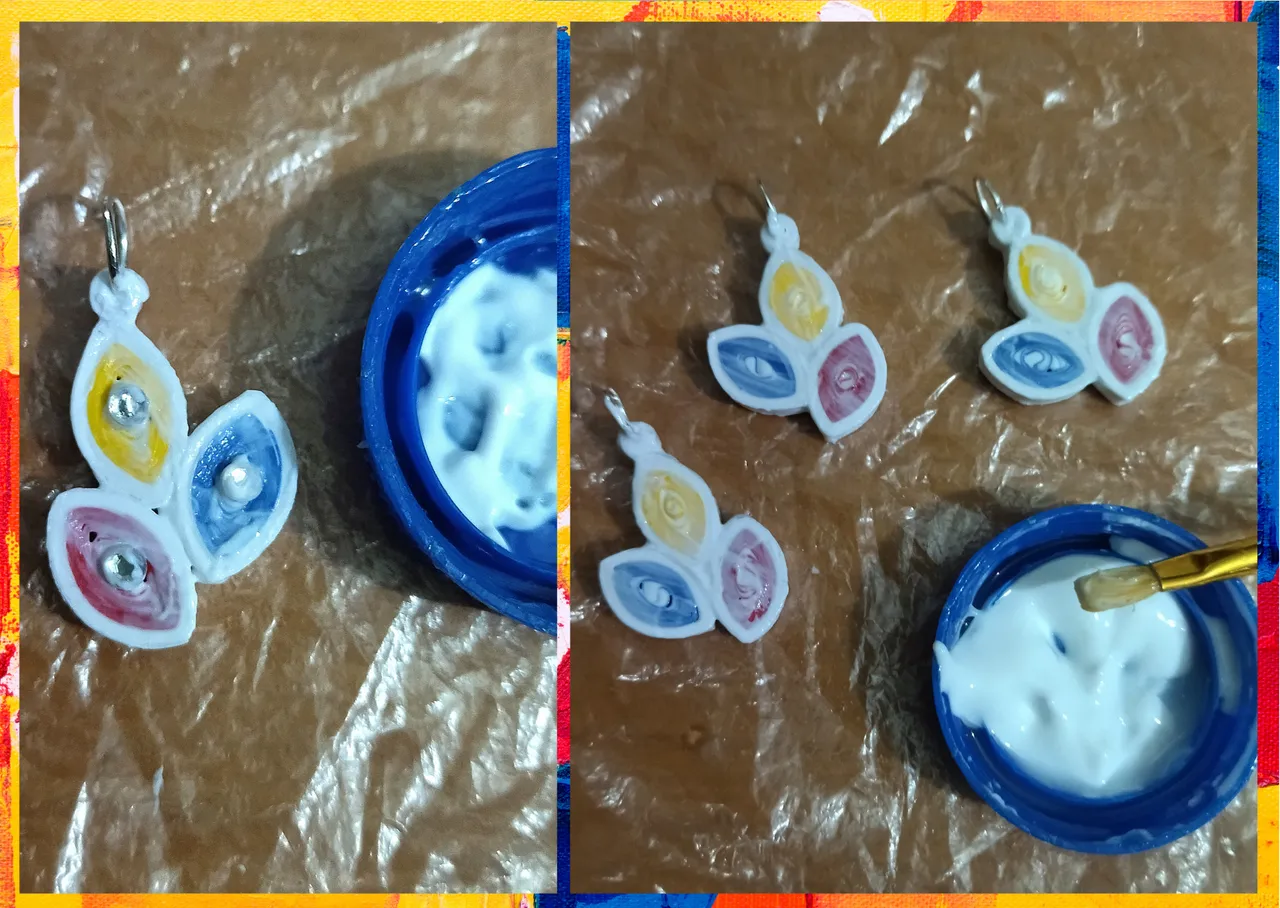
- Let's decorate our pendant, I put a small crystal of costume jewelry on each leaf to give it a more showy, delicate and shiny look.
- Now we are going to protect our charm by adding several coats of extra strong white glue (woodworking glue), letting it dry between coats. I suggest that you focus especially on laminating the small piece, adding several layers and letting it dry very well before adding the other, so that it adheres completely to the pendant and not run the risk of peeling off at any time, if you do it correctly it will not break because it will be a thick enough layer.
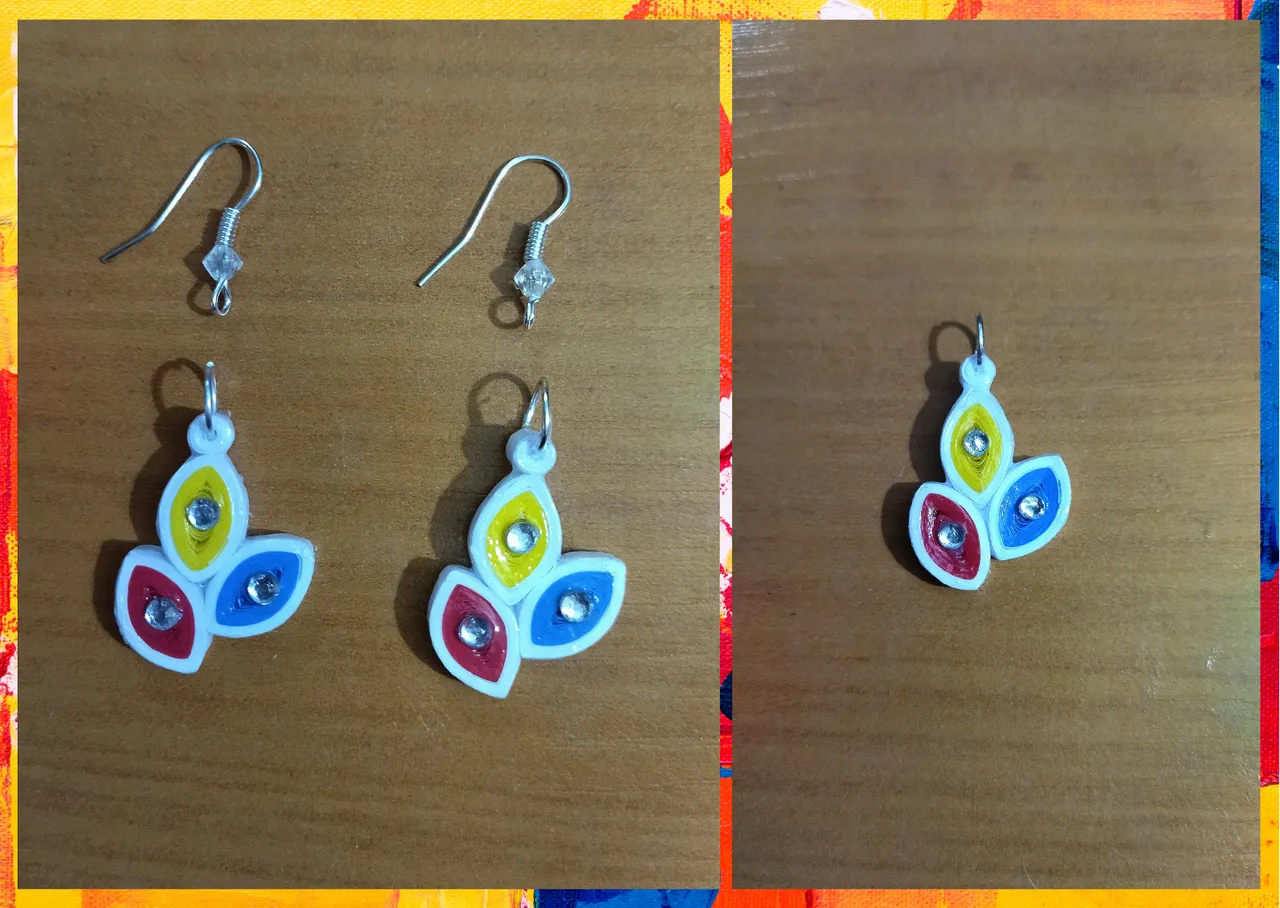
- Finally we will place the bases for hanging tendrils (hooks) to two of the pendants, to which I previously placed some crystals to decorate. Those who follow my work have noticed that I always like to add a detail to the hanging bases to change their appearance.
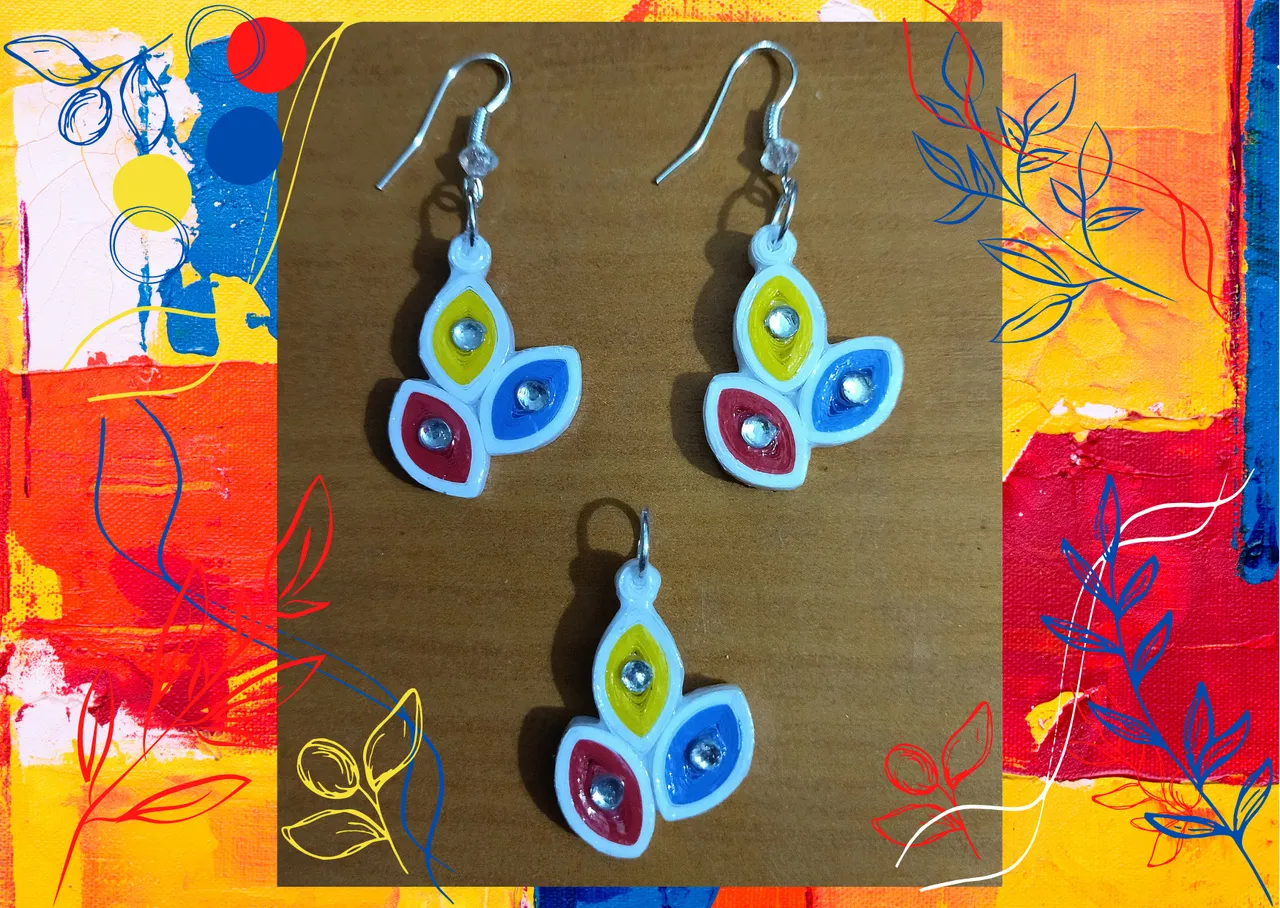
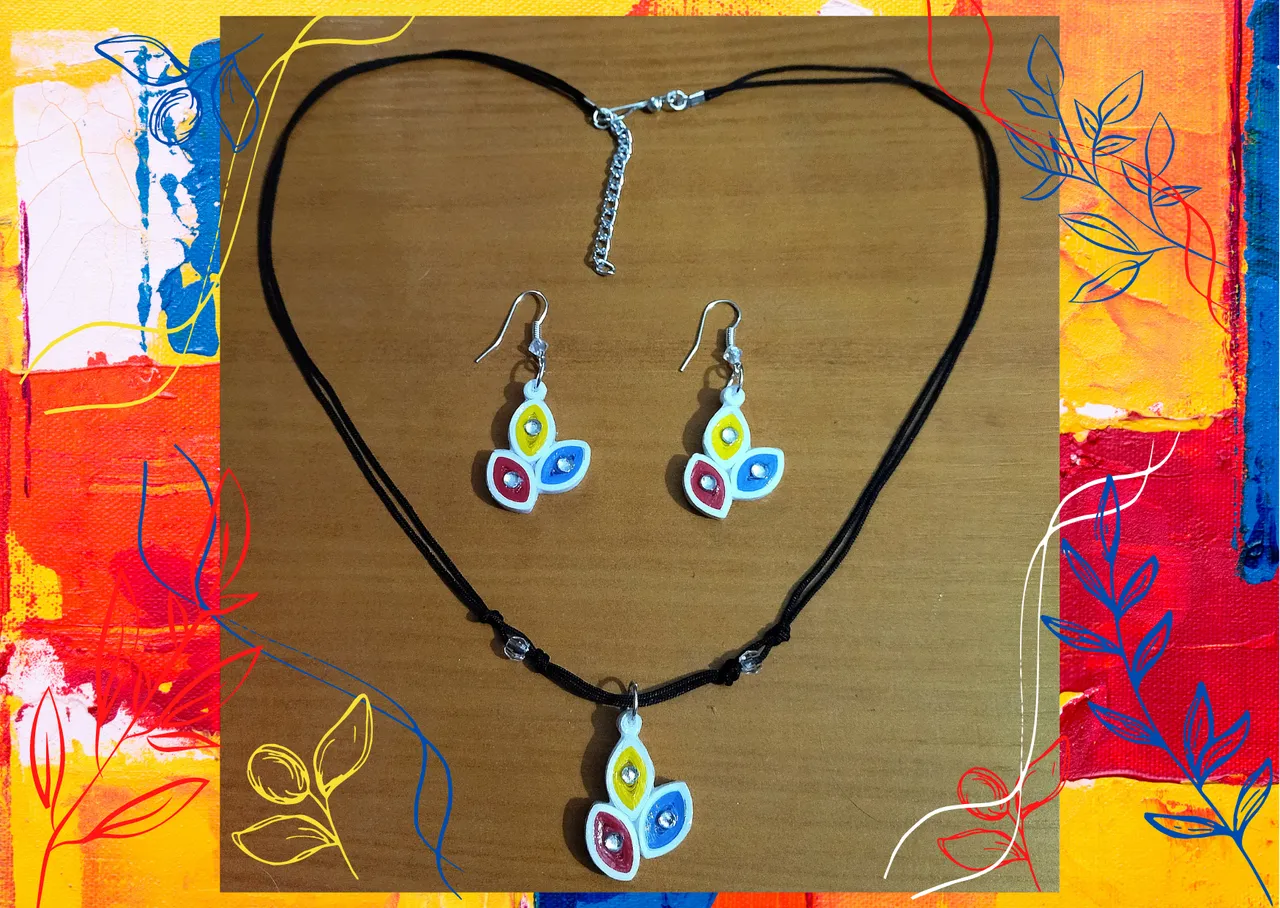
And in this simple and easy way, we will have a pair of hanging tendrils, and a pendant for necklace which we will place in the necklace of our preference💛💙❤️
• Adornemos nuestro dije, le coloque a cada hoja un pequeño cristal de bisutería para darle mayor vistosidad, delicadez y brillo.
• Ahora vamos a proteger nuestro dije añadiendo varias capas de pega blanca extra fuerte (de carpintería), dejando secar entre una capa y otra. Les sugiero que se enfoquen de manera especial en plastificar la pieza pequeña, agregando varias capas y dejando secar muy bien antes de agregar la otra, para que se adhiera totalmente al dije y no correr riesgo en ningún momento de despegarse, si lo hacen de manera correcta no se romperá ya que se hará una capa lo suficientemente gruesa.
• Por ultimo le colocaremos a dos de los dijes las bases para zarcillos colgantes (anzuelos), a las que previamente le coloque unos cristales para adornar. Los que siguen mi trabajo han podido observar que me gusta colocarles a las bases colgantes, siempre un detalle para cambiar su apariencia.
Y de esta manera tan simple y sencilla, tendremos un par de zarcillos colgantes, y un dije para collar el cual colocaremos en el collar de nuestra preferencia 💛💙❤️

What did you think, did you like it?
I hope you did, I hope you liked my explanation, procedure and photos, I made them with love for you.
"Let out that muse that inspires you, and let your imagination fly".
Thank you all, see you next time. 💛💙❤️
¿Que les pareció, les gustó?
Espero que sí, que les haya gustado mi explicación, procedimiento y fotos, los hice con mucho cariño por y para ustedes.
"Deja salir esa musa que te inspira, y deja volar tu imaginación".
Gracias a todos, nos vemos en la próxima. 💛💙❤️
Los invito que apoyen a "La Colmena", dale tu voto ✨
 Vote la-colmena for witness By @ylich
Todas las fotos usadas en este post son de mi autoría y han sido sacadas en mi celular personal un Redmi 9T y editadas Canva Banner y separador hecho por mí en Canva Traducido con la ayuda de DeepL
