Hello everyone 💙💛
Hello to my dear Hiver and the dear community of #Jewelry, as always very pleased and excited to meet me here, I have been a little withdrawn due to a strong flu that still continues to bring me a lot of discomfort, but little by little and to the extent of my possibilities I wanted to make a small detail made with love.
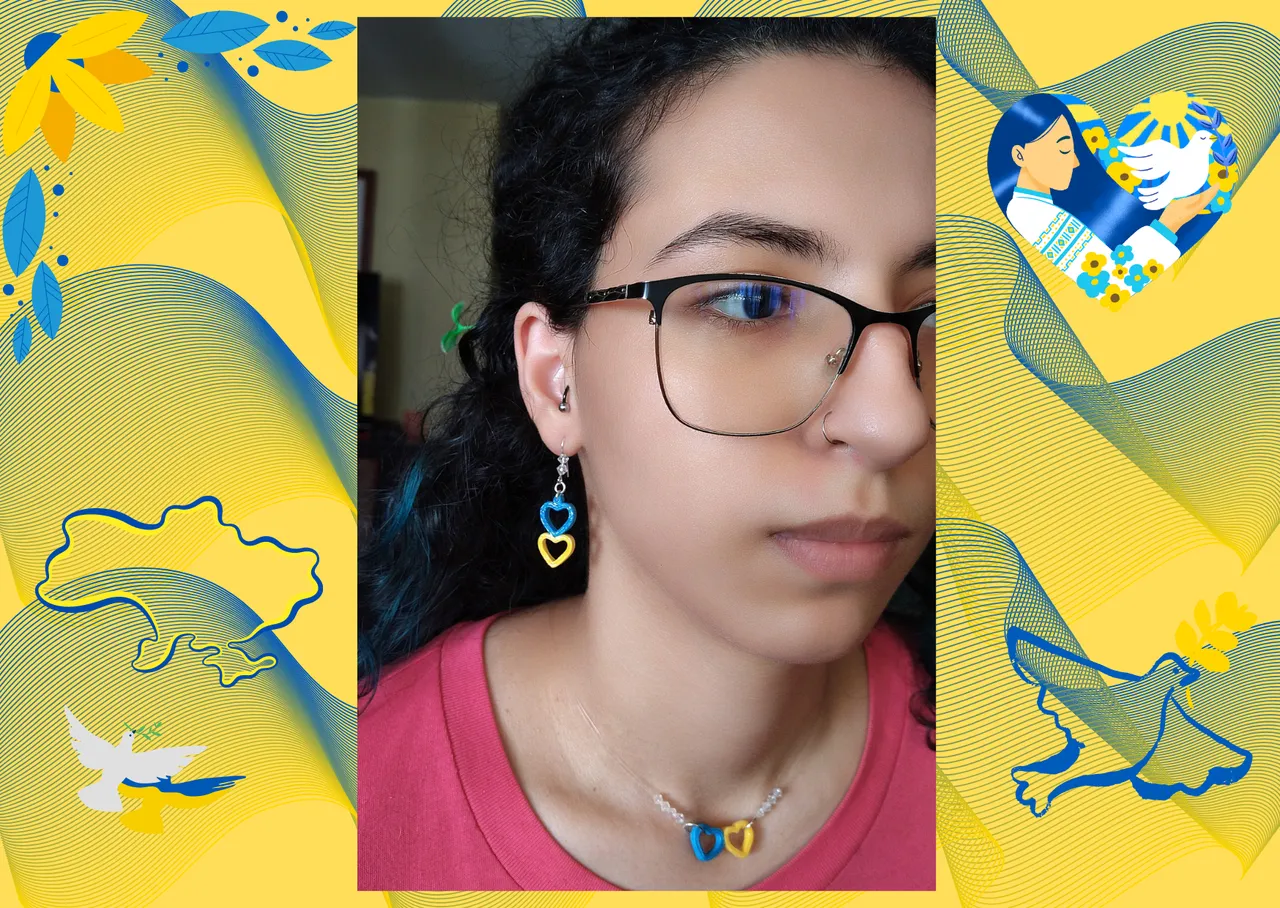
This for me is something quite special since I decided to carry them out with the colors of the Ukrainian Flag💙💛, it was really a detail that came from my heart and therefore its shape, as a symbol of love and support for so many people who have lived so many difficult moments throughout these months, and in this beautiful world of Hive I have some very dear people with whom I have lived the unfortunate events they have suffered, and it is not only for them if not for all who are living this situation. Since it is not in my hands to help in any other way, I give them this small tribute and detail on their behalf. I am not going to say anything else because I believe that with the simple fact of my action my motives and feelings are reflected there.
My friend, @stdd here is a little detail since you have asked me several times to do something with these colors, this is something simple but made with a lot of love.
I would like to mention many people, but without doing so I hope they see my humble publication.
I just ask God almighty: "Peace to Ukraine, Peace to the World." 🐦
Let's get started: 😃

- 3mm wide quilling ribbons, blue and yellow.
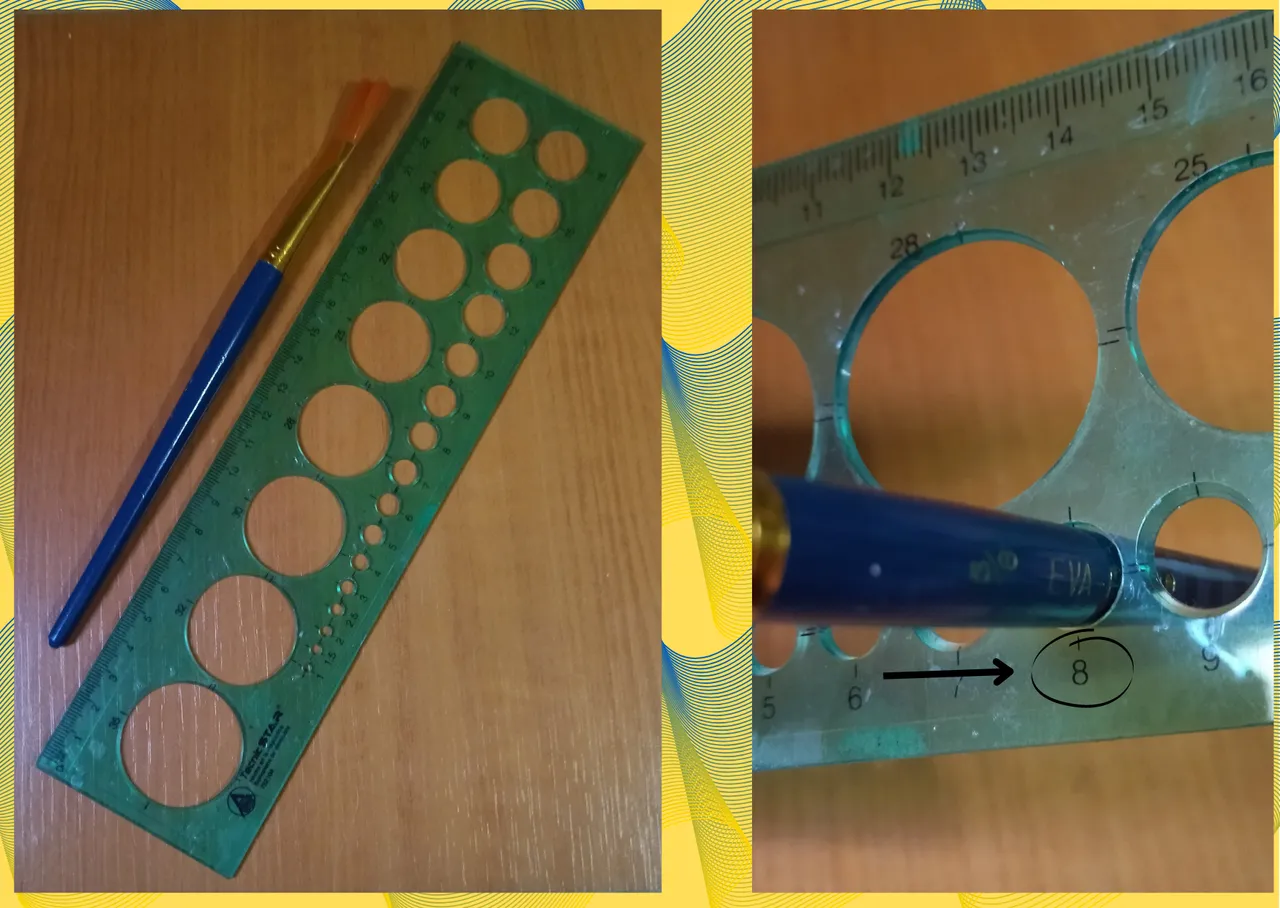
- Brush with thick base or backing, where you can roll your ribbon.
- Ruler with various circumference measurements.
- Needle with slot to roll quilling.
- Long needle for quilling.
- Extra strong white glue (carpentry).
- Scissors.
- Fine needle nose pliers.
- Nylon 0.3 millimeters.
- Czech litmus glass.
- Base for hanging tendrils (hooks).
- Medium and small costume jewelry earrings.
- Nylon knot cover.
- Sewing needle.
- Parrot's beak hook.
- Brush.

Hola a todos💙💛
Hola a mis queridos Hiver y a la querida comunidad de #Jewelry, como siempre muy complacida y emocionada de encontrarme por acá, he estado un poco retirada debido a una fuerte gripe que aún sigue trayéndome bastantes malestares, pero poco a poco y en la medida de mis posibilidades quise hacer un pequeño detalle hecho con mucho amor.
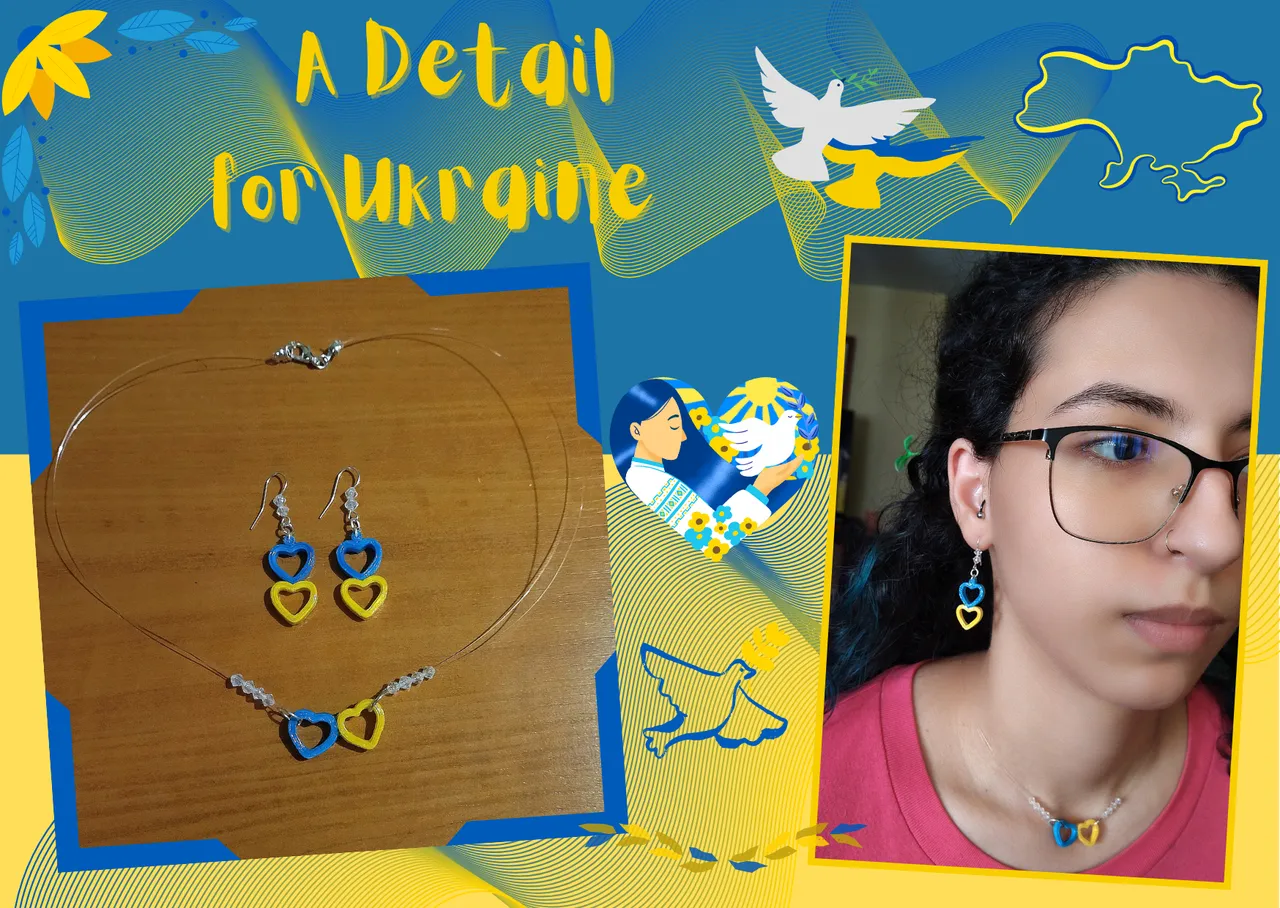
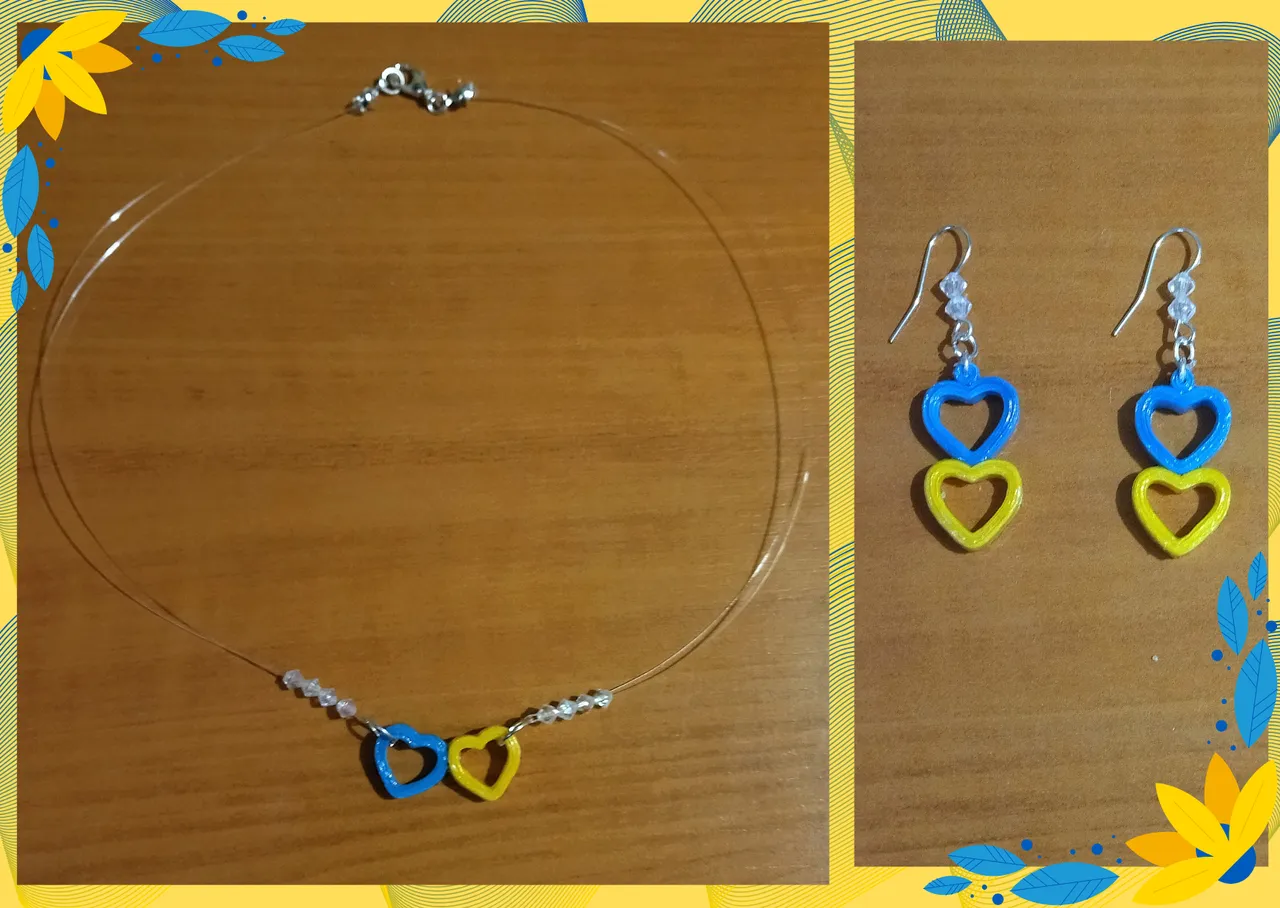
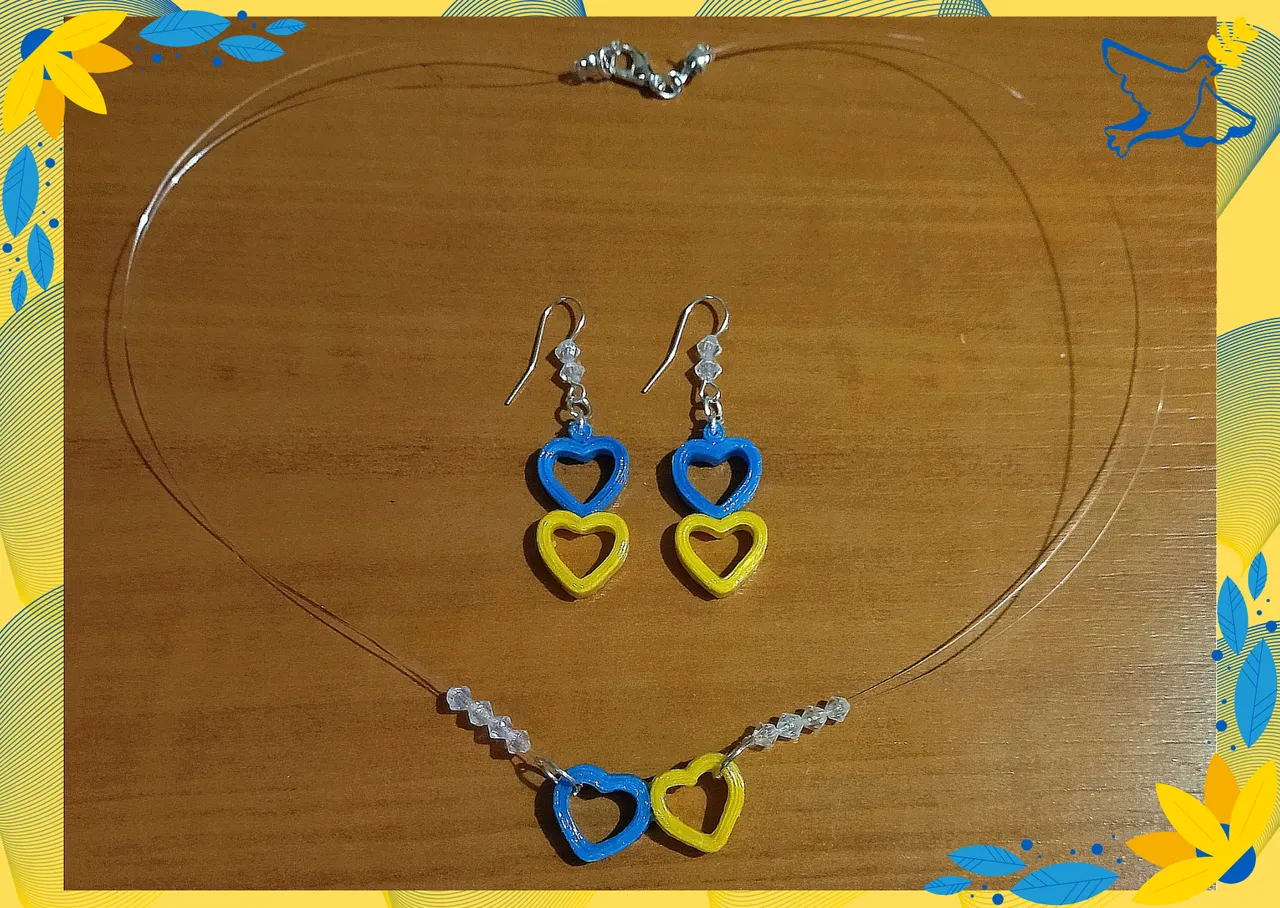
Para hoy decidí realizar unos zarcillos colgantes en forma de corazón junto a un collar fantasma con su dije.
Esto para mí es algo bastante especial ya que decidí llevarlos a cabo con los colores de la Bandera de Ucrania💙💛, fue realmente un detalle que me salió del corazón y por ello su forma, como un símbolo de amor y apoyo para tantas personas que han vivido tantos momentos difíciles a lo largo de estos meses, y en este bello mundo de Hive tengo algunas muy apreciadas personas con las cuales he vivido los lamentables acontecimientos que han sufrido, y no es solo por ellos si no por todos los que están viviendo esta situación. Ya que en mis manos no esta ayudar de alguna otra manera, les regalo este pequeño tributo y detalle en su nombre. No voy a decir nada mas porque creo que con el simple hecho de mi acción allí se encuentran reflejados mis motivos y sentimientos.
Amigo @stdd aquí te va un pequeño detalle ya que en varias ocasiones me pediste hacer algo con estos colores, esto es algo sencillo pero hecho con mucho amor.
Quisiera mencionar a muchas personas, pero sin hacerlo espero que ellos vean mi humilde publicación.
Solo pido a Dios todopoderoso: “Paz para Ucrania, Paz para el Mundo.”🐦
Comencemos:😃

• Cintas de quilling de 3mm de ancho, azul y amarillo.
• Pincel con base o soporte grueso, donde puedas enrollar tu cinta.
• Regla con diversas medidas de circunferencia.
• Aguja con ranura para enrollar quilling.
• Aguja punta larga para quilling.
• Pega blanca extra fuerte (carpintería).
• Tijera.
• Alicate punta fina.
• Nylon 0.3 milímetros.
• Cristal checo tornasol.
• Base para zarcillos colgante (anzuelos).
• Argollas medianas y pequeñas de bisutería.
• Tapa nudos para nylon.
• Aguja de coser.
• Trancadero pico de loro.
• Pincel.

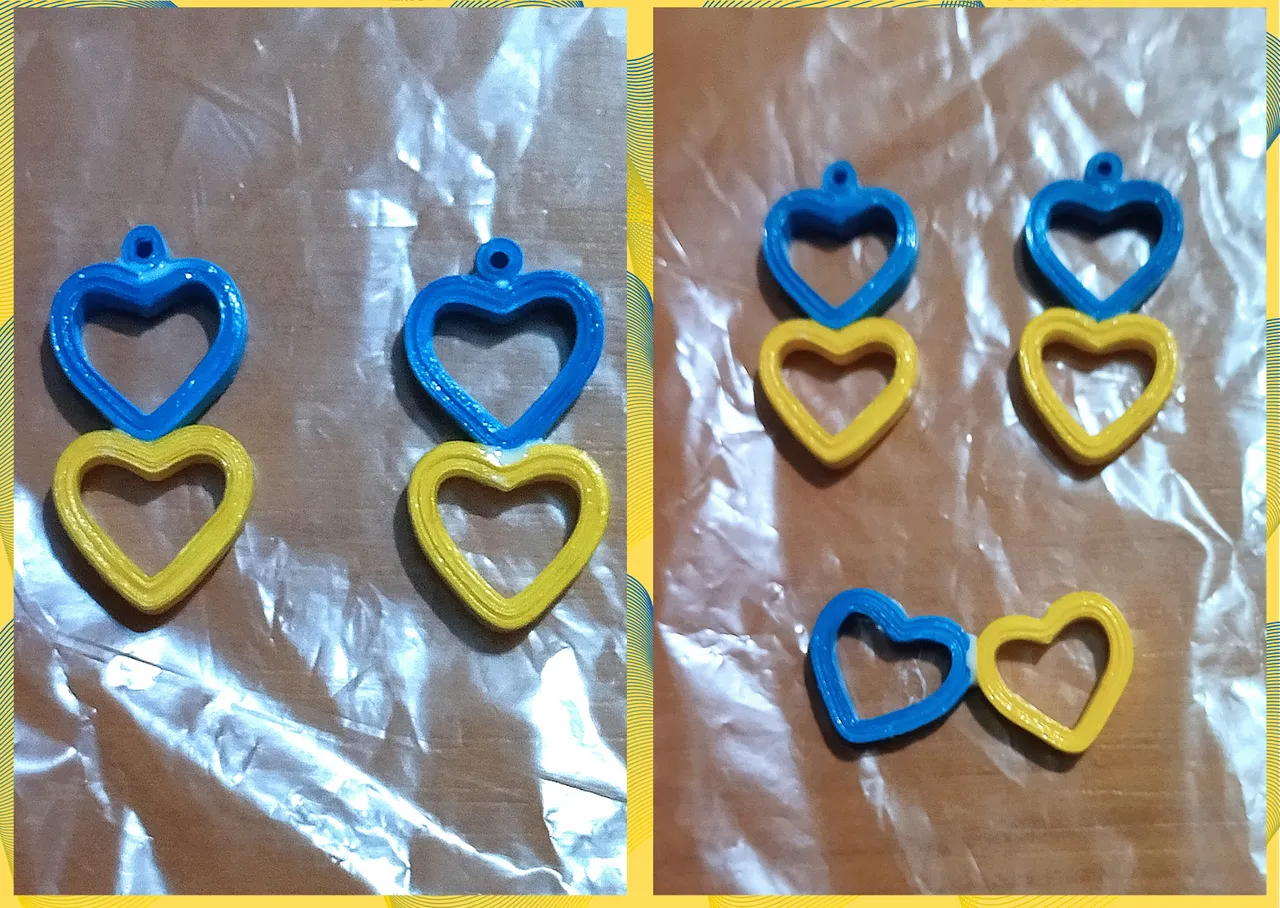
I am going to elaborate a pair of dangling tendrils and a ghost necklace with a charm. For this we are going to make 6 hearts, two for each charm, that is to say, 3 final pieces. I will explain how to make the first heart and in this way will make the others, also in the process I will explain how to form the pendant of the tendrils and that of the necklace that will be assembled in a different way.
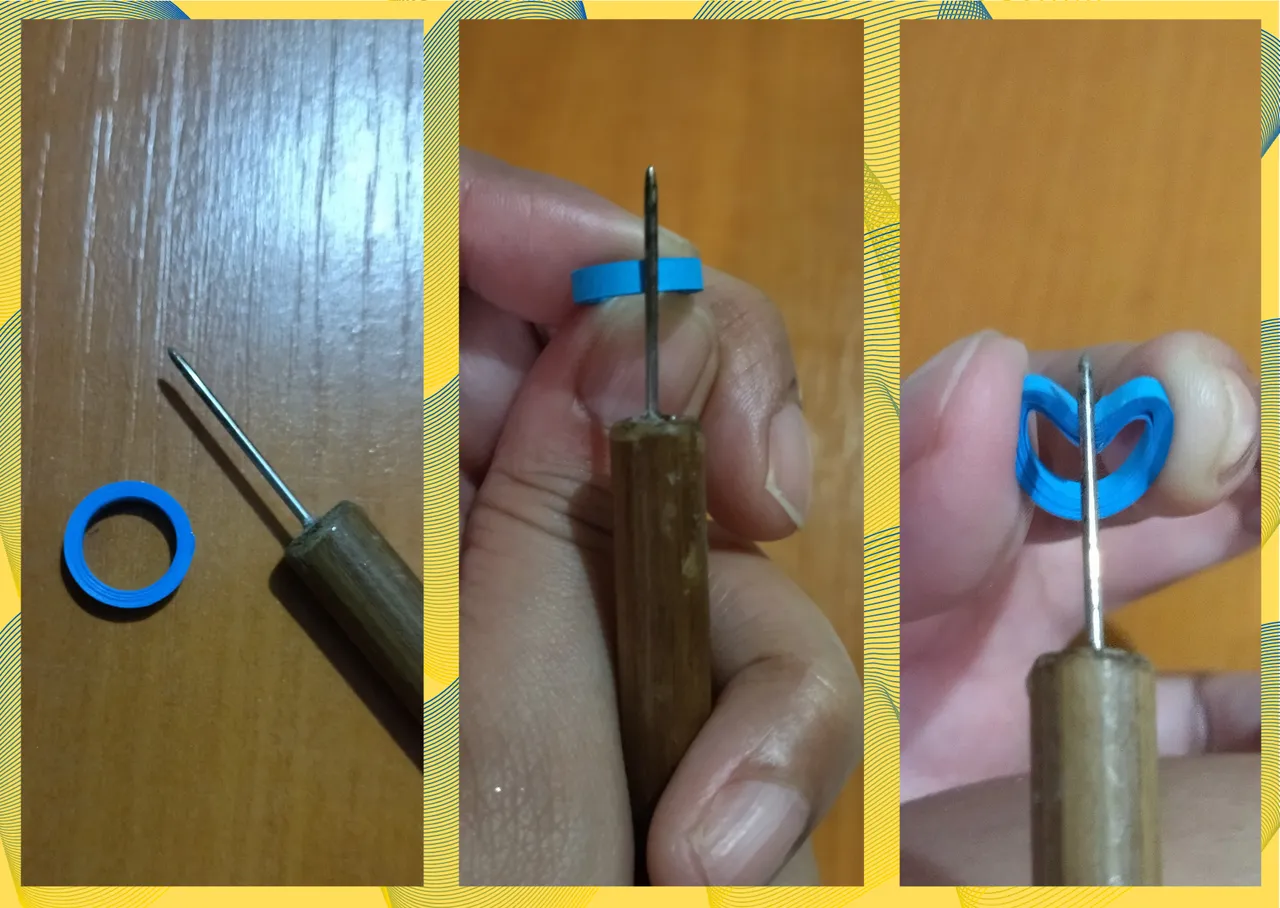
- To make the hearts: We will take a brush that has its base or support of a thickness of approximately 8mm of circumference, I helped me with a ruler that has different measures of circumferences to give you that measure, although you can do it in the thickness that you prefer.
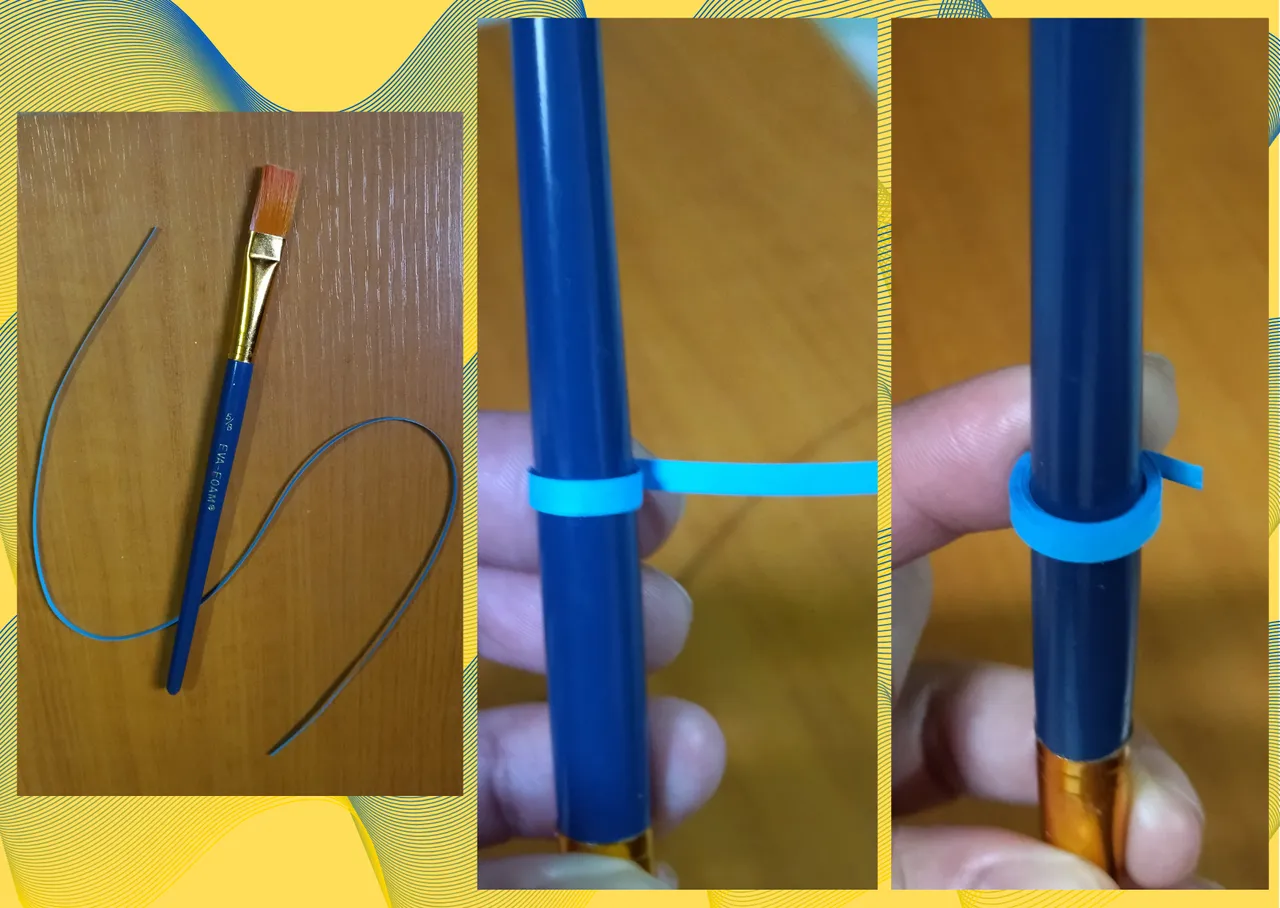
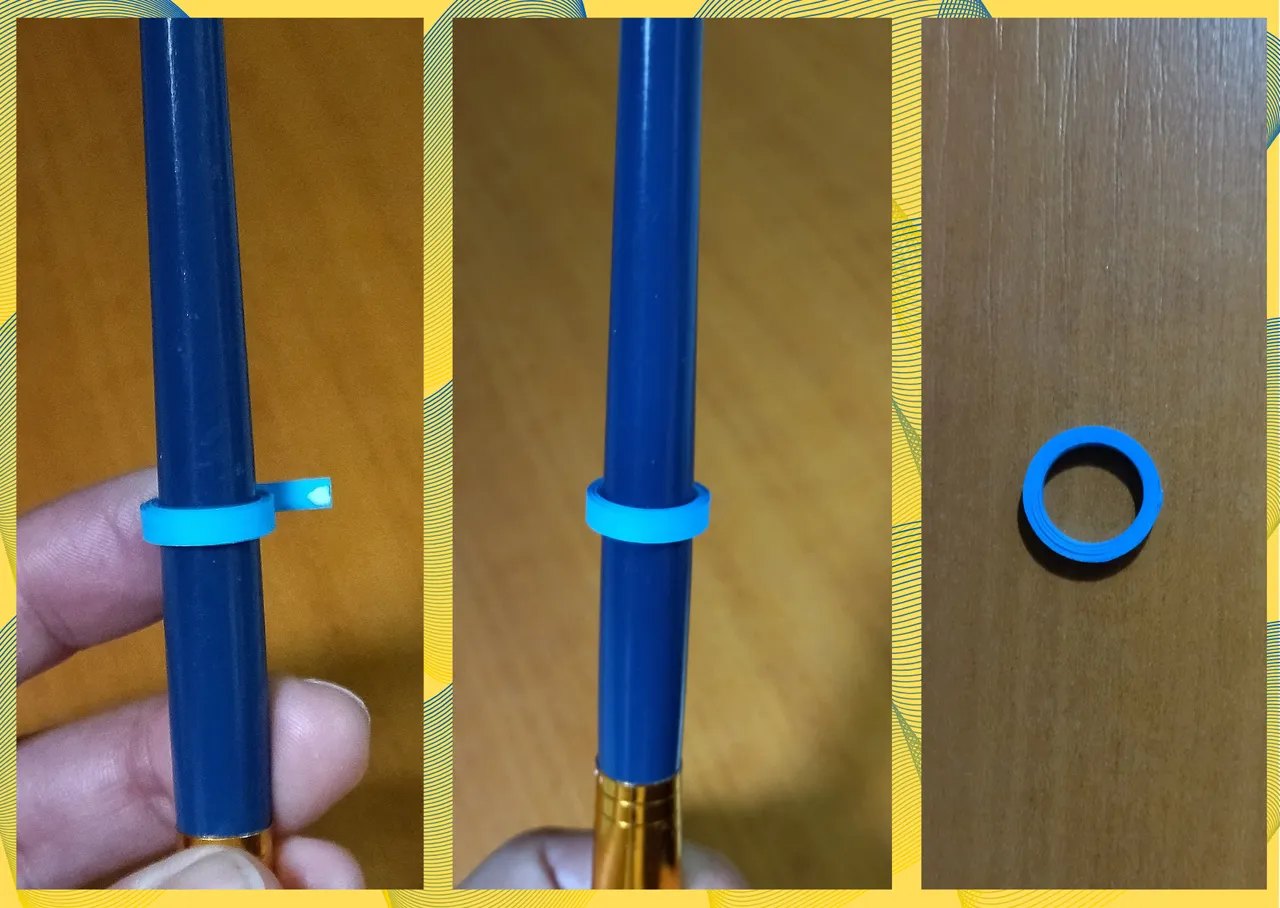
- We will take the quilling tape, 3mm wide, we will need it to measure 27cms long, we roll the tape around the brush and when we finish rolling it all we will seal it with white glue, we take it out of the brush.
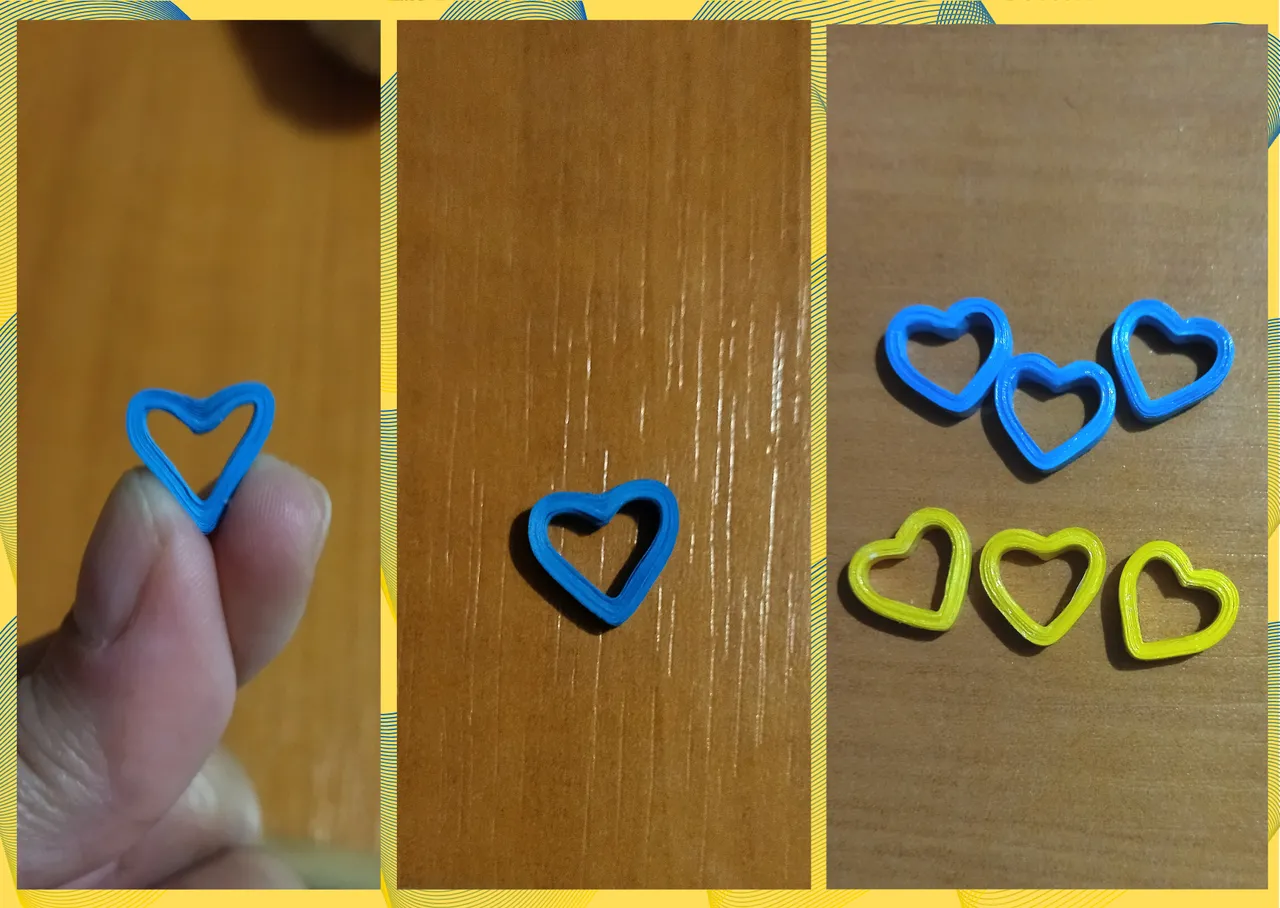
- After the previous process we will obtain a circle, we will give it a heart shape, we will take the long tip quilling needle and with it at the top we will press the circle down, then with our fingers we will pinch the bottom, to achieve our heart shape, we will mold it as we like. For this heart we will need 3 blue and 3 yellow ribbons, all the ribbons to be used must have the same measures, since the hearts will have the same size.

Voy a elaborar un par de zarcillos colgantes y un collar fantasma con un dije. Para ello vamos a elaborar 6 corazones, dos para cada dije, es decir que serán 3 piezas finales. Les explicaré cómo hacer el primer corazón y de esta manera realizarán los demás, además en el proceso les explicaré cómo formar el dije de los zarcillos y el del collar que estarán ensamblados de manera diferente.
• Para realizar los corazones: Tomaremos un pincel que tenga su base o soporte de un grosor aproximado de 8mm de circunferencia, me ayude con una regla que tiene diversas medidas de circunferencias para darles a ustedes esa medida, aunque lo pueden realizar en el grosor que más prefieran.
• Tomaremos la cinta de quilling, de 3mm de ancho, necesitaremos que mida 27cms de largo, enrollamos la cinta alrededor del pincel y al terminar de enrollar toda sellaremos con pega blanca, sacamos del pincel.
• Realizado el proceso anterior vamos a obtener un circulo, a este vamos a darle forma de corazón, tomaremos la aguja de quilling punta larga y con ella en la parte de arriba presionamos el círculo hacia abajo, luego con los dedos pellizcamos en la parte de abajo, para lograr nuestra forma de corazón, moldeamos a nuestro gusto. Cómo este corazón vamos a necesitar 3 azules y 3 amarillos todas las cintas a utilizar deben tener las mismas medidas, ya que los corazones tendrán el mismo tamaño.
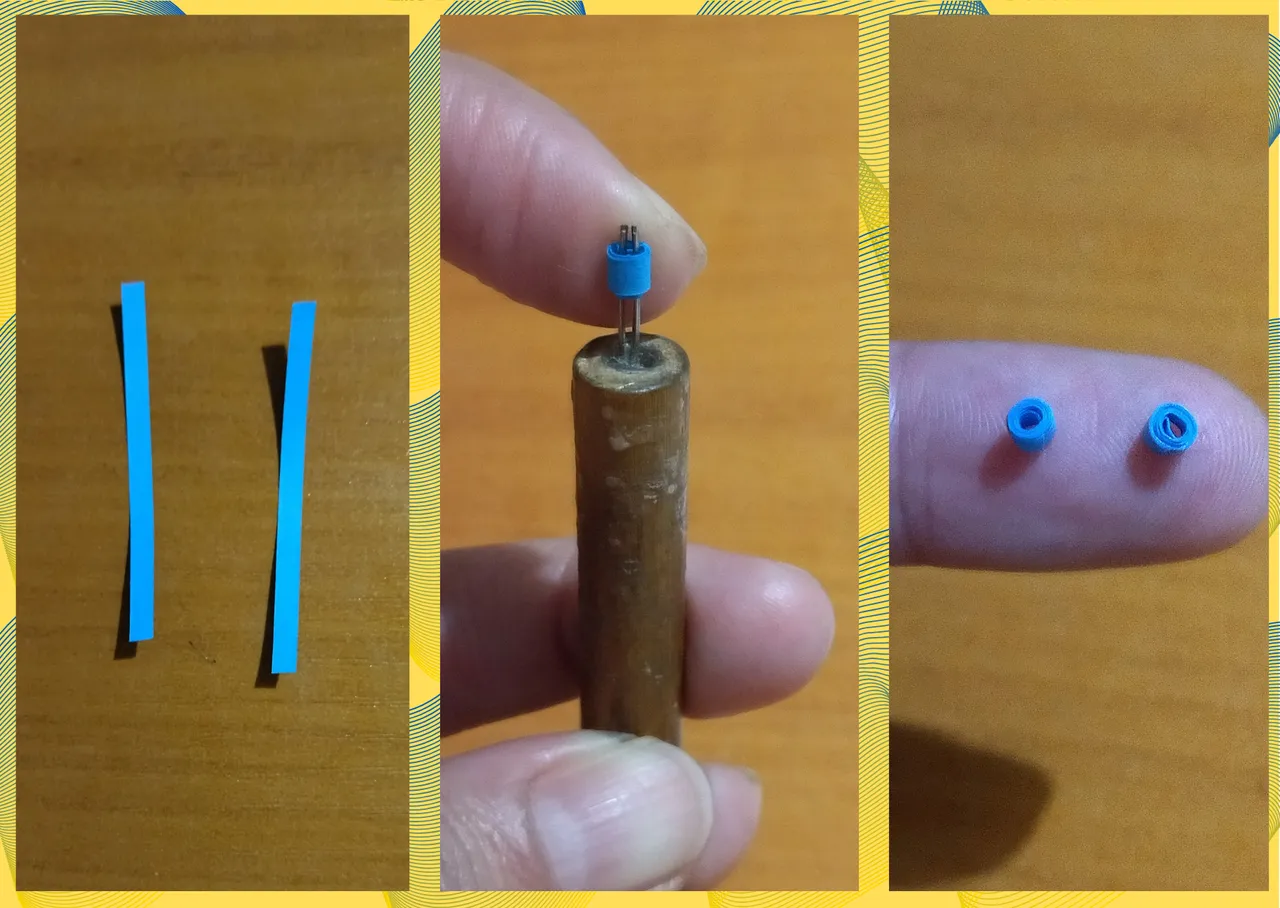
- Now we will take two pieces of blue ribbon 3mm x 4cms long, we will roll them in the quilling needle forming 2 small tight circles (reserve).
- Once we have all the pieces we will proceed to join them together to form the charms of both the tendrils and the necklace.
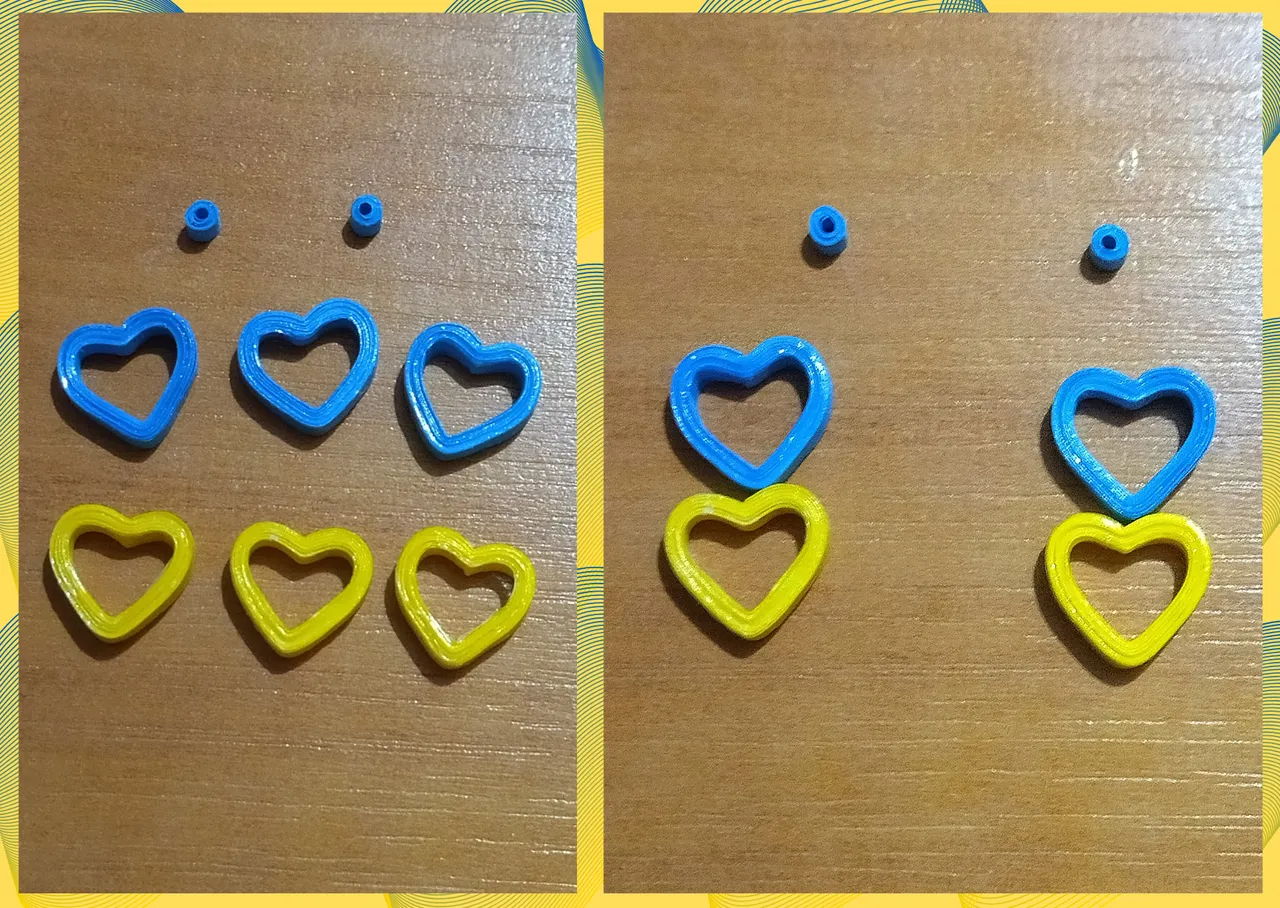
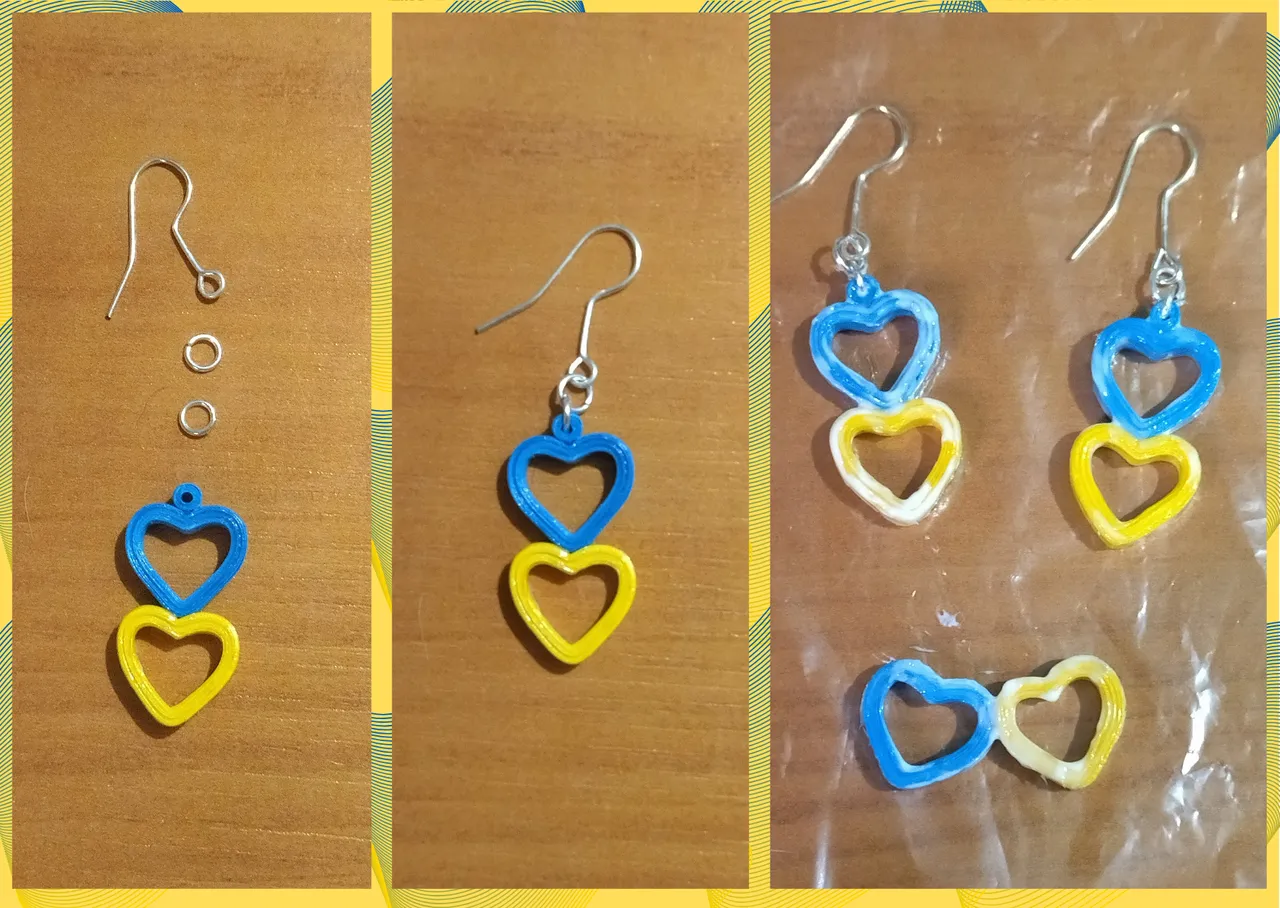
- For the tendrils we glue the hearts one on top of the other with extra strong white glue, first the blue one and then the yellow one. On the top of the blue heart we will place the small circle we made, since the ring where we will place the pendant base will go there.
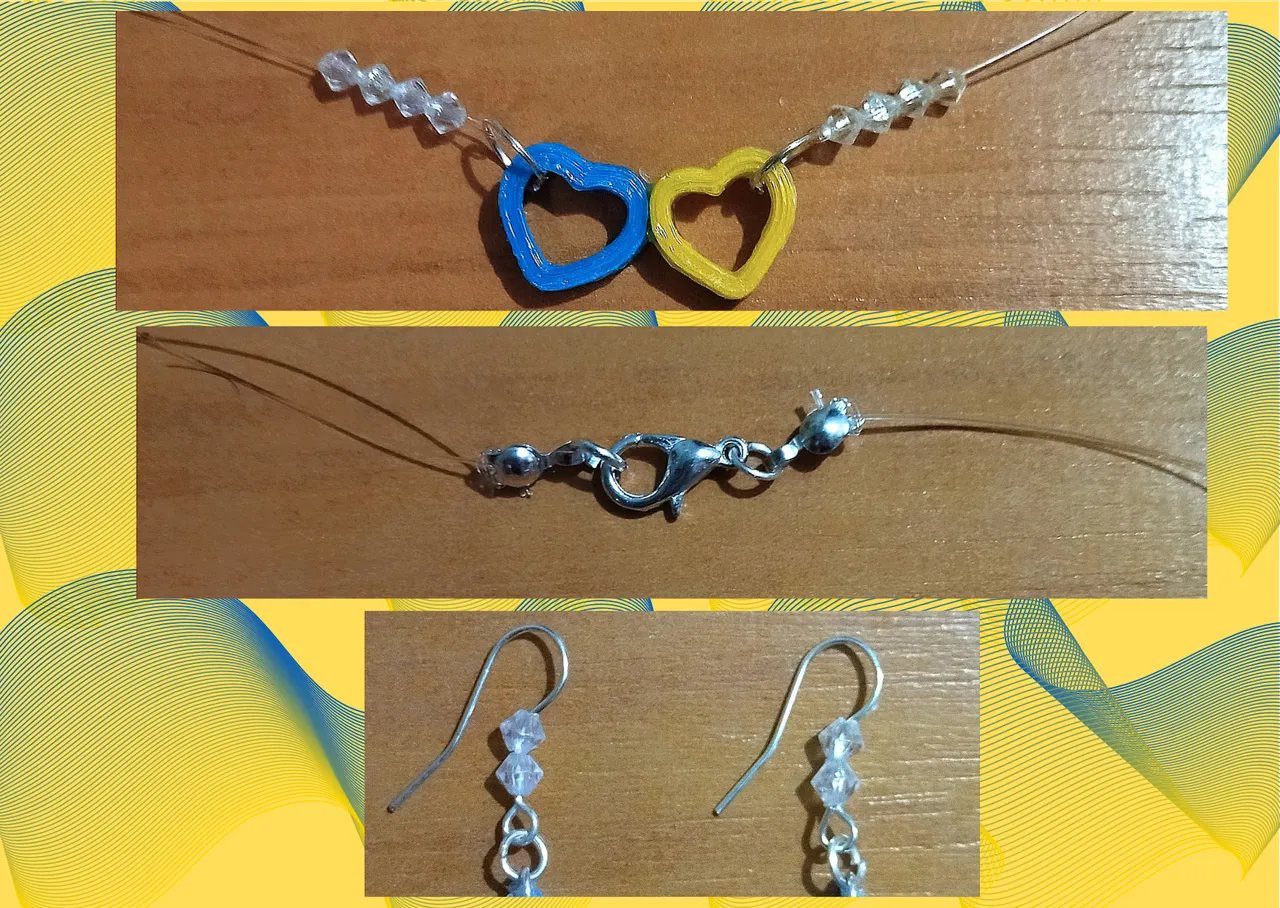
- For the necklace charm, we glue the hearts side by side, I wanted to give them a slightly inclined position.
- Let's apply the liquid protection to the pieces, this time I decided to apply several layers of extra strong white glue (carpentry glue), I tested in advance and the result was excellent, I also suggest that if it is in your hands to apply artistic resin to the pieces, do it, but I assure you that the result with the white glue is excellent and protects the piece, it is completely solidified, plasticized and the visual effect is very nice, similar or we could even say the same as the resin, and using white glue (I emphasize that it must be extra strong that used in carpentry), we avoid working with chemicals with strong odors.
- Before applying the layers of glue to the tendrils, I placed two small costume jewelry rings, plus their hanging base (hook), to prevent the holes in the circle where the ring goes from being covered, and in this way it is more practical since we hold the piece better when applying the glue. Let it dry from one day to the next so that the glue is completely resistant.
• Ahora tomaremos dos trozos de cinta azul de 3mm x 4cms de largo, enrollaremos en la aguja para quilling formando 2 pequeños círculos apretados (reservamos).
• Tenemos todas las piezas vamos a proceder a unirlas para formar los dijes tanto de los zarcillos cómo del collar.
• Para los zarcillos pegamos con pega blanca extra fuerte, los corazones uno encima del otro, primero el azul y luego el amarillo. En la parte de arriba del corazón azul colocaremos el pequeño círculo que hicimos, ya que allí irá la argolla donde colocaremos la base colgante.
• Para el dije del collar, pegamos los corazones uno al lado del otro, yo les quise dar una posición algo inclinada.
• Vamos a colocar la protección líquida a las piezas, en esta oportunidad decidí colocarle varias capas de pega blanca extra fuerte (de carpintería), hice pruebas con antelación y el resultado fue excelente, de igual manera les sugiero que si está en sus manos colocarle resina artística a las piezas lo hagan, pero les aseguro que el resultado con la pega blanca es excelente y protege bastante la pieza, queda totalmente solidificada, plastificada y el efecto visual es muy lindo, similar o hasta podríamos decir igual al de la resina, y utilizando cola blanca (recalcó que debe ser extra fuerte la que utilizan en carpinterías), evitamos trabajar con químicos con olores tan fuertes.
• Antes de colocar las capas de pega a los zarcillos le coloque dos aros pequeños de bisutería, más su base colgante (anzuelo), para así evitar que los orificios del círculo donde va la argolla, se tapen y de esa manera es más practico ya que sostenemos mejor la pieza al aplicarle el pegamento. Dejamos secar de un día para otro para que el pegamento quede totalmente resistente.
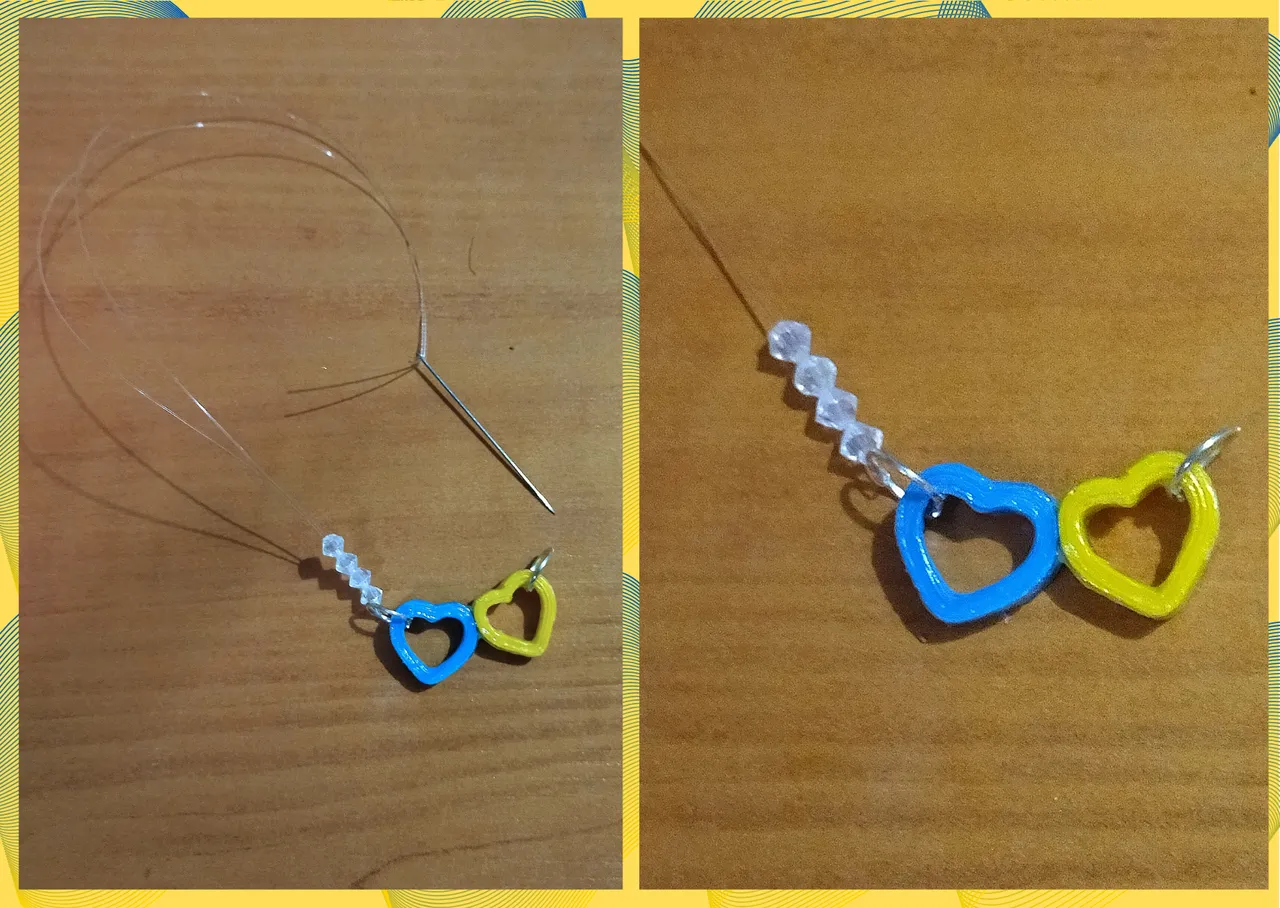
- Once the pieces are dry, we are going to assemble and decorate our ghost necklace. First we are going to attach two medium size jewelry rings to the pendant, one on the blue heart side and the other on the yellow heart side.
- We take 3mm nylon thread and cut a piece according to the length we want to give to the necklace, we will pass it double for each of the rings, in the center of the thread I put 4 Czech litmus colored crystals to decorate, to finish we put the nylon knot cover, its ring on each side, and its parrot beak lock to finish with the necklace.
- Finally, I added two Czech litmus colored crystals to the bases for the hanging tendrils (hooks), to give it a colorful and pretty detail that matches even more with the necklace.
• Secas las piezas vamos a armar y decorar nuestro collar fantasma. Primero vamos a colocar dos argollas medianas de bisutería al dije uno del lado del corazón azul y otro del lado del corazón amarillo.
• Tomamos hilo de nylon de 3mm y cortamos un trozo según el largo que queramos darle al collar, lo pasaremos doble por cada una de las argollas, por el centro del hilo coloque 4 cristales checos color tornasol para decorar, para finalizar colocamos el tapa nudo para nylon, su argolla de cada lado, y su trancadero pico de loro para culminar con el collar.
• Para finalizar le agregué a las bases para zarcillos colgantes (anzuelos), dos cristales checos de color tornasol para darle un detalle vistoso, bonito y que haga juego aún más con el collar.


What did you think, did you like it?
I hope you did, I hope you liked my explanation, procedure and photos, I made them with love for you.
"Let out that muse that inspires you, and let your imagination fly".
Thank you all, see you next time.
"Peace for Ukraine💙💛, peace for the whole world, God bless us all"🌎🐦
¿Que les pareció, les gustó?
Espero que sí, que les haya gustado mi explicación, procedimiento y fotos, los hice con mucho cariño por y para ustedes.
"Deja salir esa musa que te inspira, y deja volar tu imaginación".
Gracias a todos, nos vemos en la próxima.
"Paz para ucrania💙💛, paz para el mundo entero, Dios nos bendiga a todos"🌎🐦
Todas las fotos usadas en este post son de mi autoría y han sido sacadas en mi celular personal un Redmi 9T y editadas Canva Banner y separador hecho por mí en Canva Traducido con la ayuda de DeepL
