Hello everyone... 🌺
Hello to my dear Hivers and the dear community of artists #Jewelry, as always very pleased and excited to be here again, showing you my work made with love and especially for you.
For today I join this initiative of the day of the tree, these are life, oxygen and a fundamental part, and you can say that primordial in our life cycle, and because of its importance how not to pay tribute to him?
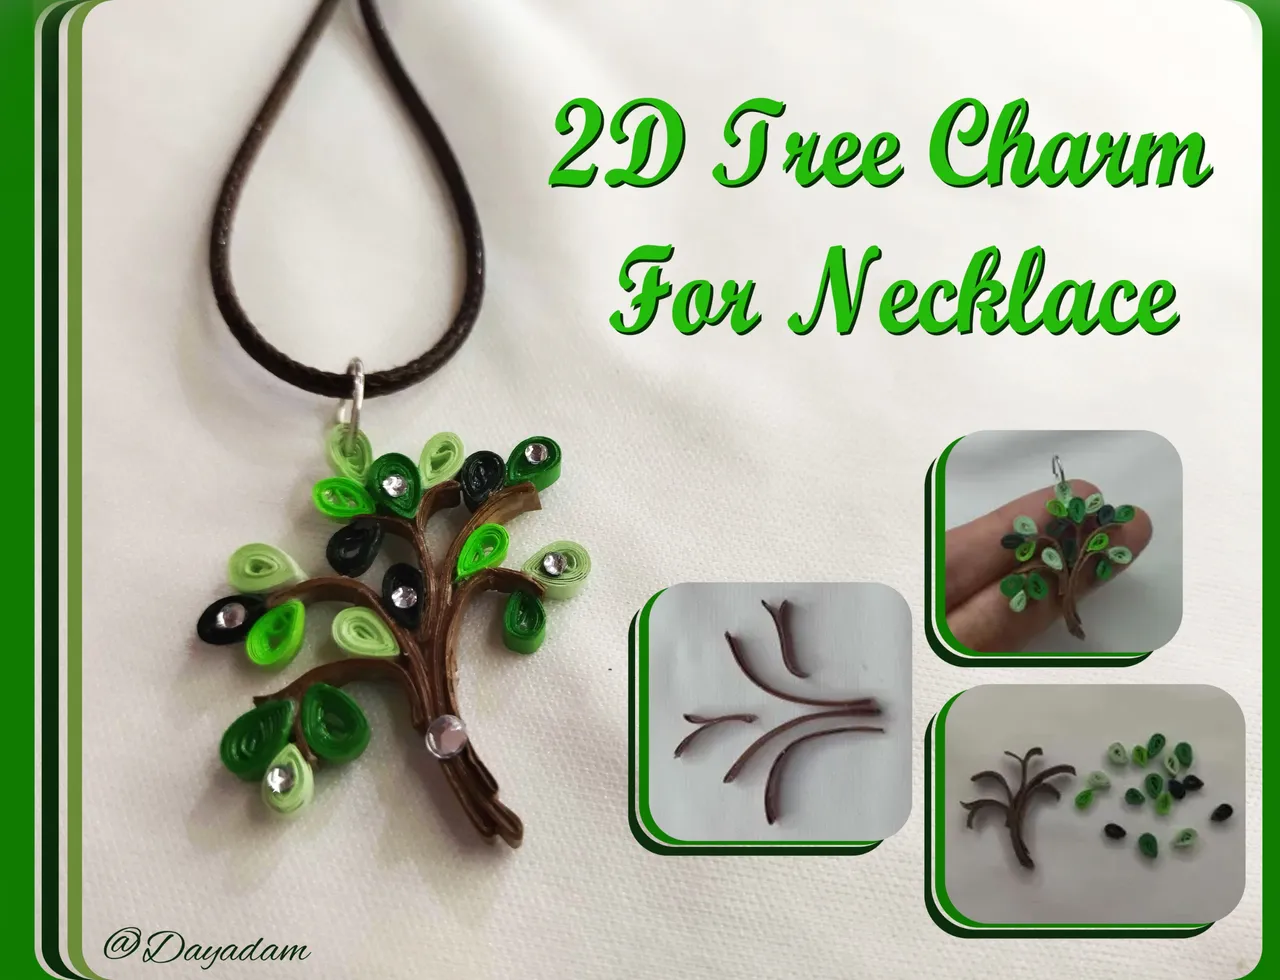
I decided to make a small necklace charm in 2D in the quilling technique, decorated with some costume jewelry crystals.
If you want to join the initiative here is the link where you can learn the necessary guidelines. I invite @irenenavarroart, @chacald.dcymt and @yennysferm71, to participate.
I hope you like the work, join me in this creative process.
Let's get started:😃

Hola a Todos... 🌺
Hola a mis queridos Hivers y a la querida comunidad de artistas #Jewelry, como siempre muy complacida y emocionada de encontrarme por acá nuevamente, mostrándole mi trabajo hecho con mucho amor y especialmente para ustedes.
Para hoy me uno a esta iniciativa del dia del árbol, estos son vida oxígeno y una parte fundamental, y se puede decir que primordial en nuestro ciclo de vida, y por su importancia como no rendirle homenaje
Decidí llevar a cabo un pequeño dije para collar en 2D en la tecnica de quilling, decorado con algunos cristales de bisuteria.
Si deseas unirte a la iniciativa por acá te dejo el link del mismo donde podrás conocer los lineamientos necesarios. Invito a participar a @irenenavarroart, @chacald.dcymt and @yennysferm71.
Espero sea de su agrado el trabajo, acompáñenme en este proceso creativo.
Comencemos:😃

• Cintas de quilling de diversos colores.
• Aguja para quilling.
• Pega blanca extra fuerte (de carpintería).
• Tijera.
• Cristales de bisutería pequeños y medianos.
• Argolla de bisutería mediana.
• Pincel.
• Pinza punta fina.
• Alicate punta fina.
• Collar de tu preferencia.
- Quilling ribbons of different colors.
- Quilling needle.
- Extra strong white glue (carpentry glue).
- Scissors.
- Small and medium-sized costume jewelry crystals.
- Medium-sized costume jewelry ring.
- Brush.
- Fine tip tweezers.
- Fine nose pliers.
- Necklace of your choice.

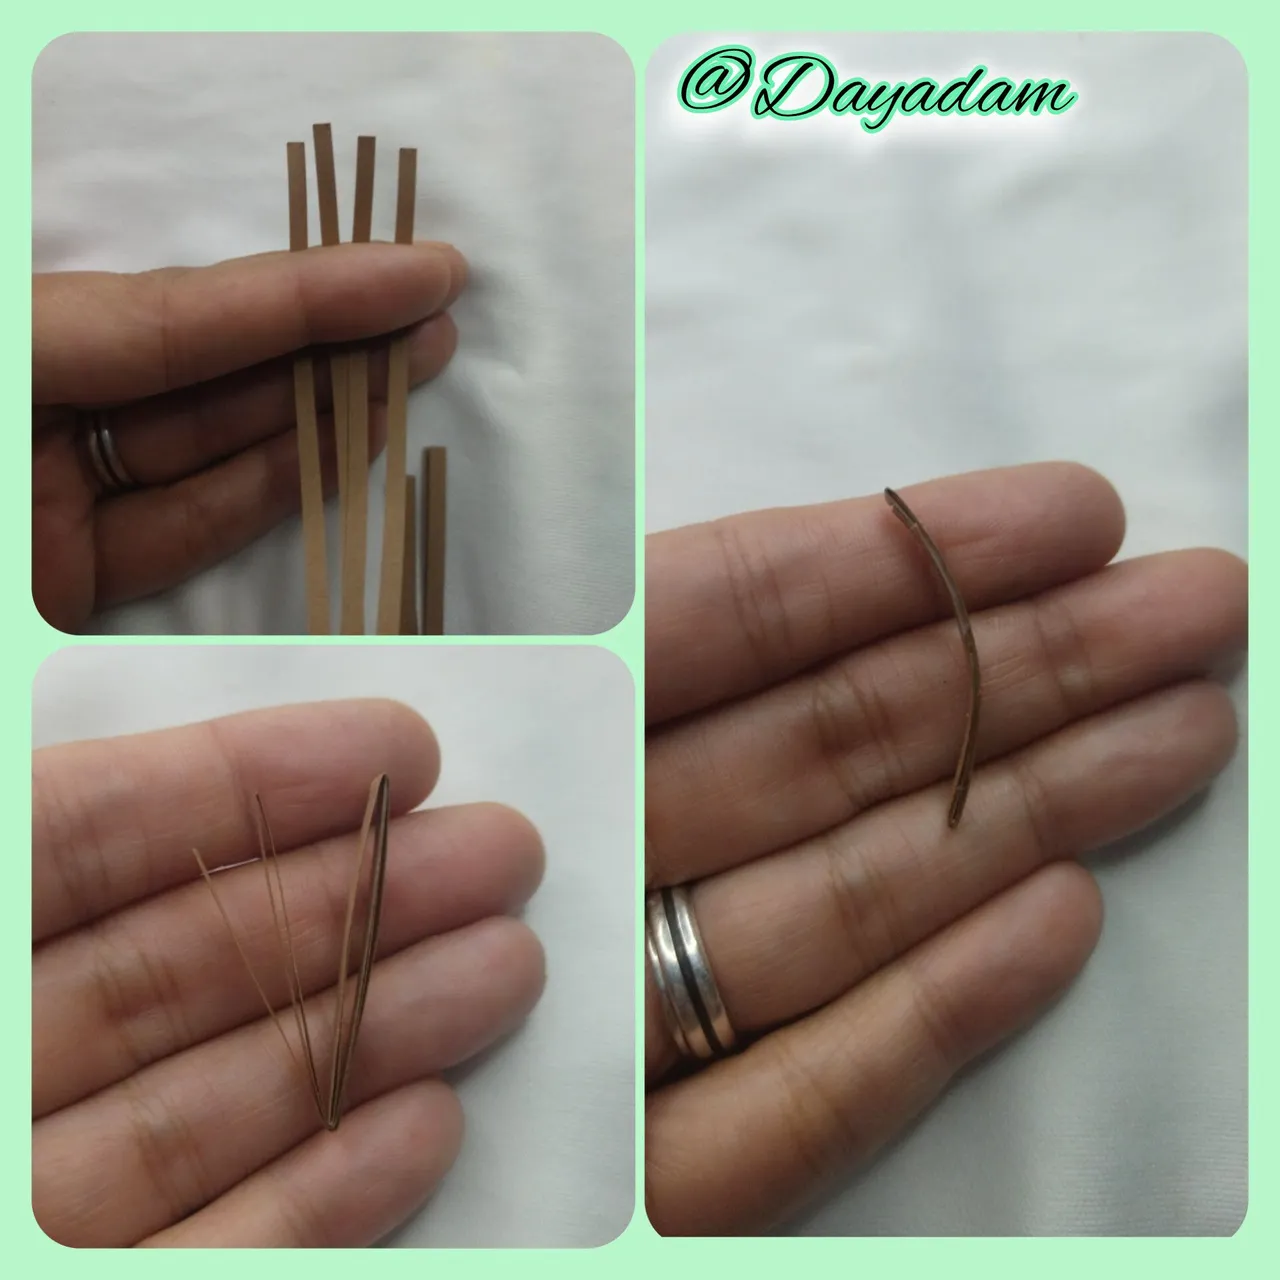
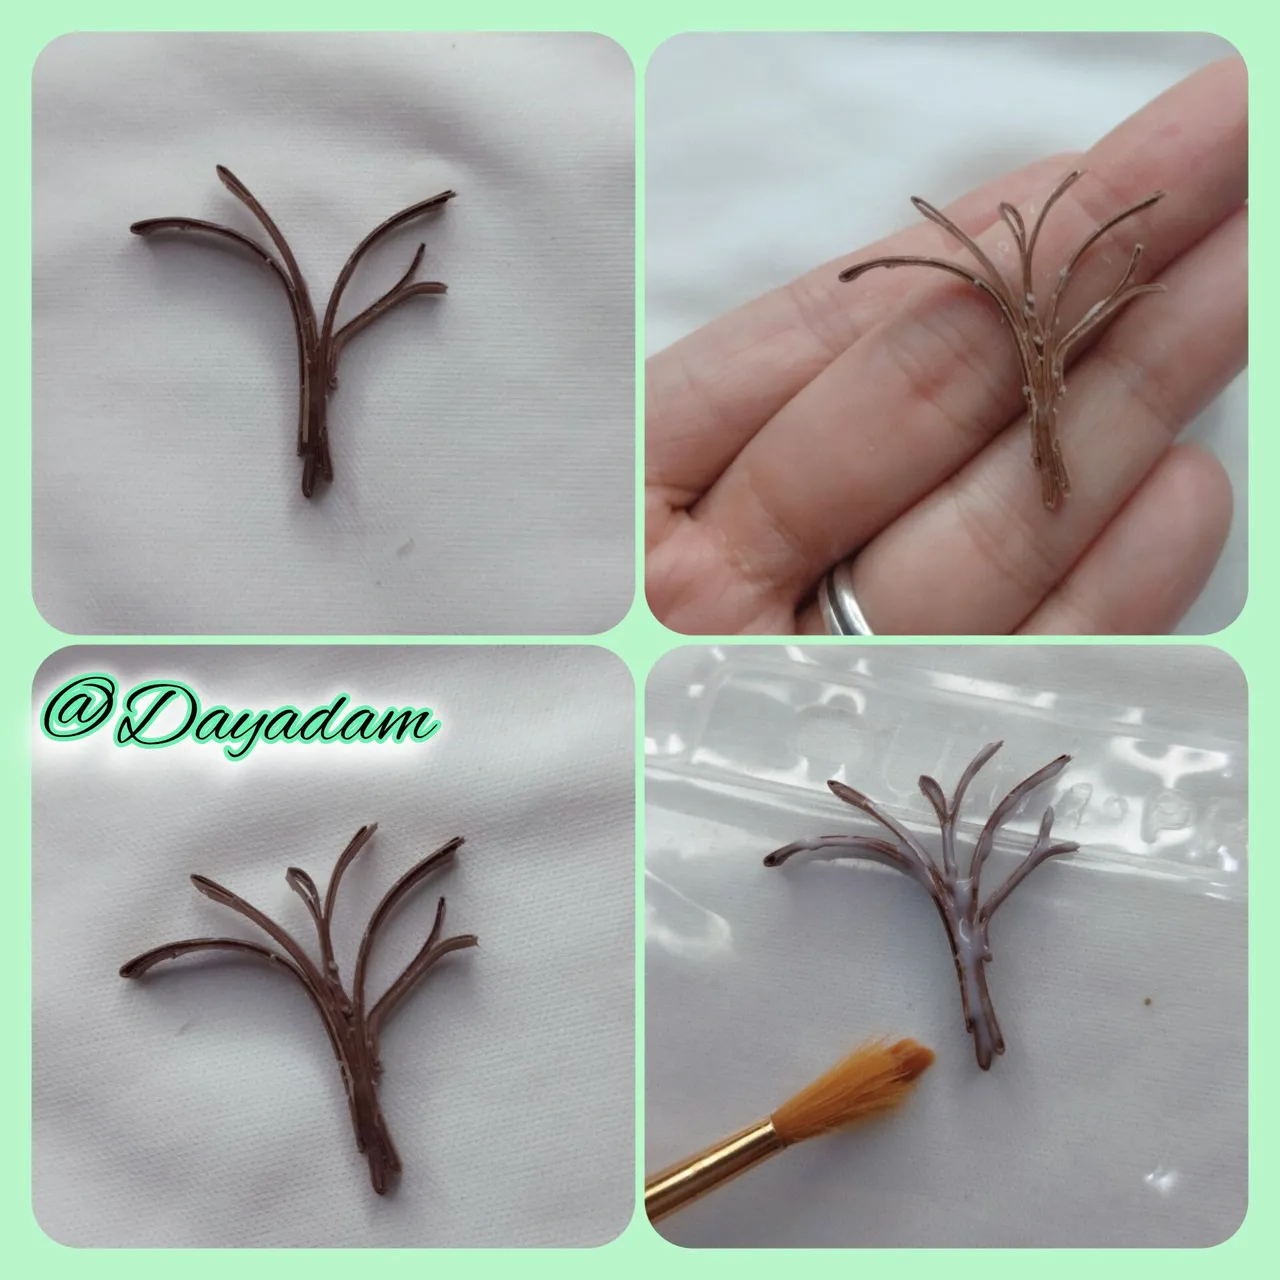
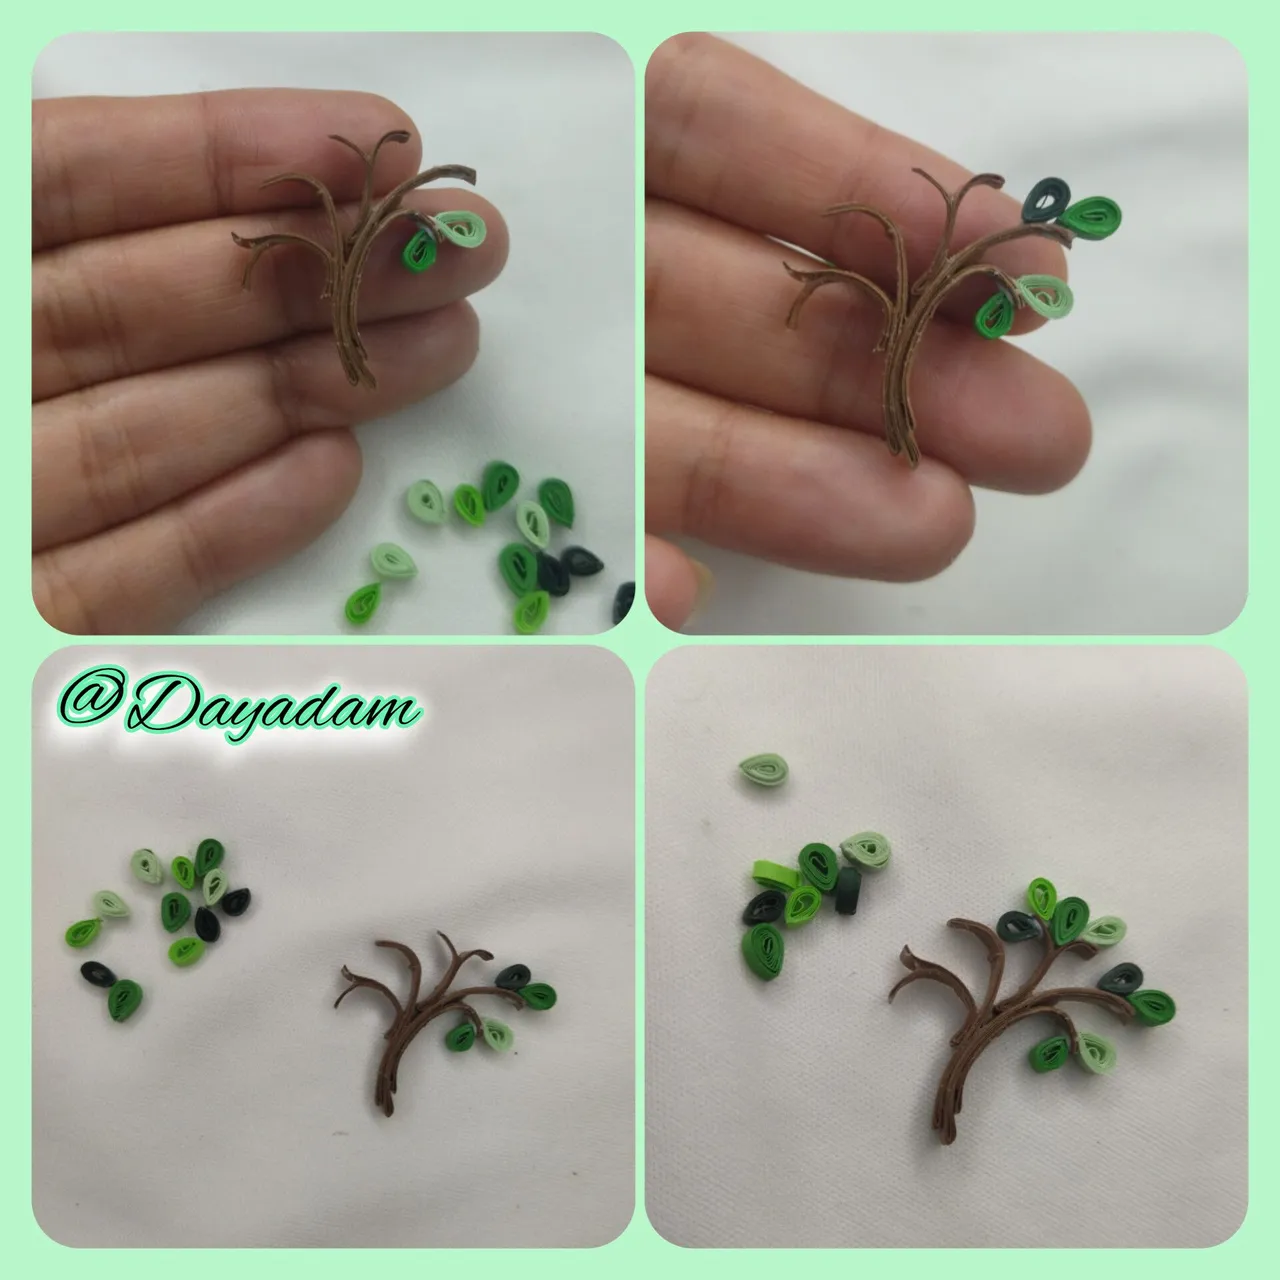
- Let's start by taking pieces of brown quilling ribbon 3mm wide, folding and adding extra strong white glue, repeat the process with several pieces of ribbon of different sizes, do the procedure in this way to make the ribbon more resistant and strong when we intend to make a pendant for a necklace.
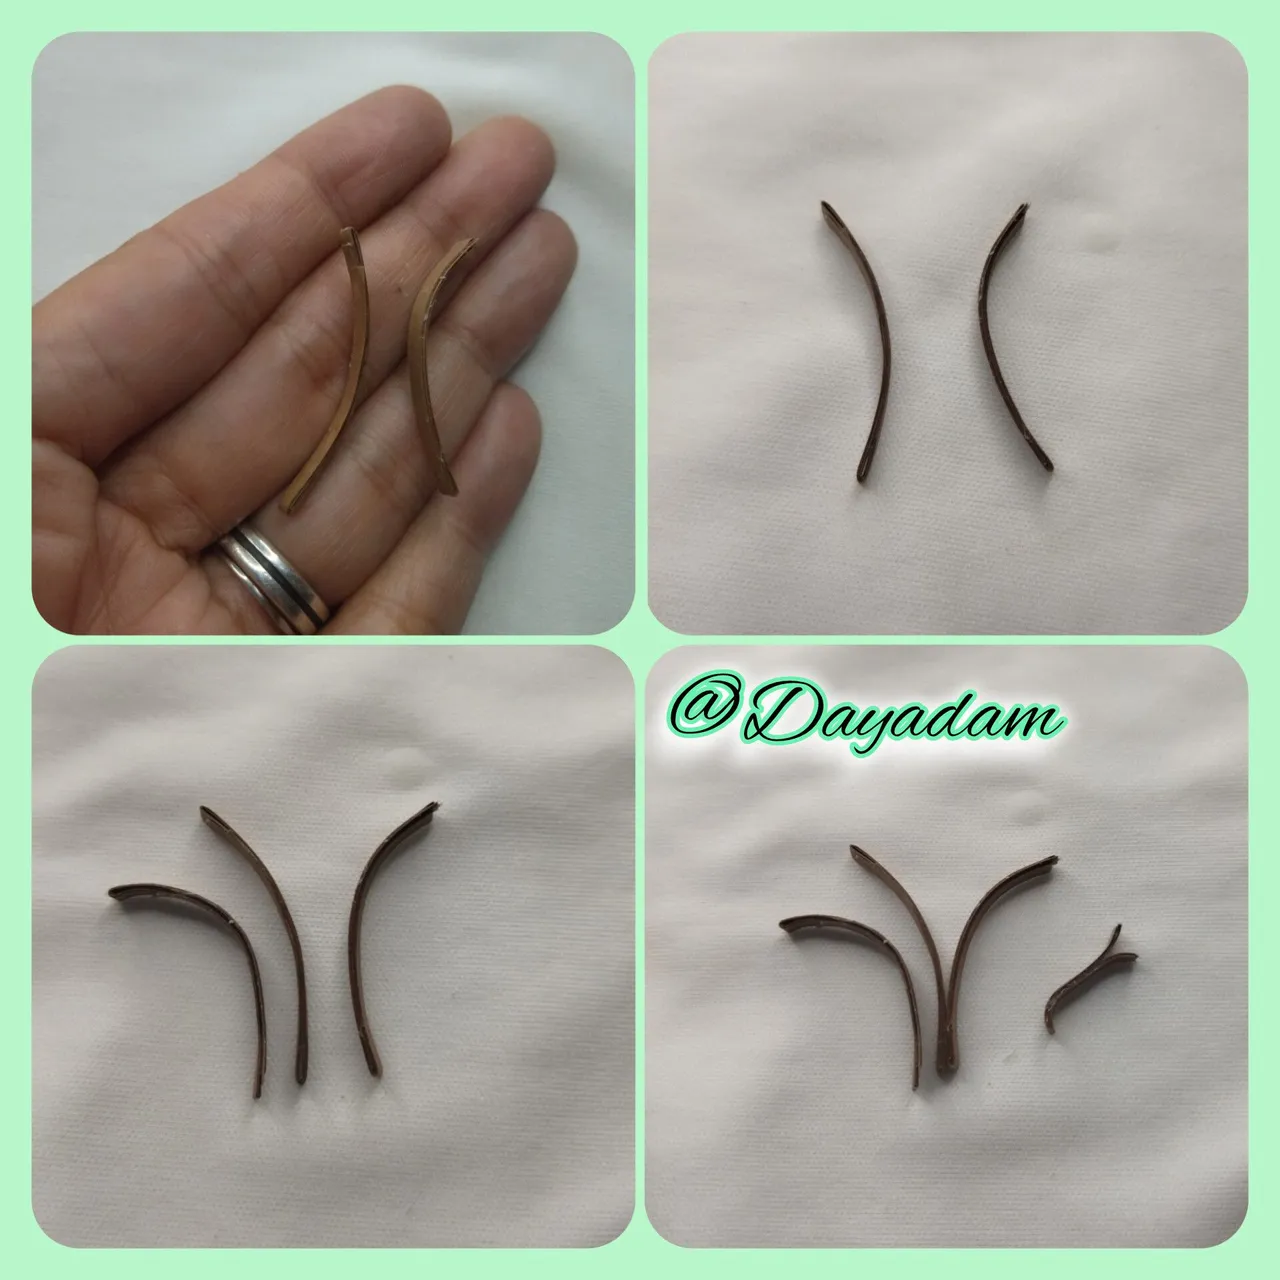
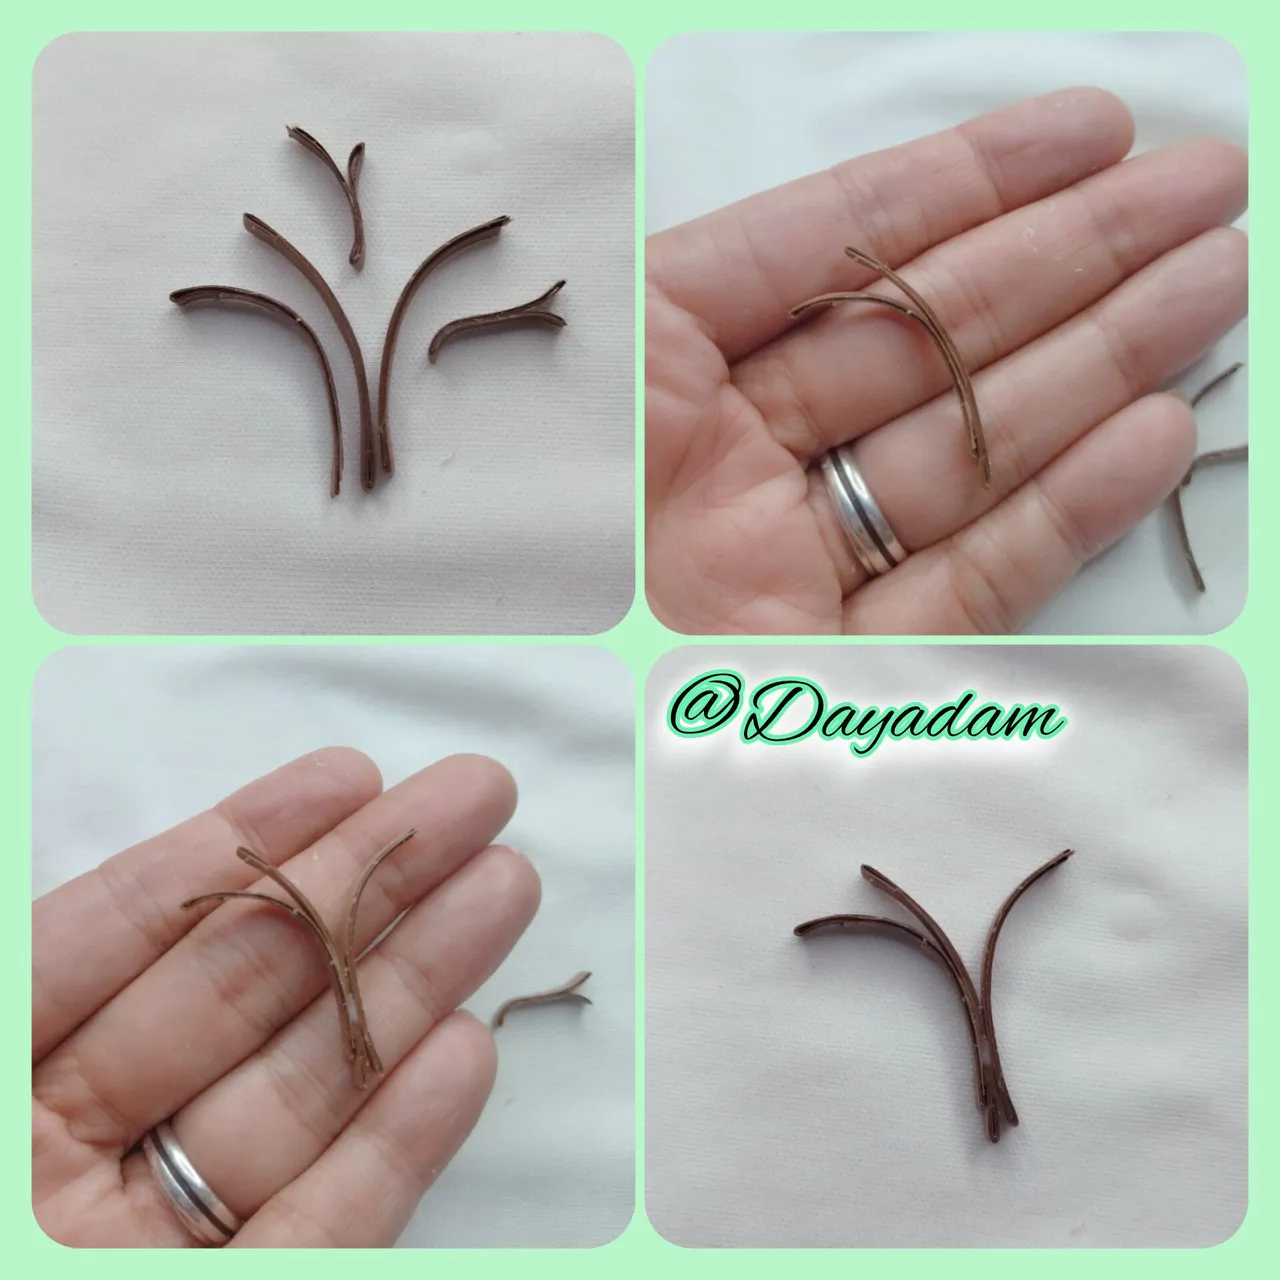
- Once the pieces of ribbon are ready, we are going to join and mold them to form the stem and branches.
- Once our piece is formed, I decided to apply several layers of extra strong white glue, letting it dry between each layer to give it firmness, to make it plasticky and strong.

• Vamos a comenzar tomando trozos de cinta para quilling de 3mm de ancho color marrón, vamos doblando y agregando pega blanca extra fuerte, repetí el proceso con varios trozos de cinta de diversos tamaños, realice el procedimiento de esta manera para hacer la cinta mas resistente y fuerte al tener la intención de hacer un dije para collar.
• Listos los trozos de cinta vamos a ir uniendo y moldeando para formar el tallo y las ramas.
• Una vez formada nuestra pieza decidí aplicarle varias capas de pega blanca extra fuerte, dejando secar ente una capa y otra para darle firmeza, que quede plastificado y fuerte.
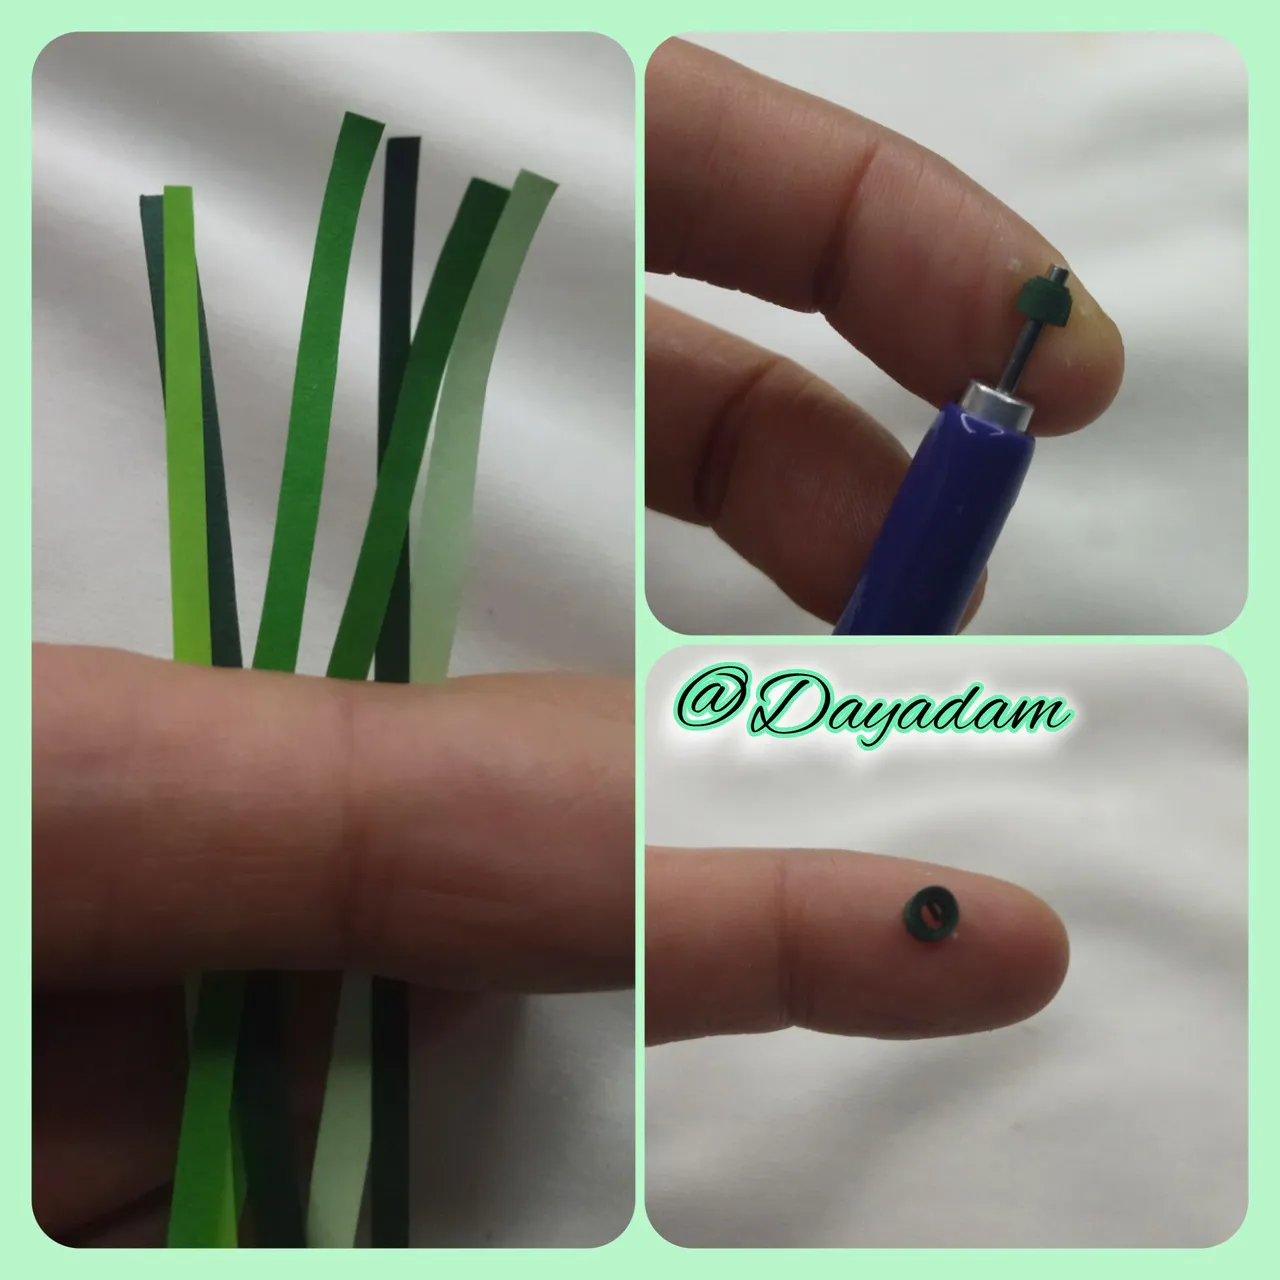
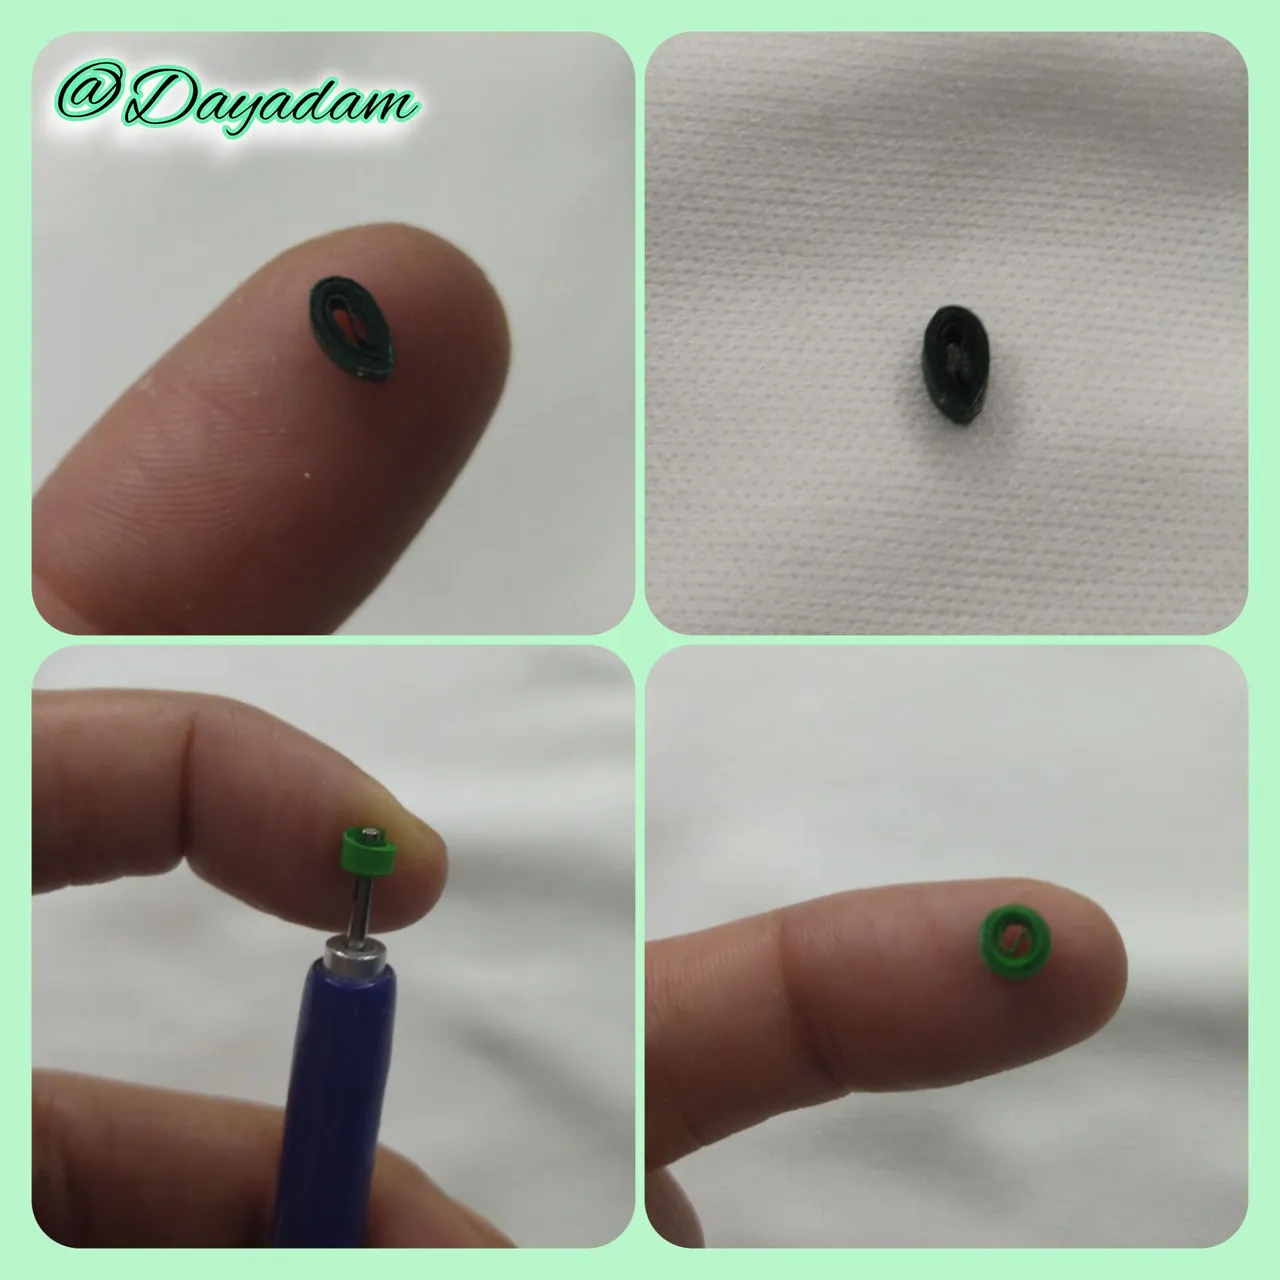
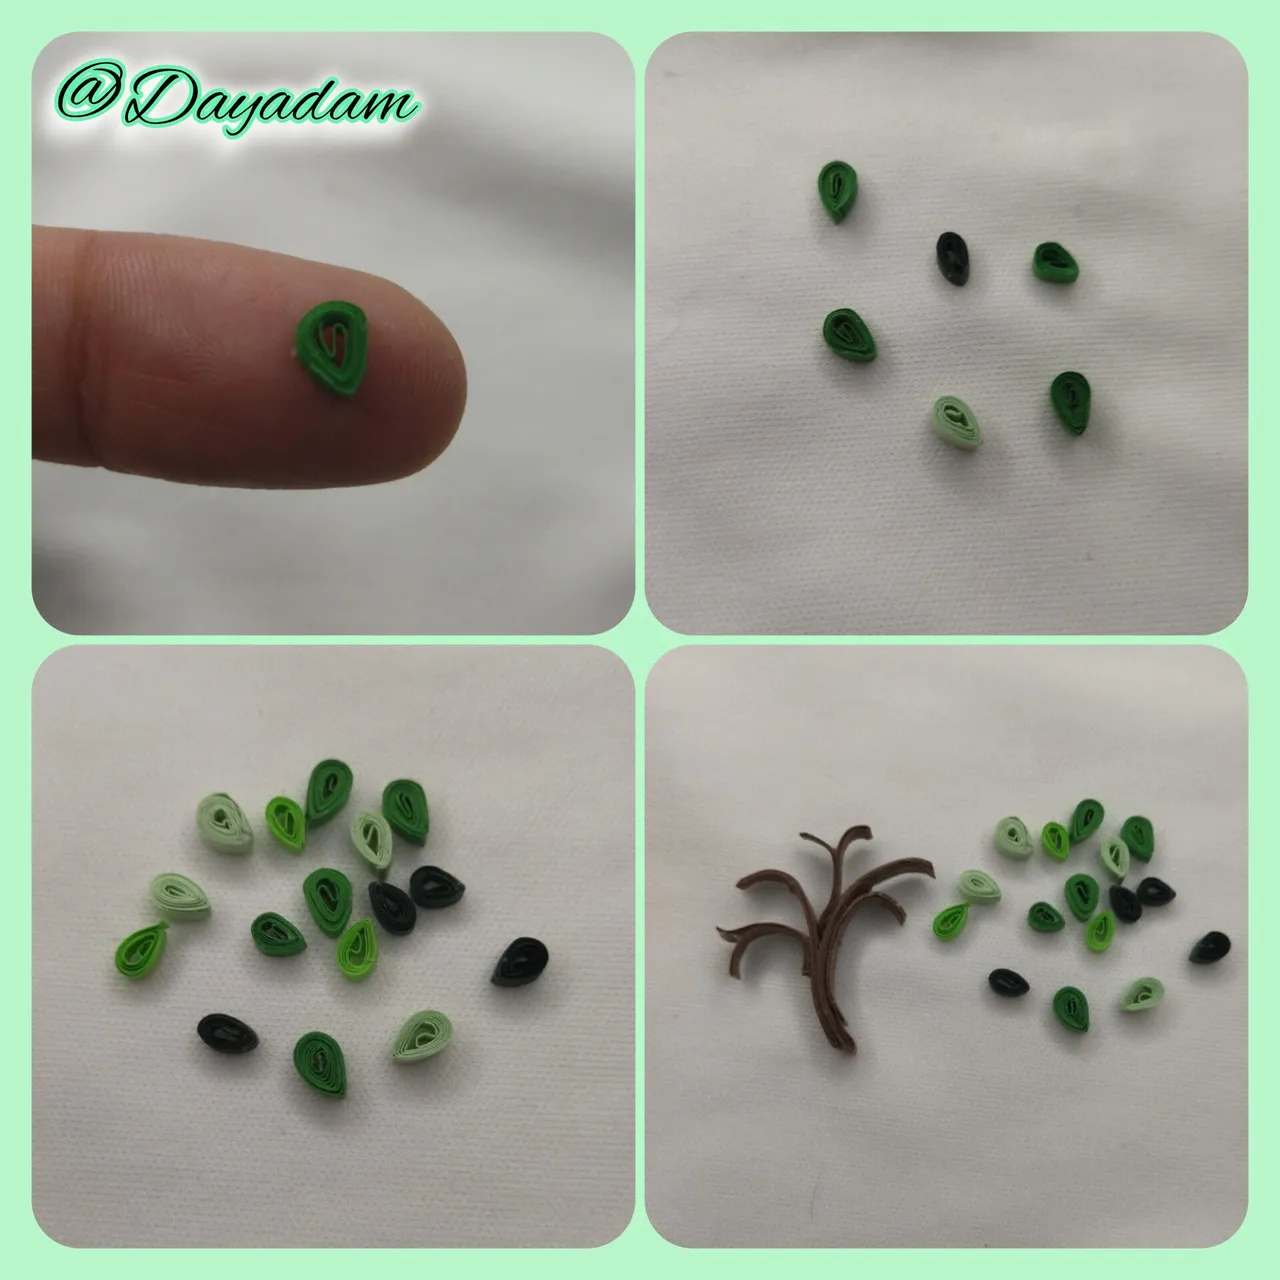
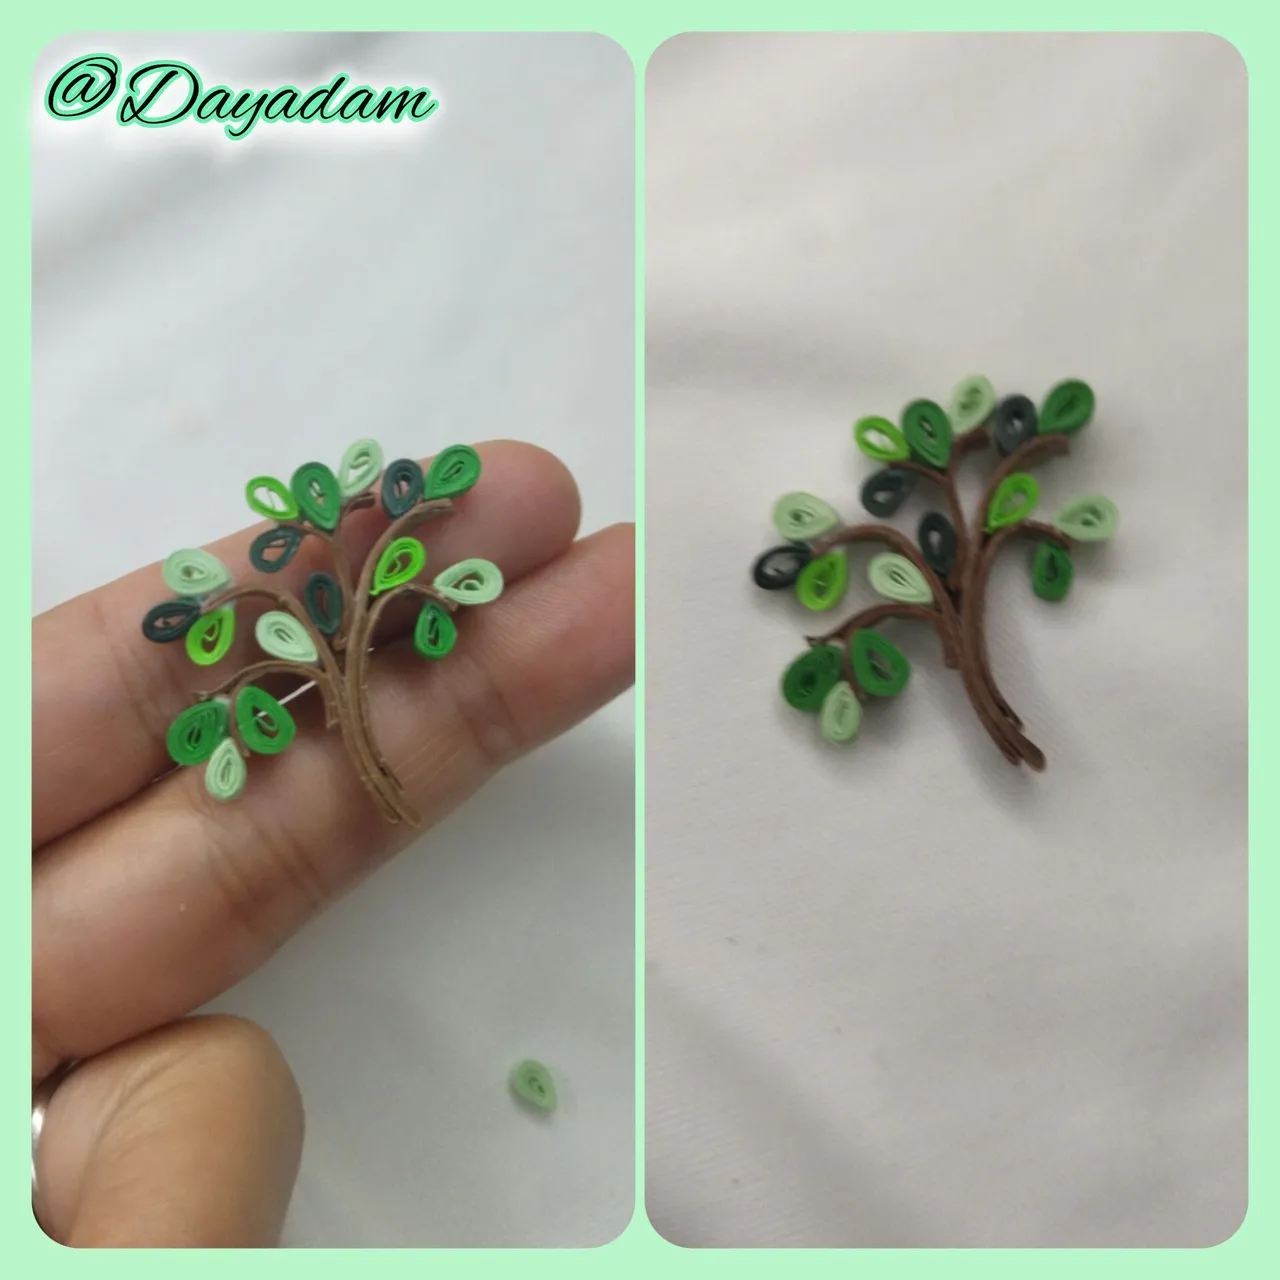
We take 3mm wide quilling ribbons of various shades of green, with the help of the quilling needle we will roll and form small open circles, then we will mold them in the shape of leaves or drops, pinching one of their tips with our fingers .
Once the leaves are ready, we will glue them in a harmonic way, in the piece of the trunk and branches that we previously made.
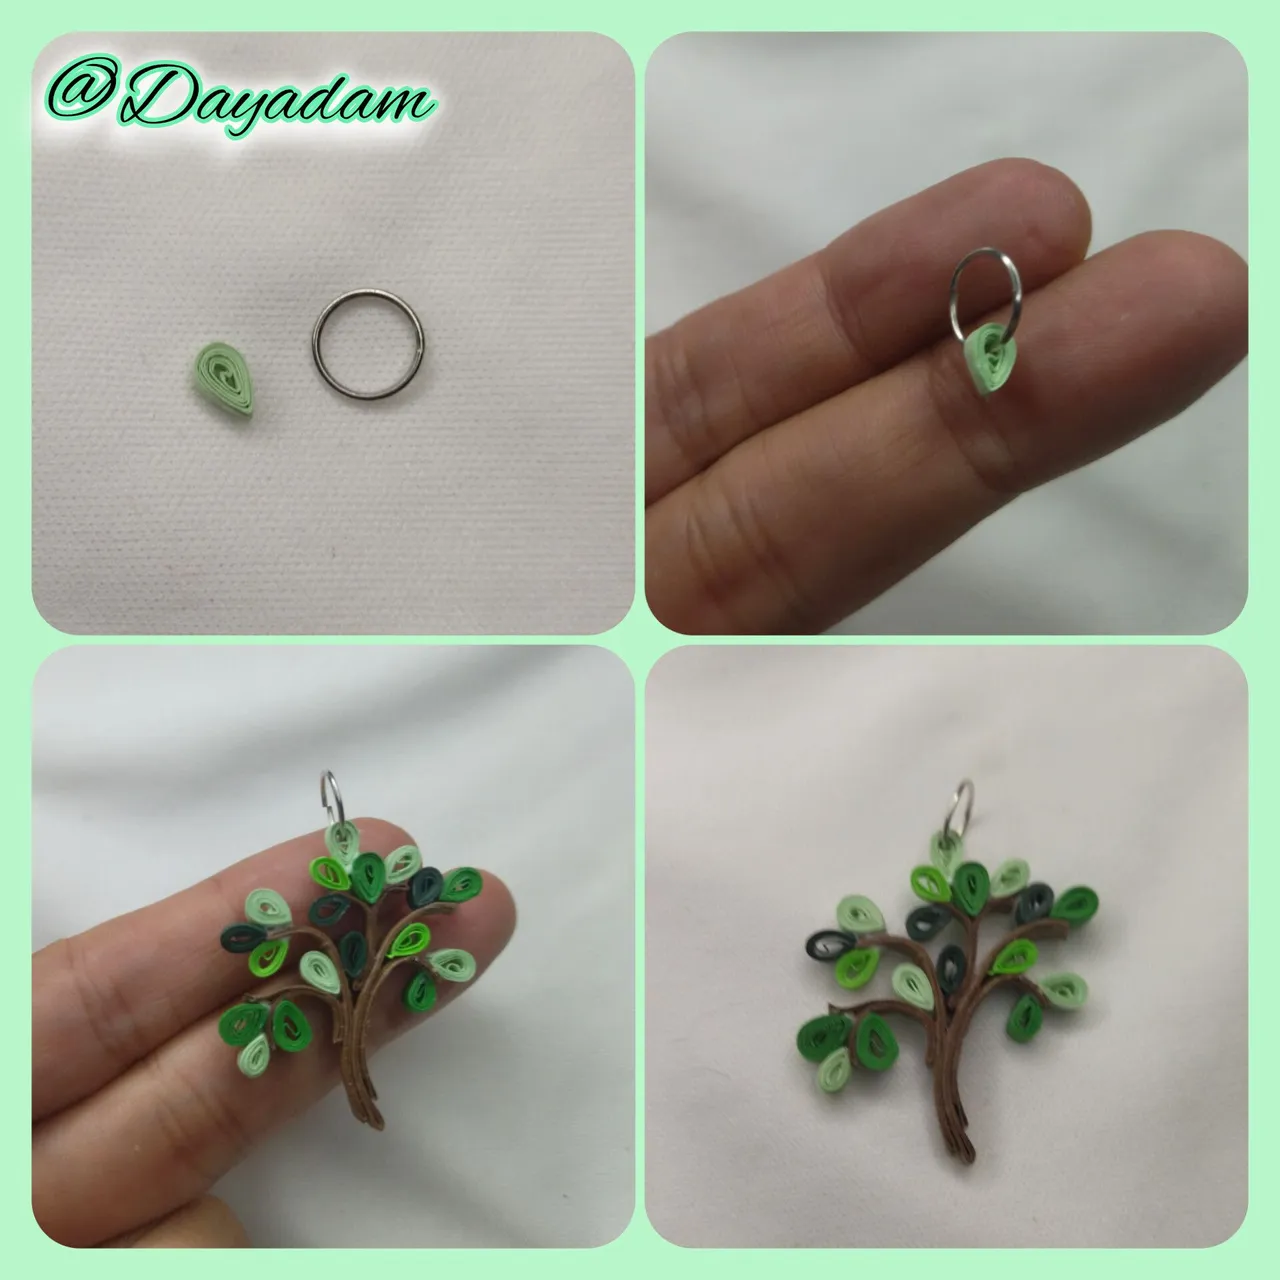
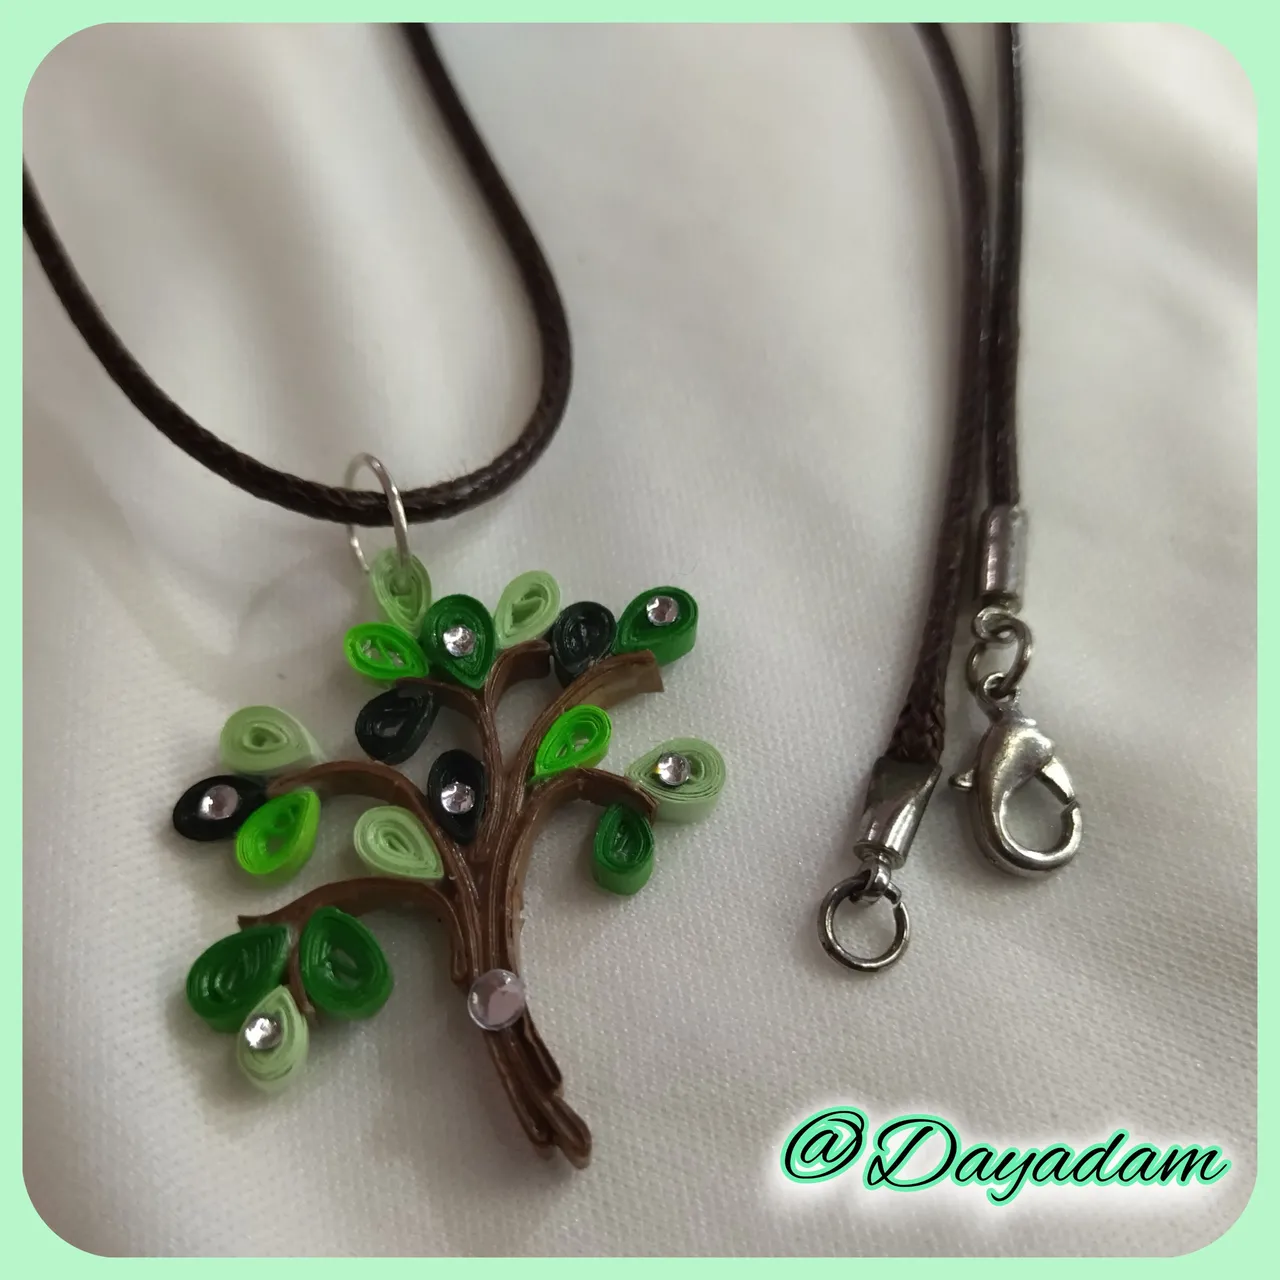
Take one of the leaves and incorporate a ring of costume jewelry, and glue it to the top of the tree already formed.
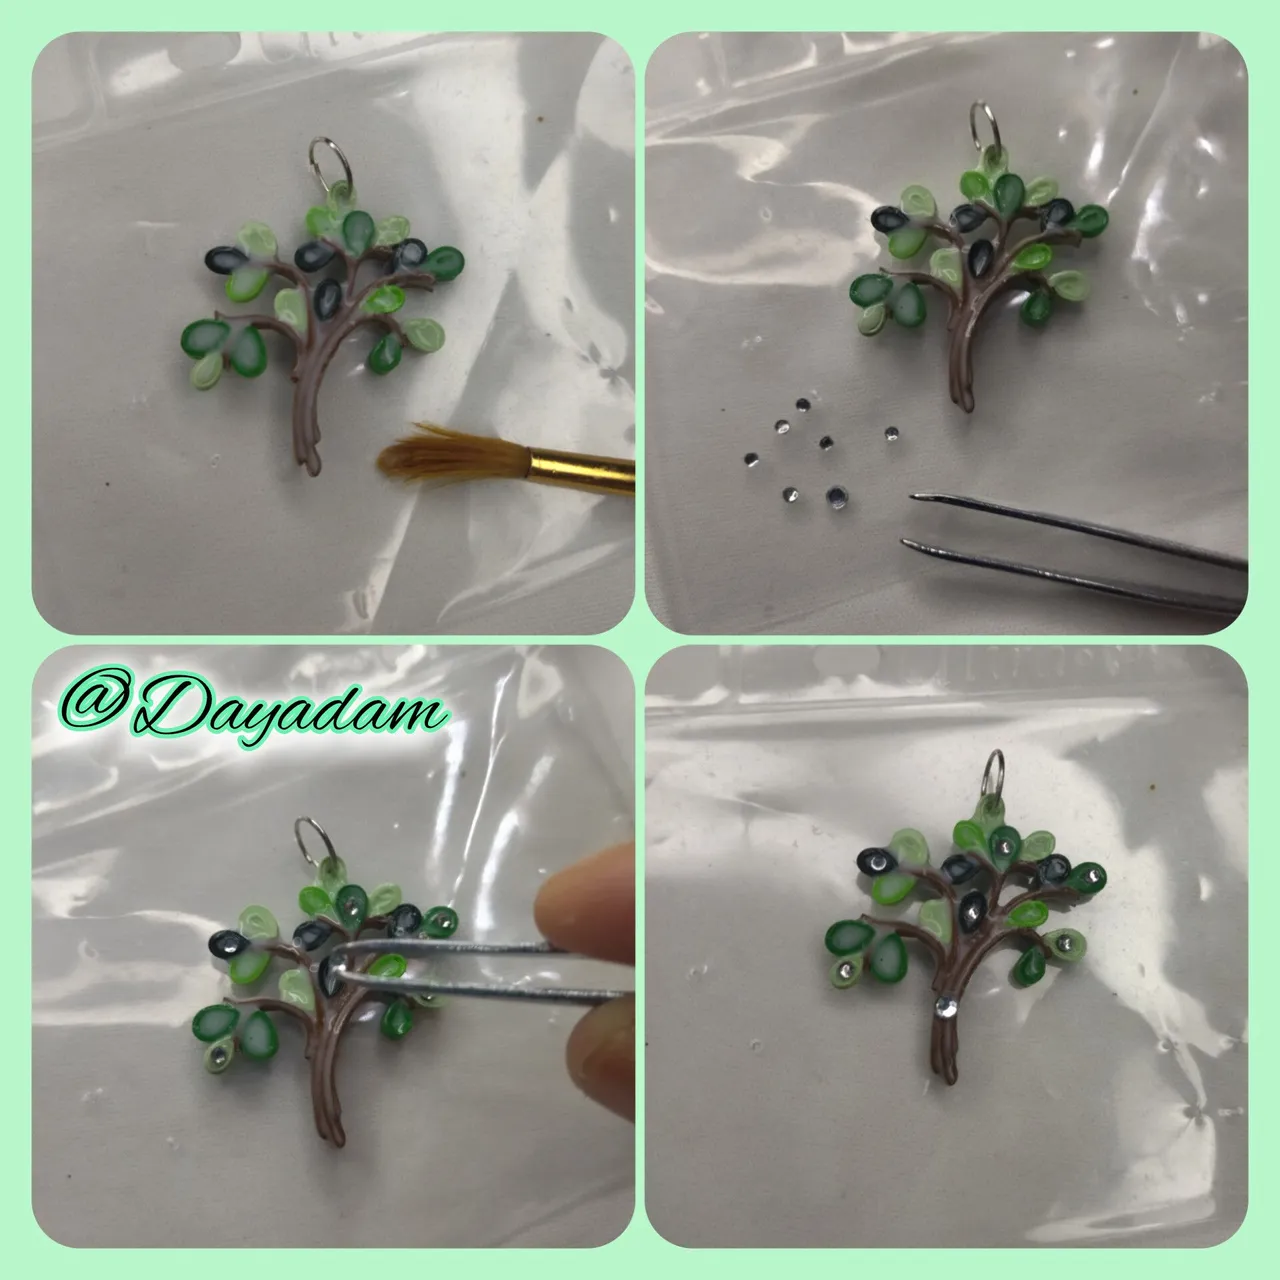
At this point I decided to apply another layer of glue to the finished piece to 'plasticize, protect and harden the pendant completely,
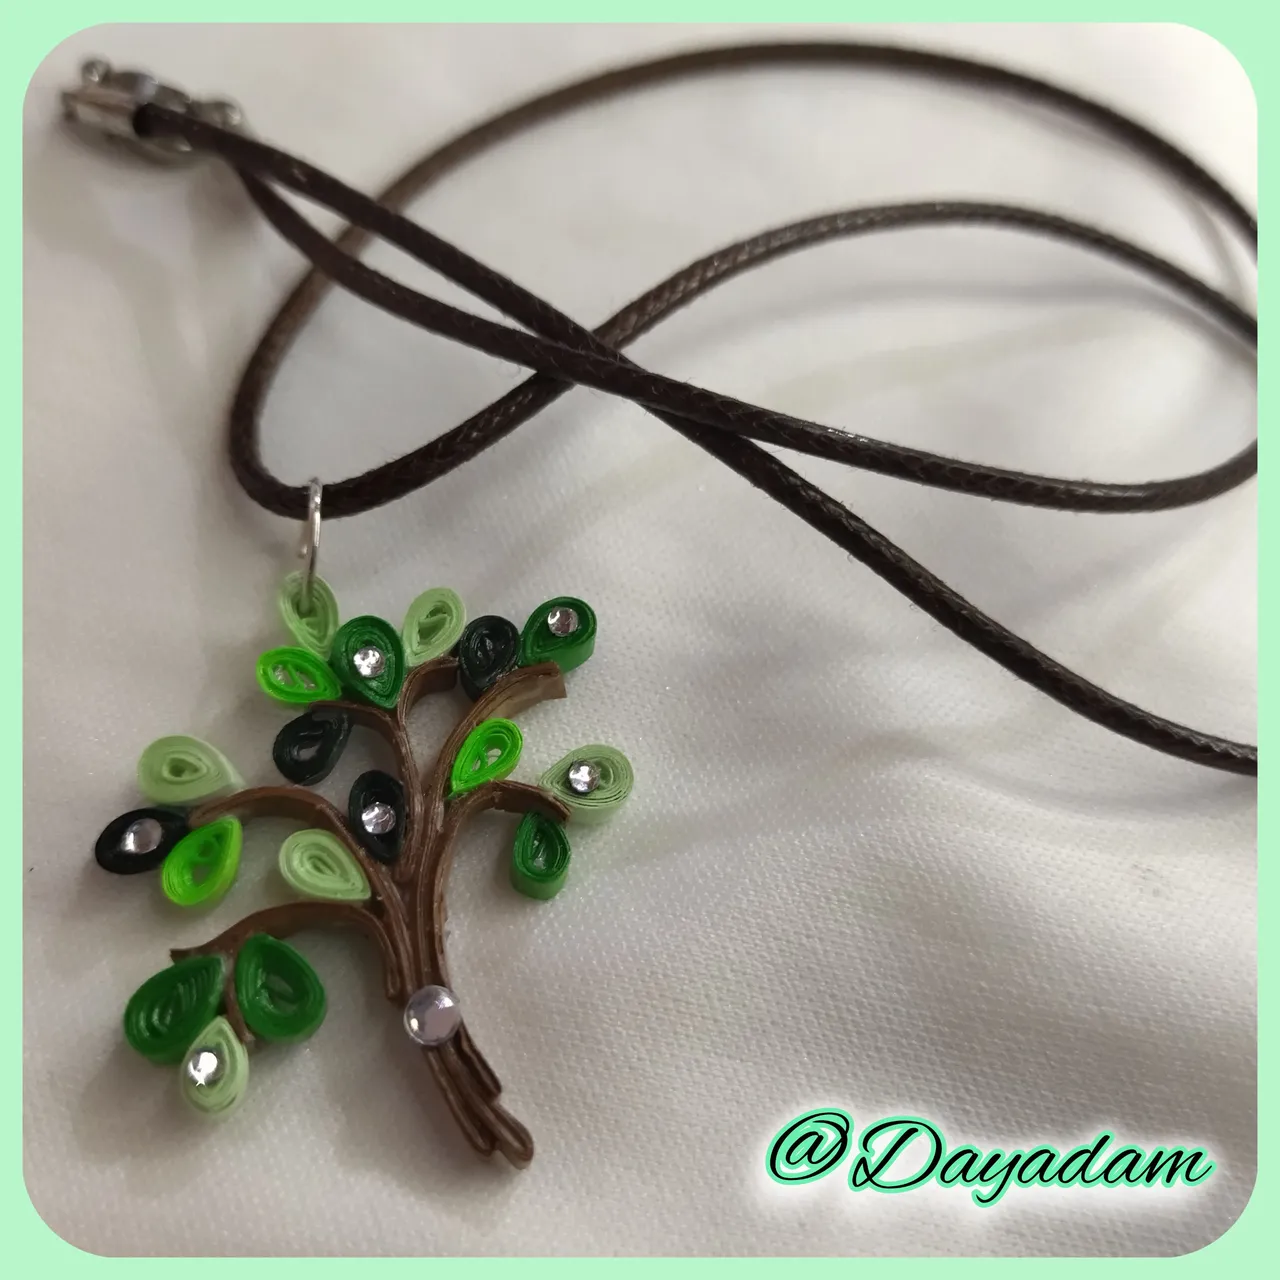
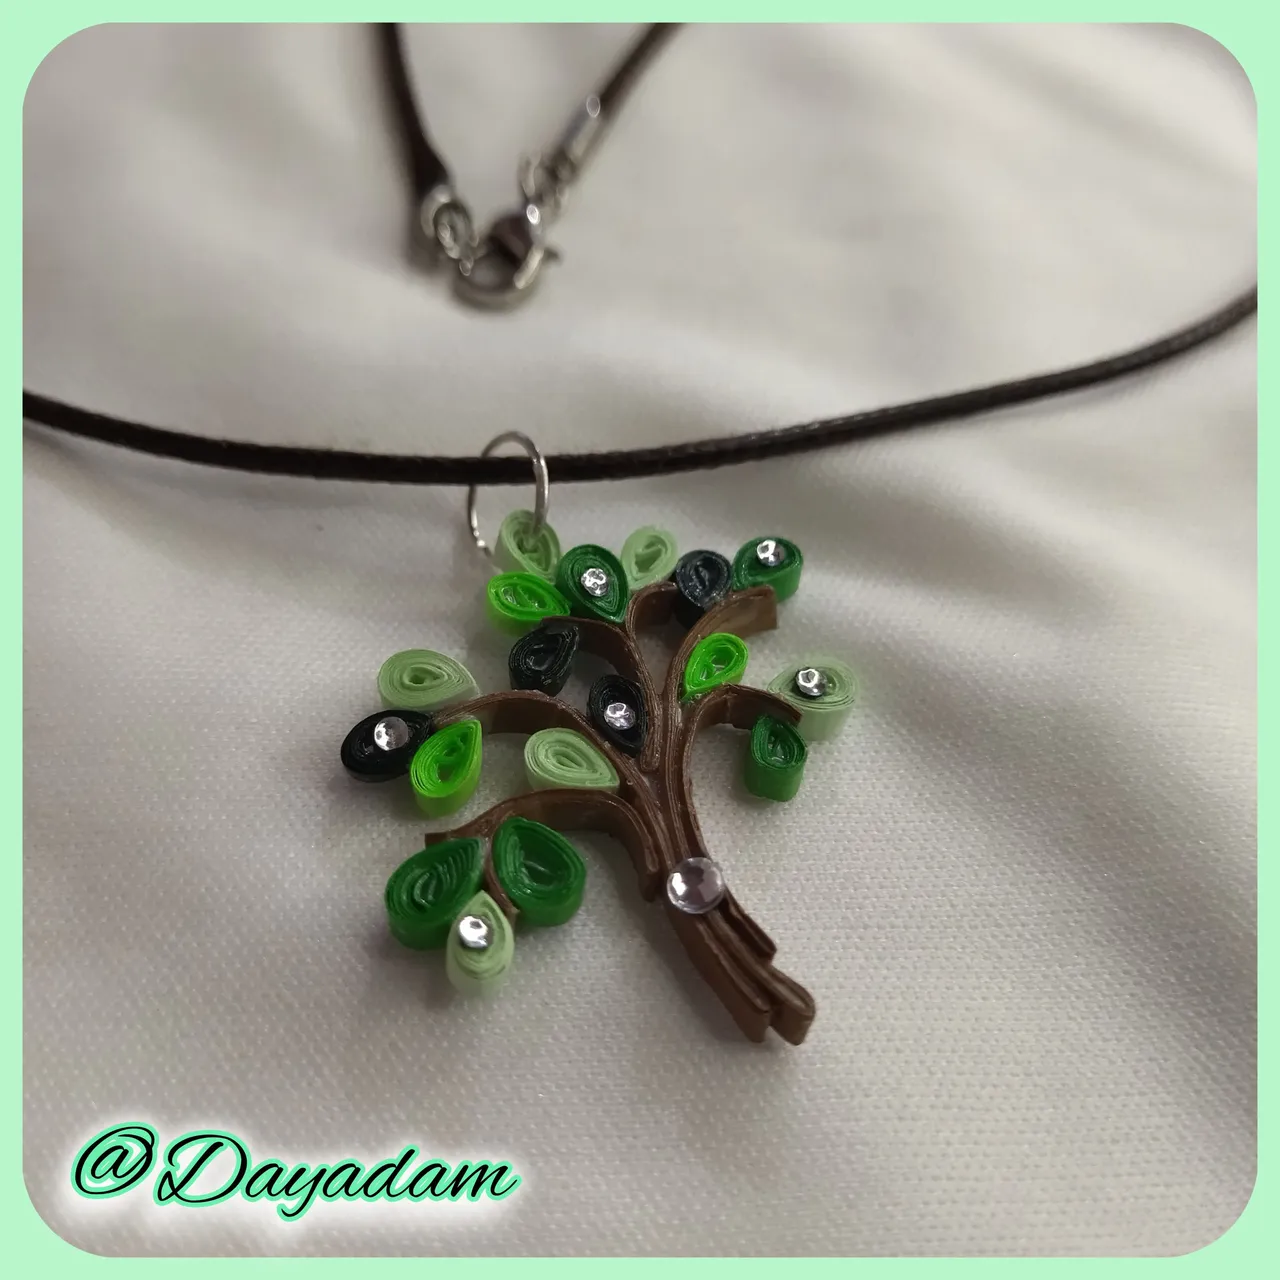
Before the pendant dried I placed in some points of the leaves and trunk, some small crystals of costume jewelry to give it more showiness.
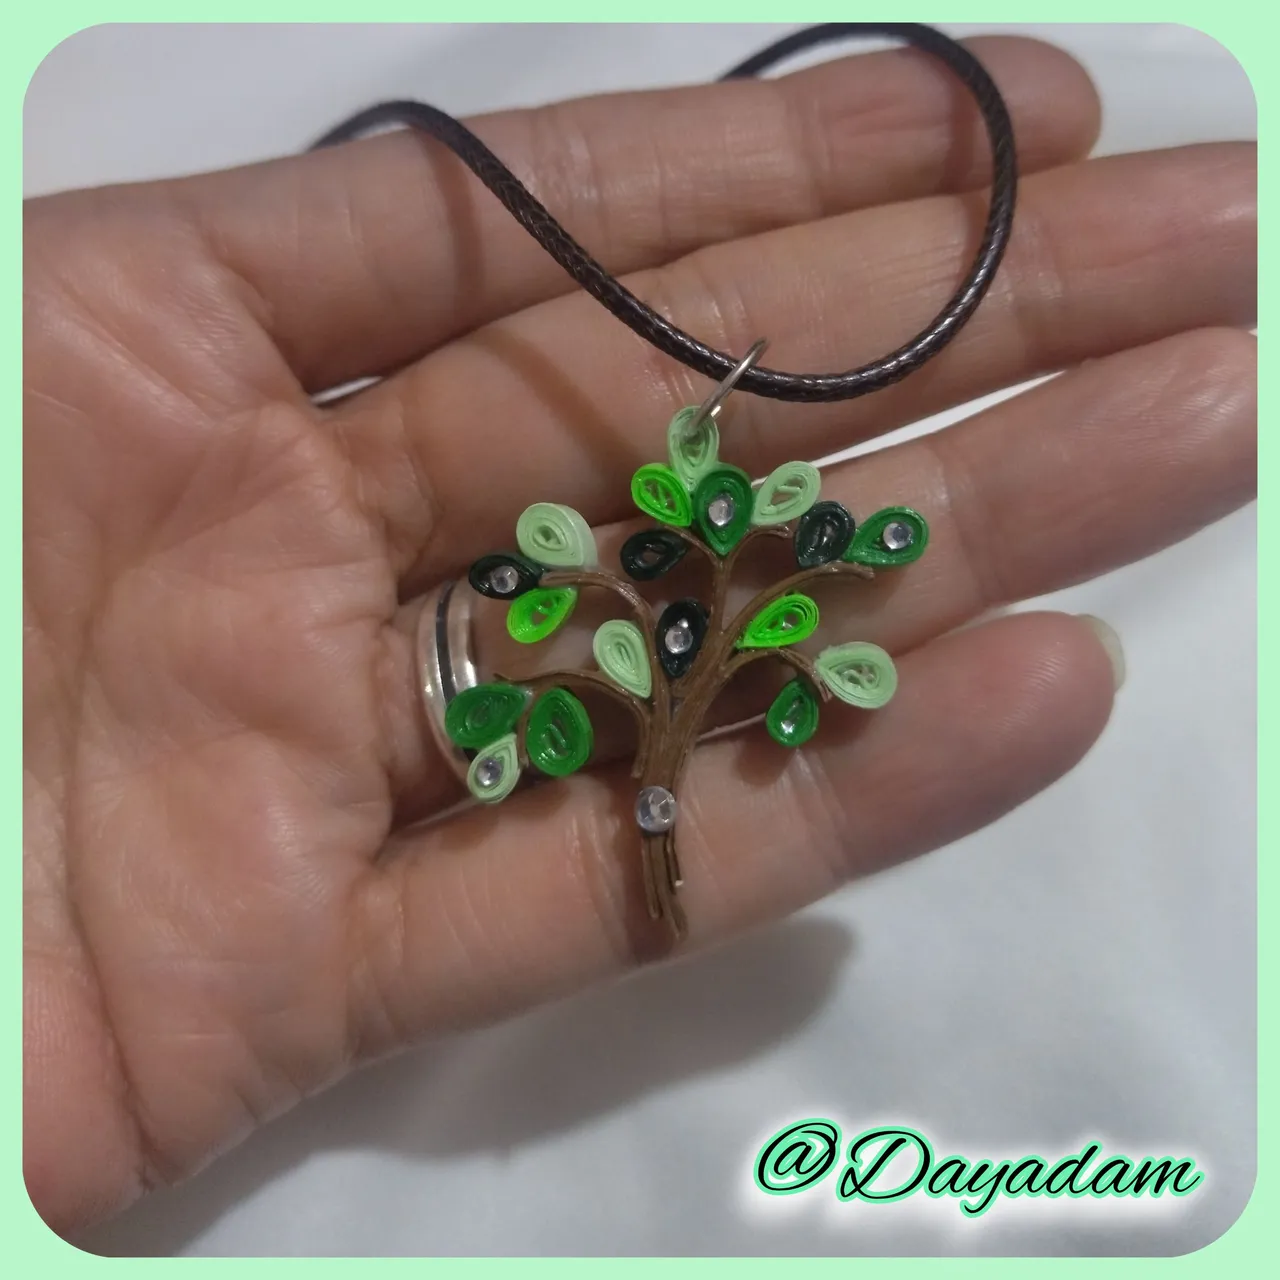
So we have this pendant for necklace in 2D in the quilling technique, of a tree to honor and commemorate the day of the tree.
• Tomamos cintas para quilling de 3mm de ancho de varias tonalidades de verde, con la ayuda de la aguja para quilling enrollaremos y formaremos pequeños círculos abiertos, luego los moldearemos en forma de hojas ogotaspellizacando con los dedos una de sus puntas. .
• Listas las hojas las iremos pegando de manera armónica, en la pieza del tronco y ramas que realice previamente.
• Tome una de las hojas y le incorpore una argolla de bisutería, y pegue en la parte de arriba del arbol ya formado.
• En este punto decidí aplicar otras capas de pega a la pieza terminada para ´plastificar, proteger y endurecer totalmente el dije,
• Antes de que secara el dije coloque en algunos puntos de las hojas y tronco, unos cristales de bisutería pequeños para darle mayor vistosidad.
De esta manera tenemos este dije para collar en 2D en la técnica de quilling, de un árbol para homenajear y conmemorar el día del árbol.


What did you think, did you like it?
I hope you did, I hope you liked my explanation, procedure and photos, I made them with love for you.
"Let out that muse that inspires you, and let your imagination fly".
Thank you all, see you next time...
¿Que les pareció, les gustó?
Espero que sí, que les haya gustado mi explicación, procedimiento y fotos, los hice con mucho cariño por y para ustedes.
"Deja salir esa musa que te inspira, y deja volar tu imaginación".
Gracias a todos, nos vemos en la próxima.
Todas las fotos usadas en este post son de mi autoría y han sido sacadas en mi celular personal un Redmi 9T y editadas en Canva y en Inshot Banner y separador hecho por mí en Canva Traducido con la ayuda de DeepL
