Hoy en dia quiero mostrarles un tutorial de como realizar una hermosa gargantilla con mostacillas, con colores muy llamativos y alegres para lucir en esta navidad.
A continuación les estaré presente los materiales utilizados para la elaboración de esta hermosa gargantilla navideña:
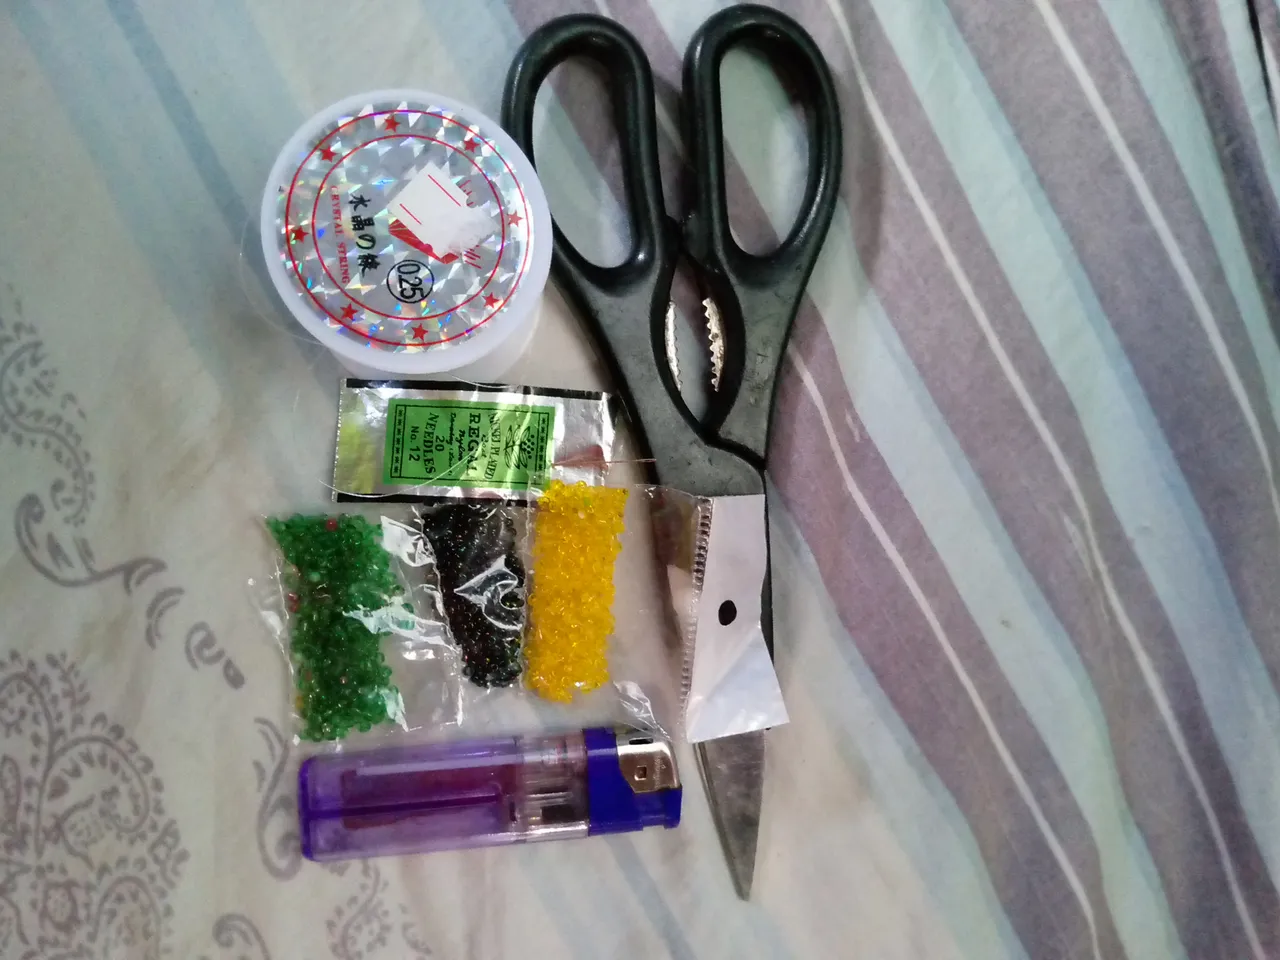
MATERIALES
- Mostacillas Amarillas
- Mostacillas de color Verde
- Mostacillas Negras
- Nylon nro 0.25
- Aguja nro 12
- Encendedor
- 1 Tijeras
- 1 perla
PASO A PASO
Los pasos a seguir para la realización de esta hermosa gargantilla son los siguientes:
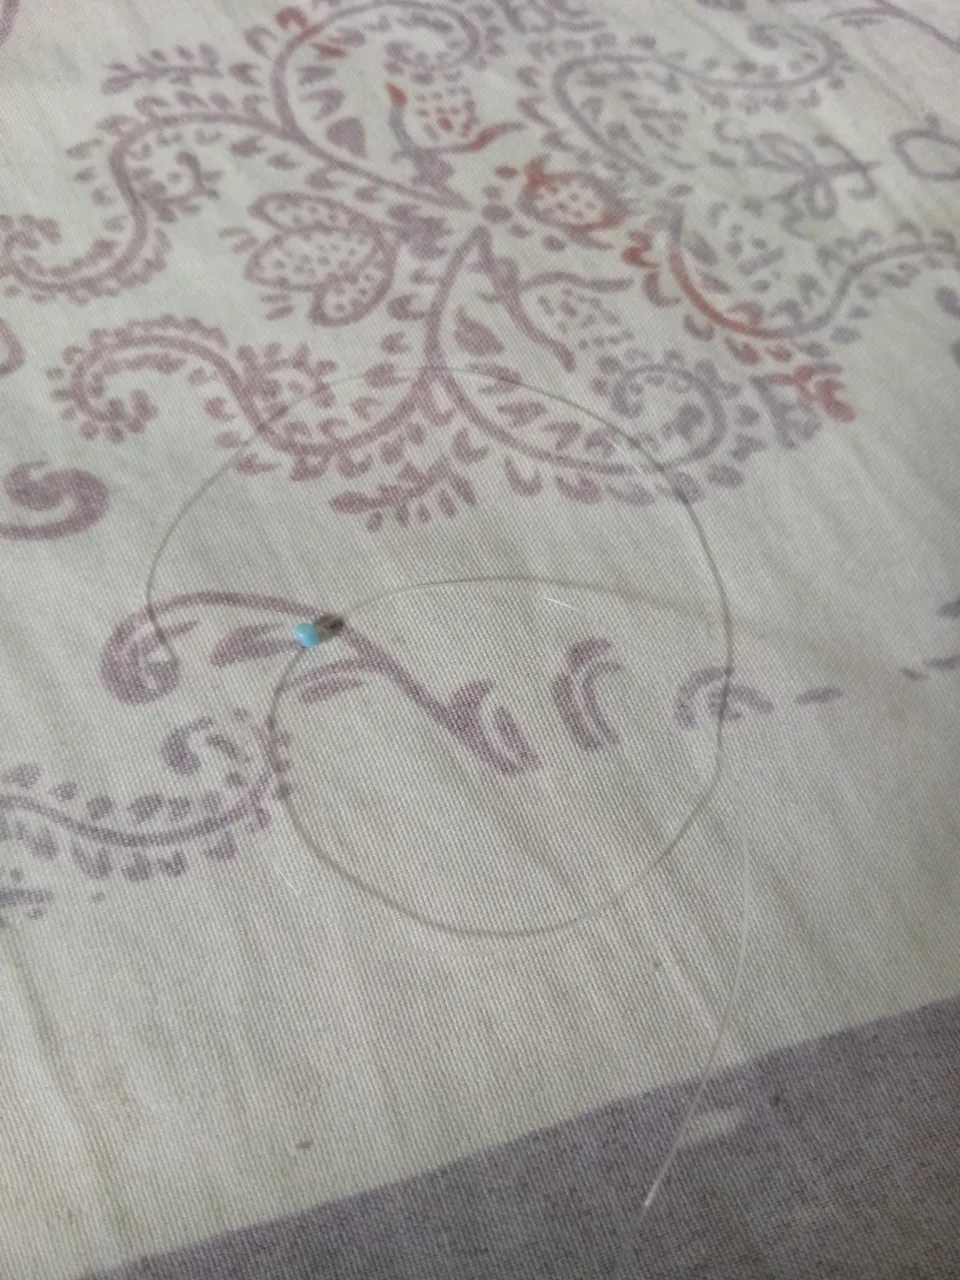
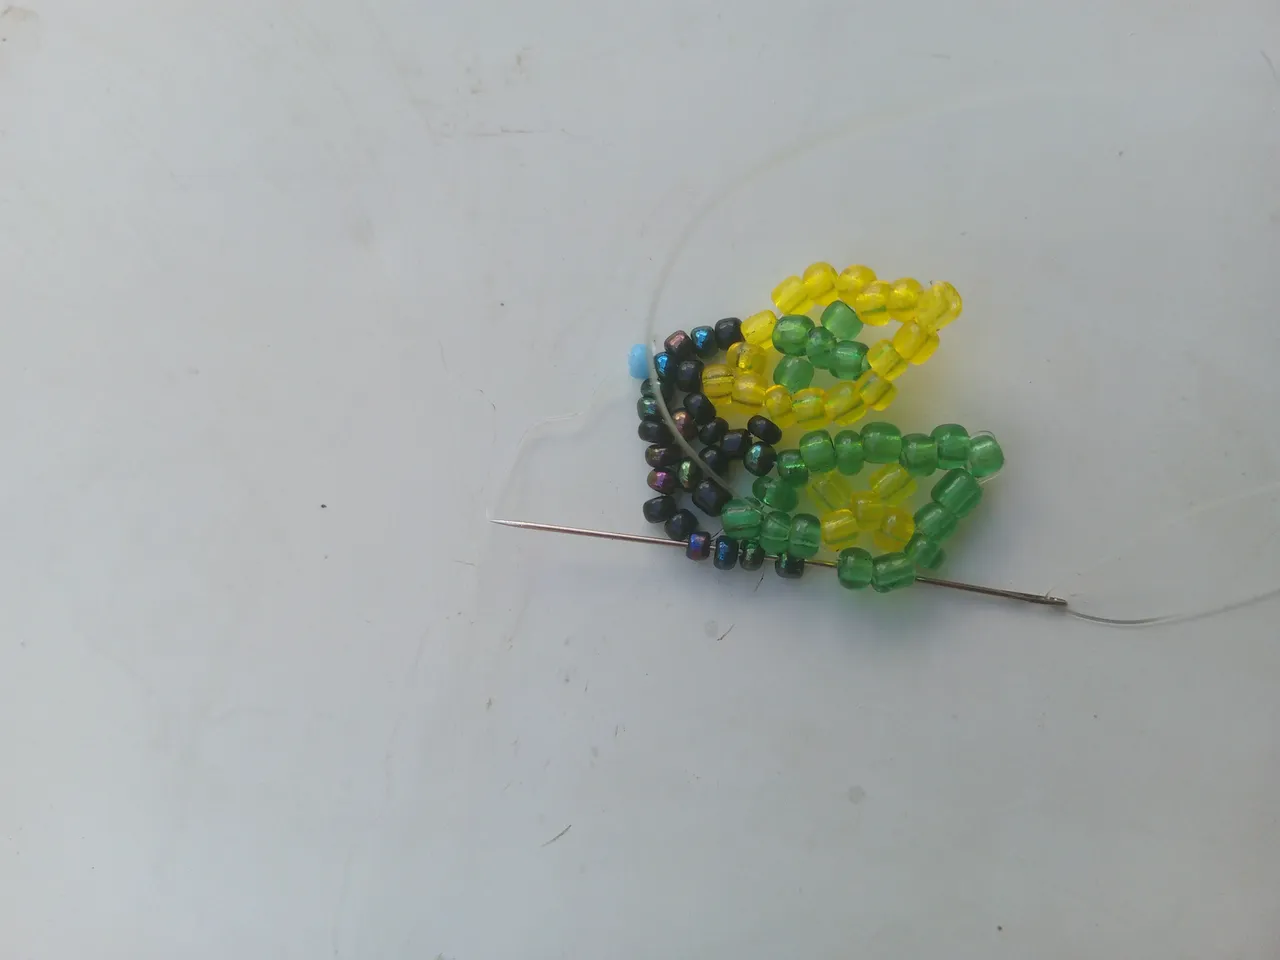
Paso 1
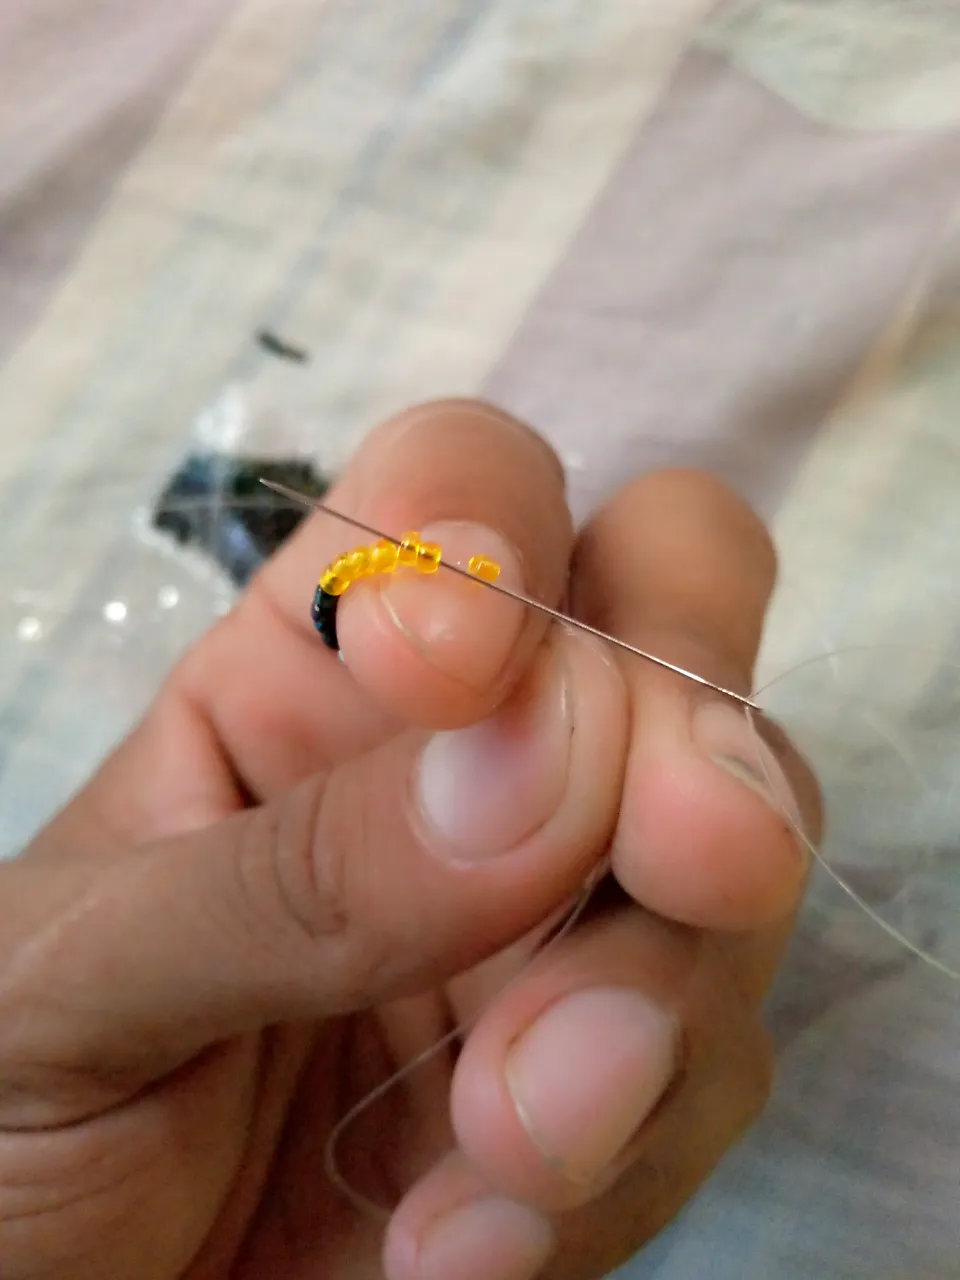
Vamos a tomar un aproximado de 200cm de naylon, lo introciremos en nuestra aguja para tomar una mostacilla de cualquier color, esta para que sirva de soporte, yo utilice una azul para diferenciar los colores, dejaremos un aproximado de 10cm de naylon sobrantes.
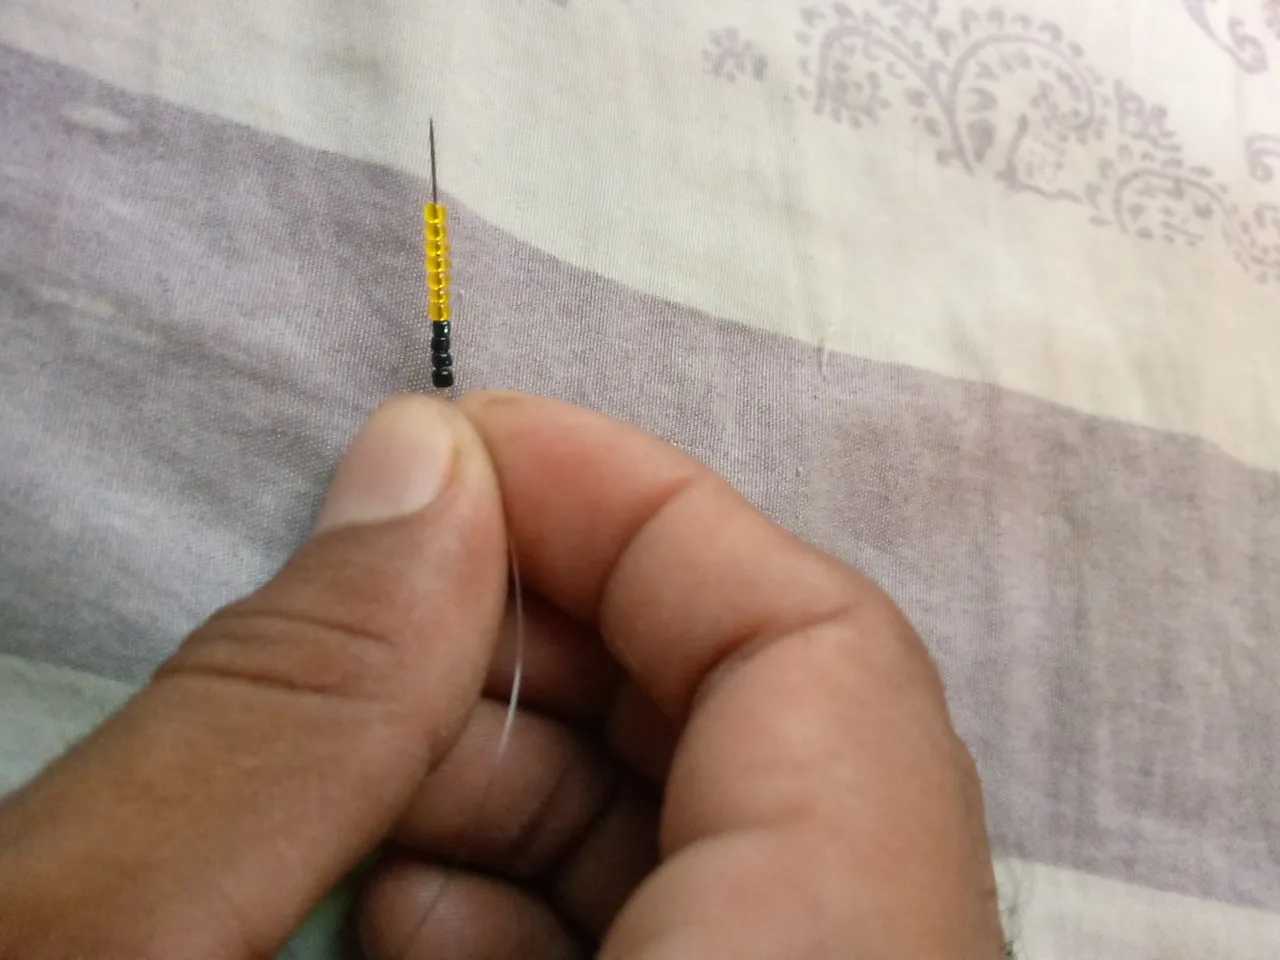
Luego vamos a introducir 4 mostacillas negras y 7 mostacillas amarillas, llevaremos nuestras mostacillas al final, donde esta el soporte.
Luego de llevar las mostacillas abajo, de arriba hacia bajo, saltaremos 1mostacilla amarilla, introducimos la aguja en la siguiente, luego contaremos 2 mostacillas y sacamos nuestro nylon.
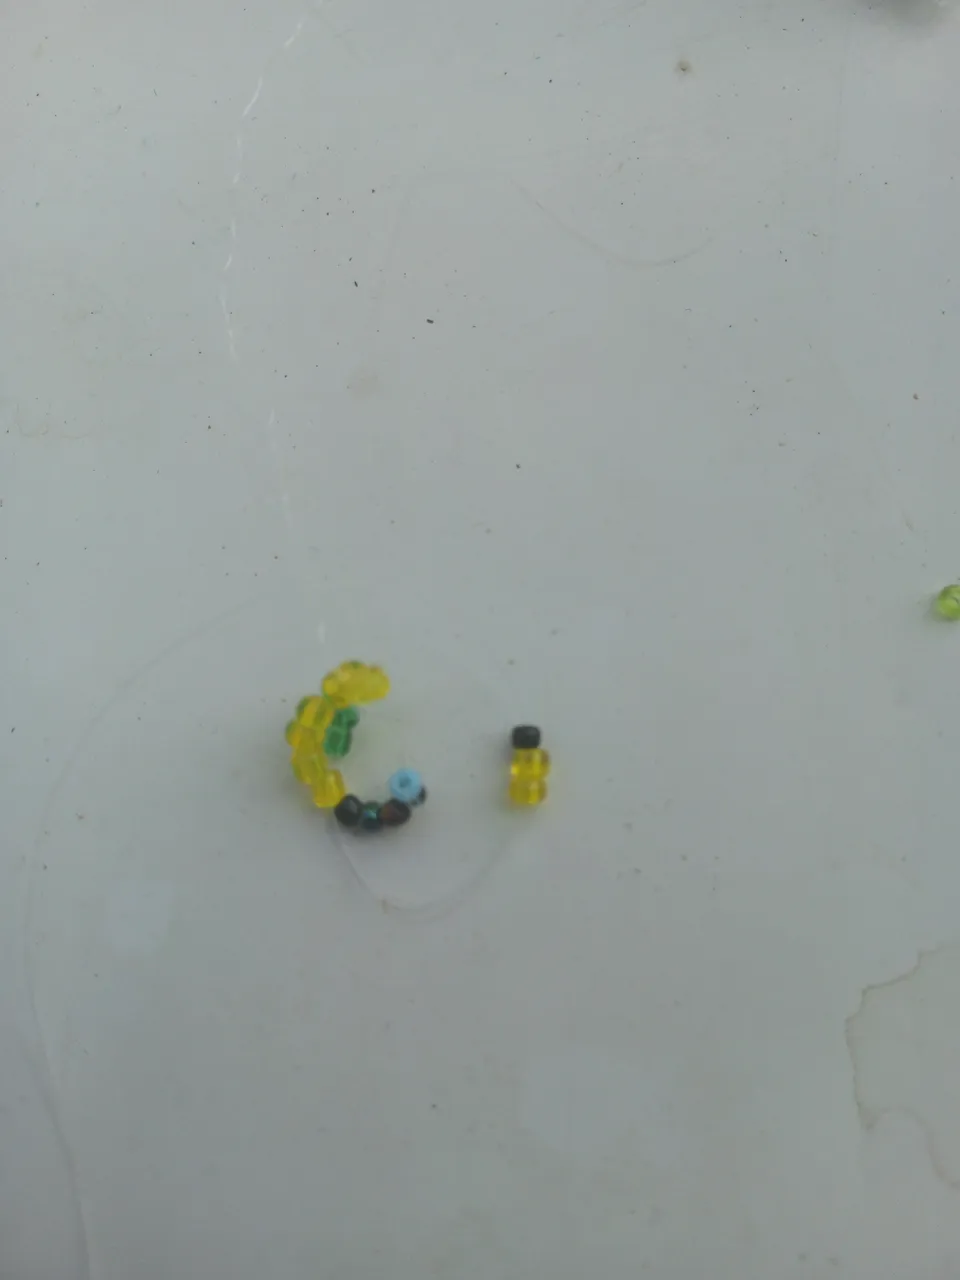
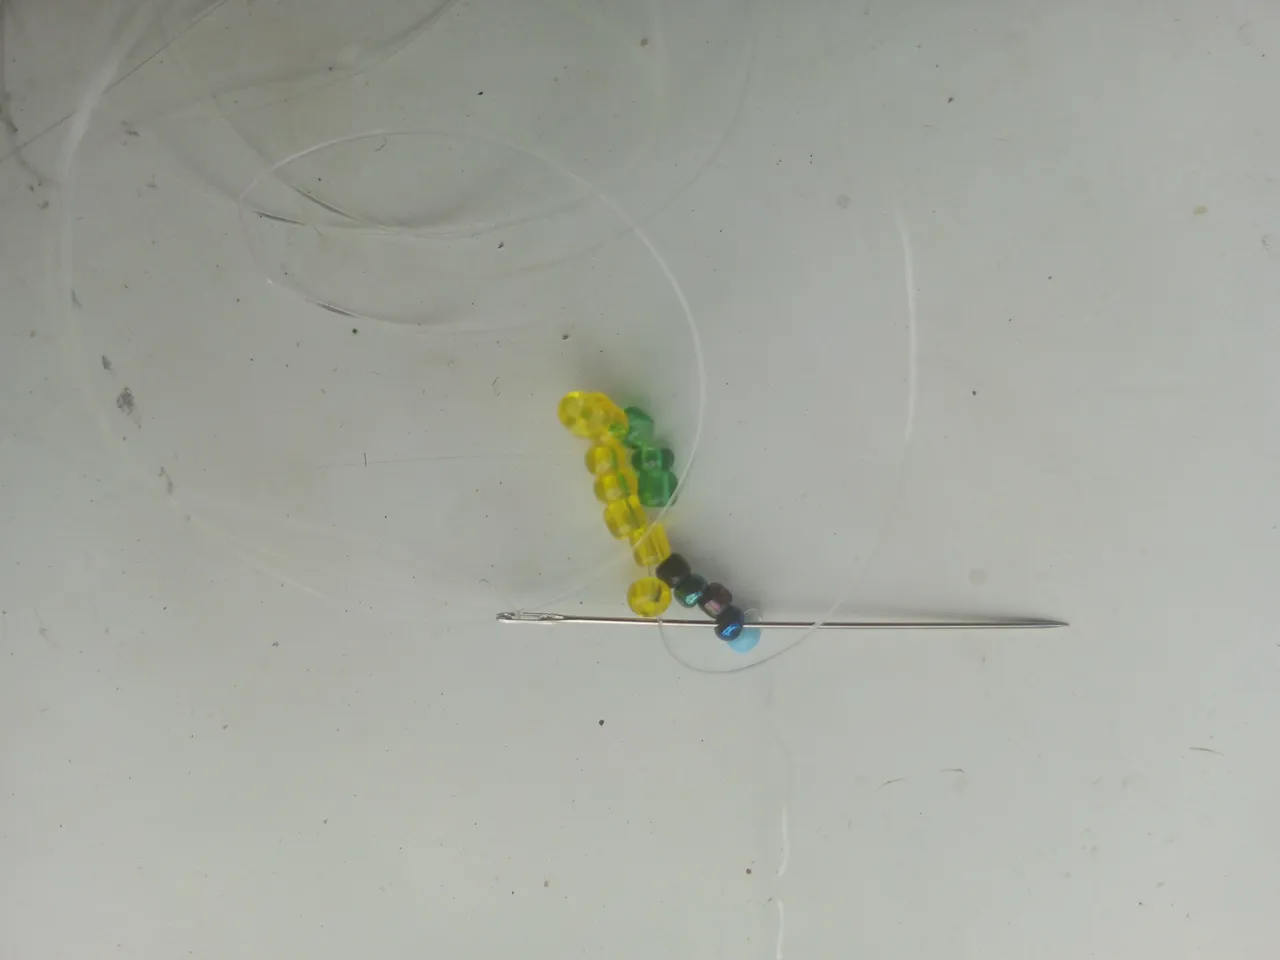
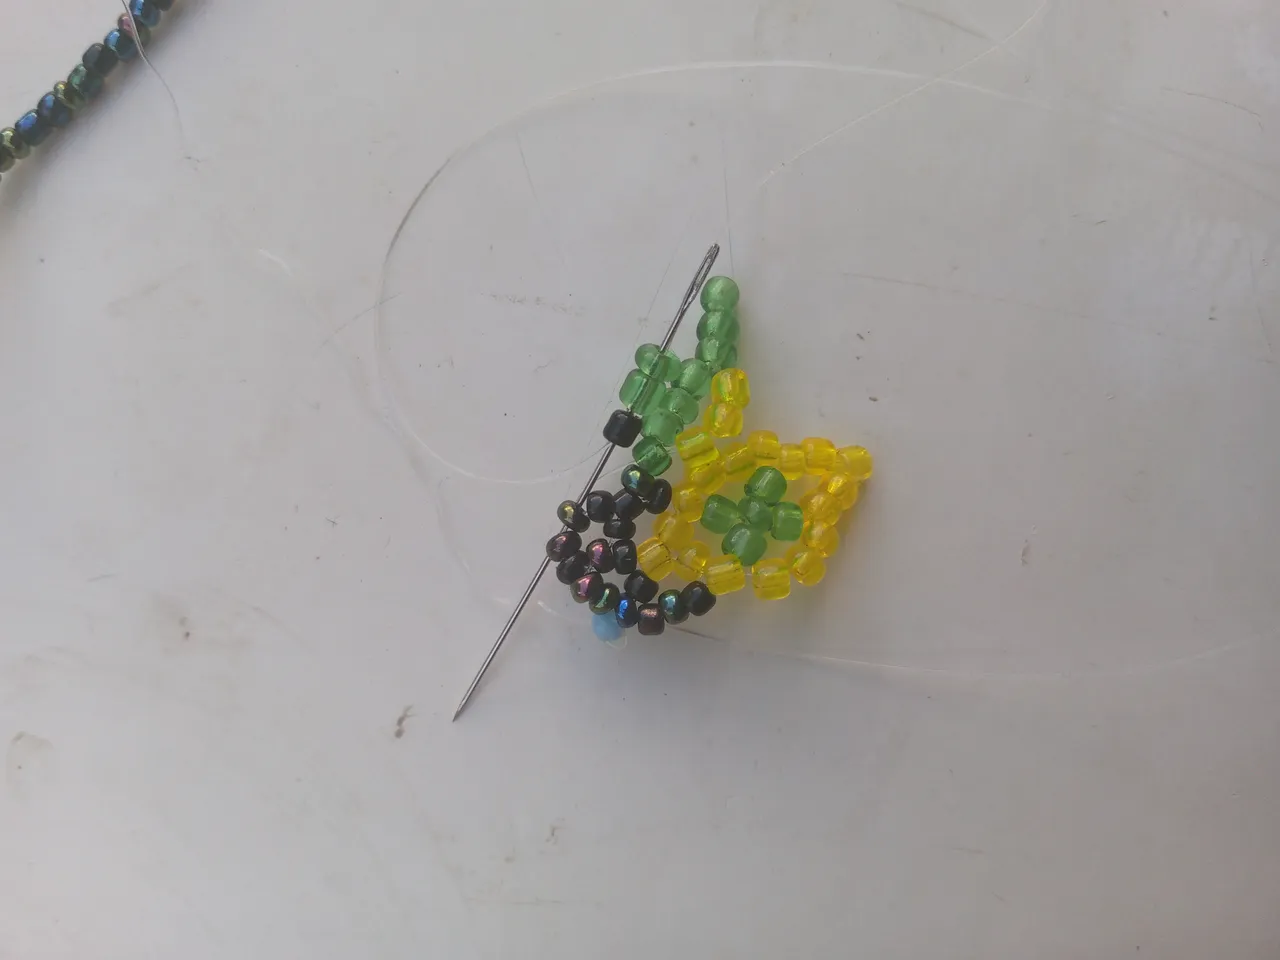
Posteriormente tomaremos 3 mostacillas de color verde, esta vez pasaremos la aguja por la ultima mostacilla amarilla


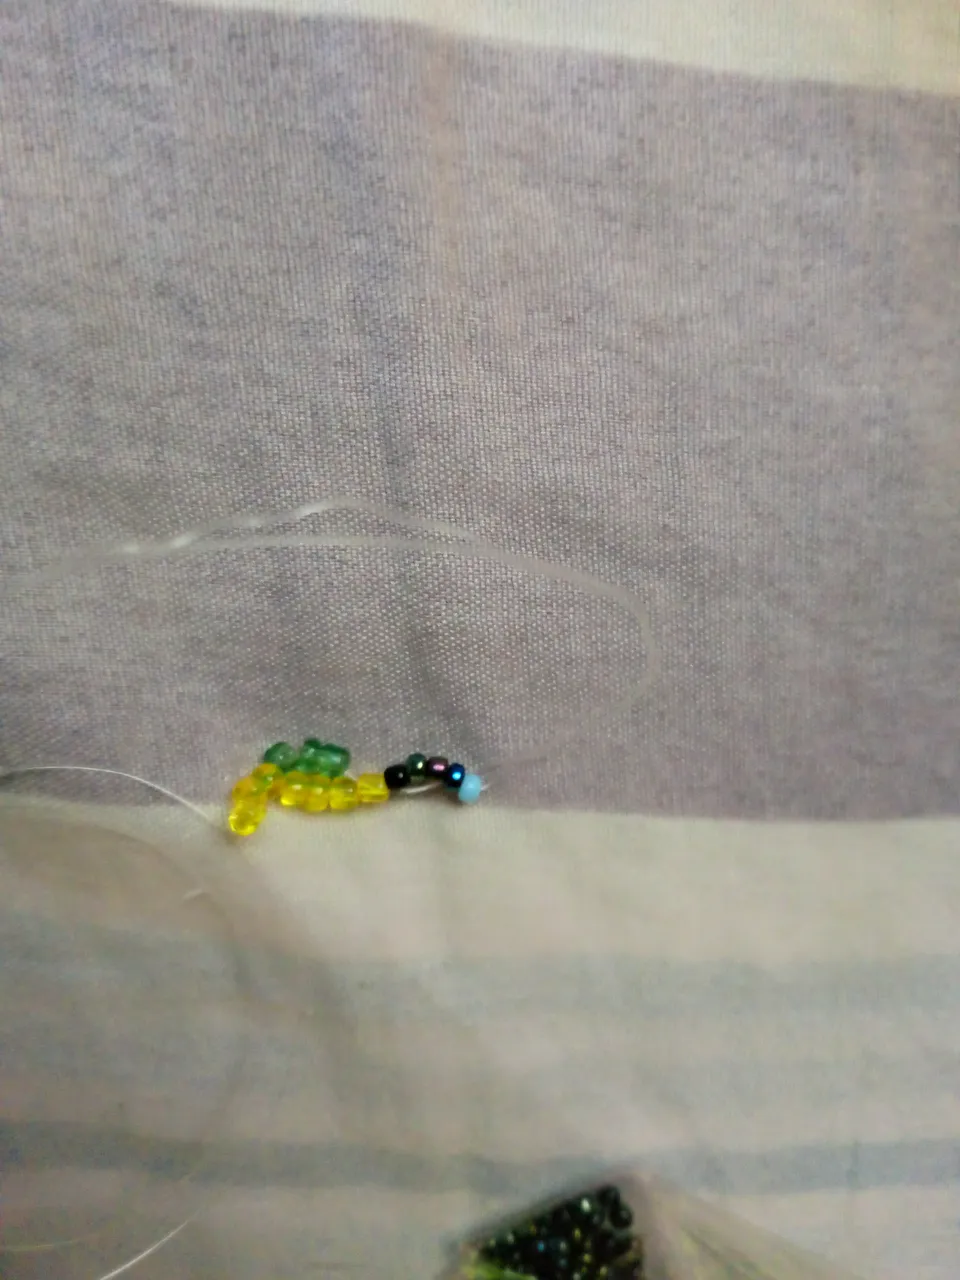
Vamos a tomar 2 mostacillas amarillas y 1 mostacilla negra, pasaremos nuestra aguja con nylon por la última mostacilla negra.
Luego tomaremos 4 mostacillas de color negro, subiremos de igual manera, con nuestra aguja pasaremos por la mostacillas amarilla, esta es la segunda de las 3 q acabamos de meter.
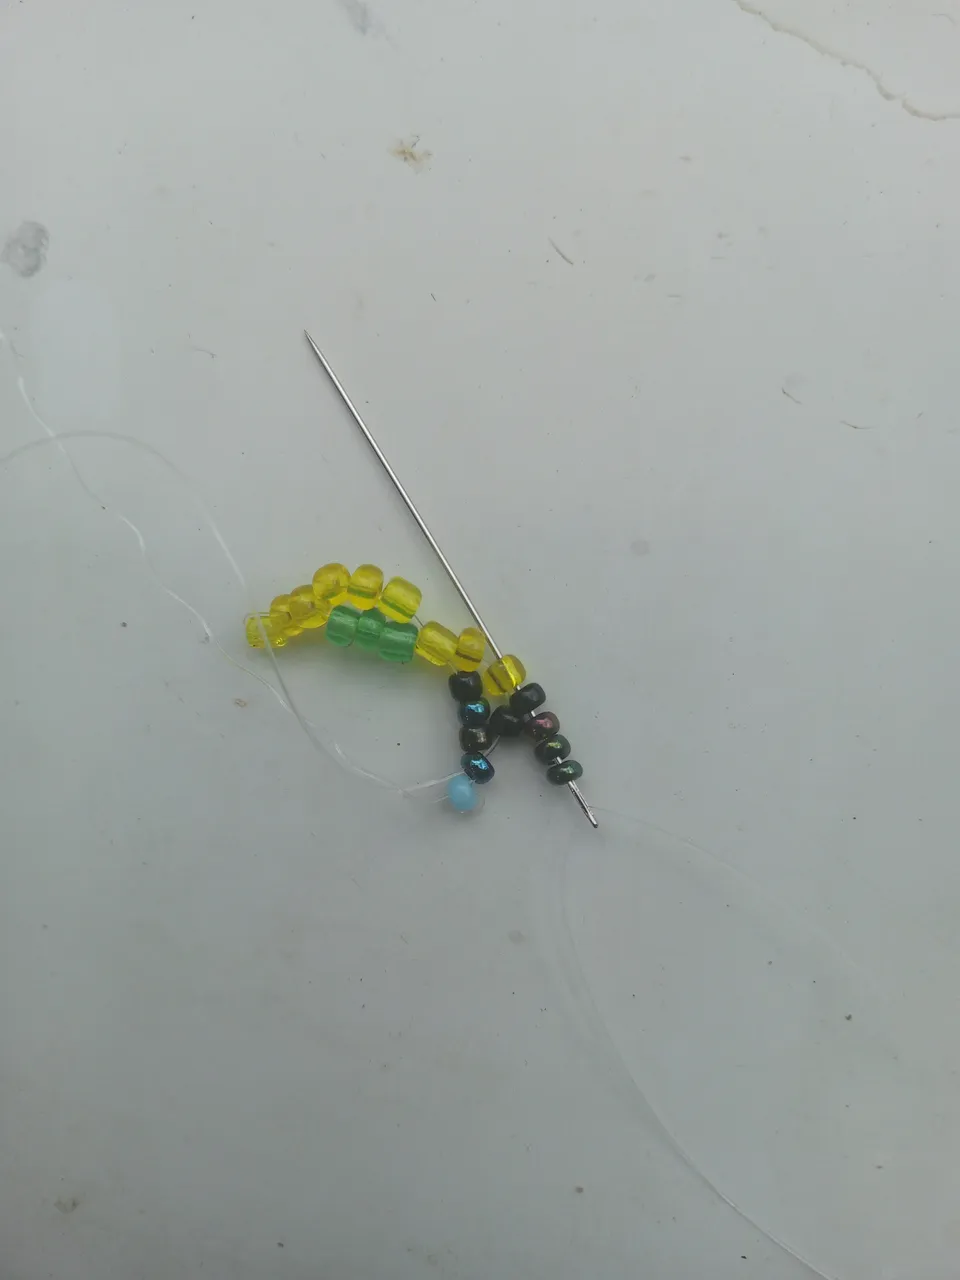
Seguidamente tomamos 2 mostacillas amarillas y 1 mostacilla verde, vamos a introducir nuetra aguja por la segunda mostacilla verde

Después tomaremos 1 mostacilla verde y 2 de color amarillo, introducimos por la mostacilla que esta en la parte superior, luego para devolvernos, saltamos la primera mostacilla y introducimos la aguja por la siguiente mostacilla, para asi contar 2 mostacillas y sacar nuestro nylon.
Vamos a tomar 3 mostacillas amarilla, pasaremos la aguja con el nylon por la siguiente mostacillas del mismo color

Vamos a tomar 3 mostacillas negras y pasamos la aguja de arriba hacia bajo por la mostacilla negra que esta en el medio, asi tendremos listo el primer paso de nuesttro hermosa gargantilla

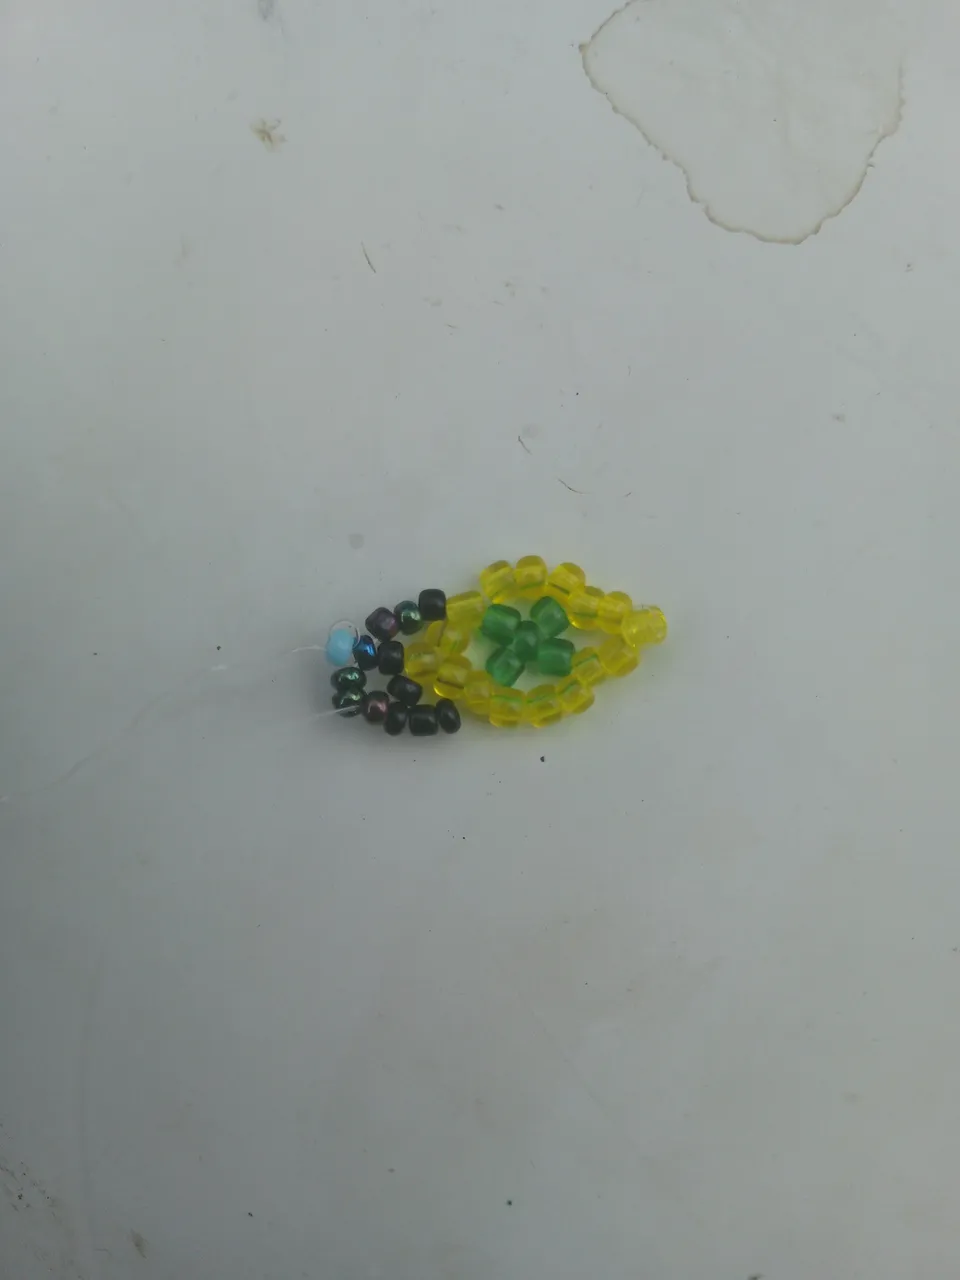
** Paso 2**
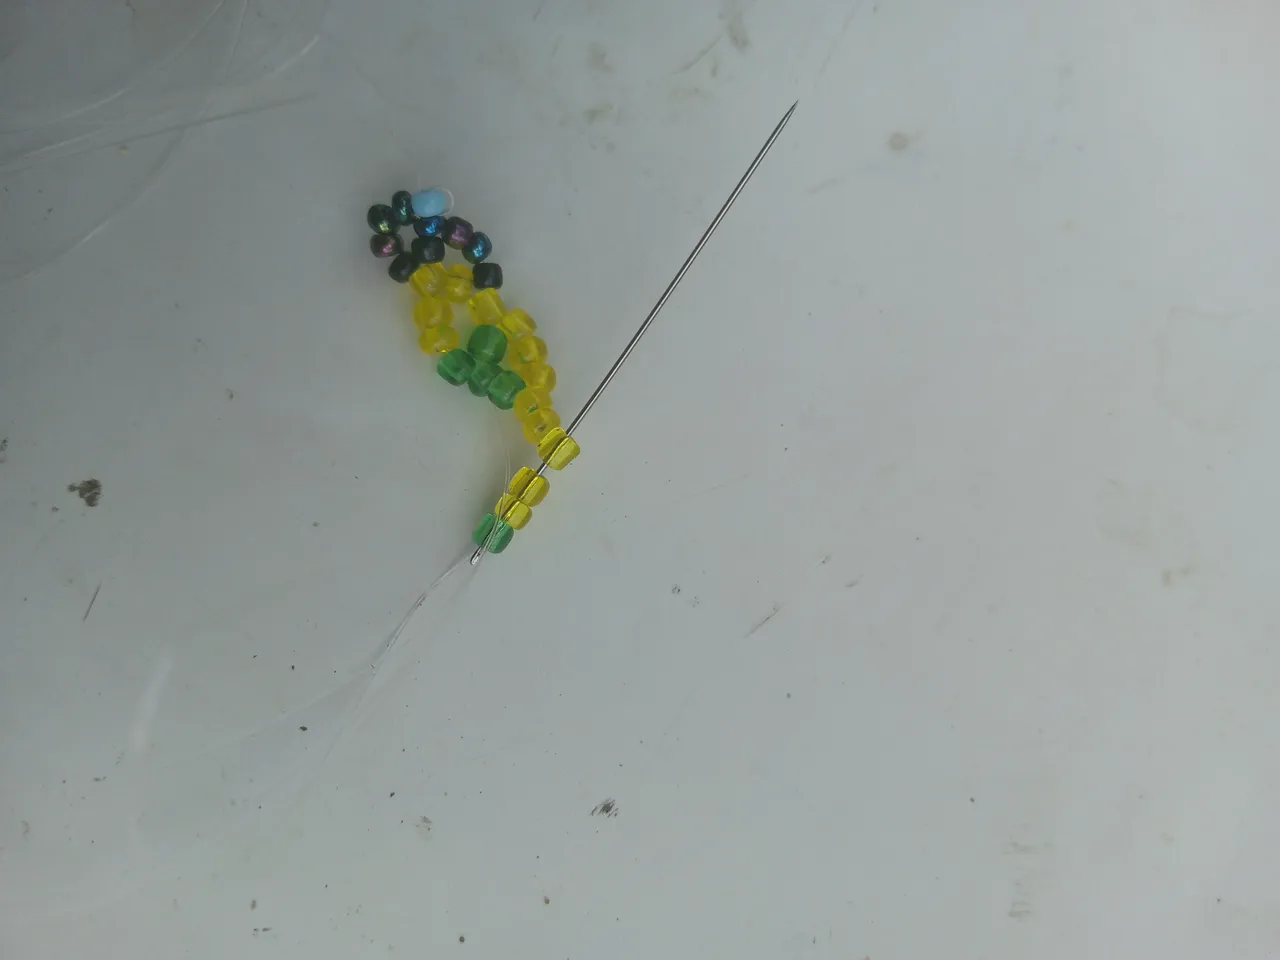
Para seguir con la secuencia, tomaremos 4 mostacillas de color negro, y pasaremos nuestra aguja por la segunda de las tres que colocamos en el paso anterior.

Ahora vamos a colocar 1 mostacilla negra y luego 7 mostacillas de color verde, lo que haremos sera repetir el mismo proceso del anterior pero esta vez con mostacillas de diferente color
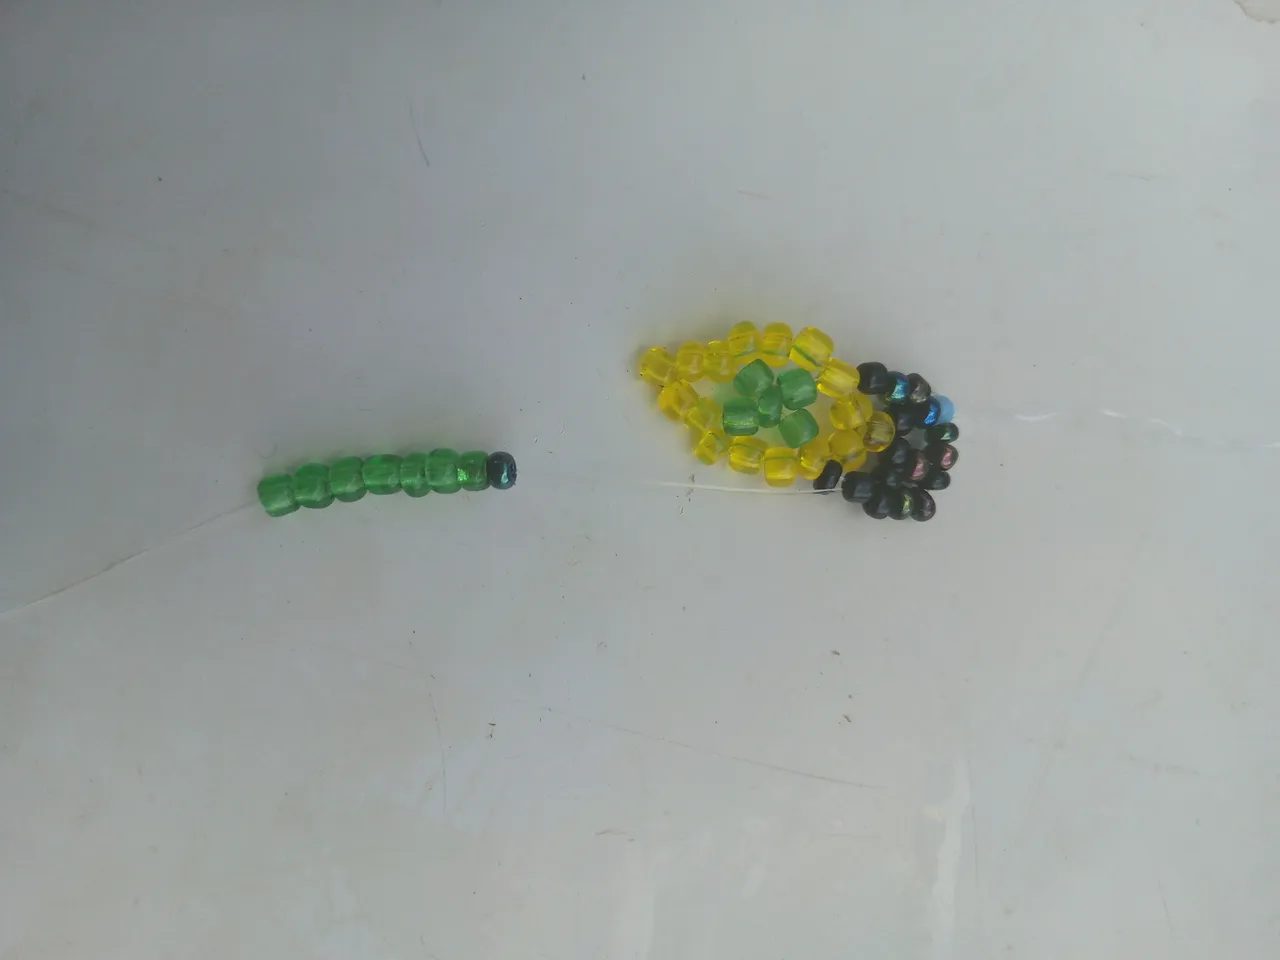
Vamos saltar 1mostacilla verde, introducimos la aguja en la siguiente mostacilla, luego contaremos 2 mostacillas y sacamos nuestro nylon.
Tomaremos 3 mostacillas de color amarillo y vamos a introducir la aguja por la última mostacilla verde
Luego tomaremos 2 mostacillas verde y 1 mostacilla negra, vamos a introducir la aguja por la tercera mostacilla negra de esta manera
Igualmente vamos a tomar 4 mostacillas negras y vamos a introducir la aguja con el nylon por la segunda mostacilla de las 3 que introducimos anteriormente, esta sera la de color verde.
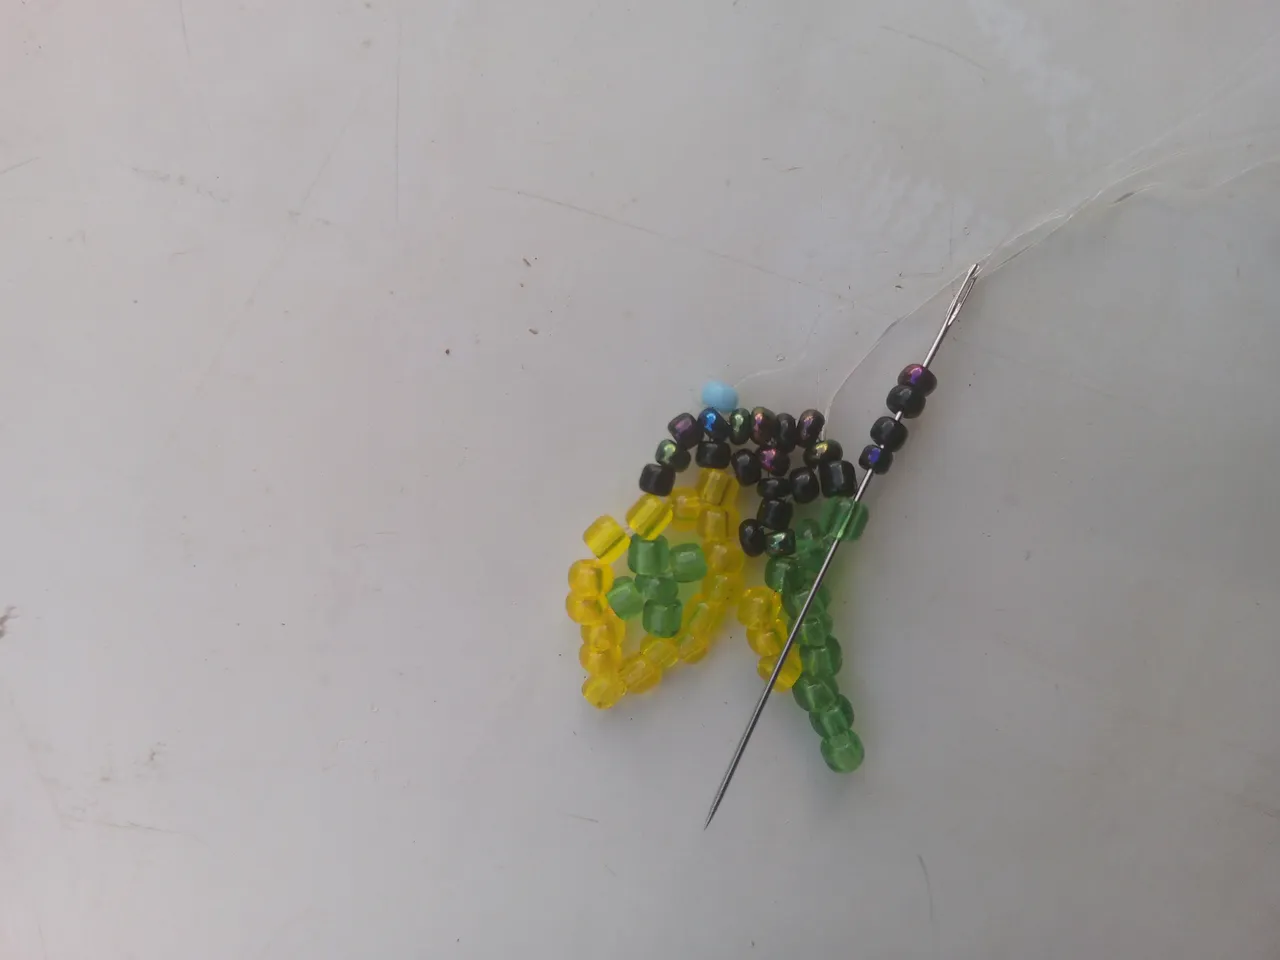
Ahora tomaremos 2 mostacillas verde y 1 mostacilla amarilla, vamos a introducir el nylon por el centro de las 3 mostacillas amarillas.
Después tomamos 1 mostacilla amarilla y luego 2 mostacillas verde, para introducir la aguja por la mostacilla que esta el la parte superior, introducimos el nylon y salimos por las 2 mostacillas de color verde

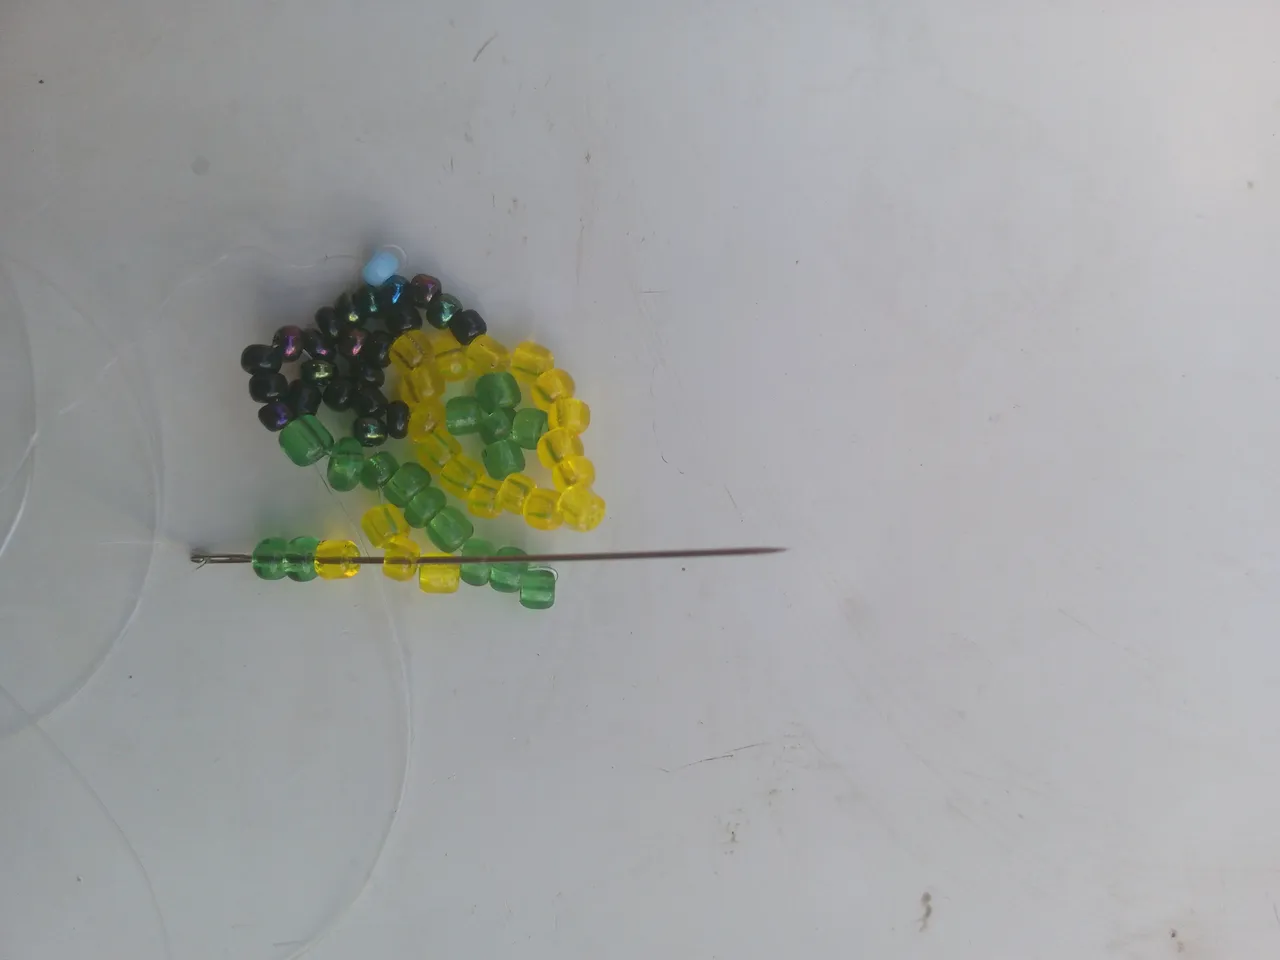
Colocaremos 3 mostacillas de color verde y pasando la aguja por las siguientes mostacillas verde, vamos a tomar 3 mostacillas negras y pasando la aguja de arriba hacia bajo por la mostacilla negra que esta en el medio tendremos nuestro segundo paso listo
Para seguir con la secuencia, tomaremos 4 mostacillas de color negro y introduciremos por el medio de las 3 mostacillas que acabamos de colocar
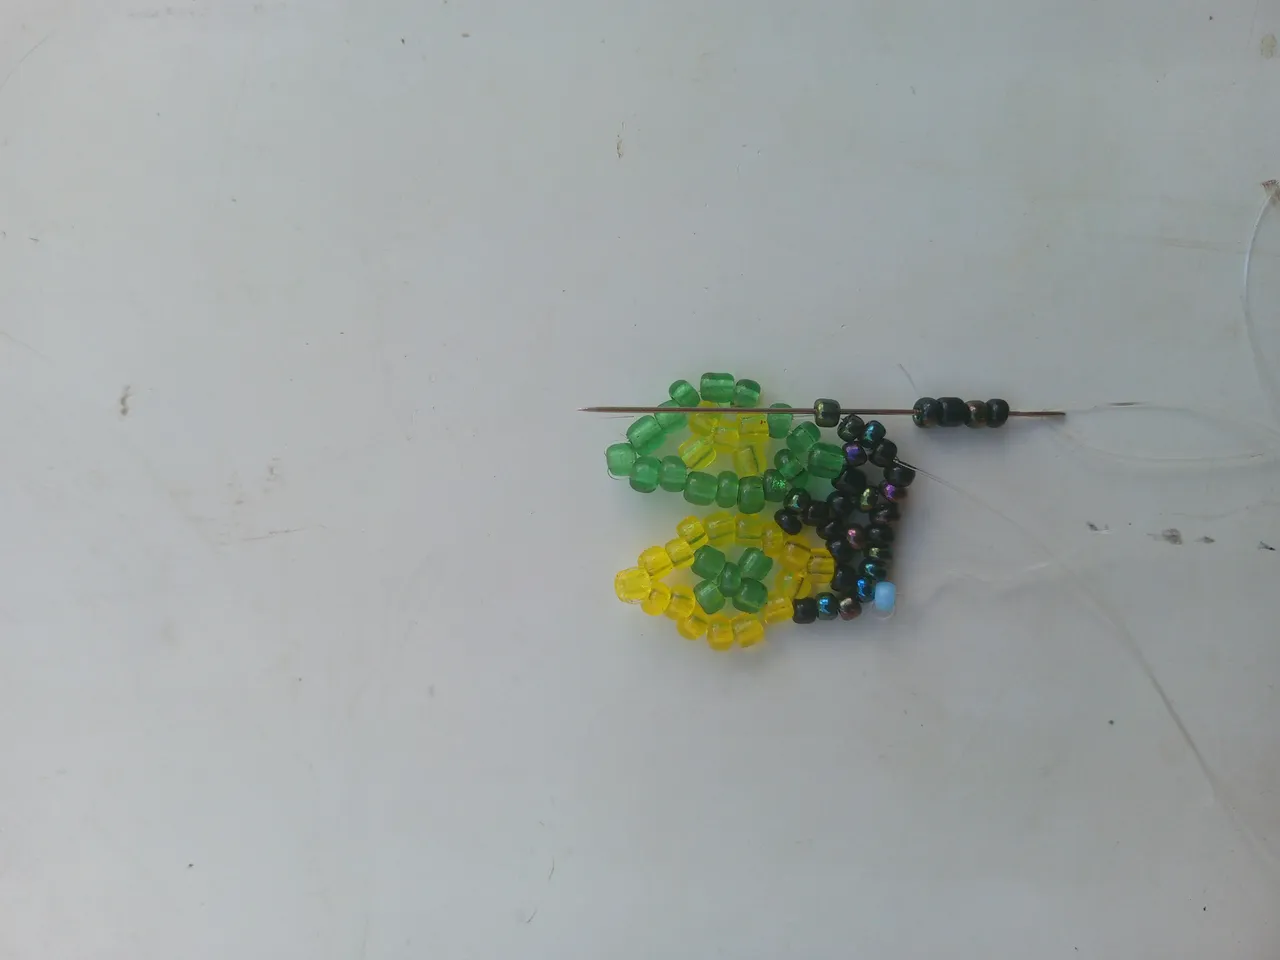
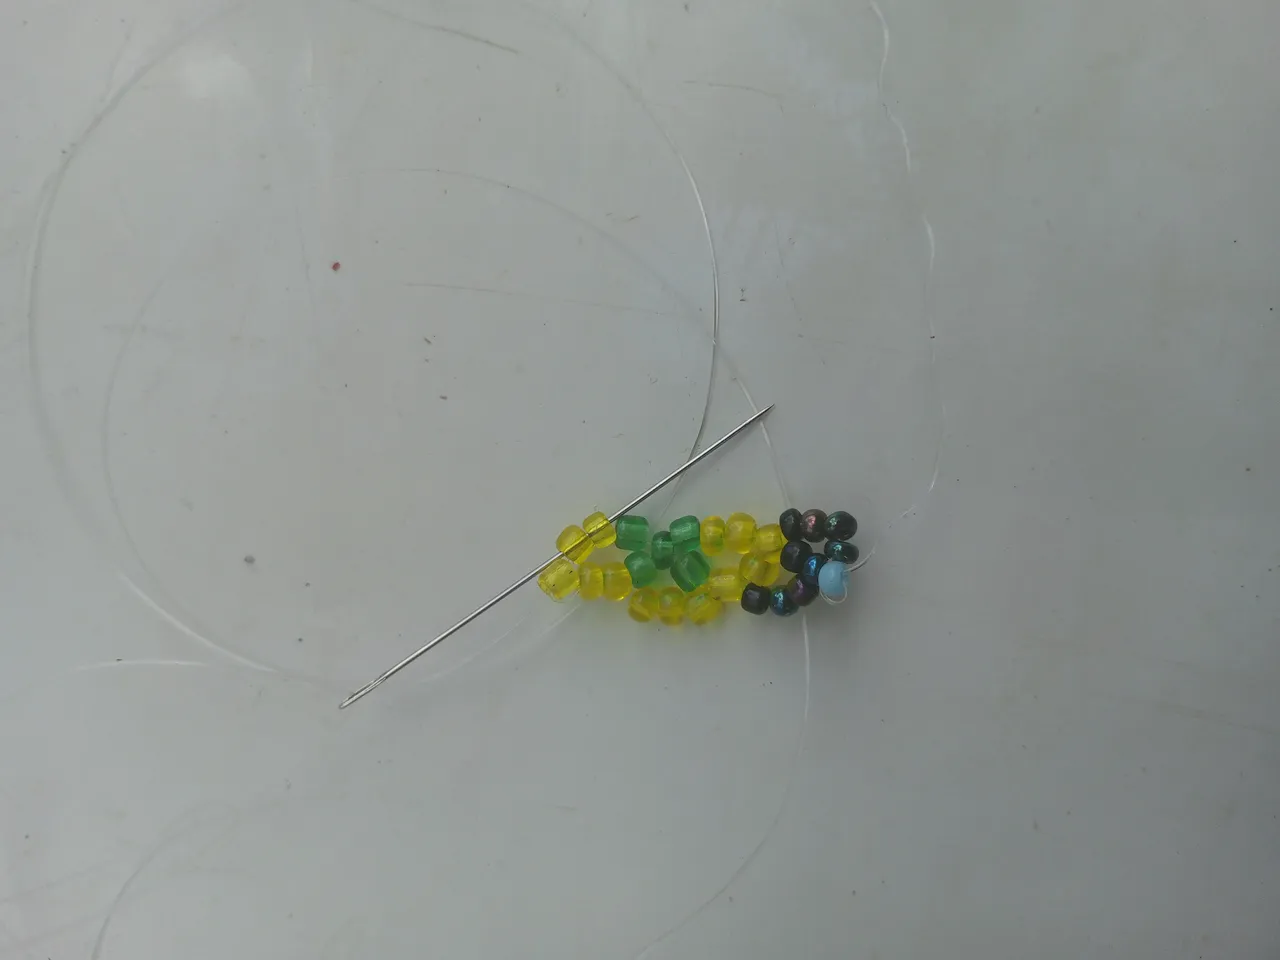
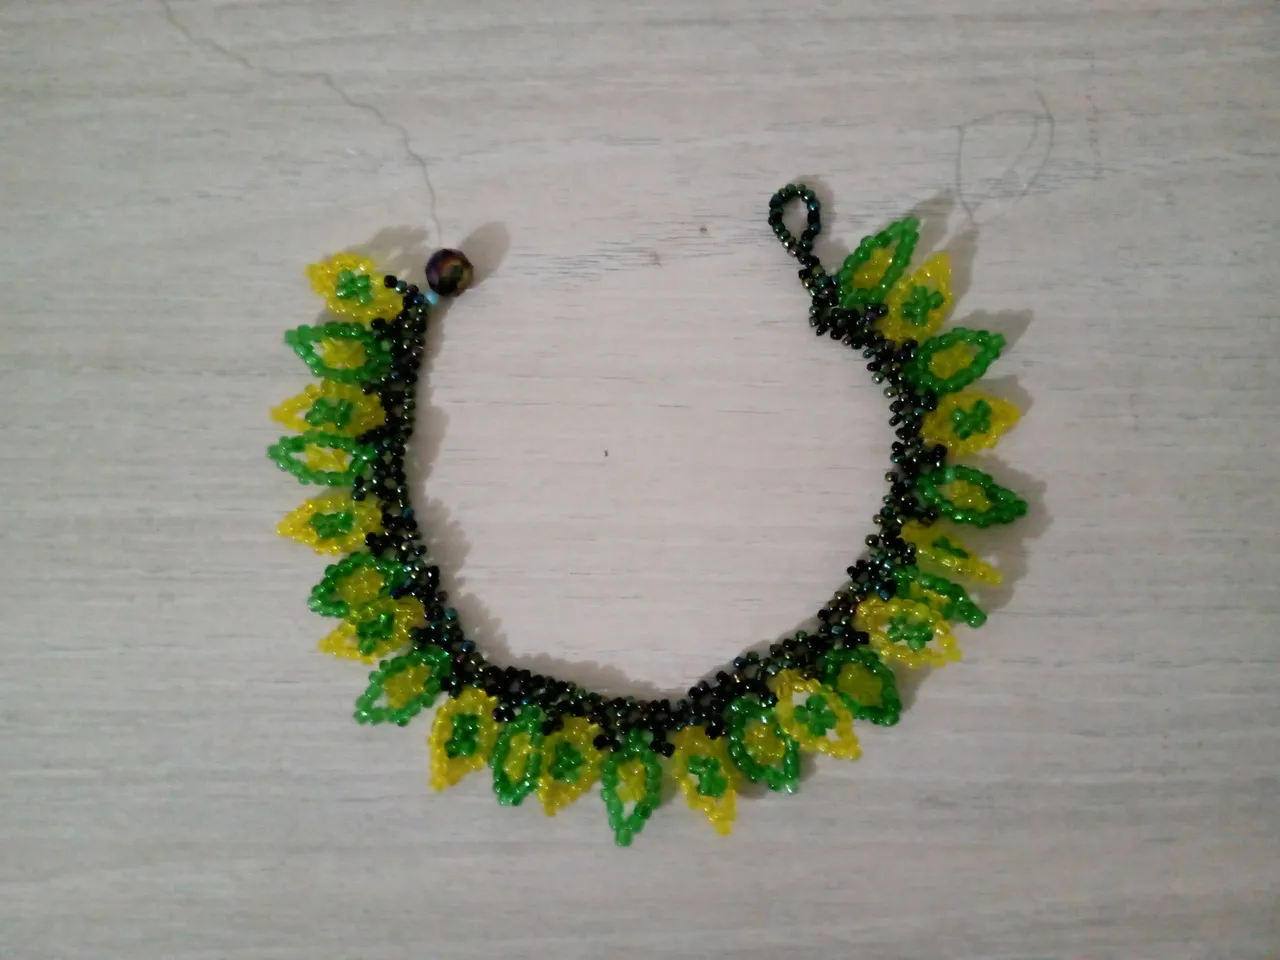
Esta gargantilla es muy facil de hacer, solo tienen que repetir los mismos pasos hasta llegar a la medida que quieran, para asi tener este bonito resultado
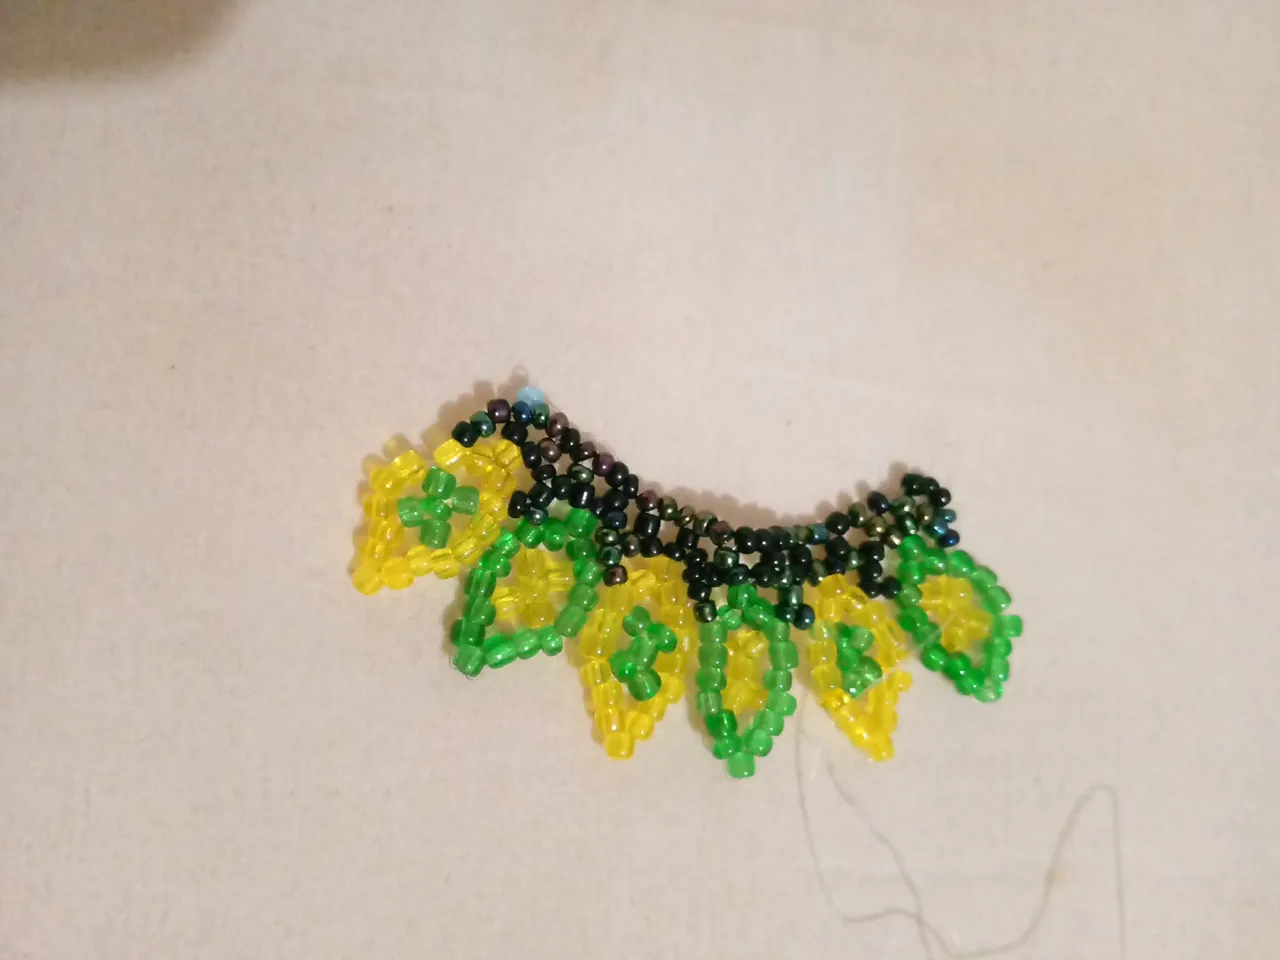
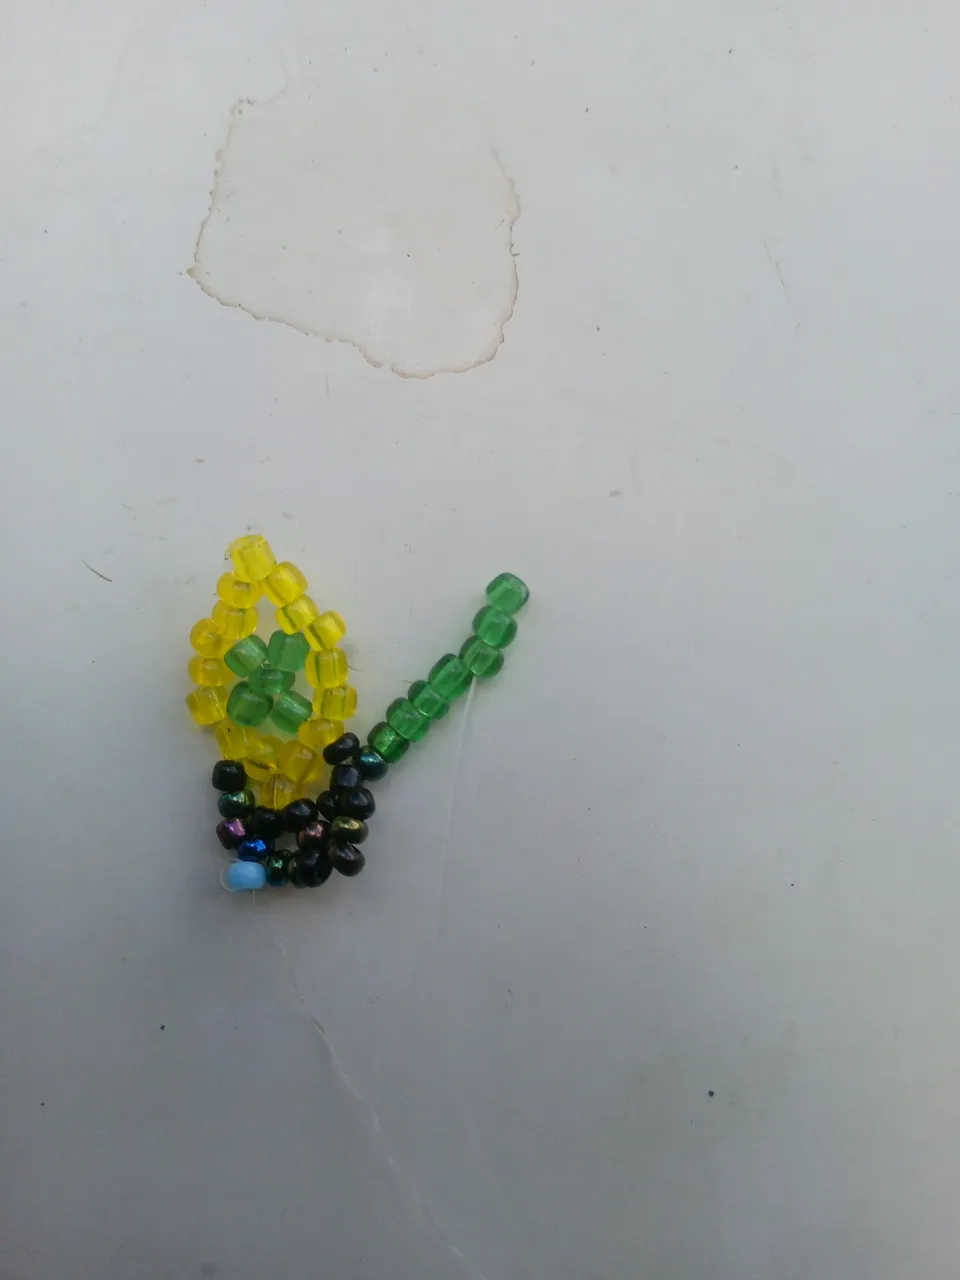
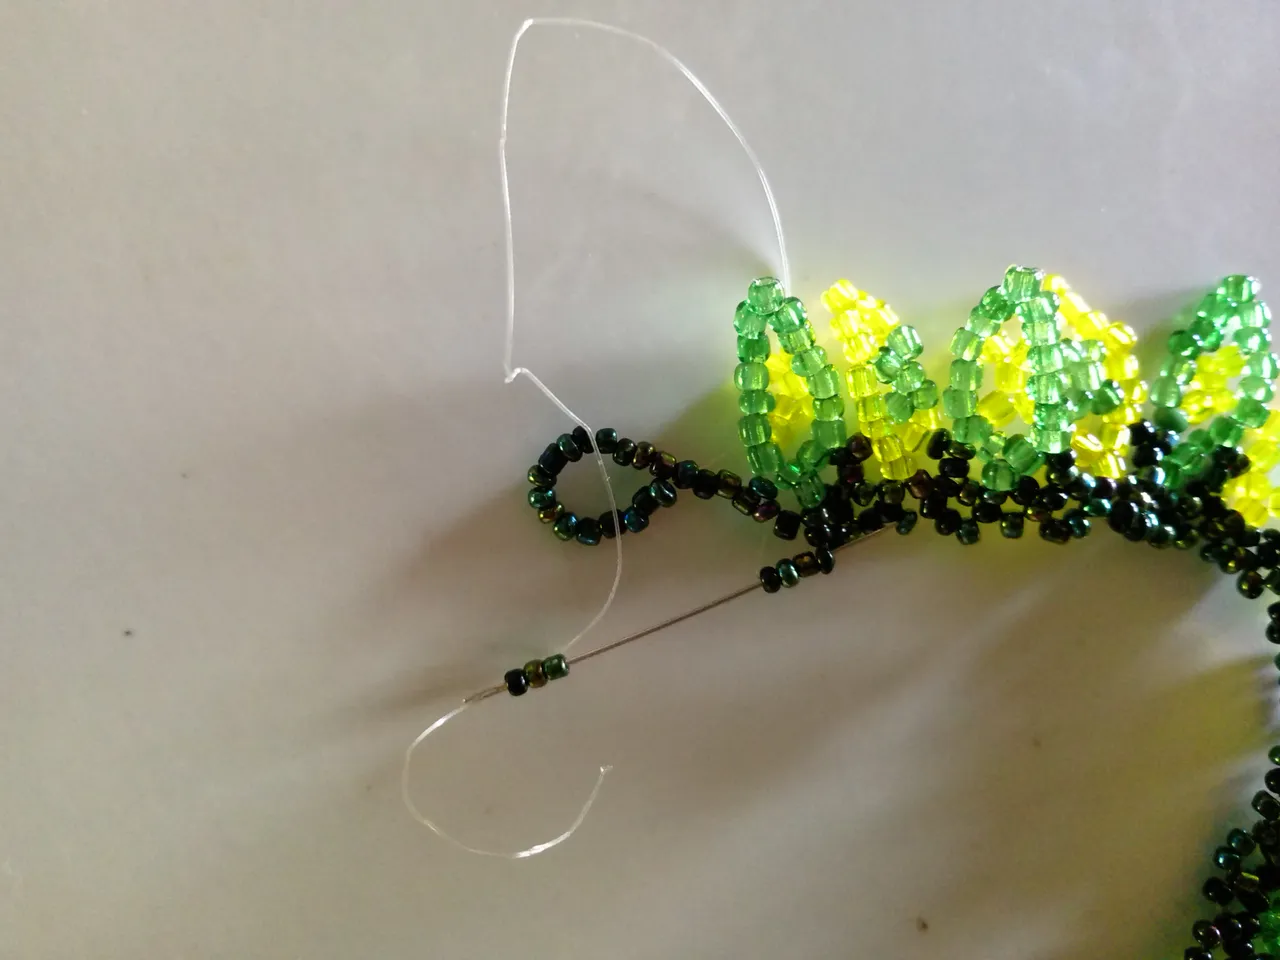
Paso 3
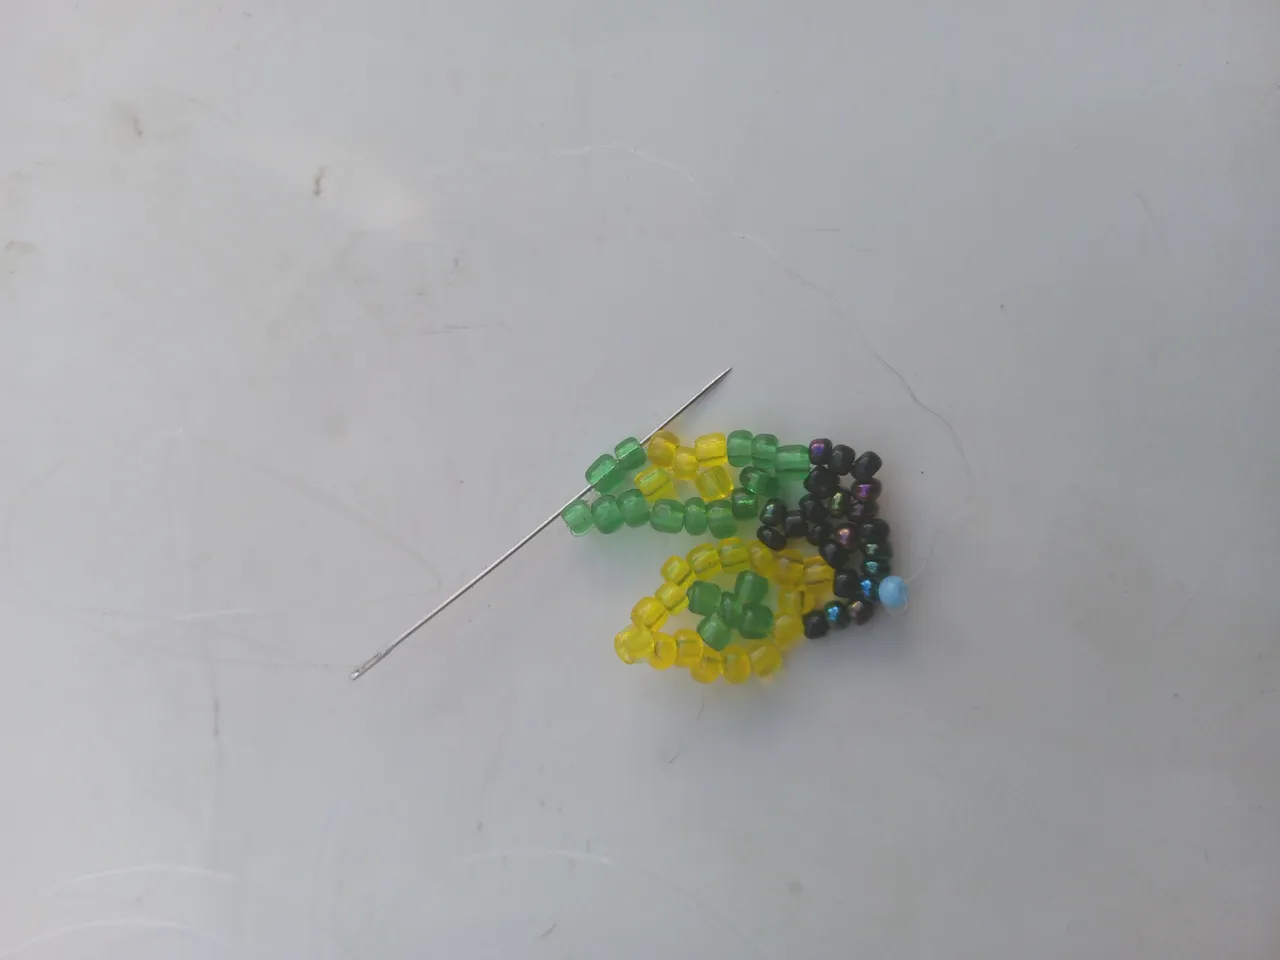
Después de haber culminado con la medida que querramos, introduciremos 20 mostacillas de color negro, las llevaremos al final y luego contamos las últimas 4 y pasamos la aguja con el nylon


Luego introducimos 3 mostacillas megras y pasamos igualmente por las mostacillas de arriba, después regresaremos el nylon para reforzar nuestra hermosa gargantilla.
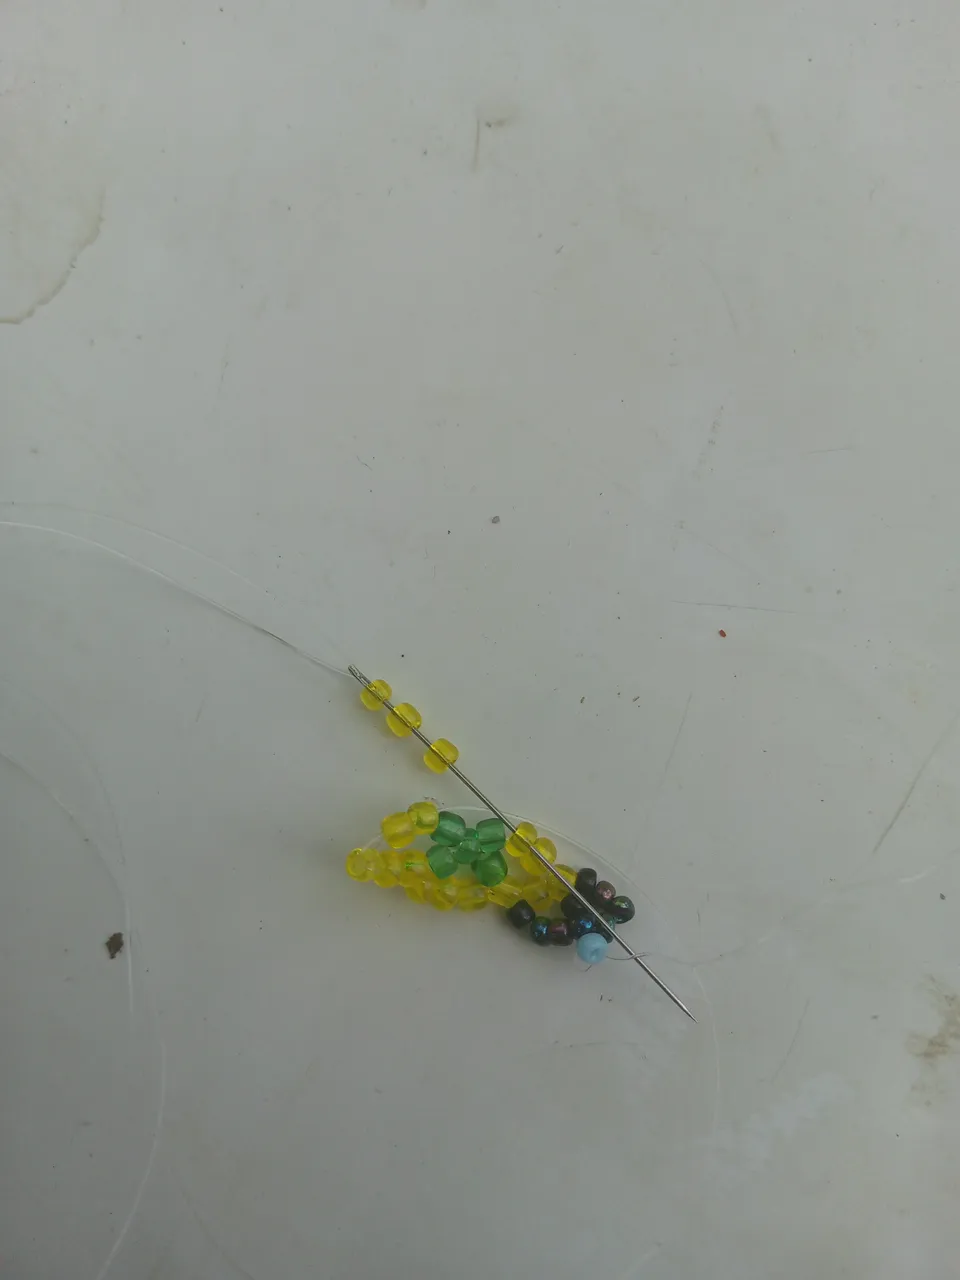
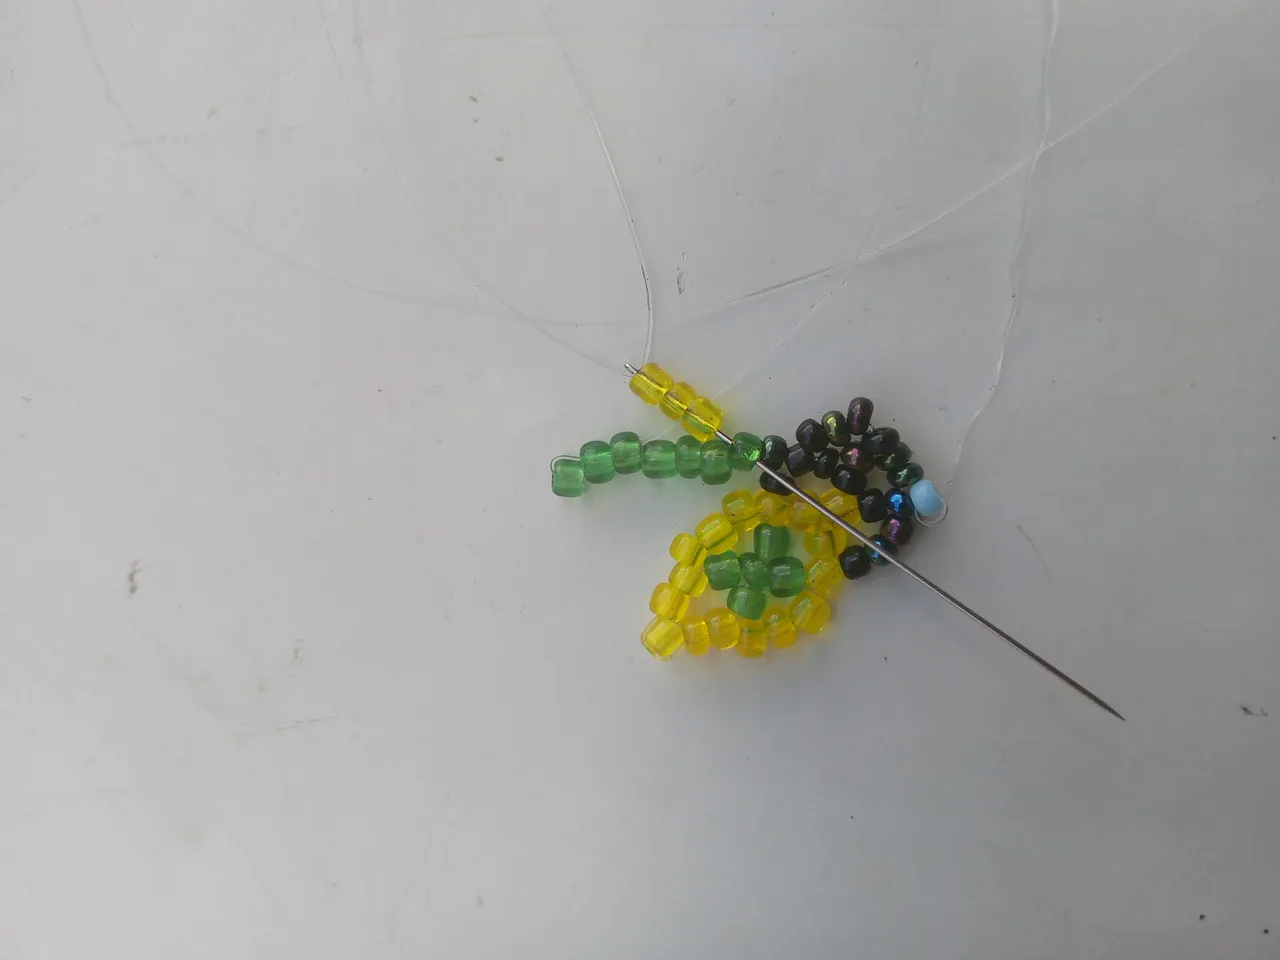
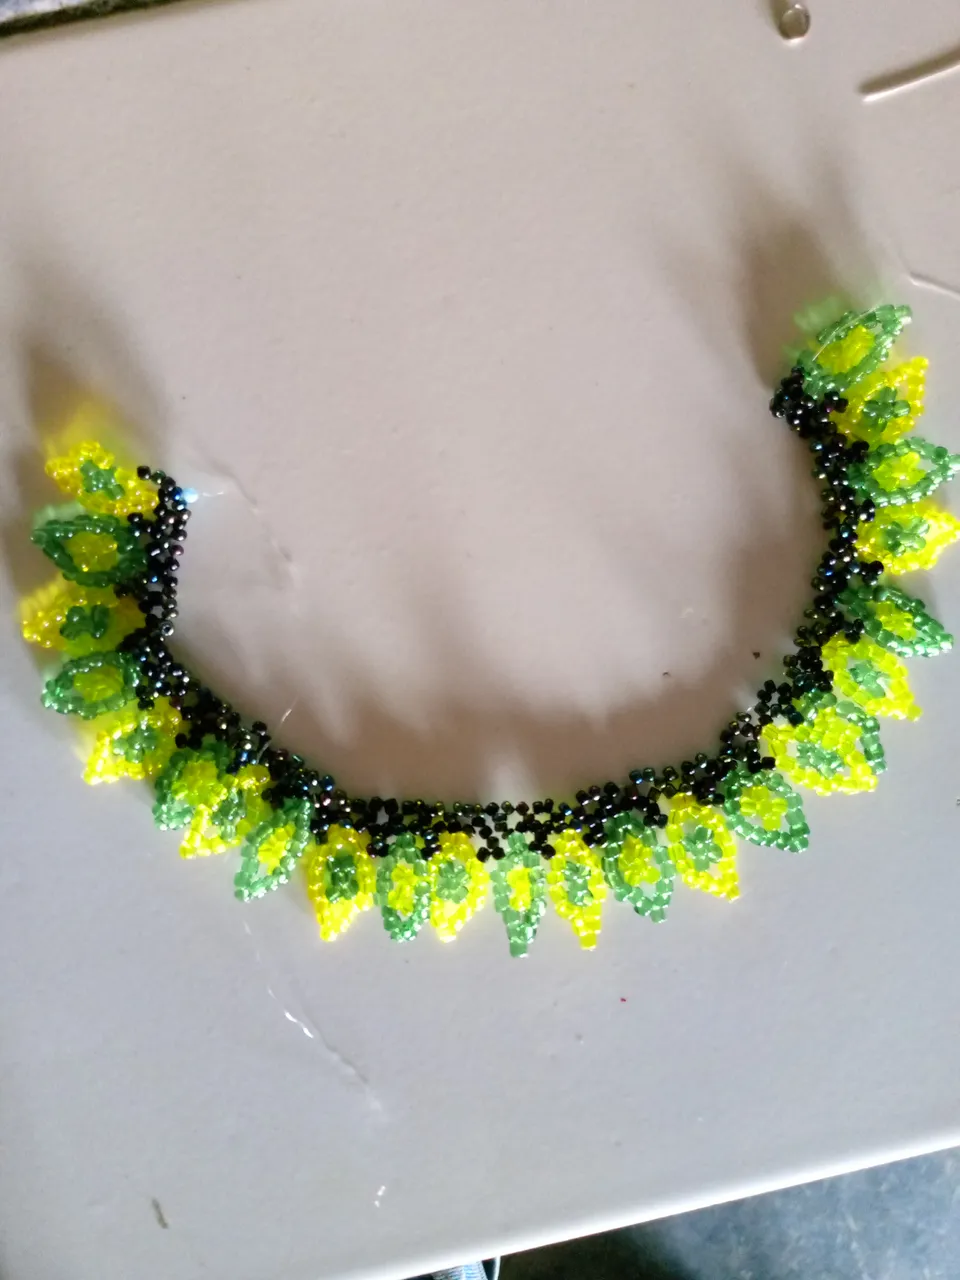
Paso 4
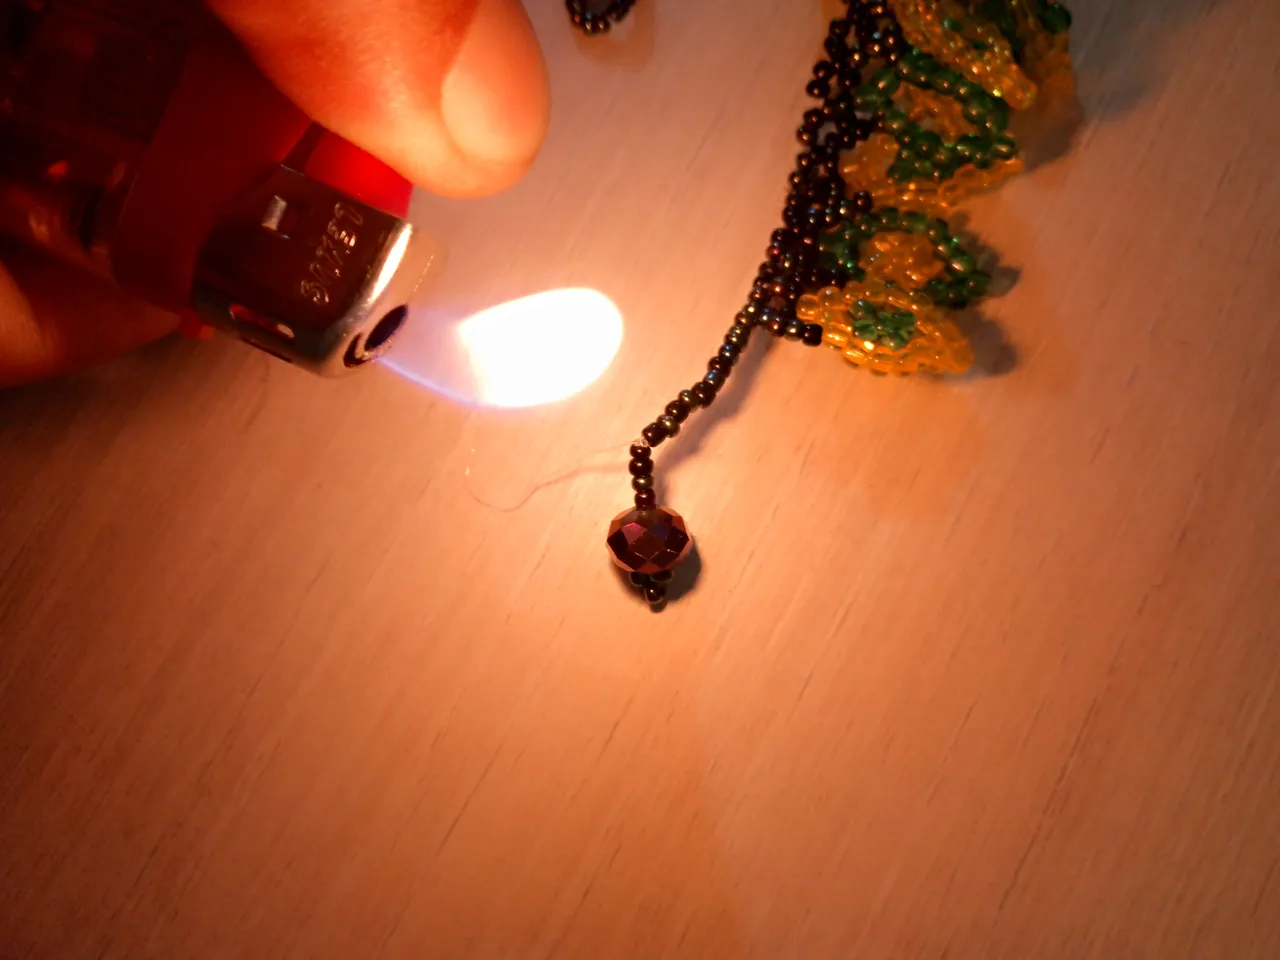
Por último retiramos el soporte que introducimos al comienzo, vamos a introducir 15 mostacillas negras, luego tomamos la perla que nos serviría de trancadero, y luego 3 mostacillas negras.
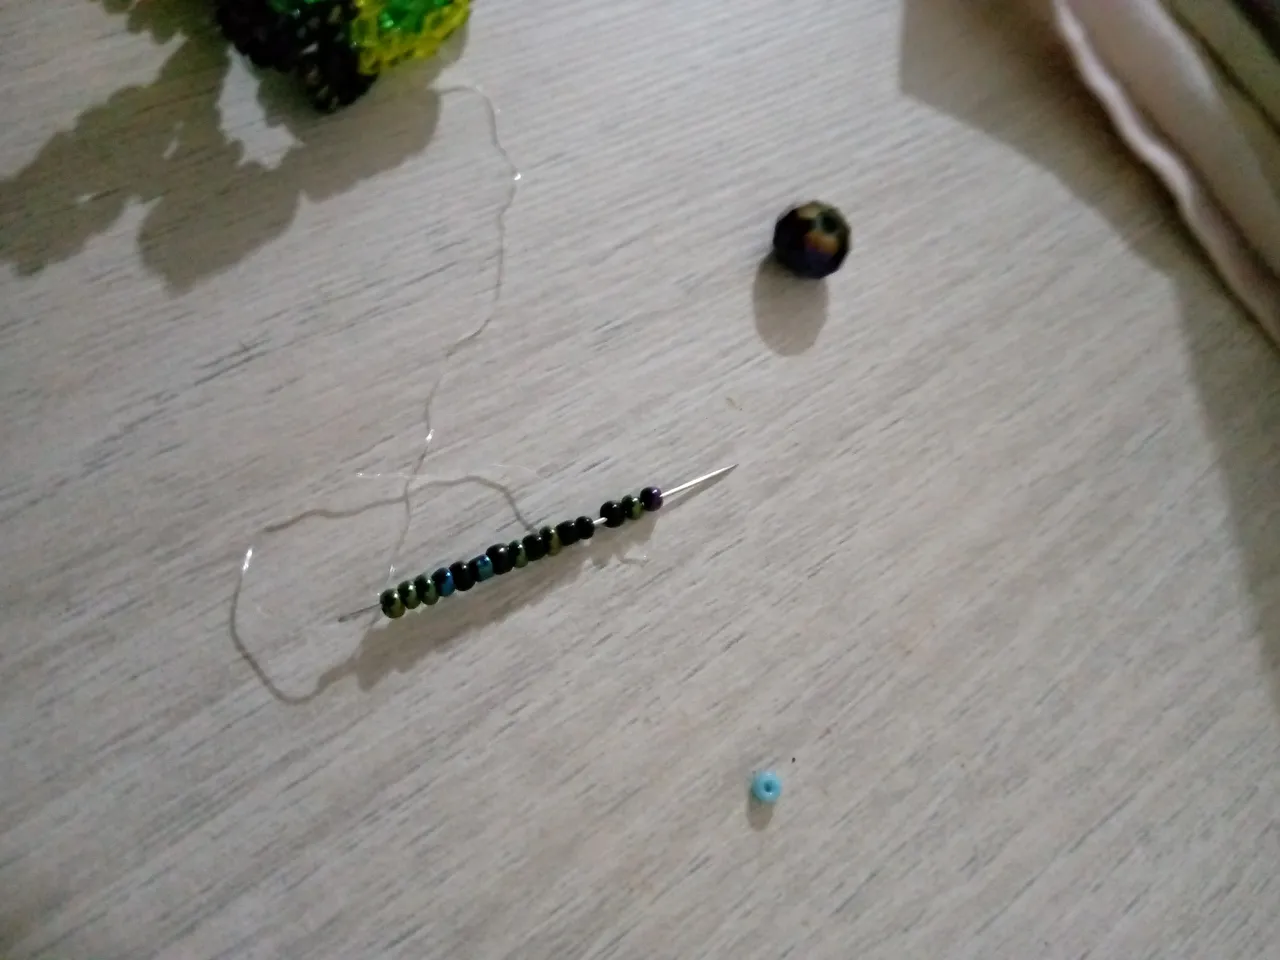
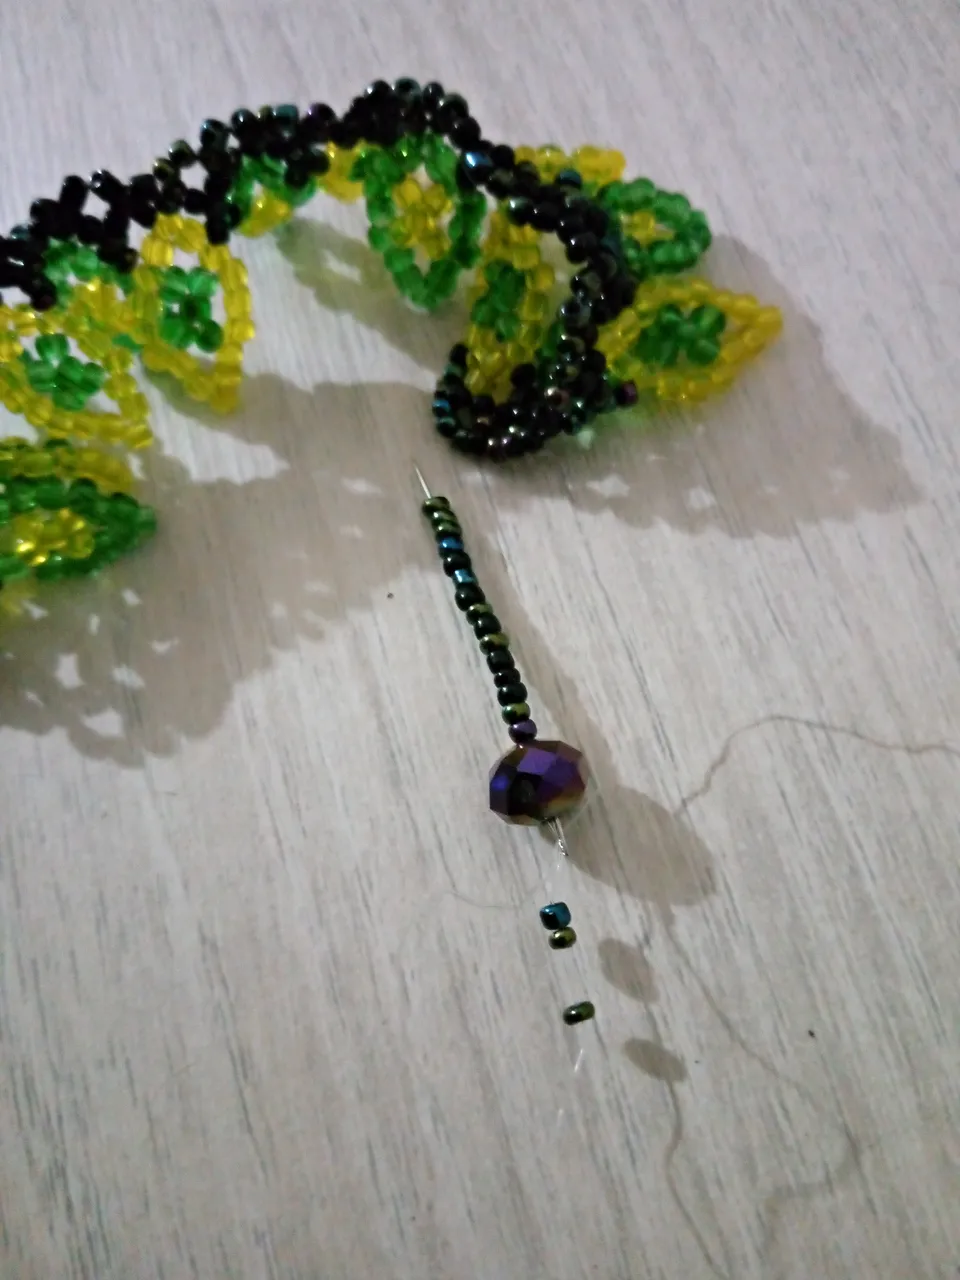
Vamos a devolvernos por la perla y por las 15 mostacillas, luego con la ayuda de un encendedor, con mucho cuidado, quemamos los excedentes para asi terminar nuestro hermoso trabajo.
RESULTADO FINAL

Asi de lindo quedó esta hermosa gargantilla, espero haya sido de su agrado y ayuda este tutorial, que con mucho cariño realicé para todos ustedes, que Dios me los bendiga y los cuide siempre muchas Bendiciones.
EXITOS
Las imágenes son de mi propiedad y fueron tomadas por mi teléfono tecno spark Go 2023.
Traductor Utilizado:Delph traslater.
Las imágenes son editadas mediante la aplicación editor de fotos canva banners
Gracias a yanetzi1 por participar de modelo
Today I want to show you a tutorial on how to make a beautiful choker with beads, with very bright and cheerful colors to wear this Christmas.
Here are the materials used to make this beautiful choker for Christmas:
MATERIALS
- Yellow beads
- Green beads
- Black beads
- Nylon nr. 0.25
- Needle no. 12
- Lighter
- 1 scissors
- 1 bead
STEP BY STEP
The steps to follow to make this beautiful choker are as follows:
Step 1
We are going to take an approximate of 200cm of naylon, we will introduce it in our needle to take a bead of any color, this to serve as a support, I used a blue one to differentiate the colors, we will leave an approximate of 10cm of naylon left over.
Then we are going to introduce 4 black beads and 7 yellow beads, we will take our beads to the end, where the support is.
After taking the beads down, from top to bottom, we will jump 1 yellow bead, insert the needle in the next one, then we will count 2 beads and take out our nylon.
Next we will take 3 green beads, this time we will pass the needle through the last yellow bead.
We are going to take 2 yellow beads and 1 black bead, we will pass our needle with nylon through the last black bead.
Then we will take 4 black beads, we will go up in the same way, with our needle we will pass through the yellow bead, this is the second of the 3 we just put in.
Next we take 2 yellow beads and 1 green bead, we are going to introduce our needle through the second green bead.
Then we will take 1 green bead and 2 yellow beads, we introduce the needle through the top bead, then to return, we skip the first bead and introduce the needle through the next bead, in order to count 2 beads and take out our nylon.
We are going to take 3 yellow beads, we will pass the needle with the nylon through the next beads of the same color
Let's take 3 black beads and pass the needle from top to bottom through the black bead in the middle, so we will have ready the first step of our beautiful choker
** Step 2**
To continue with the sequence, we will take 4 black beads, and we will pass our needle through the second of the three we placed in the previous step.
Now we are going to place 1 black bead and then 7 green beads, we will repeat the same process of the previous one but this time with beads of different colors.
We are going to skip 1 green bead, introduce the needle in the next bead, then we will count 2 beads and take out our nylon.
We will take 3 yellow beads and we will introduce the needle through the last green bead.
Then we will take 2 green beads and 1 black bead, we will introduce the needle through the third black bead like this
In the same way we are going to take 4 black beads and we are going to introduce the needle with the nylon through the second bead of the 3 that we introduced previously, this will be the green one.
Now we will take 2 green beads and 1 yellow bead, we will introduce the nylon through the center of the 3 yellow beads.
Then we take 1 yellow bead and then 2 green beads, to introduce the needle through the bead that is at the top, we introduce the nylon and we go out through the 2 green beads.
We will place 3 green beads and passing the needle through the next green beads, we will take 3 black beads and passing the needle from top to bottom through the black bead that is in the middle we will have our second step ready.
To continue with the sequence, we will take 4 black beads and we will introduce them through the middle of the 3 beads that we have just placed.
This choker is very easy to make, you only have to repeat the same steps until you reach the size you want, to get this nice result.
Step 3
After we have reached the size we want, we will introduce 20 black beads, we will take them to the end and then count the last 4 and pass the needle with the nylon.
Then we introduce 3 megras beads and pass them through the beads above, then we will return the nylon to reinforce our beautiful choker.
Step 4
Finally we remove the support that we introduced at the beginning, we are going to introduce 15 black beads, then we take the pearl that would serve us as a locking device, and then 3 black beads.
Let's go back for the pearl and the 15 beads, then with the help of a lighter, very carefully, we burn the surplus to finish our beautiful work.
FINAL RESULT!
I hope this tutorial has been of your liking and help, that with much affection I made for all of you, may God bless you and take care of you always, many blessings.
SUCCESS
Images are my property and were taken by my tecno spark Go 2023 phone.
Translator Used:Delph traslater.
The images are edited using canva banners photo editor application.
Thanks to yanetzi1 for participating as a model.