Saludos apreciados Hivers
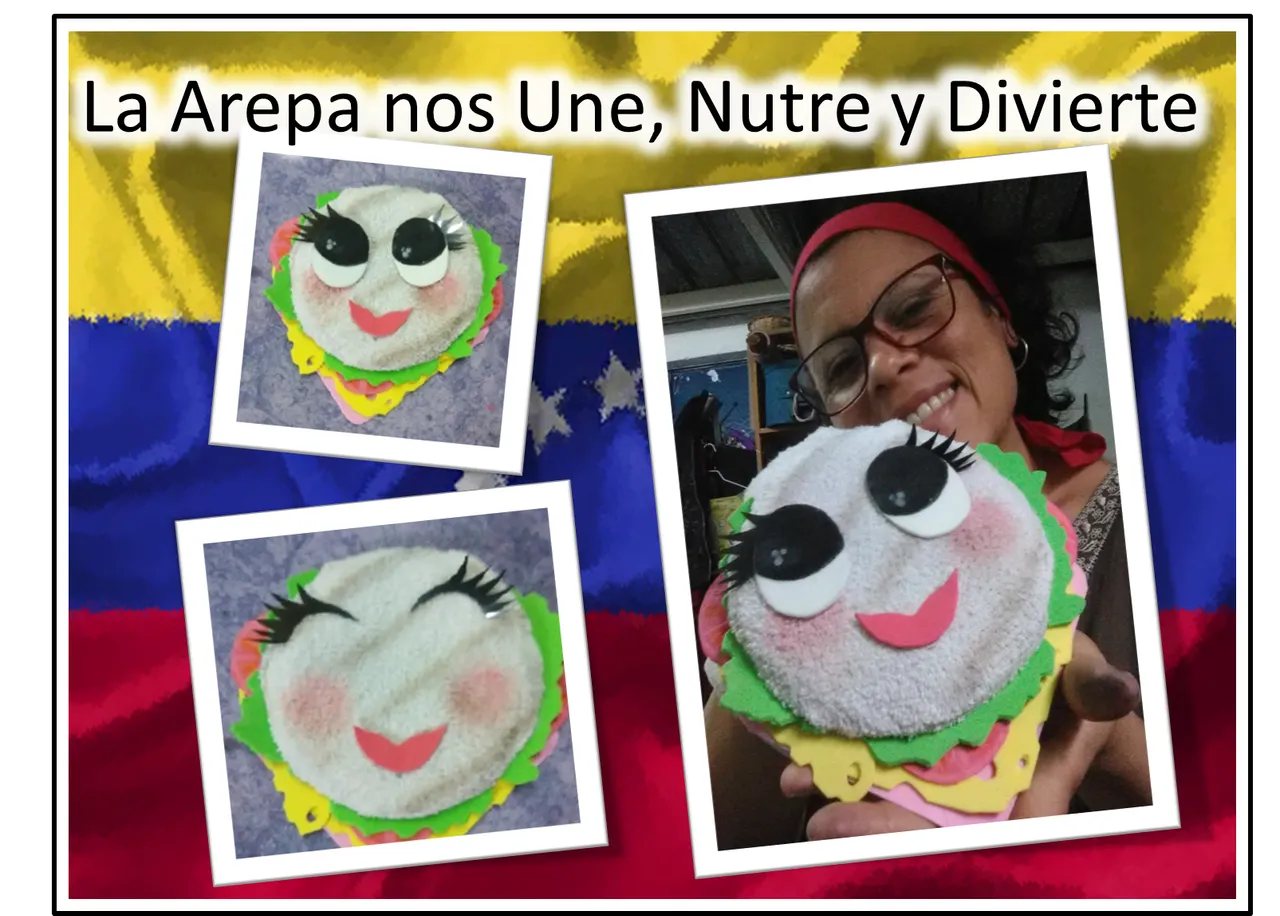
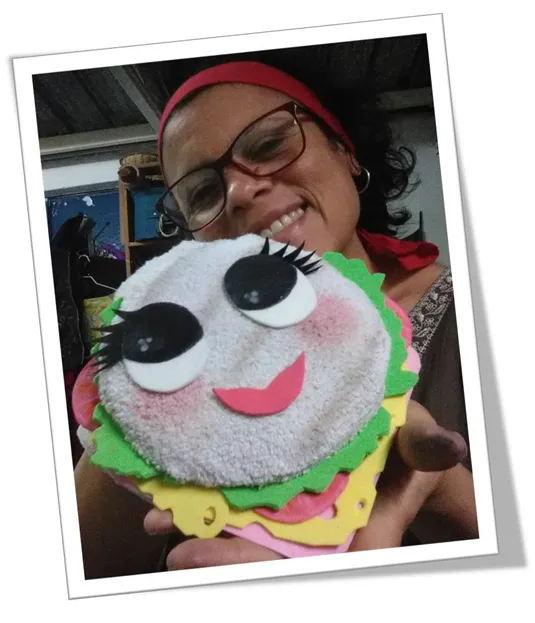
Por aquí estoy uniéndome por 2do año al gran encuentro anual #LaArepaNosUne, el año pasado participe con un relato muy particular describiendo como me nutria con mi arepa sin gluten, en esta oportunidad decidí traer un arte, caracterizada en un tierno títere hecho con medias que estoy segura me servirá para cuando me integre de nuevo con mis pequeños en este próximo año escolar, con el que les podré decir quizá entre cuentos y cantos La arepa nos Une, Nutre y Divierte…
A través mi experiencia al no poder consumir durante un año la tradicional Harina Pan, he podido dar un giro maravilloso y nutritivo en mi modo de preparar y consumir este exquisita acompañante venezolana, actualmente las hago de yuca o plátano, también las hago con la harina sin gluten llamada ReinaArepa cuyo secreto es usar el agua muy caliente y amasar con paleta, me ha ido muy bien con esta Harina obteniendo un sabor delicioso, generalmente me quedan las arepas suavecitas o tostadas según como quiera degustarla integrándole algunas veces vegetales.

A continuación les invito a ver el proceso de mi títere-arepa venezolana
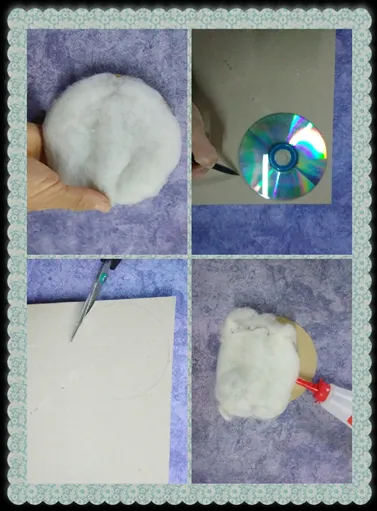
Materiales: cartoncillo, tijera, silicón frio, lápiz, marcador grueso, dos pares de medias blanca viejas, radiografías sin usar, pintura al frio negra, tizas de colores, creyón blanco, foami de colores, 1 CD, guata.
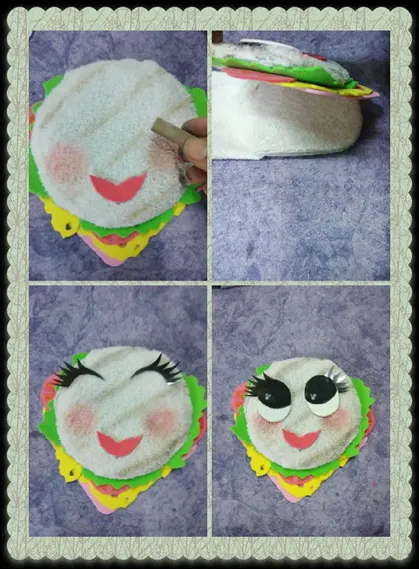
PASO 1: LA AREPA
En el catoncillo dibuje con 1 CD el círculo que conforma la arepa, luego corte su contorno y agregue el silicón frío encima colocándole la guata para dar el efecto esponjado.
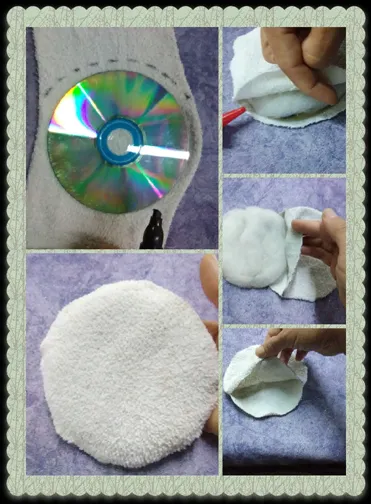
Sin abrir la la media dibuje con líneas segmentadas el círculo del CD dejando un espacio aproximado de 1 centímetro del contorno. Esto lo hice por la parte peluda de la media para crear textura de donde me salieron dos capaz, por dentro introduje el circulo con la guata ya previamente realizado, una vez encajado el circulo fui cerrando los bordes con el silicón frío.
PASO 2: BOCA Y CUERPO
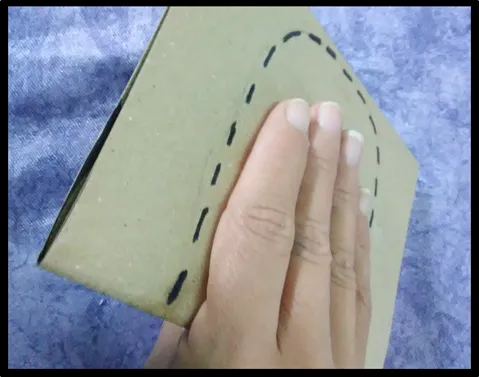
Con el retazo de cartoncillo que me sobro lo doble por la mitad, coloque cuatro dedos en la parte superior y el pulgar por debajo, trazando líneas segmentada alrededor los cuatro dedos para luego cortar.
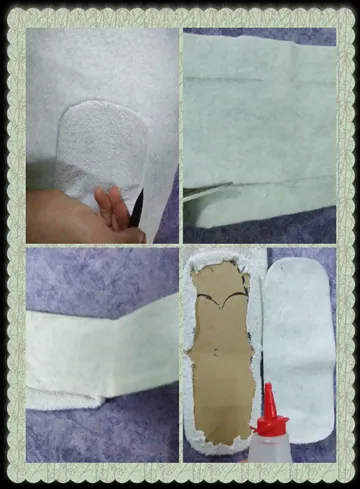
Luego tome la otra media y les corte la costura que traer en la punta, extendí la media y en la parte superior coloque el modelo de la boca que previamente había dibujada y cortada en el cartoncillo, marque con unos puntos la longitud hasta donde corté con la tijera, siendo este el tamaño de la boca. Posterior coloque el cartoncillo dentro de la media y los pegue por los borden de afuera hacia adentro.
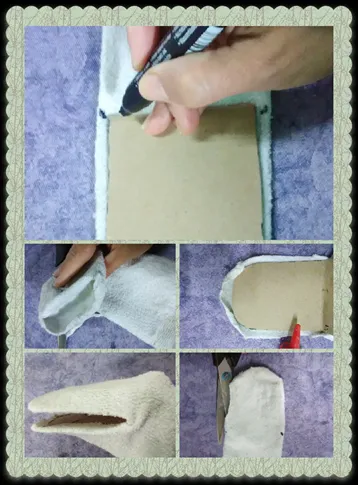
Para la parte interna decidí usar fieltro blanco marcando sobre la tela el contorno completo de la boca abierta, que luego corte y pegue por dentro.
.
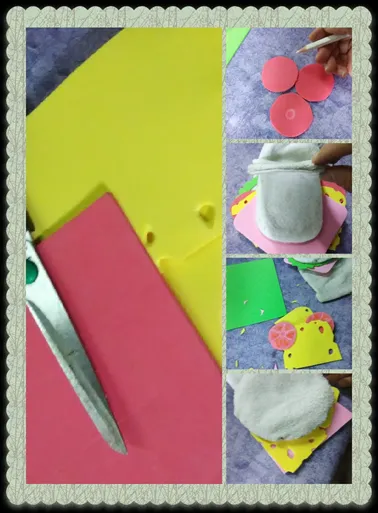
PASO 3: RELLENO
Luego empecé a trabajar lo que sería el relleno en este caso use foami de color rosado (jamón de pavo), amarillo (queso), rojo (tomate), verde (lechuga). Los fui pegando por la parte superior y de afuera del cuerpo del titiere-arepa.
PASO 4: OJOS
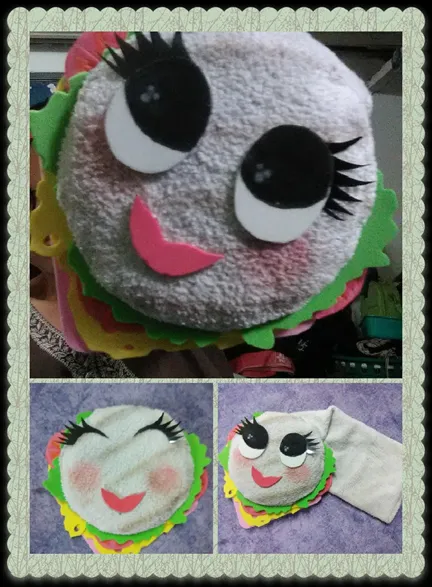
Queriendo colocarles unos ojos caricaturizados y tiernos, tomé un trozo de foami blanco, dibuje un par de óvalos trabajando primero con lápiz y marcador, al igual que le diseñe pestañas con la radiografía vieja.
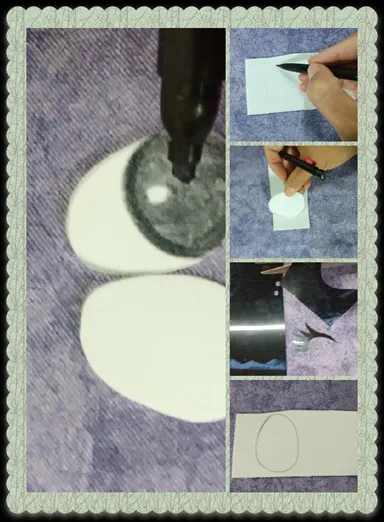
Como le faltaba más intensidad a los ojos decidí aplicarle pintura al frío color negro y con el creyón blanco unos pequeños círculos simulando un brillo.
PASO 5: OUTFIT
Una vez culminado el cuerpo decidí colocarles los últimos detalles con tiza marrón simulando lo tostado de las arepas asadas y tiza rosada para detallar el rubor femenino. Una vez definido los diseños la fijé con silicón frío sobre la parte superior de la media, para que cuando se introduzca la mano por dentro de la media no haya obstáculo para manipular al títere-arepa.
VERSIÓN ENGLISH
Greetings dear Hivers
Here I am joining for the 2nd year to the great annual meeting #LaArepaNosUne, last year I participated with a very particular story describing how I nourished myself with my gluten-free arepa, this time I decided to bring an art, characterized in a tender puppet made with socks that I am sure will serve me for when I integrate again with my little ones in this next school year, with which I can tell them perhaps between stories and songs La arepa nos Une, Nutre y Divierte....
Through my experience of not being able to consume for a year the traditional Flour Bread, I have been able to give a wonderful and nutritious twist in my way of preparing and consuming this exquisite Venezuelan companion, currently I make them with cassava or plantain, I also make them with gluten-free flour called ReinaArepa whose secret is to use very hot water and knead with paddle, I have done very well with this flour getting a delicious flavor, I usually get the arepas soft or toasted as I want to taste it by integrating sometimes vegetables.
Next I invite you to see the process of my Venezuelan puppet-arepa.
Materials: cardboard, scissors, cold silicone, pencil, thick marker, two pairs of old white socks, unused x-rays, black cold paint, colored chalk, white crayon, colored foami, 1 CD, wadding.
STEP 1: THE AREPA.
With 1 CD, draw the circle that forms the arepa on the clay pot, then cut its outline and add the cold silicone on top, placing the wadding on it to give the spongy effect.
With the other half without opening it, draw with segmented lines the circle of the CD leaving a space of approximately 1 centimeter of the contour. I did this by the hairy part of the sock to create texture where I got two capable, inside I introduced the circle with the wadding already made, once the circle was fitted I was closing the edges with cold silicone.
STEP 2: MOUTH AND BODY.
With the piece of cardboard I had left over, fold it in half, place four fingers on top and the thumb underneath, tracing segmented lines around the four fingers and then cut them.
Then I took the other stocking and cut the seam at the tip, I extended the stocking and on the upper part I placed the model of the cardboard mouth that I had previously drawn and cut, I marked with some dots the length up to where I cut with the scissors, this being the size of the mouth. Then I placed the cardboard inside the stocking and glued the edges from the outside to the inside.
For the inner part I decided to use white felt, marking on the fabric the full contour of the open mouth, which I then cut and glued inside.
.
STEP 3: STUFFING.
Then I started working on the stuffing, in this case I used pink (turkey ham), yellow (cheese), red (tomato), green (lettuce) foami. I glued them on the top and outside of the body of the puppet-arepa.
STEP 4: EYES
Wanting to put some caricatured and tender eyes, I took a piece of white foami, drew a couple of ovals working first with pencil and marker, as well as designed eyelashes with the old x-ray.
As the eyes lacked more intensity I decided to apply cold black paint and with the white crayon some small circles simulating a glitter.
STEP 5: OUTFIT.
Once the body was finished I decided to put the last details with brown chalk to simulate the toasted part of the roasted arepas and pink chalk to detail the feminine blush. Once the designs were defined I fixed it with cold silicone on the upper part of the stocking, so that when the hand is introduced inside the stocking there is no obstacle to manipulate the puppet-arepa.