Dear Hivers,
I think you will love this article.
You see, I have been fortunate to write and edit over 3000+ articles. During this period, I learned a thing or two about formatting content.
And I want to share it all here.
Not only are these tricks going to make your post compelling but also readable, scannable, and an absolute delight for your readers.
They are simple and easy to understand.
In fact, in this tutorial, we explore 5 formatting tricks you can use in your next post.
Sounds exciting, isn't it?
Lets get started:

Have you seen what newspapers secretly do?
They use text of all sizes.
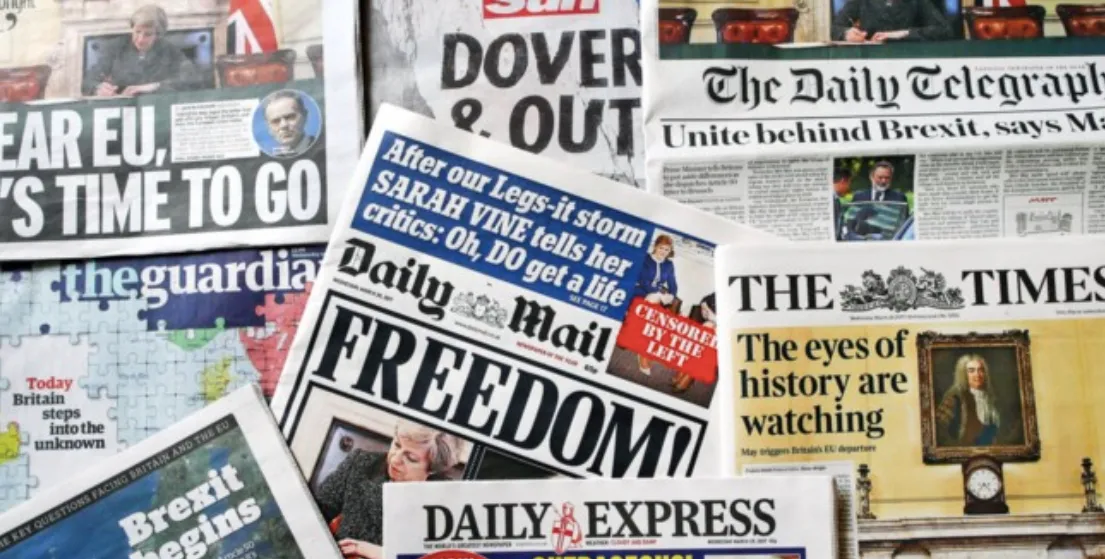
Why?
Because they know a couple of things:
- Either the reader is reading every word...
- Or the reader is scanning...
To appeal to both, you use subheads.
You see, subheads (also known as sub-headers) are mini-headlines.
Without subheads?
Readers lose attention and they feel like you are rambling. You certainly don't want them to feel that way, do you?
This is why everyone uses subheads. If you are not doing it now?
It is time!
How To Use Subheads On Hive
If you are using Peakd, you can select your sub-headers while writing your articles.
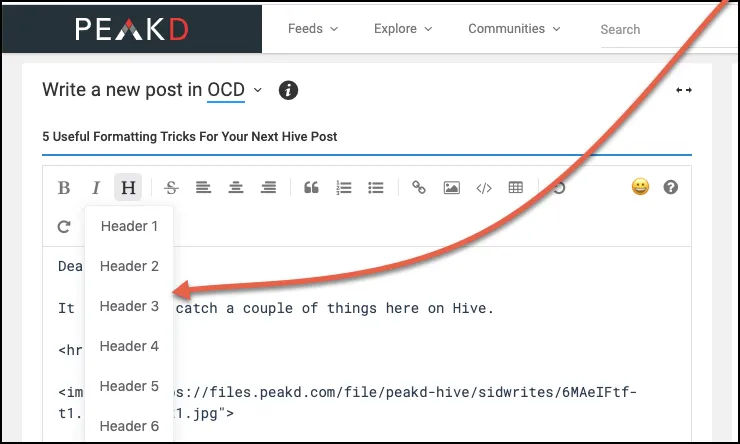
Usually, you either select H2 or H3 as your subheads.
If you notice, in this article I use graphical subheads. Soon we will see how it is done.

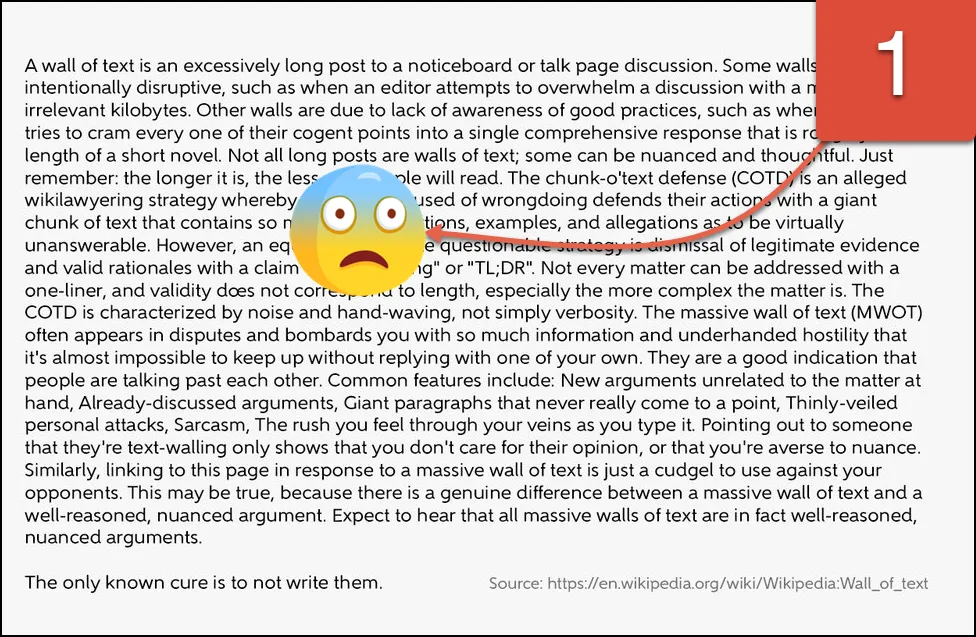
Question: Imagine you are invited as a judge to check two articles.
Here is the intro of the first one:
Here's the second:
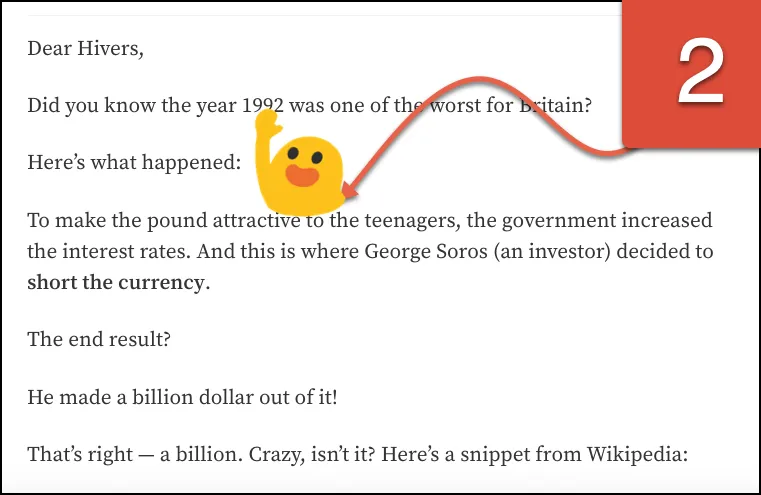
Which one is better?
The answer is easy – and perhaps a bit too obvious.
It is the second one.
Because it is easier to read.
You see, not only are we breaking up our content but also the paragraphs. The goal, however, is to convey your message. And short paragraphs are perfect for that.
Short paragraphs are also easier to read. They are like pizza slices – anyone can pick it up – easily. And digest it – easily.
Paragraph Tip
- Make sure your paragraph is no more than 5-6 lines.
- Add spaces (hit the Enter) button after every paragraph.
- Try to create "one-line" paragraphs.
To spice it up a little, some writers use "one-line" paragraph. This article is also sprinkled with such one-line paragraphs.

On Hive, I realized the regular dash is not incredibly visible.
This is why we use em dash. They are super-powerful and one of my favorite — you will see me using them quite often.
If you didn't know:
Em dash is considered the “most versatile punctuation mark” as it can do variety of things.
Like:
- Lead the reader — to the next sentence…
- Connect two sentences — just like this one.
- Make reading easier — and better…
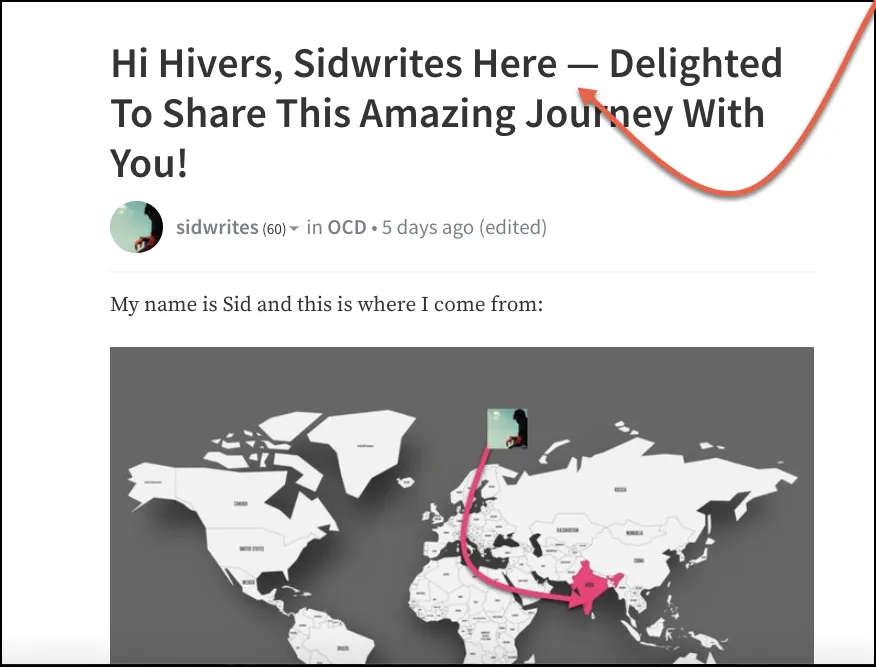
You can also use em dash in your headlines like I did in my introduction post:
Here are some examples from Grammarly:
While I was shopping — wandering aimlessly up and down the aisles, actually — I ran into our old neighbor.
If you need something, call my assistant — Catherine, not Margaret — and she’ll help you.
Where the heck is my — wait, what was I looking for?
Keyboard Shortcuts
- Keystroke (on Mac): Option + Hyphen (-)
- Keystroke (on PC): Two hyphens in a row (automatically converts to em dash)

Instead of using regular subheads, I prefer a graphical one. They are better (with red + black color) as they stop the reader from monotony.
So instead of selecting the subhead from the HTML editor, I use an image editing tool – then create an image – and upload this image.
Here is the editing process:
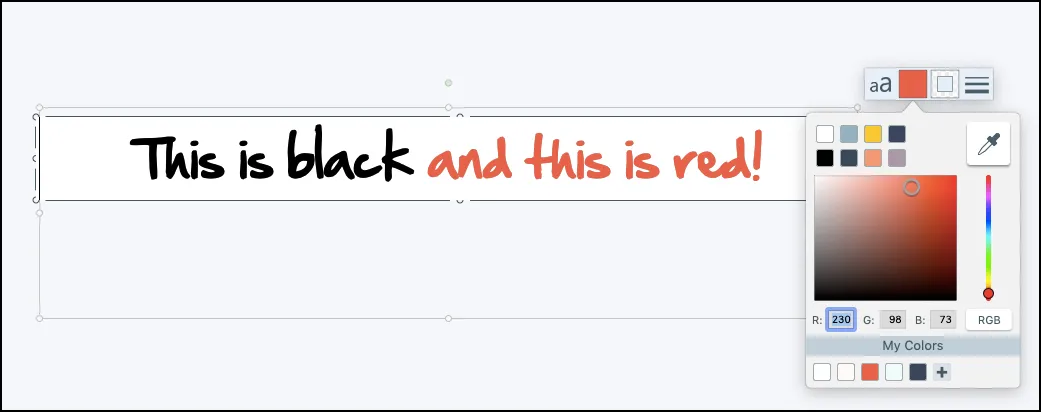
I personally use Snagit to create the subhead image.
The process is here:
Method 1:
- Open any image editing tool (Example: Snagit)
- Create a blank image of dimension 900x90
- Make the background white
- Write the text
- Color the text (first part as black and second as red)
- Save and export the image as JPG
Method 2:
- Check out any online image editing tool (example: BeFunky)
- Change the background image to white
- Write and customize the text
- Change the text color
- Crop the image size (preferably to 900x90)
- Save the image on your computer

To make your readers breathe, you need to pause. Here are two ways to do it:
- Use colon
- Ask questions
Why colon?
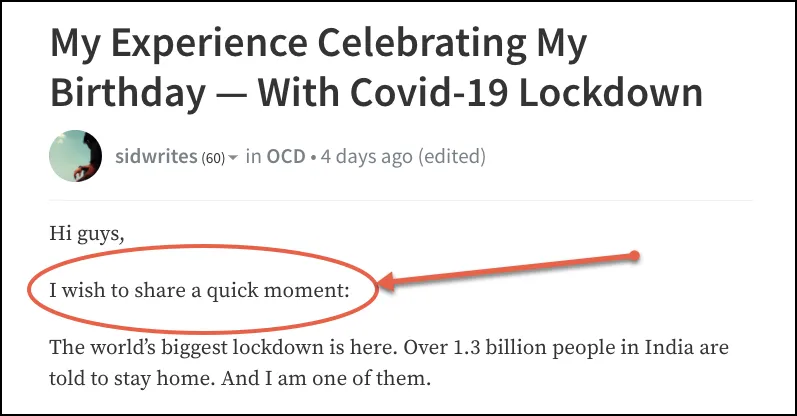
For two reasons:
Just look at what is happening right now:
I used "For two reasons:" to signal you to read further.
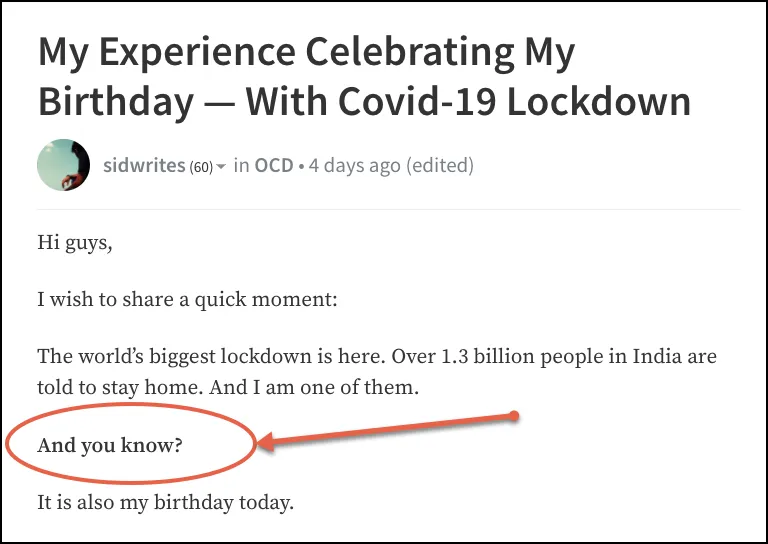
Another example from my my birthday post:
Colon creates continuation. And what's the second reason? It also creates clarity. Throughout this article, I have used colon to make my sentences simple. To offer you clarity.
Why questions?
Question is, why not? Questioning brings you, as a reader, into the conversation. Perhaps it makes you think?
Example: Again, in my birthday post, I asked a question:
Questions are truly powerful. And when used at the right time? It unlocks the hidden doors of your mind.
Don't you think so?

So there you have it...
Five simple yet powerful formatting tricks you can use in your next post.
Hope it serves you well.
And I hope you found this tutorial useful. Let me know your thoughts through the comment section below.
And if you like this post, do consider upvoting and sharing this post.
Thank you!
Cheers,
Sid