Good morning friends of the Community!
Buenos días amiga/os de la Comunidad!
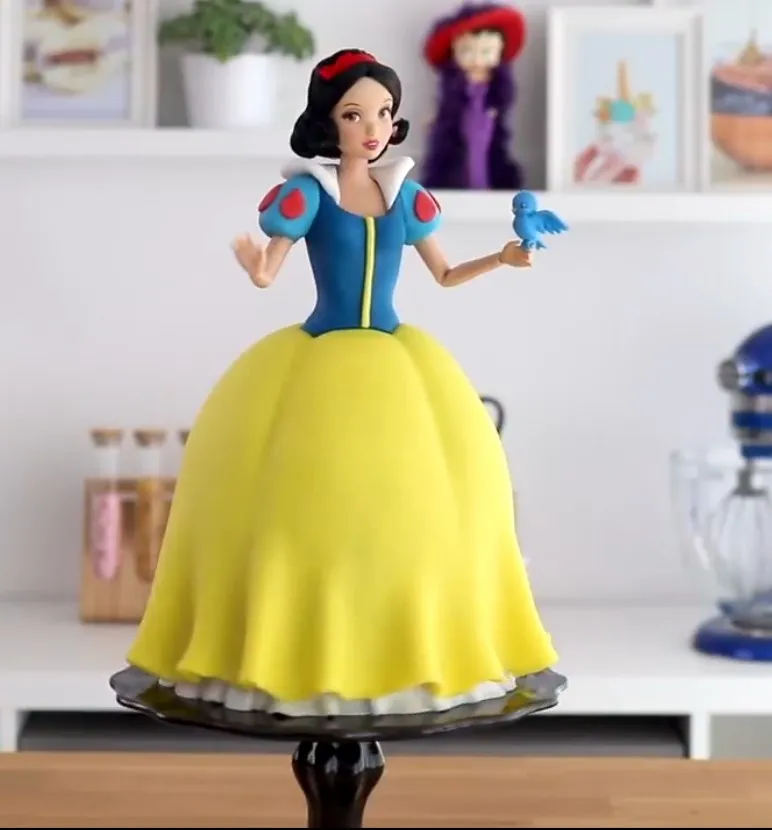
Today I want to share with all of you a recipe that awakens in all of us a very sweet memory of our childhood: our dolls and our fantasies in cartoons and their characters. I'm talking about Snow White.
Although the Snow White figure is a statuette, the entire cake is made with a particular sweetness and ingredients that call for that candor that the Walt Disney character represents.
So, get to work !!!
Hoy quiero compartir con todos Uds. una receta que despierta en todas nosotras una recuerdo muy dulce de nuestra niñez: nuestras muñecas y nuestas fantasías en los dibujos animados y sus personajes. Estoy hablando de Blancanieves.
Si bien la figura de Blancanieves es una estatuita, toda la torta está hecha con una particular dulzura e ingredientes que llaman a esa candidez que representa el personaje de Walt Disney.
De manera que, manos a la obra!!!

For 10 persons.
- 250 g flour
- 200 g of sugar
- 150 g of butter
- 2 eggs
- 140 g dark chocolate
- 1 glass of milk (approximately 100 ml)
- 1 sachet of baking powder
- 1 bag of paneangeli custard
- MMF mass in the chosen shades Figurine
- Snow White
Para 10 personas
- 250 g de harina
- 200 g de azúcar
- 150 g de mantequilla
- 2 huevos
- 140 g de chocolate negro
- 1 vaso de leche (aproximadamente 100 ml)
- 1 bolsita de levadura en polvo
- 1 bolsa de natillas paneangeli
- Masa MMF en los tonos elegidos Figurilla Blancanieves
 |  |  |
|---|---|---|
 |  |  |
 |  |  |


- Let the butter soften for 15 minutes at room temperature. Turn the oven on 180 °.
- Work the butter with the sugar in a bowl for 10 minutes, after which add the yolks and continue working the mixture.
- Melt the dark chocolate in a bain-marie and mix it with the mixture.
- Beat the egg whites until firm and set aside. Add the butter mixture and the egg yolks, the sifted flour with baking powder.
- Add milk and stir.
- If the mixture is too hard and dry, add a little more milk.
- Add the beaten egg whites to the mixture, being careful to always mix from the bottom up.
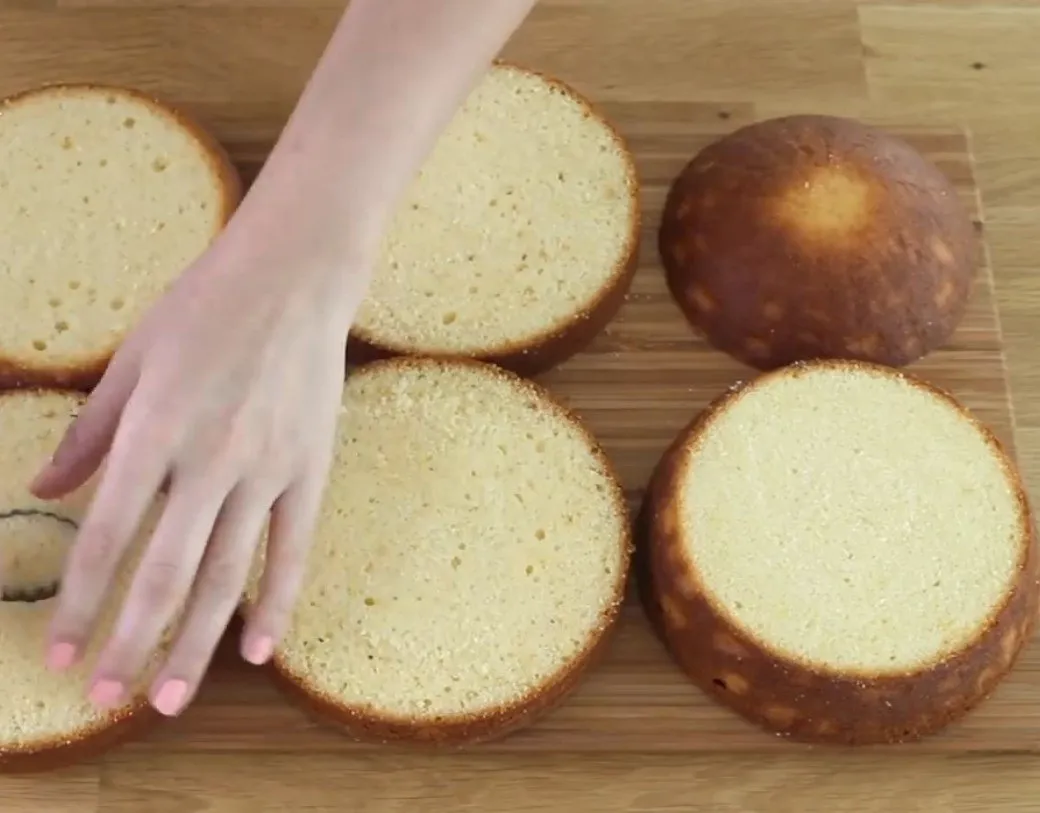
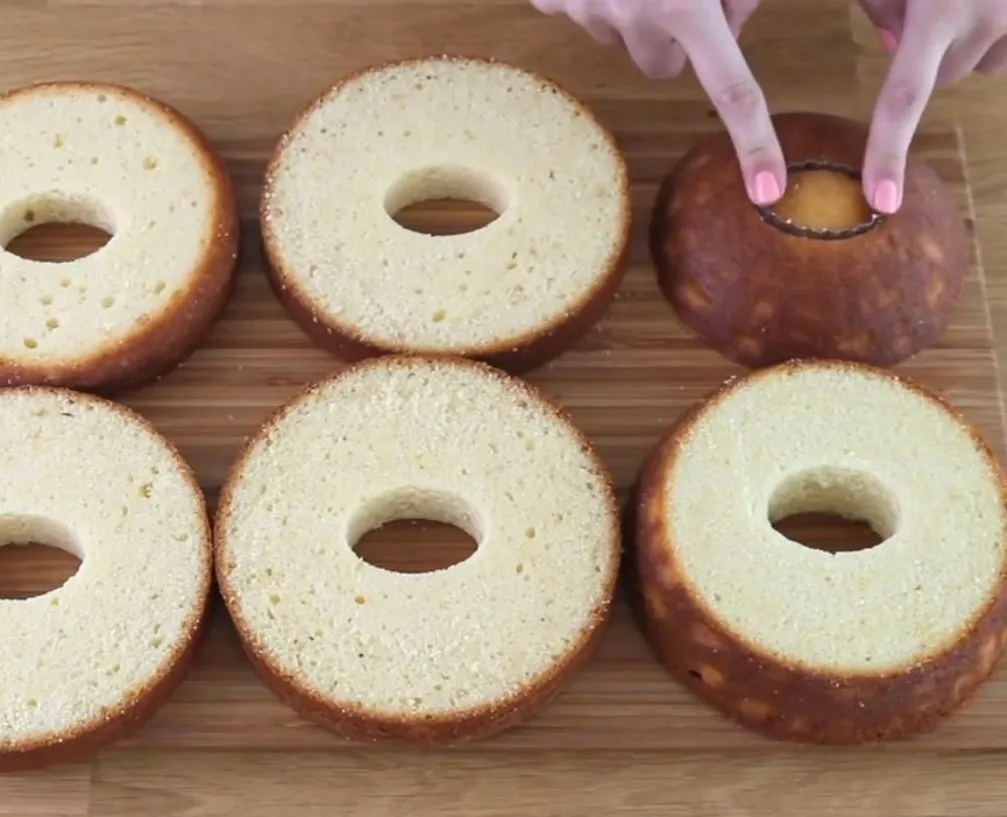
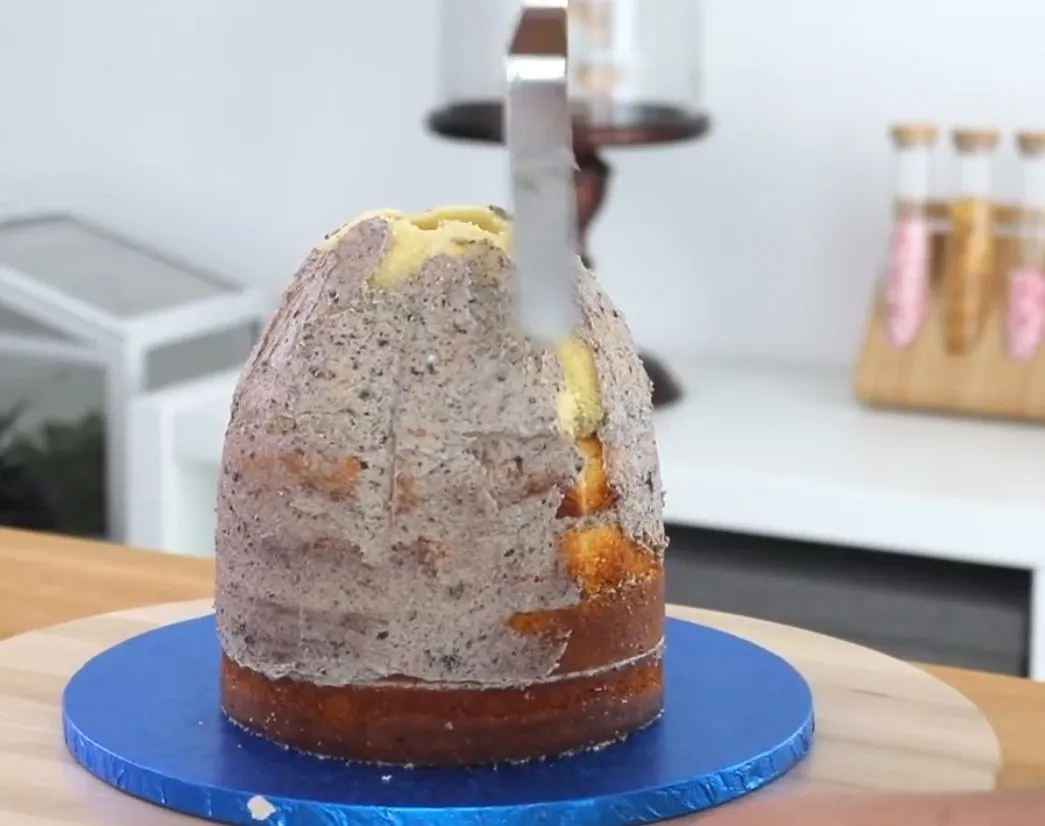
- Bake in a preheated oven at 180 ° for 55 minutes. When cooked, remove from oven and let cool.
- Prepare the custard according to the instructions on the bag.
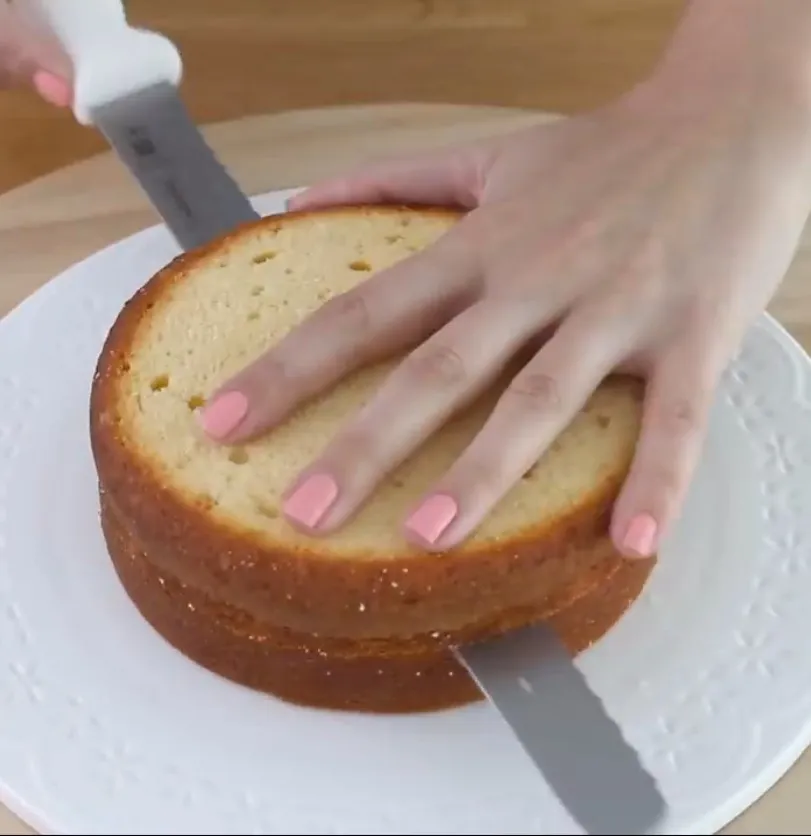
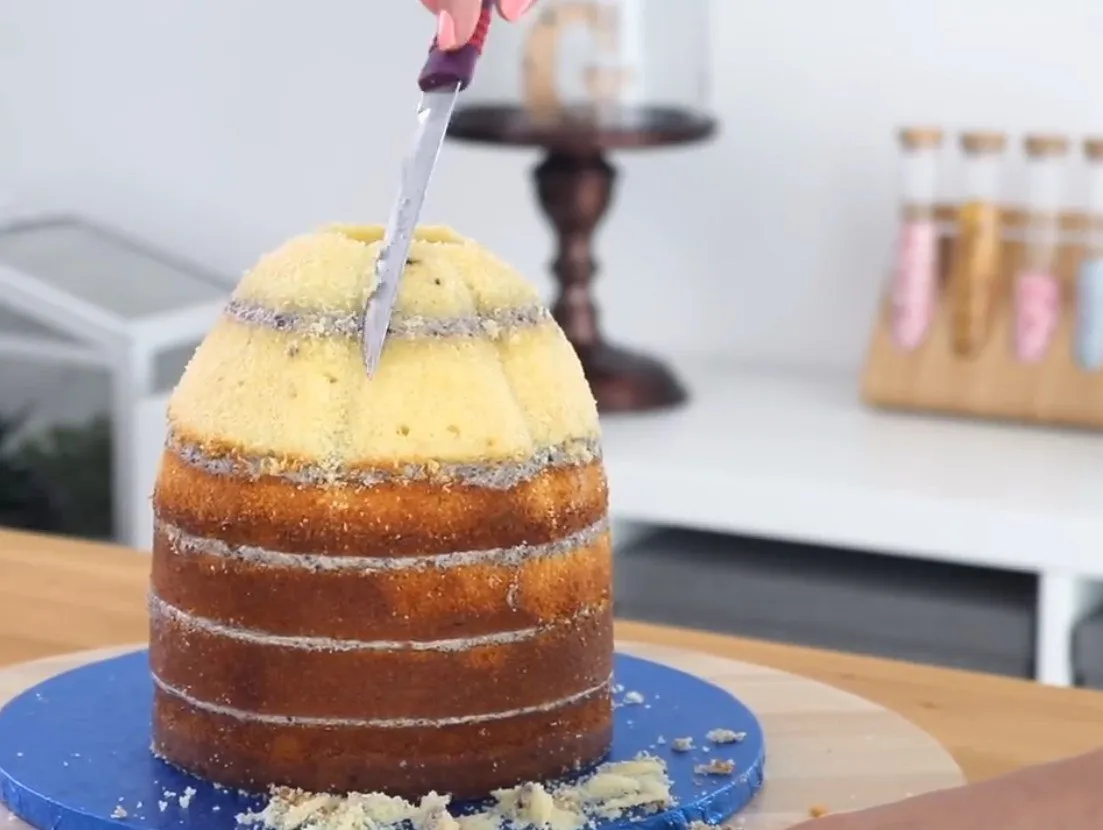
- When the cake is completely cold, cut it in half and fill it with the custard.
- If desired, you can soften the cake by moistening it with a little water and sugar.
- I did not do it because my children prefer cakes to eat with their hands and not on the plate with a fork.
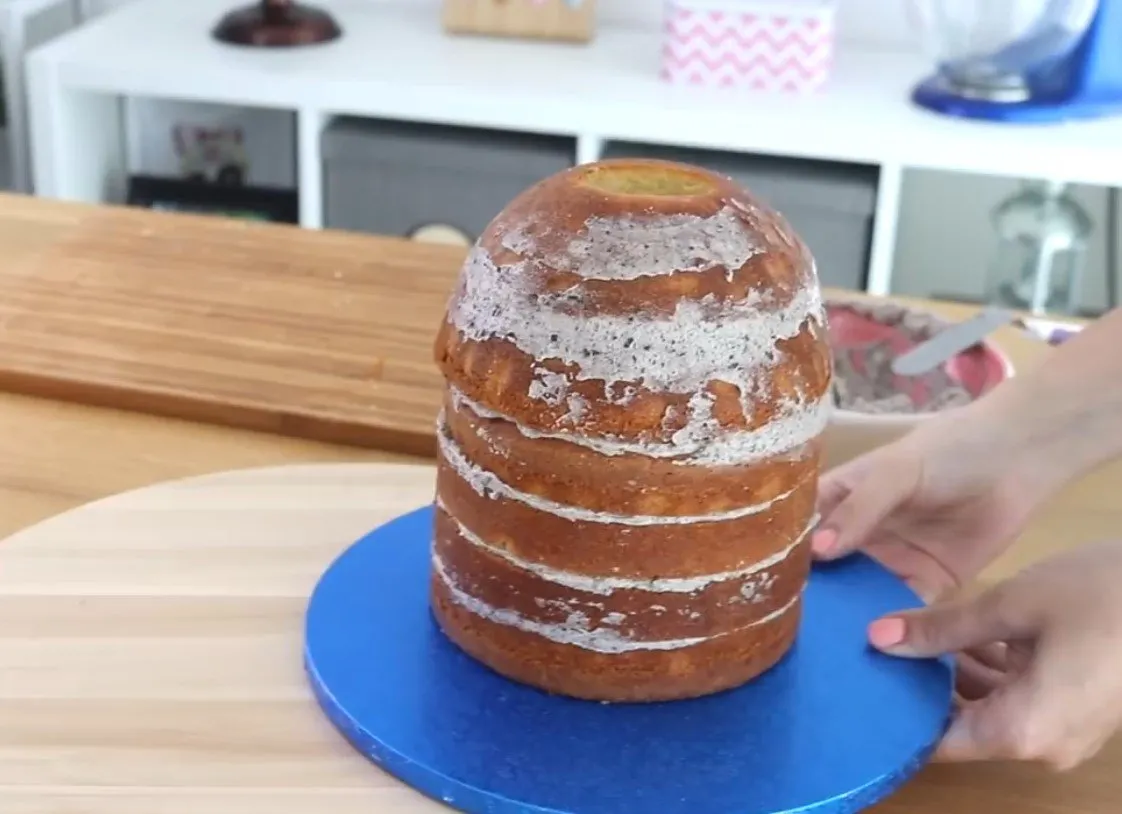
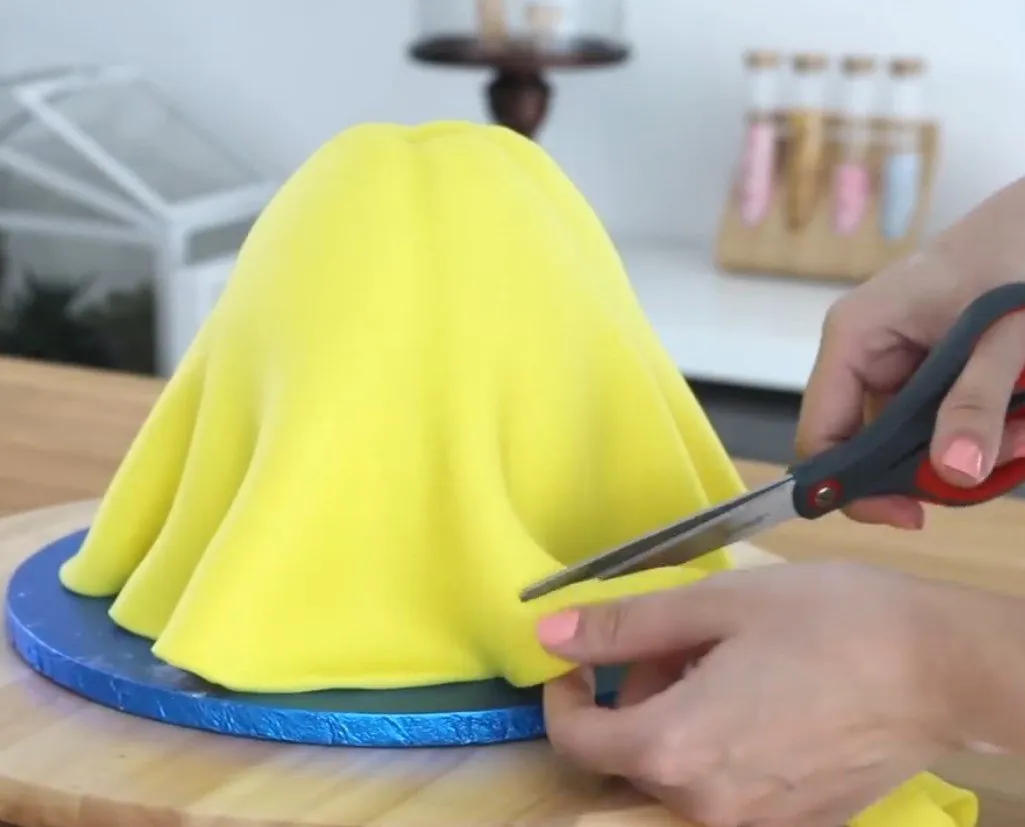
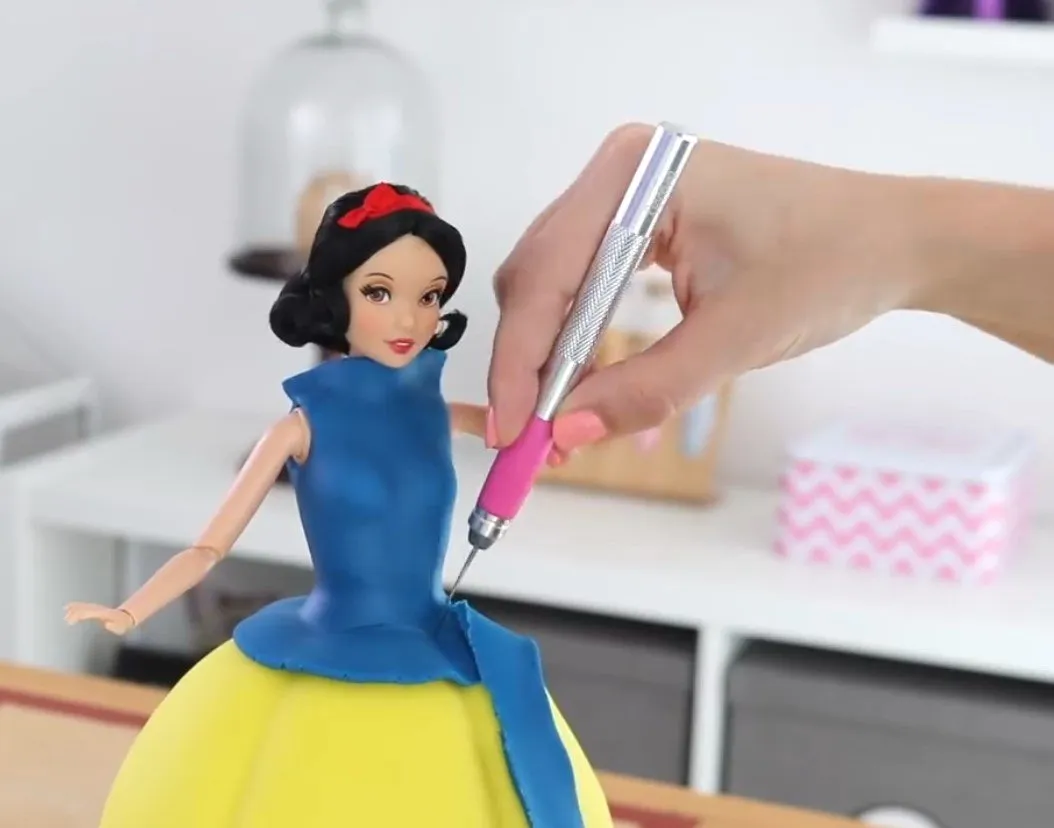
- Spread the MMF mass of the desired color as thin as possible. Actually, * I would have chosen a lighter color, but I didn't have time and used that smurf blue that I had already prepared.
- Cover the cake with the dough trying not to make too many folds on the sides.
- It is very difficult, it broke several times before I could cover it.
- On the other hand, for the flowers, since it takes time to prepare them, I made them the previous two days.
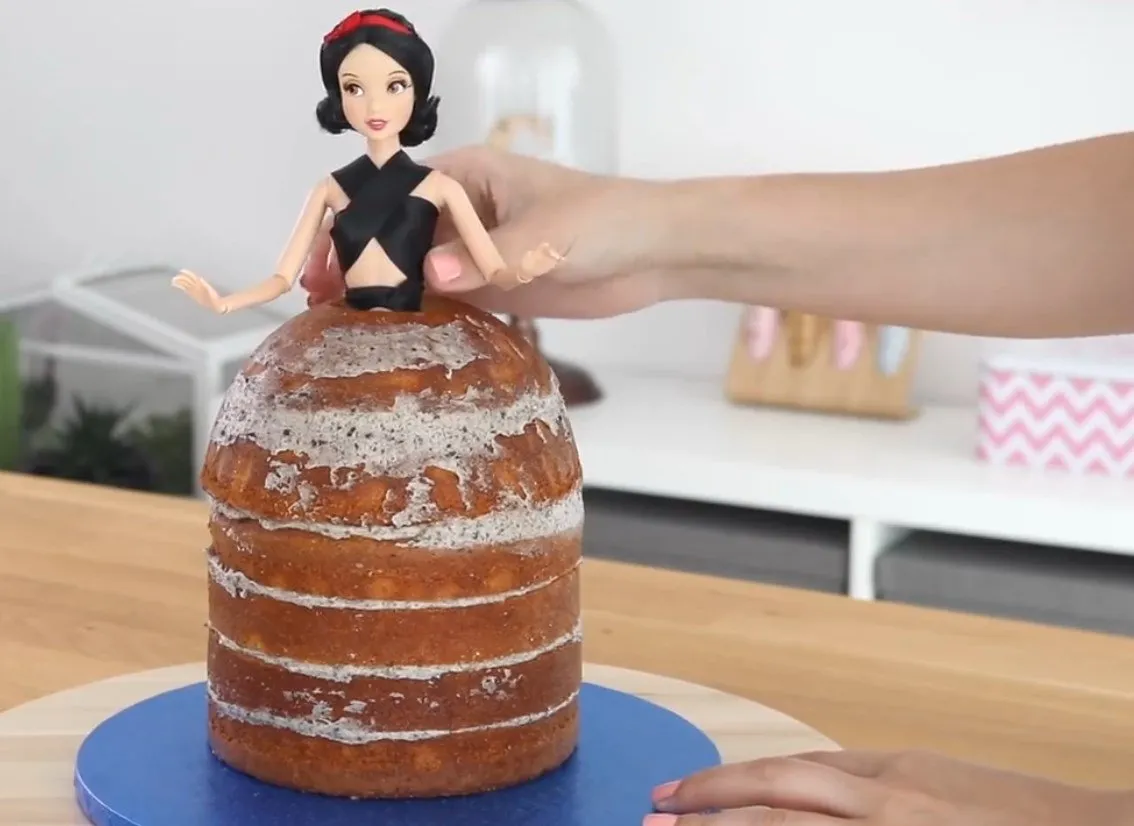
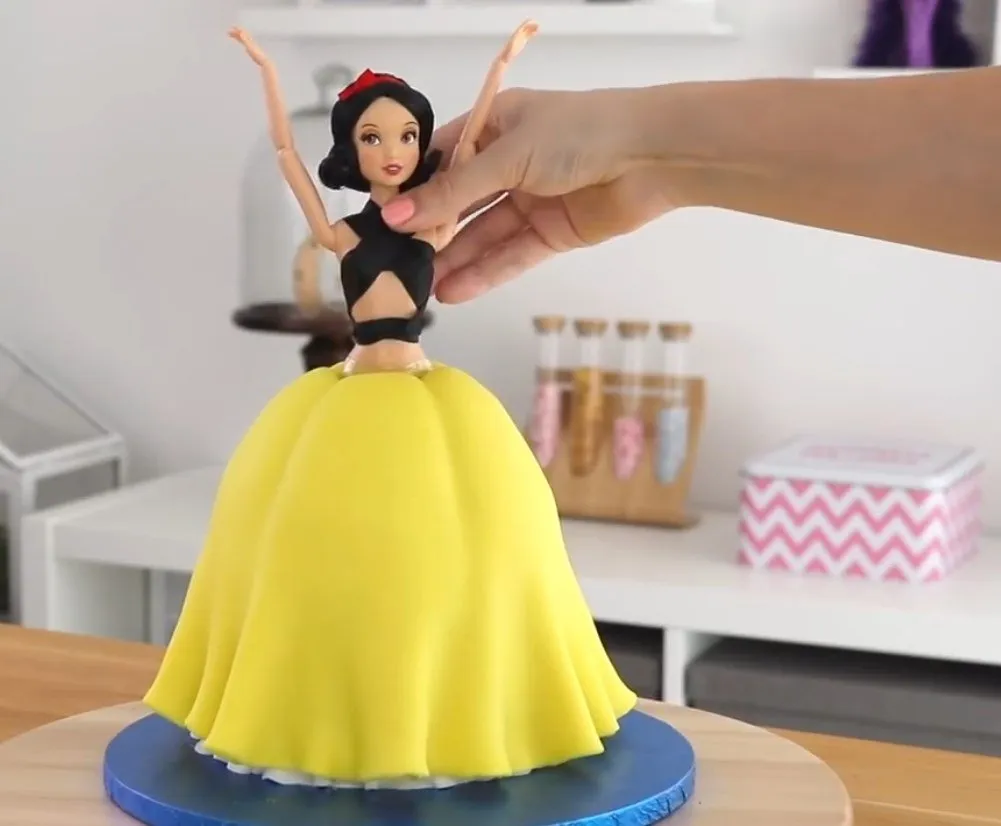
- However, once the cake is covered, all that remains is to arrange the Snow White figure and the flowers around it.
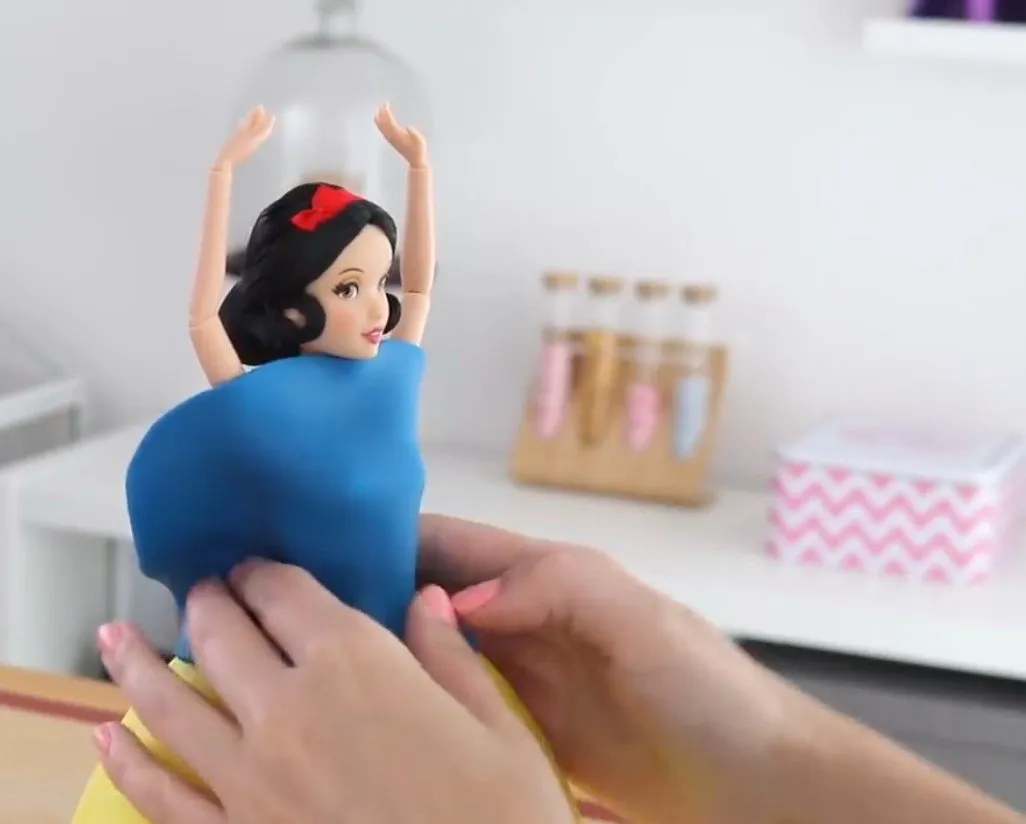
- My Snow White is nothing more than a special bubble bath package.
- I immediately thought about doing it with the MMF, but when I saw it in the perfumery I said why do so much.
- For my first MMF creation, I think it didn't go so bad.
 |  |  |
|---|---|---|
 |  |  |
 |  |  |
- Deja que la mantequilla se ablande durante 15 minutos a temperatura ambiente.
- Enciende el horno a 180°.
- Trabaja la mantequilla con el azúcar en un tazón durante 10 minutos, después de lo cual agrega las yemas y continúa trabajando la mezcla.
- Derrite el chocolate negro al baño maría y mézclalo con la mezcla.
- Batir las claras de huevo hasta que estén firmes y reservar. Agregue la mezcla de mantequilla y las yemas de huevo, la harina tamizada con polvo de hornear.
- Agrega la leche y revuelva.
- Si la mezcla es demasiado dura y seca, agrega un poco más de leche. > > * Agrega las claras de huevo batidas a la mezcla, teniendo cuidado de mezclar siempre de abajo hacia arriba.
- Hornea en un horno precalentado a 180 ° durante 55 minutos. Cuando esté cocido, sacar del horno y dejar enfriar.
- Prepara las natillas de acuerdo con las instrucciones de la bolsa.
- Cuando el pastel esté completamente frío, córtalo por la mitad y llénalo con las natillas.
- Si lo deseas, puede ablandar el pastel humedeciéndolo con un poco de agua y azúcar. No lo hice porque mis hijos prefieren pasteles para comer con las manos y no en el plato con un tenedor.
- Extiende la masa de MMF del color que desee lo más delgada posible. En realidad, habría elegido un color más claro, pero no tuve tiempo y usé ese azul pitufo que ya había preparado.
- Cubre el pastel con la masa tratando de no hacer demasiados pliegues a los lados.
- Es muy difícil, se me rompió varias veces antes de que pudiera cubrirlo.
- En cambio, para las flores, dado que lleva un tiempo prepararlas, las hice los dos días anteriores.
- Sin embargo, una vez que el pastel está cubierto, todo lo que queda es organizar la figura de Blancanieves y las flores a su alrededor.
- My Snow White no es más que un paquete especial de baño de burbujas. > * Inmediatamente pensé en hacerlo con el MMF, pero cuando lo vi en la perfumería dije por qué hacer tanto.
- Para ser mi primera creación de MMF, creo que no salió tan mal.

The original recipe has been published on my blog in Italian Il Mondo dei Dolci as a result of my several years of residence in that European country.
I have published more than 5,000 recipes in it so if you dare to translate them and modify some of the ingredients, related to each country, you can do it freely.
La receta original ha sido publicada en mi blog en italiano Il Mondo dei Dolci como consecuencia de mis varios años de residencia en aquel país europeo.
He publicado más de 5.000 recetas en el mismo así que si se animan a traducirlas y a modificar algunos de los ingredientes, afines a cada país, pueden hacerlo libremente.
Don't have a Hive account yet? Sign up for free here! Join in the fun and make money by publishing and commenting.
¿Todavía no tienes una cuenta de Hive? ¡Regístrate gratis aquí! Únete a la diversión y gana dinero publicando y comentando.