Well, as always, things happen when I make a new model 😅 this time some electrical problems and my pet got sick but he's better now, which is the important thing, I finally started to take the renders of the model that had already been ready for a few years 3 days.
With this model I learned to solve a problem with texture layers since sometimes the same thing happened to me when I had everything ready and when I exported the texture maps they came with errors but they advised me to go through photoshop to paint and I solved the problem! 😄 I hadn't learned something new for a long time, sometimes I'm stubborn and I always try to do it the same way I always use but it usually doesn't work until I try something new.
I loved working on this model, it was really great to do it, I really liked the fire effect that I used in the textures, I was thinking of making it a little more stylized but I also loved the work process and of course the final result!
- Work Tools:
Blender 3D
Armorpaint
Tablet Wacom Intuos 5
- Model of card:

- **Video in high speed 35 minutes: Here
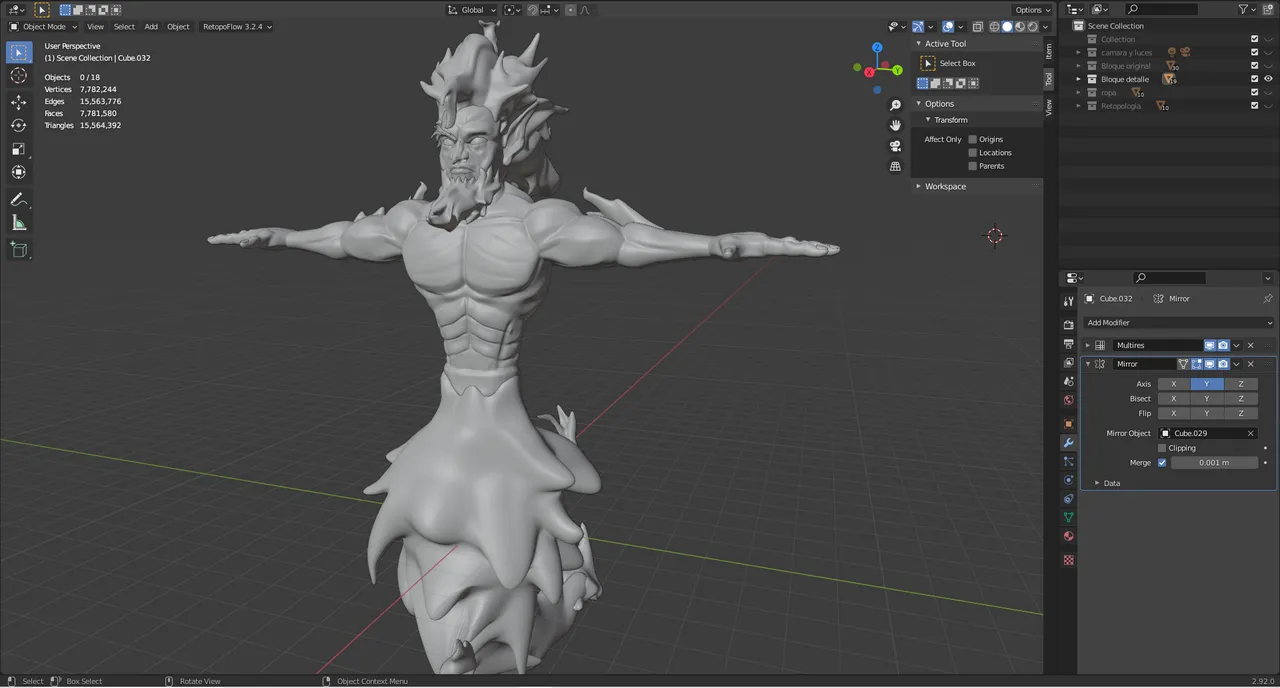
- Carved Model Block:
This process was quick as it was only the torso of the body but when I went for the fire of the beard and the hair it took me a bit since I did not know whether to use a single block or several to work the different undulations of the fire, then I went for the clothes and the last details of the model before unifying and doing the retopology to simplify the excess of polygons and thus optimize and the scenario that I made for its base.


- Textures in ArmorPaint:
Working with the textures was a little quick or so I thought at first since I didn't have many elements in the model, until I had problems making the body maps and after several attempts and asking about the problem they told me that I better paint those parts in photoshop and voila that's how it worked. I started applying the textures of the model once the problem was resolved and testing textures for the clothes.


- Textures in Blender:
This is how the model looks once finished with the textures exported from the Armorpaint program to Blender.


- Textures and render tests:
Then I made a background and tried applying some lights since I always use an HDRi backlight most of the time and it greatly improved the result, I also applied an adjustment to the body's texture to prevent it from looking so plastic and finally put a black background.


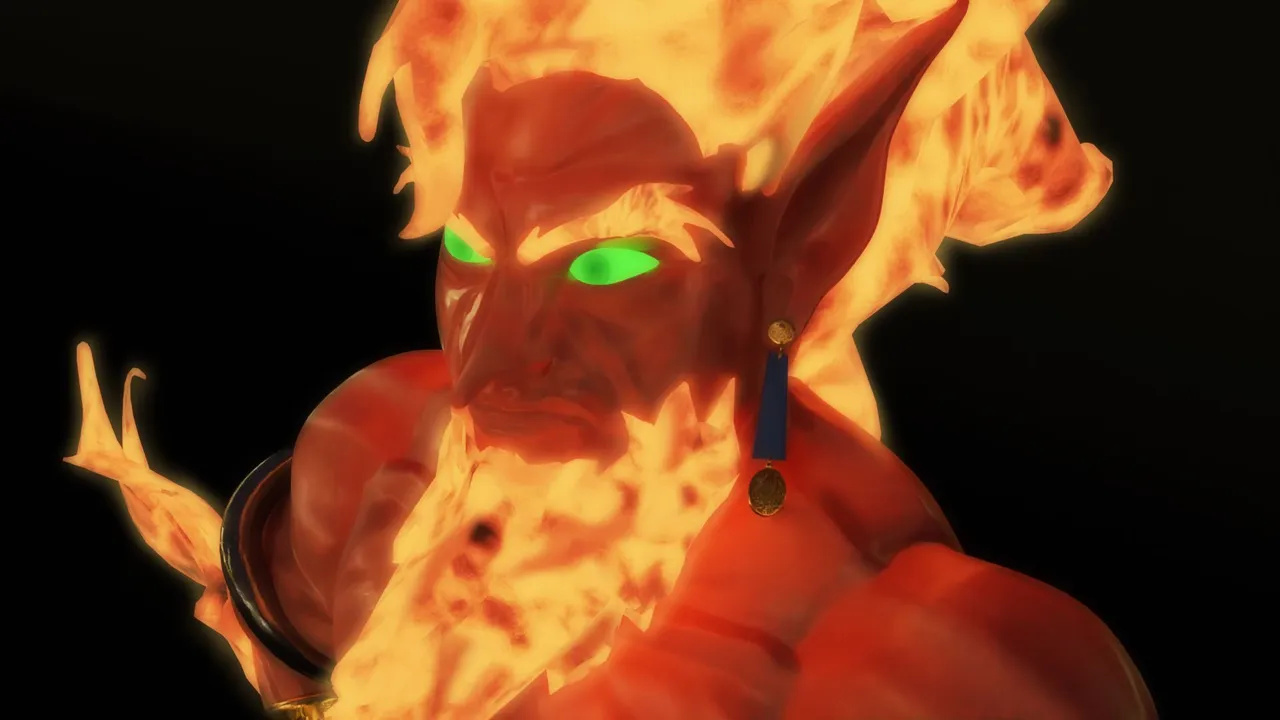
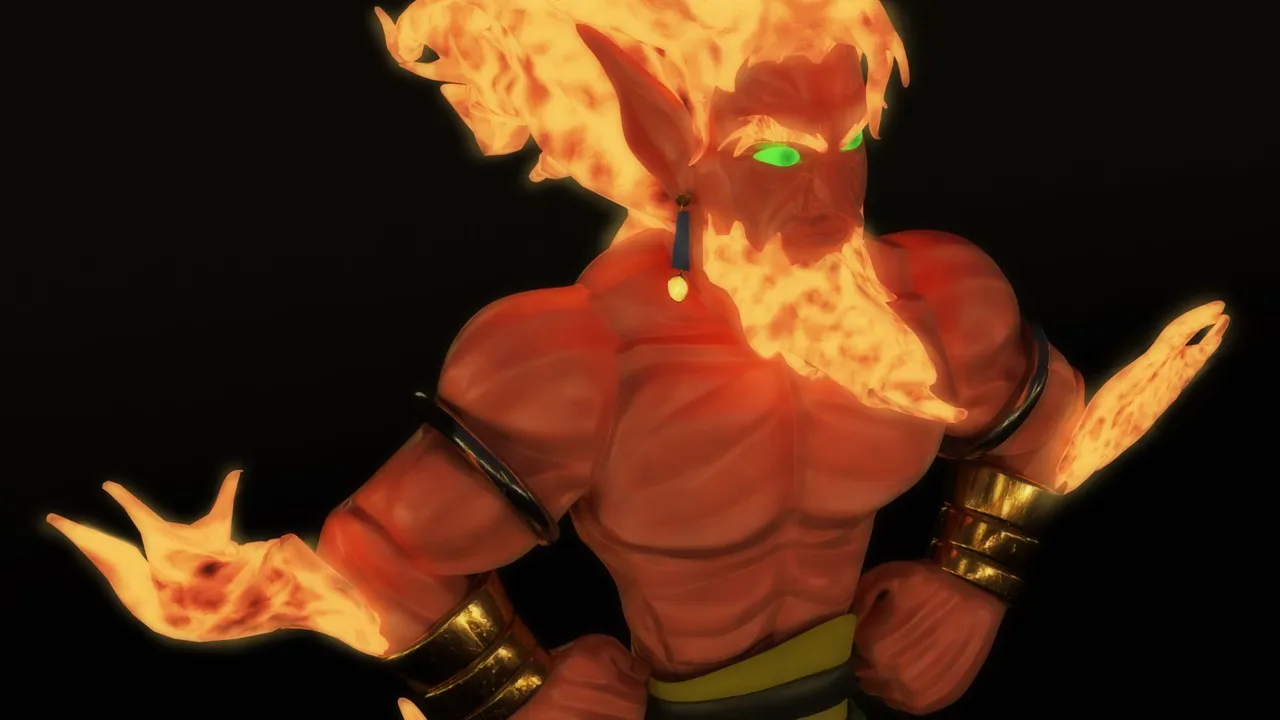
- Renders ready:
This was the final result of the model, I really liked it, even though I think the background lacked a little more detail with some other elements apart from the vases and the gold coins along with the rocks, maybe apply more coins and some vegetation, although the original idea was something like a desert.


Thank you very much and I hope you liked my post Greetings 😄

Mail: luislr0804@gmail.com
If you need my services you can contact me from my email or from my own Peakd profile leaving a message in my post 😄