
Please watch the video from start to finish for effective and efficient steps. Don't hesitate to click the Upvote and Follow buttons to support me make more videos.
Hello! My name is Hira Karmachela a.k.a BABE ODED. On this occasion, I will share my experience to create animated retro pixel art for game splash screen using Clip Studio Paint.

Below is a summary of the steps explained via video.
Canvas Setup for Pixel Art
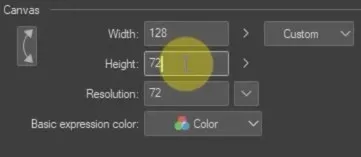
Let's get started! Open Clip Studio Paint then create a new canvas. The final work we are going to create will be 1280px by 720px but to create pixel art, we only need to create 10% of that size. So the canvas dimensions we need are 128px by 72px.
Next, we have to set the grid to make it easier to draw pixels. Go to View > Grid.
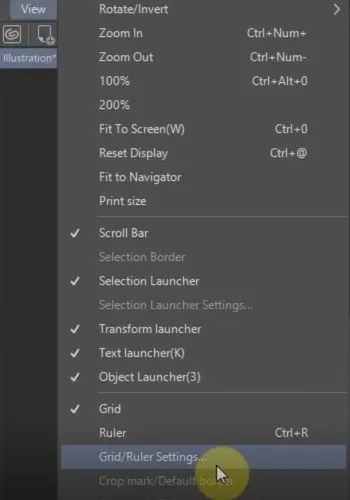
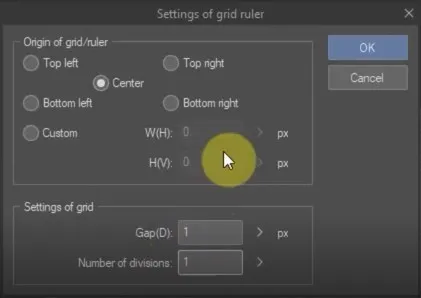
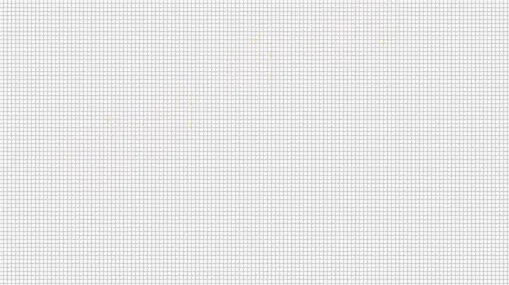
Now we can see it on the canvas. But we still have to adjust the grid size. Go to View > Grid/Ruler Settings. Set the origin at the center and set the Gap (D) and Number of divisions to 1.
Retro Color Scheme
Before we start compiling pixels. First, we need created a color palette that fits the retro style. Create a new layer to make it as a palette, name the layer as "retro palette". Below are the colors on the retro palette that we need.
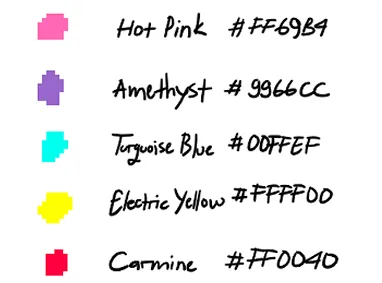
For the rest we still need Black and White which we can take in the standard palette panel.
Tools Setup for Pixel Art
OK! There are several tools that we can use to create pixel art with special settings such as lines, curves, and shape tools to create precise pixel objects. We need to turn off the Anti-Aliasing feature. Anti-Aliasing is a feature that makes the edges of digital image objects look smooth by adding and manipulating the color of the sample pixels around them.
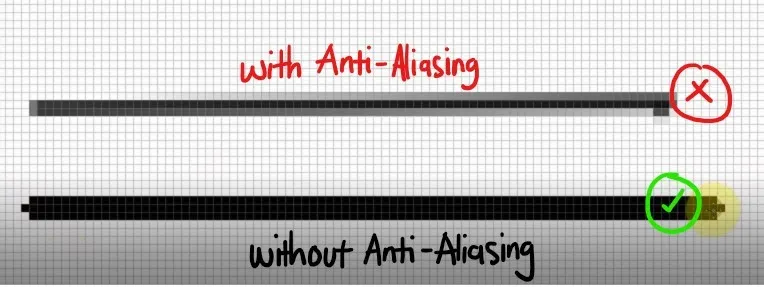
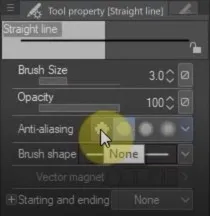
With Anti-Aliasing of course pixel art won't look good. So, we have to disable this feature in the tool-property panel on the left. In the Anti-Aliasing section there are several levels, select "None".
OK! The rest we can use other tools as needed.
Retro Background
Now let's have a pixel feast. We start by creating the background for the splash screen that we are going to create, of course in a retro style. I divide the canvas with a 1px thick line as the horizon dividing of the sky and ground area.
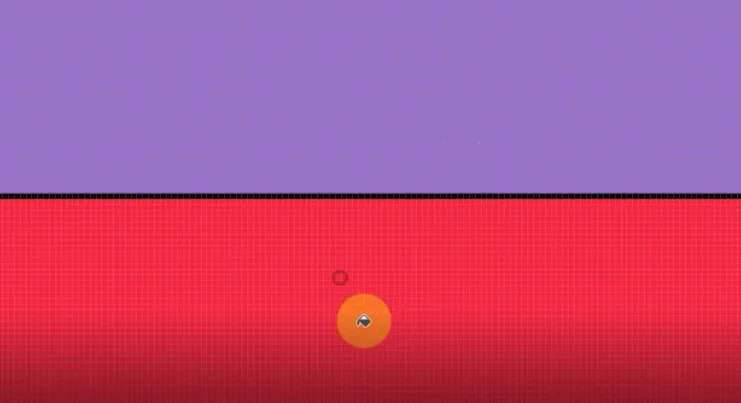
I decorate the background with mountains silhouette image. Use the line tool with black to draw the mountains on the right and left of the sunset image.
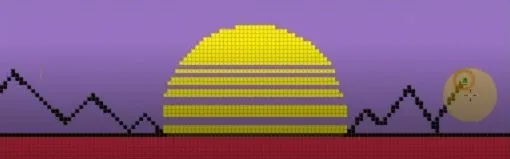
Now we move to the ground area, create a new layer to create a mesh over the ground. I use the line tool with Turquoise Blue color to make a precise design. Draw the line diagonally resting on a single point for perspective.
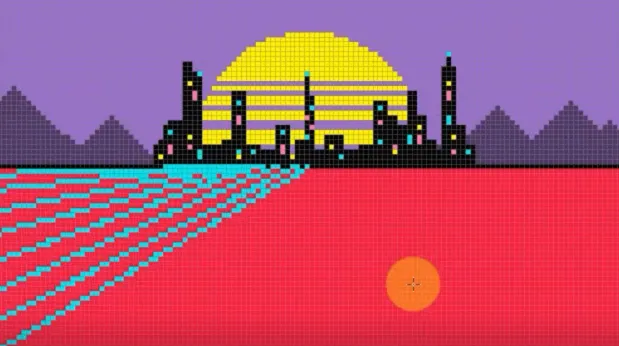
Retro Street Environment
Next, we create objects for the environment. We're going to create a retro street atmosphere. It's simple, I will make road markings and a line of palm trees on the left and right shoulders of the road.
Next, create another new layer to make a palm tree. Use the dot pen tool to make it. Make it symmetrical on the right and left.
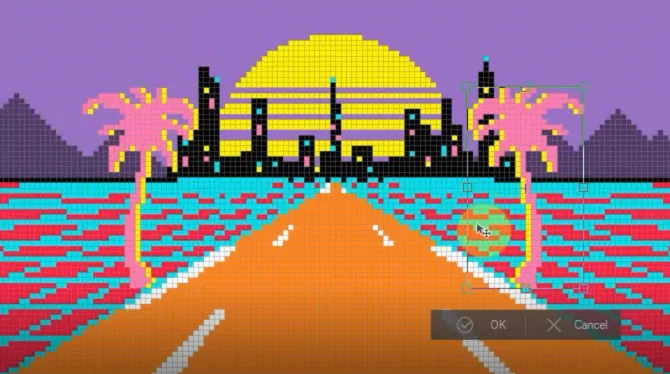
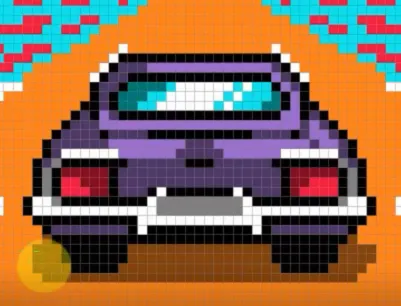
Retro Car Object
OK! Now it's time to create the main model. Create a new layer for the retro car object. Use a dot pen to draw it.
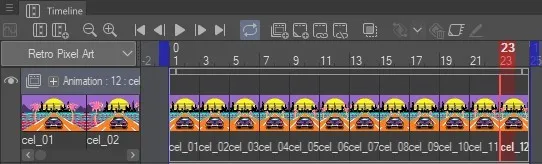
Animating Process
Now it's time to bring the scene to life. There are two parts that we will animate, namely the street environment and the lights in the buildings.
As the road markings move, the palm trees also have to shift toward the bottom of the canvas. From a logical perspective, the object that approaches the view will look bigger. So, as it shifted, the palm tree had to be scaled up.

Rendering and Publishing
OK! I've finished composing and filling every 2 frames with the animated cel for a total of 24 frames.
Before we render and publish this animation. Let me remind you that this animation has dimensions of 128px by 72px. So that if we render it right away, the result we can see will be this size.
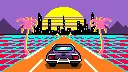
For that, we need to resize it first. Change the width to 1280px and the height to 720px. Then change the Interpolation method to Hard Edges. Then the image will be enlarged without destroying the pixel arrangement.
Thank you for visiting this post. Look forward to my next works.
Visit My Gallery:
Twitter: babeoded
Instagram: babeoded
Henext: babeoded
Opensea: babeoded
NFT Showroom: karmachela
▶️ 3Speak