♥ Español ♥
Lo prometido es deuda compañeros de Hive ♥ Hoy vengo a mostrarle un estilo de sombreado que a mi personalmente me encanta para mis estilos de dibujo.
Les explicaré paso a paso como se hará, teniendo como ejemplo esta ilustracion que yo misma hice.
♥ English ♥
The promise is due, fellow Hive ♥ Today I come to show you a shading style that I personally love for my drawing styles.
I will explain step by step how it will be done, taking as an example this illustration that I made myself.
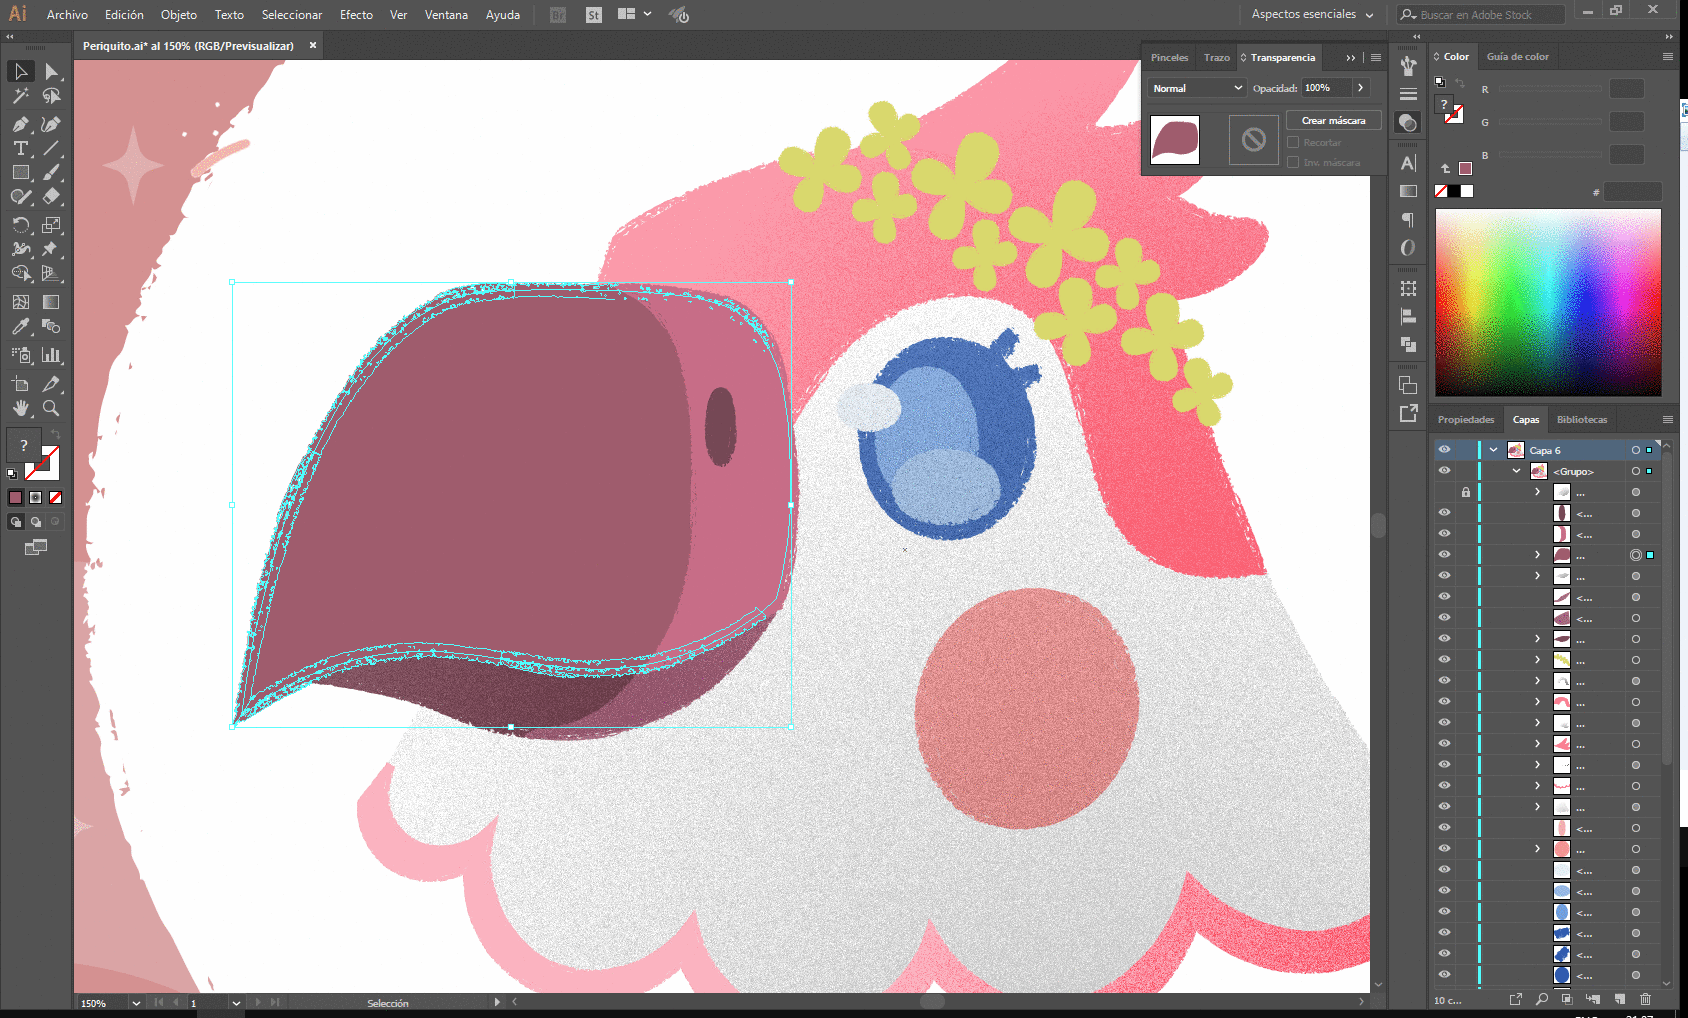
El primer paso será seleccionar el objeto al que queremos aplicar el efecto.
The first step will be to select the object to which we want to apply the effect.
Al tenerlo seleccionado usaremos el comando CTRL+C para copiar, seguido usaremos en comando CTRL+F para pegarla en la capa superior.
When we have it selected we will use the CTRL + C command to copy, followed by the CTRL + F command to paste it in the upper layer.

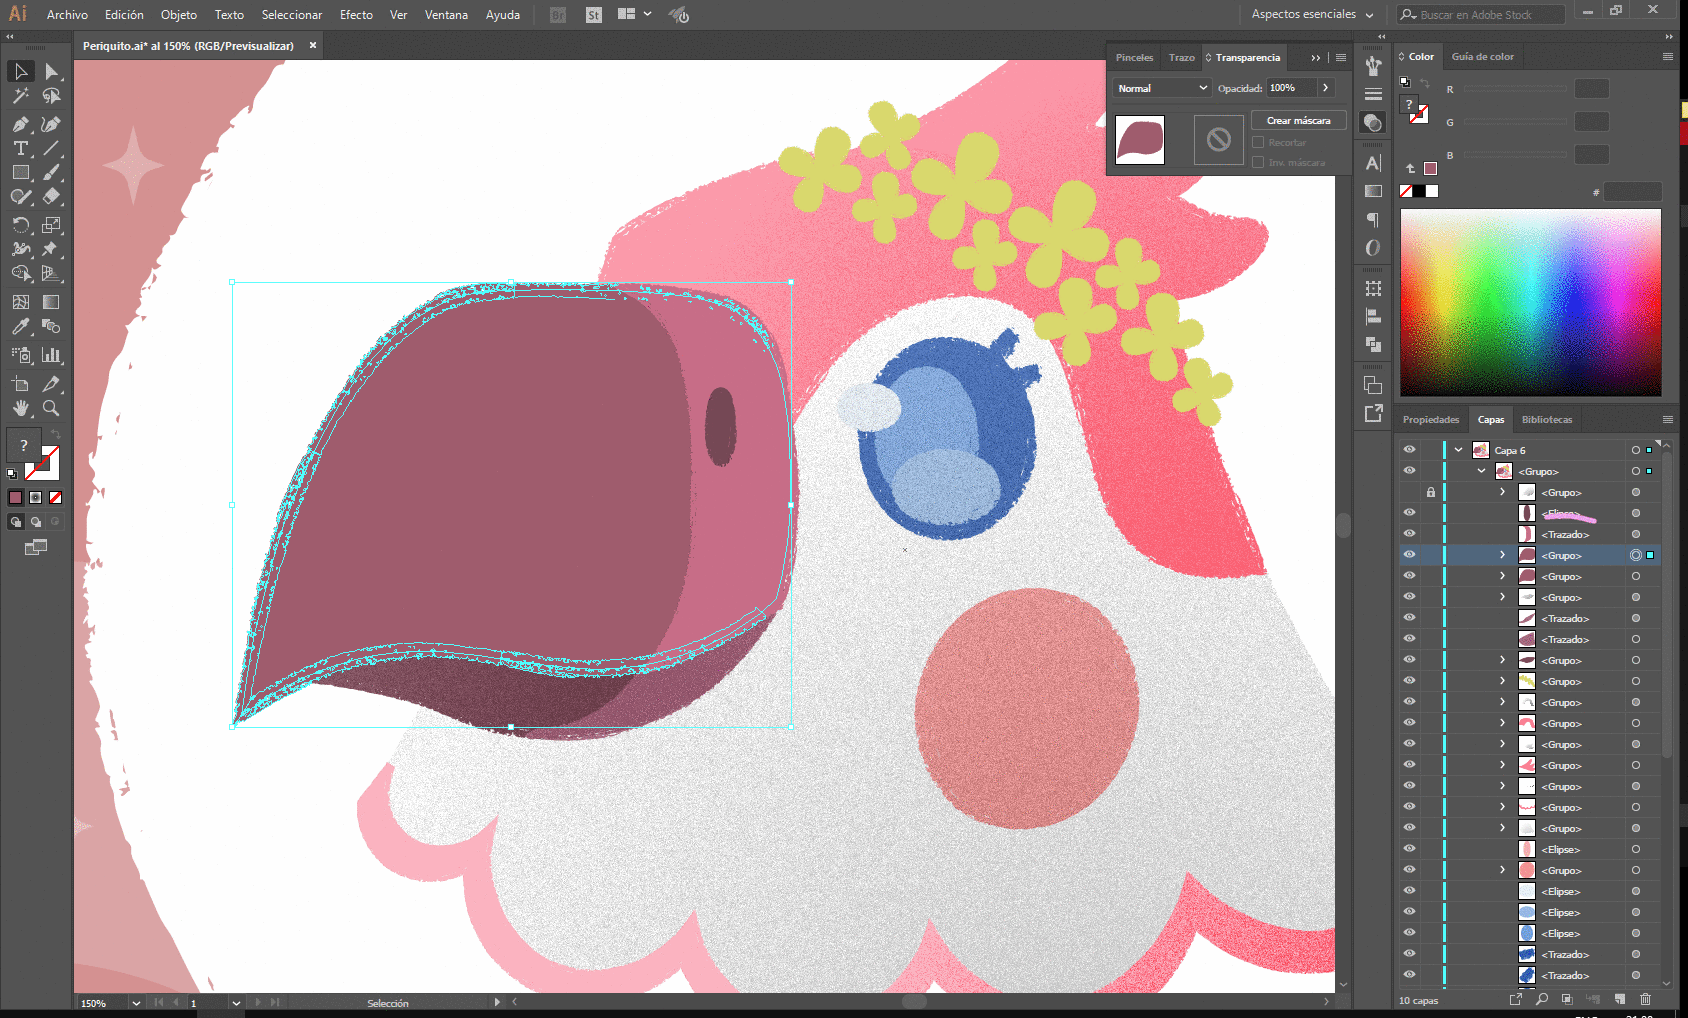
Seleccionando la capa superior, abriremos las opciones de degradado y lo colocamos en tipo radial, nos quedará algo así.
Selecting the upper layer, we will open the gradient options and place it in radial type, we will have something like this.
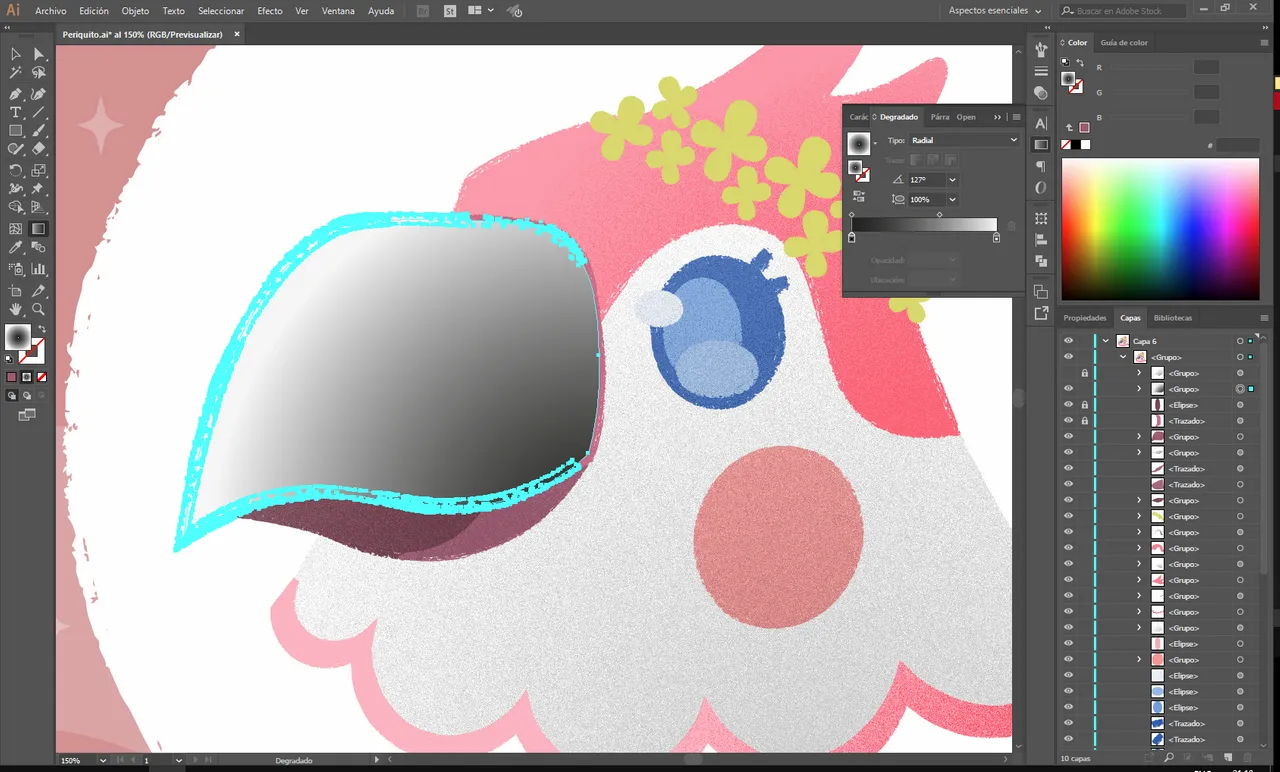
aplicamos el degradado a nuestro gusto, en mi caso quedará de esta forma.
We apply the gradient to our liking, in my case it will be this way.
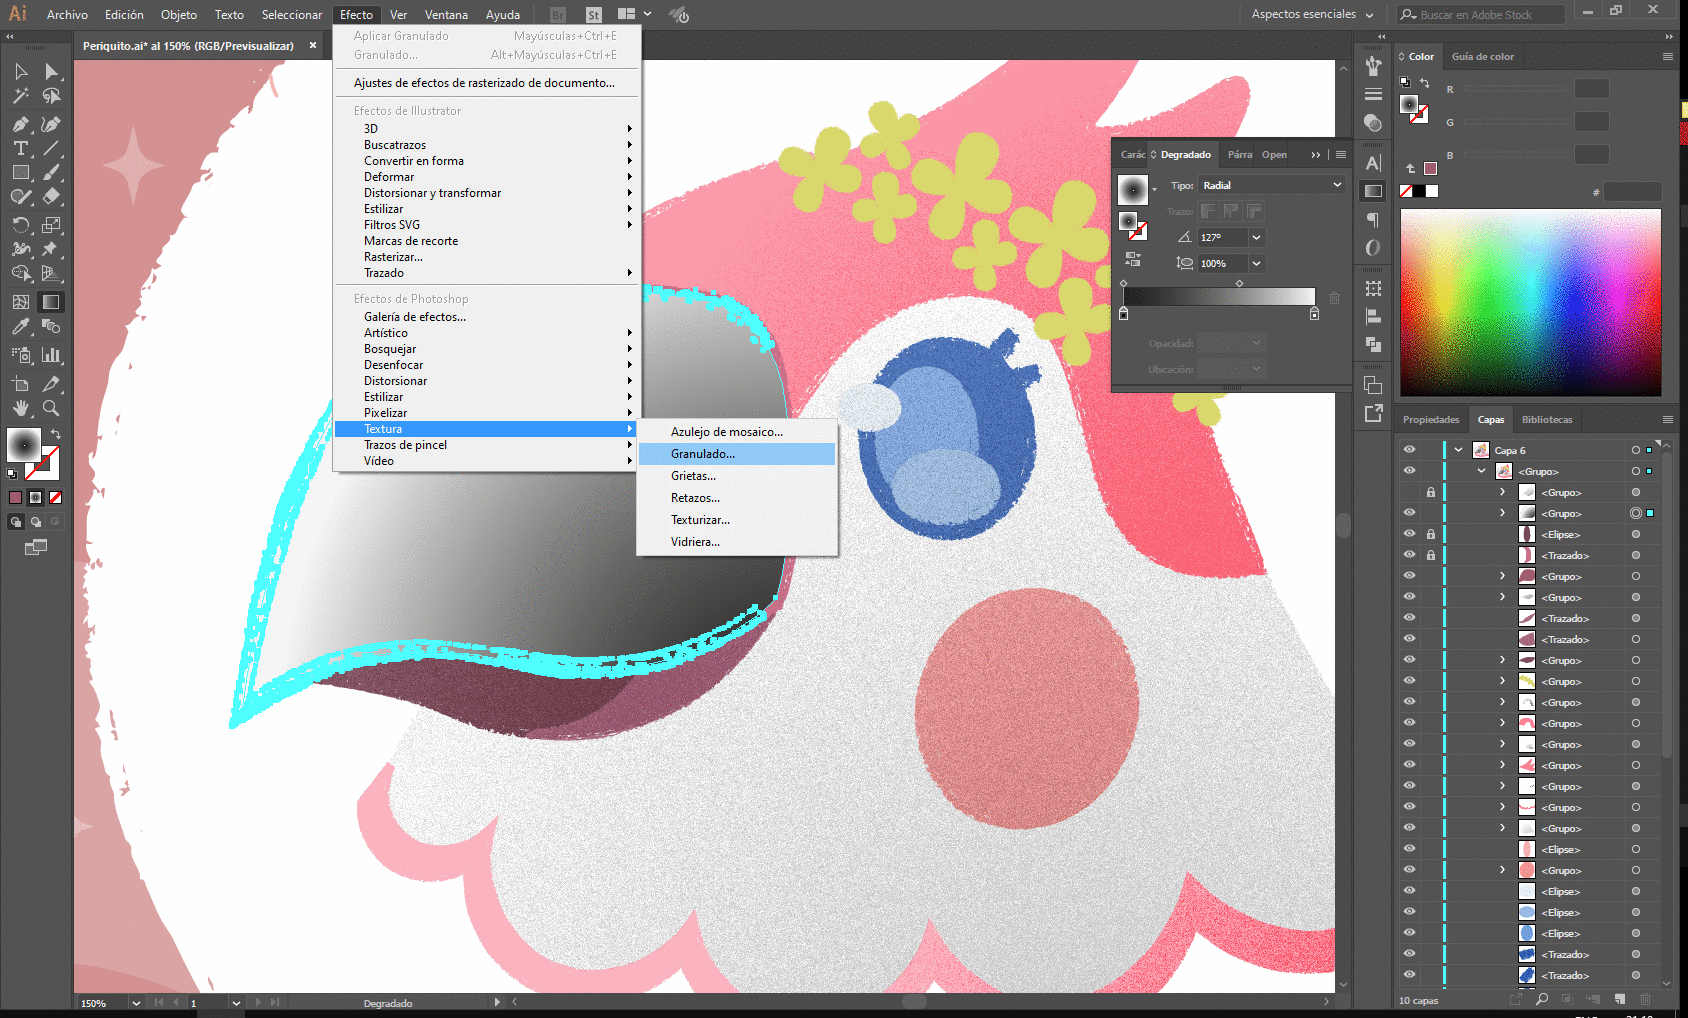
Ahora nos dirigimos al menú Efectos y luego en el apartado de texturas seleccionamos el efecto Granulado.
Now we go to the Effects menu and then in the textures section we select the Grain effect.
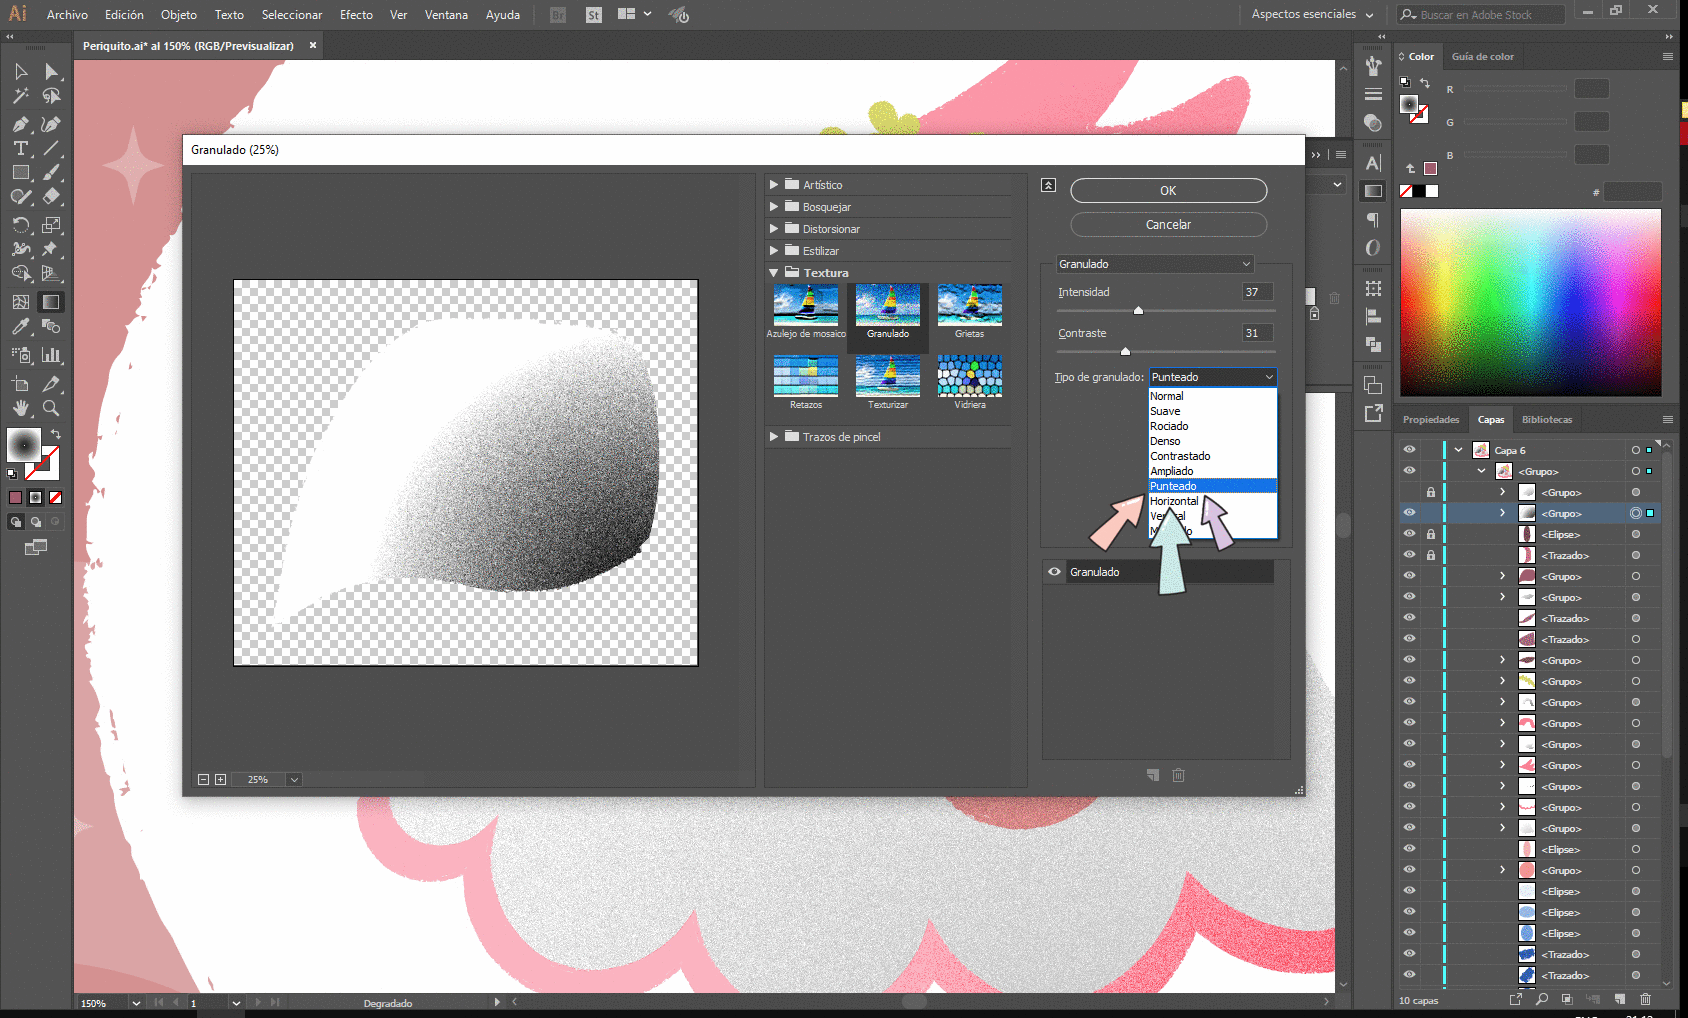
En las opciones de granulado, seleccionamos la opción de punteado, luego modifica la intensidad y contraste a tu gusto.
In the grain options, we select the stippling option, then modify the intensity and contrast to your liking.
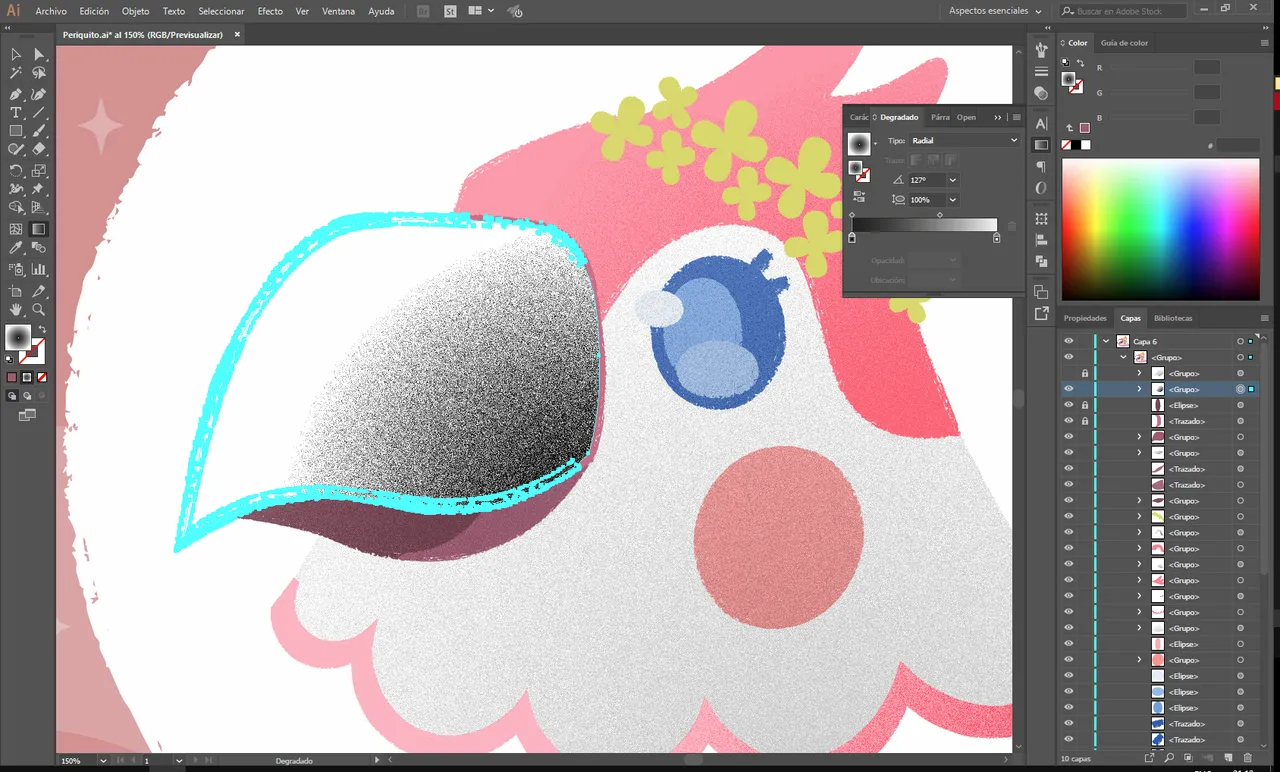
Nos quedará este efecto de degradado en nuestra ilustración.
We will have this gradient effect in our illustration.
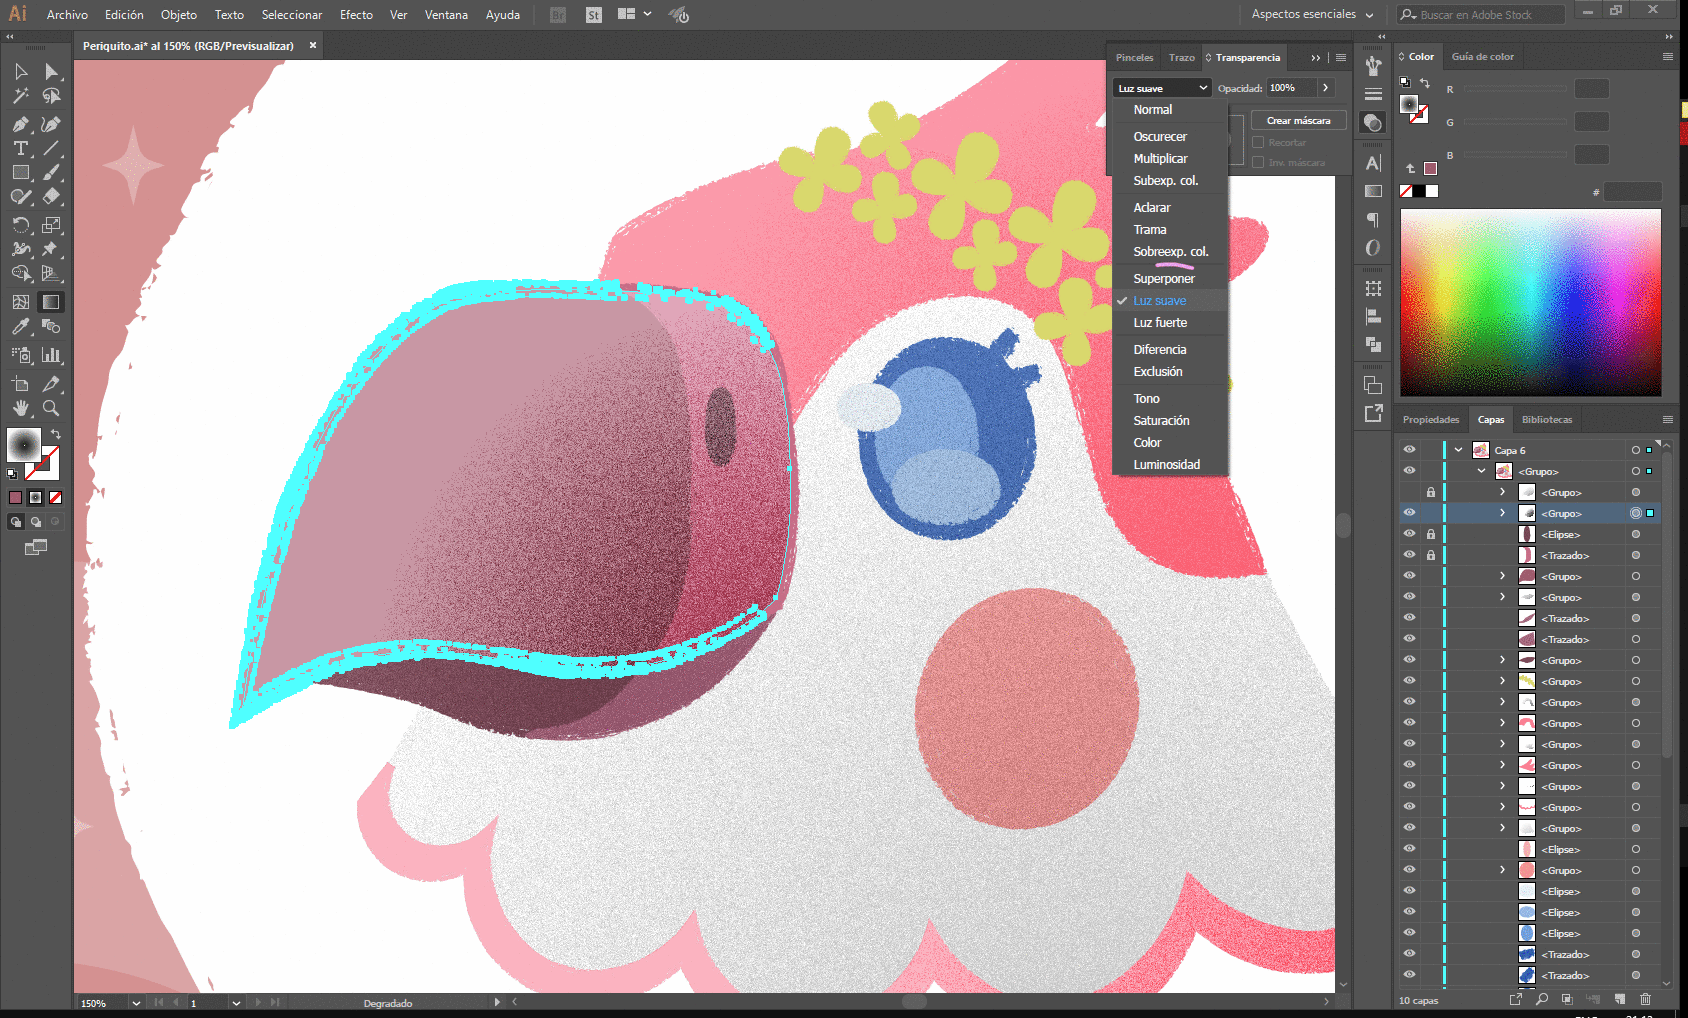
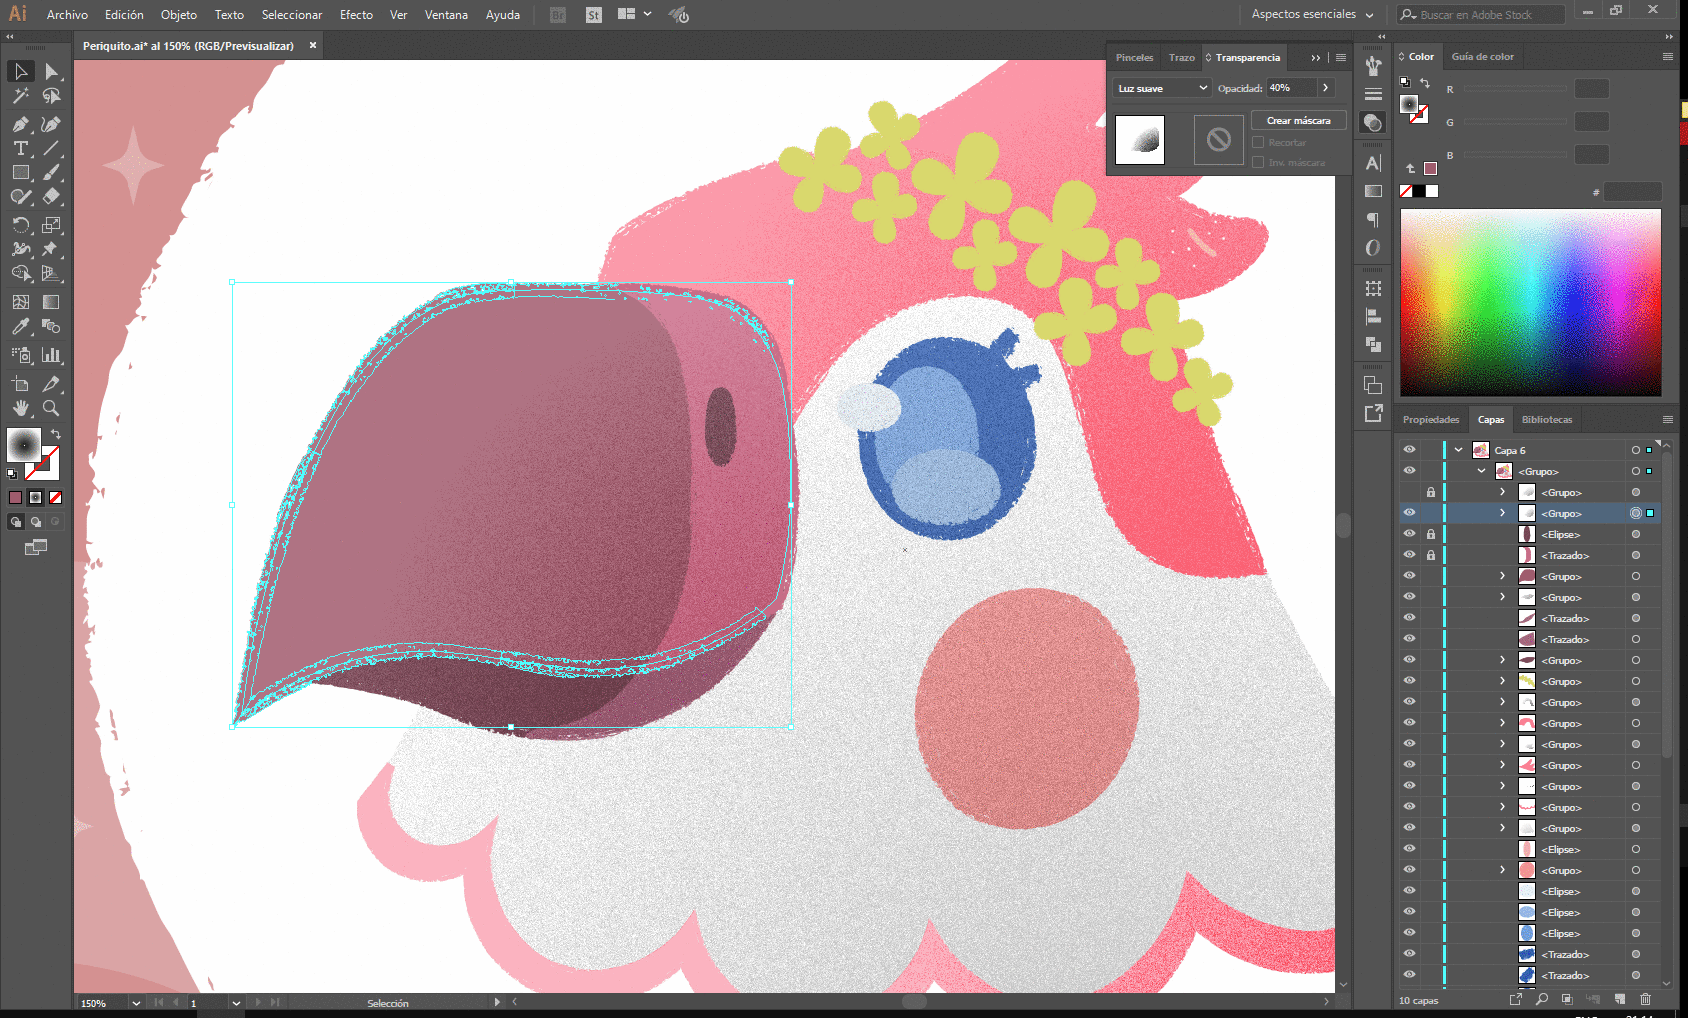
Ahora para terminar tendríamos que irnos a opciones de transparencia y colocar la capa con la opción de luz suave. Nos quedará así como lo muestra en la imagen.
Now to finish we should go to transparency options and place the layer with the soft light option. It will be as shown in the image.
¡Y listo! Ahora solo toca jugar con la opacidad para tener el mejor resultado. ♥
And ready! Now you just have to play with the opacity to have the best result. ♥
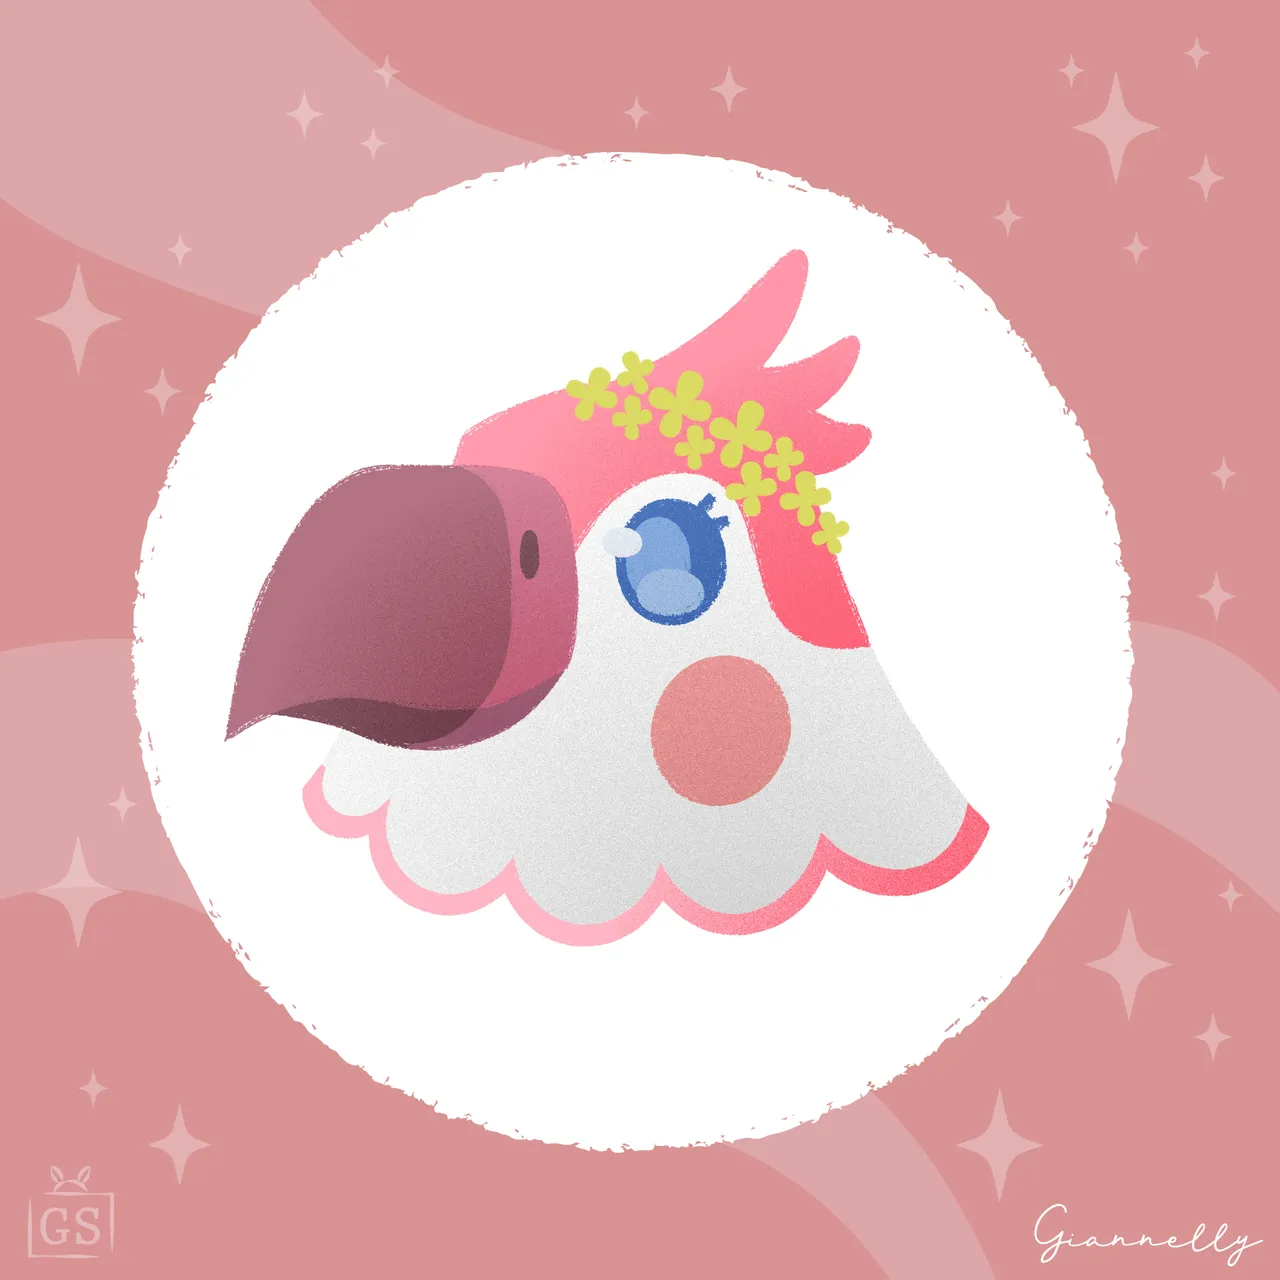
¡Este seria el resultado final! ¿no se ve interesante el efecto en las ilustraciones? Sin duda es uno de mis favoritos y seguiré usándolo para muchos mas.
¡No olvides apoyar si te ha gustado!
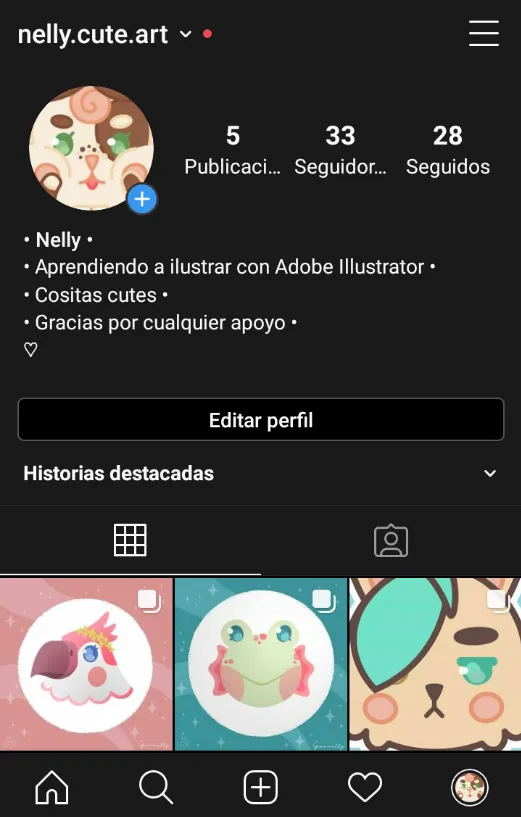
Recuerda que tengo instagram en donde iré subiendo varias ilustraciones hechas por mi.
This would be the end result! Doesn't the effect look interesting in the illustrations? Without a doubt it is one of my favorites and I will continue to use it for many more.
Don't forget to support if you liked it!
Remember that I have instagram where I will upload several illustrations made by me.