Greetings Hivers, today I bring you my work process of a digital illustration, this time it is a red-haired military girl.
Saludos Hivers, el día hoy les traigo mi proceso de trabajo de una ilustración digital, en esta ocasión es una chica pelirroja militar.

Process / Proceso
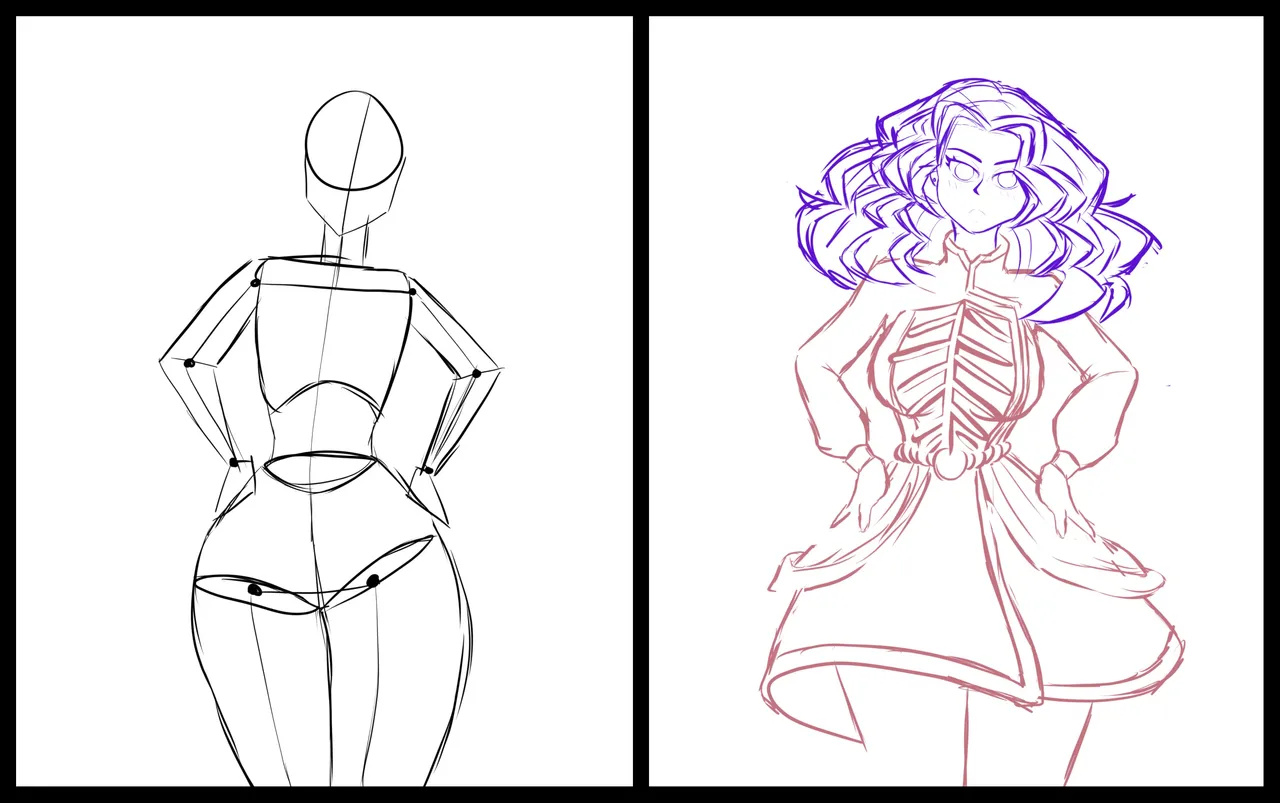
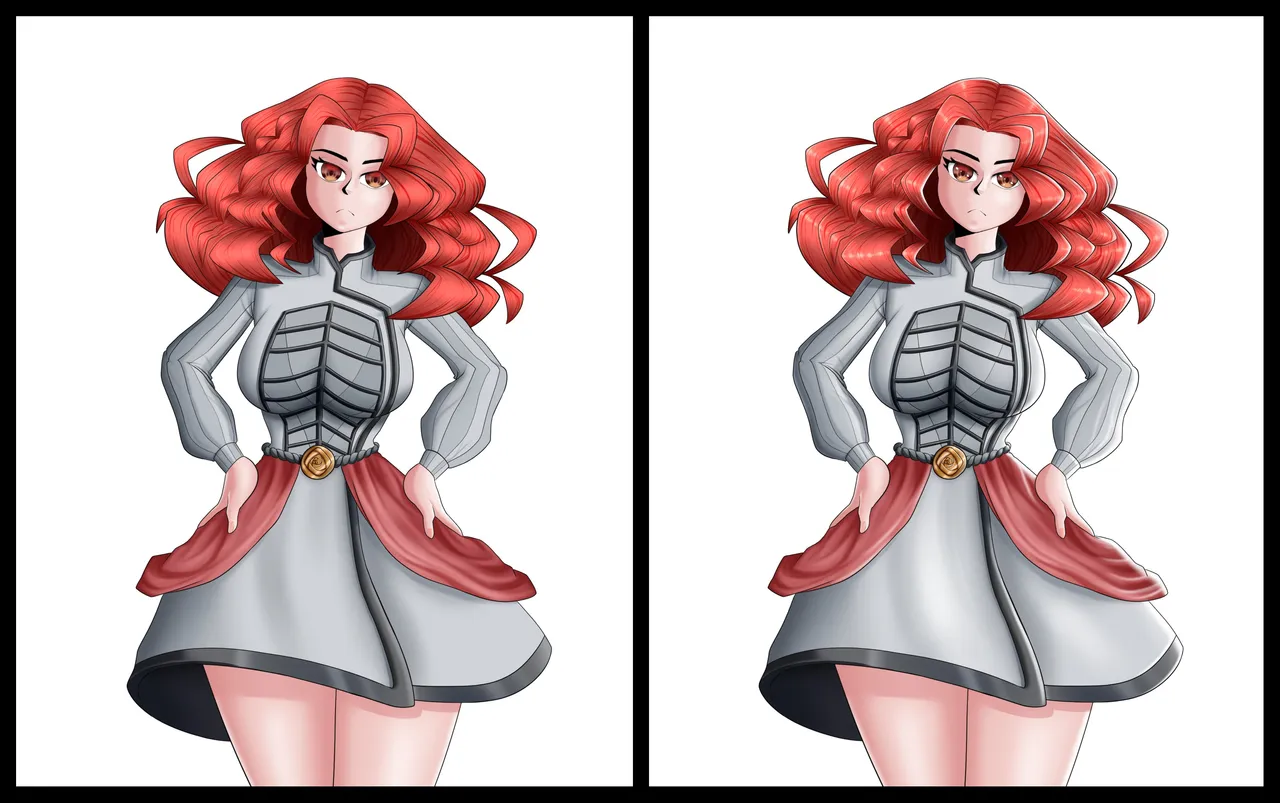
As I always started with the pose, this time I wanted her to be from the front, with a certain air of being annoyed, her hair is curly and wild, but to give it a different touch I did it as a zigzag instead of They were like rollers.
Como siempre comencé con la pose, en esta ocasión quise que fuera de frente, con un cierto aire a que estuviera como molesta, su cabello es rizado y salvaje, pero para darle un toque diferente lo hice como en forma de zigzag en vez de que fueran como rulos.
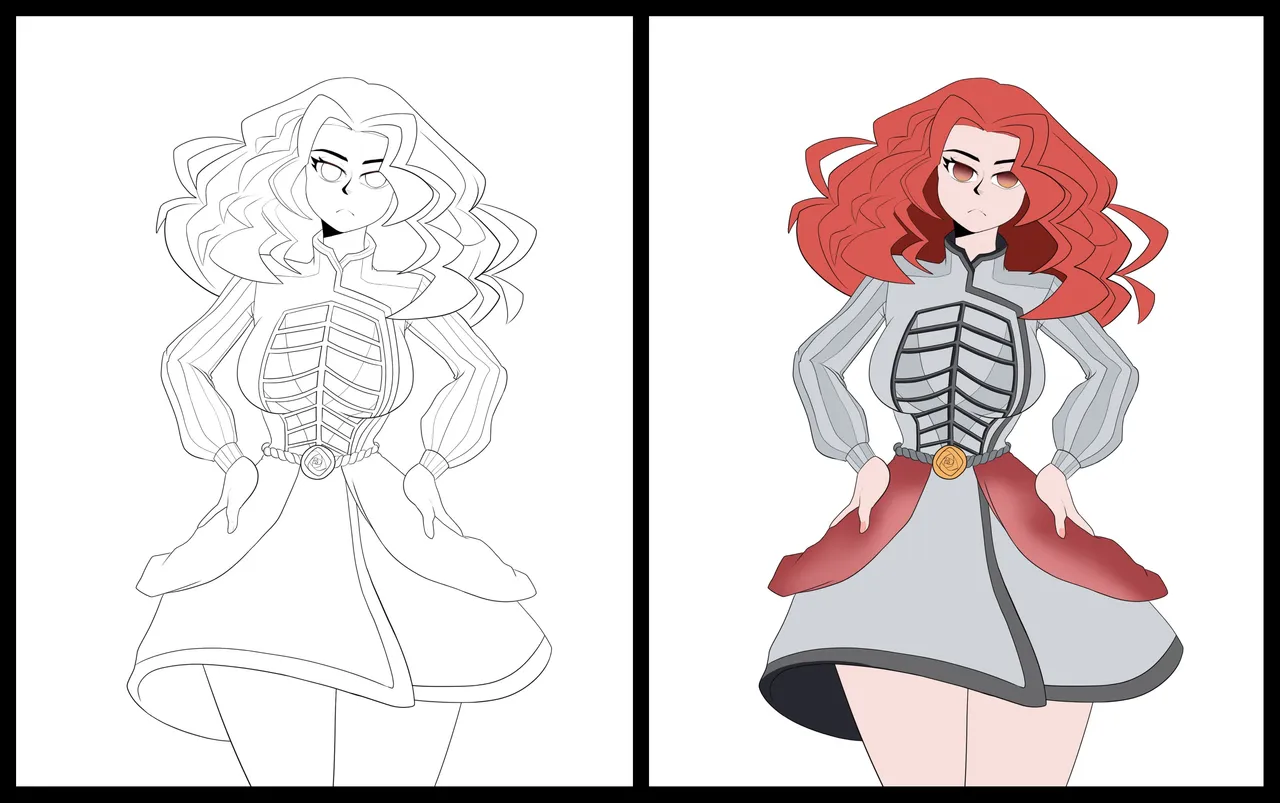
Once the design was clearly defined, I continued with the outline, to later add the base colors. On this occasion, for the inner part of the hair I added a darker tone to once and for all make a separation between the strands that are in front and those that are behind, for the red fabric that is under her hands I added a small degradation to start with the volume.
Una vez con el diseño claramente definido proseguí con el delineado, para posteriormente agregar los colores base. En esta ocasión, para la parte interna del cabello le agregué un tono más oscuro para de una vez hacer una separación entre los mechones que están adelante y los que están detrás, para la tela roja que está debajo de sus manos le agregué una pequeña degradación para comenzar con el volumen.
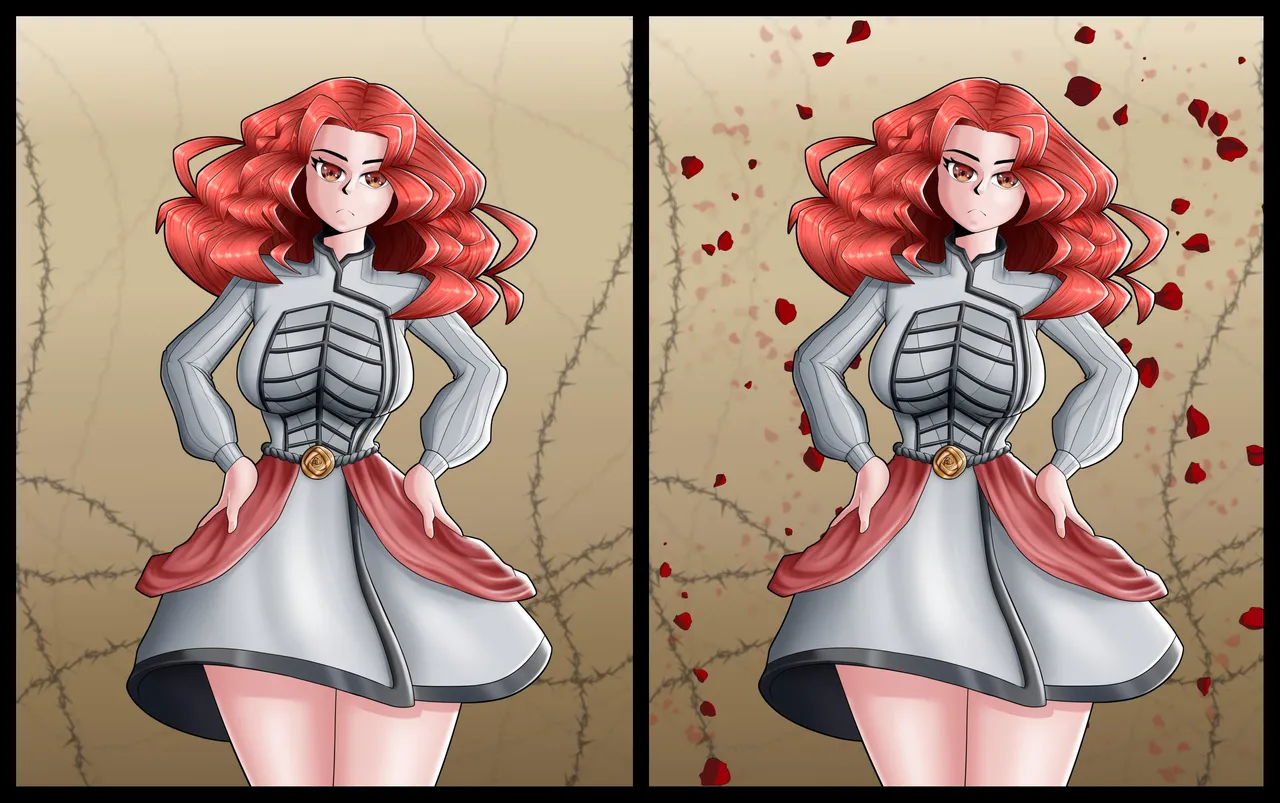
Having the base color ready, I started with the first shadows, in another layer using the multiplication layer mode, and the normal brush without texture I make the folds of the clothes to later blur them with the blur tool, in addition to using the airbrush in the same way. For the hair on another layer with the multiply mode I add lines to it to make it look like strands of hair and not look like a single mass.
Teniendo el color base listo, comencé con las primeras sombras, en otra capa usando el modo de capa de multiplicación, y el pincel normal sin textura hago los pliegues de la ropa para posteriormente ir difuminándolos con la herramienta de desenfoque, además de usar el aerógrafo de la misma manera. Para el cabello en otra capa con el modo de multiplicación le agrego líneas para dar la sensación de ser mechones de cabello y que no se vea como una sola masa.
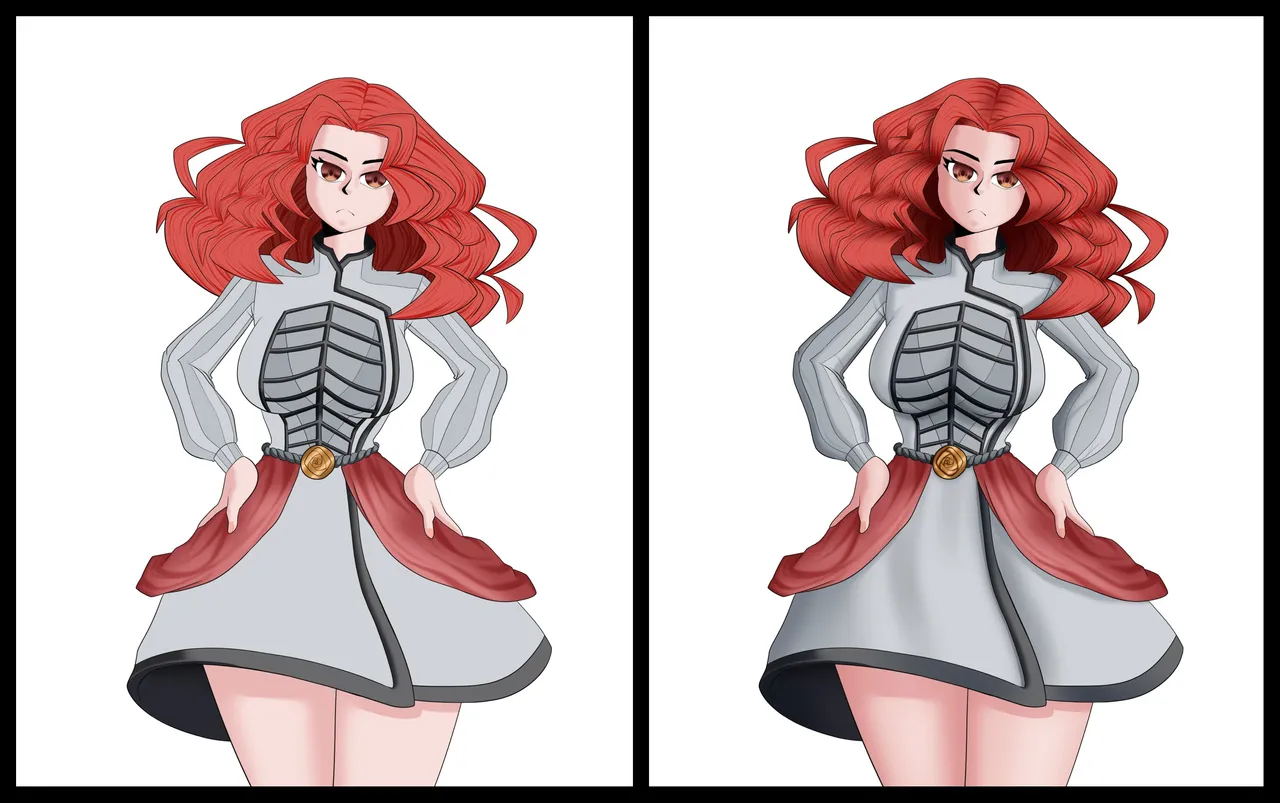
Here I add the first lights, which are mostly for the volume of the character, I do this in the same way as the shadows, I use the normal brush and blur it, also using the airbrush. In this illustration I want the light to come from the right side so the shadow will be on the left side.
Aquí le agrego las primeras luces, que son más que todo para el volumen del personaje, esto lo realizo de la misma forma que la sombras, empleo el pincel normal y lo desenfoco, también apoyándome del aerógrafo. En esta ilustración quiero que la luz venga del lado derecho por lo cual la sombra estará del lado izquierdo.
Already at this moment I have the character completely colored, so I start with the background for this I made a simple gradient with the gradient tool using only two colors, a dark brown and a beige. To make it look rougher, I searched the free Clip Studio Paint library for a brush with a wire design, if you don't get the brush tell me in a comment I'll write the code so you can find it quickly and easily. For the creation of the wires, I acted them in three different layers and lowered or increased the thickness to give the effect of being closer or further away. In a first closest layer I put the greatest width and I reduced the others, to those that are further away I blurred them more and lowered the opacity of the layer. I used the same process for the rose petals.
Ya en este momento tengo el personaje coloreado completamente, por lo cual inicio con el fondo para este efectué una degradación sencilla con la herramienta de degradado utilizando únicamente dos colores, un marrón oscuro y un beige. Para que se vea más ruda busqué en la librería gratuita de clip estudio Paint un pincel en con un diseño de alambre, si no consiguen el pincel me dicen en un comentario les escribo el código para que lo encuentre rápido y fácil. Ya para la creación de los alambres los actué en tres capas distintas y le baja o subía el grosor para dar el efecto de estar más cerca o más lejos. En una primera capa más cercana le puse el mayor ancho y a las demás las reduje, a los que están más lejos los desenfoqué más y le bajé la opacidad a la capa. Usé el mismo proceso para los pétalos de rosa.
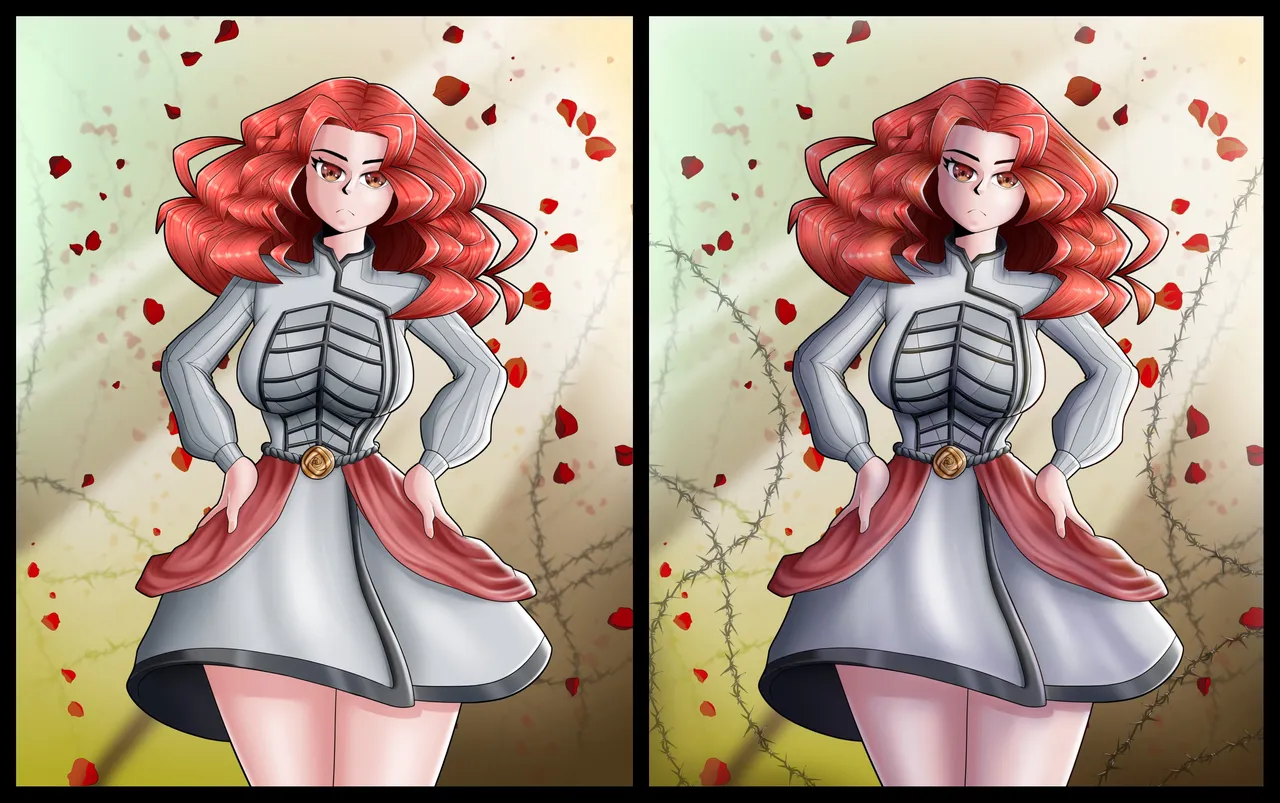
To conclude I added the lights (you are in a layer with the dodge mode and I lowered the opacity) and stronger shadows (you are also in another layer with the multiply mode and a dark purple color). For the beam of light I made them in a layer with the add brightness mode and I diffused and blurred it. I recommend you see and look for brushes with different shapes and experiment with them to give different sensations to the illustrations, if you don't find a material that you like you can create it yourself, these are tools and the tools were made to be used. I leave you a gif and the final work so you can see the step-by-step sequence and the final work.
Para concluir le agregué las luces (estas en una capa con el modo de sobreexponer brillo y le bajé la opacidad) y sombras más fuertes (estás también en otra capa con el modo de multiplicación y un color morado oscuro). Para el haz de luz los realicé en una capa con el modo de añadir brillo y lo difuminé y desenfoqué. Les recomiendo ver y buscar pinceles con formas distintas y experimentar con estos para dar sensaciones distintas a las ilustraciones, si no consiguen un material que les guste lo pueden crear ustedes mismos, estos son herramientas y las herramientas si hicieron para utilizarse. Les dejo un gif y el trabajo final para que puedan ver la secuencia del paso a paso y el trabajo final.
GIF
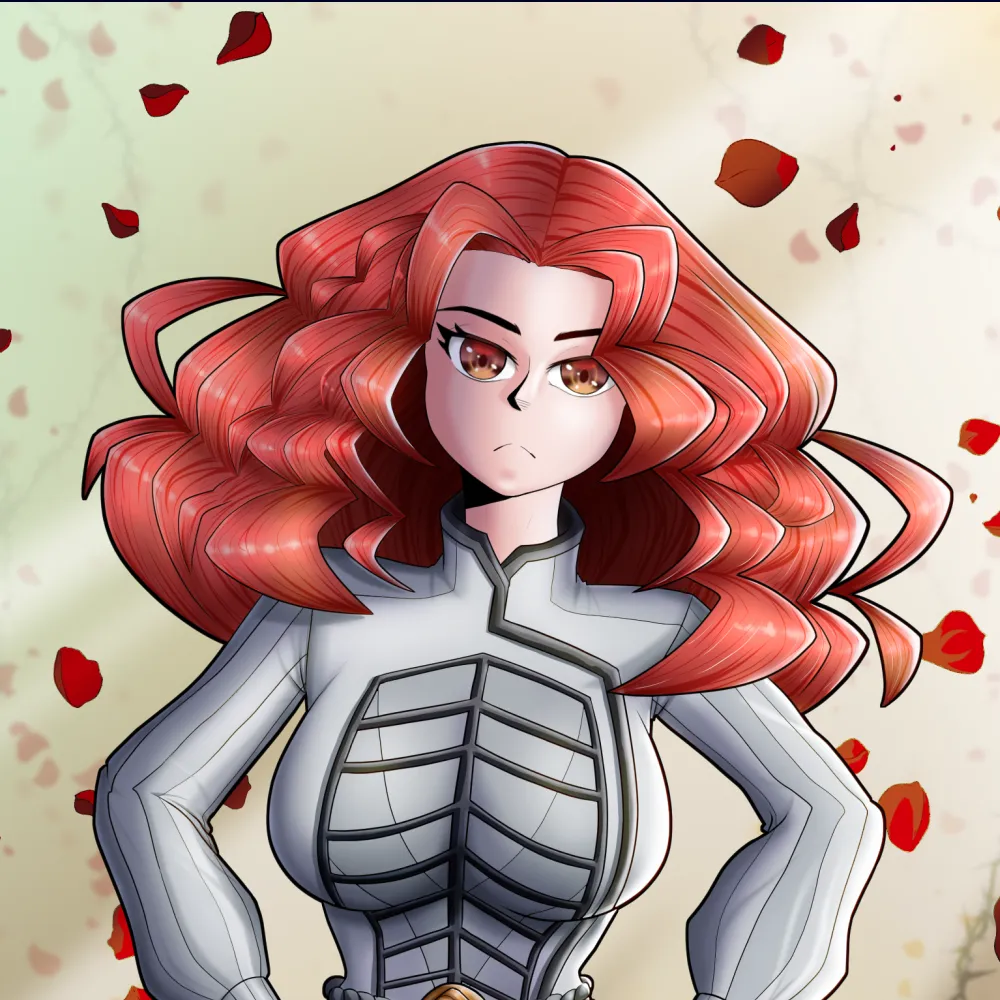
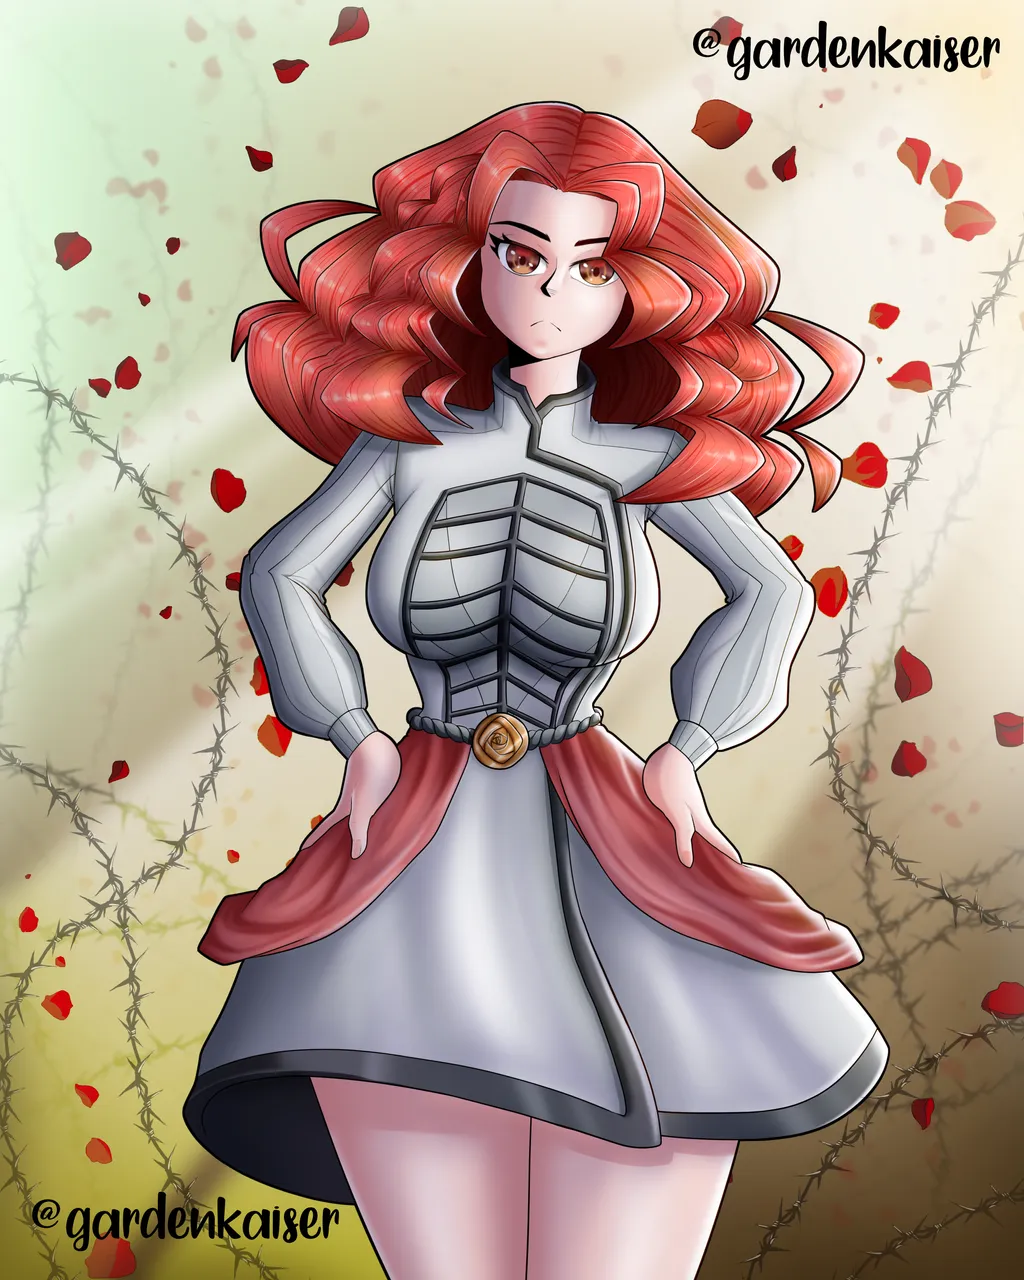
FINAL WORK / TRABAJO FINAL
I hope you liked this illustration of a red-haired military girl. It's the first time I'm doing a military character and I liked it a lot, I'll be doing others in the future. Soon, I will be bringing you more designs and tutorials, remember to leave support and your like if you liked it and want more content, if you have any questions you can leave them in the comments and in the next blog I will be answering. I send you a strong hug!
Espero que les haya gustado esta ilustración de una chica pelirroja militar. Es la primera vez que procedo un personaje militar y me gustó mucho, estaré haciendo otros en el futuro. Próximamente, les estaré trayendo más diseños y tutoriales, recuerden dejar apoyo y su like si les gustó y quieren más contenido, si tienen alguna duda las pueden dejar en los comentarios y en el siguiente blog estaré respondiendo. ¡Les mando un fuerte abrazo!
Collages made with: befunky
Translator: Google Translate
Drawing program: Clip Studio Paint
Collages realizados con: befunkyTraductor: Google Translate
Programa de dibujo: Clip Studio Paint
Instagram: @gardenkaiser
Discord: Garden#7637