Hello everyone. Welcome to the part two of building e-commerce website using Python Django. For the first part of buidling e-commerce website series, refer to this post. The link to the code is also available at the bottom of the page. In this tutorial, we will be dealing with admin panels, creating our models (which is usually the database) and rendering those data into our front-end or the templates. We will start this tutorial by first creating an administrator user from what we have left behind in the last tutorial.
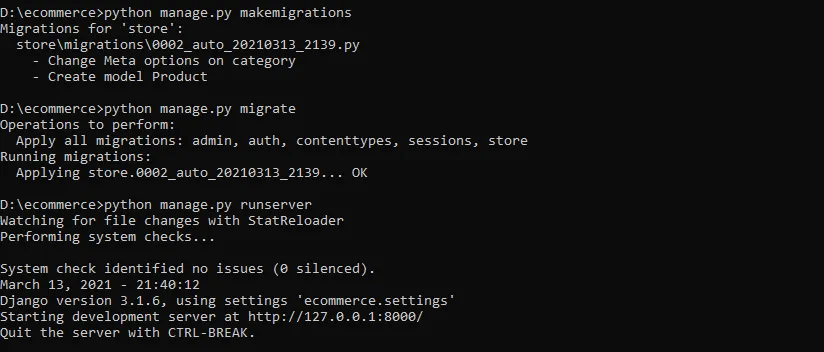
Go to your project directory and type python manage.py createsuperuser. At first you will receive error because there were unapplied migrations before running our project. So lets apply the migration by typing python manage.py migrate. Then only after applying the migrations we can type the above command to create admin user.
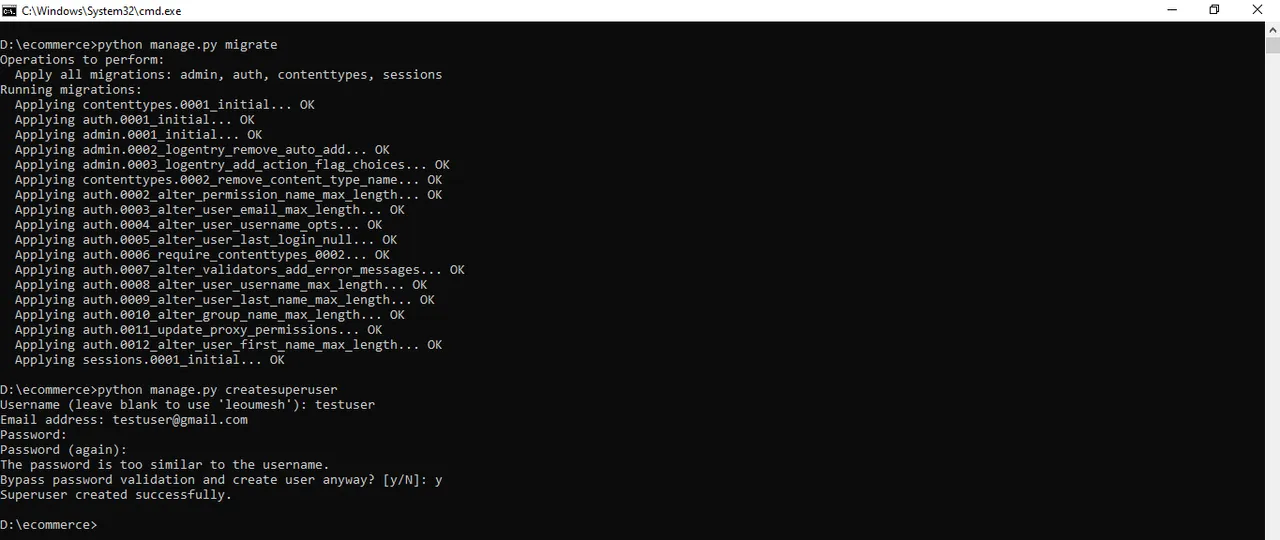
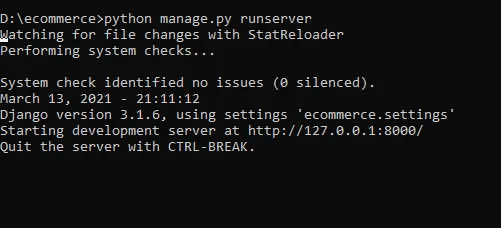
As you can see here, I have first apply the migrations and then created the superuser. You will be prompted to type in Username, Email, Password and then confirm that. While putting the password, you may notice that it isn't being typed in the screen but it is being typed behind the scenes. So don't worry with that. I have created a password similar to my username so you can see the warning there if I want to bypass the weak validation. That's really a cool feature that Django provides to work with Admin panel. Now lets go to our terminal and run our server by typing python manage.py runserver. You should see following message if everything is working correctly without an error.
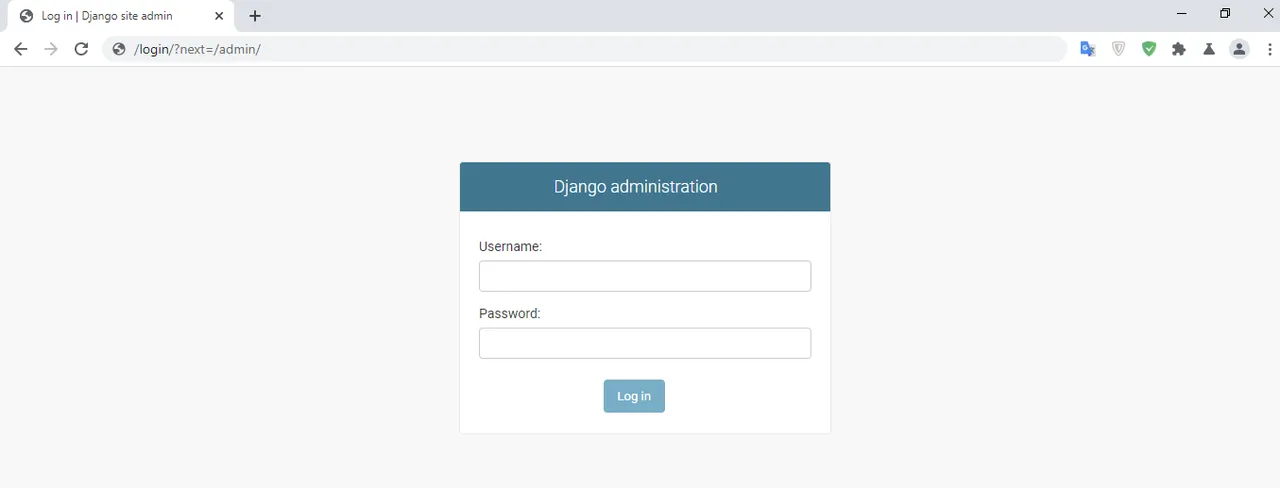
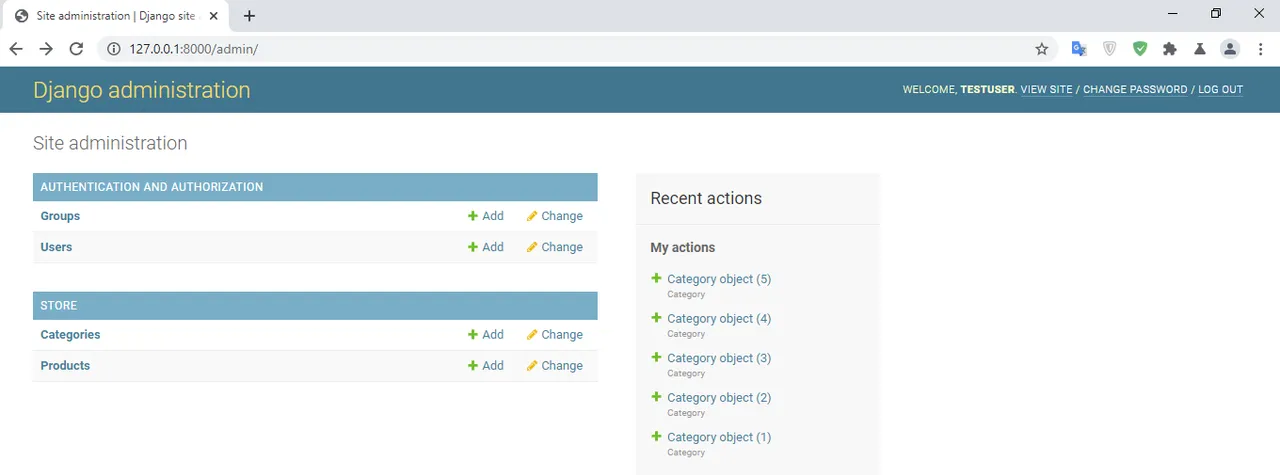
Now lets open our admin dashboard in our browser by typing http://127.0.0.1:8000/admin. This screen should appear in your browser.
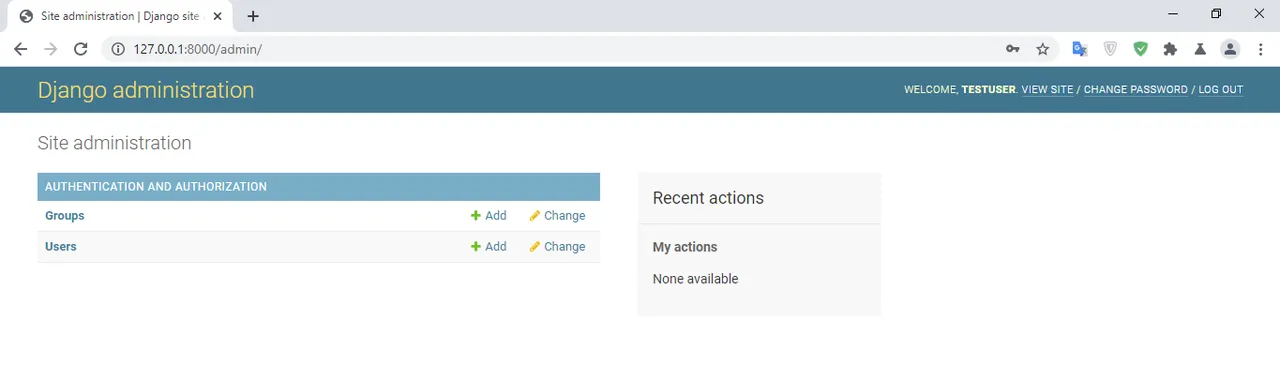
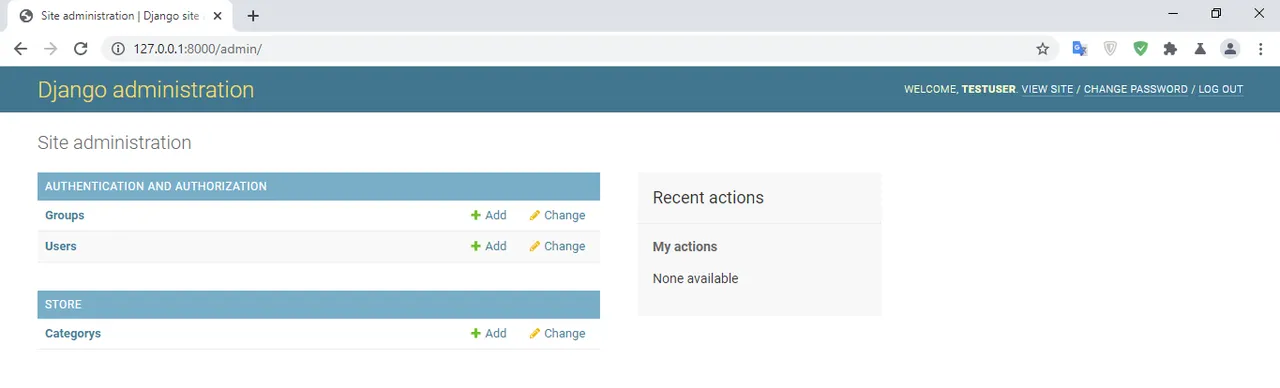
Login to the panel with the username and password you have created using the terminal and this screen should appear. By default, there's only Groups and Users model and we will be adding our models there soon.
As for our project, there will be three models as of now (if I want to extend the functionality of our e-commerce project, I will add other models too soon). These are products, categories and customers model. We want to show the product list by categories like Men's Clothing, Women's Clothing, Babies Toys, Vegetables. That being said categories has One-to-Many relationship with products i.e. one categories can have many products. So first lets create our categories model. For this open our store/models.py.
class Category(models.Model):
    name = models.CharField(max_length=200, blank=False)
All models in Django will inherit from models.Model class. We have specified just one field for our categories model i.e. name. Since it will be short we have define CharField with maximum character length to 200 and for the form validation we have specified blank=False. What it does is that if anyone tries to submit the form without specifying the name then it will throw an error that name must be given. To see our model in dashboard, we need to register that model. So open store/admin.py and lets first import our model which is in our base directory. And then we will register it.
from django.db import models

class Category(models.Model):

    name = models.CharField(max_length=200, blank=False)
Also inside store/admin.py, type in following to register our model.
from django.contrib import admin
from .models import *

admin.site.register(Category)
Django requires that once you have created and register your model, you need to apply the migration to actually reflect that in the database. So go to your terminal and type python manage.py makemigrations. This will just prepare the table for database. To actually work with the databases we will need to type in this command again python manage.py migrate. Now check if your server is still running in the terminal. If not type python manage.py runserver and go to your dashboard to see following output.
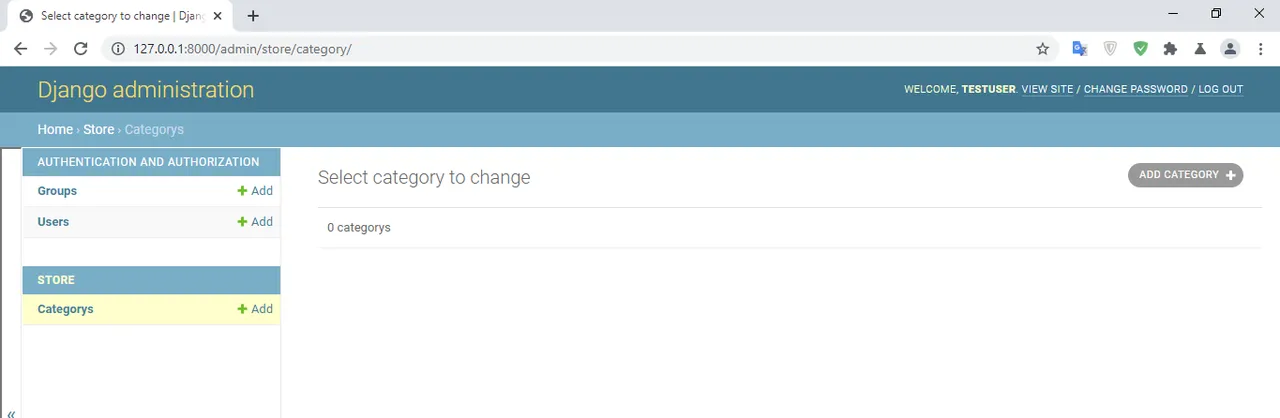
Click on "Categorys", the following screen should appears.
Let's add few categories like Men's Clothing, Women's Clothing, Babies Toys, Vegetables and Fruit making it to 5 categories.
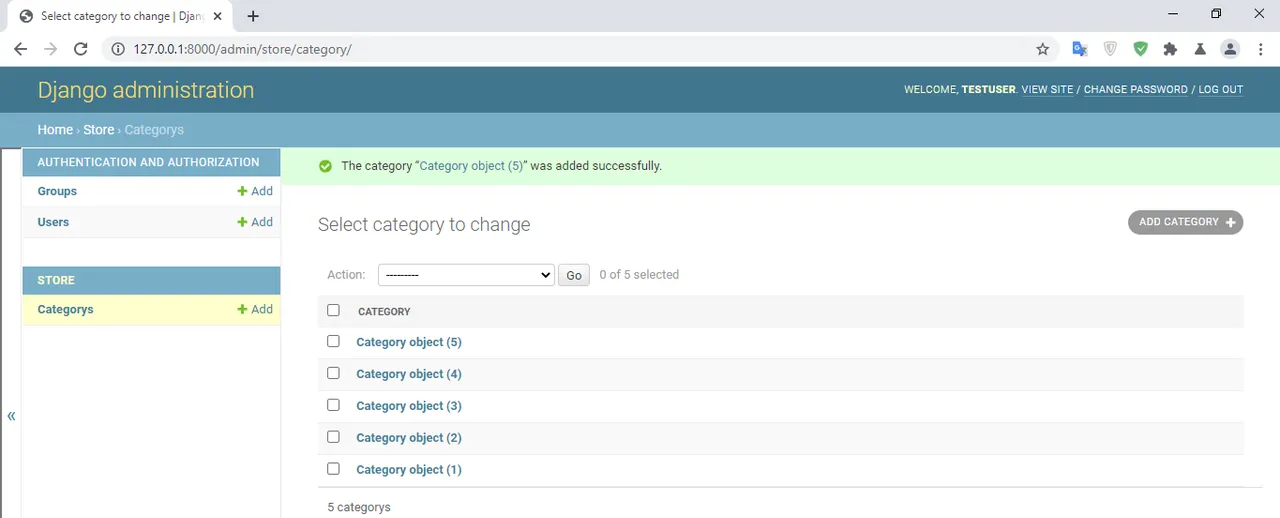
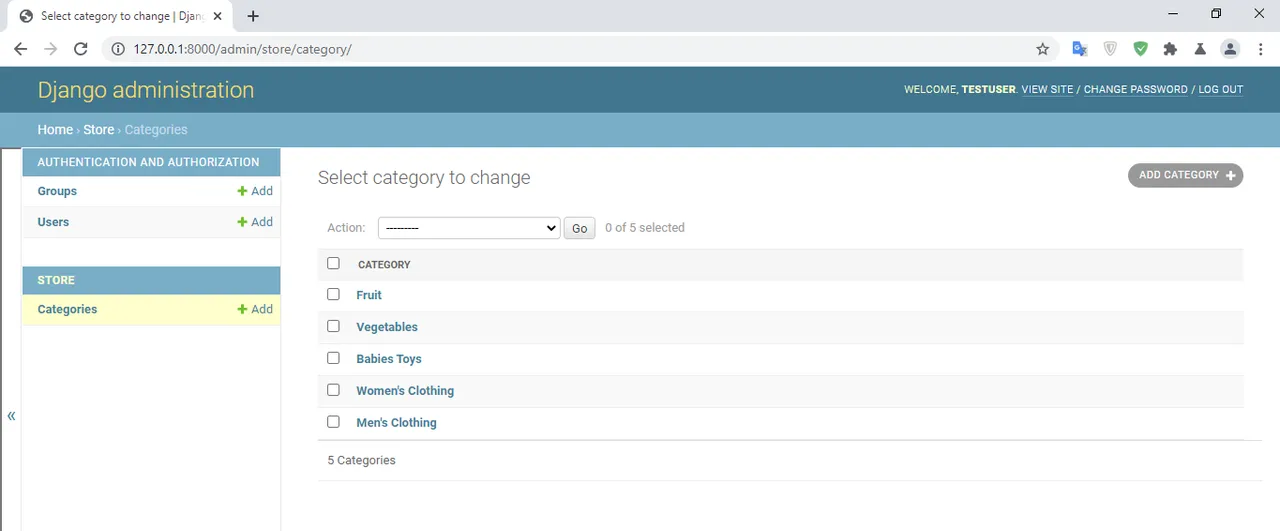
But you can see Django is returning the categories we have just filled as an object and the model name has been named as "Categorys" in the admin panel. By default, Django will try to pluralize the model with its own rule. Let's add few lines of code to our store/models.py to show Categories instead of Categorys and show the categories name instead of the object.
from django.db import models

class Category(models.Model):

    class Meta:
        verbose_name_plural = "Categories"

    name = models.CharField(max_length=200, blank=False)

    def __str__(self):
        return self.name
Now refresh your browser to reflect those new changes we have made.
Everything is working fine till this point. Let's also create our Product model inside store/models.py
class Product(models.Model):
    name = models.CharField(max_length=200, blank=False)
    price = models.IntegerField(default=0, blank=False)
    category = models.ForeignKey(Category, on_delete=models.CASCADE,)
    description = models.TextField(max_length=600, blank=False)
    image = models.ImageField(null=True)

    def __str__(self):
        return self.name
Each products will have a name which is fairly short. So we have specified a CharField. It will have a price where we have specified IntegerField, a description that will be fairly long enough where we have specified a TextField and an ImageField to store the image of the product. Each product will have a category so we have used a parameter called ForeignKey to establish One-To-Many relationship between categories and products that we have discussed just above. And whenever a category is deleted we want to delete the products too that is listed under that category so thats why we have used on_delete=models.CASCADE. So now lets apply the migrations to reflect those changes. The command is as above while creating Categories model - python manage.py makemigrations and then python manage.py migrate. Also run your serve to see changes by typing python manage.py runserver.
Just an overview of the command we have used so far for Product model. (You might encounter an error saying you need to install Pillow to use ImageField. If that error appears just install Pillo by typing pip install Pillow.)
Now lets register our model inside store/admin.py.
from django.contrib import admin
from .models import *

admin.site.register(Category)
admin.site.register(Product)
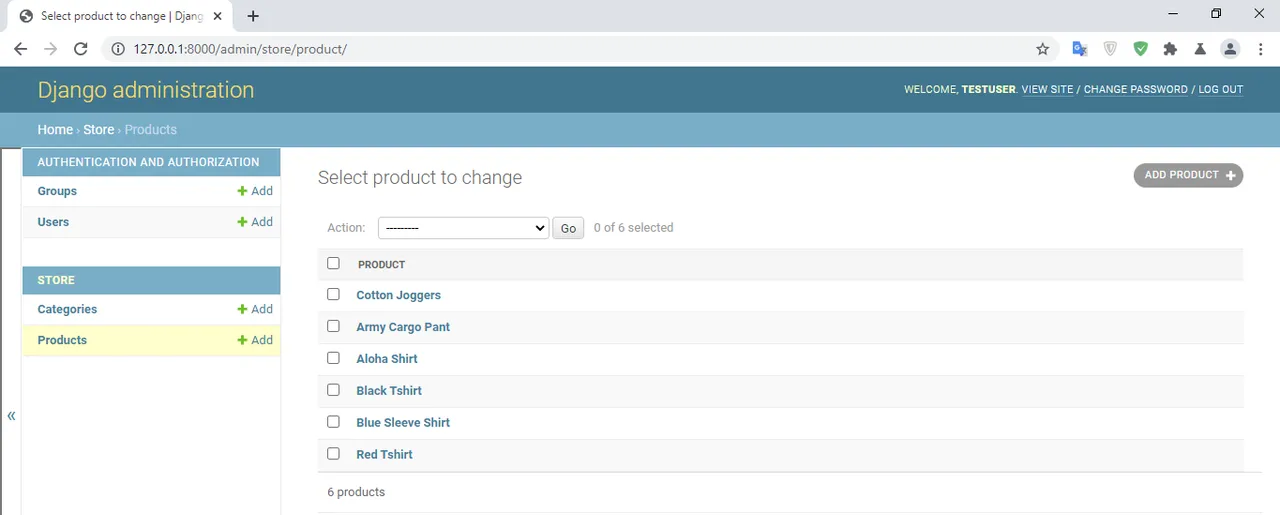
Now type localhost address into your browser and you should see the following output with Product model.
Before adding products, we have forgot to do one thing i.e. configuring setting for images. Go to ecommerce/settings.py, first import os and at the end add this code:
MEDIA_URL = '/images/'

STATICFILES_DIRS = [
    os.path.join(BASE_DIR, 'static'),
]

MEDIA_ROOT = os.path.join(BASE_DIR, 'static/images')
STATICFILES_DIRS is basically used to specify a folder where you wants all your static files into. MEDIA_ROOT is basically a root directory used to specify where are we looking into for any kinds of media files like images, video and so on. Now a little things remain for our configuration- adding a URL configuration for media in our project directory. So go to ecommerce/urls.py and import static and settings and finally add this one at the end.
urlpatterns += static(settings.MEDIA_URL, document_root=settings.MEDIA_ROOT)
Now our ecommerce/urls.py code will be this:
from django.contrib import admin
from django.urls import path, include
from django.conf.urls.static import static
from django.conf import settings

urlpatterns = [
    path('admin/', admin.site.urls),
    path('', include('store.urls')),

]

urlpatterns += static(settings.MEDIA_URL, document_root=settings.MEDIA_ROOT)
Let's add 6-6 items to two of the categories i.e. Men's Clothing and Women's Clothing into the admin dashboard. Saving your first product will automatically create staticdirectory inside our project directory. Don't worry about pictures, I have provided all the image files at the bottom.
After adding 6 products in Men's Clothing:
After adding 6 products in Women's Clothing:
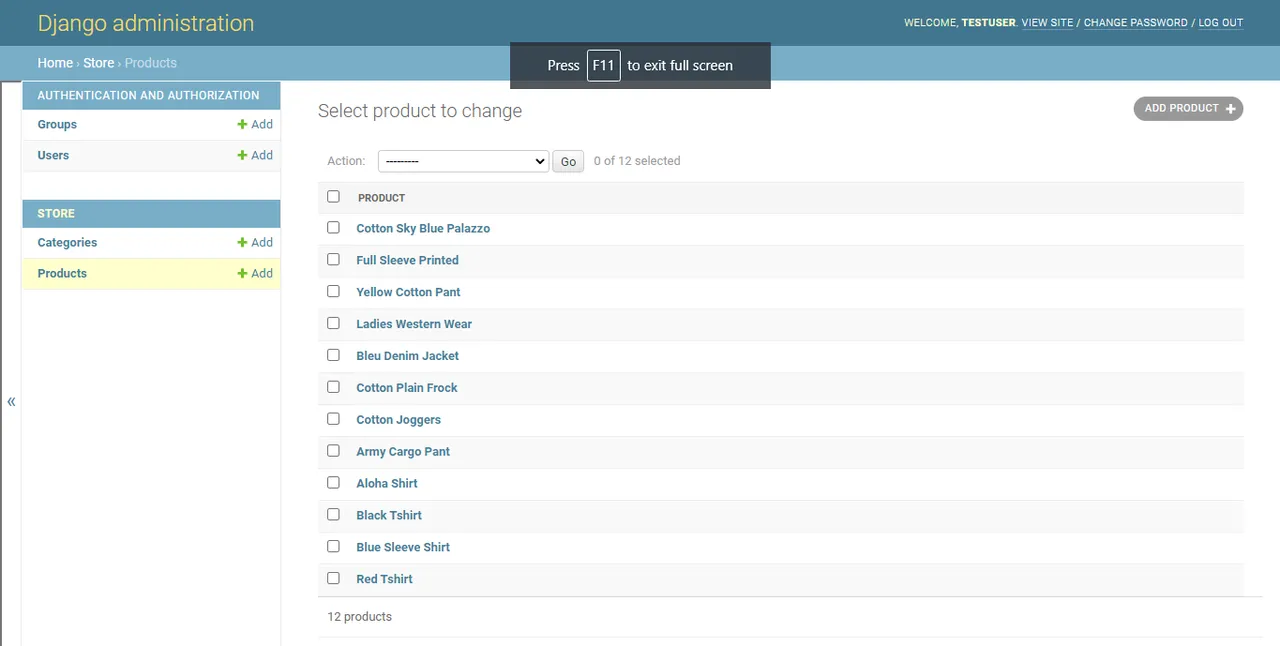
Let's modify this design a little bit. We want to display in list format showing product name, price and category. For this go to store/admin.py and put this code:
class ProductAdmin(admin.ModelAdmin):
    list_display = ['name', 'price', 'category']
Also lets pass this class to our register function within the same file to reflect the change. So final code in store/admin.py will be.
from django.contrib import admin
from .models import *


class ProductAdmin(admin.ModelAdmin):
    list_display = ['name', 'price', 'category']

admin.site.register(Category)
admin.site.register(Product, ProductAdmin)
Refresh your browser and you should see this:

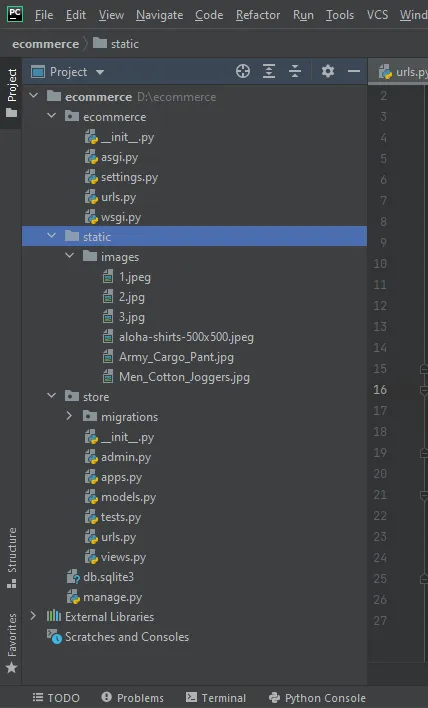
We will work with Customers model in later part of our series. For now lets render these contents in Product model in our homepage. For this according Django convention, create a directory named templates inside ecommerce/store. Inside templates directory create another directory that same as your app name which is store in our case. So our project structure looks like this:
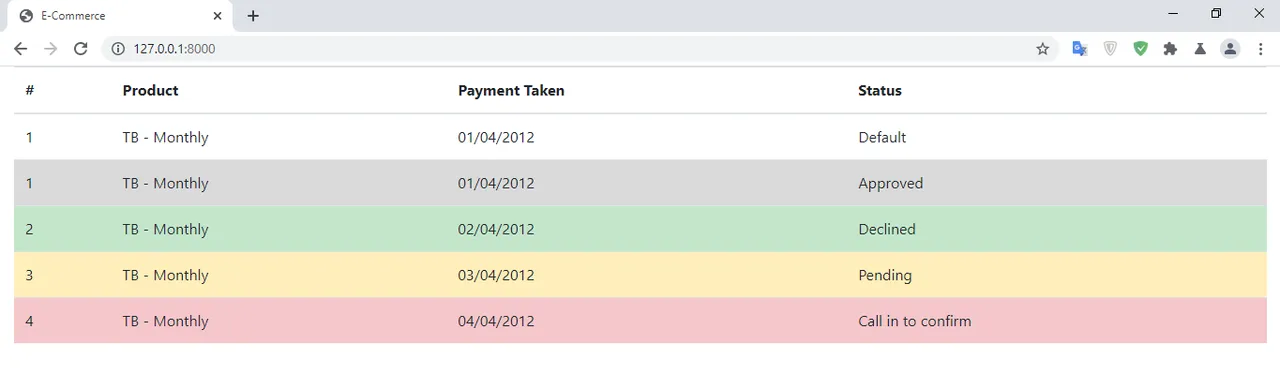
Let's use a simple bootstrap table to render the data in home.html. This code goes inside the same file.
<!doctype html>
<html lang="en">
  <head>
    <meta charset="utf-8">
    <meta name="viewport" content="width=device-width, initial-scale=1, shrink-to-fit=no">

    <link rel="stylesheet" href="https://maxcdn.bootstrapcdn.com/bootstrap/4.0.0/css/bootstrap.min.css">
    <title>E-Commerce</title>
  </head>
  <body>
<div class="container-fluid">
    <div class="row">
        <div class="col-md-12">
            <table class="table">
                <thead>
                    <tr>
                        <th>
                            #
                        </th>
                        <th>
                            Product
                        </th>
                        <th>
                            Payment Taken
                        </th>
                        <th>
                            Status
                        </th>
                    </tr>
                </thead>
                <tbody>
                    <tr>
                        <td>
                            1
                        </td>
                        <td>
                            TB - Monthly
                        </td>
                        <td>
                            01/04/2012
                        </td>
                        <td>
                            Default
                        </td>
                    </tr>
                    <tr class="table-active">
                        <td>
                            1
                        </td>
                        <td>
                            TB - Monthly
                        </td>
                        <td>
                            01/04/2012
                        </td>
                        <td>
                            Approved
                        </td>
                    </tr>
                    <tr class="table-success">
                        <td>
                            2
                        </td>
                        <td>
                            TB - Monthly
                        </td>
                        <td>
                            02/04/2012
                        </td>
                        <td>
                            Declined
                        </td>
                    </tr>
                    <tr class="table-warning">
                        <td>
                            3
                        </td>
                        <td>
                            TB - Monthly
                        </td>
                        <td>
                            03/04/2012
                        </td>
                        <td>
                            Pending
                        </td>
                    </tr>
                    <tr class="table-danger">
                        <td>
                            4
                        </td>
                        <td>
                            TB - Monthly
                        </td>
                        <td>
                            04/04/2012
                        </td>
                        <td>
                            Call in to confirm
                        </td>
                    </tr>
                </tbody>
            </table>
        </div>
    </div>
</div>
    <script src="https://code.jquery.com/jquery-3.2.1.slim.min.js"></script>
    <script src="https://cdnjs.cloudflare.com/ajax/libs/popper.js/1.12.9/umd/popper.min.js"></script>
    <script src="https://maxcdn.bootstrapcdn.com/bootstrap/4.0.0/js/bootstrap.min.js"></script>
  </body>
</html>
The code is so long here but we will be shortening it in a while. For now, lets see demo on how our home page looks like. So for this go to our store/views.py to render our homepage. Remove the HttpResponse line we have created in previous tutorial with this code:
from django.shortcuts import render
from django.http import HttpResponse

def homePage(request):
    return render(request, 'store/home.html')
Check if your development server is still running. If not type python manage.py runserver in your terminal and then go to the browser to see the following output:
Now lets render out the data from database to our templates. For this, we need to query our database to receive all products and categories details and pass this as a dictionary to our render function in views. First we need to import our model inside store/views.py file. And put this code there:
from django.shortcuts import render
from django.http import HttpResponse
from .models import *

def homePage(request):
    products = Product.objects.all()
    categories = Category.objects.all()
    context = {'products': products, 'categories': categories}
    return render(request, 'store/home.html', context)
Now lets minimize some of our code inside store/home.html. We will just keep one table data and delete rest table rows. And then use for-loop logic. The syntax for using this is:
{% for i in dictionary_key_name %}
{% endfor %}
And to access the variables value this must be encased within {{i.field_name}}.
So our store/home.html will have this code:
<!doctype html>
<html lang="en">
  <head>
    <meta charset="utf-8">
    <meta name="viewport" content="width=device-width, initial-scale=1, shrink-to-fit=no">

    <link rel="stylesheet" href="https://maxcdn.bootstrapcdn.com/bootstrap/4.0.0/css/bootstrap.min.css">
    <title>E-Commerce</title>
  </head>
  <body>
<div class="container-fluid">
    <div class="row">
        <div class="col-md-12">
            <table class="table">
                <thead>
                    <tr>
                        <th>
                            S.N
                        </th>
                        <th>
                            Product
                        </th>
                        <th>
                            Price
                        </th>
                        <th>
                            Categories
                        </th>
                    </tr>
                </thead>
                <tbody>
                {% for i in products %}
                    <tr>
                        <td>
                            {{i.id}}
                        </td>
                        <td>
                            {{i.name}}
                        </td>
                        <td>
                            ${{i.price}}
                        </td>
                        <td>
                            {{i.image}}
                        </td>
                    </tr>
                {%  endfor %}
                </tbody>
            </table>
        </div>
    </div>
</div>
    <script src="https://code.jquery.com/jquery-3.2.1.slim.min.js"></script>
    <script src="https://cdnjs.cloudflare.com/ajax/libs/popper.js/1.12.9/umd/popper.min.js"></script>
    <script src="https://maxcdn.bootstrapcdn.com/bootstrap/4.0.0/js/bootstrap.min.js"></script>
  </body>
</html>
We have used for-loop logic just before <tr> tag and terminated that loop before closing <tr> tag. And then accessed the id, price, name and categories within the product model. Now go to your browser and you should see this output.
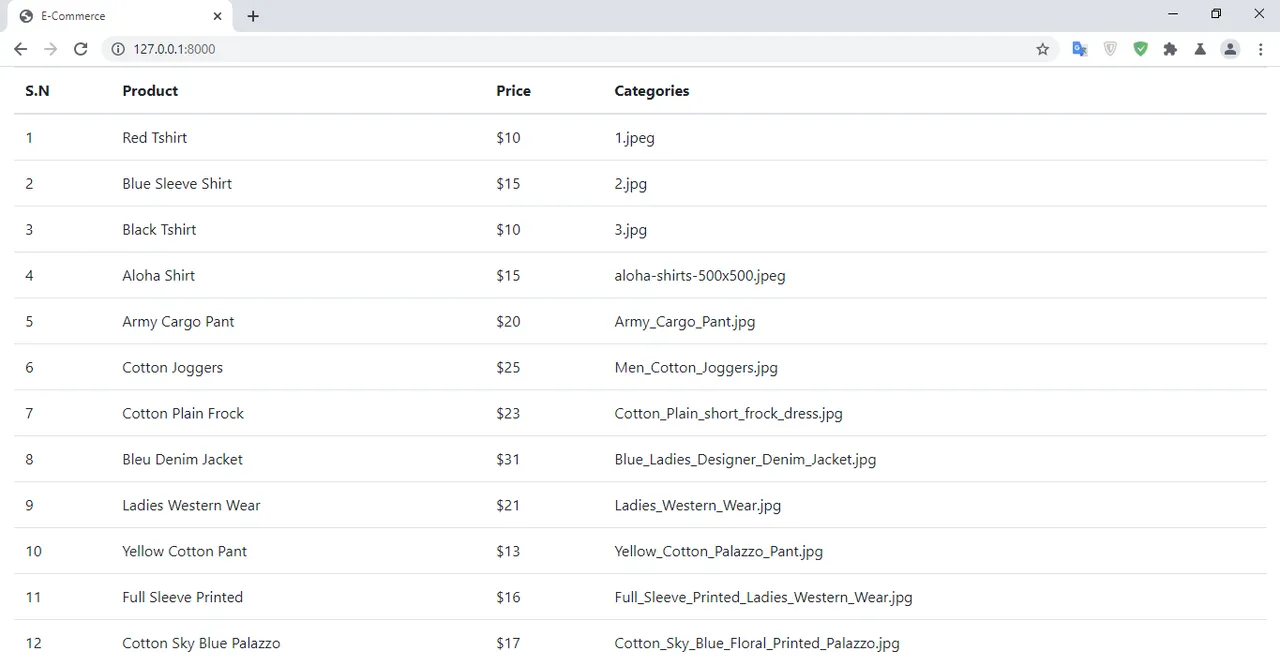
We have just displayed the image name in the last column. Later, we will be displaying the real image. Before, I want to finish this part, there is a little thing I want to focus on Admin UI that shows how image is displayed.
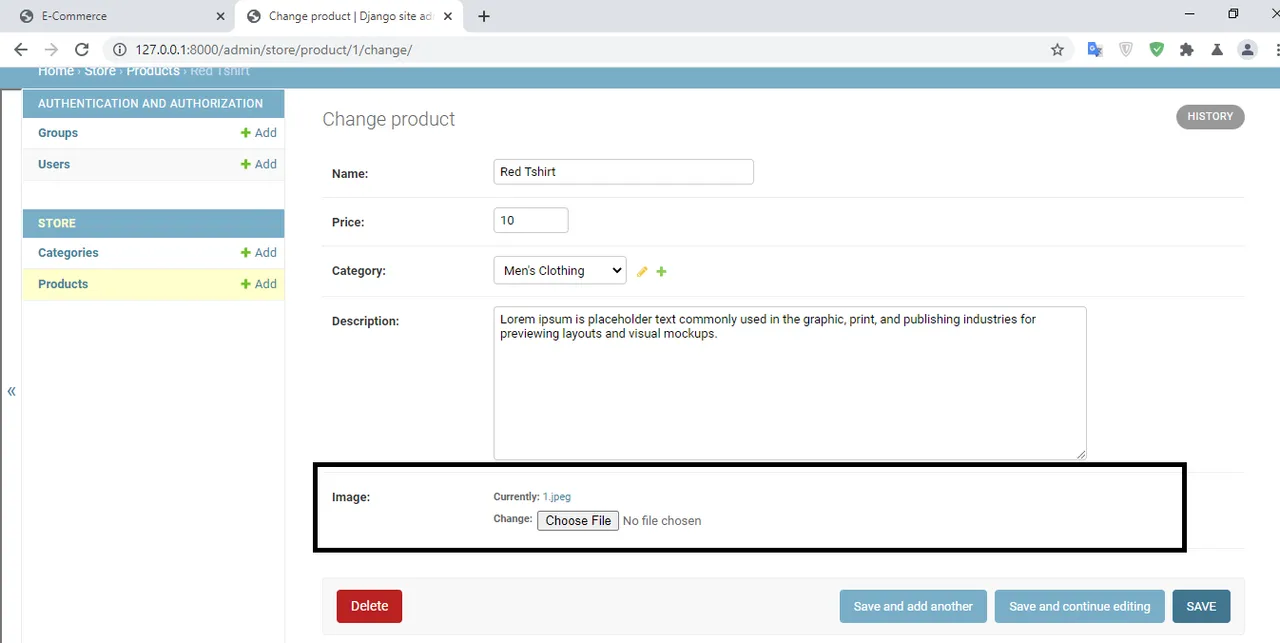
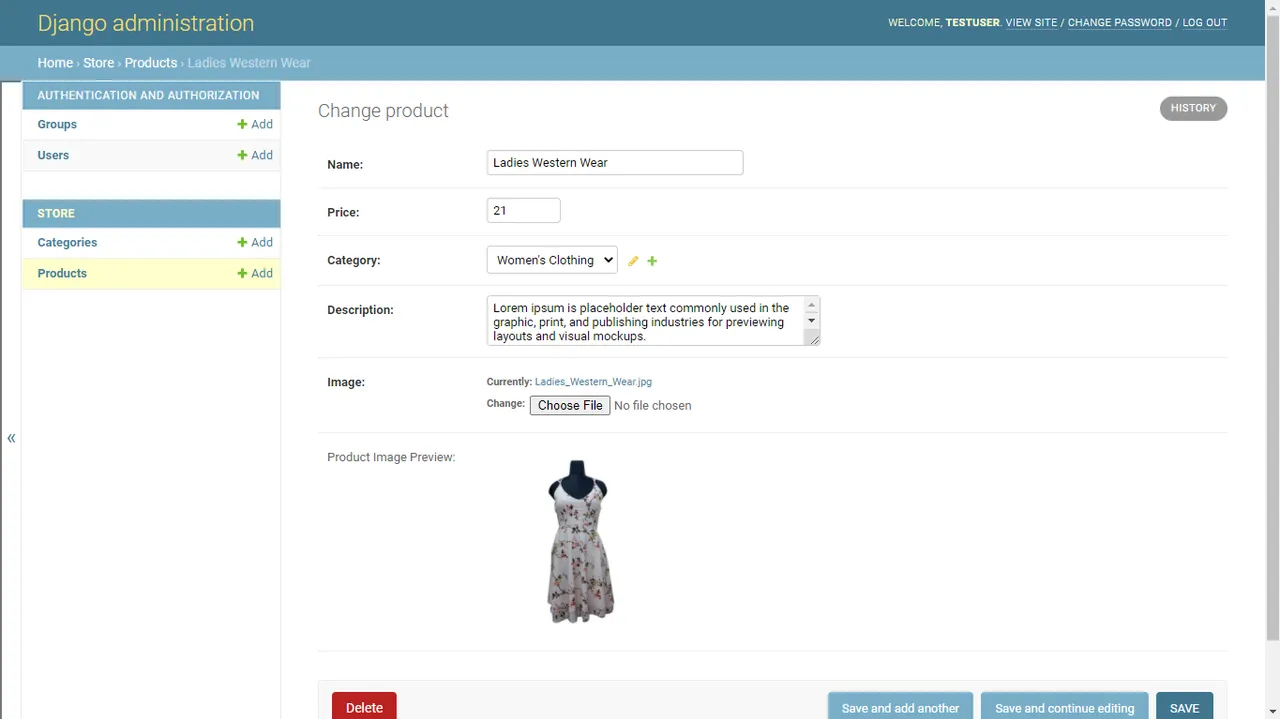
This is obviously a bad design. Only after clicking that link, it shows you an image but lets show preview image of the same products in the same page. For this go to store/admin.py and lets import format_html from django.utils.html and place this function inside our ProductAdmin class.
def image_tag(self, obj):
return format_html(' '.format(obj.image.url))
image_tag.short_description = 'Product Image Preview'
readonly_fields = ['image_tag']
'.format(obj.image.url))
image_tag.short_description = 'Product Image Preview'
readonly_fields = ['image_tag']
Final code inside our store/admin.py will be:
from django.contrib import admin
from .models import *
from django.utils.html import format_html
class ProductAdmin(admin.ModelAdmin):
list_display = ['name', 'price', 'category']
    def image_tag(self, obj):
        return format_html(''.format(obj.image.url))
    image_tag.short_description = 'Product Image Preview'
    readonly_fields = ['image_tag']
admin.site.register(Category)
admin.site.register(Product, ProductAdmin)
Lets check the output. You can see the preview image but you can't do anything with that like hover, edit because its a read only field as we specifed above.
This marks the end of second part of our tutorial. The next part will be focused on designing. We will be adding Bootstrap 4, some CSS and learn template inheritance and static files in Django.
Find the Source code of the project here.
Find the product images here
Getting Started
Username: testuser
Password: testuser321