Good day everyone!
Two weeks ago I played in a Warhammer 40,000 competitive tournament called the King of the Cape! I wrote a post about it HERE.
There were 21 players and I finished a lower half 14th but since I have been out of the hobby for around 8 years (I am not quite sure)
Now, 2 weeks later I have the opportunity to play against Marc Pittermann who placed higher than myself in the tournament (10th) and also had the highest placing of Space Marines of any kind.
I often would approach Marc to clarify rules for me during the tournament because he knows his stuff! So this would be a great opportunity to play against someone where I would definitely learn something.
Marc Played Space Wolves in the tournament, but has a very large Space Marines army that he plays as a variety of loadouts and representing many different Space Marine Chapters. He also has a T'au army and a Necron Army.
So I had no idea what he was going to bring because he literally said that he MIGHT bring Necrons or T'au.
However, on the day of arriving he brought out a Dark Angels army! Historically, in the lore, the Lion and the Wolf were always set against one another. The Primarchs of each of these Space Marine founding Legions had an epic duel after a disagreement. Ever since, whenever the Space Wolves and the Dark Angels would meet, they would distrust one-another and often, should there be the slightest opportunity, they would have an Honor Duel against one another.
My son @merenludick went with me and bought some Pokemon cards with his allowance money. I will let him make his own post about how he did on his pulls.
Anyway, onwards to the battle!
I played a modified version of my tournament army list because I did not have in my possession any of my friend's models and it was time for me to stand on my own two feet.
I had to remove the Relic Contemptor Dreadnought and the Murderfang. In their place I put a Wulfen Dreadnought, 3 Thunderwolf Cavalry, 6 Fenrisian Wolves and 1 Cyberwolf.
Thus, my total 2000pts army is this:
Space Wolves

- Bjorn the Fell Handed
- Wolf Priest with Jump Pack
- Redemptor Dreadnought
- Wulfen Dreadnought
- 5x Wolf Guard with Jump Packs
- 8 Blood Claws with Wolf Guard Leader
- Land Raider tank
- 2x 6 Grey Hunter Packs
- 2x Razorback transports
- 5x Long Fangs (4 Missile Launchers)
- 3x Thunderwolf Cavalry
- 6x Fenrisian Wolves
- 1x Cyberwolf
- Vindicator tank
(Essentially I play with a lot of old school stuff that has been around for years.)
I do not have Marc's total armylist, I will just list it by memory:
Dark Angels

- Azreal, Grand Master of the Dark Angels
- Captain
- Judicar
- Apothacary on Bike
- 2x 5 Infiltrators
- 2x Impulsor transports
- 2x 5 Blade Guard
- 3x Aggressors
- 3x Interceptors with Plasma (Whatever their plasma weapons are called)
- 5x Interceptors with Bolt weapons
- 2x 5 Desolator Marines
(This is a far more modern army. New units from the last couple of years, now in the hands of the Dark Angels, who have just been updated with a new model for Azreal. And armed with Desolators, who are a brand new unit.)
This army was actually crazy tough! Especially the Blade Guard were so difficult to remove. Because of Dark Angels rules, the Blade Guard and the characters become difficult to kill and the Desolators become super accurate when they stand and do not move.
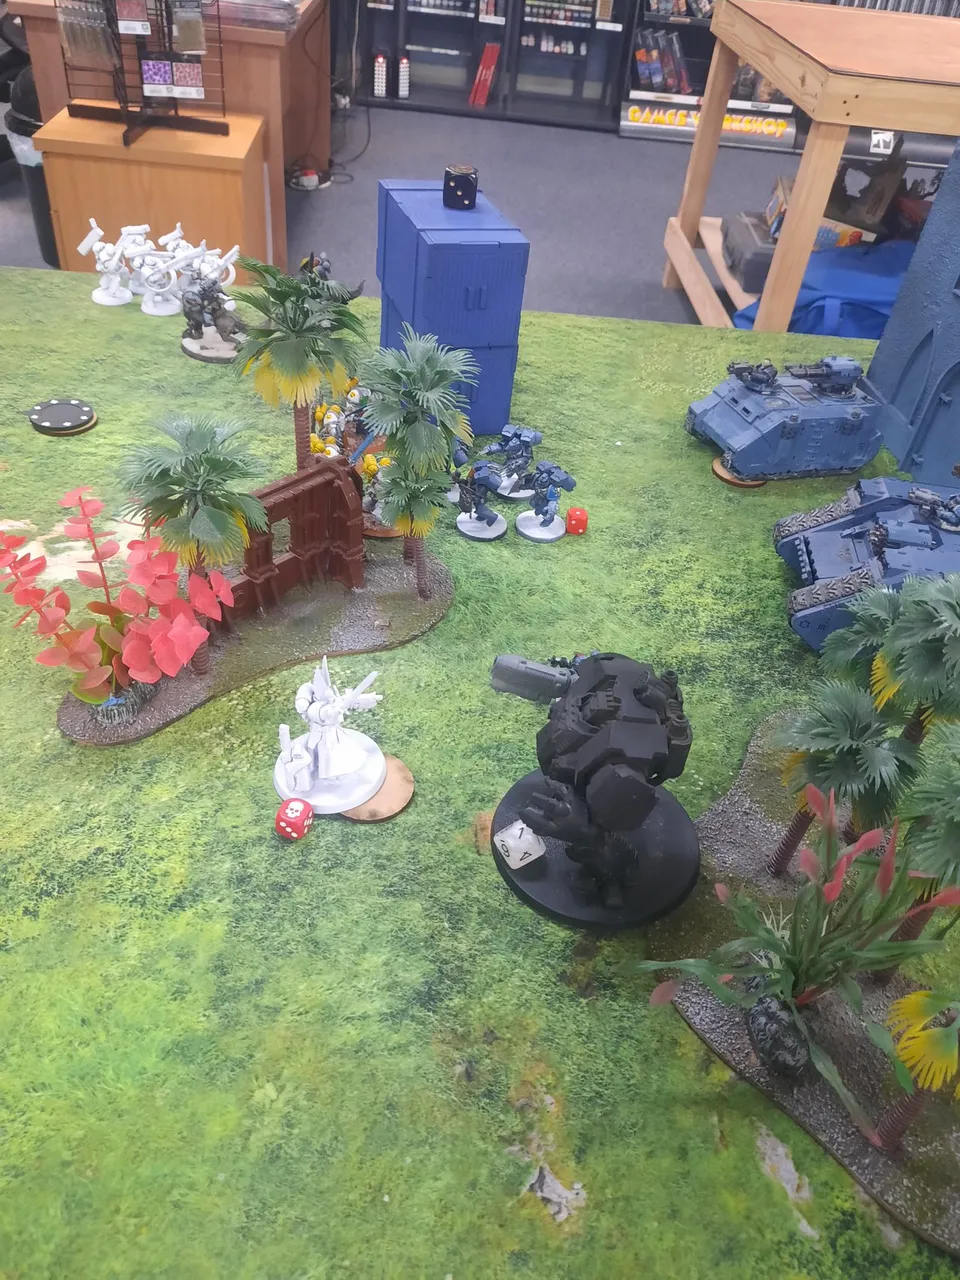
We set up the board and rolled for who chooses where to deploy:
Marc wins and deploys his first unit and then we alternate deploying units unit everything is deployed.
Marc kept both units of Interceptors in Strategic Reserves.
I kept my Thunderwolves and Wulf Guard in Strategic Reserves as well.
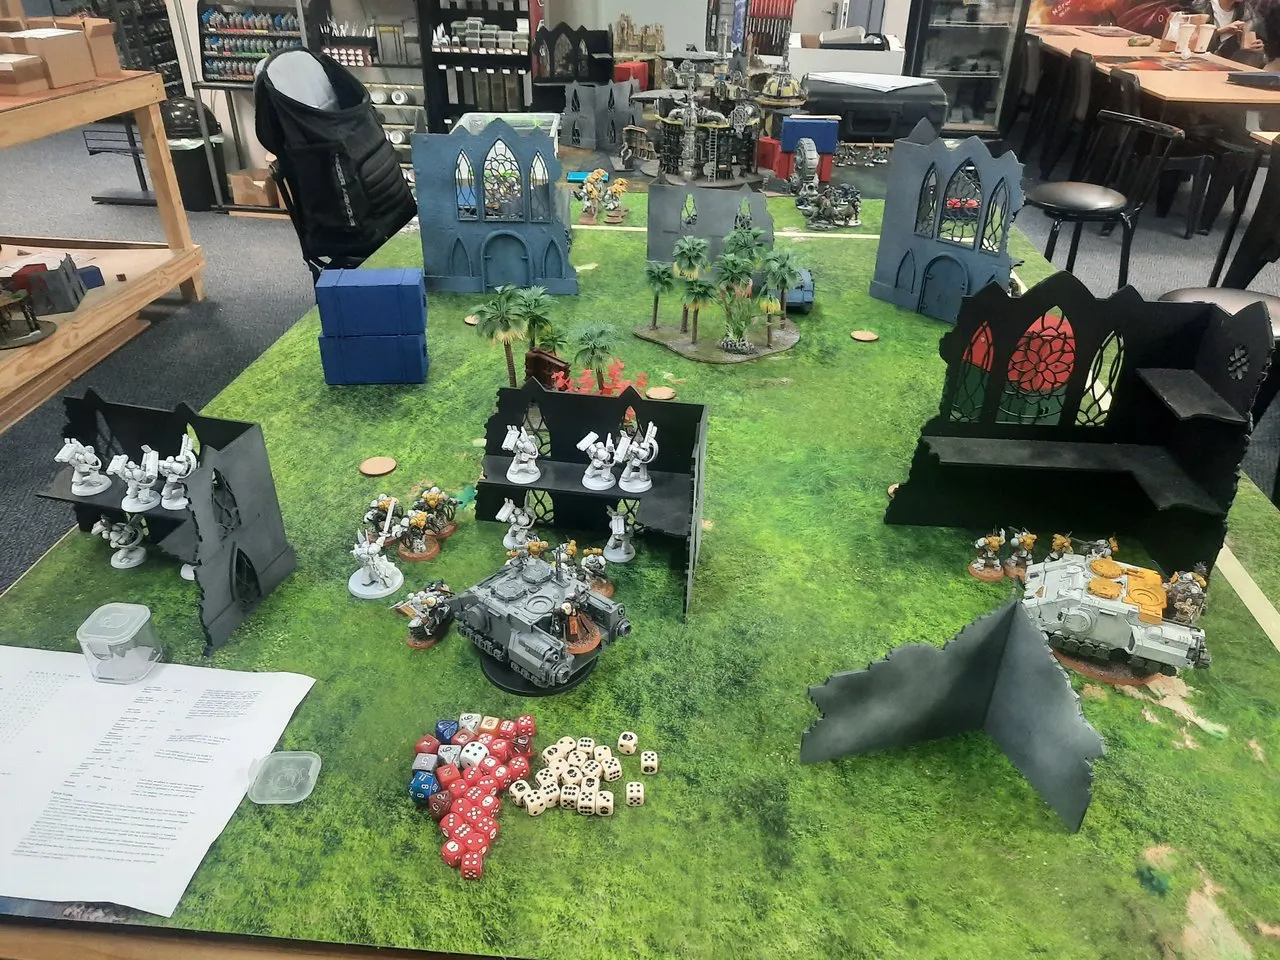
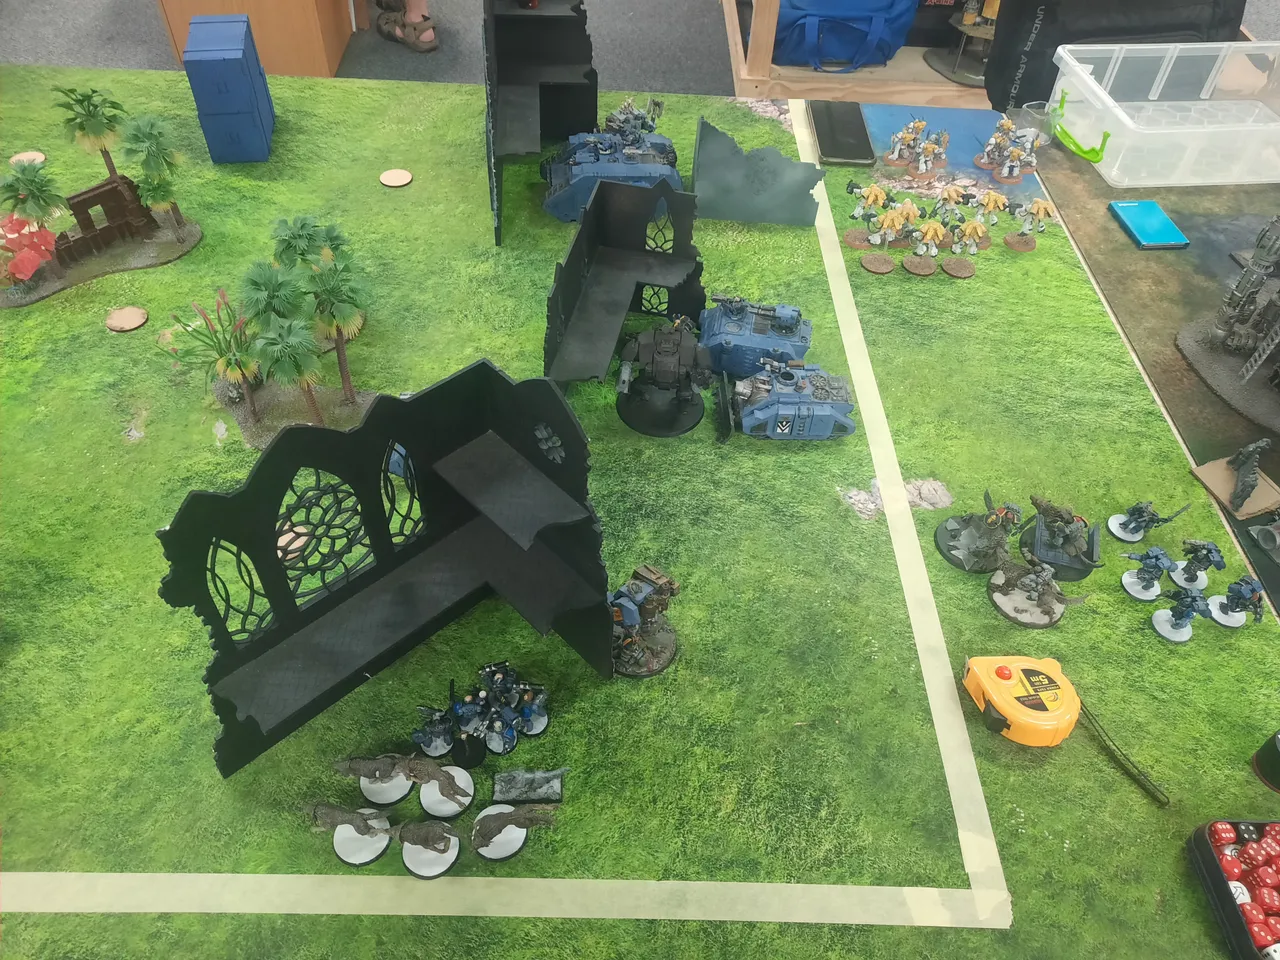
Here you can see the setup from Marc's side of the board.
And my setup from my side of the board.

Mostly taking cover, the one Razorback was deployed more forward but behind a treeline that would make it more difficult to hit.

Fenrisian Wolves deploying out of sight behind a ruin.
The Blood Claws in the Land Raider and the Wulfen Dreadnought keeping one flank of my battle line.
We roll off for first turn: Marc wins and gets to go first!

The Impulsors glide forward on their anti-gravity fields and the one squad of Blade Guard and Captain jump out and move forward to take the centre objective in the very first turn!
Usually, transports cannot move and then have infantry deploy from them, but these Impulsors can. The unit in the transport cannot then make a charge into Engagement, but they really do have a massive command of the board.
Let's break it down: The Impulsor tank moves 14", the Blade Guard deploy within 3" of the hull at any point and then move 6"! Thus a total of 23" from the deployment position of the Impulsor is a one turn move to take and hold positions on the board!

Aggressors in front, Blade Guard following behind supported by both Azreal and the Apothecary.
Then came the first turn of shooting! A blistering hail of fire occurred.
One squad of Desolators let rip, firing Superkrakk missiles at my Exposed Razorback transport. Because they are Dark Angels, they gain a +1 to hit, even though firing through the woods give you a -1 to hit, they ignore this and blew up the tank soundly in a single, spectacular volley.
Simultaneously, that SAME squad let rip with their Castellan Launchers, firing indirectly (meaning against a target they cannot even see) at the Fenrisian Wolves! They killed all but one of the wolves and the remaining wolf ran away due to the shock of losing its pack.

The Grey Hunters leaving the transport take cover inside some terrain. They are then fired upon by the other squad of Desolators and the two Impulsors. They are wiped out!
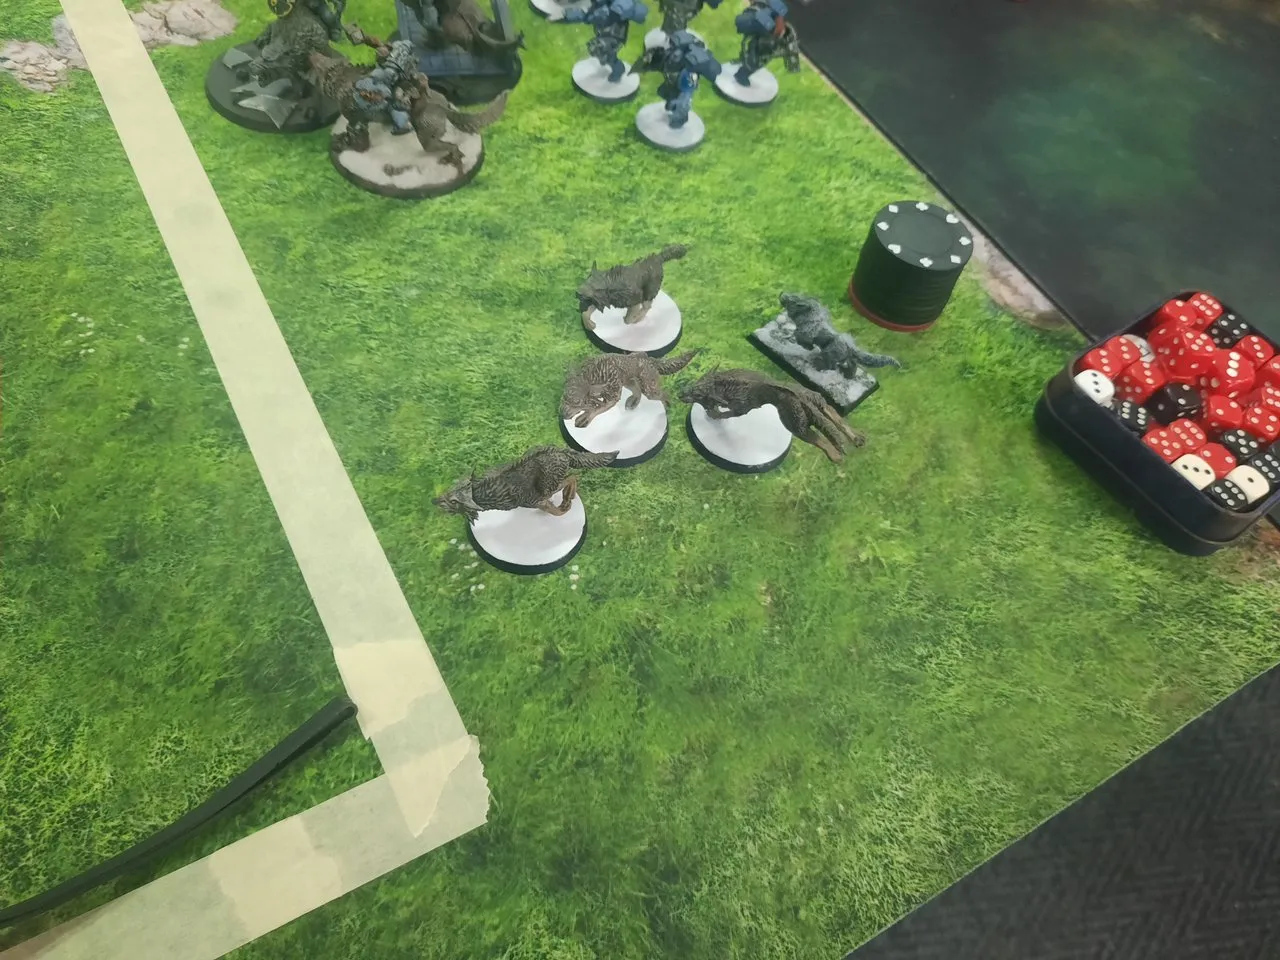
Poor wolfies did not even get to move or anything!

The position where the Grey Hunters used to be... This was quite a big loss for me all in the first turn of the game.
It was time for the Space Wolves to take THEIR first turn.
My Long Fangs moved into the ruin and I used my Keen Senses Space Wolves Stratagem to shoot with no penalty.
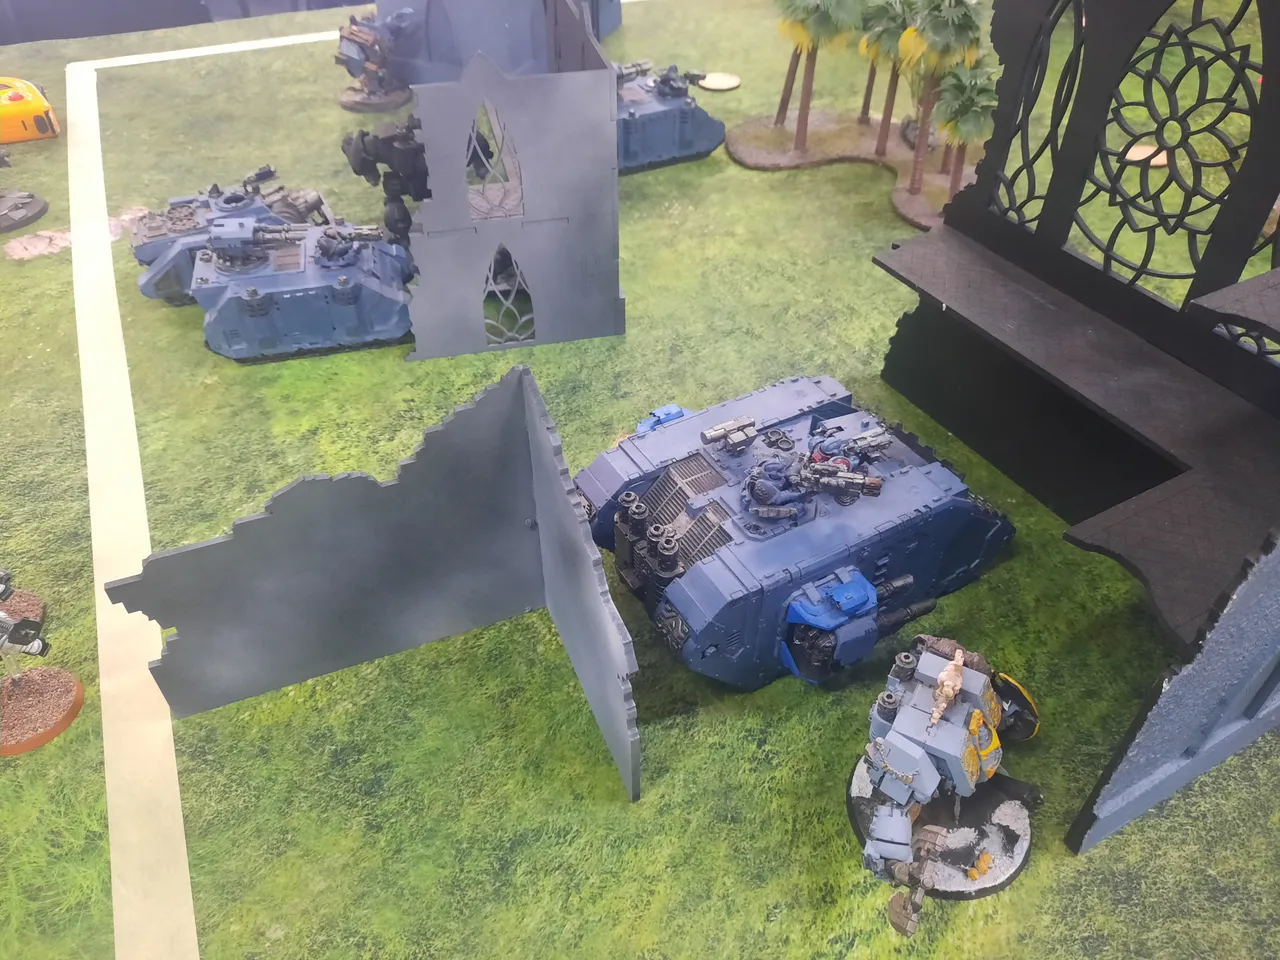
The Redemptor, Bjorn, Vindicator, Razorback and land Raider all moved into position to fire.
The Blood Claws had left their transport and ran forward to take an objective closest to me. The Wulfen Dreadnought sprinted forward a solid 13" (since it has no ranged attacks to bother firing).
I concentrated most of my long ranged firepower on one of those Desolator squads...

..and wiped them all out!
Besides this damage, my first turn has very little other damage, I shot at some of the Blade Guard with my remaining firepower, but they are seriously tough.
Also, the Apothecary would zoom in and would bring a Blade Guard back!
I determined that I would need to put a decent amount of damage into those squads to render the ability of the apothecary nill.

At this point I had advanced up the board in a significant way.
On turn 2 Marc brought down his Inceptors - the flyboys with the guns. Dropping in front of his Captain in center field was the squad of 3 with Plasma weapons.
They used overcharged plasma together with the Captain's re-roll 1s to avoid blowing themselves up and the Dark Age of Technology stratagem the Dark Angels have to increase their damage and targeted my Land Raider.
In response, I deployed a Smoke Screen from my Land Raider, reducing his ability to score hits on me.
The result was that he caused 2x unsaved wounds for a total of 6 Damage. But no more.
The other unit had come down and opened fire on my Long Fangs, killing 4 out of 5 of them. A lone Fang with a Missile Launcher remained.
In his Assault phase, he charged into my Wulfen Dreadnought with his Aggressors a s my Blood Claws did a Heroical Intervention and joined that combat.
They caused some damage on the Dreadnought but were dispatched by the Wulfen Dread's mighty Axe!

Then it was my turn again.
My Thunderwolves and my Wolf Guard also arrived from Reserves.
My Wolf Priest moved in to attack the squad of 5 Interceptors.
I saw a great opportunity for me... the Blade Guard with the Captain was down to three bodies and the Inceptors also numbered only three.
The Captain and the Judicar both stood with these units.
For those that do not know, Characters cannot be shot at if they are too close to squads of infantry, Vehicles and Monsters who perform the "Look Out Sir!" general rule that protects them... However the unit has to be 3 or more for that to work... so I took my chance!
Targeting the Blade Guard, I shot onw down. Then the Inceptors and killed one of them too.
I then fired on the Judicar and then the Captain, killing both of them in that turn. I proceeded to charge into combat as well.
I was not sure if I was going to make the charge into the other squads, to the Redemptor Dreadnought charged into a nearby Impulsor. Grey Hunters and Lone Blood Claw charged into the Interceptors.
The Wulfen Dreadnought that had killed the Aggressors now charged into the other squad of Blade Guard.
I tried to perform a turn 2 charge with my Wolf Guard and Thunderwolves but they could not get in there. I did however make 4 successful charges.
The Redemptor Dreadnought ripped the Impulsor...
...AND THEN IT HAPPEND...
Catastrophic results causes the Impulsor to explode! It wounds the Dreadnought, the other Impulsor takes some damage, some Space Wolves, the Interceptors and the Blade Guard all take major damage!
Even though I had caused some damage to myself, with the low number of Dark Angels with massive value that got taken down, this was a hammer blow to Marc's army.

It left a big hole in the Dark Angel's battle line and allowed me to take and hold the center of the board.

Since the Thunderwolves could not make the charge, the Desolator Marines fired on the Thunderwolves and the Wolf Guard. They managed to kill one Thunderwolf and one Wolf Guard.
Azreal retaliated. He attempted to make a grand sweep and kill both Dreadnought and the one remaining squad of Space Wolves left over. This was a mistake as the failed to do either. The result was that he was punched by the Dreadnought, taking 6 Wounds.
The Apothecary had charged into the Wulfen Dreadnought to try prevent more Blade Guard from dying and in return I killed the Apothacary. The Wulfen Dreadnought died in that combat as well.


In my turn, the Redemptor Dreadnought and Blood Claw fell back from Azreal so I could shoot the final wound off him.
The Thunderwolves charged into the Desolators, managing to Overwatch and kill another one, the lone cavalry still wiped out the unit.
The Wolf Guard moved in and charged the Blade Guard and killed them as well, though only one still remained.

At the end of the battle, even though few Space Wolves remained, even fewer Dark Angels remained.

The follow up turns we pretty much just discussed our intentions. It was clear that with a hand full of Infitrators and an Impulsor against Bjorn, the Land Raider, The Vindicator, a Razorback, A Thunderwolf Sergeant and a Wolf Guard with a Thunderhammer... he was going to be wiped clean off the table and I was going to hold the maximum number of objectives in those turns.

Wrapup - Results - Space Wolves Win!
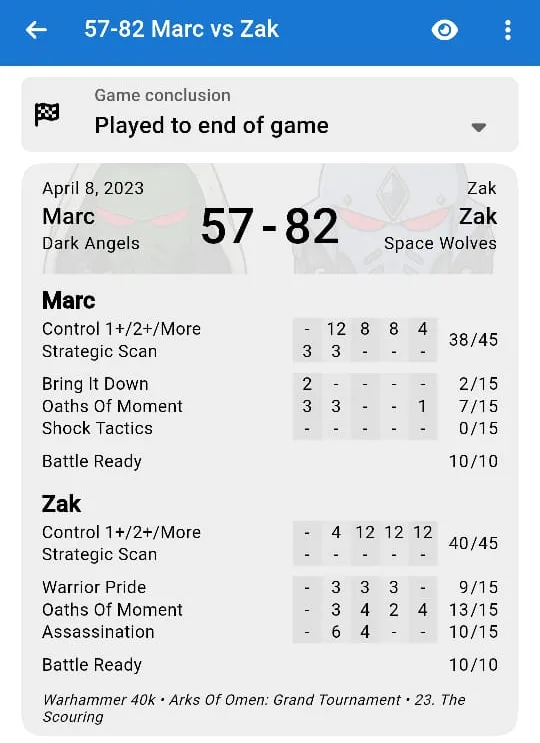
This was actually totally unexpected. Going into the game, especially after turn 1, I thought I was going to get demolished by Marc.
Thankfully I held on and kept fighting hard even though things were not going my way in the beginning.
There were some moments, like blowing up the transport and getting to punch Azreal that really changed the outcome towards the end. Perhaps if the tank had not exploded and Azreal had put all of his attacks into the Dreadnought, then the game might very well have swung the other way, resulting in a dead Dreanought and a lot more living units.
I did learn a lot from the game. I learned that for the tournament I had selected completely wrong Secondary Objectives.
I am a great fan of the Oath of Moment and Warrior Pride. I should have used that in the tournament and I might have gotten some better results.
But time will tell. I will need to battle more foes with this army to truly know what the results would be if I do that.
Thank you for reading!
Cheers!
@zakludick