Learning and memorizing the multiplication tables has been for many the most difficult part of primary education, in my case it was somewhat traumatic since I had to sit down daily and for a couple of hours to memorize each of the tables, Later my dad would ask me to memorize them without any kind of order, when I failed three times my dad scolded me and told me to go on studying, at that moment I felt that this was a punishment and I didn't understand why I had to learn something that was in the back of my notebooks hahahaha; the most difficult table to memorize was the 7, I could not get a way to learn it but to read it over and over again. This is something I am very grateful to my father, because even though he only studied up to third grade of elementary school he is very good at math and always tried to help us as much as he could.
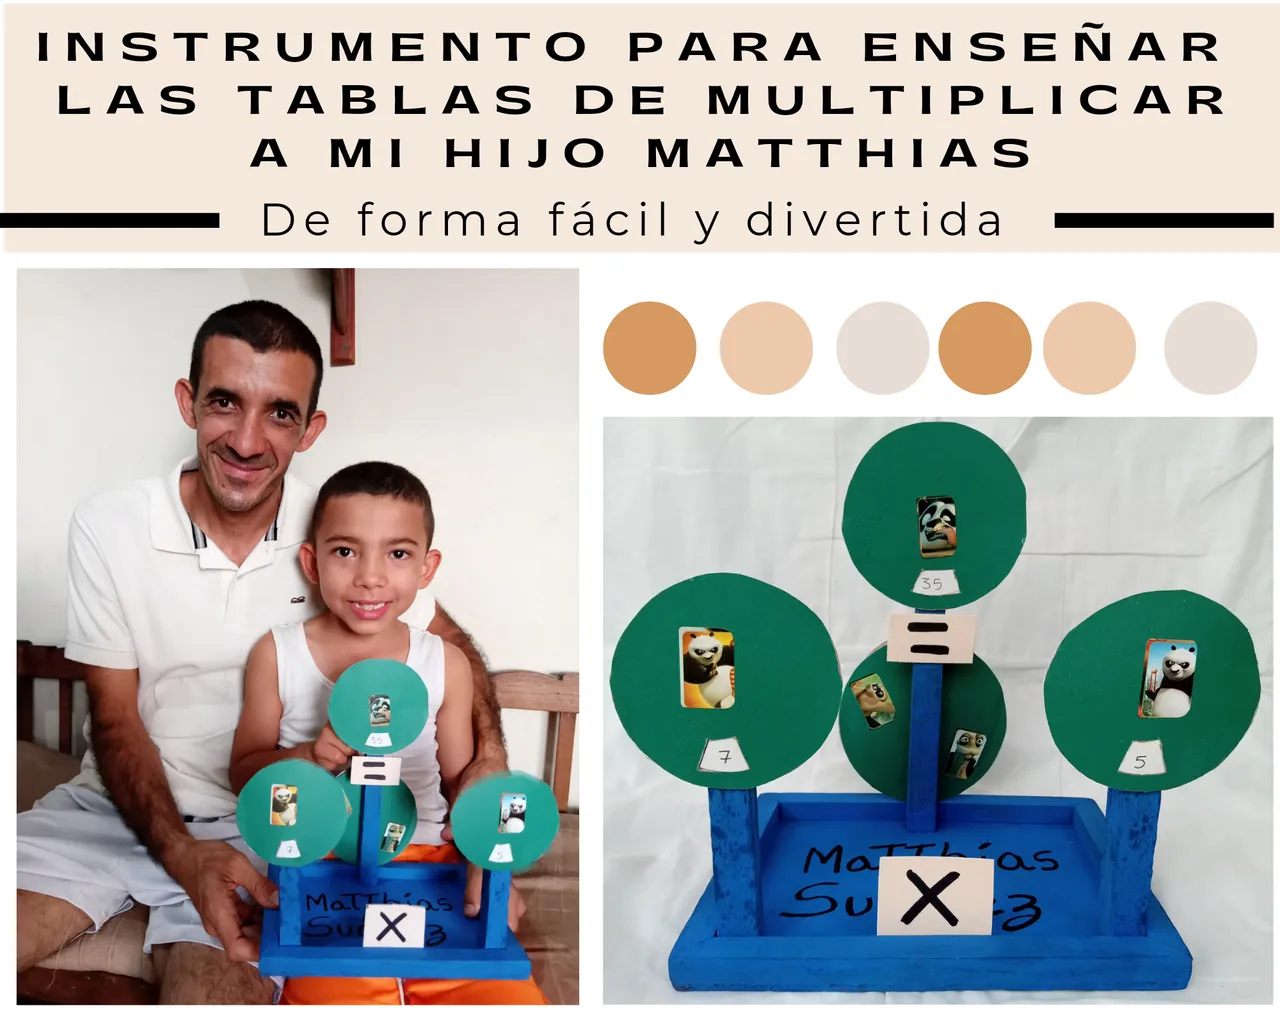
En la actualidad las cosas han cambiado mucho, y uno de estos cambios es el los métodos de estudios para los niños, donde los educadores deben ingeniarse la manera de hacer el aprendizaje algo divertido para así mantener la atención de los niños; es aquí donde solicitan ayuda a los padres para la elaboración de diversos instrumentos y debemos imaginar una forma con la que nuestro representado se sienta identificado. De allí nació esta idea para ayudar a mi hijo Matthias con el aprendizaje de las tablas de multiplicar.
Nowadays things have changed a lot, and one of these changes is the study methods for children, where educators must figure out how to make learning something fun in order to keep the attention of children; it is here where they ask for help from parents for the development of various instruments and we must imagine a way that our child can identify with. This is where this idea was born to help my son Matthias with learning the multiplication tables.

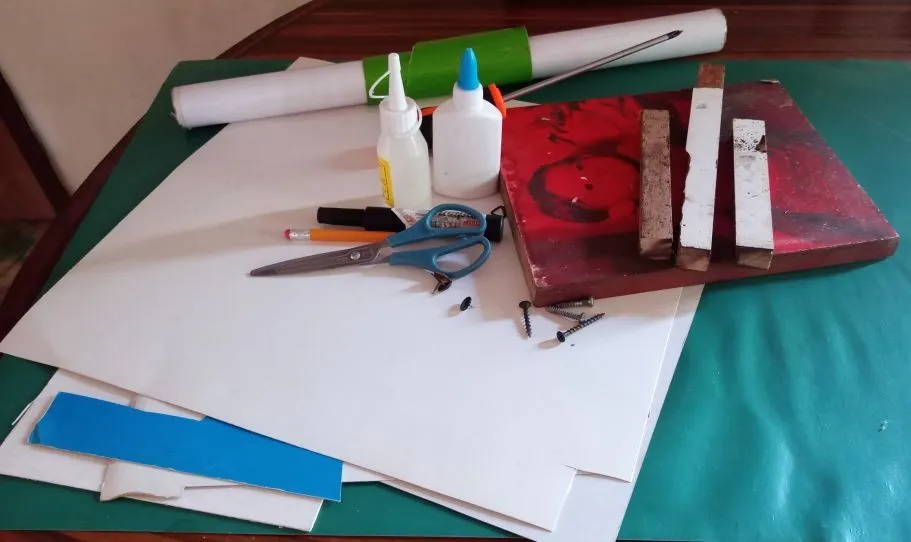
Materiales y herramientas a utilizar
Una montura de cuadro viejo (medida 20m x25cm)
3 laminas tamaño carta de cartulina doble fax (de 2 colores diferentes)
Pintura al frío del color de tu preferencia
1 listón de madera de 55 centímetros (cortados en: 2 de 15 cm y 1 de 25)
3 tornillos para drywall
8 chinches
Pega blanca
Silicón liquido.
Marcador punta fina, lápiz de carbón y bolígrafo.
Tijeras, juego de escuadras, destornillador.
Materials and tools to use
An old picture frame (size 20m x25cm)
3 letter size sheets of double fax cardboard (2 different colors)
Cold paint in the color of your choice
1 55-centimeter wood strip (cut in: 2 of 15 cm and 1 of 25)
3 drywall screws
8 bedbugs
White glue
Liquid silicone.
Fine tip marker, charcoal pencil and ballpoint pen.
Scissors, set of squares, screwdriver.
Elaboración / Elaboration
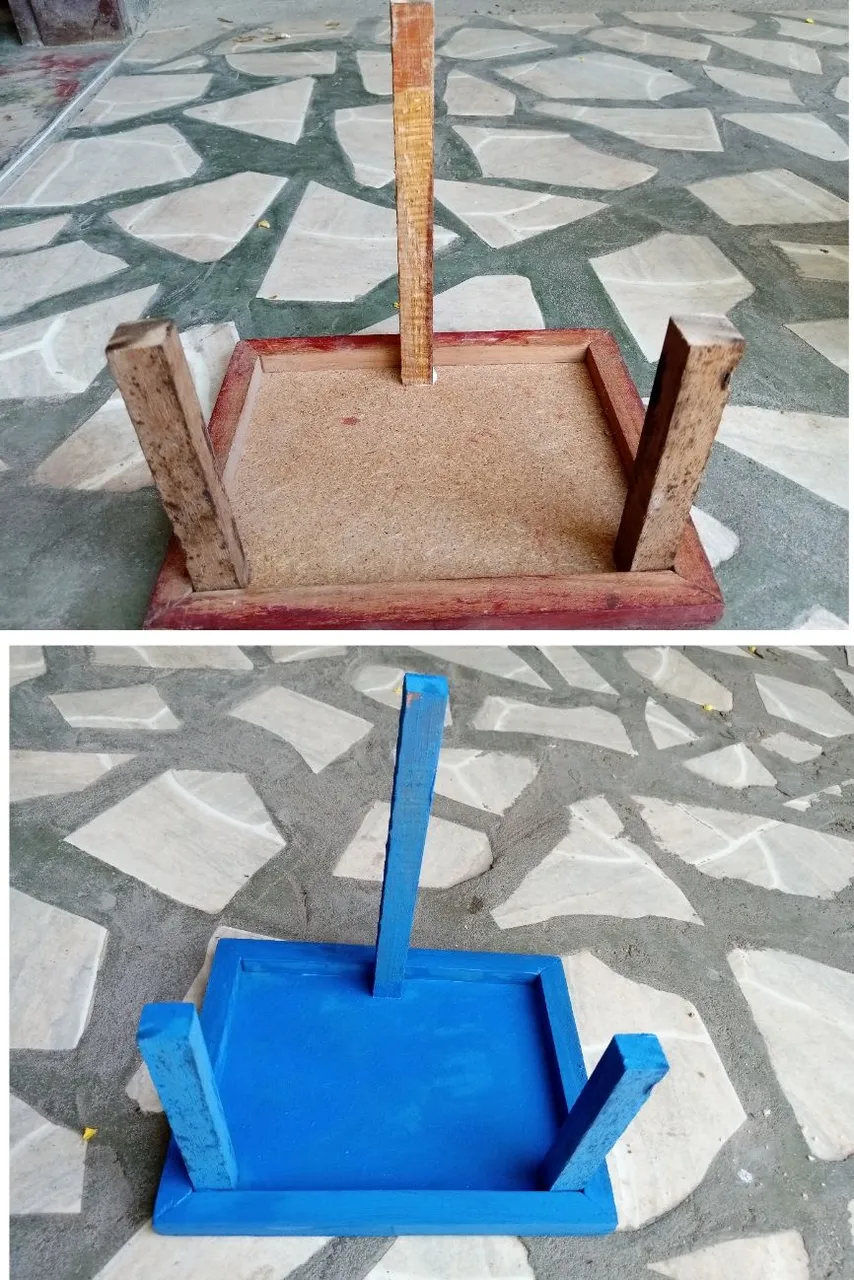
Primeramente realice la base del instrumento, para lo cual tome la montura de un cuadro viejo que encontré en la marquetería de mi suegro, marque los puntos para colocar los listones de madera; seguidamente coloque un poco de pega blanca a cada listón, con la ayuda de un destornillador fui fijando con un tornillo cada uno de los listones, dejando el listón mas alto para el centro posterior.
First I made the base of the instrument, for which I took the frame of an old picture that I found in my father-in-law's marquetry shop, I marked the points to place the wooden strips; then I put some white glue on each strip, with the help of a screwdriver I fixed each of the strips with a screw, leaving the highest strip for the back center.

Lista la base procedí a pintarla de azul, que fue el color que eligió mi hijo Matthias, deje secar la pintura al aire libre.
Once the base was ready, I proceeded to paint it blue, which was the color chosen by my son Matthias, I let the paint dry in the open air.
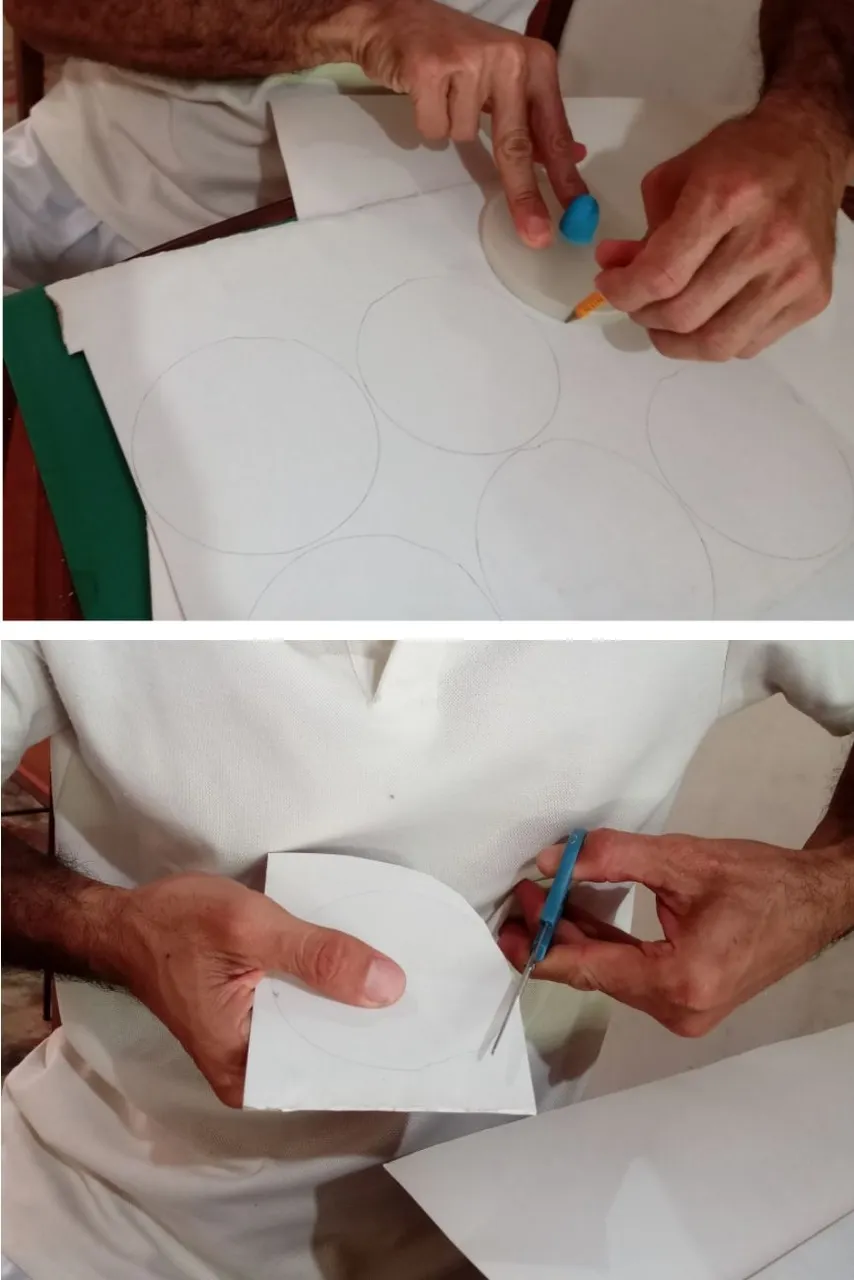
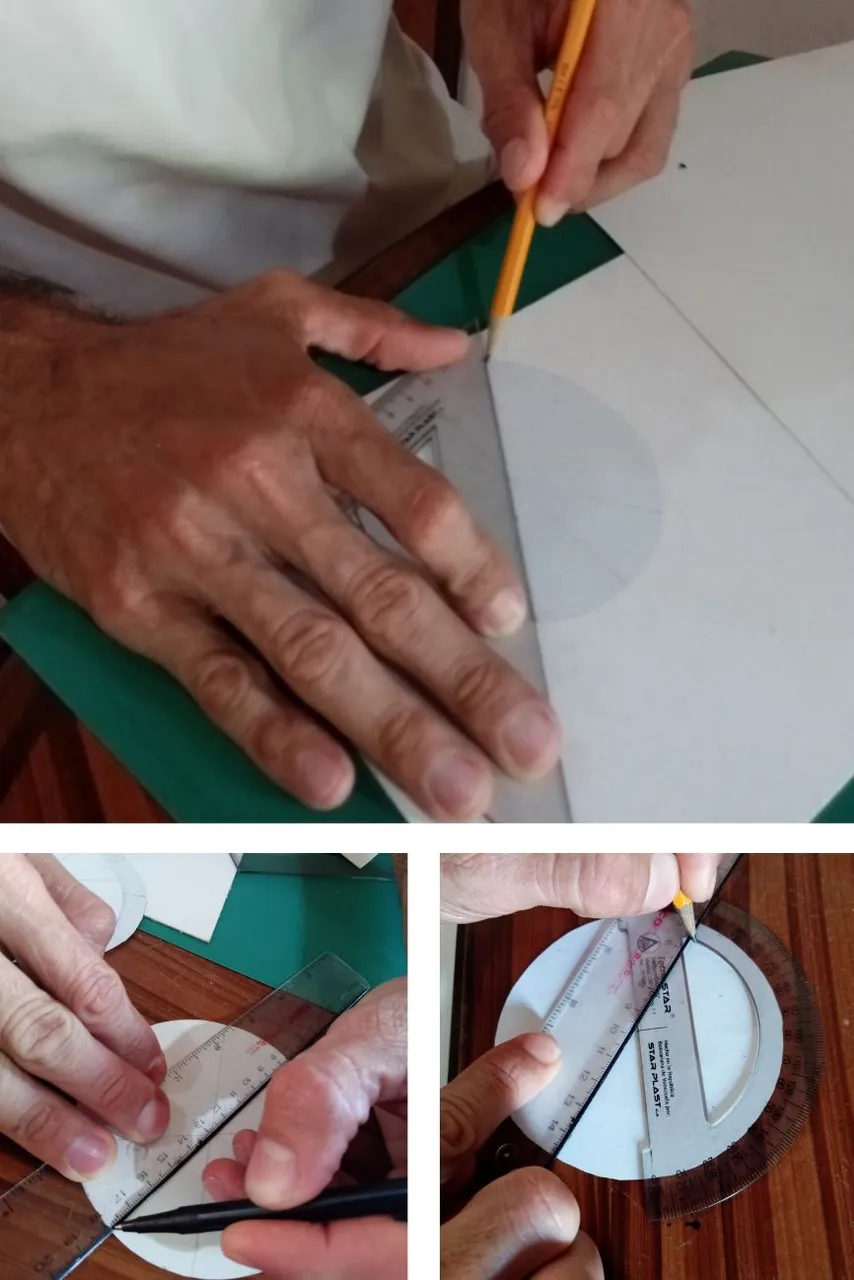
Por otra parte realice las tablas de multiplicar de forma individual, para eso realice 9 círculos de aproximadamente 10 centímetros de circunferencia y los recorte.
On the other hand, I made the multiplication tables individually, for that I made 9 circles of approximately 10 centimeters in circumference and cut them out.
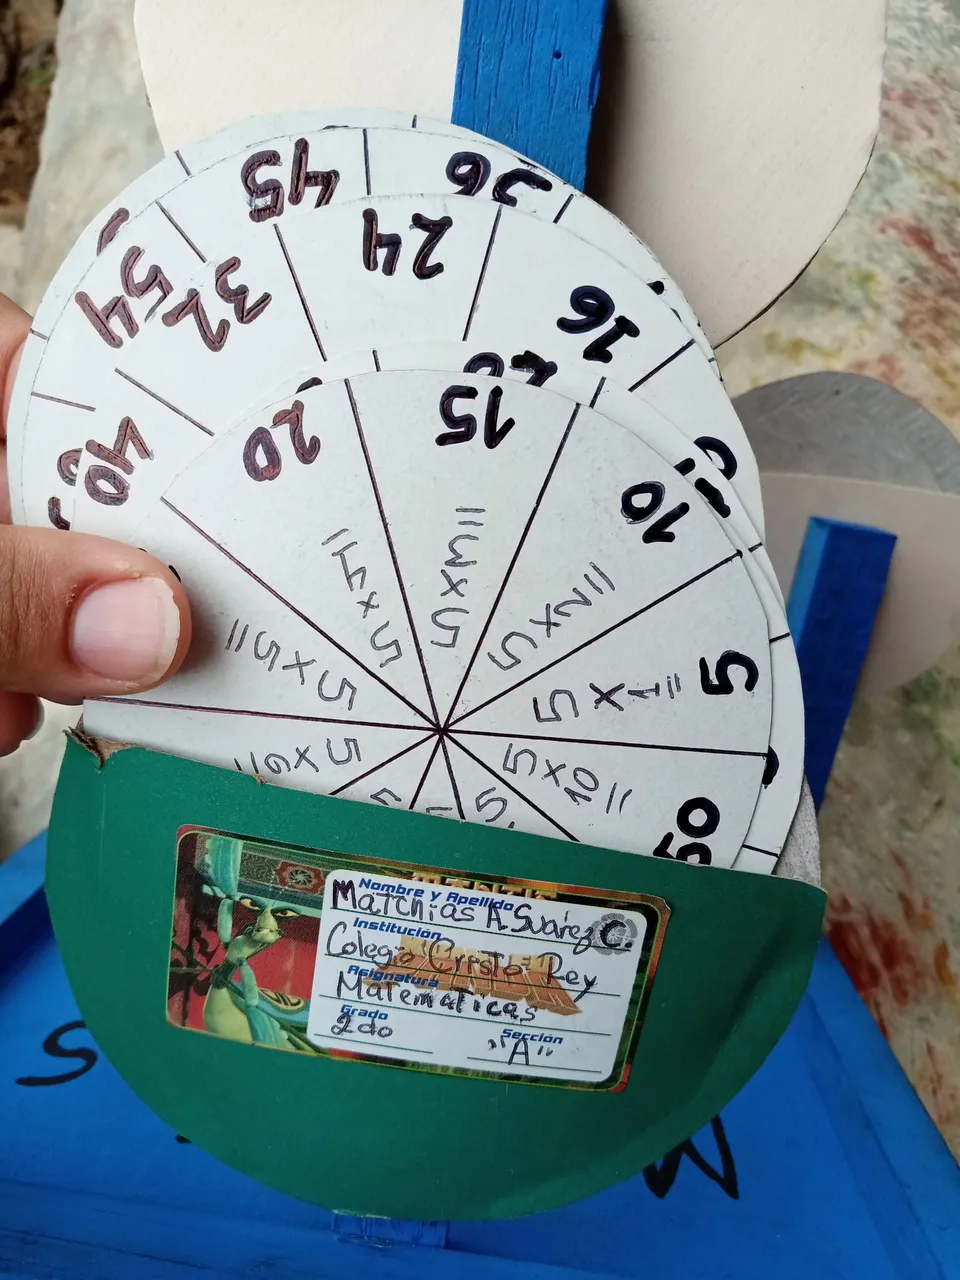
Dividí en 10 partes iguales, marque el centro y trace una línea para dividir la circunferencia en 2 partes iguales, luego con ayuda del transportador primeramente dividí 180 entre 5 partes (la mitad de la circunferencia) y marque cada punto a 36 aproximadamente, por ultimo con un bolígrafo dividí la torta. Repetí este paso con los 9 círculos para cada tabla.
I divided them into 10 equal parts, marked the center and drew a line to divide the circumference into 2 equal parts, then with the help of the protractor I first divided 180 by 5 parts (half of the circumference) and marked each point at approximately 36, finally with a pen I divided the cake. I repeated this step with the 9 circles for each board.
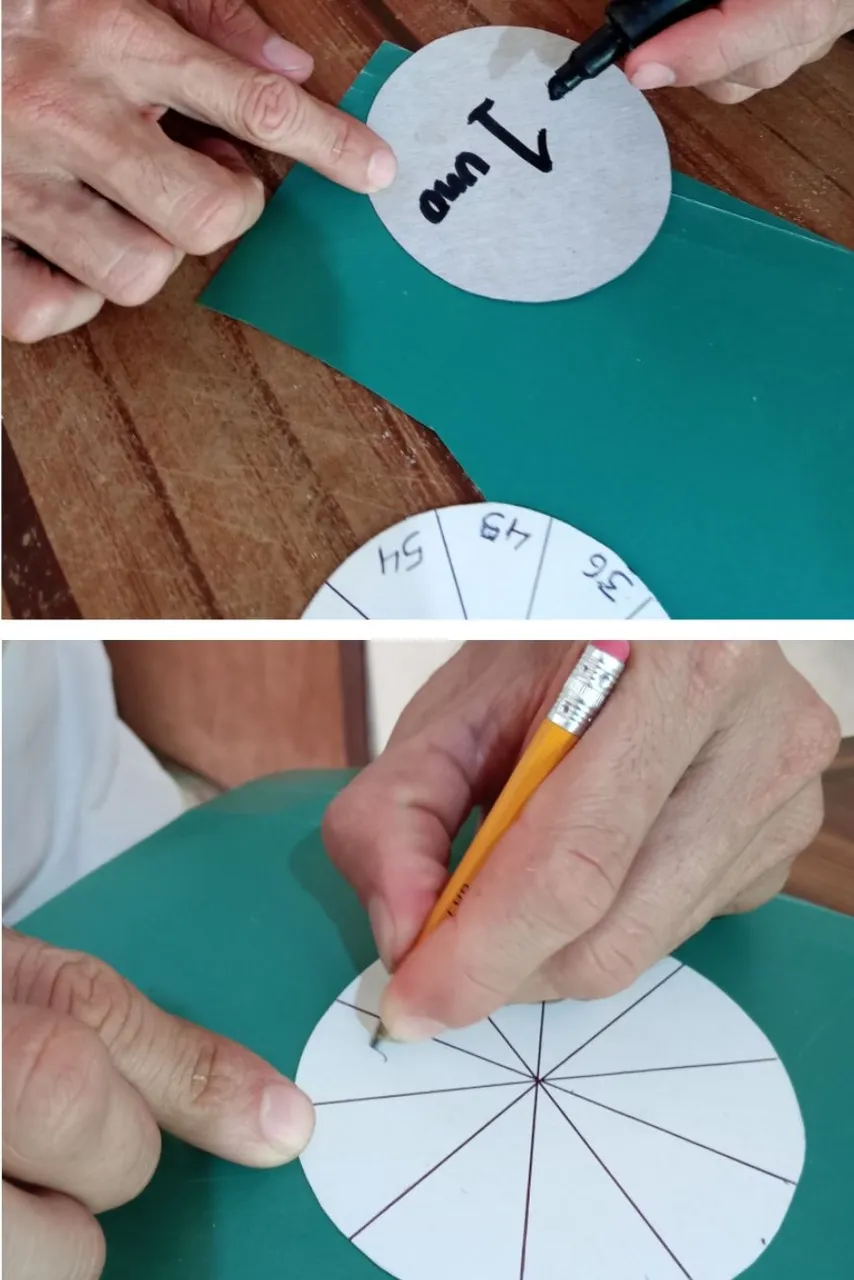
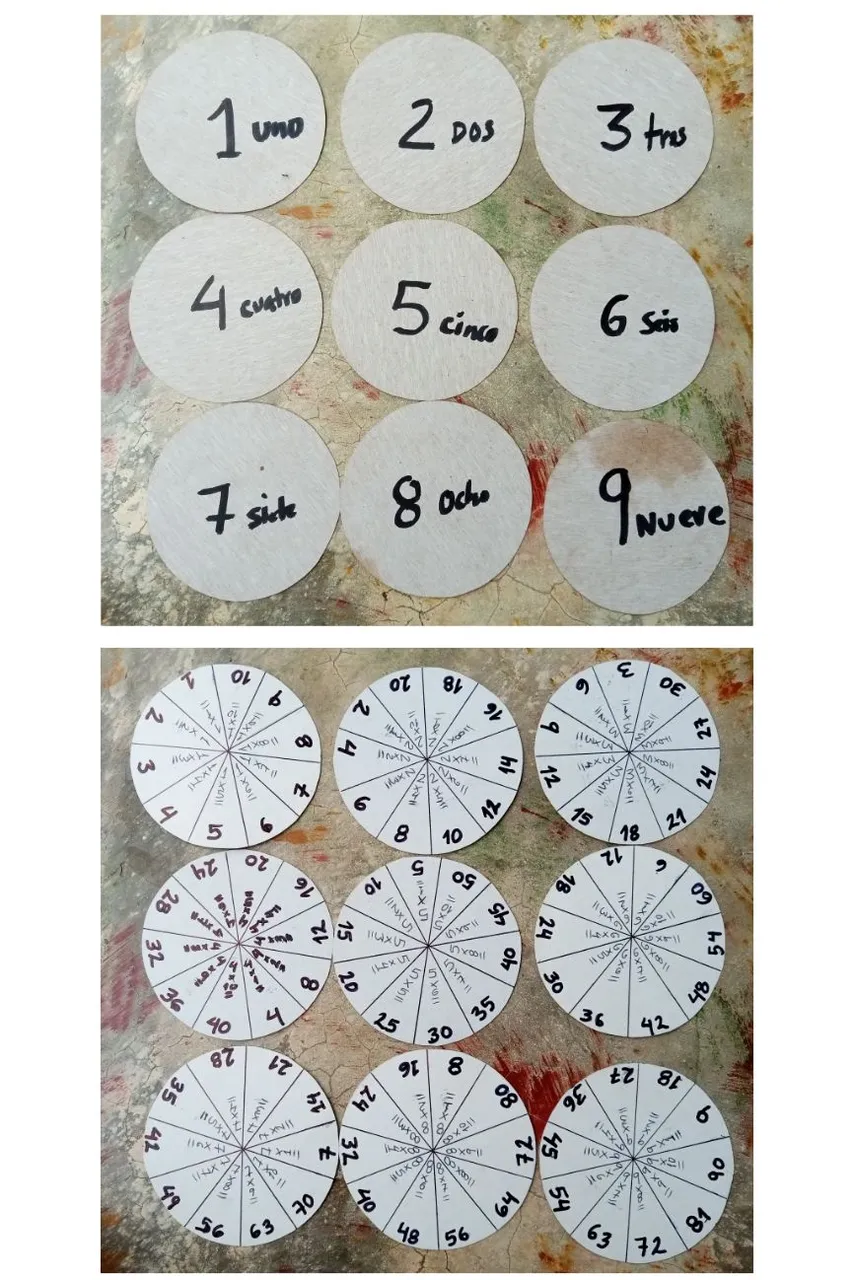
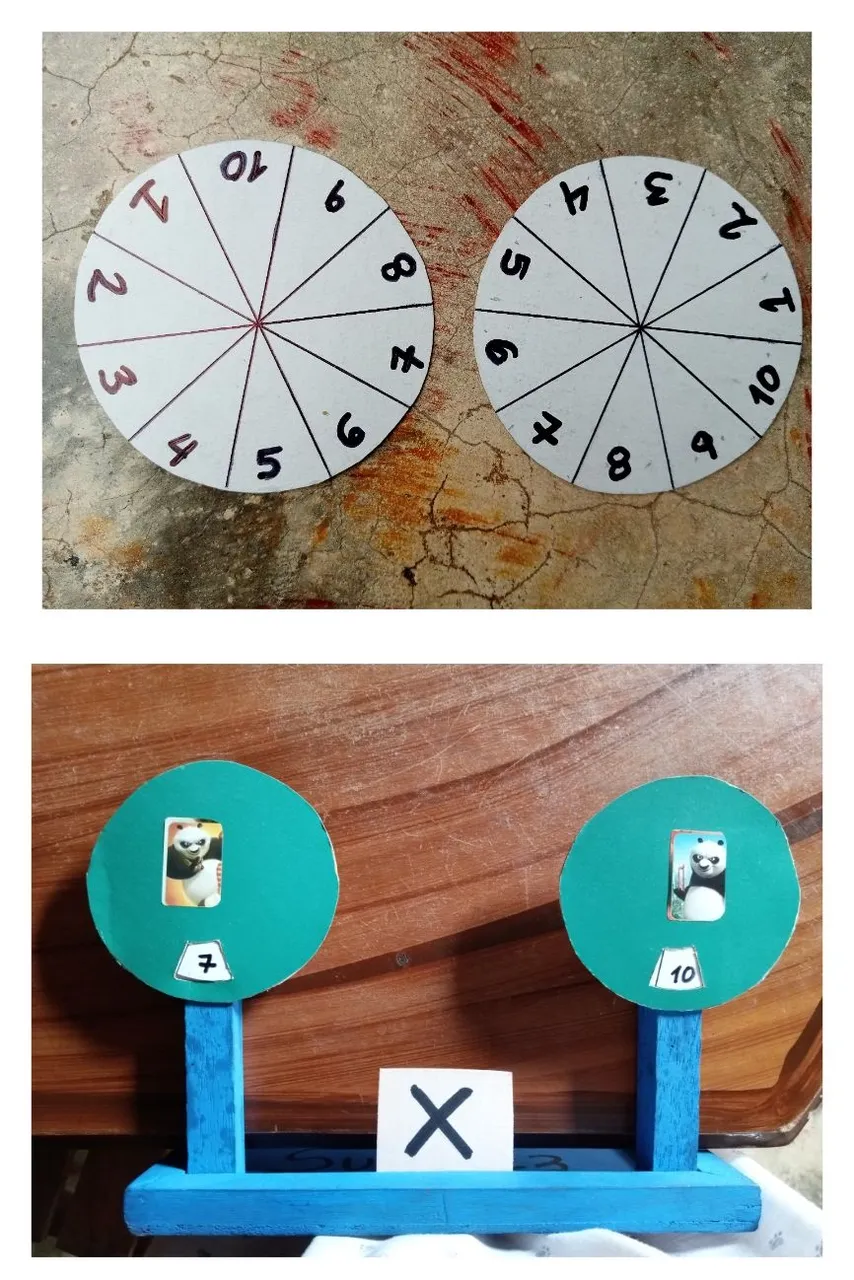
En este momento colocamos en el reverso del circulo el número de la tabla, y en el anverso colocamos la multiplicación y los resultados; realizamos este paso con las 9 circunferencias, con sus respectivos montos. Adicionalmente realizamos 2 círculos extras, los cuales van a estar enumerados del 1 al 10, para realizar las multiplicaciones a resolver.
At this moment we place on the back of the circle the number of the table, and on the front we place the multiplication and the results; we do this step with the 9 circles, with their respective amounts. Additionally we make 2 extra circles, which will be numbered from 1 to 10, to perform the multiplications to be solved.
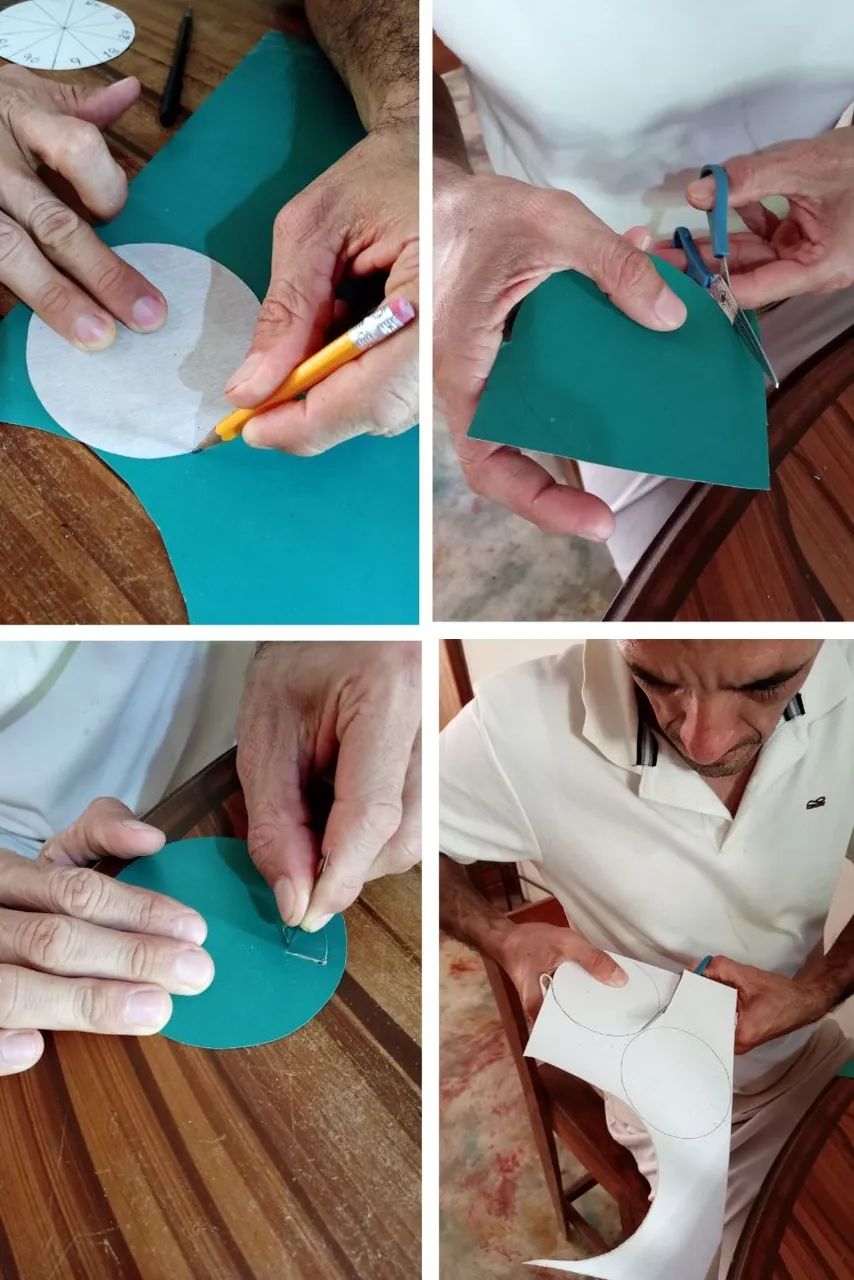
Seguidamente realizamos 4 círculos dobles, haciendo una especie de estuche, en donde se van a colocar las tablas respectivas; a 3 de ellos les realizaremos una pequeña abertura para que se observen los números a utilizar, tanto en la multiplicación como el resultado. El circulo restante será utilizado para guardar las tablas restantes. Pegamos cada uno de los círculos en el lugar escogido.
Then we make 4 double circles, making a kind of case, where the respective tables will be placed; 3 of them will have a small opening to show the numbers to be used, both in the multiplication and the result. The remaining circle will be used to keep the remaining tables. We glue each of the circles in the chosen place.
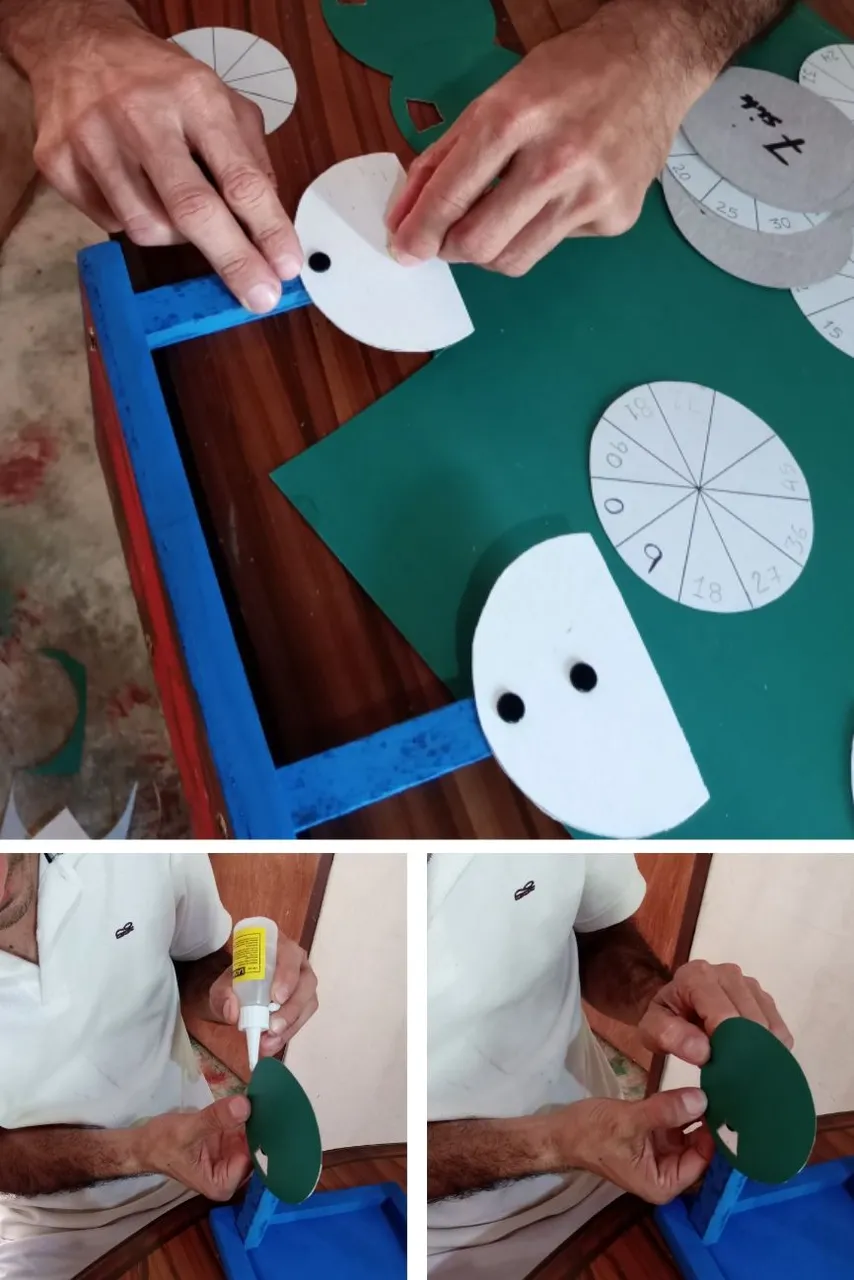
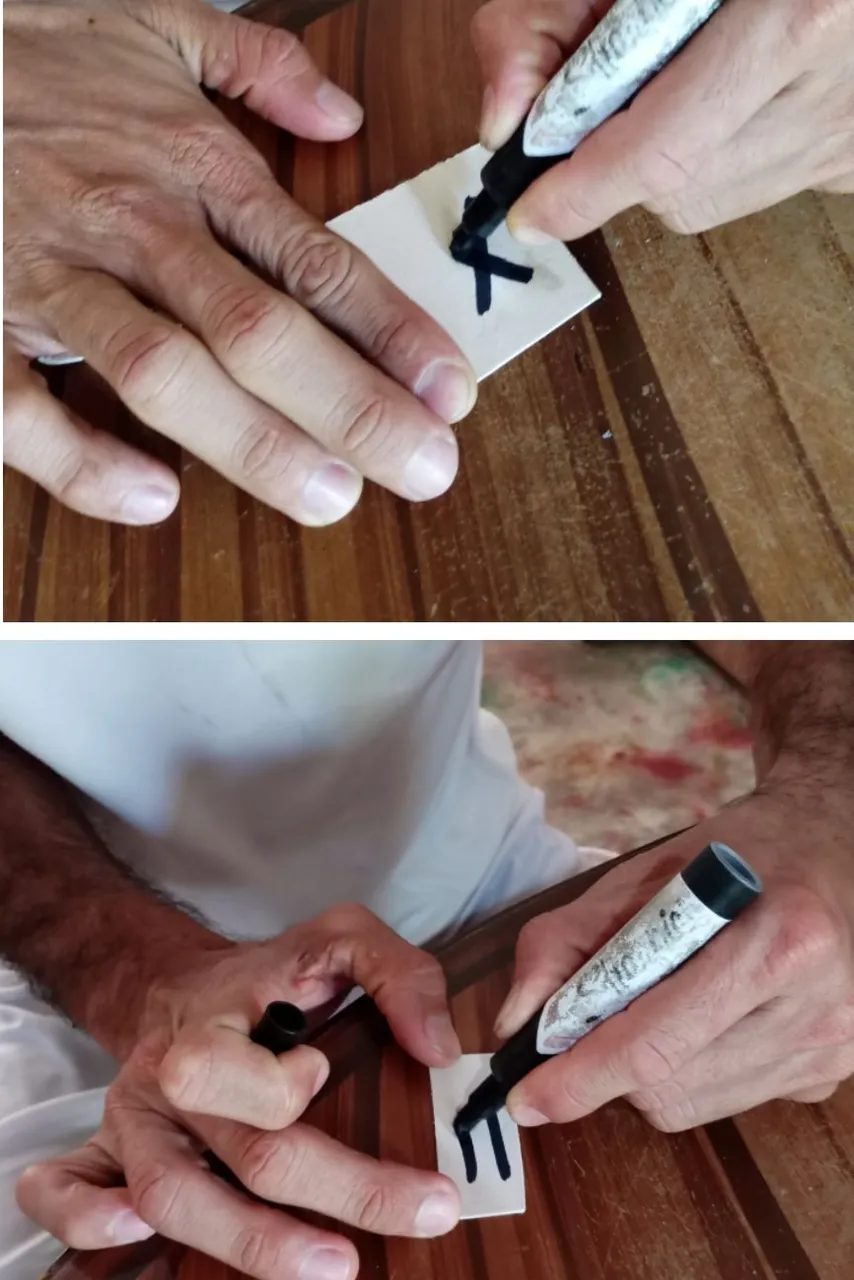
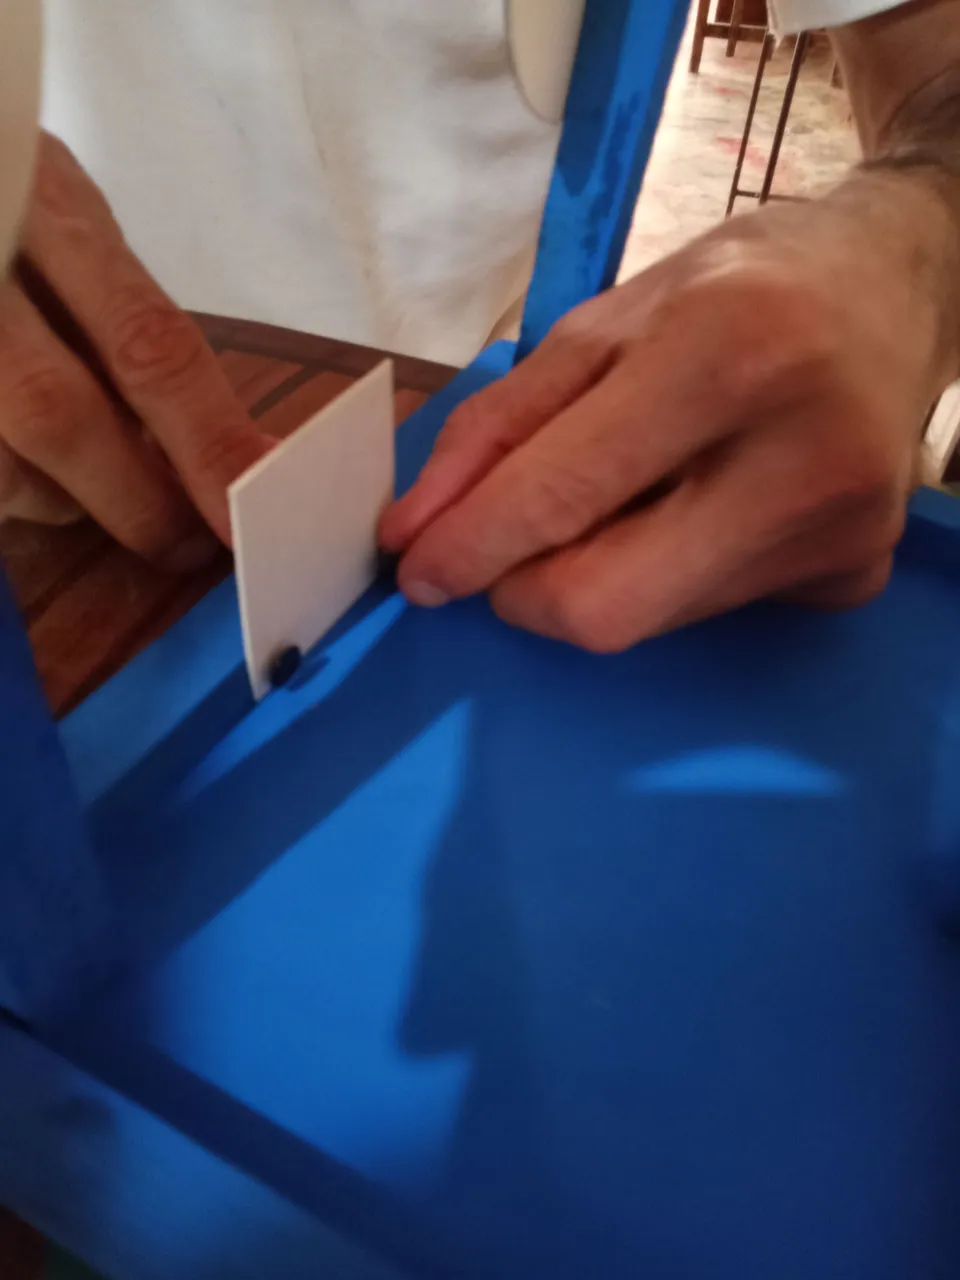
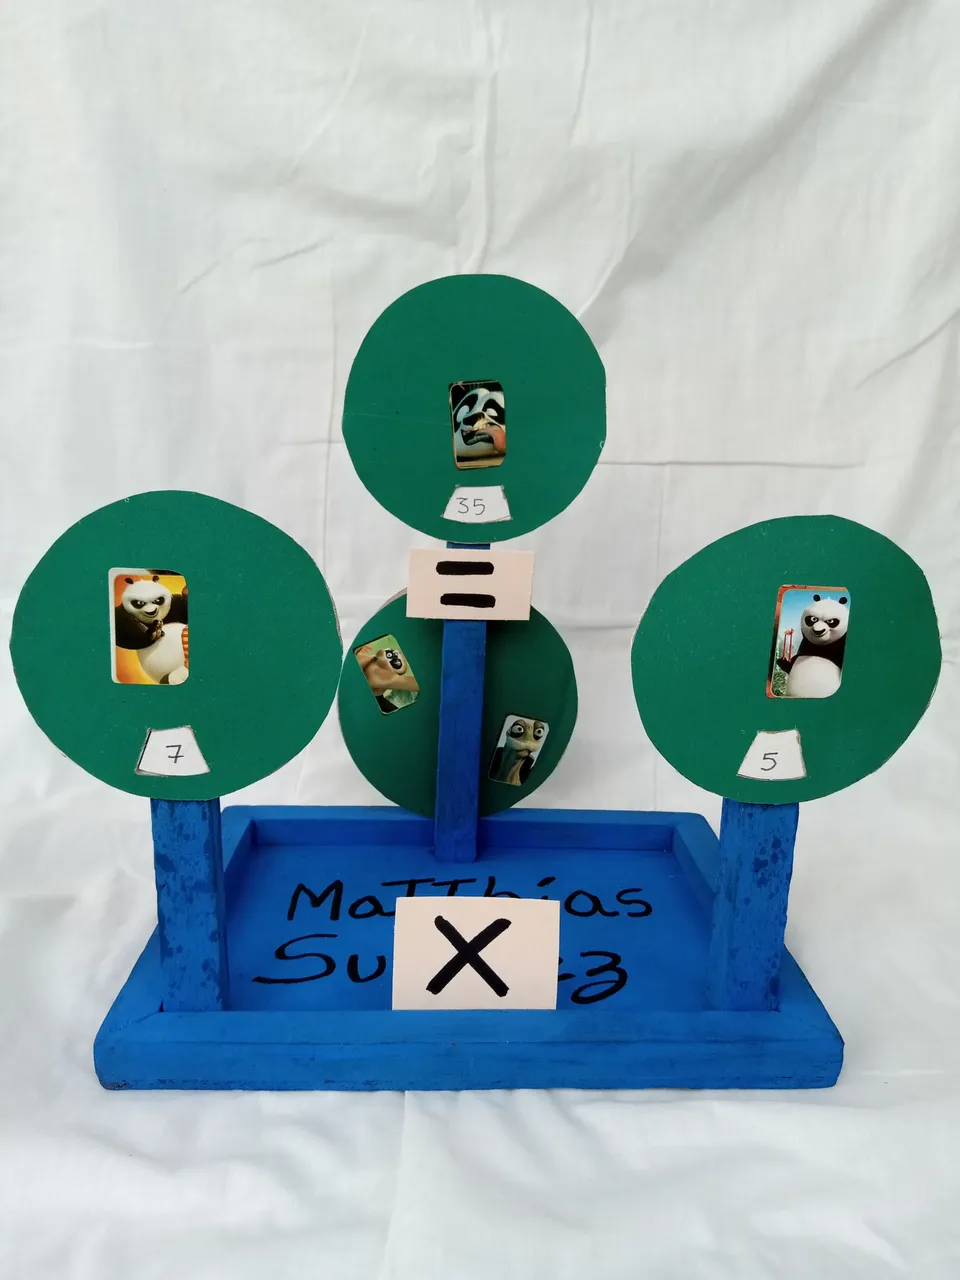
Por ultimo en un trozo de cartulina colocamos el símbolo de la multiplicación “X” y en otro el símbolo de igualdad “=”, para lo cual colocamos un poco de pega blanca y aseguramos con 2 hinches cada uno.
Finally, we put the multiplication symbol "X" on one piece of cardboard and the equality symbol "=" on the other, for which we put some white glue and secure each one with 2 punches.
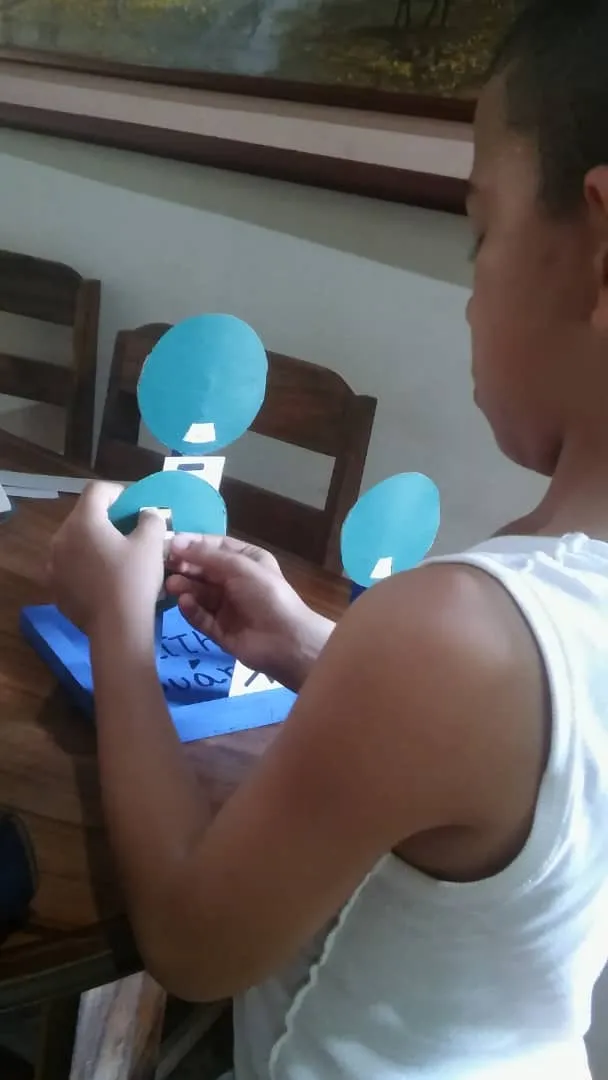
Matthias no estaba muy convencido con este instrumento, pensó que era aburrido por lo que busco unas etiquetas y las coloco a su gusto, dando un toque personal.
Matthias was not very convinced with this instrument, he thought it was boring so he looked for some labels and placed them to his liking, giving a personal touch.
Resultado / Result
Ya terminamos el instrumento para las tablas de multiplicar, quedo muy llamativo y divertido; su funcionamiento es sencillo, en los 2 círculos delanteros colocamos la multiplicación a resolver, donde el niño debe identificar la tabla que debe buscar, posteriormente la ubica en la tabla y coloca en el círculo superior el resultado.
We finished the instrument for the multiplication tables, it was very striking and fun; its operation is simple, in the 2 front circles we place the multiplication to solve, where the child must identify the table to look for, then place it in the table and place the result in the top circle.
Matthias esta muy emocionado con su proyecto, desde el momento en que lo terminamos a estado practicando y ya sabe algunos resultados, el día de mañana Lunes debe llevarlo a su colegio y defenderlo, explicarlo a sus compañeros y demostrar que sabe utilizarlo ya que de ahora en adelante este será su mejor amigo por algún tiempo, hasta que logre memorizar todas las tablas.
Matthias is very excited with his project, since the moment we finished it he has been practicing and already knows some results, tomorrow Monday he must take it to his school and defend it, explain it to his classmates and show that he knows how to use it because from now on this will be his best friend for some time, until he manages to memorize all the tables.
Amigos lectores y padres espero les haya gustado este instrumento, es la manera mas fácil y divertida que se me ocurrió para ayudar a mi hijo con sus matemáticas, así prepararlo para su año estudiantil venidero; por ahora se despide su amigo el Drhueso hasta una nueva oportunidad.
Dear readers and parents, I hope you liked this tool, it is the easiest and most fun way I could think of to help my son with his math, and prepare him for his next school year; for now, your friend Drhueso bids you farewell until another opportunity.

Las imágenes son de mi propiedad, fueron tomadas con mi teléfono celular Tecno Spark 6 / The images are my property, they were taken with my Tecno Spark 6 cell phone.
Translated with www.DeepL.com/Translator (free version)