What first started out as a joke turned into reality! I was discussing possible adventure trips with a like minded friend and the thought of 'wouldn't it be cool to kayak through the jungle and camp along the way' came up!
We first had the idea of riding our enduro and motocross bikes through jungle tracks and building a bamboo raft to float back, as we had seen someone do in South America online. After a little more though we decided the risk of loosing or sinking valuable bikes might not be the best idea.
Our second thought was to hike with backpacks through the jungle, somewhere up stream and build a raft to float back on but decided the hike would be an immense amount of effort to cover any great distance and require a lot of time.
And so we arrived at our third idea and thought is was the way to go.
The plan was to find a section of river, somewhere in Thailand, that had a drop off and collection point, preferably by road. We could unload our gear and set off from the upstream location, kayak down, exit and reconnect to a road that would bring us back to the starting point.
After much searching we had finally found a river that we felt was suitable, the River Nan. Our starting point would be from a small town called Wiang Sa right on the banks of the river. We would have to kayak about 9km through local farm land before the river would meander through mountainous jungle. It would be at this point that all civilisation, help and exit points would end until reaching the 85km mark, that we had earmarked to take around 3 to 4 days. Strictly speaking there was one, and only one chance in that 85km stretch that an exit could be made. A small bridge crossed the river connecting the local national park roads on either side but other than this, the only way out would be, down the river, or a long and hard 30km trek through dense forest.
Preparing for the trip was of great importance and we made sure we had back up plans for the worst case scenarios and that we had covered everything.
Maps, situations and gear were high of our prep list
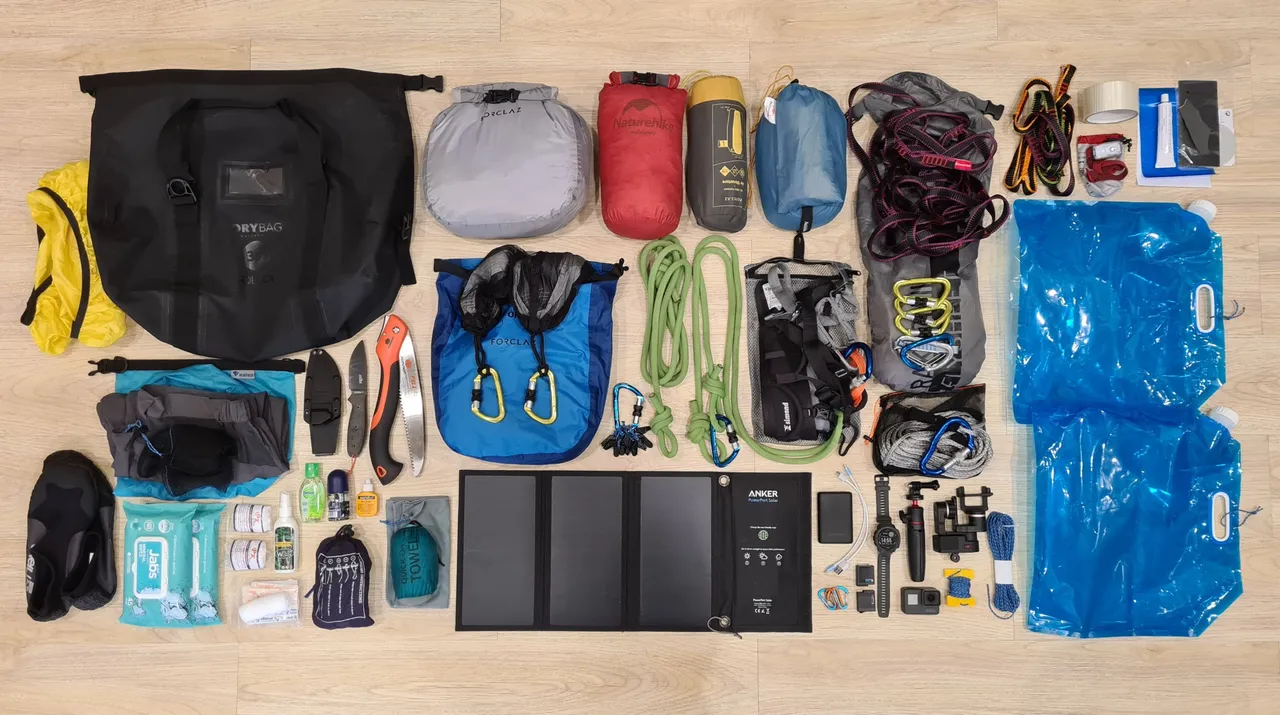
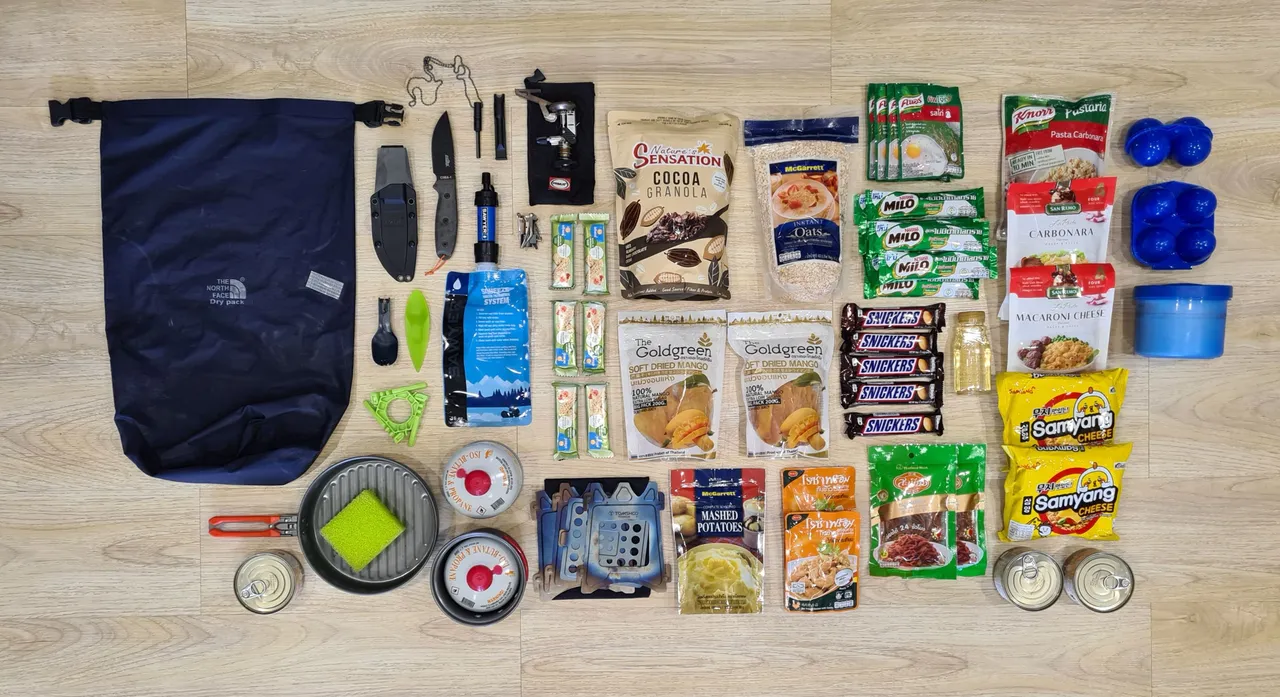
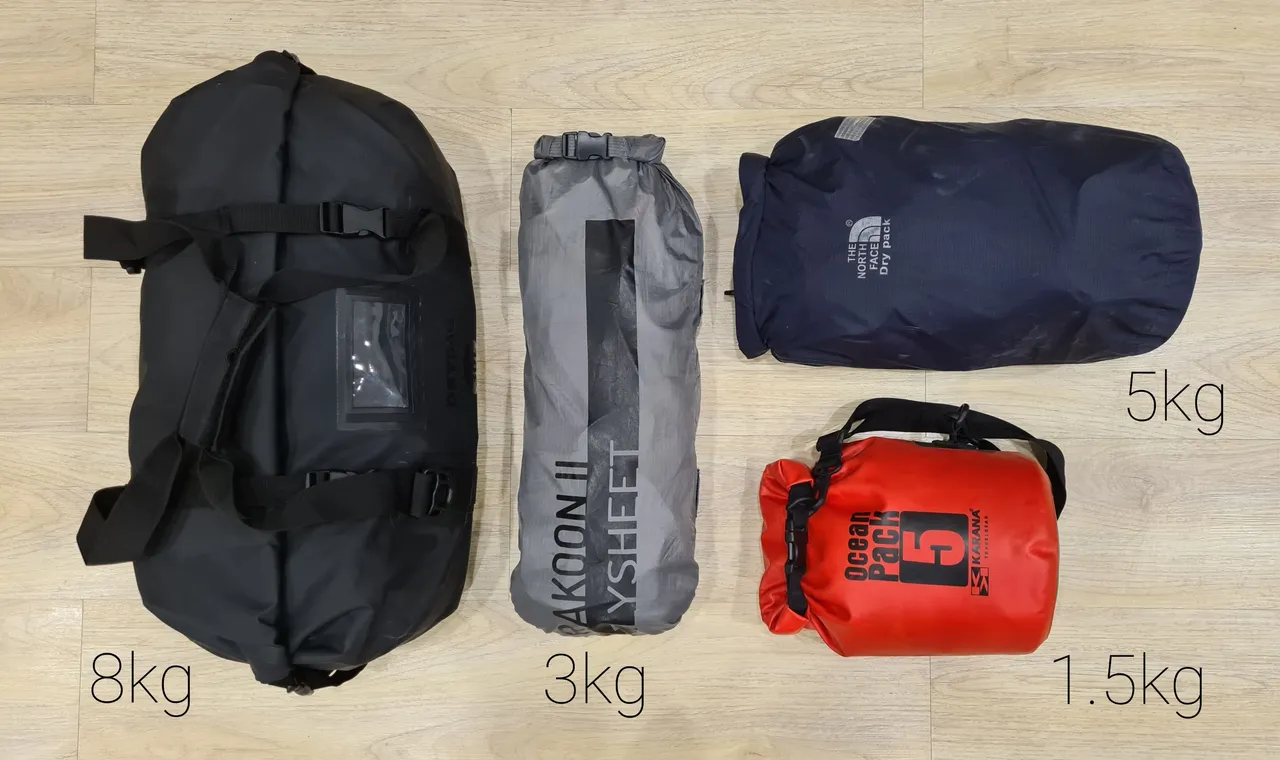
You can see from the 3 photos above the gear and food that I packed. My friend has a similar amount of gear as well.
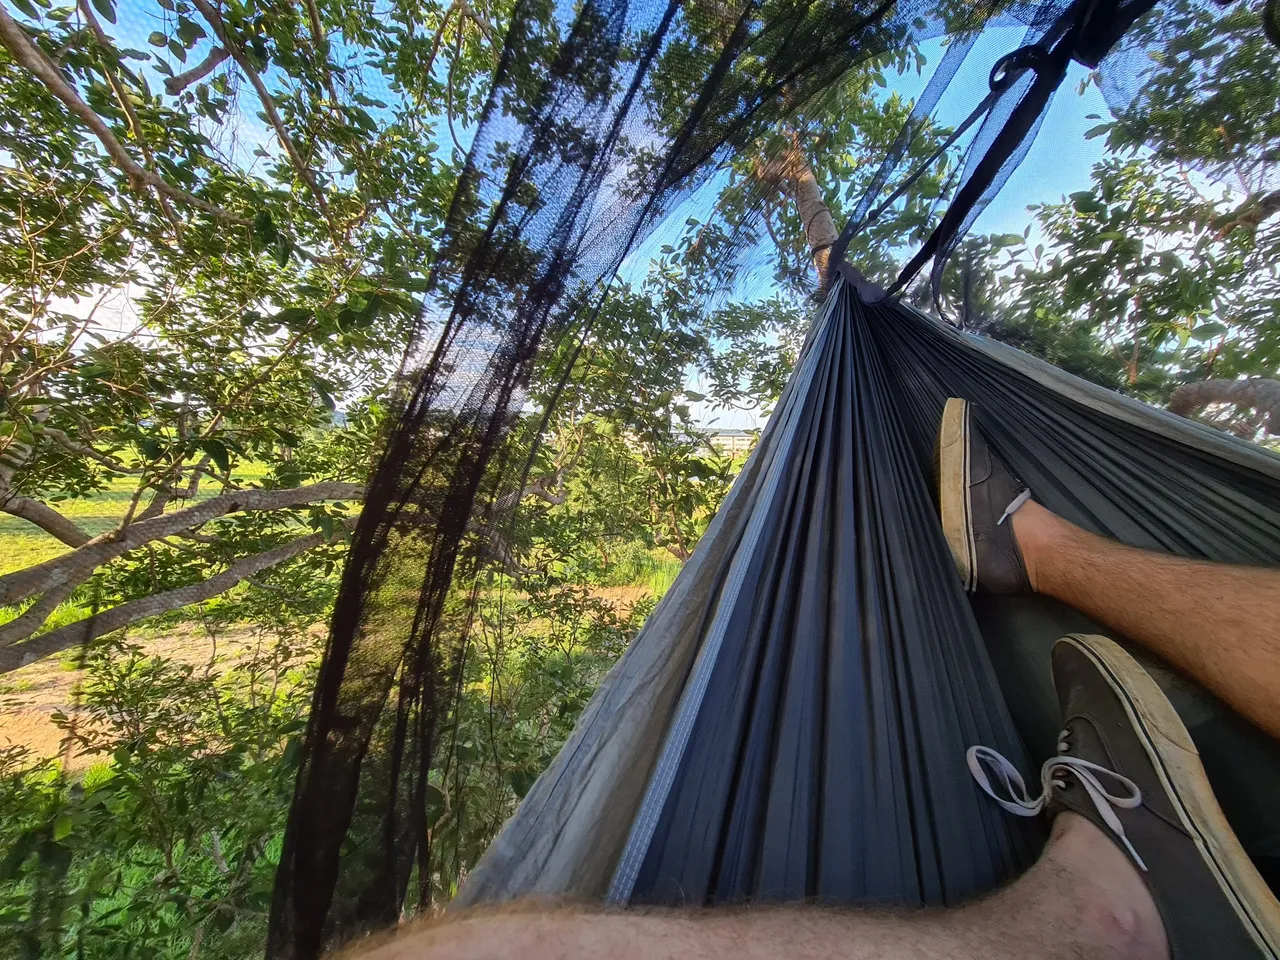
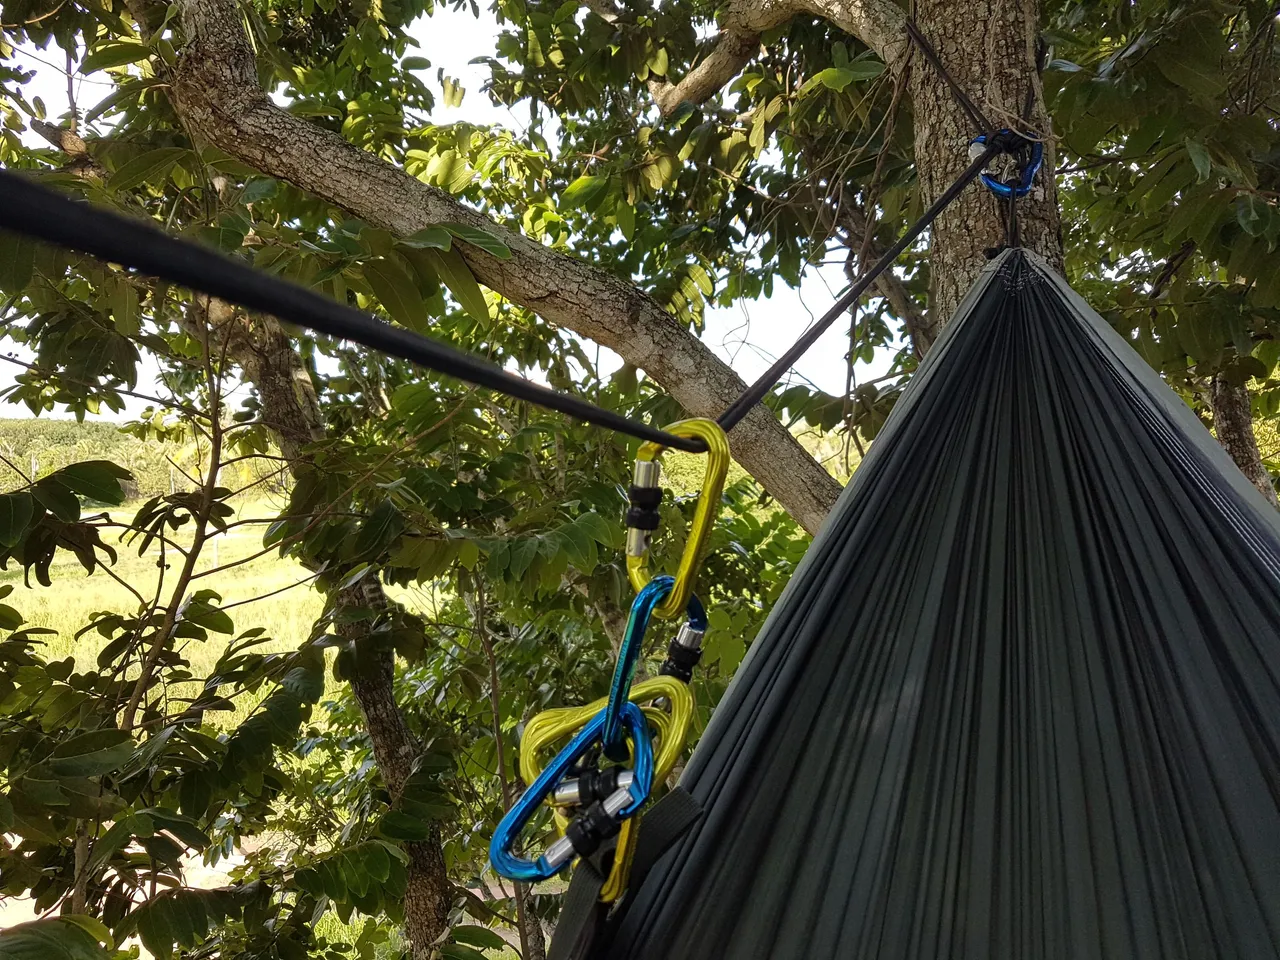
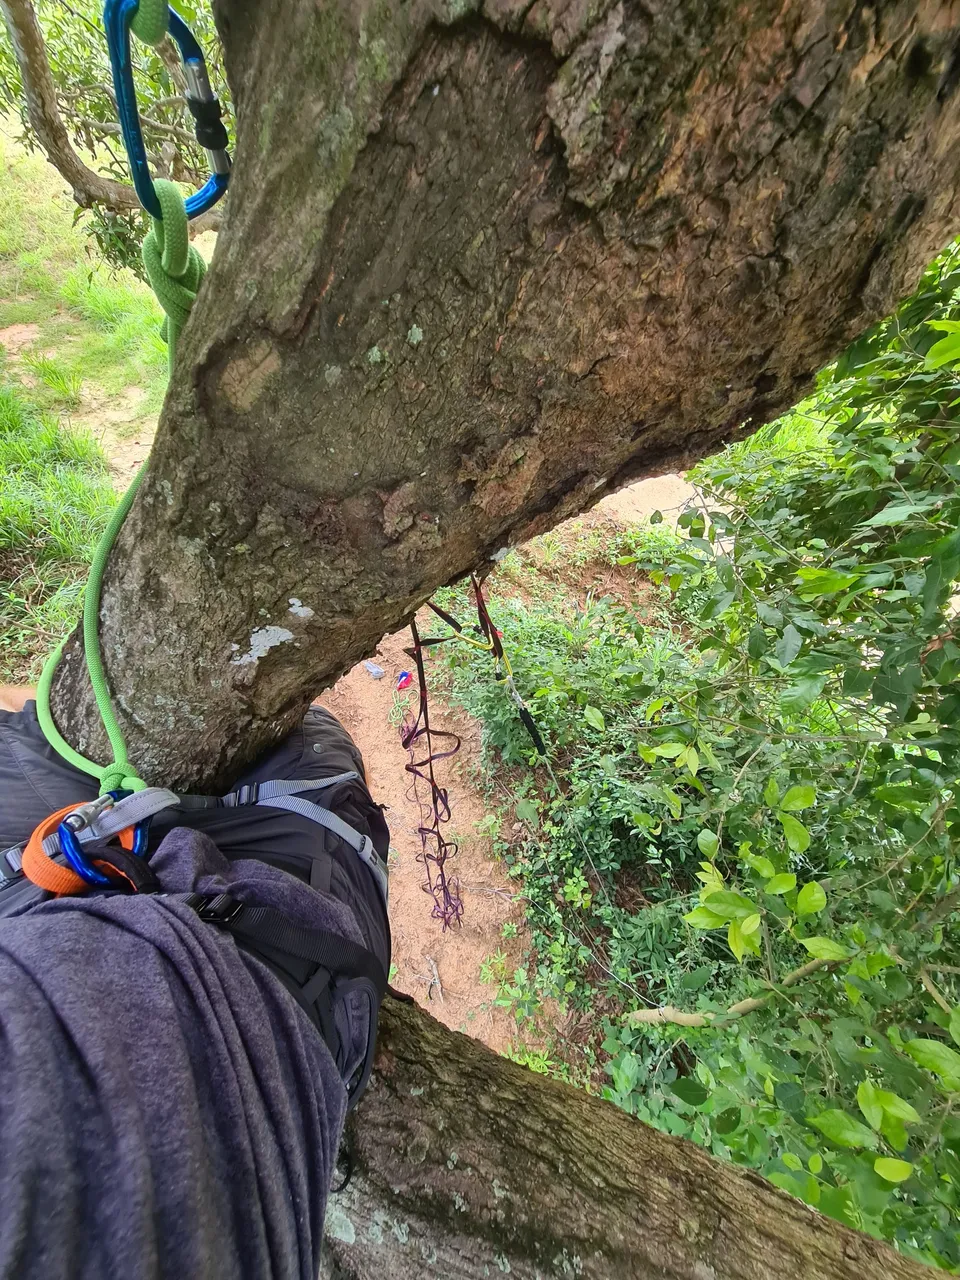
When deciding what sleep set up I/we would use, we decided to opt for hammocks instead of tents. there were several reasons for choosing hammocks but with hammocks in mind we then had to consider safety, which is why we decided to pack climbing equipment such as, harnesses, climbing rope, carabiners and a single line ladder.
Hammocks were our preferred choice so that we could get off the ground since we knew we would be camping along the river banks and that overnight flooding could/would be a problem but more importantly or worryingly we wanted to be up in the trees away from wild animals!
The main, 85km section of jungle river we would be camping at flowed through the heart of a national park and we knew for sure there were wild elephants, leopards, snakes and possibly tigers in the area, among other less scary animals as well!
We tried to do some background research on camping among wild animals like these but couldn't really get any definite answers on how to 'actually' stay safe (other than just stay home!). We knew Asian elephants would have a max reach of about 3.5 to 4 meters and that tigers could jump 4 meters. We also knew leopards can climb as high as the tree will grow and that snakes could follow but felt reassured when we read multiple articles claiming that these types of animals will rarely attack prey in trees and that they prefer to stalk their prey on the ground from behind and only if they can identify prey as known prey - not a big lump wrapped up in a hanging hammock under a 3x4m tarp with bags hanging and dangling from the same tree!
With this in mind we set about practicing setting up hammocks in the lofts of trees above the 5 meter mark and practiced climbing single line ladders in the event there might not be branches to climb up.
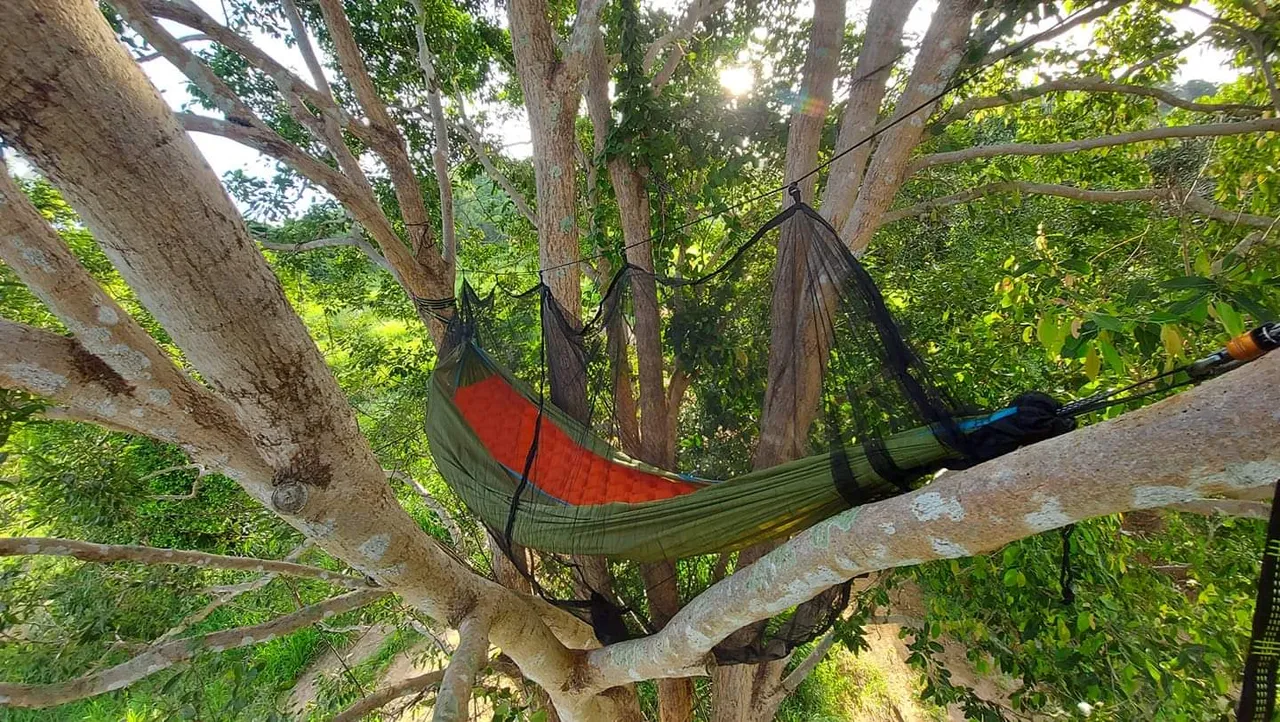
My friend was the first to scramble up one of the biggest trees near to were we lived and succeeded in setting up his sleeping arrangement without any issues. We both went for a full cover mosquito net rather than the hammocks that come with the built in top net covering just the top half as bugs can still bite your back through the lower material where there is no netting.
Getting just the right amount of tension for the hang of the hammock was also important in how it would hang, which would then determine the level of comfort. We tested out a few different angles, different trees and different set ups to see what worked best.
To speed the practice up I removed my mosquito net. This also prevented any possible snags or tears it might ensue since this particular tree had some spiky vines growing out along some of the branches.
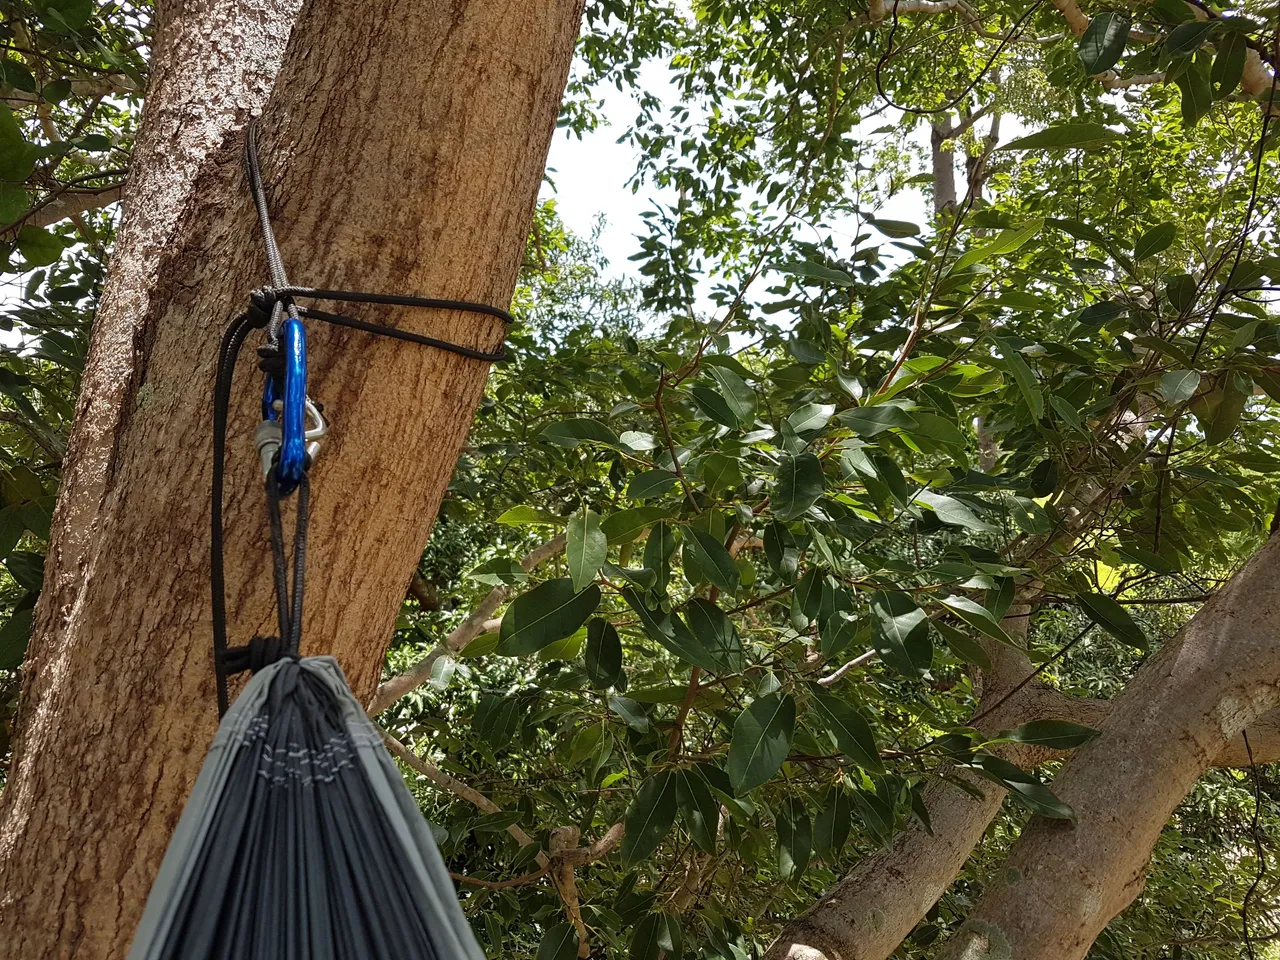
Once I had decided upon the perfect hang for my hammock, the length that I felt was the most comfortable, I went about measuring and tying on a fixed ridge line to both ends of my hammock. This would ensure that if the ridge line was pulled taut on every hang, then the hang would be exactly the same. The only variable in this with each hang would be the length of the tree straps that tether it to the tree (which by themselves would not alter the hammock hang providing the ridge line was still taut).
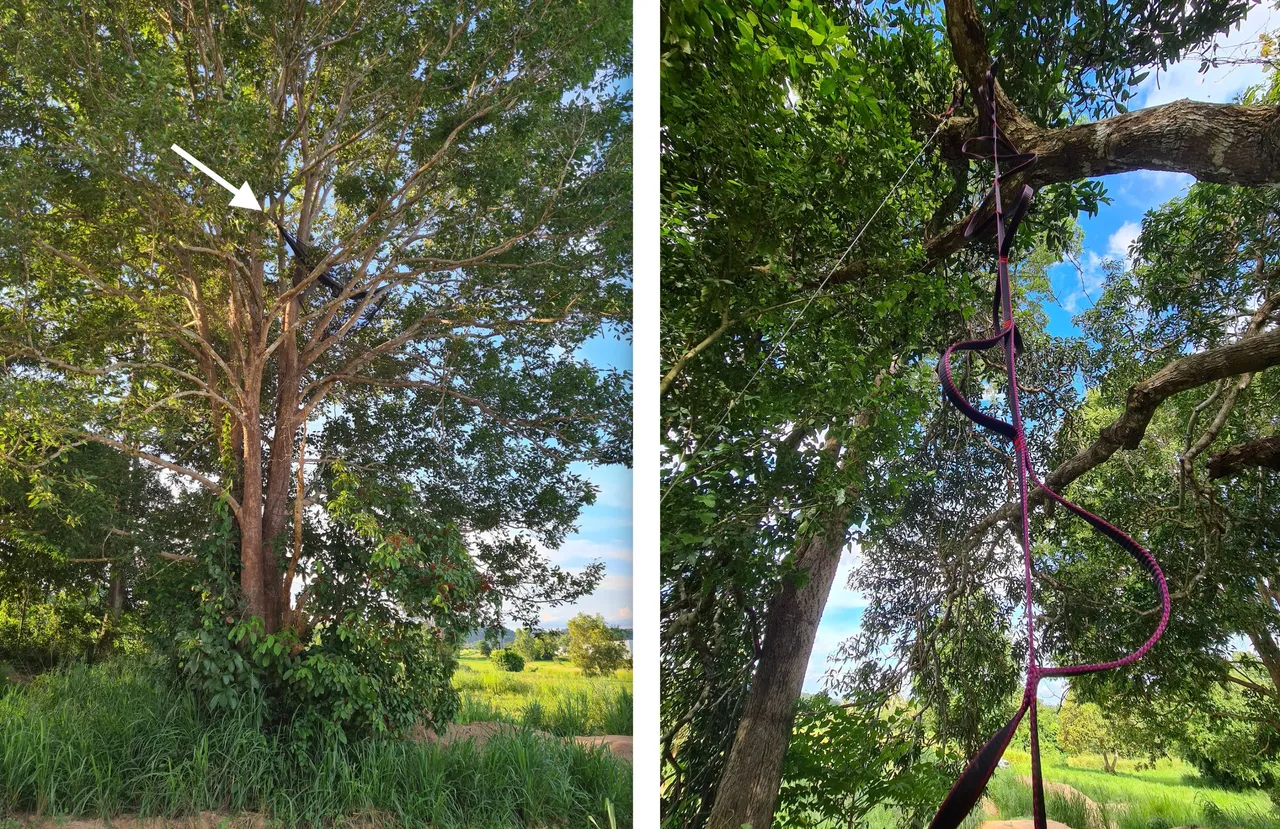
The single line rope ladder was pretty easy to set up and was very adaptable to every situation we test it under. We linked the end of the ladder to a lightweight synthetic throw line, threw the line over the branch we wanted to climb to and then pulled the ladder up to that branch. Once at the correct height, we tied of the throw line and started to climb.
We got into the habit of wearing a harness as we intended to sleep with it on in case of failure during the night but also, so that we could hook on to a ladder loop and take a rest if needed mid climb.
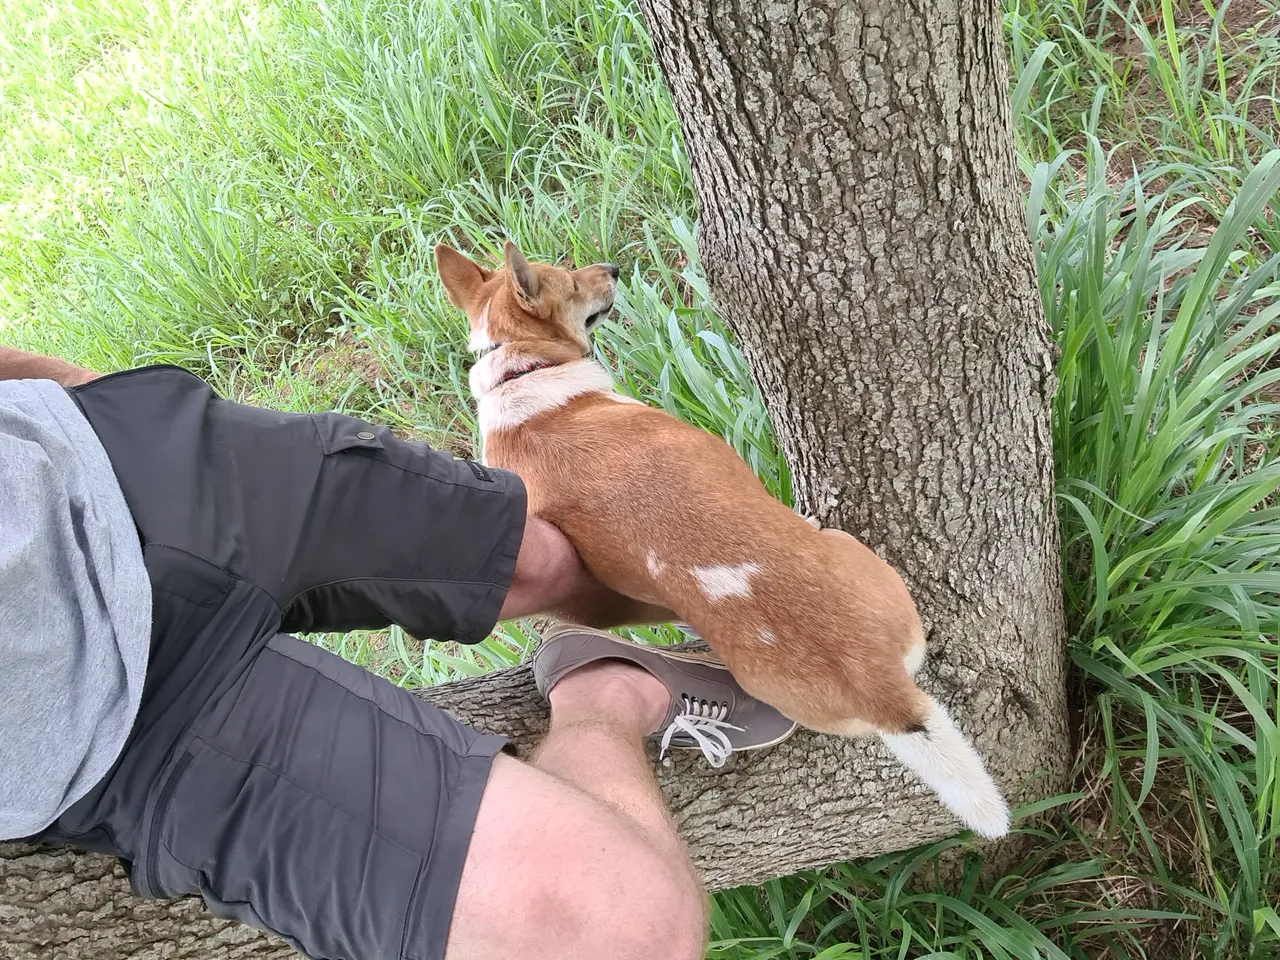
While we were out climbing trees, we weren't the only ones trying to practice. As my dog follows in tow as often as she can, she was keen to jump up and climb the trees as much as she could!
We also took time in setting up and checking the load/carry capacity of the kayak as well. Budget was part of our buy considerations so we took time looking for the right 2 man kayak. We were keen on the Decathlon inflatable kayak since it also had to fit inside the car boot and drive 10 hours from Chonburi to Nan province in North Thailand but also because the Itiwit kayaks had a good reputation for their price.
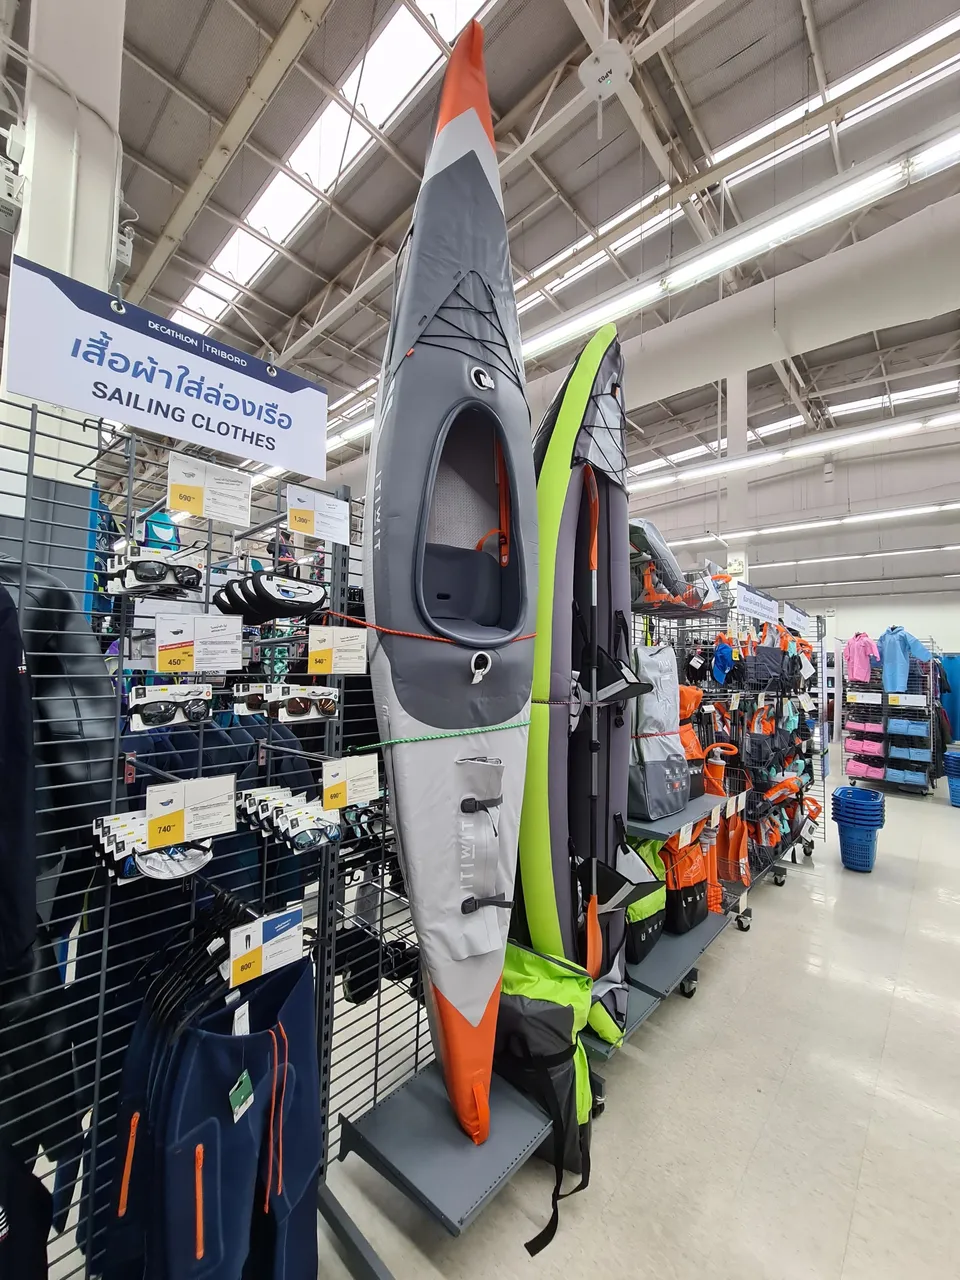
Fortunately, Decathlon allow a 'borrow and try' 48 hour period on any of their products, so that's exactly what we did. Not having a test model on hand and available for us to try, they simply gave us a brand new 2 man kayak with a 2 day test window! Perfect!
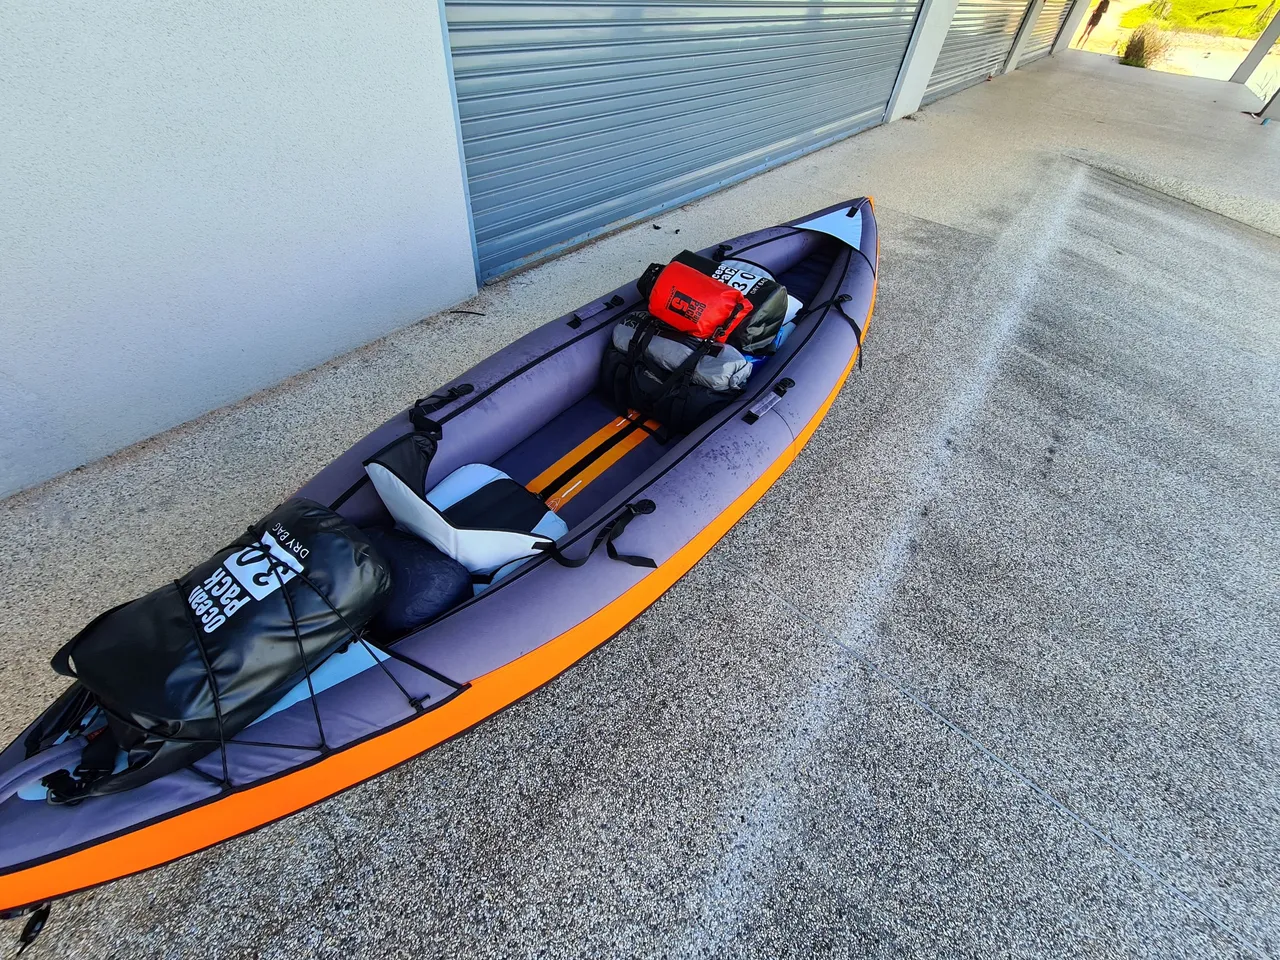
We had borrowed everything we needed and tested it in every way possible - with and without gear, different storage and seating arrangements, with and without the plastic rudders on the bottom, thinking they would be useless and break very easily but actually turned out to be crucial to keeping the kayak floating in a straight line, who knew!! And the old 'rock it' from side to side as much as possible to see how stable it would be.
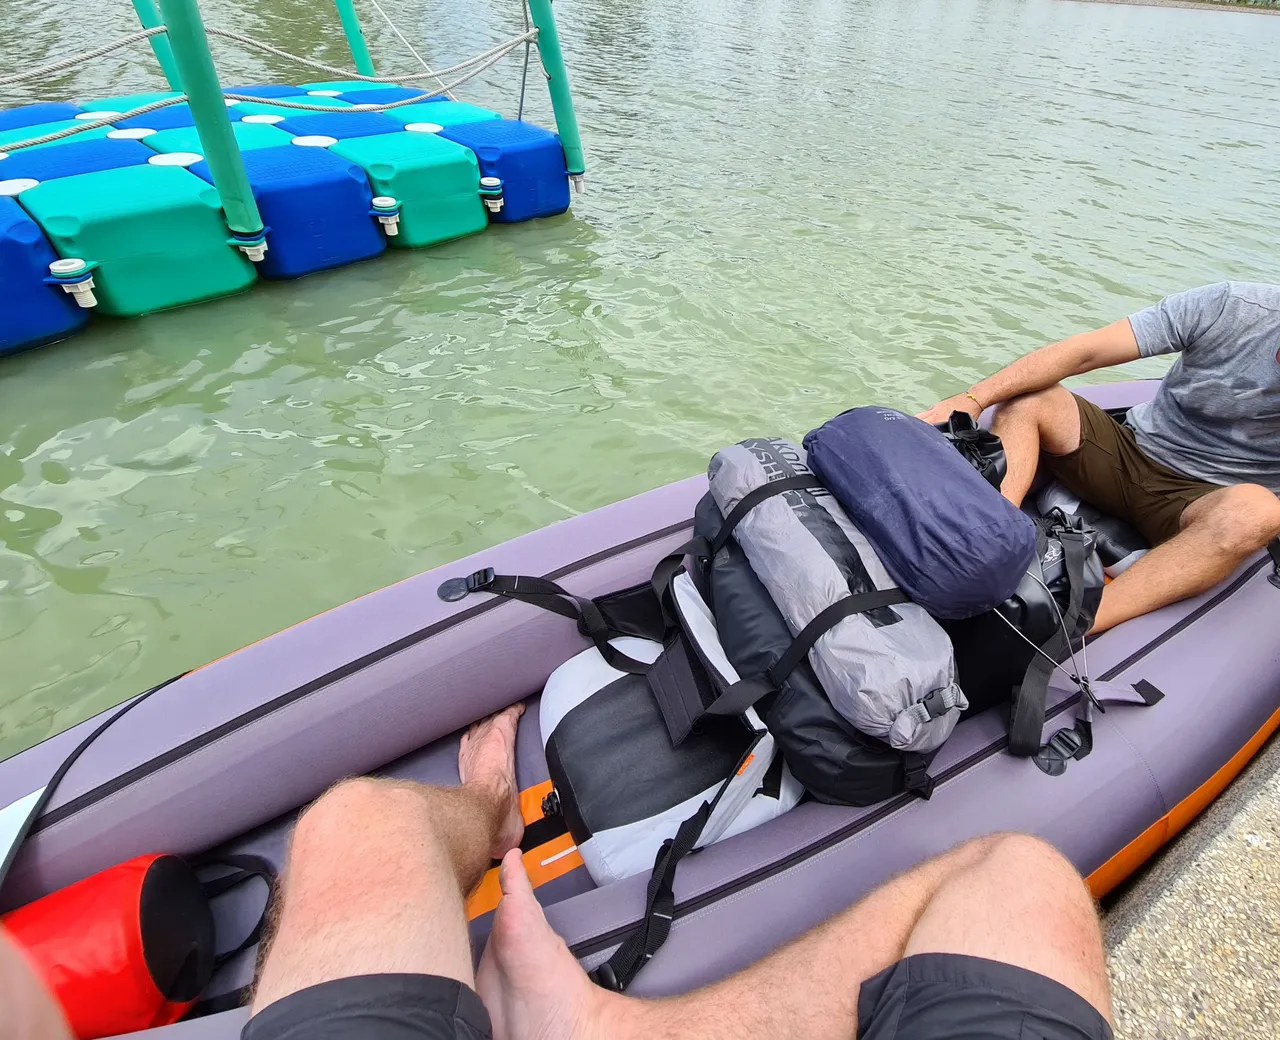
Our first test of having all our gear piled up in the center felt weird and worried us that the top bags might start to slip off in rough water or strong currents.
After returning the kayak back to Decathlon we decided not to buy it there and then but would be back nearer the time. However a Facebook Marketplace search a week later showed the exact same kayak, with paddles and pump for sale in the local area at half price! We quickly called and met the seller and found out that it had been used as a beach toy for a 5 year old and had never left the holiday resort. From what we could see, the kayak was literally in perfect condition. A quick sale and 2 happy customers.
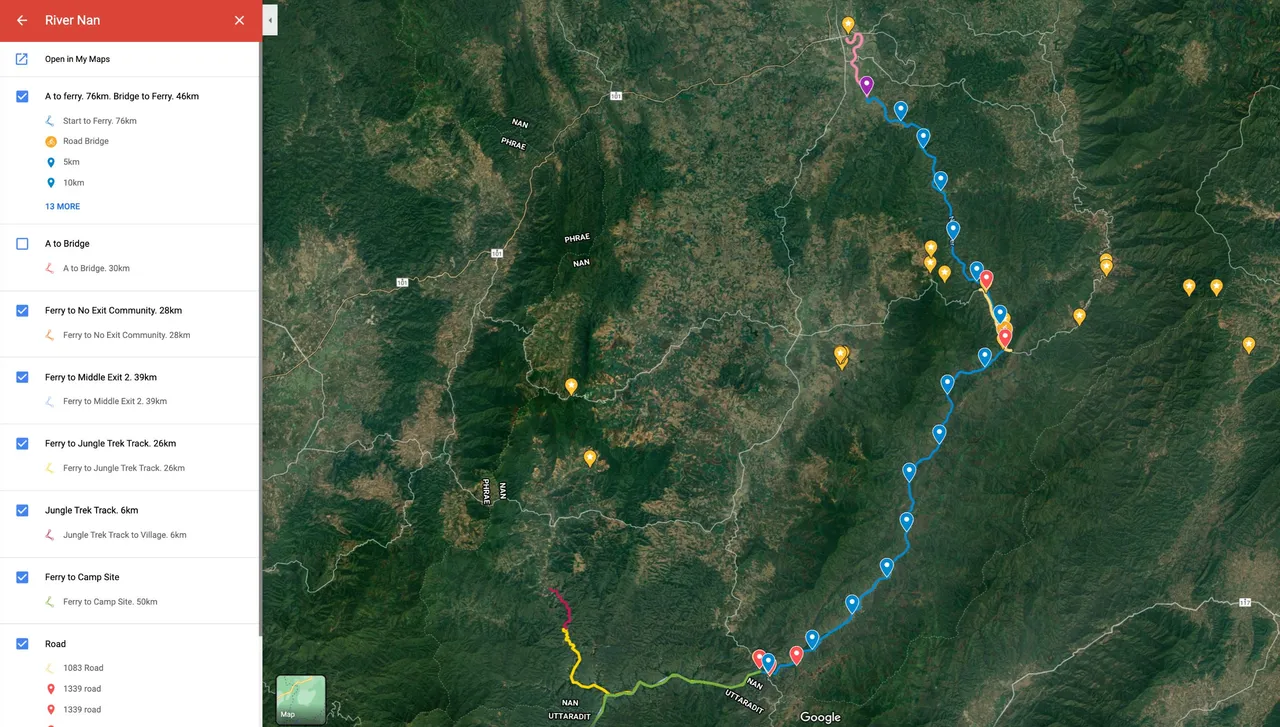
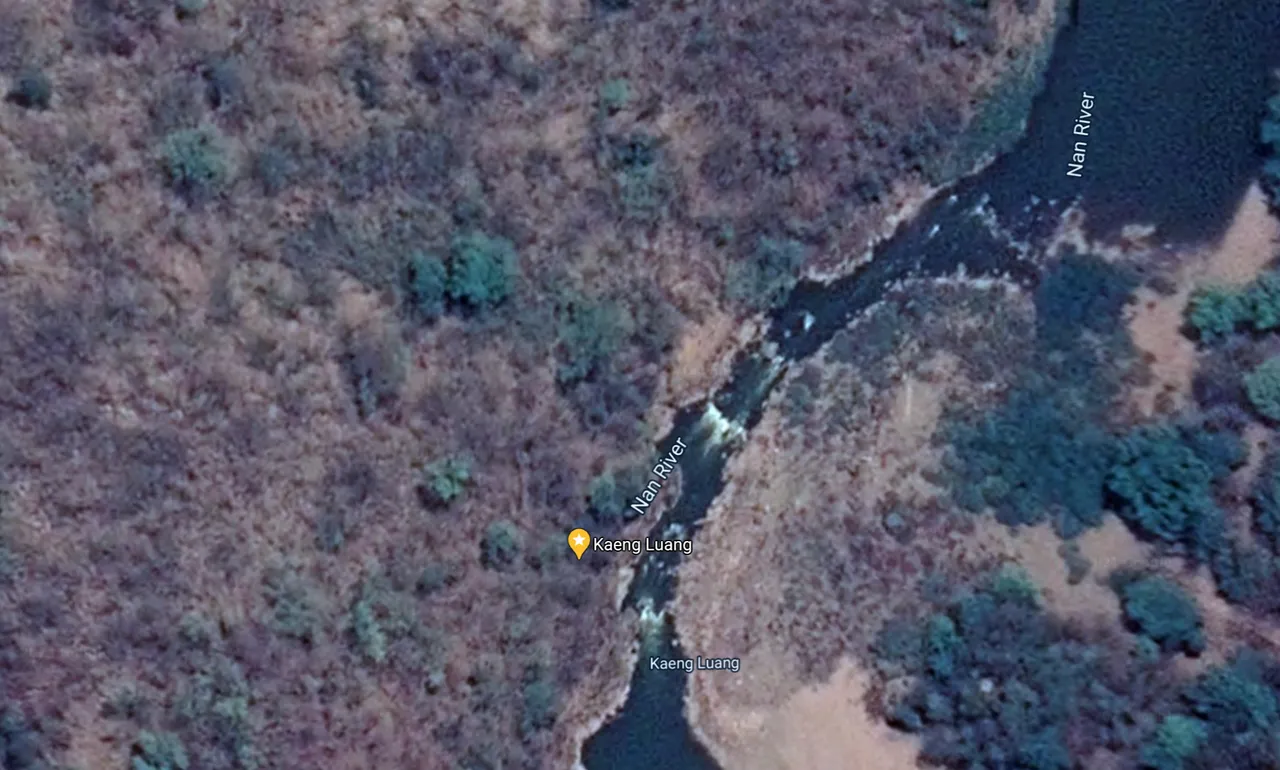
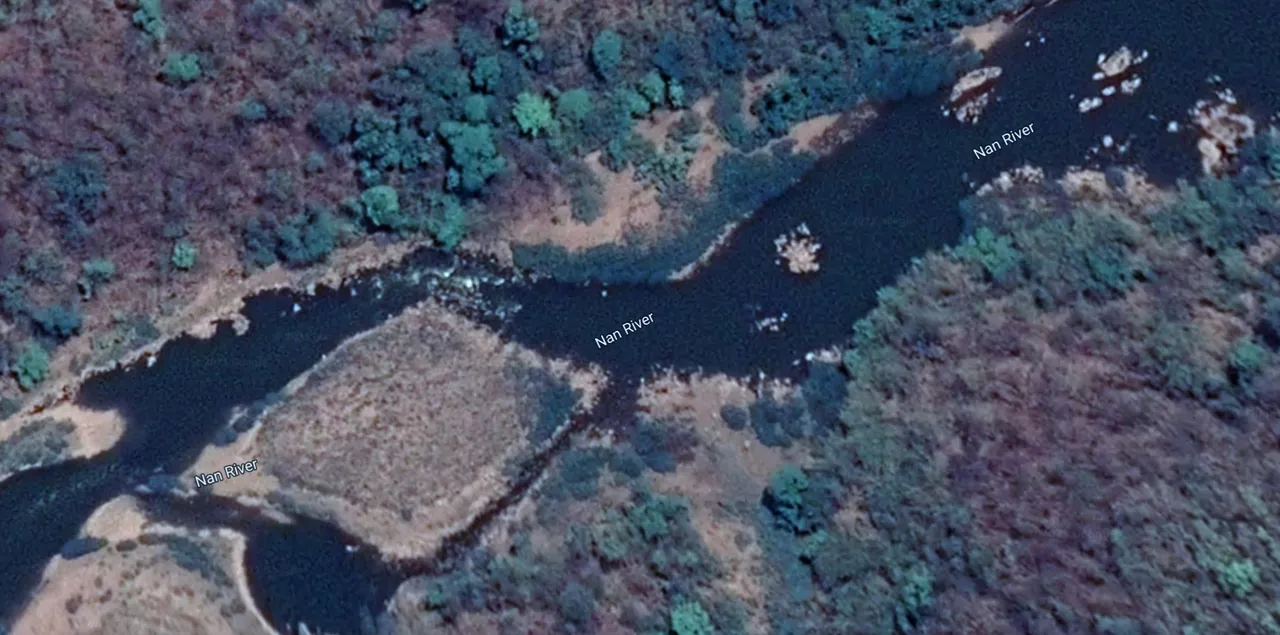
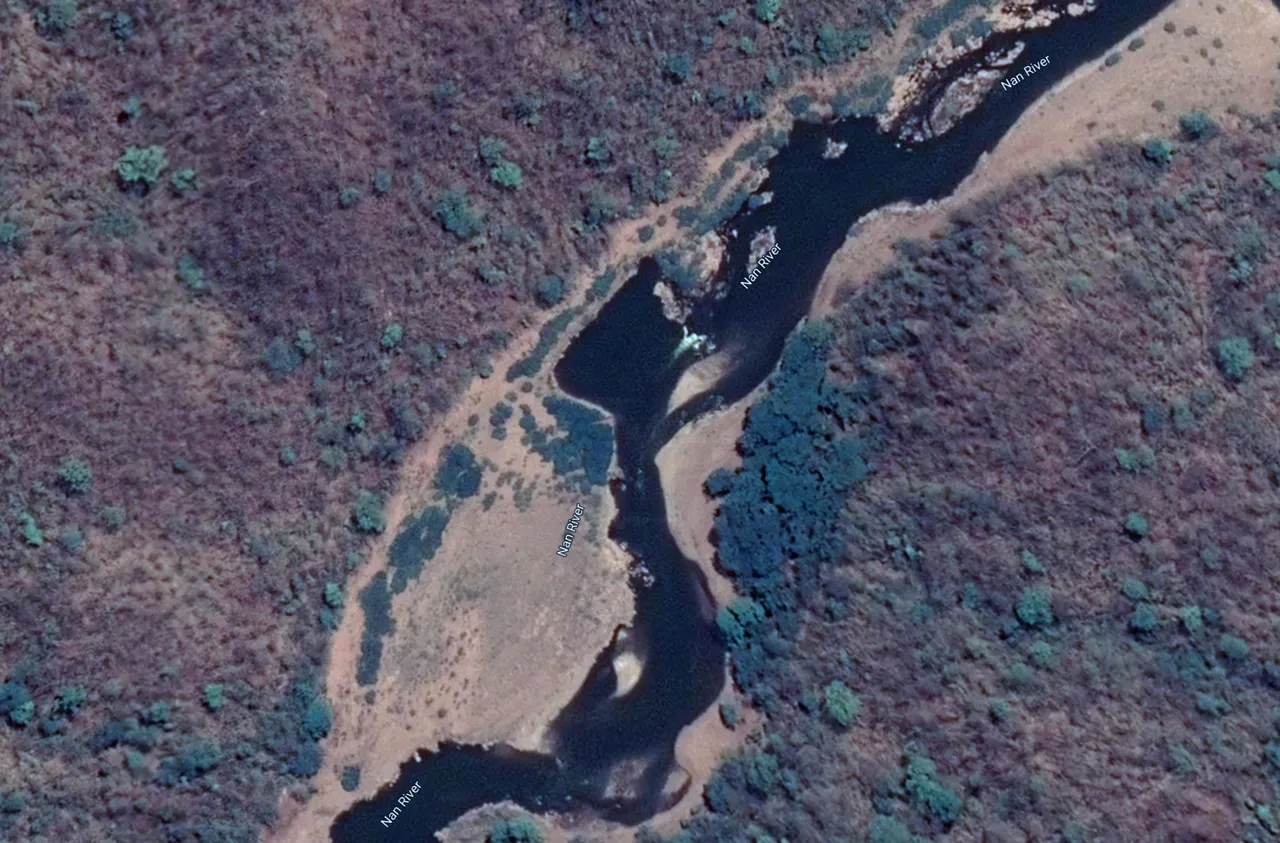
Next up, was perhaps one of the most crucial parts of the trip, the map. We spent hours and hours zooming in and out of the River Nan trying to spot things. We were looking for river banks or river islands to stop at, white water rapids, roads, forest clearings, anything!
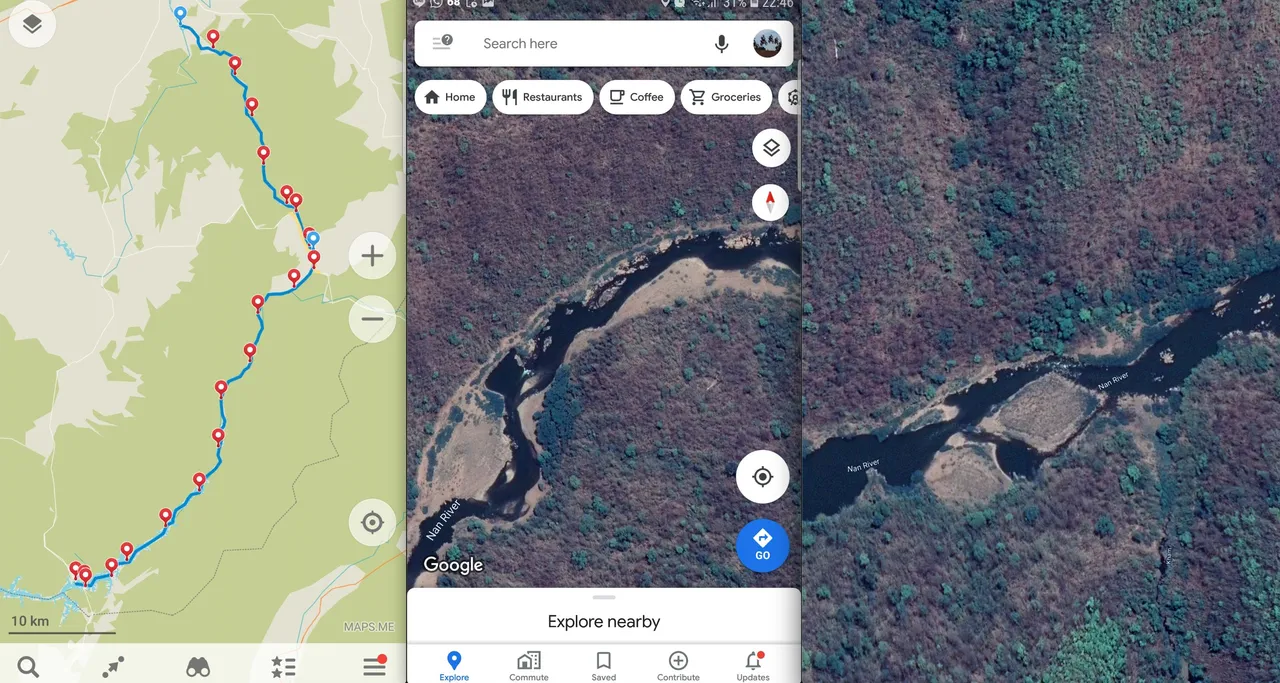
Source: Maps.Me, Google Maps
We used a combination of Google Maps, Maps.Me and Garmin Maps to plan the route. We created our own map markers and set waypoints so that we could track and estimate the time needed or know exactly where we were at any given time.
Source: Google Maps
While researching and planning maps, we tried to do the same for the River Nan itself. We searched endlessly for actual photos and tags to the river but found very few. We knew that sections of the River Nan were used for white water rafting and even tried to get information from the raft companies on this section of the river.
A white water raft company based in Nan province confirmed that our route was not the section they rafted on since the distance to the next exit point was too great for their regular half day and full day trips but said our route would likely be a simple and manageable trip apart from 4 rapid sections that they couldn't accurately comment on other than stating that a 2 man Decathlon inflatable kayak would most likely not be up to it and that some of the rapids can get really wild!
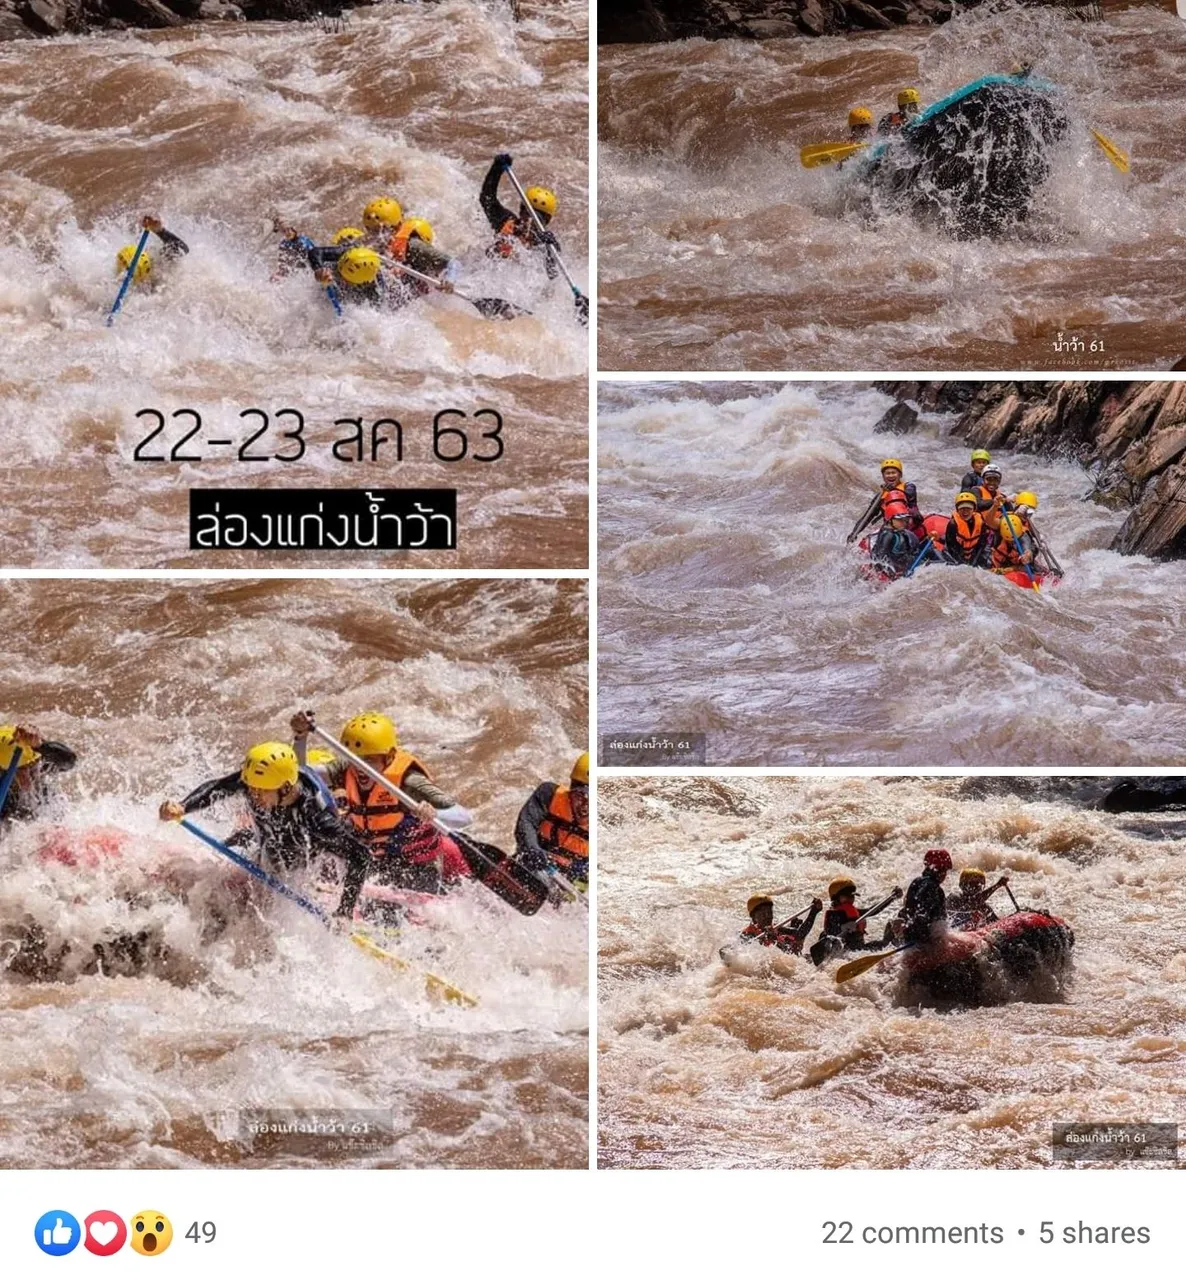
Source: Facebook
With this in mind, we searched their Facebook page to see exactly what they meant by 'wild' and found this photo! We went back to Google maps and again searched every meter of the River Nan to see where the 4 sets of rapids were and just how much white water could be seen from the satellite images.
Source: Google Maps
Source: Google Maps
Source: Google Maps

Source: Google Maps
The rapid sections we could see in the satellite photos didn't really worry us or seem of great risk but knew they could potentially be very different in real life.
After everything we had heard, prepared for and planned, we still felt we were ready to take on this 100 kilometer kayak trip along the mighty Nan River.
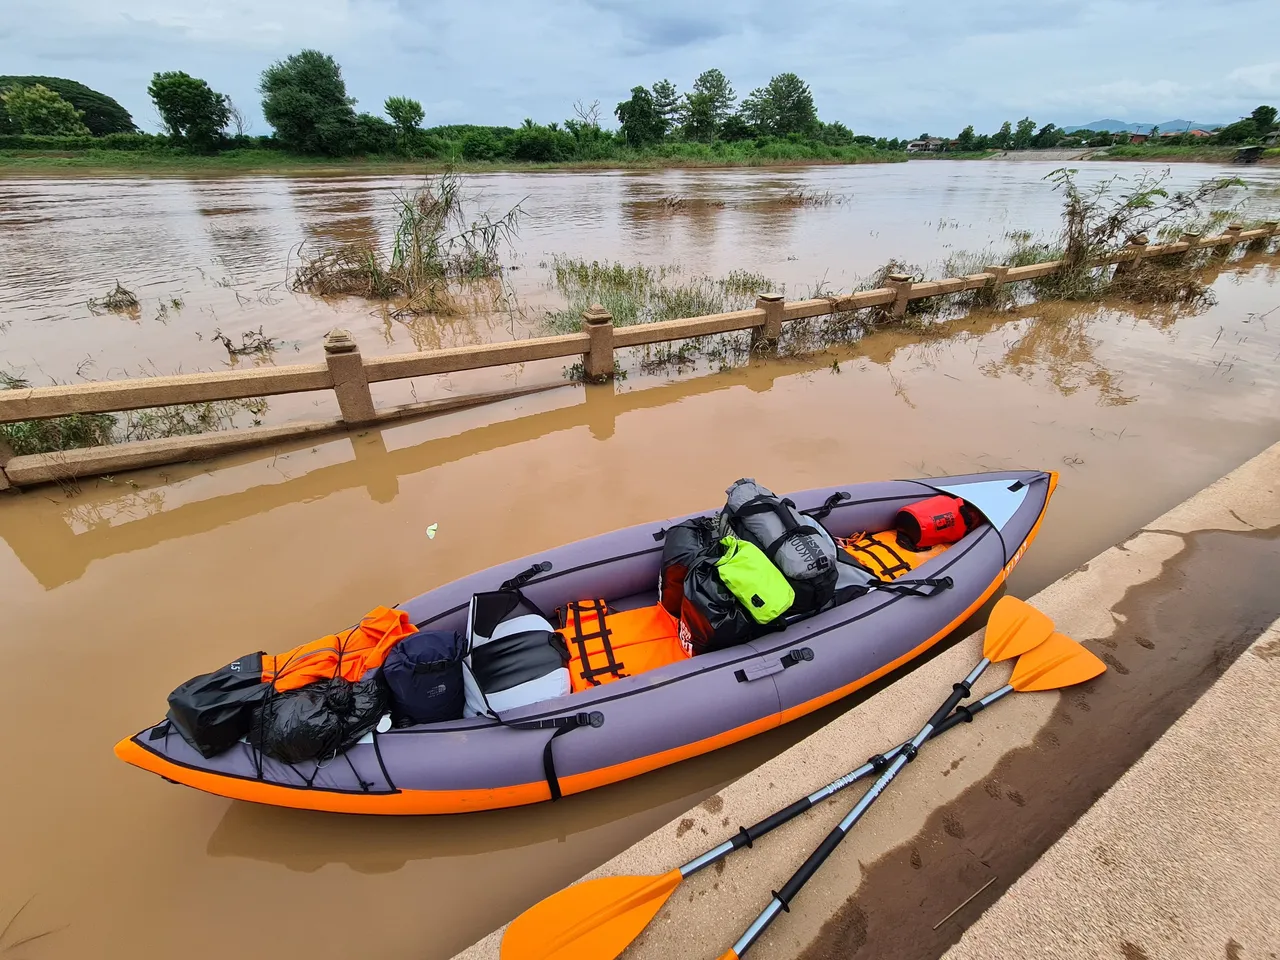
A few weeks later the time had finally arrived. We were packed and ready to go. A long drive took us to the start point of Wiang Sa and we set off.
The northern provinces has just been hit by heavy rain and widespread flooding, the banks of the Nan had burst in many areas and we were not sure what that would mean for us trying to setting up on the edge of the river or how the sheer amount of water would affect the rapids but we were ready for any challenge.
To find out what happens on our 4 day kayak adventure, how we set up camp in the trees and how we lost the battle during the first rain storm, please be sure to check out my next post coming soon!
I hope you enjoyed this post and please follow for more like it in the future.
All content is original: the photos (unless stated), the writing and the adventure!