
I got myself a good deal on a CPU and motherboard during Cyber Monday, its a Ryzen 7 5000X on an Asus B550-Plus board. This machine will just be used for mining at the moment. I had two Nvidia 1080s running on a core 2 quad rig, its hashrate was under 1000 for the CPU so I figured it would be a good time to retire it. Just about everything besides the old hard drive and memory was used. I moved over the two video cards, power supply and reused the old case.

Previously this rig had a 2.5" laptop hard drive for its operating system storage. The boot times were terrible, taking a few minutes. But now with this SSD the machine is up in 30 seconds or less.

The processor is quite powerful, I was in the market for a Ryzen a few years back. And now its great to buy a higher end one at a good price. Got it from Amazon.

Finding the marking on the processor I place it into the socket carefully. Making sure it is completely seated before bringing down the retention bar.
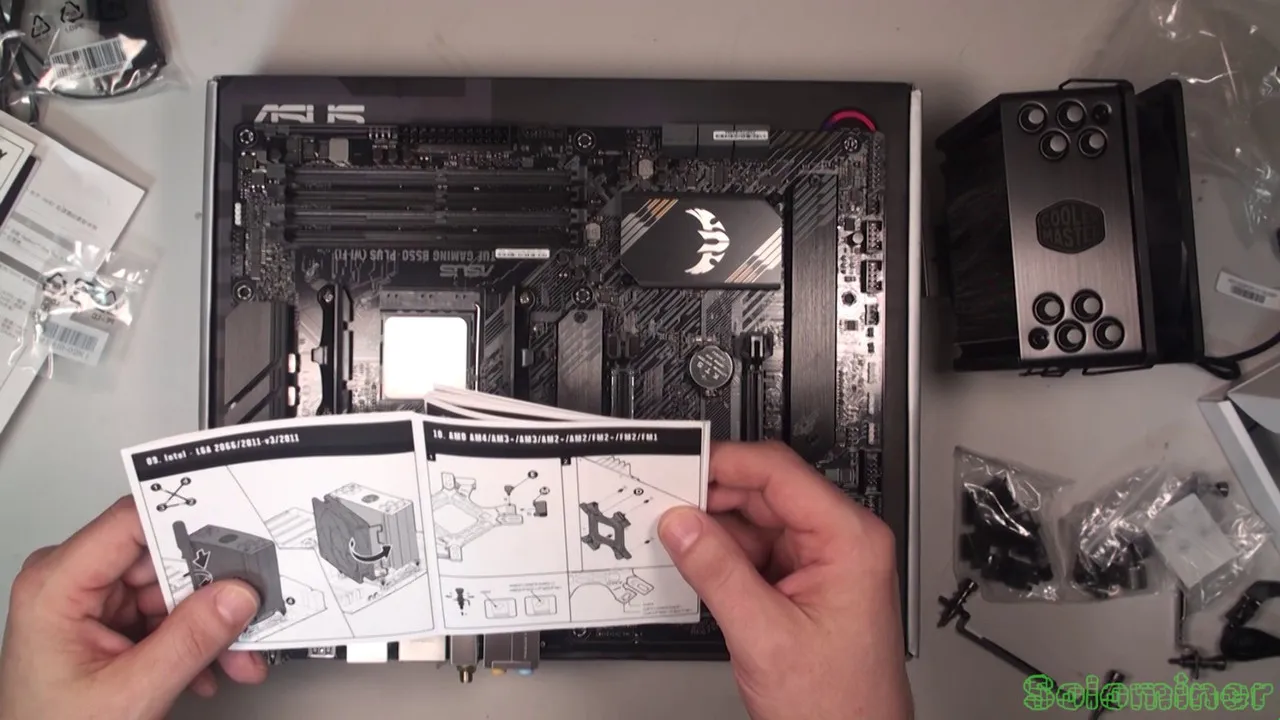
With the CPU installed I got to replacing the heatsink mounting hardware. My CPU did not come with a fan, so I bought one and its pretty nice. Though I had to replace the back plate and needed to refer to the manual to figure out what position to mount it in.

After seeming like 10 minutes staring at the manual I take a break.

I just went ahead and removed the mounting brackets for the stock cooler.

Going back to the manual I wrap my head around these images the best I can. Probably should have watched a video on how to mount this cooler before trying to build it.

Thinking I got it, I went to install and it seemed to all fit. Depending on if the CPU is an Intel or AMD it can differ how you set up the back plate.

With the back plate installed we were ready to mount the cooler.

I ditched the thermal paste it came with and used my tried and true Artic Silver paste. I will always use this over some OEM paste.

Adding a dab of the paste its ready to be mounted.

I almost forgot to install the SSD, it mounts directly to the motherboard. Known as NVMe m.2 drive.

Going with a 512GB drive, they are pretty cheap these days. I have had the 128GB drives but I find myself running out of space after a few projects are on the drive so I just went ahead with a bigger one this time.

All mounted I swivel the plate back into place, it covers the drive.

Placing the cooler in its spot I check the mounting holes to make sure it all lines up.

With the heatsink screwed down I mount the fan, had to take it off as a couple of the screws are right below the blades. Making it impossible to screw in without removing the fan first.

Once the heatsink and fan are mounted I check out the back plate, all looks good.

Now I pull out my old rig and we start taking it all apart.

Removing the motherboard screws I can then remove the old CPU by the heatsink. Its going to be completely broken down for its metals so I dont really care about being gentle with the old rig.

The case is nice, so I was happy to reuse it. Though for mining I will leave the case wide open without the door on it.
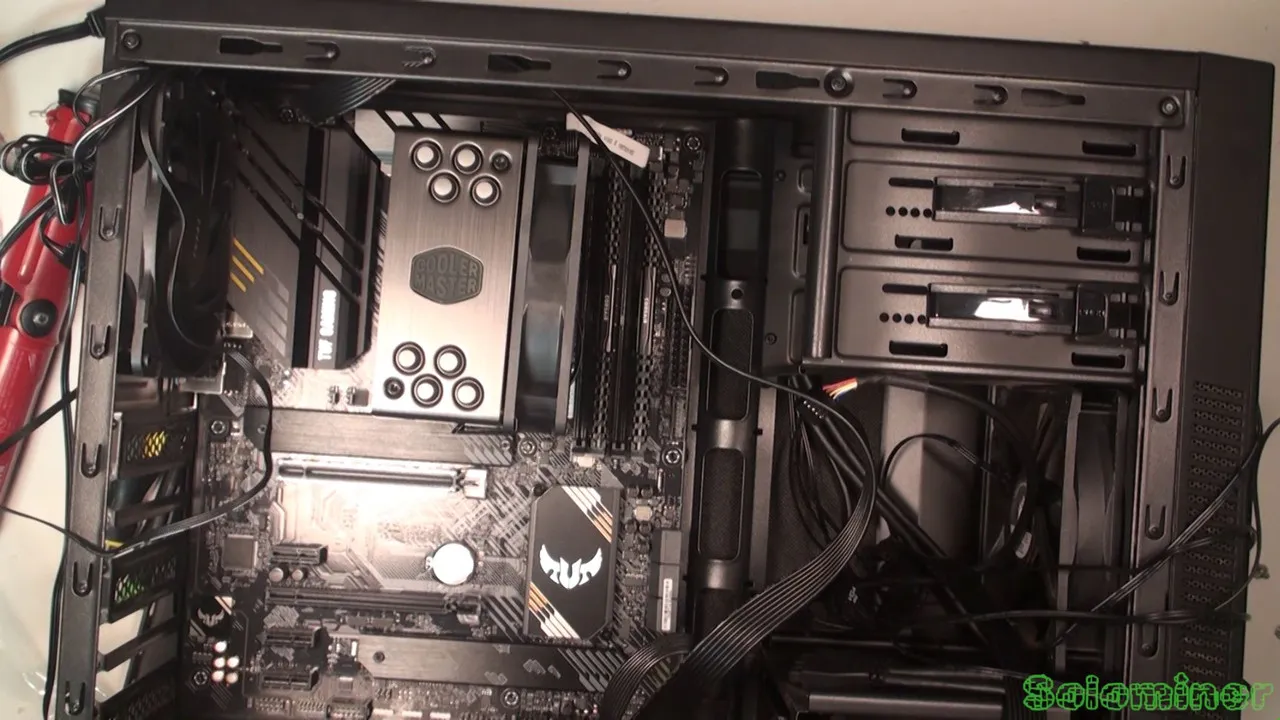
I place the new motherboard in the case and check the screw holes to make sure it all lines up.

Connecting the power cables is a good idea before mounting it, sometimes you need to move it to the side to reach it with my big fingers.

Once the power cables are connected I route the video card power cables so it does not block the airflow too much.

First card is mounted, one more to go. It barely fits in this case, haha.

Second card is in, and there is no more room in this case. It comes with experience knowing how to build this computer in layers, as trying to do it out of a certain order can be quite the pain in the ass. But besides the cooler all went well once I figured out the back plate.
