Today I took up a task to set up a witness server for neoxianminer account. I thought it would be better to document the steps for myself to use in the future and make a post so that anyone who would like to get started can make use of this guide. There is already a nice guide to setup Hive Engine Witness made by @rishi556. I would like to go a little more elaborate and cover some more details in this guide. This article is going to be lengthy so please bear with me.

Prerequisites
It is an assumption that the users who are trying to set up the witness server are familiar with the below topics:
- Connecting to a Linux server, either with a password or through SSH.
- Basic troubleshooting
- Securing your server
Server Requirements
The below specs are the bare minimum requirements for setting up the witness server. We tried with specs lower than this but we had issues during the test run. Especially during the setup where we will have to restore the database from a snapshot and it failed multiple times if specs are lower than this.
Minimum Requirements:
Linux (Any version should be okay)
2 GB
50 GB SSD
4 cores
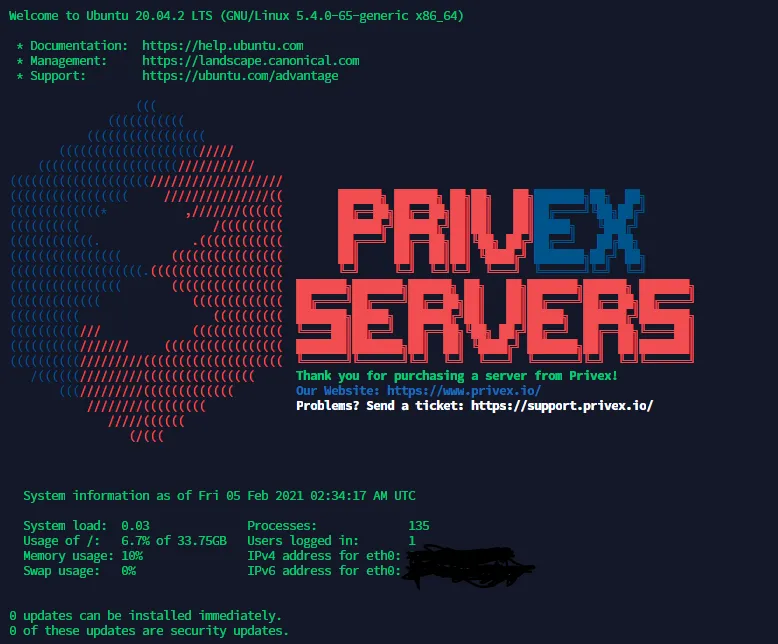
I would like to personally recommend getting a server from Privex where we get the above specs for 10 $ a month. Privex (VPS-SE) 2G RAM, 35G SSD, 4 cores, Unmetered 100mbps with an additional extension to 50G storage. In this guide, I will be using Ubuntu 20.04.2 provisioned through Privex.
EDIT: Initially the hard disk requirement was 35G SSD but is not sufficient anymore. Currently, a 130G SSD should be sufficient and it is also good to use Nvme to have it more efficient. (I would recommend contacting me or Hive Engine discord for the current requirement. There is a high possibility that the value displayed here can be outdated.) If you are using Privex as your service provider, you can write an email to Privex to get it increased.
One good thing about Privex servers is that we can pay using crypto and it also accepts Hive as a mode of payment. I haven't started using Privex yet but if you would like to order a server, you can use the below referral link of @reazuliqbal.
https://www.privex.io/?r=reazuliqbal
Step 1: Initial server setup
There are some basic utilities that need to be installed to make the server suitable. Below are the commands that can be used to set up these utilities. You can google each one of them to understand why they are required.
sudo apt-get update -y
sudo apt-get upgrade -y
sudo apt install git -y
sudo apt install screen -y
sudo apt install ufw -y
sudo apt-get install -y fail2ban
I will cover the major things like nodejs and mongodb in separate steps.
Step 2 : Installing Nodejs
Installing nodejs is the first step. We have to install Node 13+. I had version 12 running and I got an error message during my testnet setup. I then upgraded it to version 15. The error message would look like the below:

(If the image is not clear, right-click and open in new tab to see it a little bigger.)
This link provides the instructions for installing nodejs on different Linux machines. In our case, we are using Ubuntu, and below are the commands. These commands will install both nodejs as well as npm.
# Using Ubuntu
curl -sL https://deb.nodesource.com/setup_15.x | sudo -E bash -
sudo apt-get install -y nodejs

# Verify the version using the below commands
node -v
npm -v
Step 2: Installing Mongodb
It is required to install the mongo server version 4.4. Below are the commands to install Mongodb. This will install all the packages that would be necessary.
wget -qO - https://www.mongodb.org/static/pgp/server-4.4.asc | sudo apt-key add -
echo "deb [ arch=amd64,arm64 ] https://repo.mongodb.org/apt/ubuntu focal/mongodb-org/4.4 multiverse" | sudo tee /etc/apt/sources.list.d/mongodb-org-4.4.list
sudo apt-get update
sudo apt-get install -y mongodb-org
The above commands would install the packages but don't start the service automatically. The below commands can be used:
# Start the service
sudo systemctl start mongod.service
# Check the status of the service
sudo systemctl status mongod
# enable the MongoDB service to start up at boot
sudo systemctl enable mongod
# Check the connection status using the following command
mongo --eval 'db.runCommand({ connectionStatus: 1 })'
Securing the mongodb instance is very important. Especially if you are connecting to the instance from outside with a direct connection URI, it is important you have all the security in place. If your connection is always through an SSH tunnel, then it should be okay. This article provides additional information about securing your mongodb instance.
Step 3: Enabling replication in Mongodb
This is the next important step for the higher availability of your node. This article provides you more details on why it is good to enable replication. Below are the steps to enable replication:
We have to navigate to the below path and open it in our favorite editor. You can either use vim or nano. It is your choice.
sudo nano /etc/mongod.conf
You will find a line #replication: commented out there. We have to uncomment that line by adding removing the # and add the following:
replication:
  replSetName: "rs0"
Adding two space before replSetName: "rs0" is important. Once it is done, you can save the text editor with the command Ctrl+O, then Enter, and then Ctrl+X.
Now the mongod instance should be restarted. You can either restart it directly with the below command or stop it and start it again.
sudo systemctl restart mongod
OR
sudo systemctl stop mongod
sudo systemctl start mongod
Now we will have to activate the replica set with the below commands:
mongo
rs.initiate()
Once that is done, you will see the below.
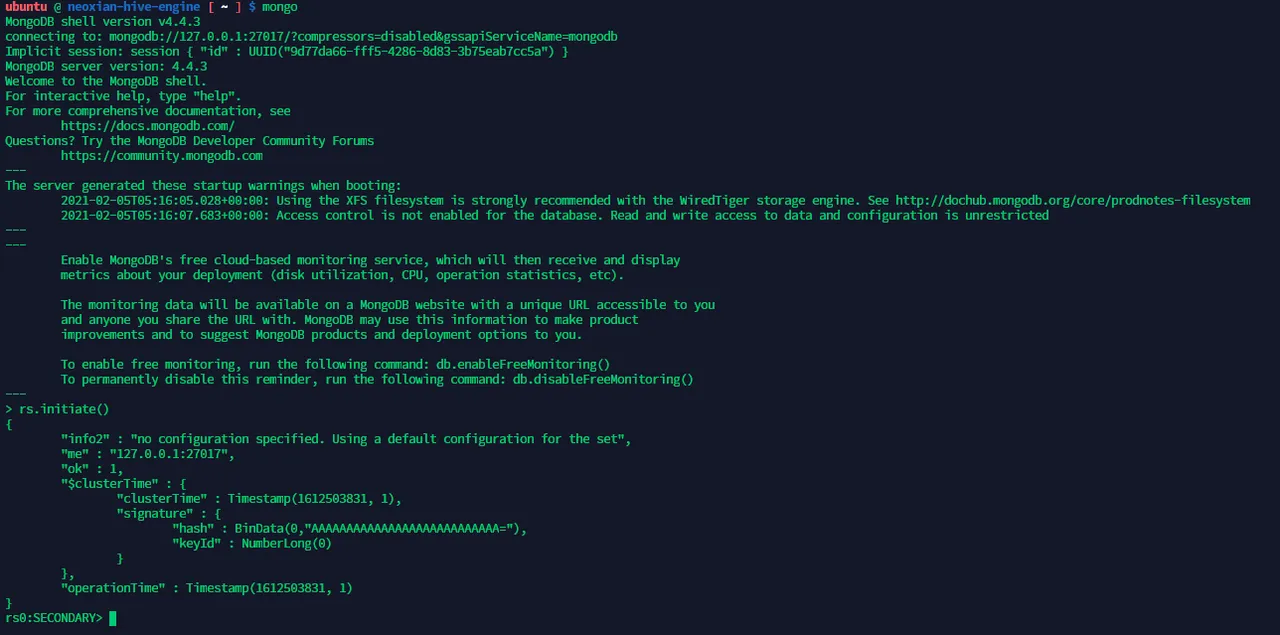
(If the image is not clear, right-click and open in new tab to see it a little bigger.)
Step 3: Creating a swapfile
This step is mandatory and exclusively for people who are running the witness server in bare minimum requirements with 2GB RAM mentioned at the start of the article. This step will not be required if you are going to have a bigger server with RAM of more than 4GB. You can skip this step and move to the next step.
While doing the setup on testnet, we had an issue with mongodb import. 2 GB RAM was not enough for the import activity. But creating a swap file for 2GB the import issue was handled. Below are the basic commands and more instructions are available in this article.
sudo fallocate -l 2G /swapfile
sudo chmod 600 /swapfile
sudo mkswap /swapfile
sudo swapon /swapfile
# Use this command to verify
sudo swapon --show
# This command will show the available free space along with the swapfile
sudo free -h
Once the import is complete, this swapfile may not be required but there is no harm in retaining it.
Step 4: Getting the latest snapshot and importing it
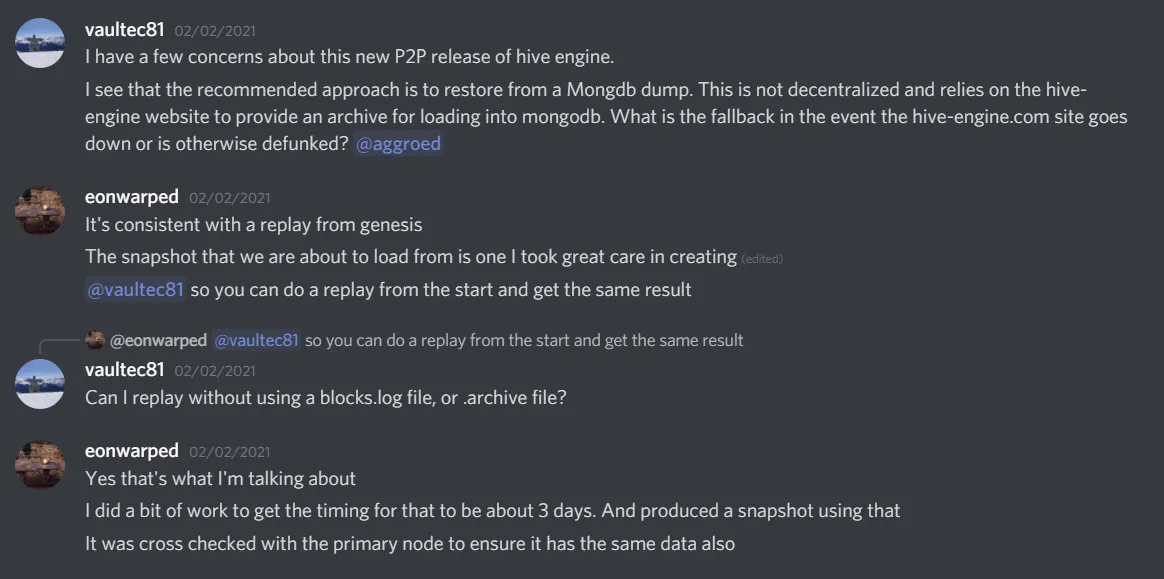
This step is to download the latest snapshot of the mongodb and import it. Some people might have a question as to why a snapshot would be required. Someone asked a similar question to @eonwarped and look at the below conversation to know the answer.
At the time of writing this article below is the link to the latest official snapshot during the launch.
http://api2.hive-engine.com/hsc_20210203_b50993579.archive
In addition to the above, there is also another backup set maintained by @rishi556. He doesn't guarantee it would always be updated with the latest snapshot but you can check to see if you are lucky to find any latest snapshots there.
https://cdn.rishipanthee.com/hiveengine/
In this example, I'm using the official snapshot from Hive Engine. Below are the commands.
# Create a directory
mkdir backups
# Get the file
wget http://api2.hive-engine.com/hsc_20210203_b50993579.archive
In the above command, the file name should match with the file name from the snapshot you are trying to download. Based on your server's network speed and performance this activity would take some time. Wait patiently till the download is complete.
After the download is 100 percent, the next step is to import the database into your mongodb server. Make sure you are staying in the same backup directory. But before doing that it is recommended to create a screen. The screen is a utility that helps in creating a session for the activity you do. By doing this, even if you get disconnected from the server, the activity that you initiated would still be active and you can get back to that activity after connecting again. This utility is now a part of the base Linux setup itself. If it is not found, you can install it manually.
screen -S reload
mongorestore --gzip --archive=hsc_20210203_b50993579.archive
If you are using the bare minimum specs, then it would take close to 2 hours or even more to complete importing. Of course, it also depends on your server's network speed as well. On a better server, this would take less than 10 to 15 mins to get imported.
In the meantime, we can either wait or complete the other steps. I would say let's wait till the import is complete. If you get disconnected from the server. The below command will help you get back to your instance.
screen -r reload
Once the import is complete and all good, you can use ctrl+D to disconnect from the screen instance.
Step 5: Checkout Hive Engine code
If you are in your backup directly, you might have to come back to the main directly with the command cd ~ or cd .. and use the following commands. I usually create a directly called apps and have all my applications there instead of keeping it in the root directly. Whether to create it or not is your decision.
mkdir apps
cd apps
git clone https://github.com/hive-engine/steemsmartcontracts.git
cd steemsmartcontracts
git checkout hive-engine
Though we have moved to Hive, this repository name is still referring to Steem. I guess there is no one to update this terminology in the repo. But that shouldn't be a big deal. Right now the branch I'm using is hive-engine. If you are checking this article at a later point in time, reach out to Hive-engine discord to check with other witnesses what would be the latest branch you should be checking out.
We have to now install the dependencies with the help of the following command. Make sure you are inside the directory steemsmartcontracts before doing this.
npm install
Step 8: Configure the application
There are two files in which the configuration will need to be updated.
config.json and .env
First, let's start with the config.json file. When you open the file with nano with the following command,
nano config.json
In the above file, two things need to be updated. "startHiveBlock": should be set to 0 and "witnessEnabled:" should be set to true. After updating the file should like similar to below:
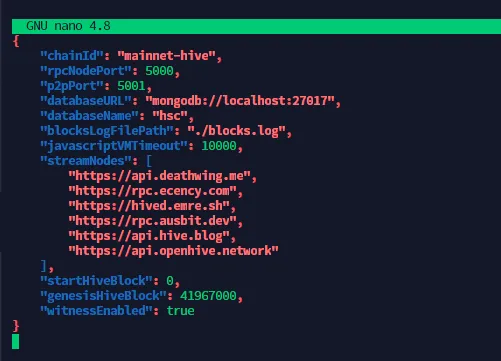
You can also change the streamNodes to your favorable RPC nodes. If you have your own private node, then it would be better to stream faster. You can now save this file and exit.
Next is to change the .env file. This is where we enter the witness account information and private key. But we may not have .env file in this folder. We have to first create one by copying .env.example
cp .env.example .env
nano .env
There would be 3 fields to enter. First the active key of the account, the second would the account name and the third would be the IP address of the server.
The next step would be to enable the ports with the following commands.
sudo ufw allow ssh
sudo ufw allow 5001
sudo ufw enable
5001 is the witness port and it is important to enabling it for the other witnesses to connect to your witness. If you are going to make the RPC node public, you can also allow port 5000.
If you are using AWS, then you have to enable the port outside the server in the network configuration. You can check and make changes accordingly.
Step 7: Install pm2 and start the app using pm2
Now we have the source code and we have already made the necessary changes to the configuration file. The application can be directly started with the node command. But if there are any server issues or if the server restarts by any chance, we will have to again manually run the application.
Using pm2 will make things handy. This will help us run the application as a service. Pm2 also comes with other utilities to make it easier to manage the application. I will leave it to you guys to explore more about pm2 and understand.
sudo npm i -g pm2
In the above command -g is important to deploy the application globally to make it available globally for other applications as well.
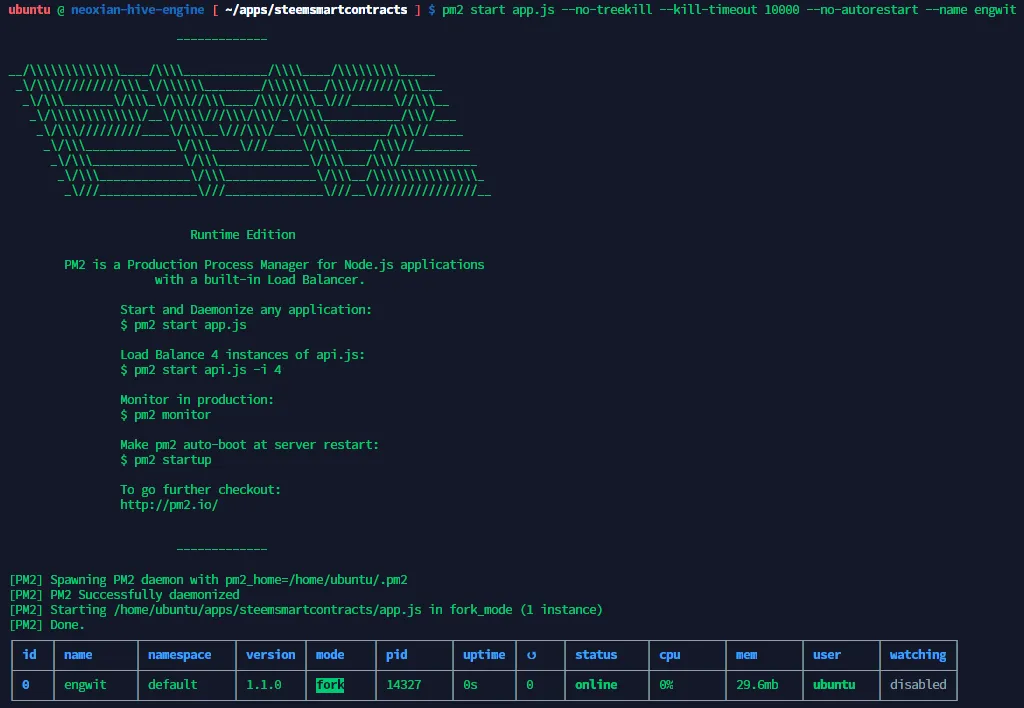
Now that all the steps are done, we are almost in the final step to start the application. The following command can be used.
pm2 start app.js --no-treekill --kill-timeout 10000 --no-autorestart --name engwit
Once the above command is executed you will be able to see below where the application is up and running.
You can start watching the logs to understand what is happening in the server. The below command can be used to check the logs.
pm2 logs engwit
The log should say something like the below and keep rolling.
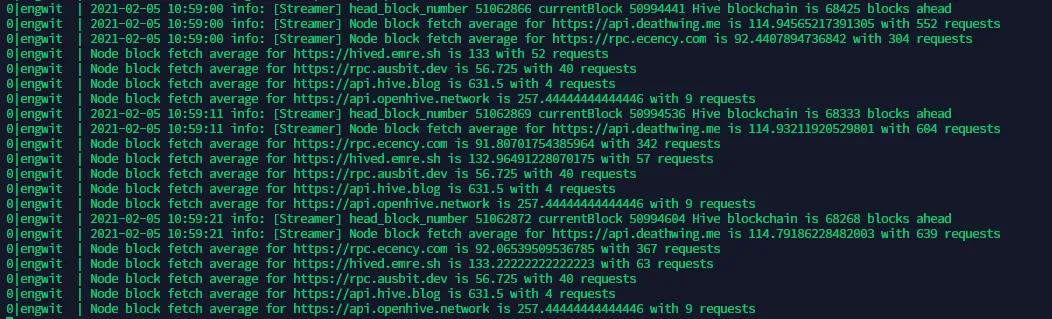
We have to now wait until the part where the log says Hive blockchain is 0 blocks ahead. That is when we are ready to register the witness. This can take some time to get to the latest block. If we have powerful nodes in the configuration, it shouldn't take a lot of time. The older the snapshot you have restored, the longer it takes to get to the head block. You can now just sit and relax and let it happen. You don't have to stay connected with the server until this happens.
Step 8: Register your witness
This is the final step you need to do to complete the witness setup. In the config file, we would have enabled the witness but we have to register the witness with the below command.
node witness_action.js register
The above command should be executed from inside steemsmartcontracts directory. If you are not inside that, go cd inside the directory and execute the above command.
With this all the steps are complete and you should be able to see your name displayed on this page. https://tribaldex.com/witnesses. Use that page to vote for the witness. There are a few other alternative sites where you can check your witness status and the number of votes received etc.
https://primersion.com/he-witnesses
https://cdn.rishipanthee.com/enginewit.html
For you to start participating in the rounds, you will need a bare minimum witness vote with WORKERBEE.
I hope I covered everything in this article. If you find something missing, please let me know. I can edit this article accordingly.
If you consider this guide helpful and if you have WORKERBEE staked in your account, please consider voting me as a witness. I'm running my Hive-Engine witness with the account @kanibot.