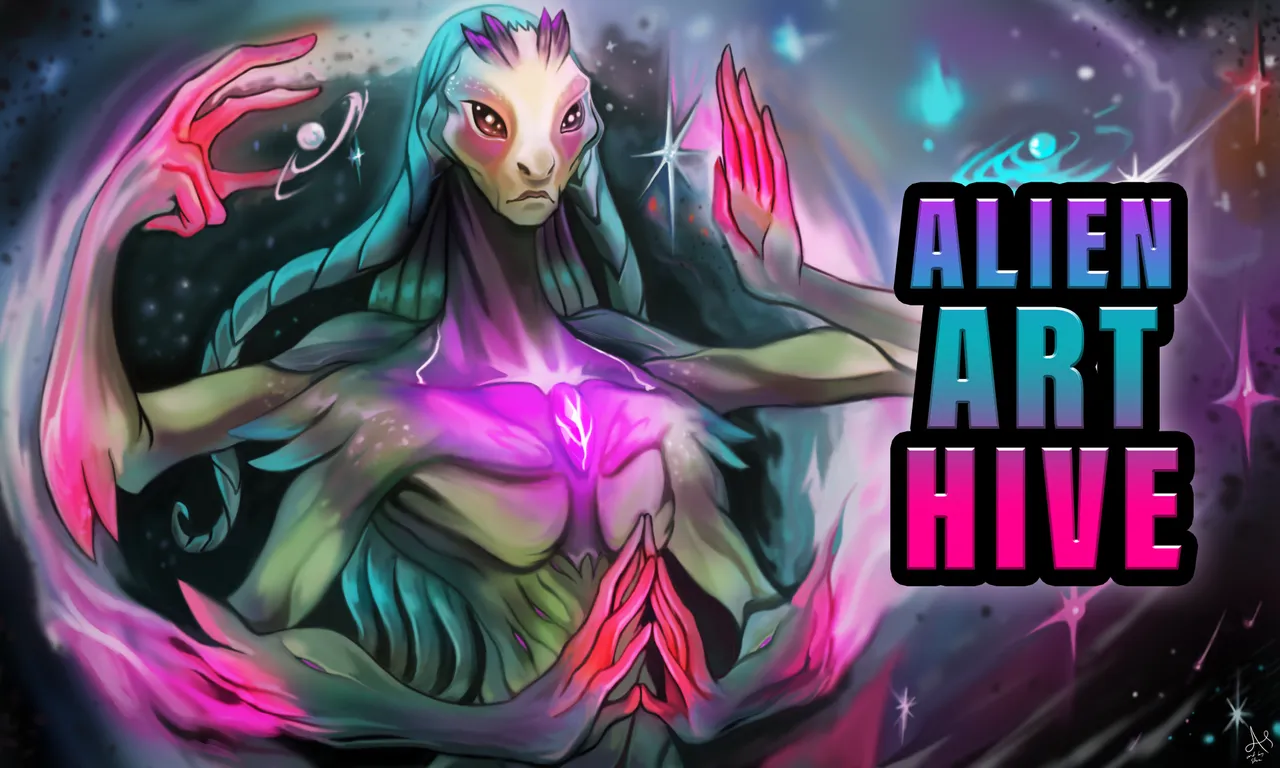
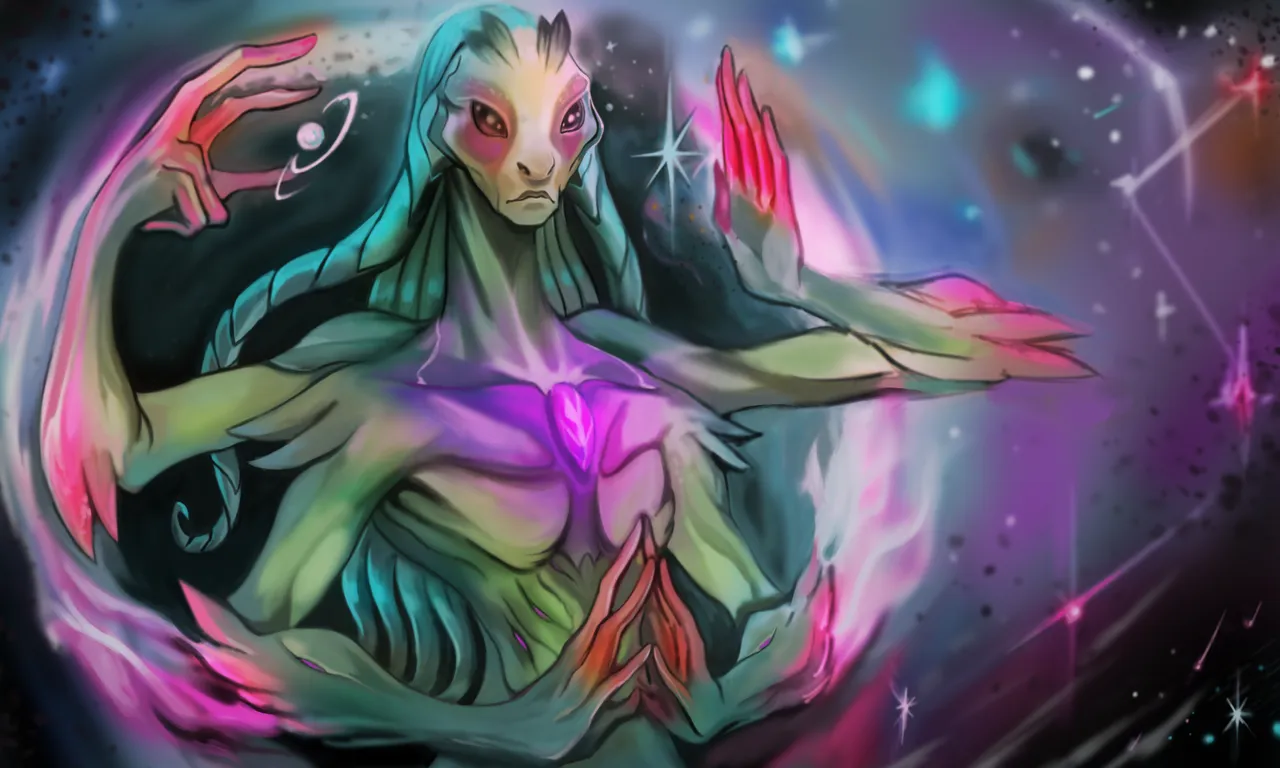
Andromeda. The very first Original Alien Character I have made.

The Creation of Andromeda Artwork
Helllooooo everyone! It is me again Steven.
Recently, I have been abducted by an Alien Mothership!
Yes! the Alien Art Hive Alien Incubation
If you my friend still don't know about the alien community why not SMASH! this Alien Art Hive and subscribed to see cool Artworks in the future! Not just aliens but all sort of art related contents.
And hey! As I was wandering through the incubation I saw lot's of beautiful artworks inspired me to do some Alien artwork too!
Until I stumbled unto this post Alien Art Hive Graphics Contest that was made few days ago by juliakponsford.
And coool! I got to draw alien with my own style now. Hype is on me!
Join me walk through the process of creation and hope you have fun as the art progress from the start to finish.
Materials and Software
Adobe Photoshop
HUION H640P graphic tablet
ASUS X415 Laptop

Digital Art Creation Process
The very first step you should do is get a coffee my friend. That's right boil that water pour that to your mug, add the coffee and take a sip.

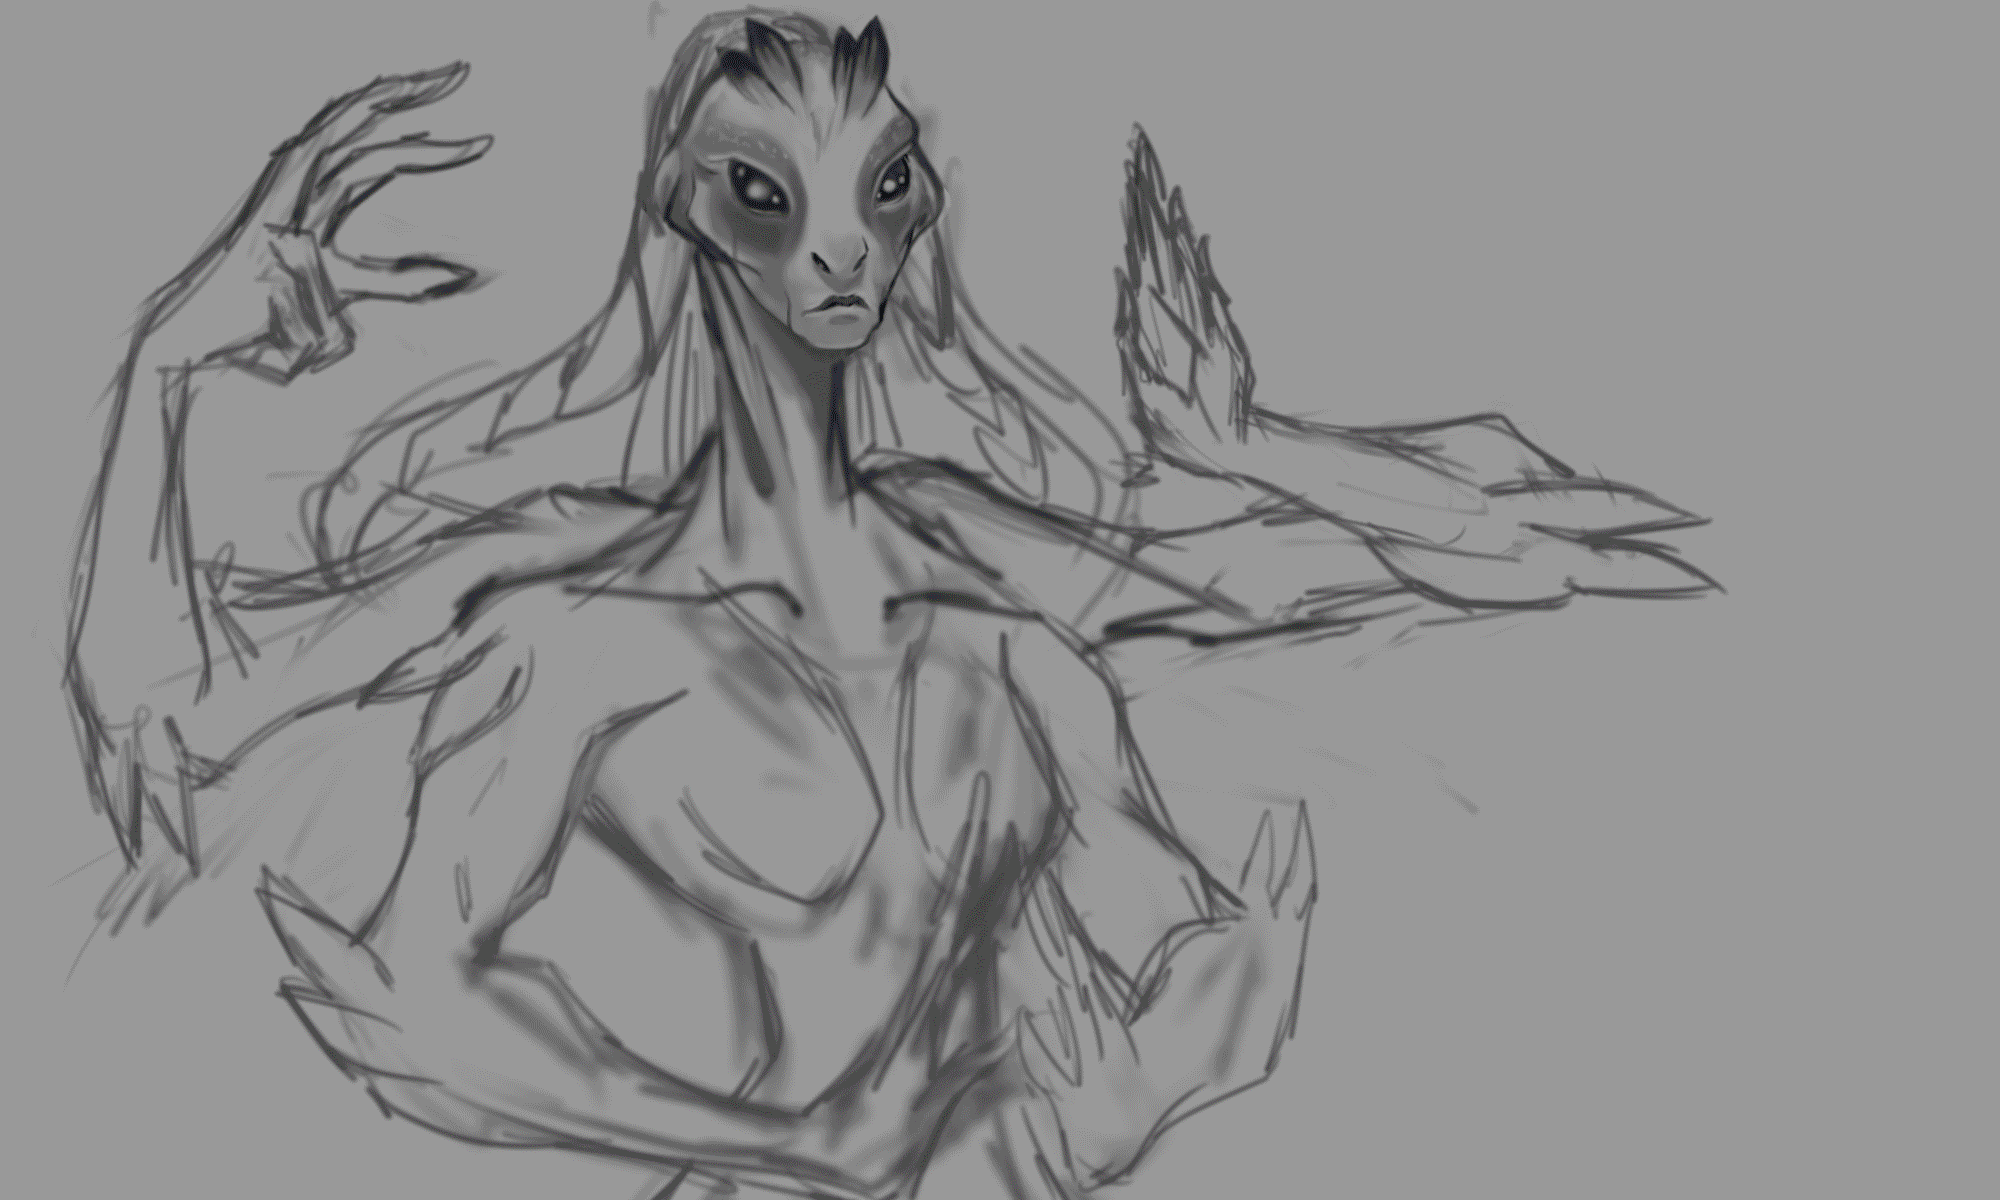
STEP 1
Sketching
Let's make the background gray and sketch our Alien Character.

That's seem nice but it's not quite the pose I was looking for. The face is good for me so I retain it. And do a second sketch.
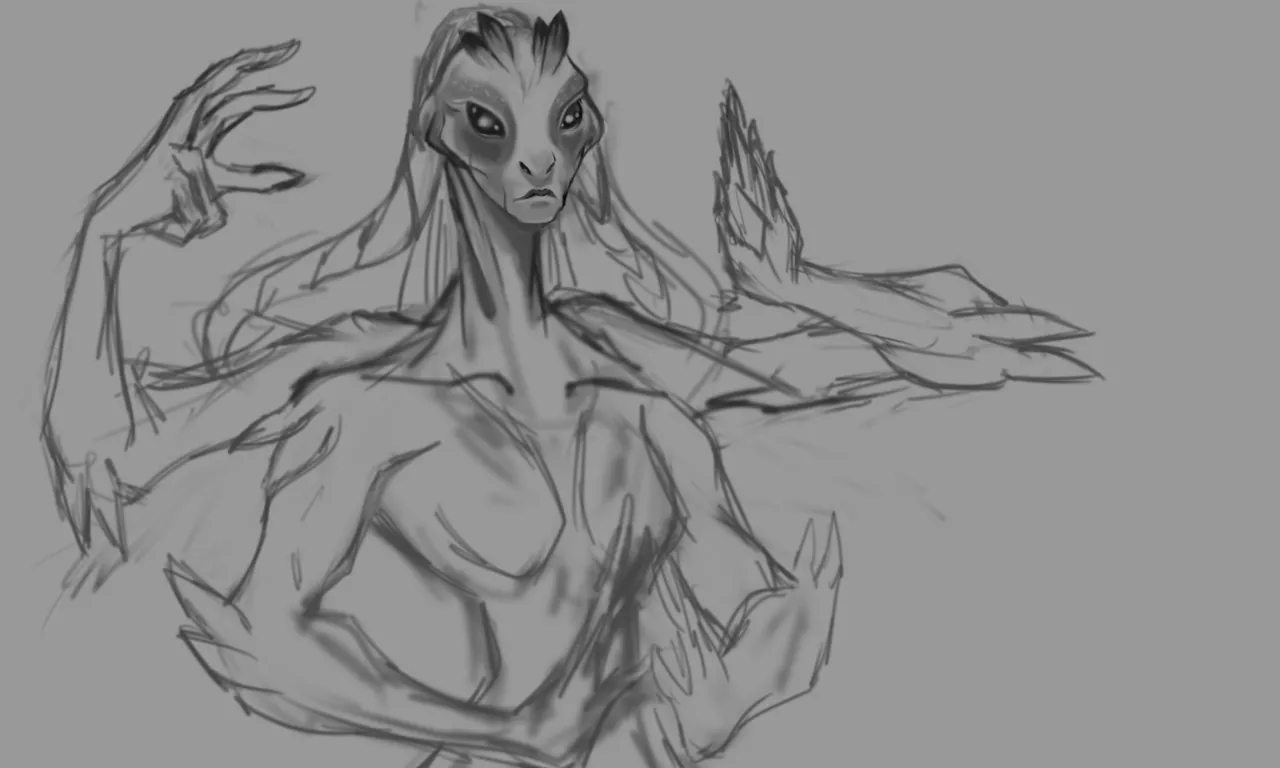
Yeaaahhh that's cool alright add some depth of shadows and some background stuffs.
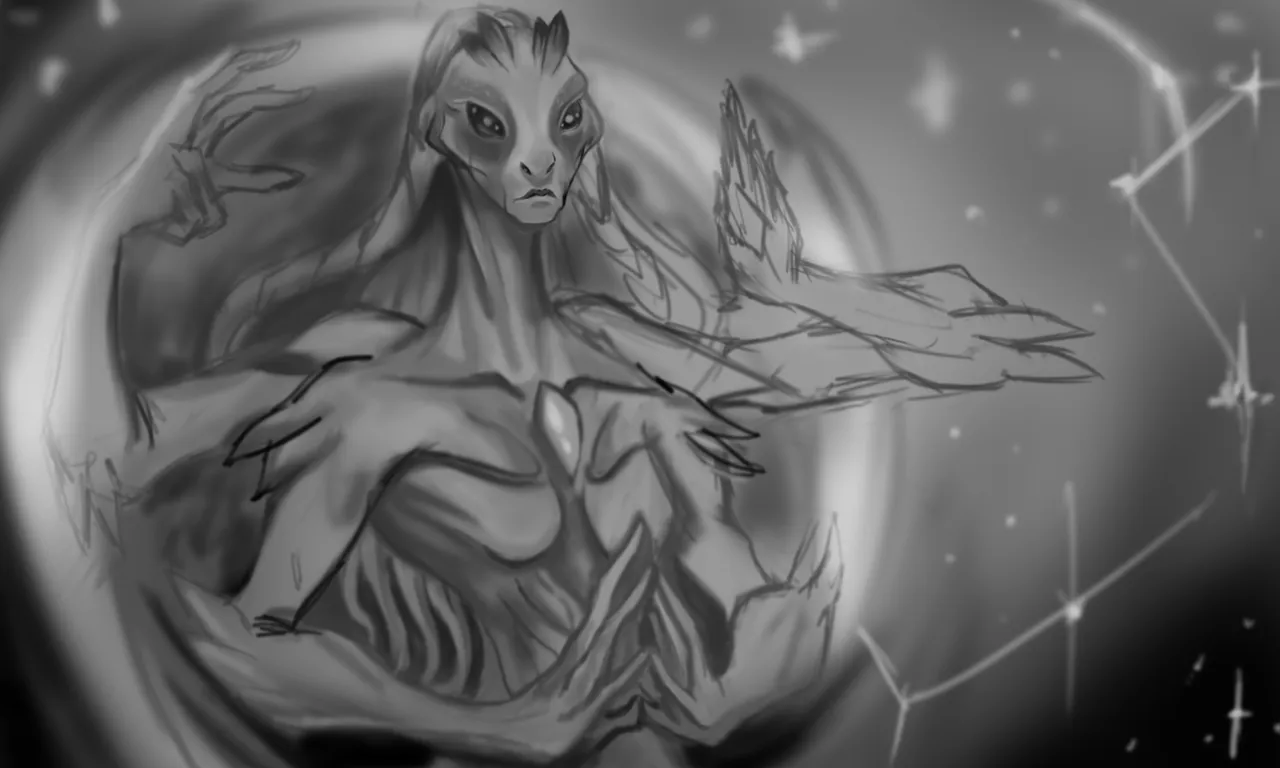

Mother of galaxy! She's freaking huge to fit in the galaxy, universe and space hahaha. We're just having fun with the sketch guys. I often do this grayscale of the character and input the colors on top in the next process.
STEP 2
Coloring Stage
The coloring phase, I don't really have the idea of what the colors should I put so I look for images of the space/universe in google. I saw blues, red, white, actually damn universe have lot's of colors. Let's dive in and put all of it!
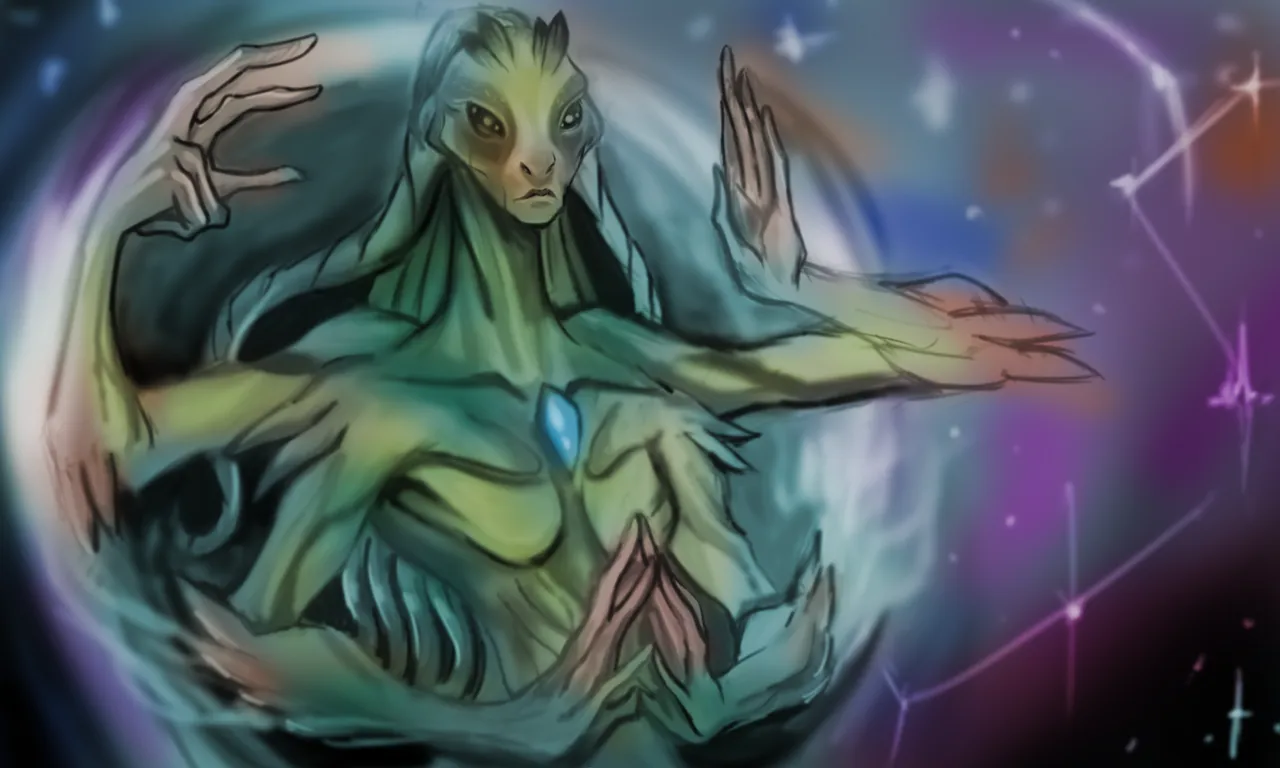
How I color grayscale is I add layer on top of it and make that into an overlay blending mode. Somewhat like this would be a base color.
I could add some more overlay layer to pop those colors. Like this one here.
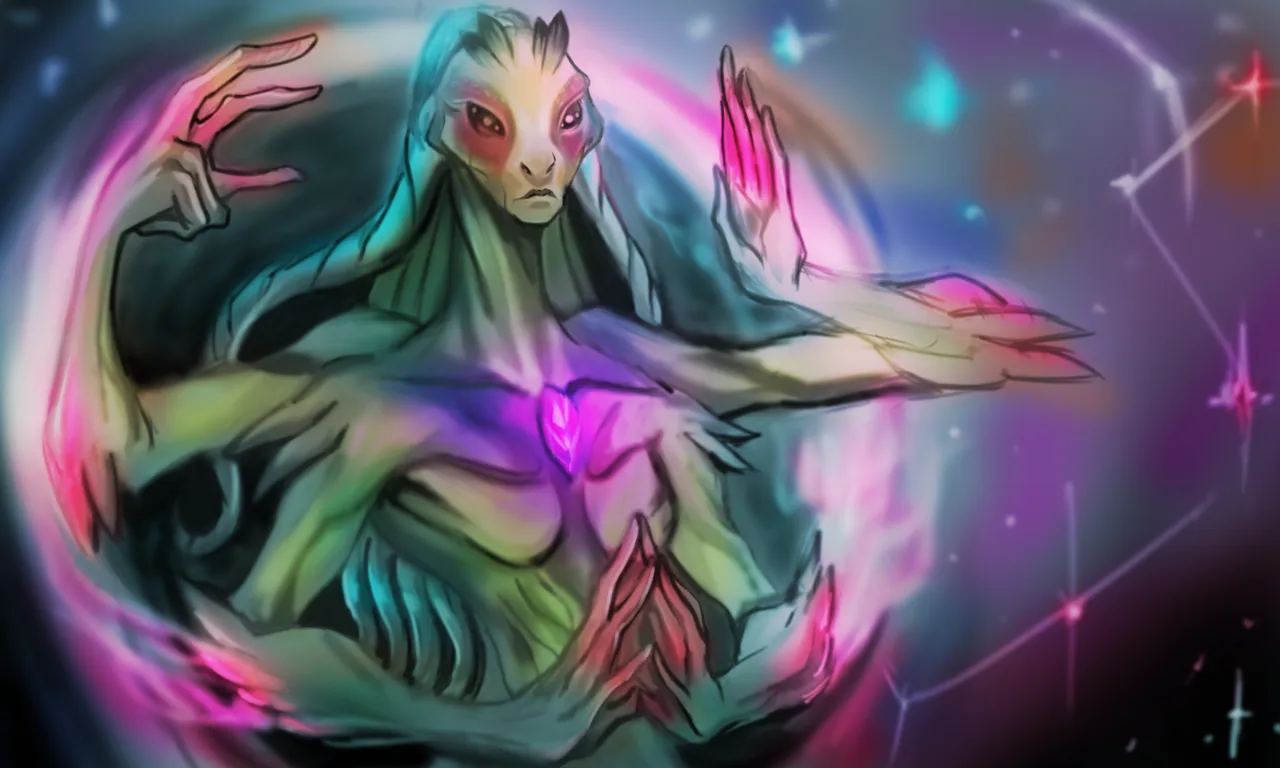
After that I think I love the colors already. It turns now to refining the artwork. We just figuring out the character as we go clean and refine it.
Before refining I adjust the image a little bit using liquify tool in Photoshop. You might not see the changes it is somewhere the face area down to neck and breast part. That makes the neck part not so stiff.
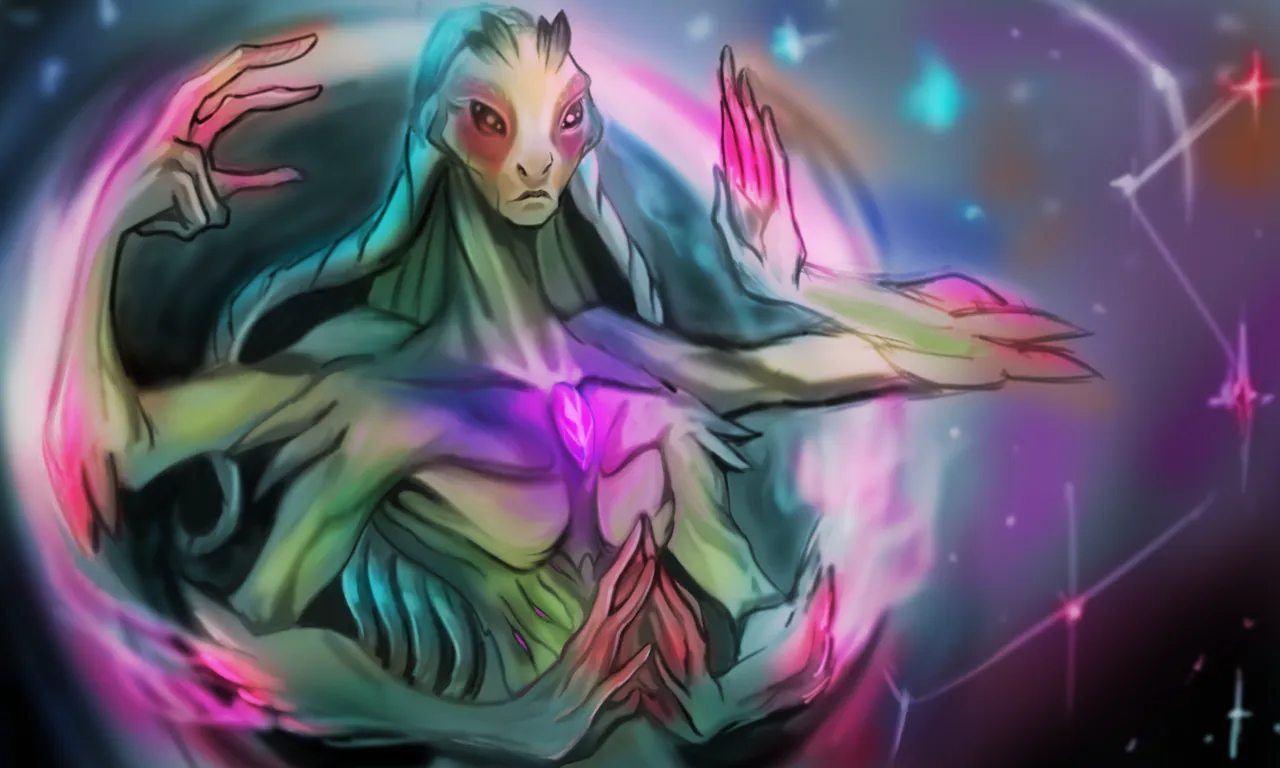
STEP 3
Final Touch and Render
In this stage it is where we define the forms of the character. I also find having these black outlines looks cool. It's a matter of finding it by accident so I retain some of those outlines.
I'm not really an art expert to really know the exact thing to do. In refining I just put what's cool and what works for the character.
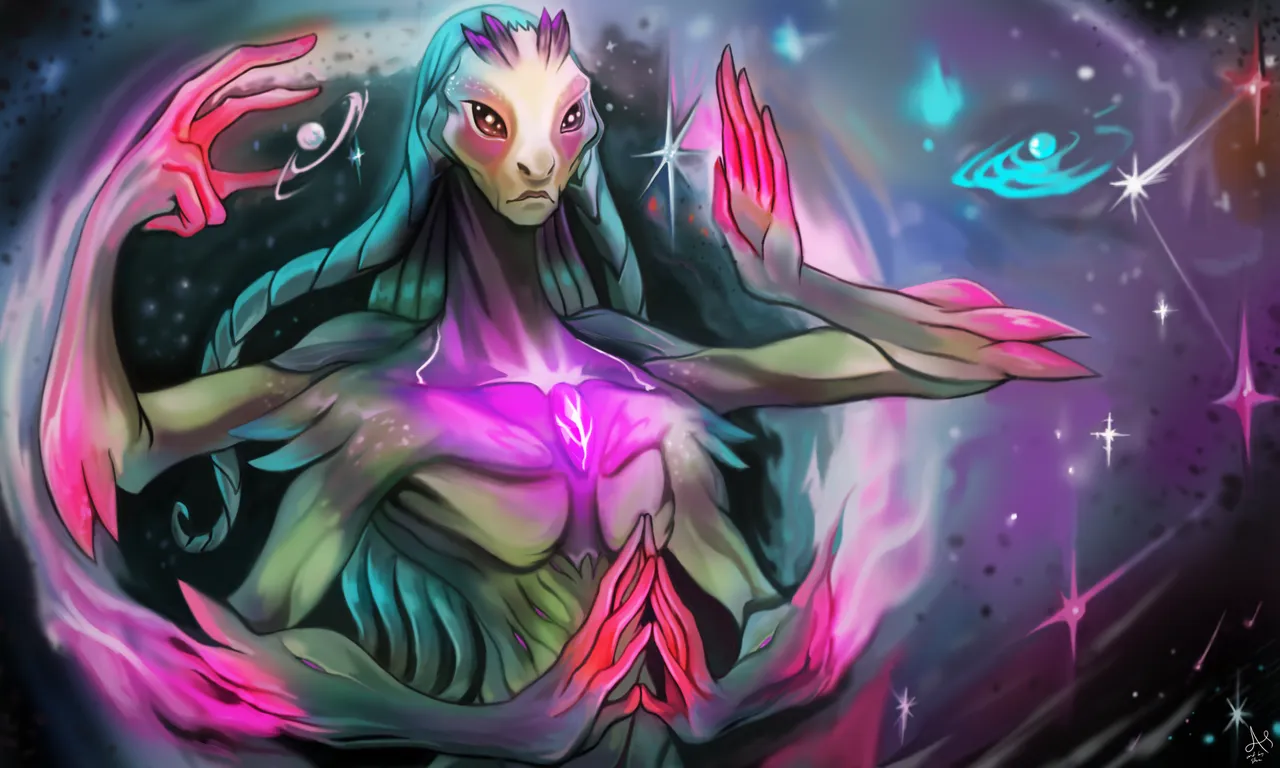
For the final touch add our ALIEN ART HIVE text.
That's it we're done! And the coffee needs a refill hahaha 🤣 And the name Andromeda would be cool too.

RENDER GIF PROCESS
If you want to know about these cool Text Formatting please visit Cartel Post Framework I know you would love this guide as much as I do.
Hoooo! that was fun. You made it to the end of this post. I really appreciate your time and attention and I hope you learned something today.
'Till the next post see yah!
Thank you very much!
Join the Discord to learned more about Oneup and the Cartel for playtoearn games and NFTs