Hola a todos en la comunidad de @onchainart !! 😄💖
Hello everyone in the de @onchainart community!! 😄💖
Hoy les traigo un dibujo que realice intentando aprender un poco más la técnica de dibujo de los animes. Me gustó mucho el resultado por ello decidí compartirlo con ustedes. Espero que este dibujo les agrade tanto como a mí. Para este dibujo hice un personaje inspirado en el anime Love is War.
Today I bring you a drawing that I made trying to learn a little more the anime drawing technique. I really liked the result so I decided to share it with you. I hope you like this drawing as much as I do. For this drawing I made a character inspired by the anime Love is War.
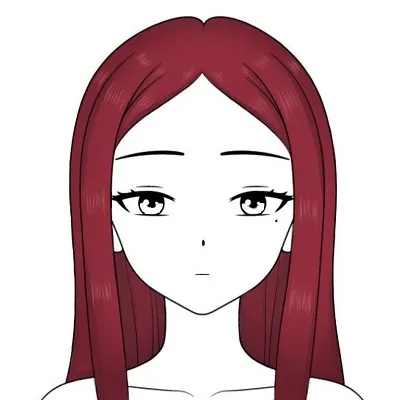
✨ Paso 1 | Step 1 ✨
Capture de Pantalla Realizado por la Autora // Screenshot taken by the Author
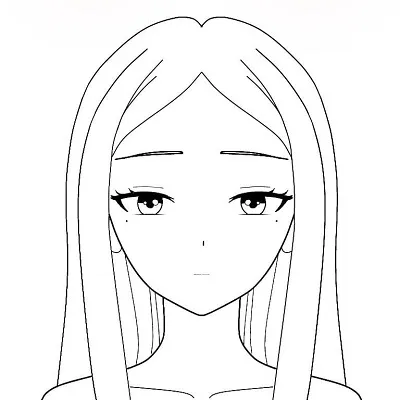
Realice los primeros trazos con pincel (Rotulador suave) en color negro.
I made the first strokes with a brush (soft marker) in black color.
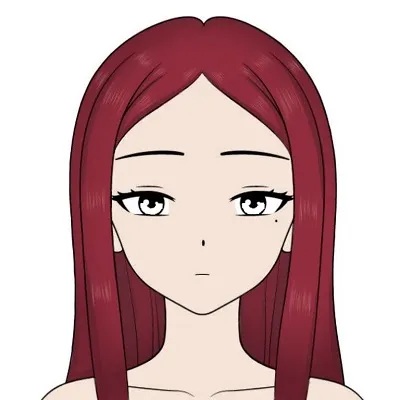
✨ Paso 2 | Step 2 ✨
Capture de Pantalla Realizado por la Autora // Screenshot taken by the Author
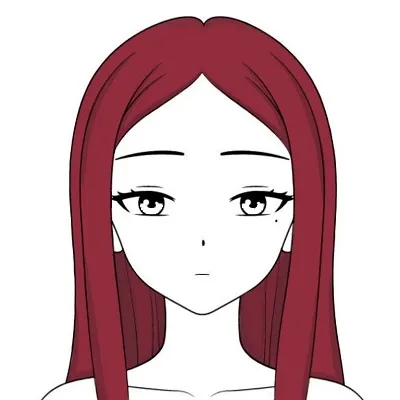
Rellene con color vinotinto el cabello y agregue sombras con el pincel (Rotulador suave) en un color más oscuro.
Fill with vinotint color the hair and add shadows with the brush (soft marker) in a darker color.
✨ Paso 3 | Step 3 ✨
Capture de Pantalla Realizado por la Autora // Screenshot taken by the Author
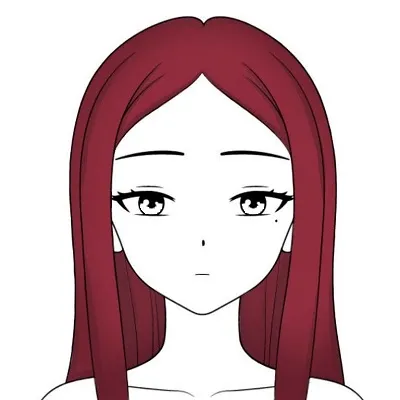
Agregue sombreado al cabello con el pincel (Aerógrafo triangular)
Add shading to the hair with the brush (Triangle Airbrush).
✨ Paso 4 | Step 4 ✨
Capture de Pantalla Realizado por la Autora // Screenshot taken by the Author
Añadí brillos con el pincel (Pluma difuminado)
Add shimmers with the brush (Feather Blurred)
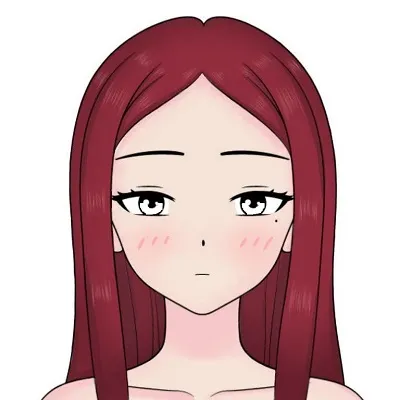
✨ Paso 5 | Step 5 ✨
Capture de Pantalla Realizado por la Autora // Screenshot taken by the Author
Rellene con color rosa claro la cara
Fill in light pink color on the face
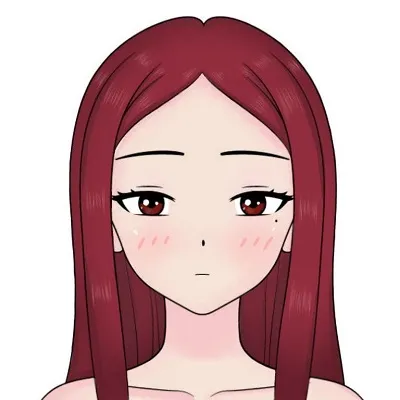
✨ Paso 6 | Step 6 ✨
Capture de Pantalla Realizado por la Autora // Screenshot taken by the Author
Agregue sombra con el pincel (Aerógrafo triangular) y algunos otros detalles con el pincel (Pluma difuminado).
Add shadow with the brush (Airbrush Triangle) and some other details with the brush (Feather Diffused).
✨ Paso 7 | Step 7 ✨
Capture de Pantalla Realizado por la Autora // Screenshot taken by the Author
Pinte los ojos de color rojo y agregue algunos brillos
Paint the eyes with red color and add some glitters.
✨ Paso 8 | Step 8 ✨
Capture de Pantalla Realizado por la Autora // Screenshot taken by the Author
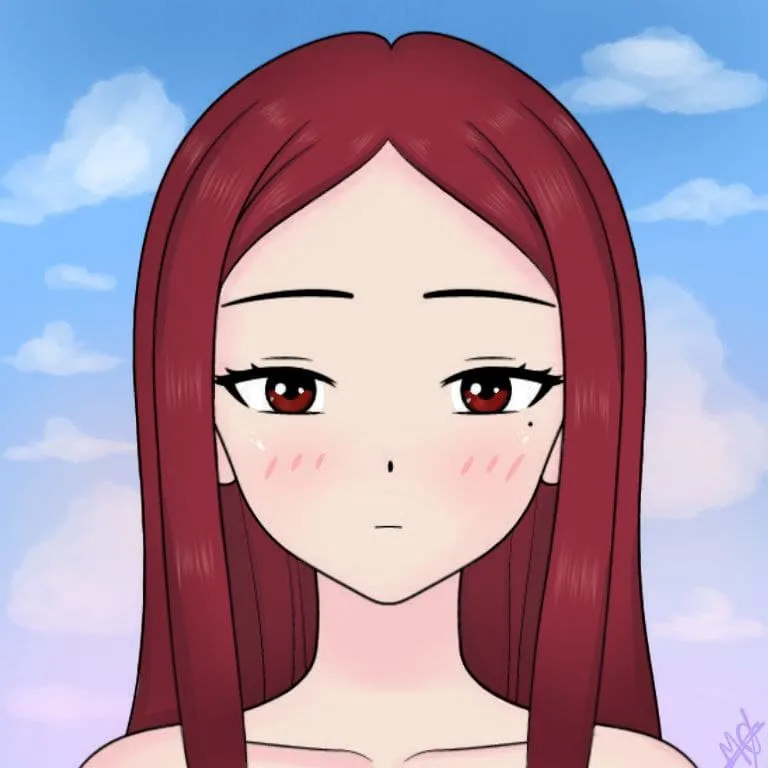
Añadí en fondo y algunas nubes con el pincel (Clouds Blush)
I added in background and some clouds with the brush (Clouds Blush)
Imagen de referencia que utilice para hacer el Dibujo Fuente
Reference image that I used to make the Drawing Source
///
Dibujo de mi Autoría creado desde mi celular TECNO SPARK 6 Go
Author's drawing created from my TECNO SPARK 6 Go
///
La App que utilice para realizar este dibujo fue ibisPaint
The App that I used to make this drawing was ibisPaint
