Light around, dark thoughts, glances exchanged, a deadly connection in which you will surely fall and enjoy it, come closer, maybe it is your last step, but your body will not suffer.
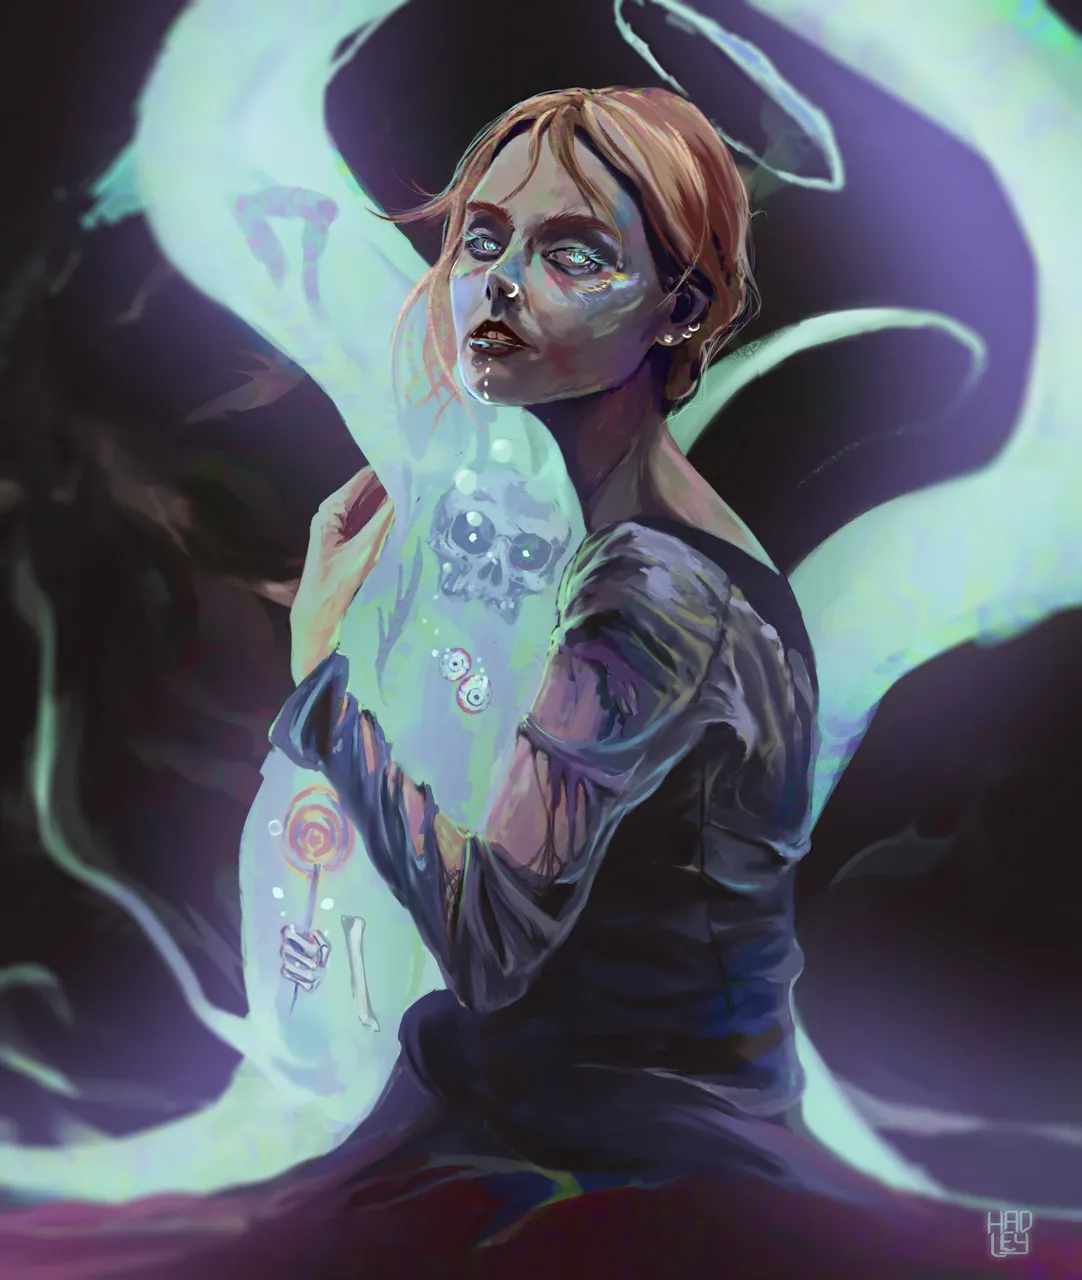
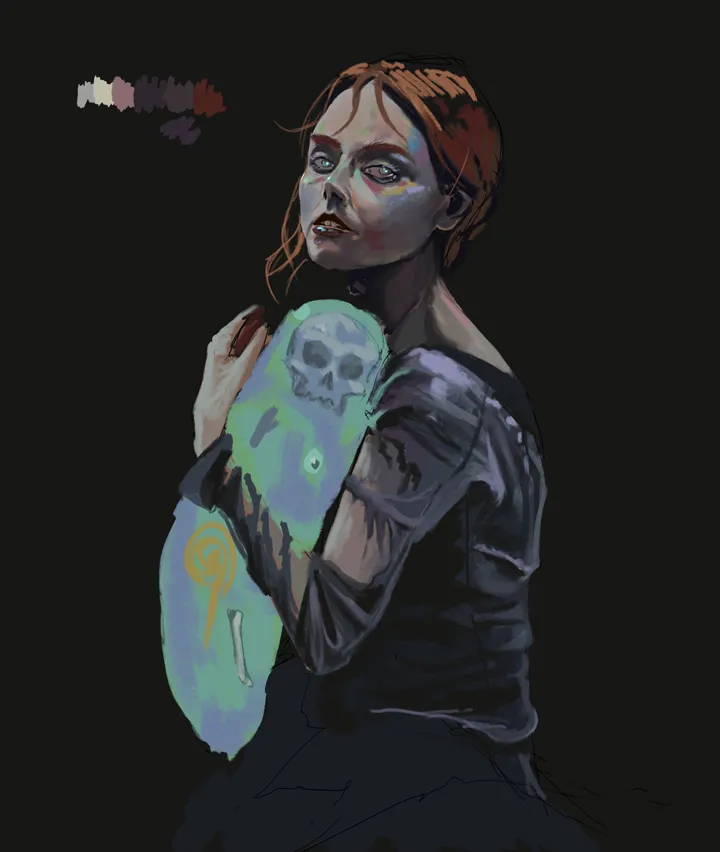
Hello children of neon lights, welcome once again to this little digital art space. This time I present to you a girl wrapped in danger, melting between the mowing light and the darkness that will absorb you.
I must admit, this illustration turned out better than I planned in terms of color, so come with me to see how I did it.
Details
| Name : | Luminescence |
|---|---|
| Marketplace: | Ghostmarket |
| Price : | 115 SOUL |
| Pieces : | 3/5 |
| Direct Link : | https://ghostmarket.io/asset/pha/GHOST/112169937998252158415410805461448114251281601848144717006839992387520526292612/ |

Tools:
- Gaomon S620
- Photoshop
- Brushes courtesy of Imad Awan: Download here
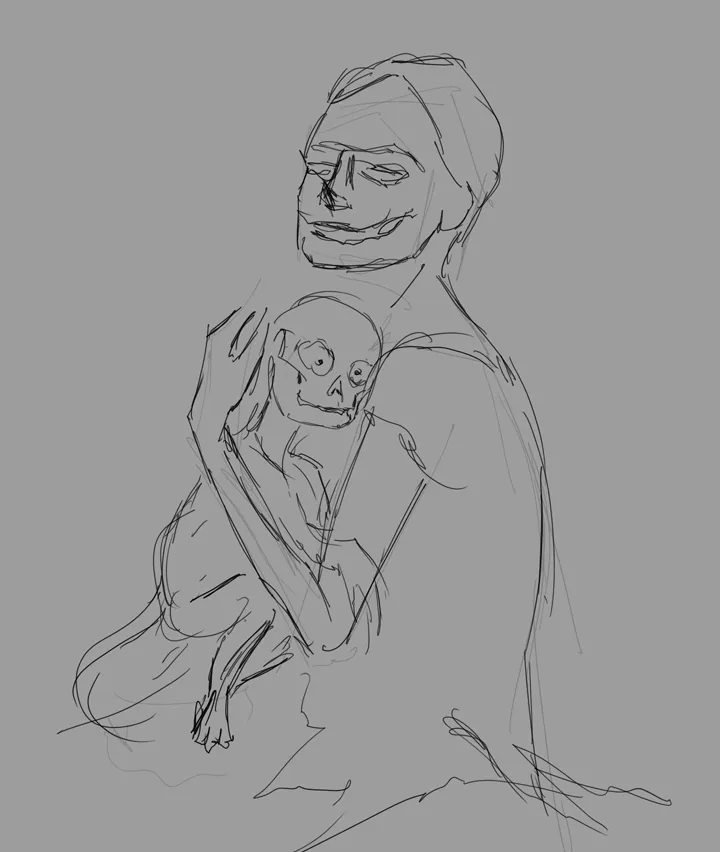
-Step 1:
The rough sketch was the detonator of this painting, not very defined strokes to quickly capture the idea I had in my head. It took no more than two minutes to do it.
-Step 2:
Then I created two new layers, one below and the other above the sketch, with them I started coloring. At first I wanted the scene to be set in a forest and the girl to hold a kind of baby demon. Therefore I painted with spots over the sketch, trying to give volume to the character.
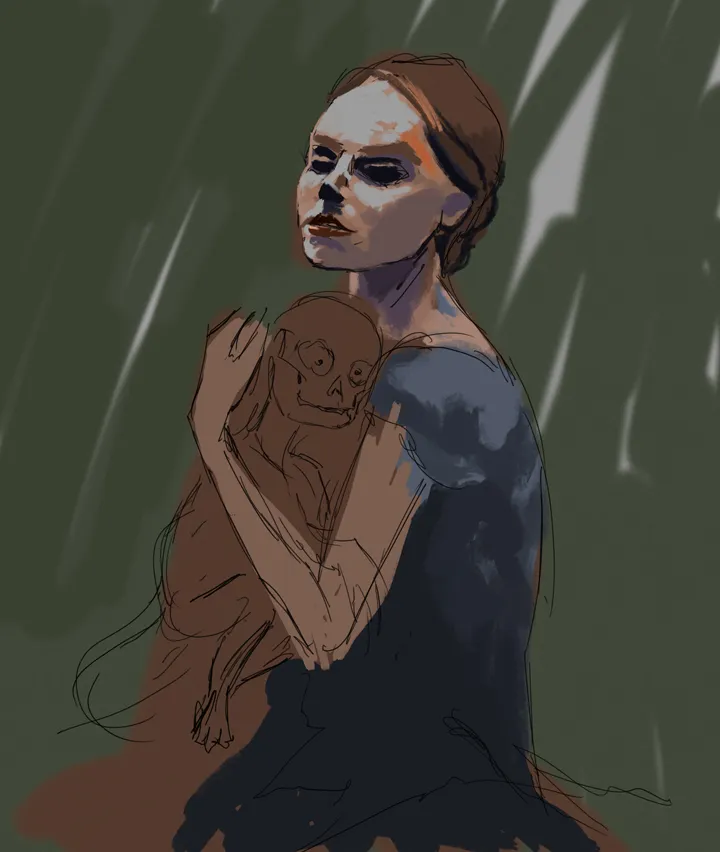
-Step 3:
While I was detailing the girl I realized that the environment and the demon were perhaps not the most appropriate for the scene. So I darkened the background and changed the demon for some kind of slime.
 |  |
|---|
-Step 4:
To achieve the coloring of the monster and the clothes, I used a soft brush set to " hard light" blend mode, with this I progressively detailed through different layers in order to easily and quickly undo unwanted brush strokes. The accessories of the girl's nose and ear were done with the "Linear dodge (add)" blend mode which generates a very fast glow despite the color you are using.
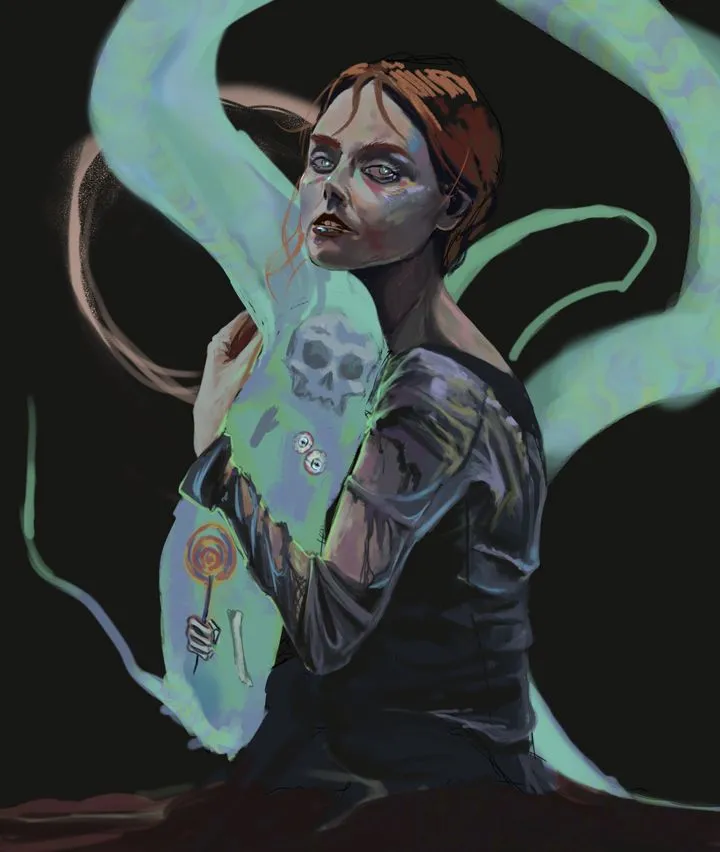
Now it's time to talk about the highlight of the illustration, the glows. How did I make them you may ask, well here is the explanation, take note.
You take an airbrush, set the flow to 10% and the opacity to 5%, and you give one pass with a light blue tone. If you painted in any unwanted places, apply a layer mask and gently erase the excess strokes. Now duplicate that layer and set it to " hard light" (you can change the opacity), duplicate the layer again and this time set it to "lighten", blend these three layers and then duplicate it again.
Once you have both layers equal, it's time for the last step, you go to filter>blur>gaussian blur and set the blur you want and now it's time to create a layer mask and get rid of the blurred areas. And that's it, it reads a bit complicated, but once you do it you'll see that it's not.
 |  |
|---|
I will leave you a GIF with the whole process on it, so you can better appreciate the illustration process.

Tell me in the comments that you imagine when you see this illustration.

See you in a future post!
Thank You for Supporting My Artwork
▶️  |
| |
| |
| |
| |
| |
| |
| ◀️
◀️
TWITTER | RARIBLE | GHOSTMARKET | FOUNDATION |TERRA VIRTUA |NFT SHOWROOM | INSTAGRAM | FACEBOOK
⬆️ Follow ⬆️