Hi everyone, I'm going to share with you a few pointers on creating animated GIFs in Adobe Photoshop. This is something I learned how to do a couple years ago and it has allowed me to become a Giphy artist on Giphy and it allows me to make animated graphics for my social media channels. Not to mention, it can help you create animated GIFs to upload onto your Hive blogs. This is my first Adobe tutorial on here, so let me know if there's anything I could explain better or if you have any questions.
The main things you want to have set up in Photoshop is the Timeline function:
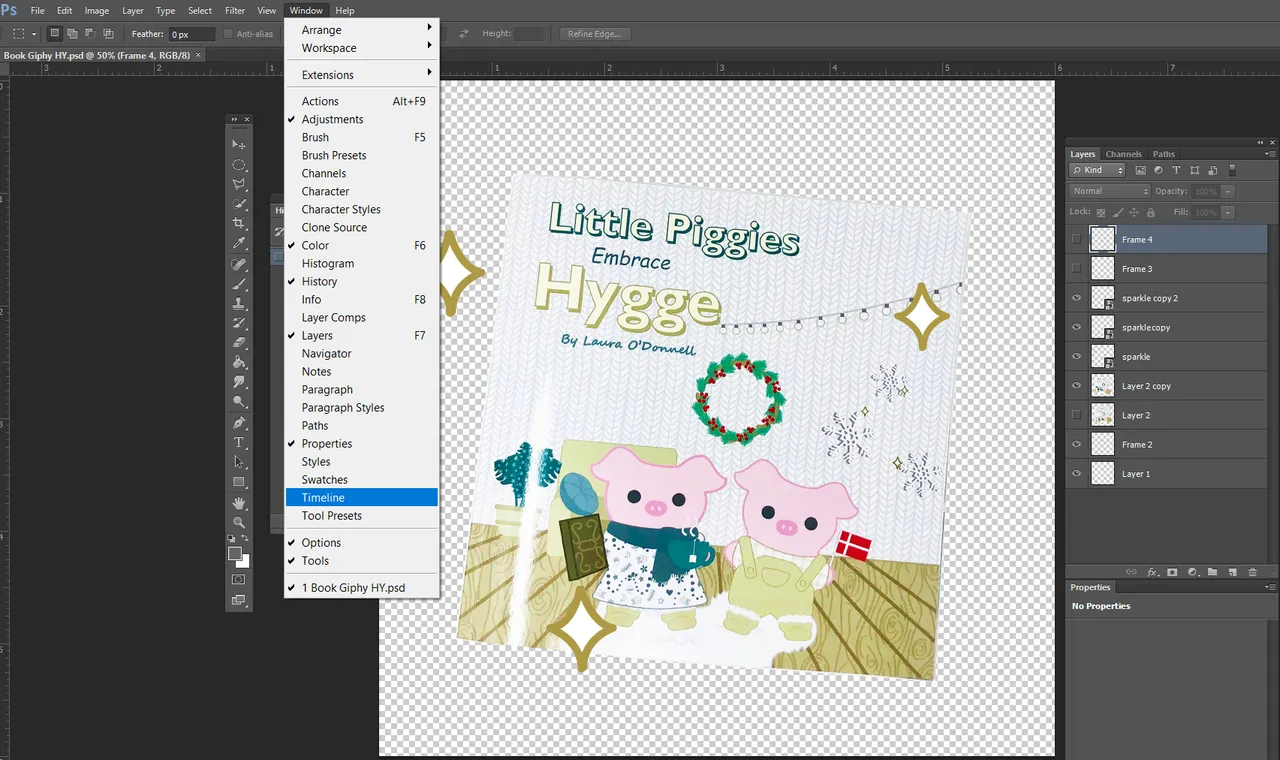
Click Window ➡️ Timeline
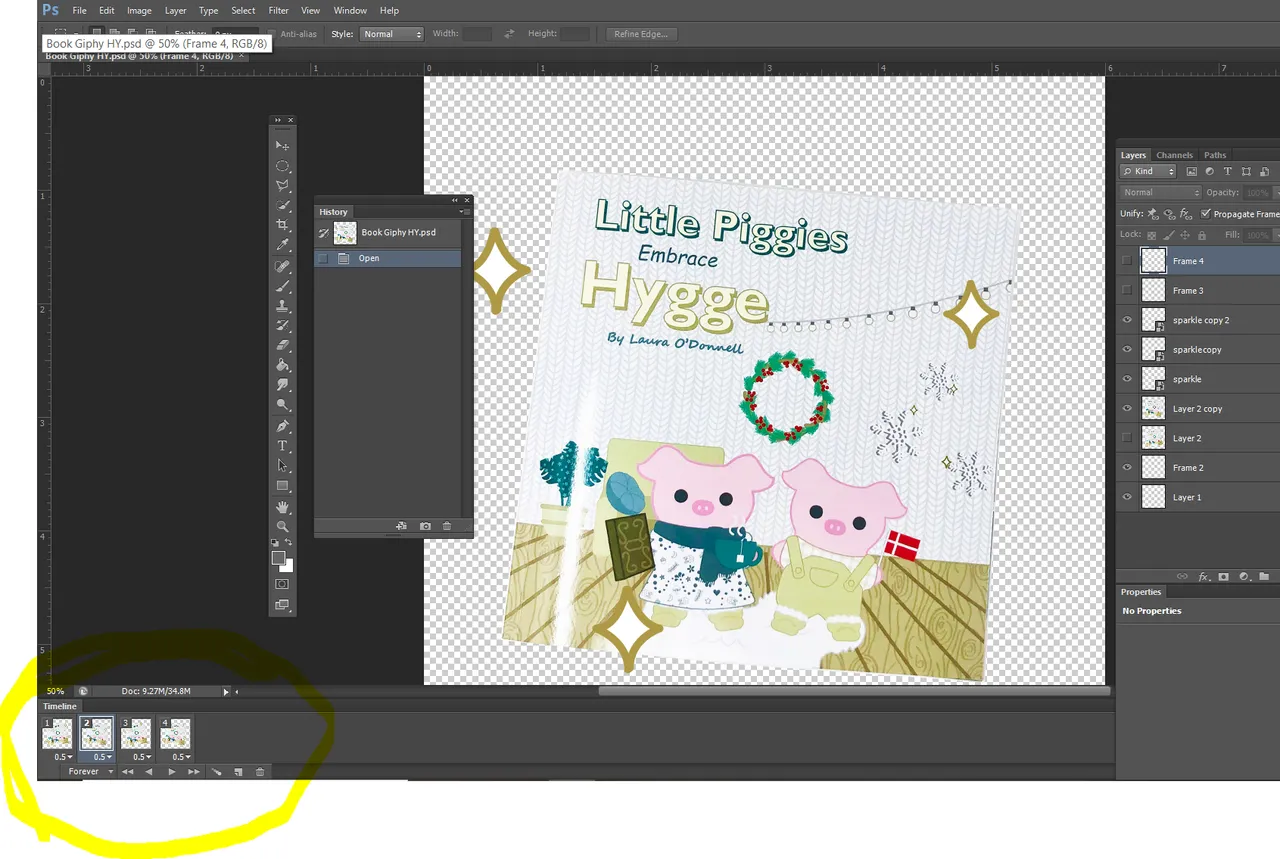
You will see the Timeline at the bottom of your screen. You can change the timing of each frame and choose which frame you want to edit. I usually set mine to .4 or .5 seconds.
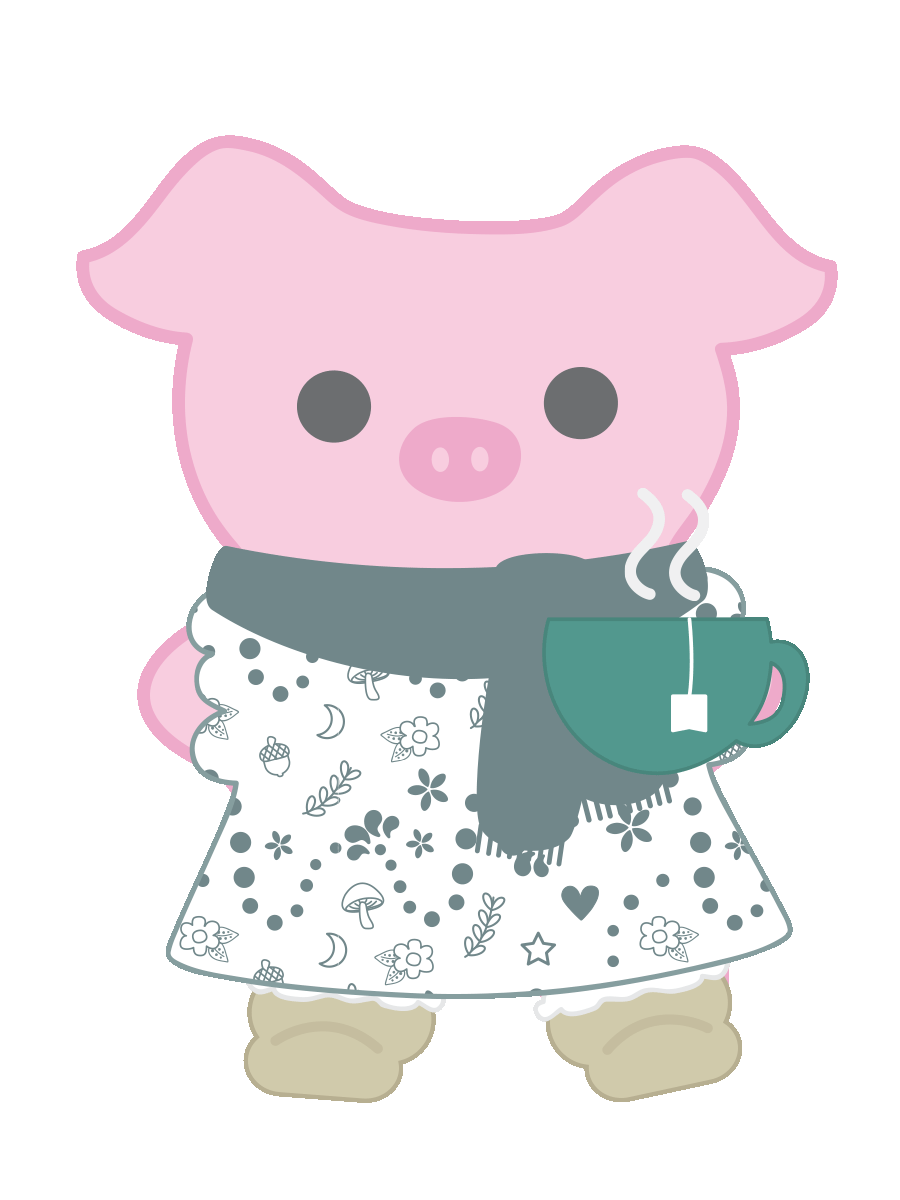
Here is a video on how I create a very simple animation with the steam from the coffee cup that the piggy is holding. I copy and paste my own illustrations into Photoshop and size them accordingly. Each movement in the animation is a different frame in the timeline. Check out the video below for more details ⬇️
(Tip: There is a button on the lower right of the video that lets you speed it up 2x.)
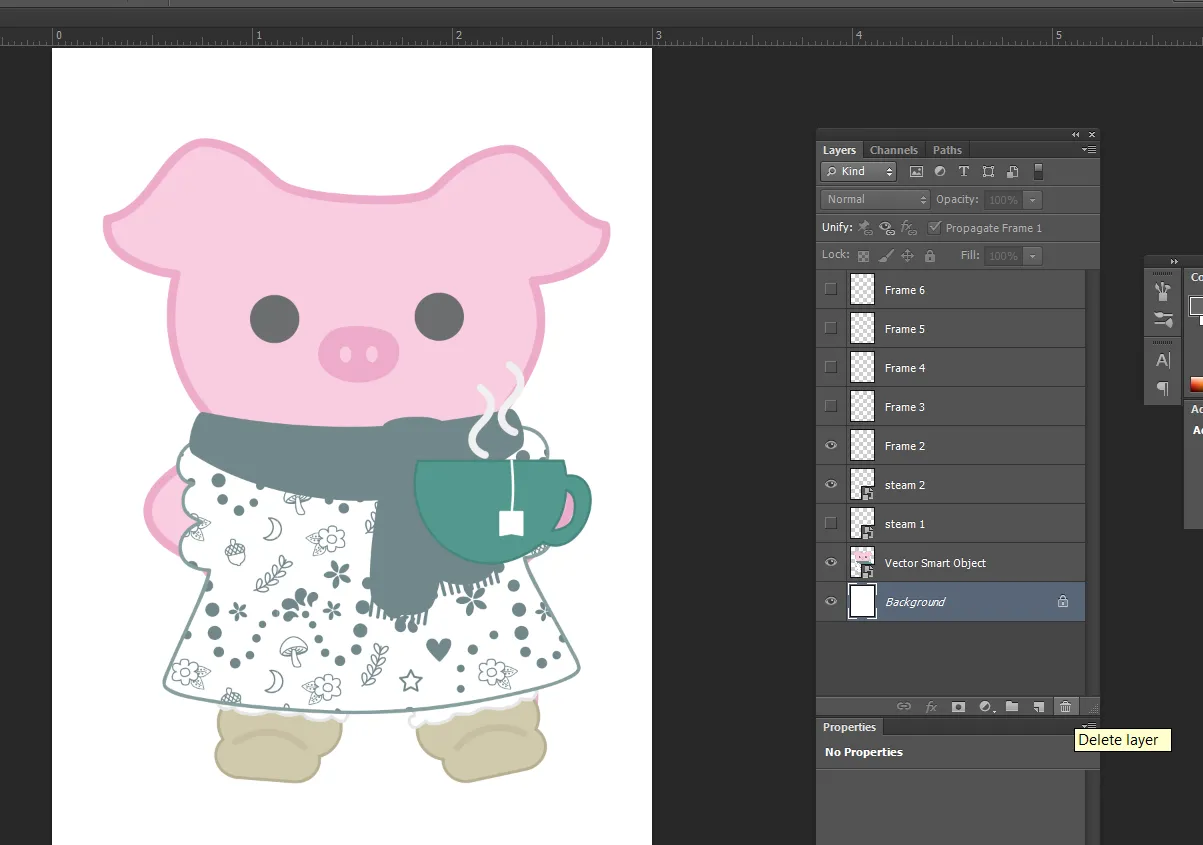
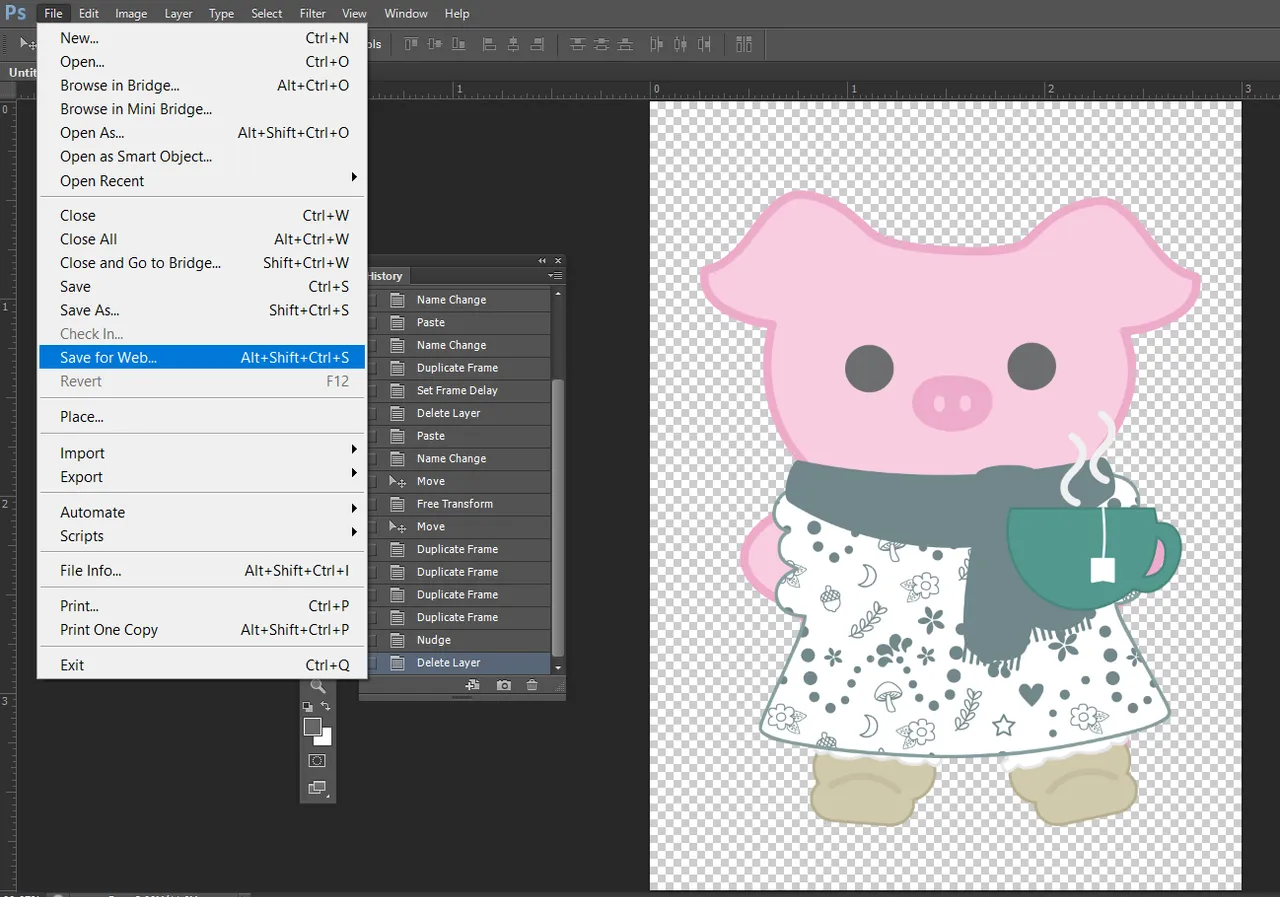
Delete the background layer for a transparent background:
To save as a GIF: Click File ➡️ Save for Web
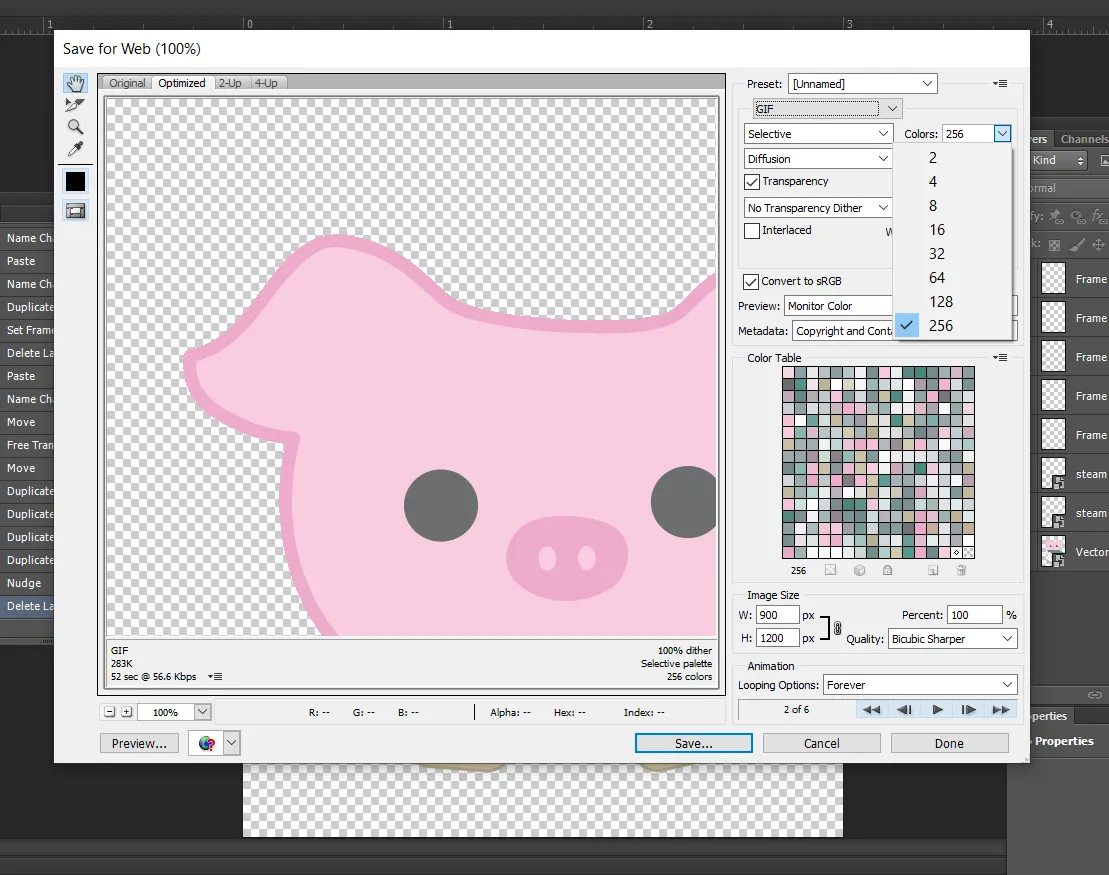
Save as a GIF ⤵️

I like to save it with the maximum amount of colors ⤵️
The final