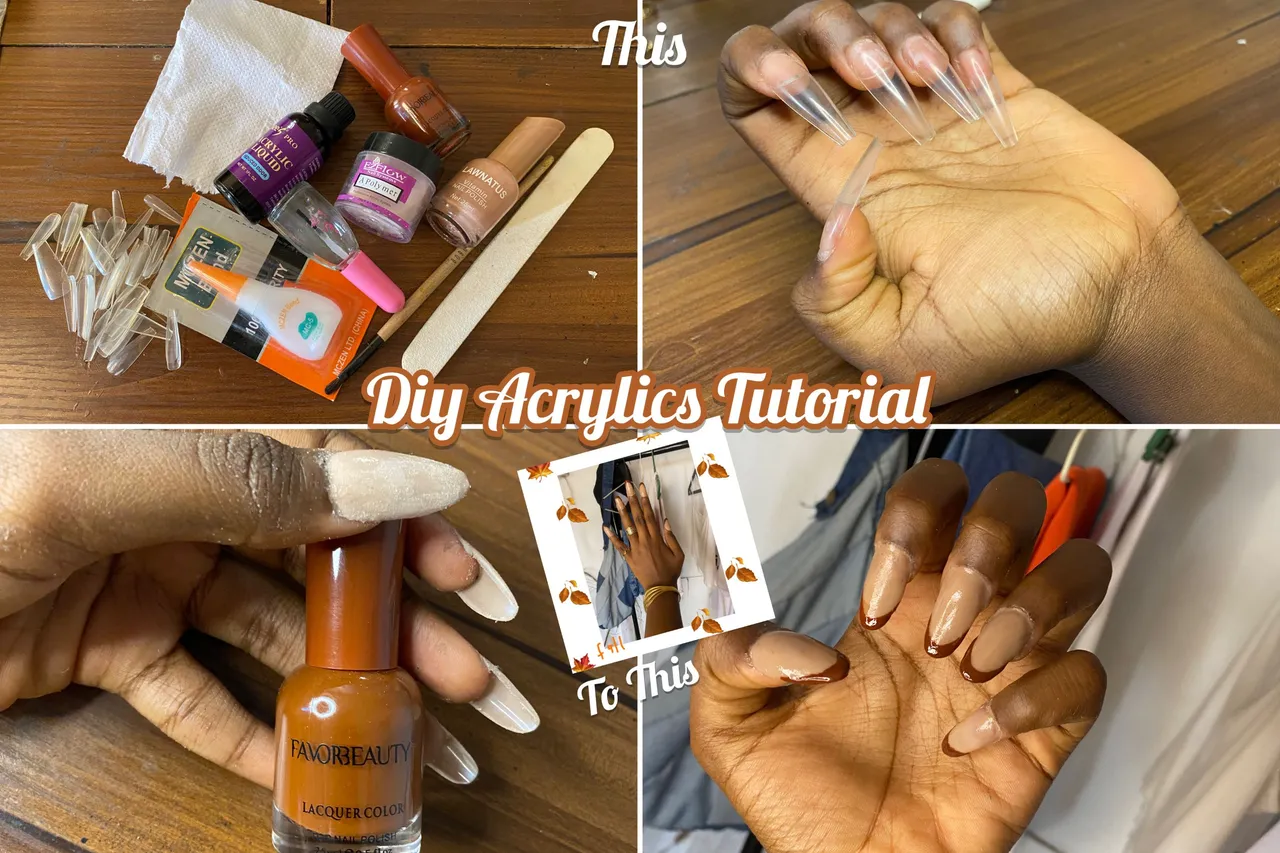
happy creative sunday friends ,hope you are having a great weekend, i am bringing to you all another creative diy for this weeks creative Sunday initiative, this diy tutorial features a do it yourself beauty routine for an affordable maintenance, this is to inspire my beauty lovers on how to do your acyrlic nails which are super expensive these days in the comfort of your home and save your coins. If these interests you keep reading below.
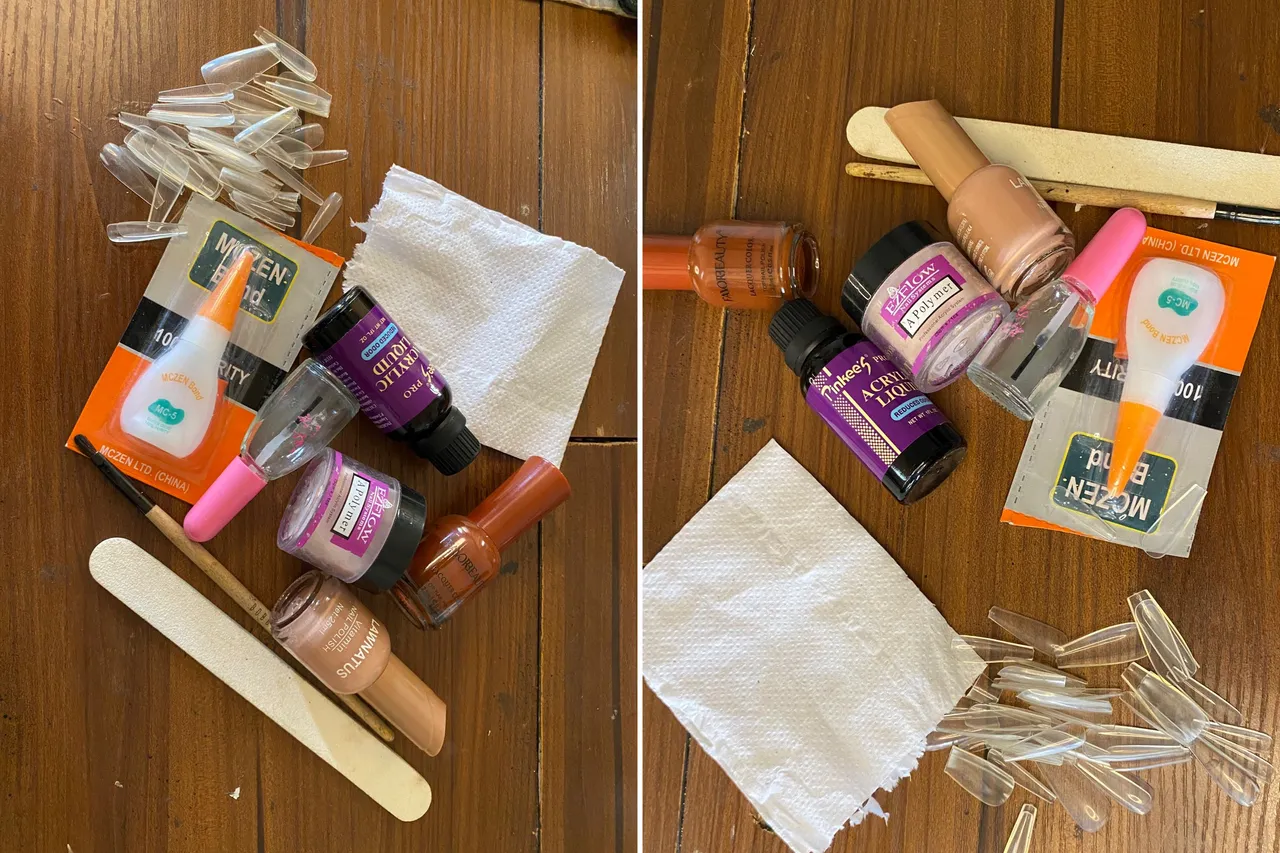
Material Needed
Nails extensions
Nail glue
Paper towel
Acrylic Liquid
Nail polish of your choice
Clear nail polish
Acrylic powder
Nail File
steep Brush
Nails acetone
cotton ball
STEP BY STEP PROCESS
Step 1
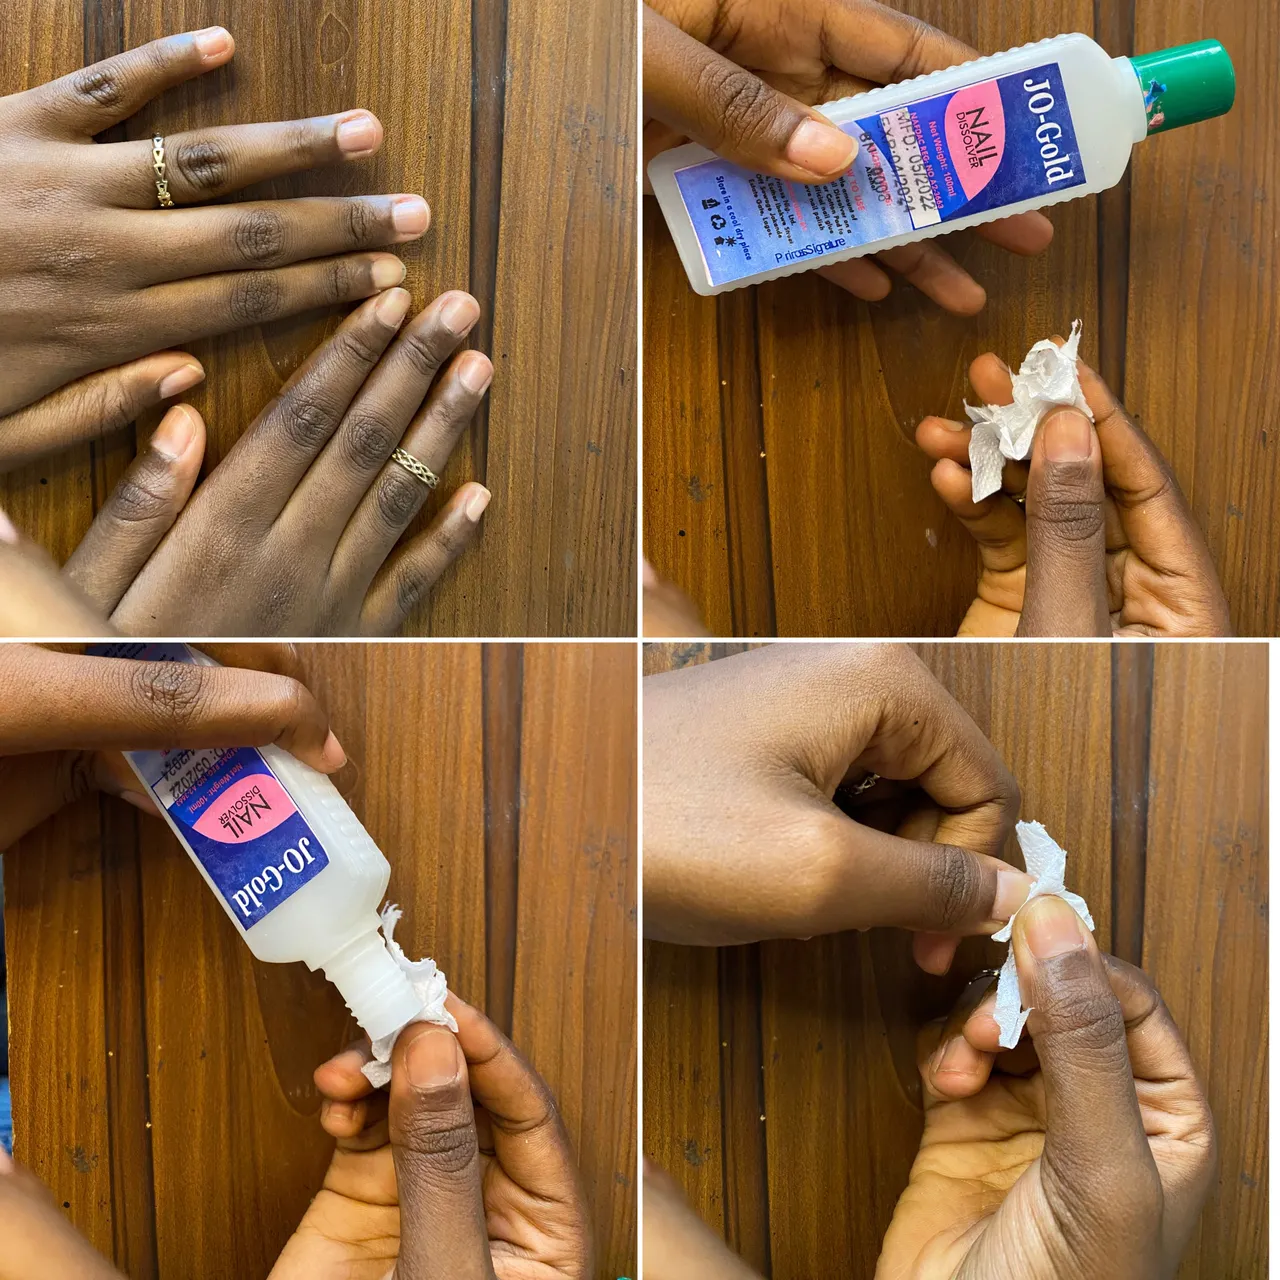
Using some acetone solution i am cleaning my nail beds with a cotton ball which i had soaked with aceton, this i am doing to get any debri and oil on my nails for a clean surfeace to work with.
Step 2
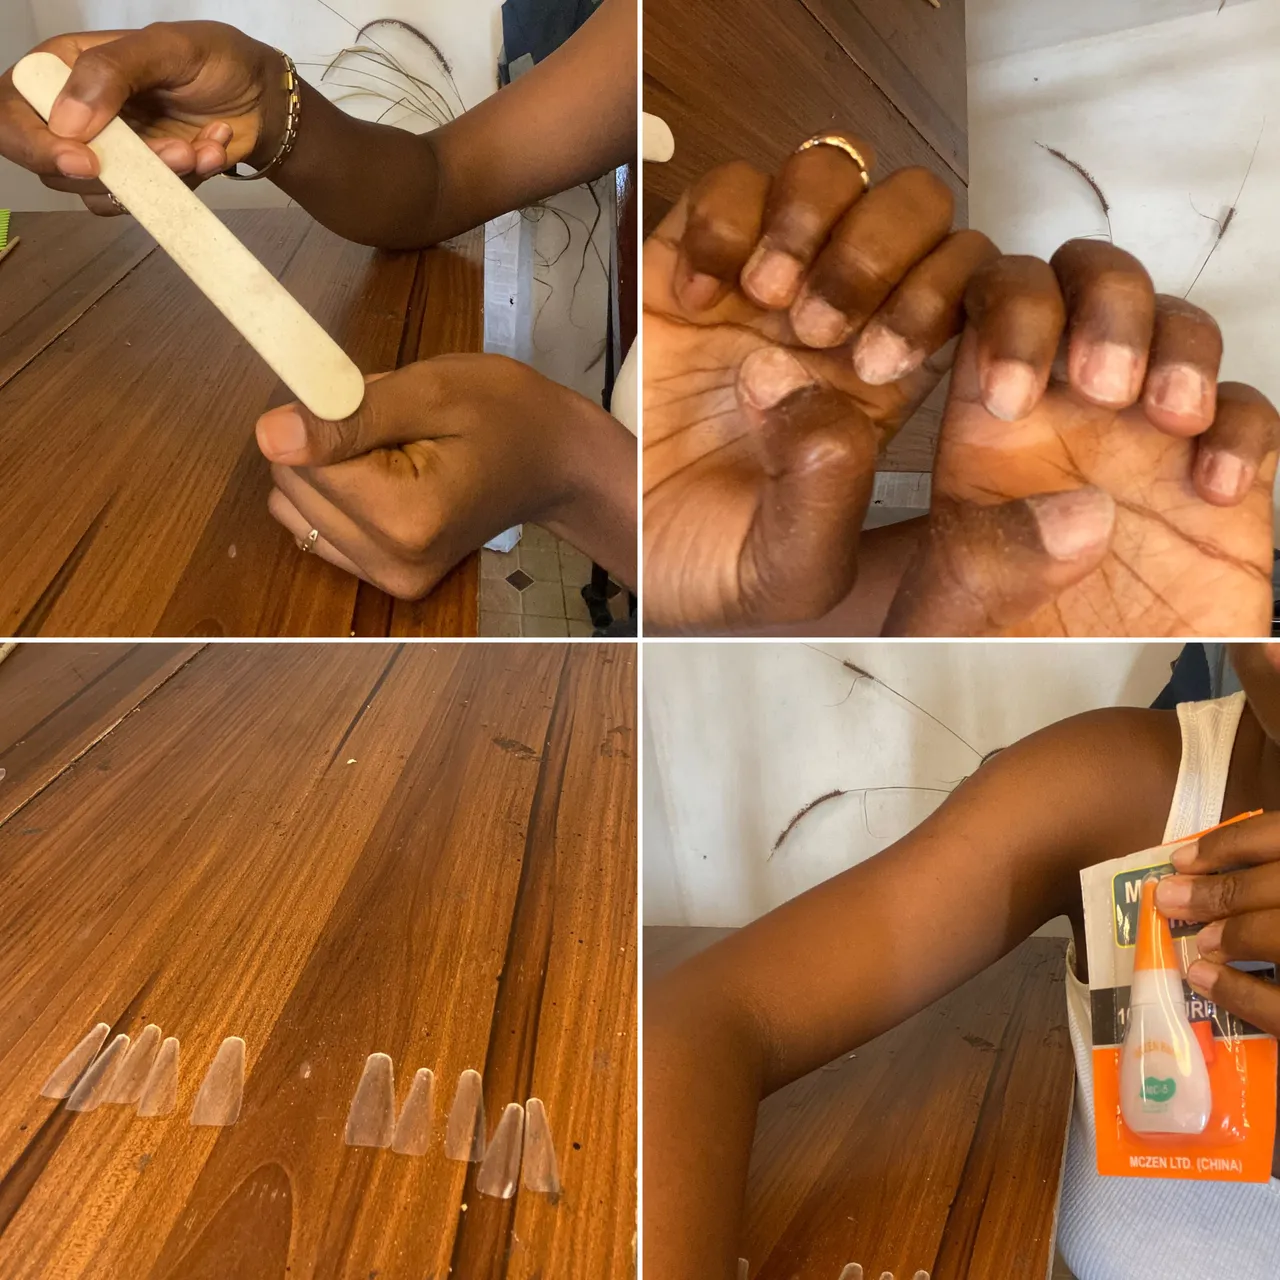
In the next step i am filing my nail beds using a nail file, this is so that the surface of my nails is rough for the glue which i am going to use to with the nail extension to adhere well to my nails.
Step 3
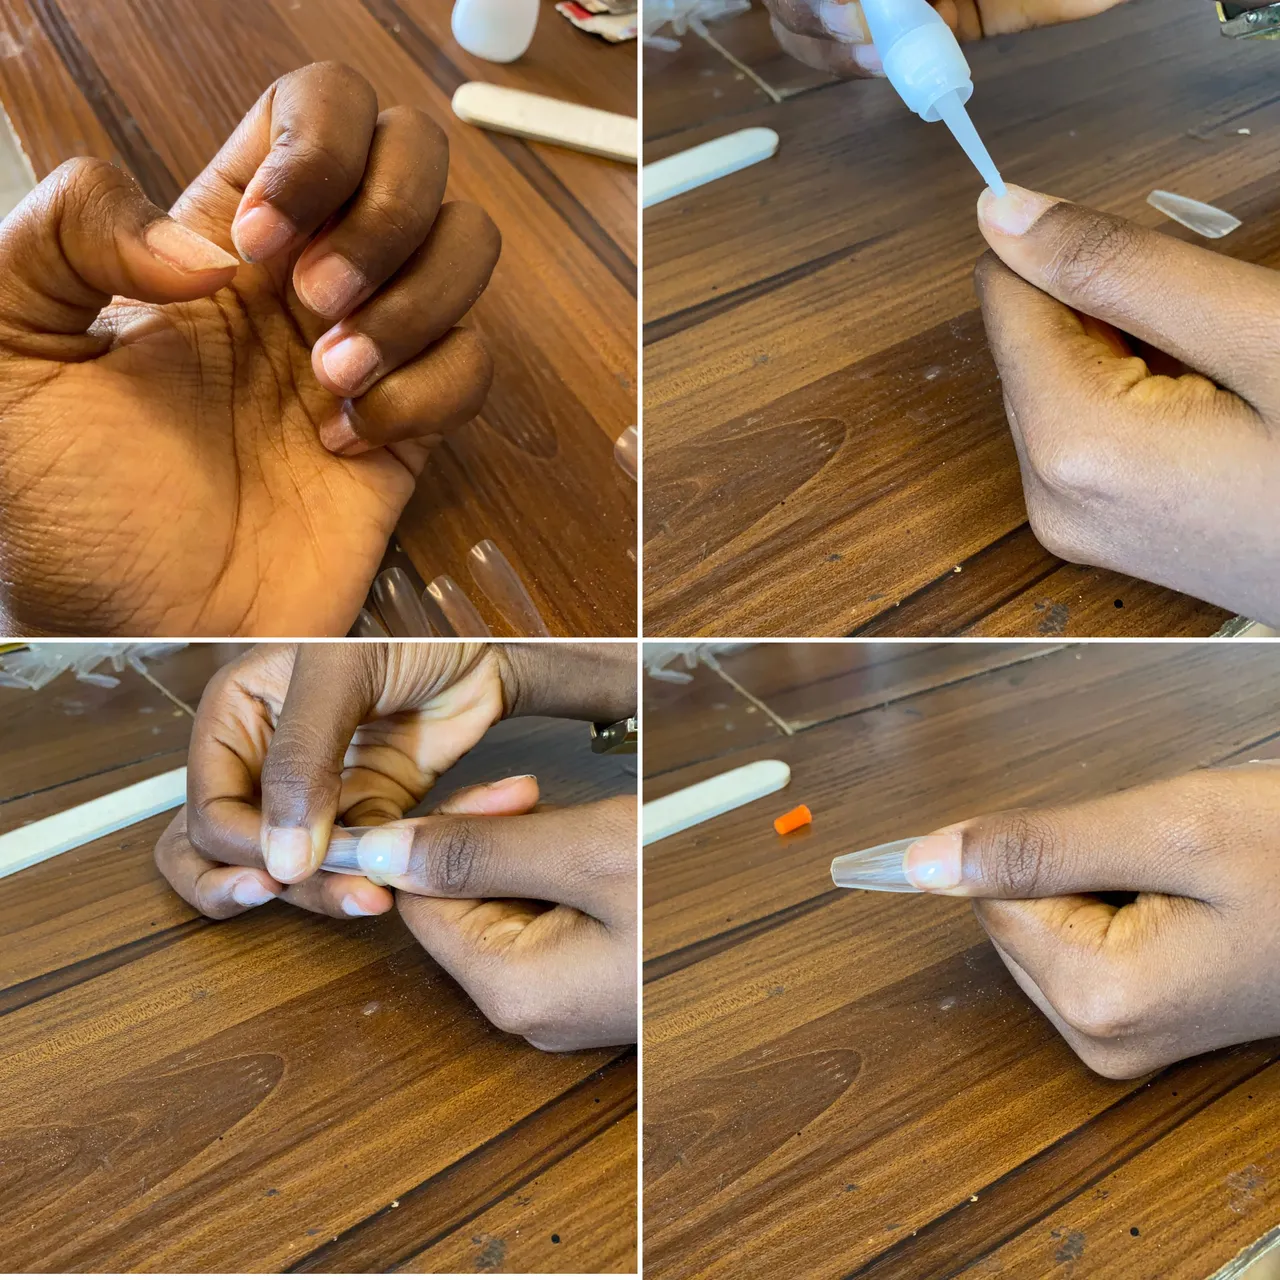
After filing i went ahead to choose the nail sizes which fit my real nails beds perfectly , then i am going ahead to apply some glue unto my nails and placing each of the ten the nail extension unto my nails beds.
step 4
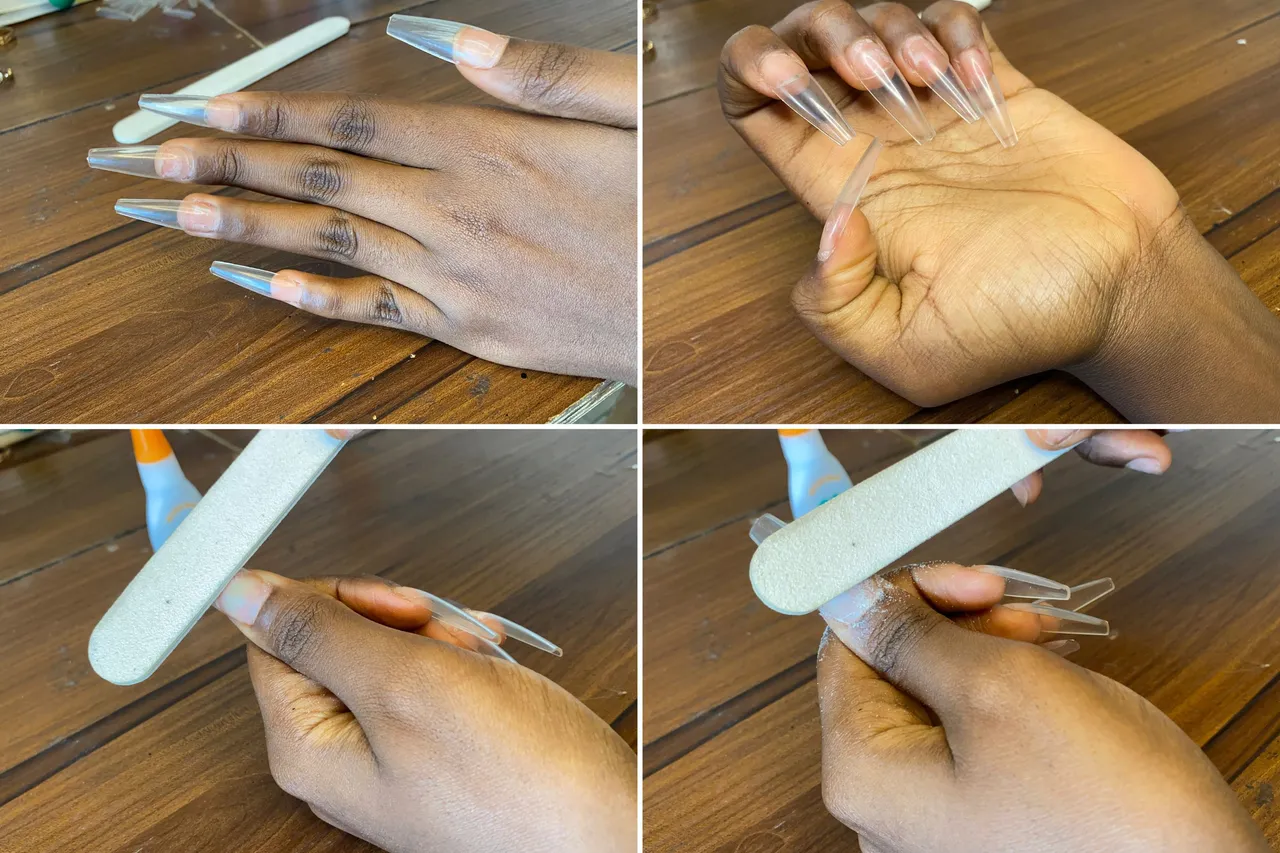
Here is a look of the nails after application, , the next thing i do is file down the point where the nail extension adhers to my nails beds, this is so that it appears seamless in the transition.
Step 5
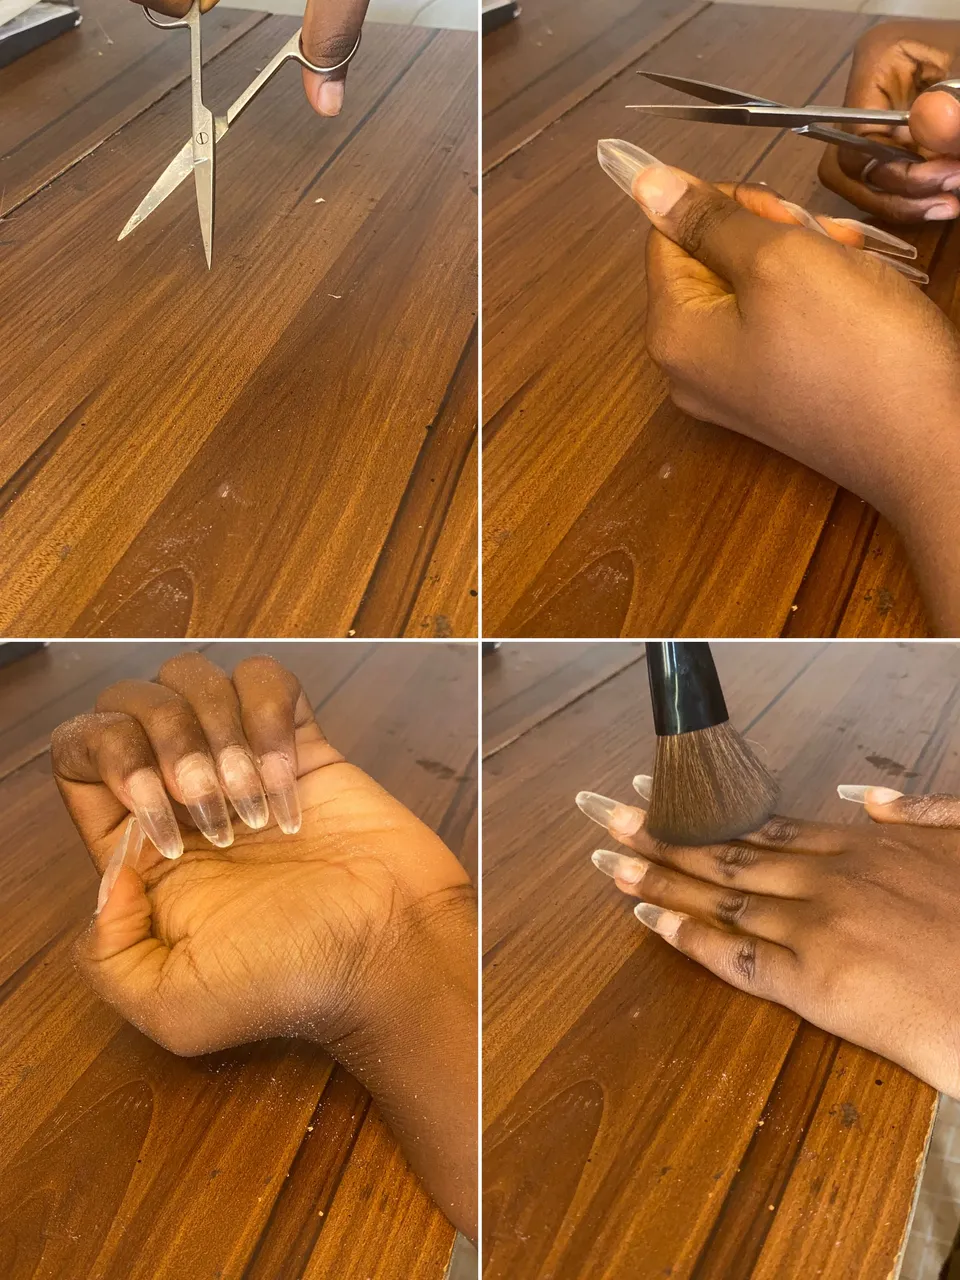
The next step is to shape the nails into my preferred shape, as you may be aware there a re different types of nails shape, today i am going for a almond shaped nails, i went ahead to cut the nails into a triangle-like shape, then went in with a nails file to do the rest of the shop. After filing i am wiping off the dust from my hands
Step 6
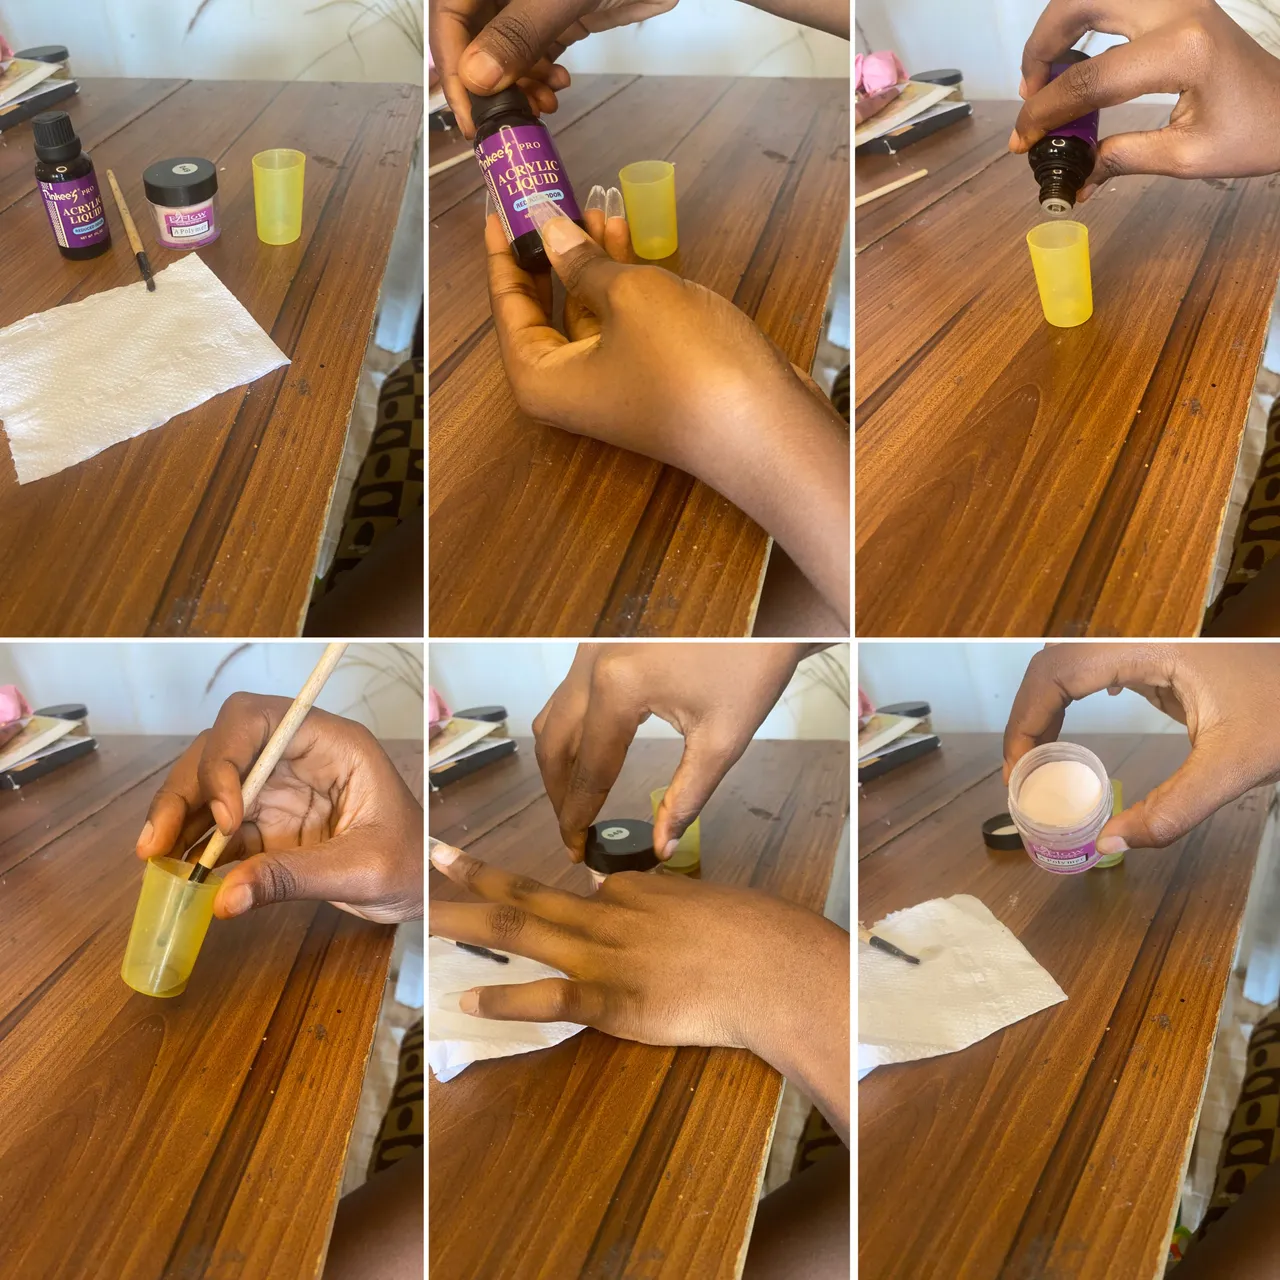
This step is where we incorporate the acrylic process, to do this i am setting out the acrylic powder which is a nude shade,the acrylic liquid solution,the steep brush and a small cup container, taking the acrylic liquid i and pouring a little amount into the cup, next i deep the steep brush into the solution and next into the acrylic powder, this is to create a sort of cement consistency on the brush with this step.
Step 7

Here we are going to be building the acrylic unto our nails using a swiping motion to cat the entire nails shape, i did this building process about 3 times to achieve a thick layer of acrylic nails, although it appears rough.
Step 8
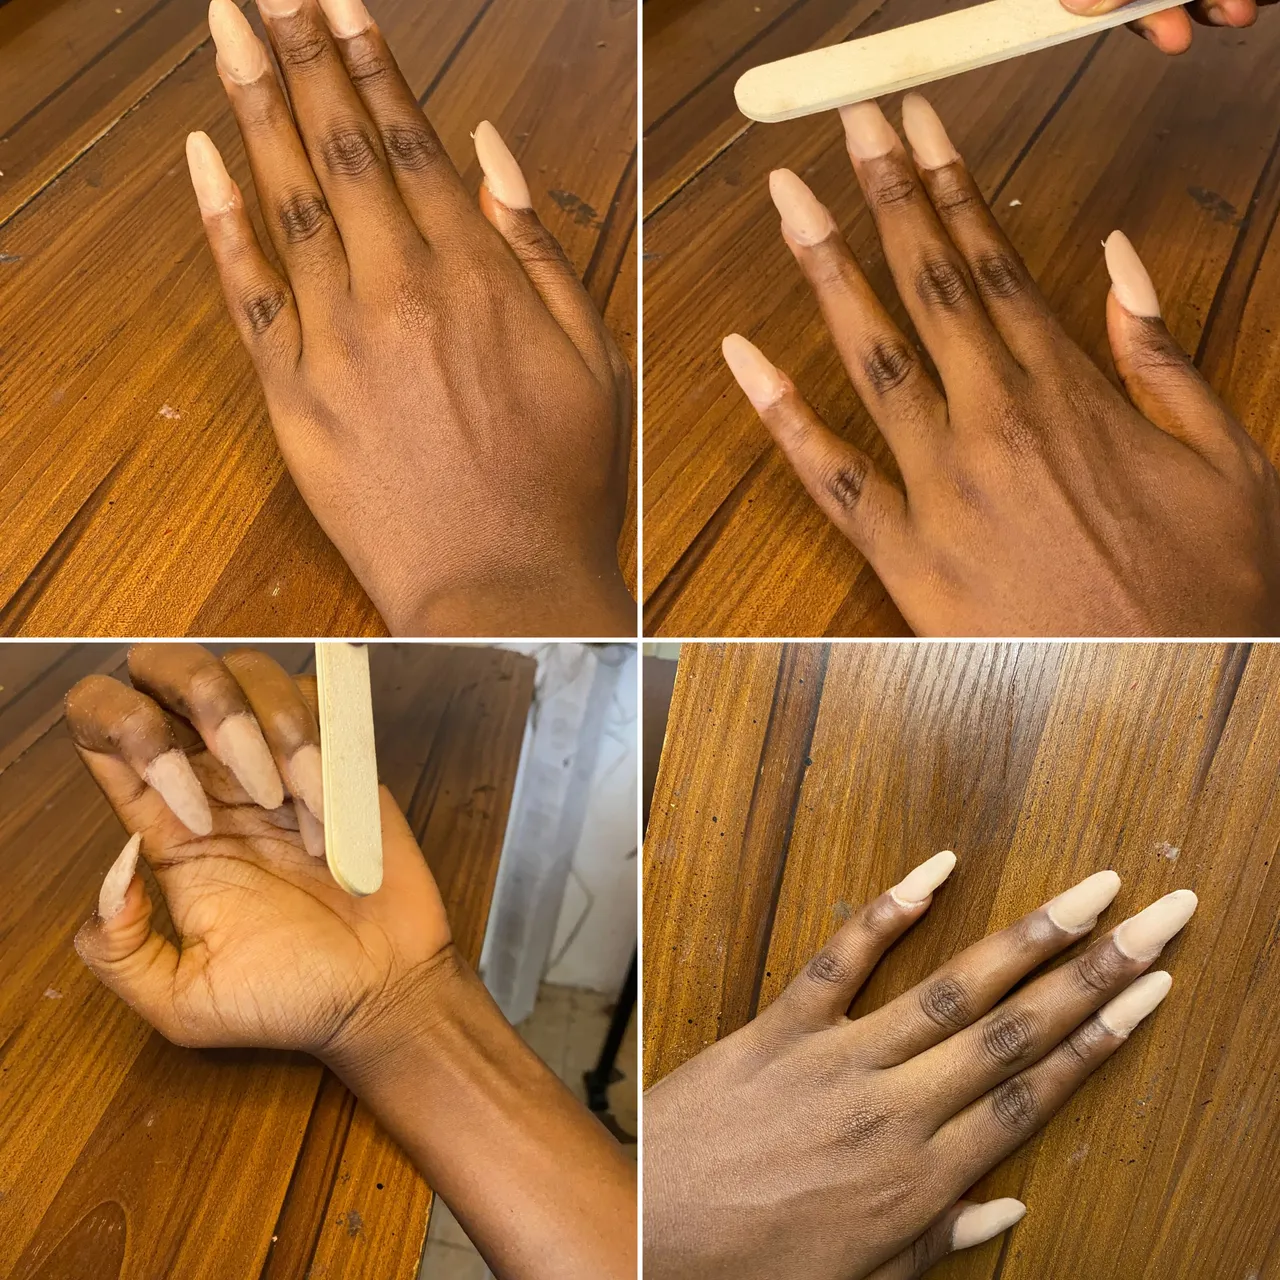
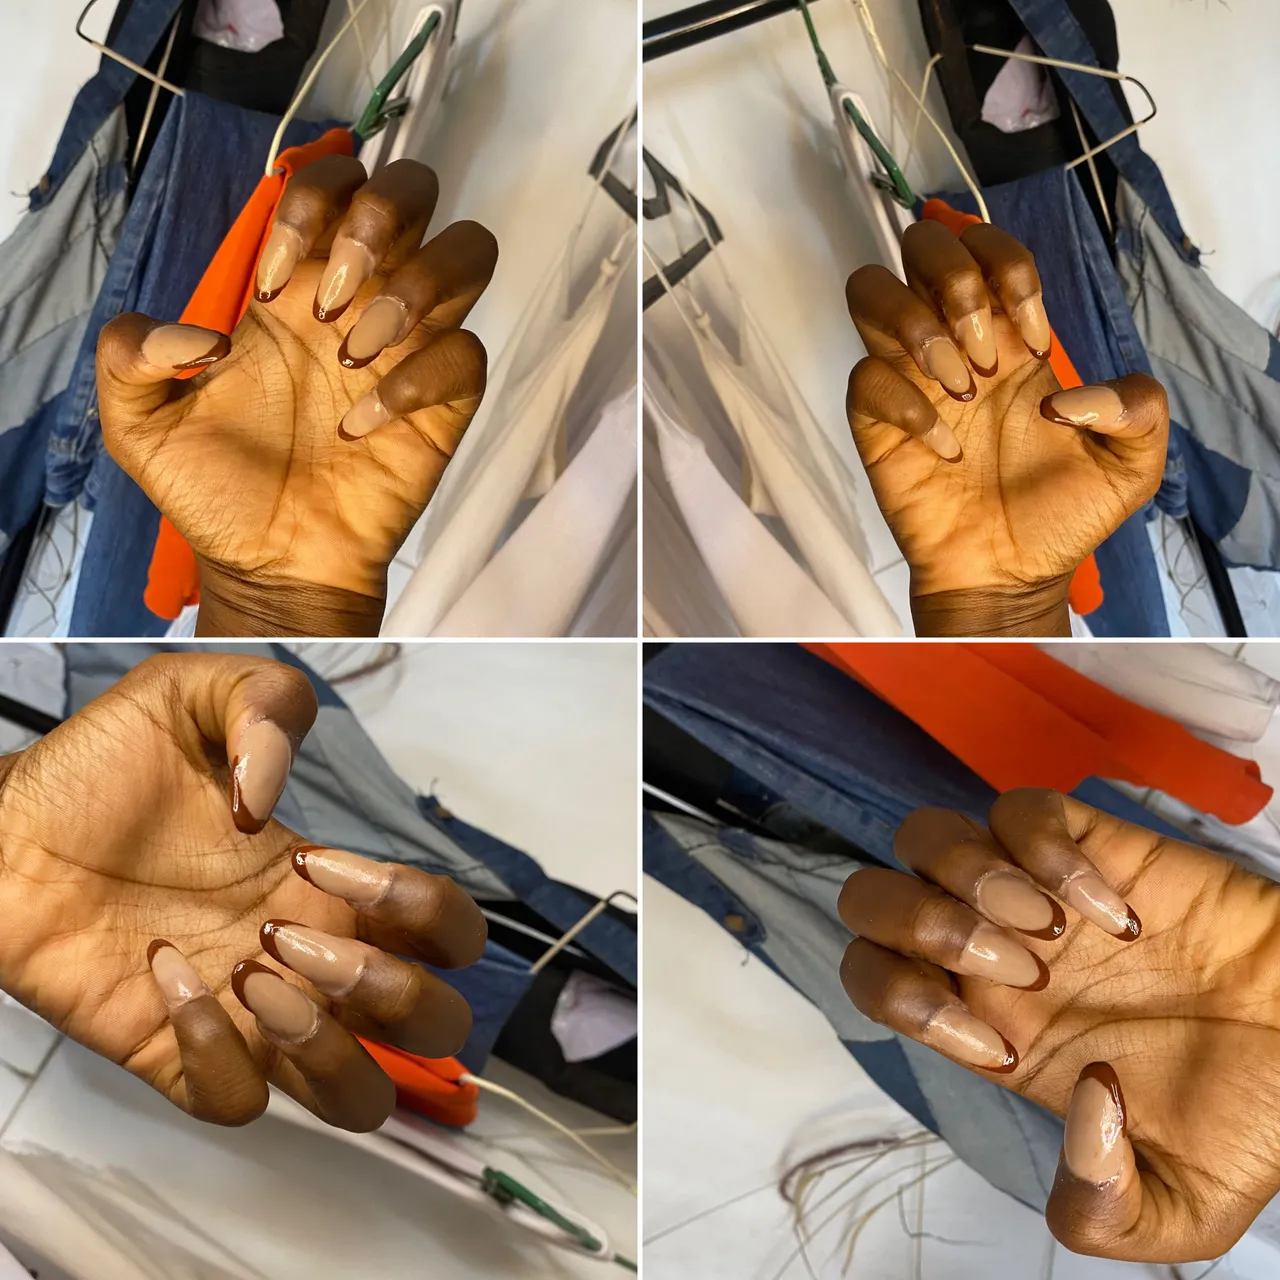
After i was satisfied with the thickness of the nails, i am going ahead to file the nails so that it has a smooth surface and this is the look!!
Step 9
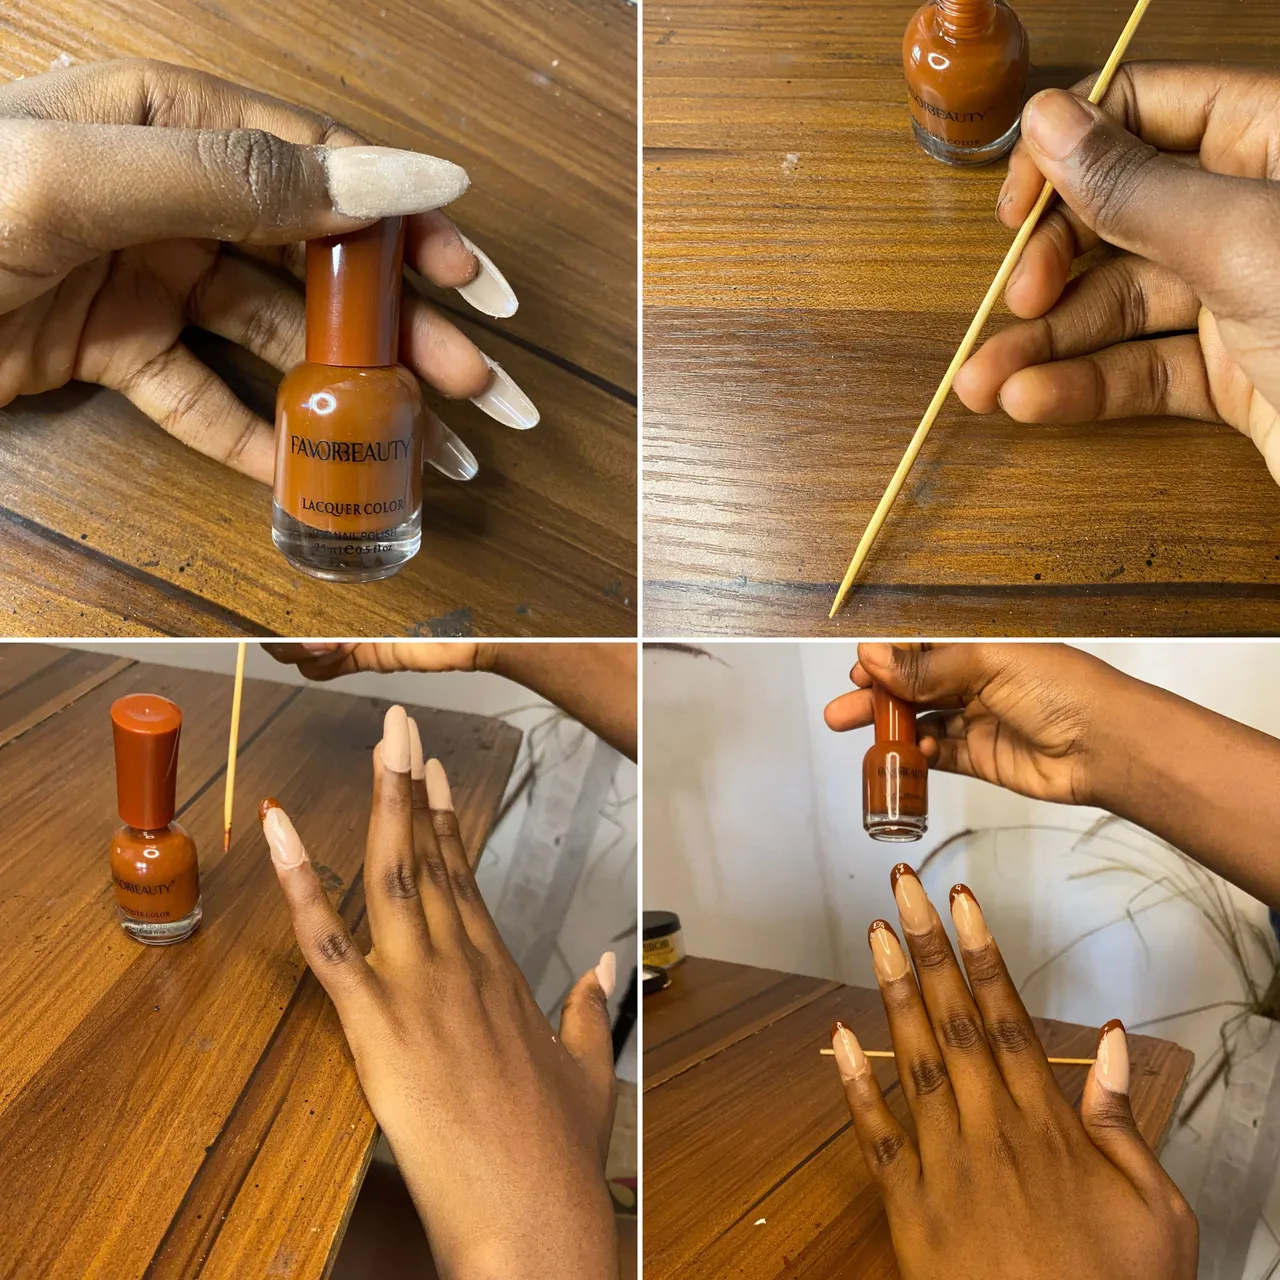
In this step i am creating a designing of my choice with regular nail polish instead of gel nails polish because this is what i had available.I am using the brown nails polish because i was going for a fall inspired nails, i went ahead to use the pointy edge of a cooking bamboo stick to create a curve at the pointy part of the nails.I did two coats of nail polish after creating the curve.
Step 10
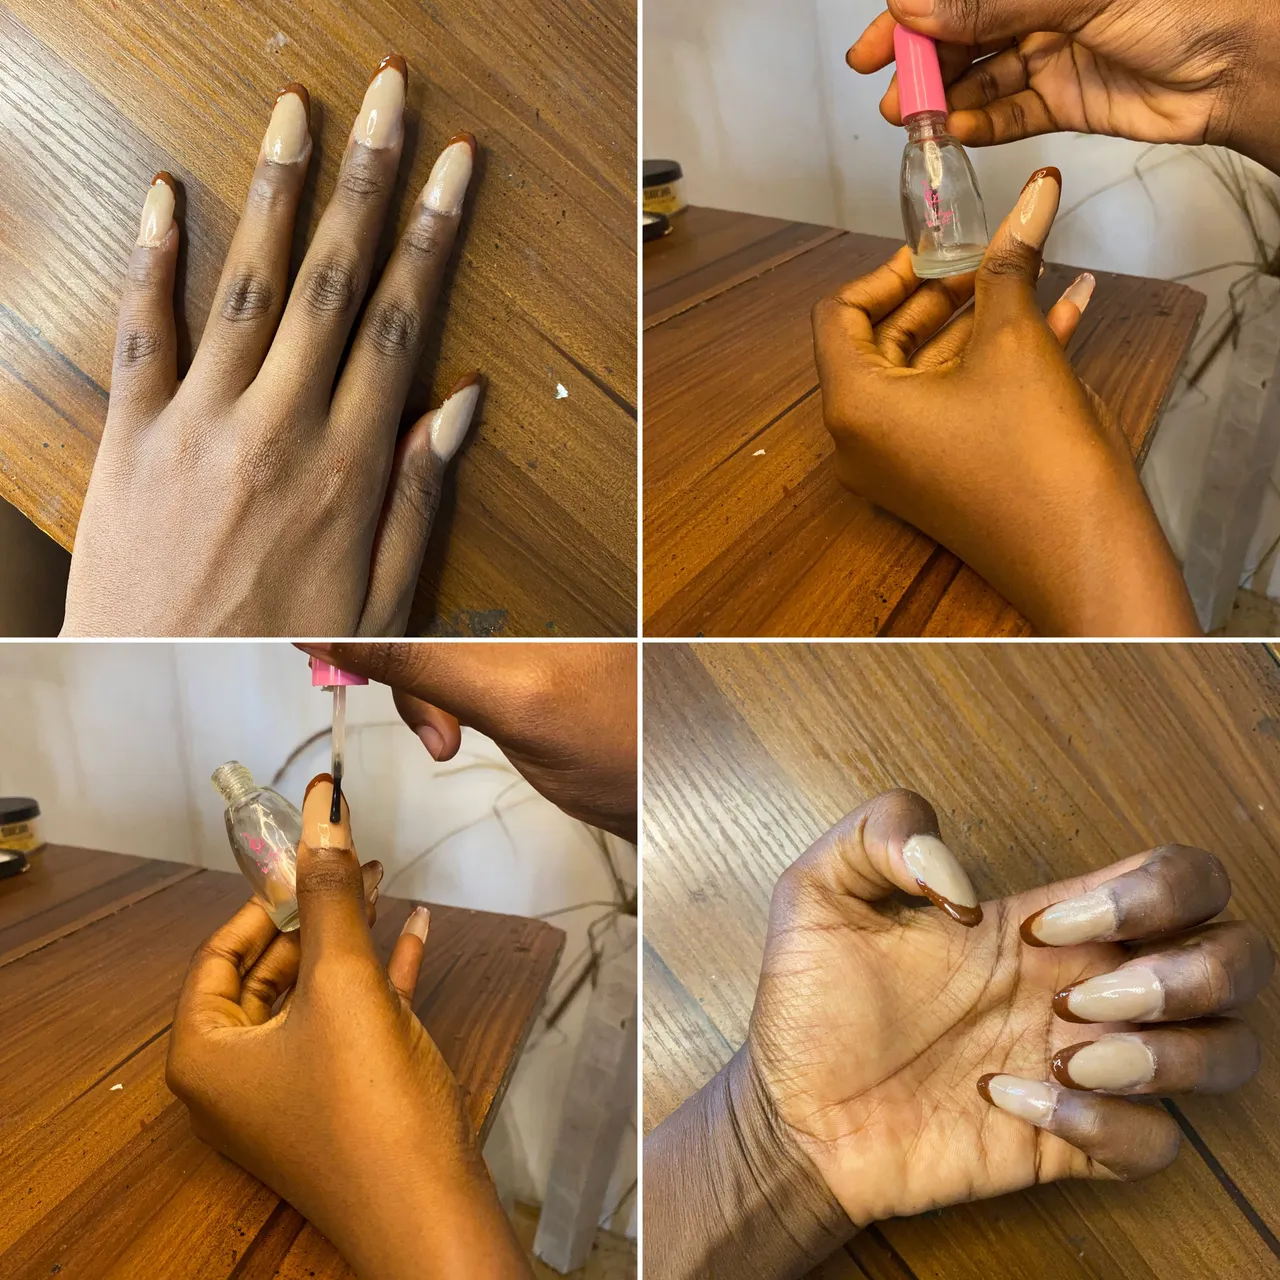
I then did a top coat of clear regular nail polish instead of gel clear nail polish.this sis to give the nails a good glossy shine and for a luxurious look.
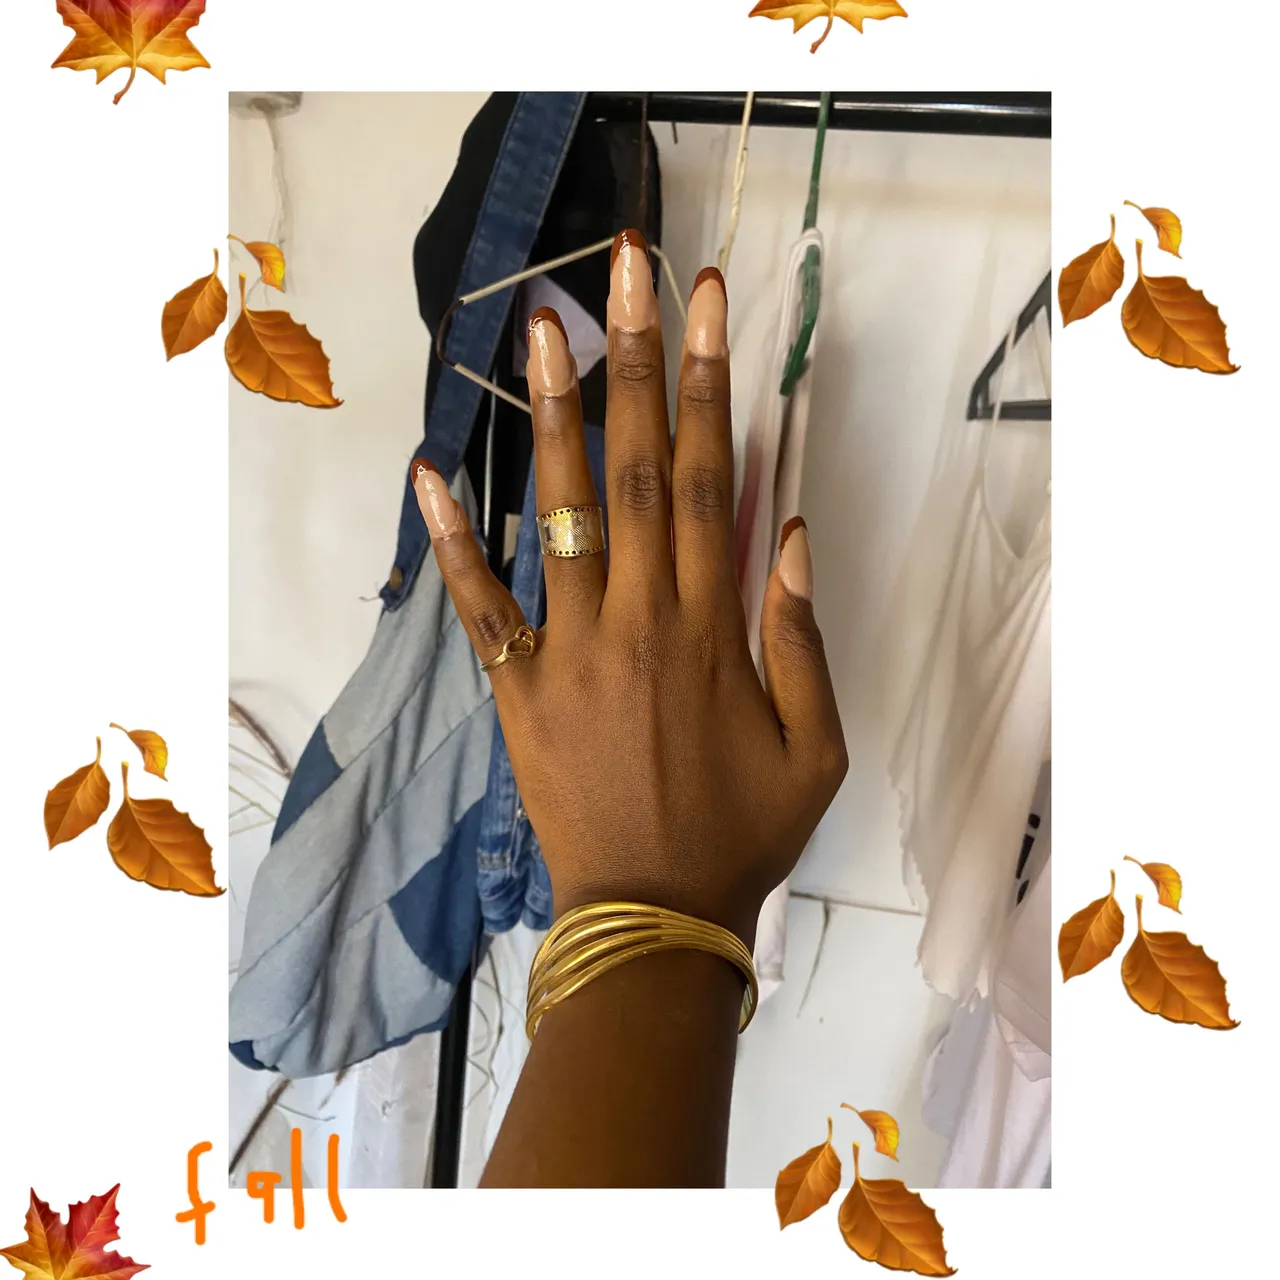
And This Was The Final Result!!
What do you think of the creative beauty #diy be sure to comment your thoughts and if you would try it out i am happy i got to share this affordable beauty #tutorial with you, i hope this helps and inspire you to try it out. thanks foe reading my blog, and i would see you next time!!. ciao.