A mi modo de ver las cosas es el mejor pues por ser el original, el que salió primero tiene una serie de aditamentos y complementos que otros no tienen, aparte de que constantemente adicionan cosas nuevas como la reciente actualización 27.0 que nos ha dejado muchas cosas nuevas que probar.
For some time now, several people have asked me how I make my gameplay and streams, to make them several things are needed but one of the most important is the use of OBS Studio which is an open source program for video recording and stream.
To my way of seeing things is the best because for being the original, which came out first has a number of additions and supplements that others do not have, besides that constantly add new things like the recent update 27.0 that has left us many new things to try.
En esta serie de posts iré publicando tutoriales de como usarlo para sus diferentes funciones, que la verdad son muchas y no cabrían en un solo post, por eso lo dividiré en varias partes y esta publicación es la primera que tratará de lo básico, como instalarlo como configurar una escena y como grabar sobre una foto o diapositivas o un video.
Cabe mencionar que existen en la web otros programas con el mismo fin , pero OBS Studio para mi es el mas amigable al uso, aparte de que hay muchos que se inspiran en este, así que porque usar las copias si puedes usar el original.
In this series of posts I will be publishing tutorials on how to use it for its different functions, which are many and would not fit in a single post, so I will divide it into several parts and this publication is the first one that will deal with the basics, how to install it, how to set up a scene and how recording over a photo or slideshow or a video.
It is worth mentioning that there are other programs on the web with the same purpose, but OBS Studio for me is the most friendly to use, besides there are many that are inspired by this, so why use copies if you can use the original.
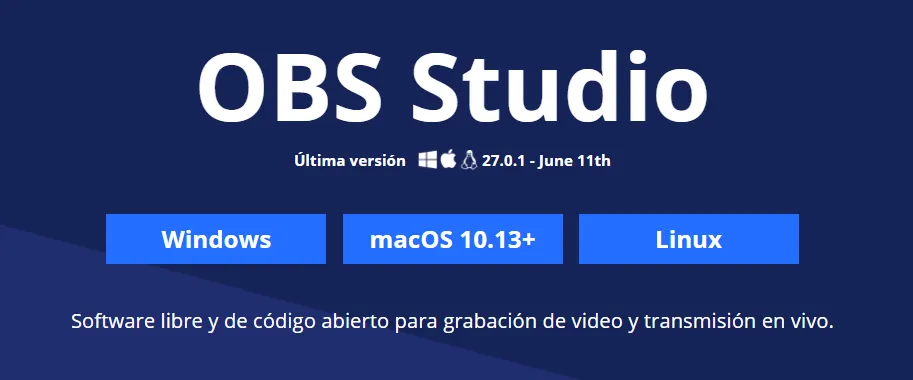


Como ya mencioné el OBS es una programa de código abierto gratuito que puedes descargar desde su pagina oficial que te dejo aquí que nos ayudará en la creación de nuestros videos y streams cuenta con una interfaz muy amigable y su función principal es gestionar todos los complementos que queramos incluir en nuestras creaciones, como música, voz, video, fotos etc...
Después de haberlo descargado que por cierto es compatible con Linux, Mac y Windows nos queda la parte de la configuración, que no es tan complicada, aquí te iré guiando paso a paso en como configurarlo para hacer una captura de pantalla y grabar lo que sucede en tu navegador mientras puedes añadir tu voz para describir o comentar tu video.
As I mentioned the OBS is a free open source program that you can download from its official website that I leave you here that will help us in the creation of our videos and streams has a very friendly interface and its main function is to manage all the add-ons we want to include in our creations, such as music, voice, video, photos etc ....
After downloading it, which by the way is compatible with Linux, Mac and Windows, we are left with the configuration part, which is not so complicated, here I will guide you step by step on how to configure it to take a screenshot and record what happens in your browser while you can add your voice to describe or comment on your video.
Vamos a la configuración básica, en primera tu OBS aparecerá así como te muestro en la siguiente captura, parece un poco enredado pero no lo es , la cosa es que te familiarices con los elementos que vamos a usar.
Let's go to the basic configuration, at first your OBS will appear as I show you in the following screenshot, it seems a little complicated but it is not, the thing is that you become familiar with the elements that we are going to use.
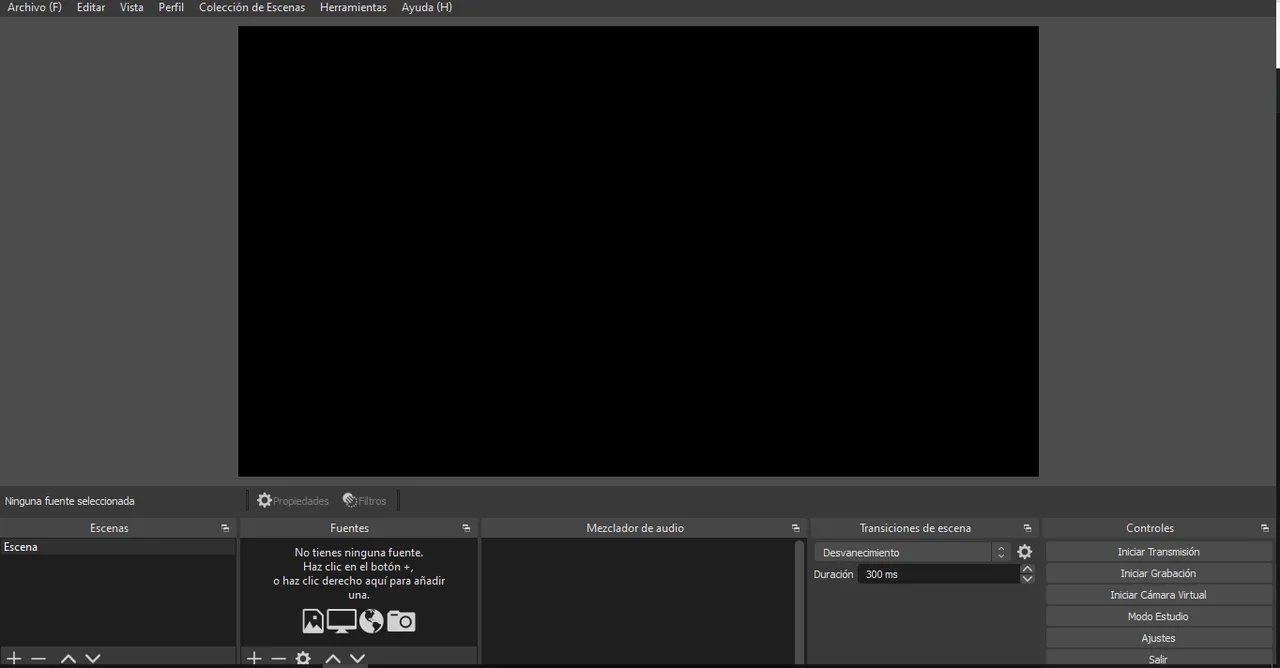
La pantalla negra de en medio es tu lienzo donde iremos poniendo las fuentes o complementos que se van a capturar en tu creación, por ejemplo voy a poner una foto para mostrar como queda, para esto debemos ir a el apartado de abajo a la izquierda y presionar el botón de escena ahí crearemos una nueva escena y le iremos aumentando las fuentes que tendrá en ella.
The black screen in the middle is your canvas where we will put the fonts or complements that are going to be captured in your creation, for example I am going to put a photo to show how it looks, for this we must go to the section at the bottom left and press the scene button there we will create a new scene and we will increase the fonts that it will have in it.
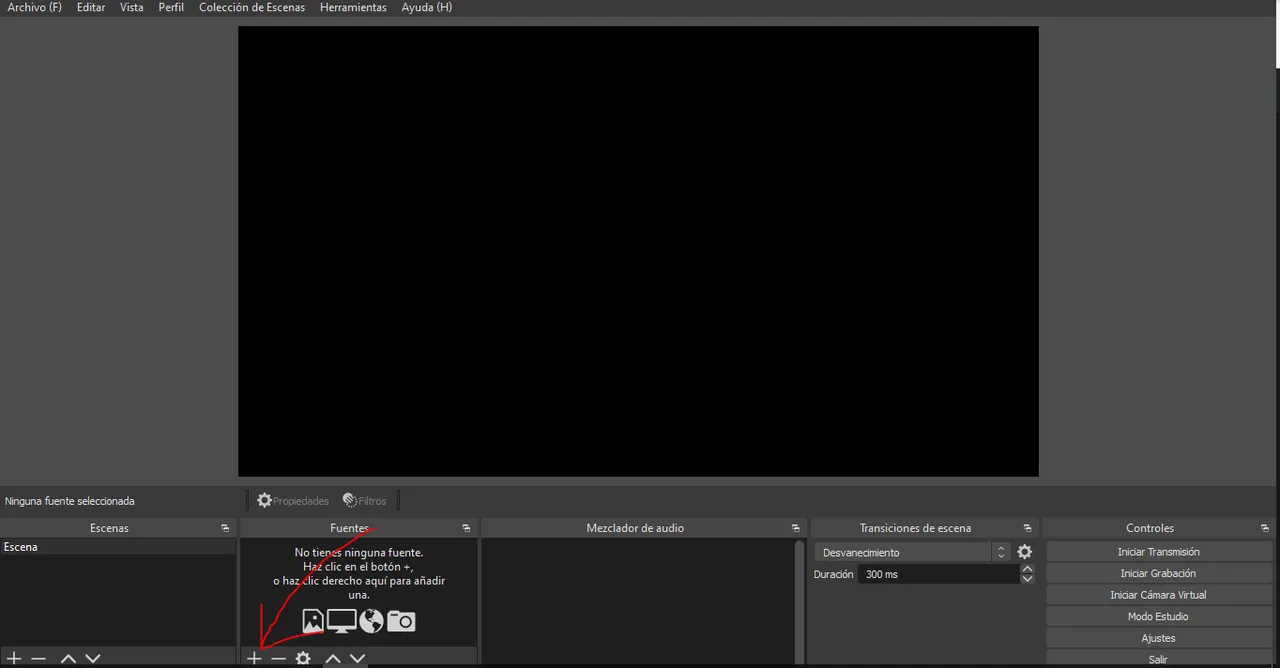
Por ejemplo esta escena la he llamado prueba 1 y le he añadido una fuente de imagen o sea una foto, puedes elegir la foto de tu preferencia, yo lo hice con una foto pero esto puede ser con una serie de fotos a modo de diapositivas o un video, captura de pantalla o cualquier fuente multimedia.
For example this scene I have called it test 1 and I have added an image source or a photo, you can choose the photo of your preference, I did it with a photo but this can be with a series of photos as a slideshow or a video, screenshot or any multimedia source.
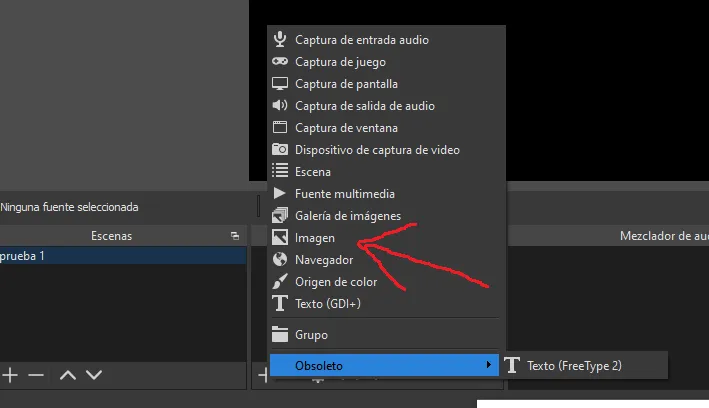
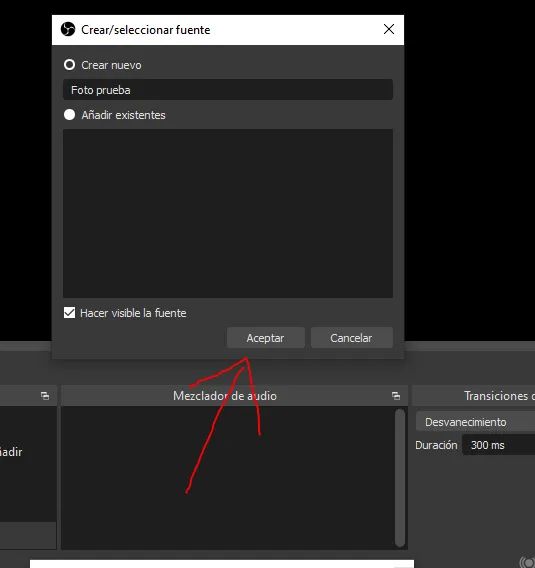
Elegimos la fuente que queremos agregar a nuestra escena en este caso una imagen, la nombramos, para que no se nos confunda con demás posteriores y le damos aceptar.
We choose the source that we want to add to our scene, in this case an image, we name it, so that we do not confuse it with other later ones and we accept it.
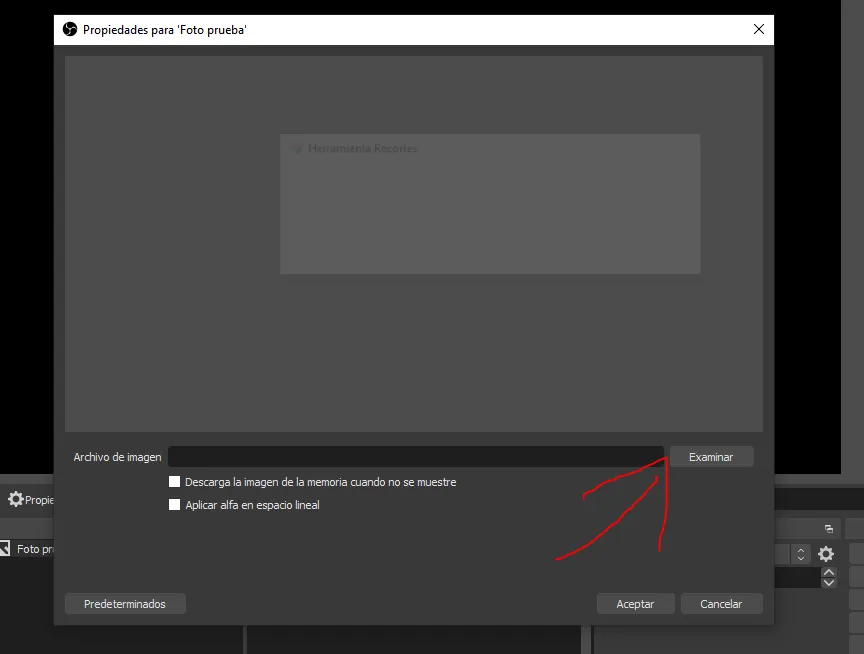
Nos saldrá un recuadro donde debemos seleccionar la ruta de donde va a tomar la foto o la fuente de nuestro PC el OBS y después acomodamos la imagen o fuente a nuestro lienzo.
We will get a box where we must select the path where the OBS will take the photo or source and then we place the image or source to our canvas.
Después de esto casi terminamos pues como vamos a grabar si no tenemos sonido o sea nuestra melodiosa voz, para esto nos regresamos a el apartado de fuentes le damos a la tecla de + pero esta vez elegimos captura de entrada de audio debe estar de primero.
After this we are almost finished because as we are going to record if we do not have sound or our melodious voice, for this we return to the section of sources we give to the key of + but this time we choose audio input capture must be of first.
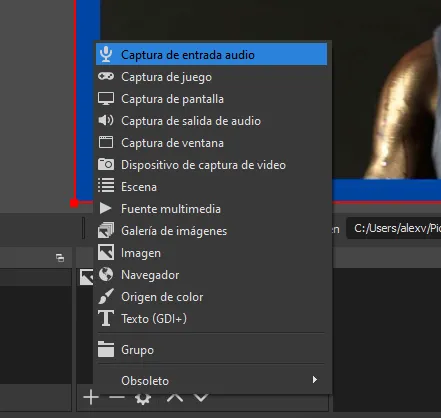
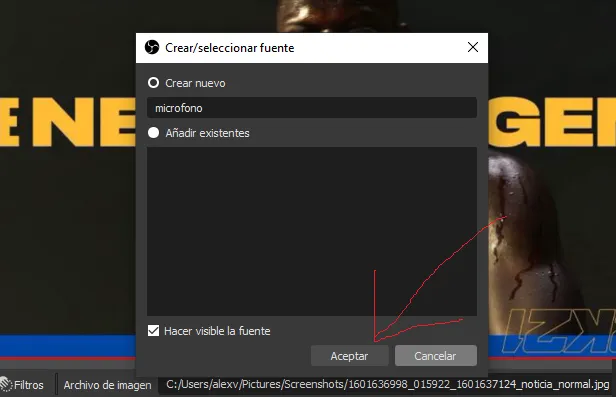
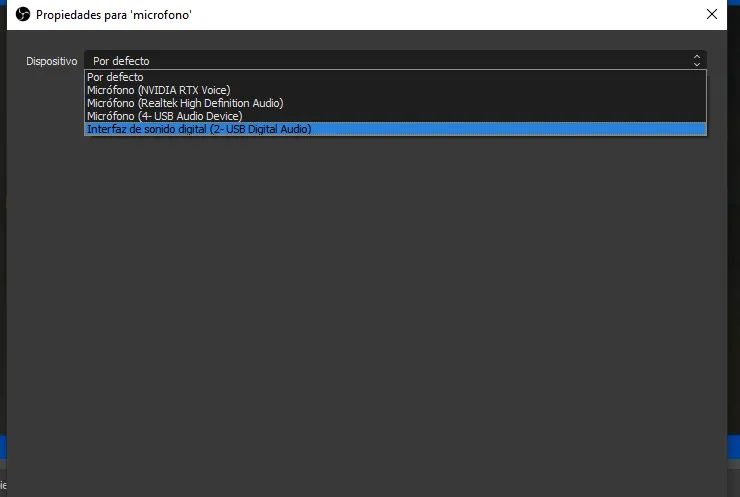
El procedimiento es el mismo que al ingresar la foto , solo que al seleccionar al renombrar la fuente, te recomiendo que le pongas micrófono para no confundirte, tienes que elegir entre todos los micrófonos que tenga tu PC activados en ese momento, también hay forma de obtener un sonido mas limpio con los filtros y parámetros que se le pueden ajustar a al micrófono, pero eso ya lo trataremos en otro post.
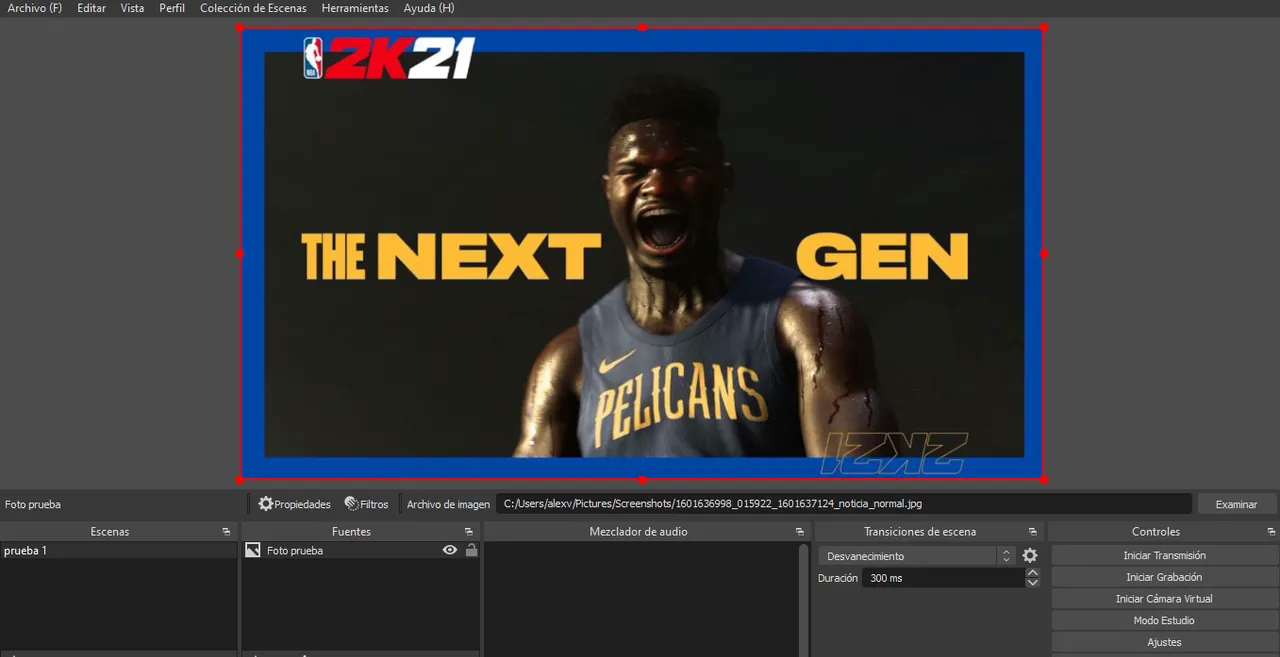
De igual forma para este ejemplo puse una foto como fondo de nuestro video pero las posibilidades son ilimitadas, todo se puede agregar mientras sea multimedia, en próximos posts de este tipo les mostrarte como hacerlo con video o con alguna captura de pantalla y poniendo tu imagen sobre tus transmisiones o videos.
The procedure is the same as when entering the photo, only when selecting the rename the source, I recommend that you put microphone to avoid confusion, you have to choose between all the microphones that your PC has activated at that time, there is also a way to get a cleaner sound with filters and parameters that can be adjusted to the microphone, but that will be discussed in another post.
In the same way for this example I put a photo as background of our video but the possibilities are unlimited, everything can be added as long as it is multimedia, in next posts of this type I will show you how to do it with video or with a screenshot and putting your image on your transmissions or videos.
Después de todo este procedimiento ya puedes apretar el botón donde dice iniciar grabación y por defecto los videos que grabes se irán a tu carpeta de videos, así de sencillo, cuando quieras terminar de grabar solamente le das al botón de detener grabación y listo, no tiene ciencia, apartar de esto que enseñe tu puedes experimentar diferentes cosas como en vez de una foto poner un video y comentarlo por ejemplo o capturar tu pantalla y comentar lo que sucede en ella y porque no, grabar tus primeros gameplays.
After all this procedure you can press the button where it says start recording and by default the videos you record will go to your video folder, it's that simple, when you want to finish recording just hit the stop recording button and that's it, it has no science, apart from this I teach you can experiment different things like instead of a photo put a video and comment it for example or capture your screen and comment what happens on it and why not, record your first gameplays.
Es todo por mi parte amigos espero que sea de utilidad esta información y no dejen de estar pendientes para próximos posts de este tema, para cualquier duda pueden mencionarla en los comentarios o ponerse en contacto conmigo en cualquiera de mis redes sociales que estén bien les deseo mucho éxito.
That's all for my part friends I hope this information is useful and do not fail to be pending for future posts on this topic, for any questions you can mention it in the comments or contact me on any of my social networks to be well I wish you much success.
Transleted with DeepL (Free Version)