I've been studying how to grow mushrooms for the last 3 months. I've gone through several fruitings and thought I would share a step-by-step show and tell.
Holy Moly, it's easier to do than telling. I haven't written seriously in three years!
As soon as the bags start fruiting, I will post pictures and recipes!
Things you will need
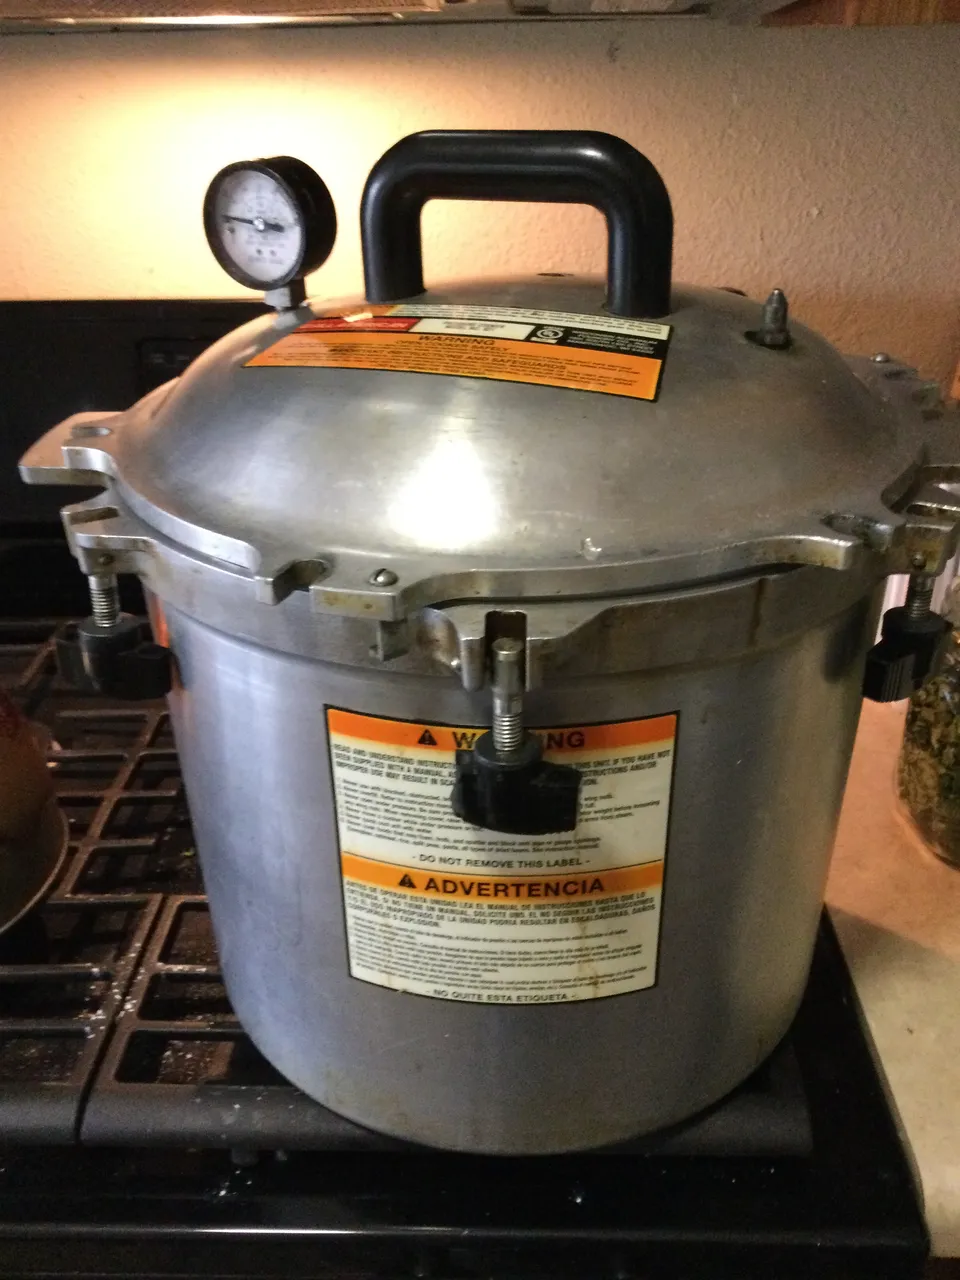
- Pressure Cooker (All American)
- Six Wide Mouth Pint Jars
- Mixing Bowls
- Grain of your choice
- Vermiculite
- I used liquid spoors and syringe
- Hydrogen Peroxide
- Barbeque lighter, I use my gas stovetop burners
- A Phillips screwdriver and a hammer
- Reusable sterile injection rubber plugs

- Poly-Fil
- Six wide-mouth canning lids and some tin foil to cover the lids when your pressure-cook the grain.

Place canning lids on clean wide-mouth pint jars and add two holes using your Philips screwdriver and a hammer. Add the sterile injection plug and stuff the second hole with the poly-fil. Remove lid and add your grain, replace the lid and cover with tinfoil
Step 1 – Prepare the Substrate
Step Requirements:
- For one wide-mouth pint jar, you will need 1.5 cups of grain.
- 1.5 cups of wheat grain or any kind of grain soaked for several hours in water.
Soak your grain in tap water or filtered water for a couple hours. It didn’t matter what kind of water I used because mushrooms are famous for filtering out and transforming toxins.
Step 2 – Sterilize the substrate
- Pressure Cooker.
- Water
- Stove Top.
Sterilization
- Fill your wide mouth pint jars with 1.5 cups of grain, leaving a good inch of space between the grain and the top of the jar. Make sure you have some kind of buffer between your jars and the bottom of your pressure cooker.
- Bring the Pressure cooker to 15psi using full heat, then turn down to maintain pressure for 2 hours. Make sure you have enough water in your pressure cooker!
- Allow the pressure cooker to cool down to room temperature. I leave my jars sit overnight.
Step 3- Inoculation
Step Requirements:
- Jars full of sterilized grain
- Syringe full of liquid spores
- Barbeque lighter or gas stovetop burner
- Rubbing Alcohol/Alcohol Wipes, or 3% hydrogen peroxide (I hate rubbing alcohol, it has lots of toxic crap in it.)
Tips: Wipe down all surfaces with your choice of sterilant. Try to keep room clutter and dust-free. If you dust or vacuum, wait a couple hours before you start inoculation. Turn off your heating or air conditioning. This will help keep the dust down, which may corrupt your inoculation process.å
- Use your choice of cleaner to clean the surface of your counters and stove, whatever you're going to touch. Have you noticed I keep everything really clean?
- Wash hands thoroughly.
- Preheat your oven to 350 degrees. This is called the “Open Door Sterilization Method.”
- Open the oven door, place a wooden (plastic melts) cutting board down, place the jars, spawn syringe, your work surface. You can use your top gas burners to sterilize your needles.
- Remove tinfoil
- Wipe down the top of your jars
- Shake your spore-filled syringe for at least 60 seconds. Sterilize the needle with your stovetop burner or your barbeque lighter.
- Place Jars on the open oven door, inject 1-3cc of spawn into an inoculation hole you’ve made. If you are using a resealable injection plug, you are good to go. If not, wipe down the inoculation area add poly-fil or breathable micro-tape.
- Store your jars in a dark area at room temperature, lions mane, and blue oyster mushrooms like cool rooms around 60 to 70 degrees.
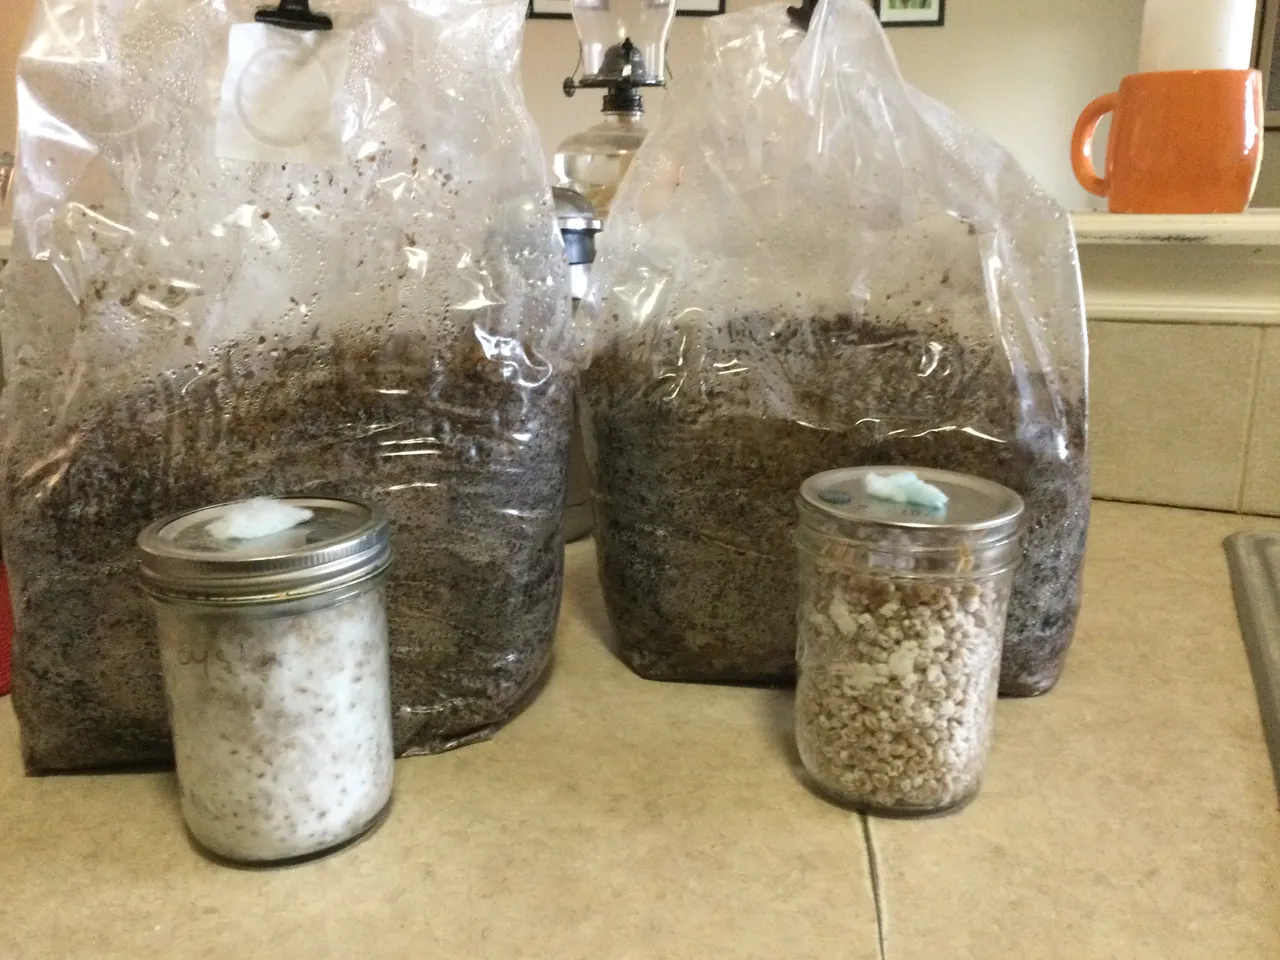
Steralized sawdust blocks and grain spawn
Step 4 – Wait
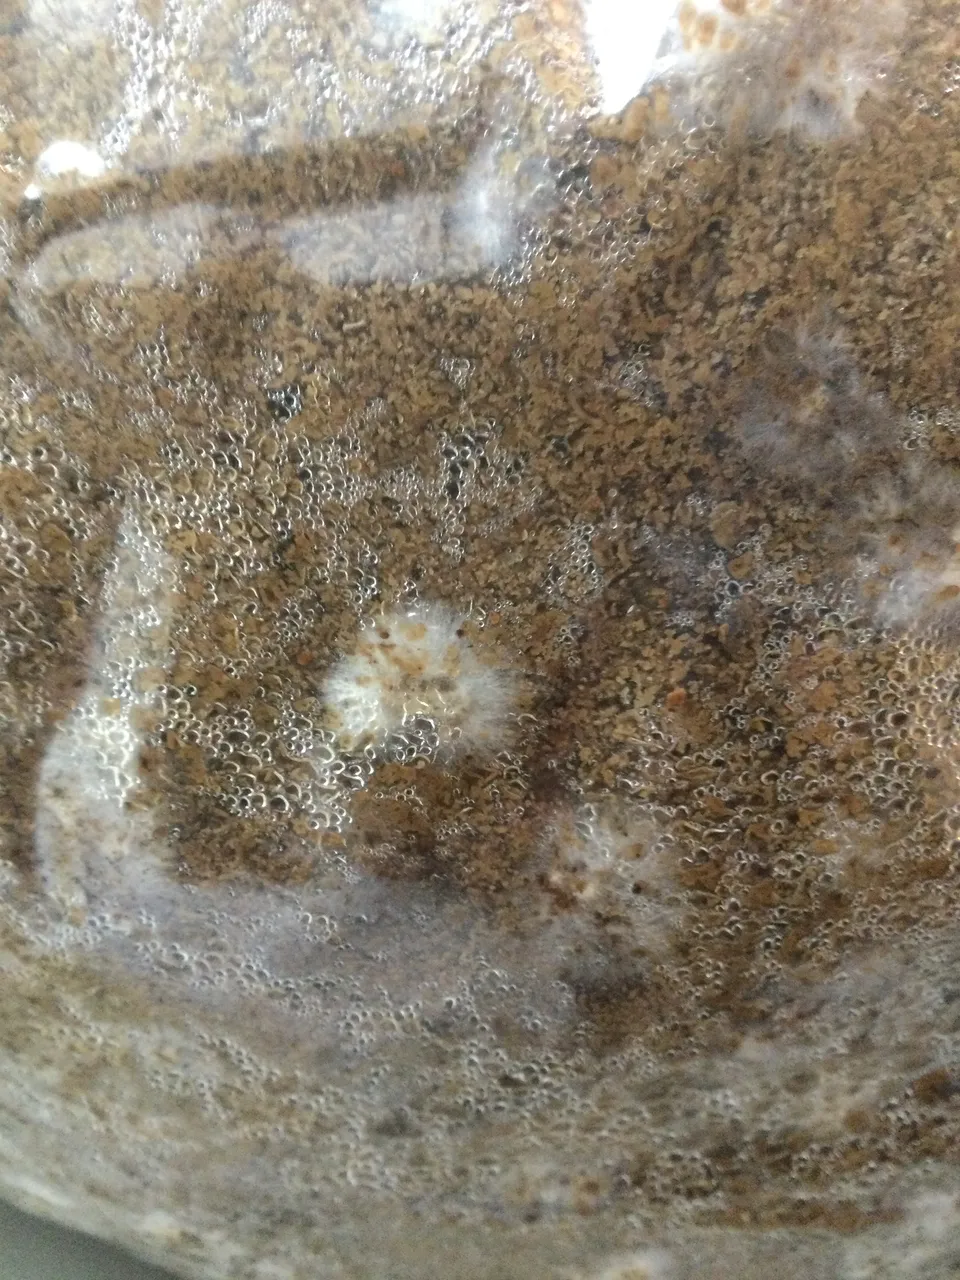
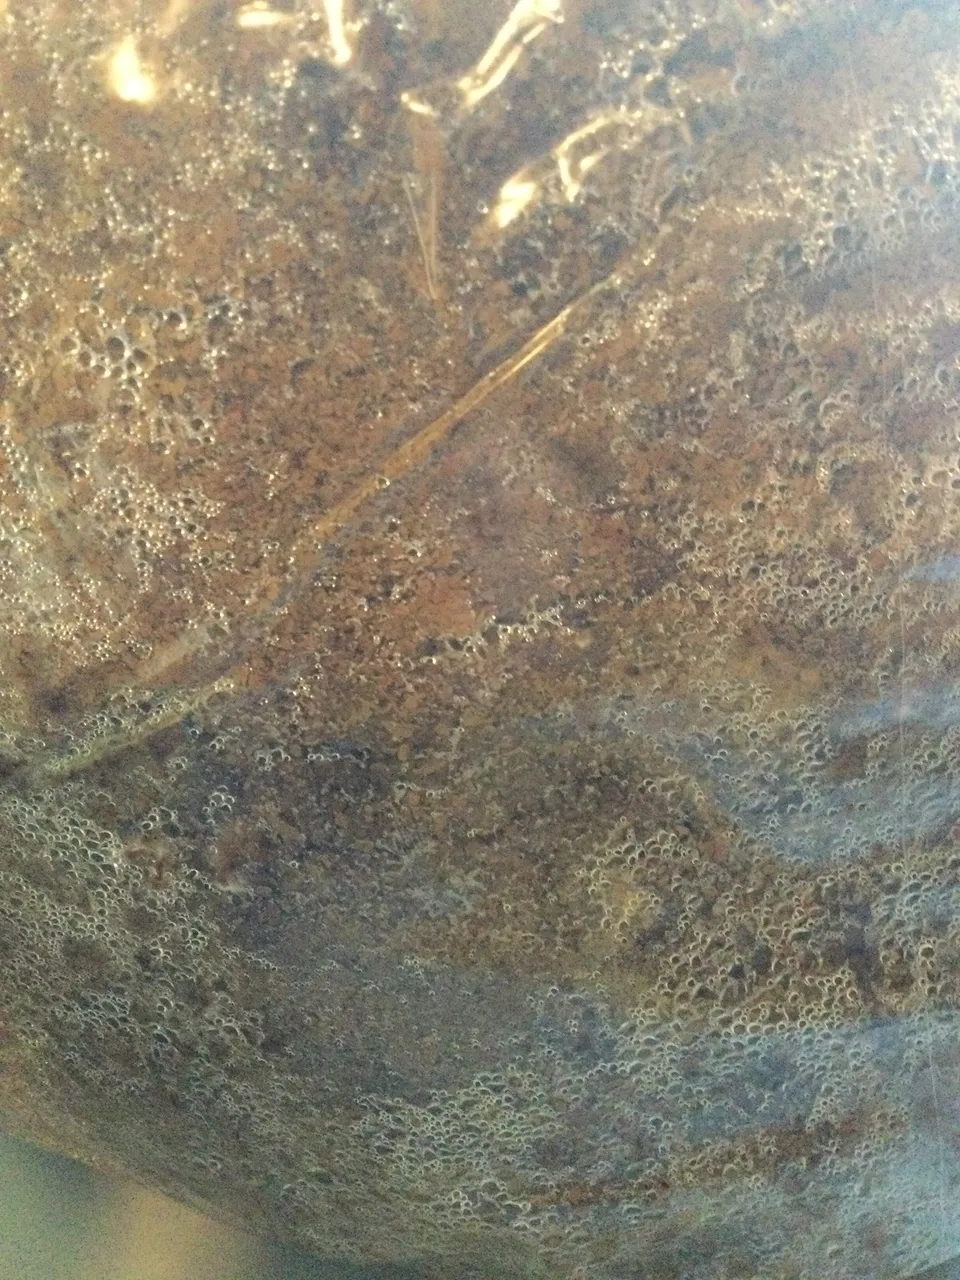
- You won’t see any mycelium growth for 3-4 days.
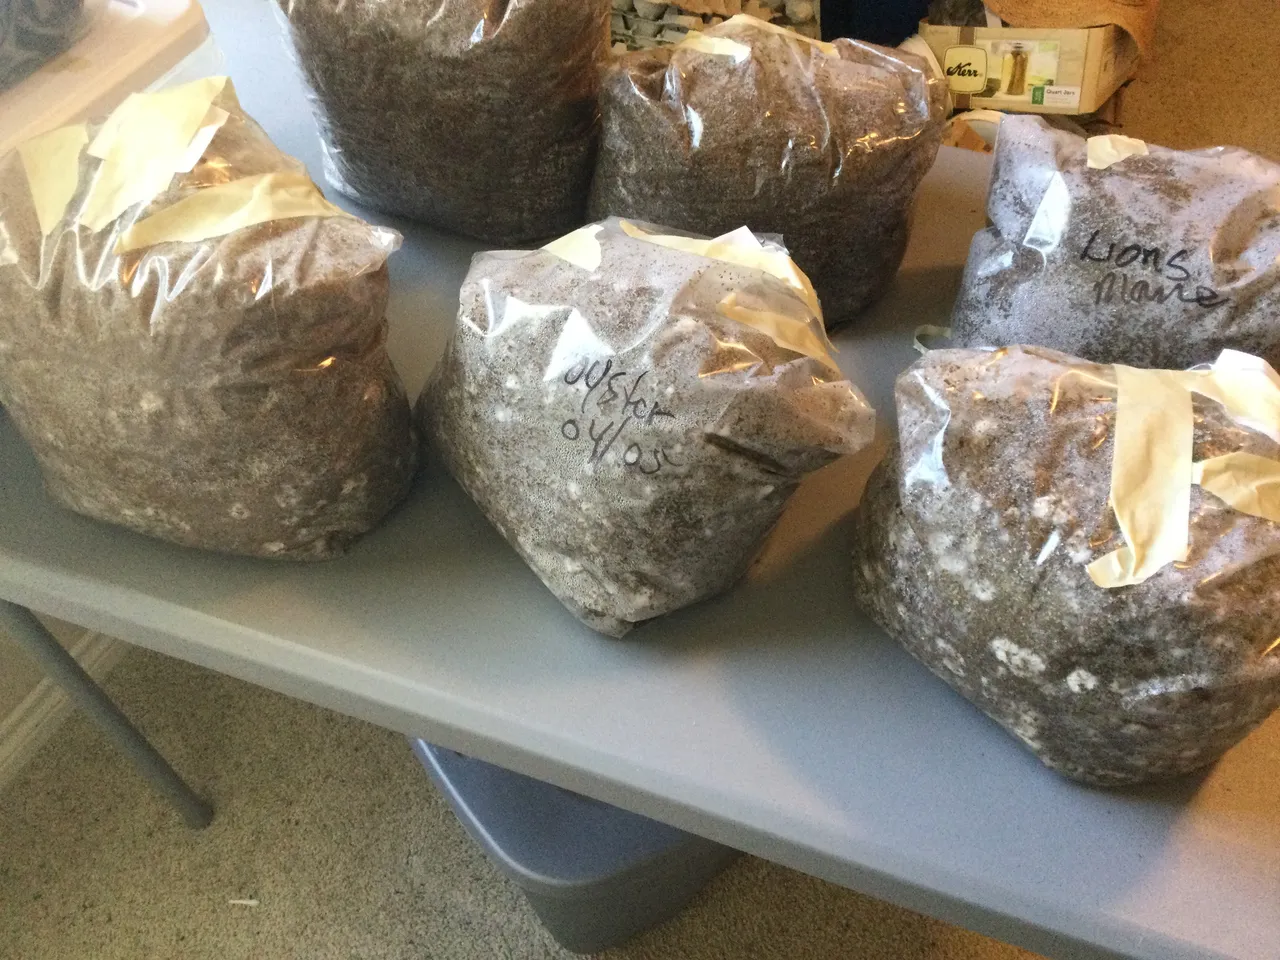
- Lions Mane looks thin and wispy. Blue Oyster mycelium is dense and white like cotton. Most contamination is discolored and causes excess moisture. Cobweb mold looks like Lions Mane, but it turns gray and grows quickly with no pattern.
Step 5 – Fruiting
- I add my fully cultured grain to a wood mix placed in a Polypropylene fruiting bag. I’m thinking of changing to buckets next time to cut down on plastic.
- Seal bag, so there is no air until you cut the bag to let oxygen for fruiting.
Blue Oyster mycilium
Lions Main and Blue Oysters are aggressive fruiters, so watch out when you let that oxygen in. Craziness is going to happen!
Make a Sawdust Block For Lions Mane and Blue Oyster Mushrooms
Make your sawdust block by combining:
- Five cups of sawdust, I used hardwood pellets for barbeques and smokers.
- One cup wheat bran to add nutrients.
- I add 3 tablespoons of gypsum for sulfur and calcium. I also use powdered eggshells I grind up in my blender if I am out of gypsum.
- 1 cup of vermiculite
- Six cups of warm water.
Add all the water to the mix, let soak for an hour. When adding the mix to your bag, squeeze like forming a snowball, and no water comes out. Add the mix to your bag.
Once this is done:
- Place grow bag upright and fold the excess bag over the and seal with some ducktape.
- Sterilize the bags in a pressure canner. Make sure you have a buffer in between the bags and the bottom. You need to sterilize for 2.5 hours to make sure you kill any bacteria, mold, and fungus. Again, make sure you have enough water in your pressure cooker to last two hours.
- Cool for at least 24 hours.
Inoculating Your Sawdust Blocks
Before starting, make sure your hands and work area are clean to avoid contamination.

Lions Mane spawn
Add the grain spawn to your sawdust block and mix well. I use 3 pints of spawn for 5 pounds of mix. Although I've used 1 or 2 pints, too, it just takes a little longer for colonization.
Place the bag in a dark, warm (65 to 75 degrees) area to grow. It will take a few weeks for the mycelium to spread throughout the bag. Remember Lion's Mane will look like it is not spreading because its mycelium is slightly transparent.
Lions Mane MyciliumCut 1/4 inch holes in the bag, a lot of small holes will create smaller mushrooms, a few bigger holes, and you will get larger mushrooms.
Place your fruiting blocks in an airy place with indirect light. The blue oysters will need high humidity to feel happy.
How to care for sawdust blocks
You can see my spawn has started colonizing in just 3 days. It’s easier to see the Blue Oyster mycelium. Lions Mane mycelium is almost transparent. Check your blocks once a week. Look for any mold, fungus, or dry spots. Lion’s mane does best in a humid environment, so make sure to keep it moist. You see some odd growths called pins. It is time to cut areas in the bag to let some oxygen in to start fruition.
Mold
Molds may develop from too little oxygen or not enough moisture. You can soak your blocks in a bucket and also mist with a spray bottle. Lack of oxygen can be improved by moving the blocks to an area with better air circulation.


 A link to My Blog