💖 BIENVENIDOS A MI BLOG 💞
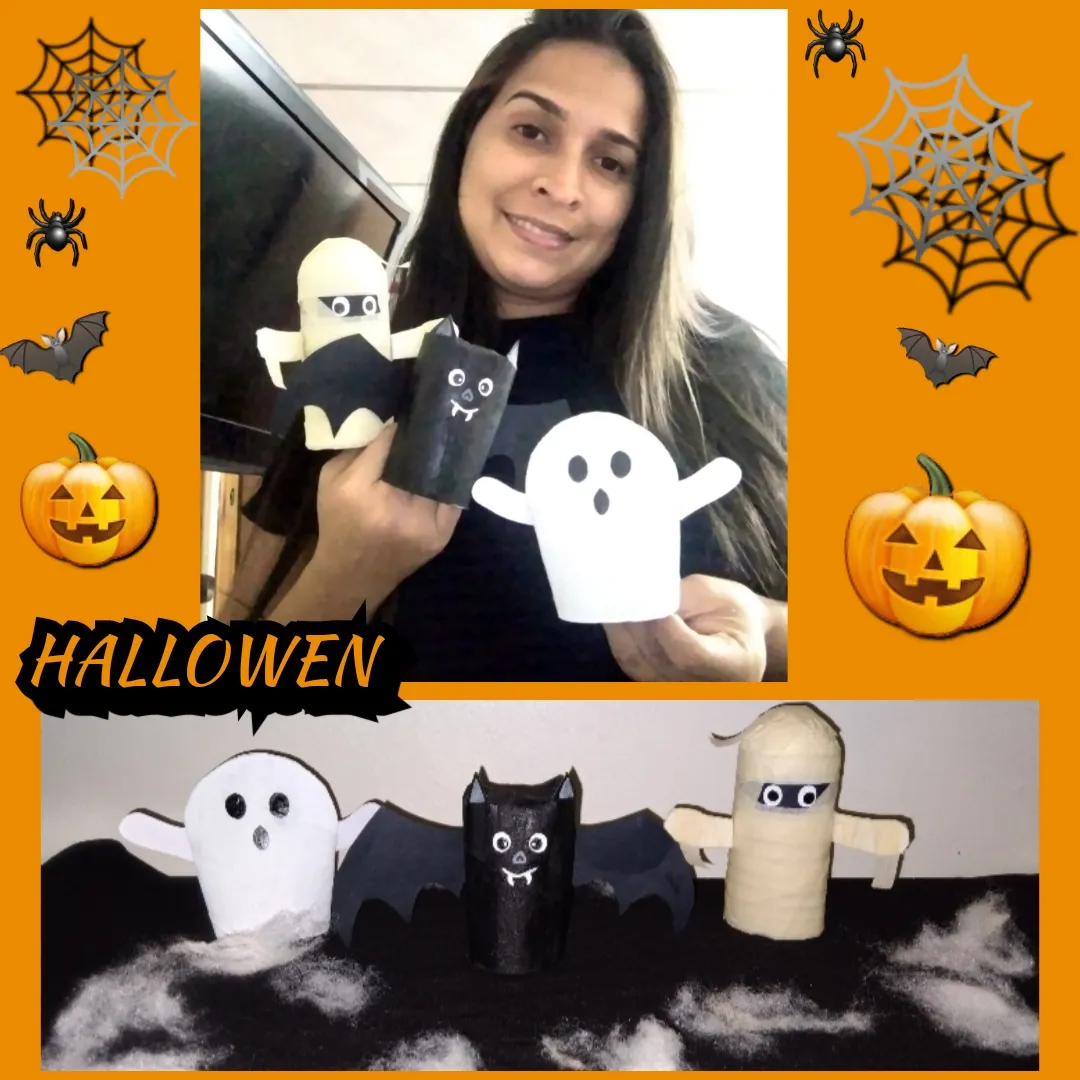
Hola mi gente linda de esta maravillosa comunidad feliz inicio de semana espero esten muy bien👍, este mes me gusta mucho a parte de que cumplen años varios de mis familiares me encanta hallowen por esa razón hoy quiero mostrarles como hacer unos creativos y divertidos muñecos que nos sirven para decorar en hallowen 🎃 y lo mejor es que use material de provecho ♻️ en este caso tubos de papel higienico.
WELCOME TO MY BLOG 💞
Hello my beautiful people of this wonderful community, happy start of the week, I hope you are very well👍, this month I like it a lot apart from the fact that several of my relatives have the birthday I love hallowen for that reason today I want to show you how to make some creative and fun dolls that They serve us to decorate in Hallowen 🎃 and it is best to use useful material ♻️ in this case toilet paper tubes.
A continuación lo que necesitaremos y su elaboración:
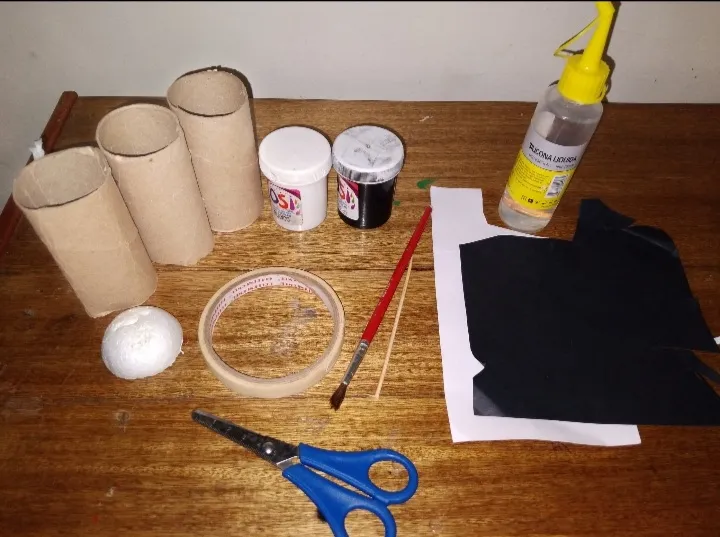
🎃 Materiales:
• 3 tubos de papel higienico
• Pinturas negra y blanca
• Cinta de adesiva de papel
• Pedazo de cartulina negra y blanca
• Silicon
• Pincel
• Tijera
• Palillo
• Medio circulo de anime
Here is what we will need and how to prepare it:
🎃 Materials:
• 3 tubes of toilet paper
• Black and white paints
• Paper adhesive tape
• Piece of black and white cardboard
• Silicon
• Brush
• Scissor
• Toothpick
• Anime half circle
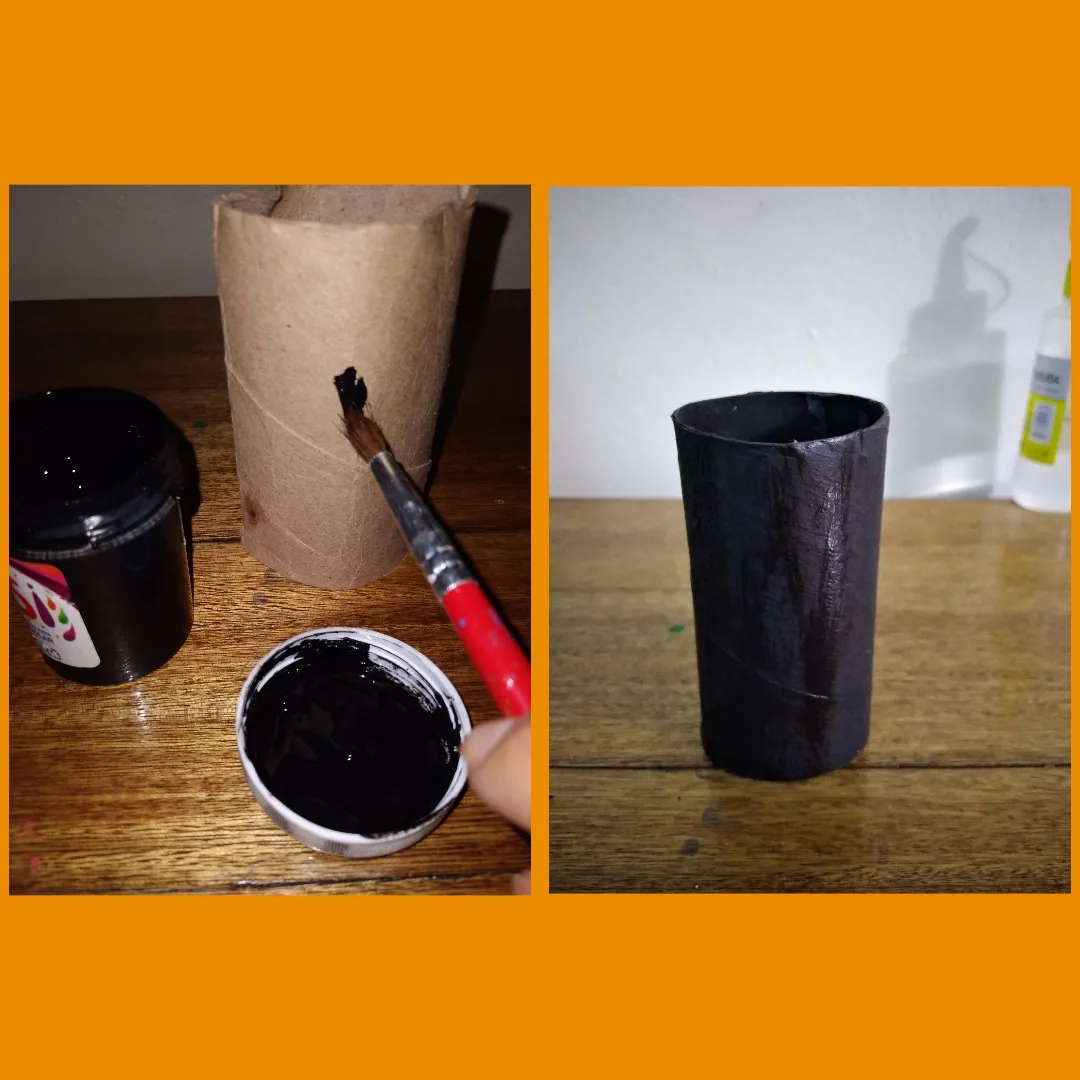
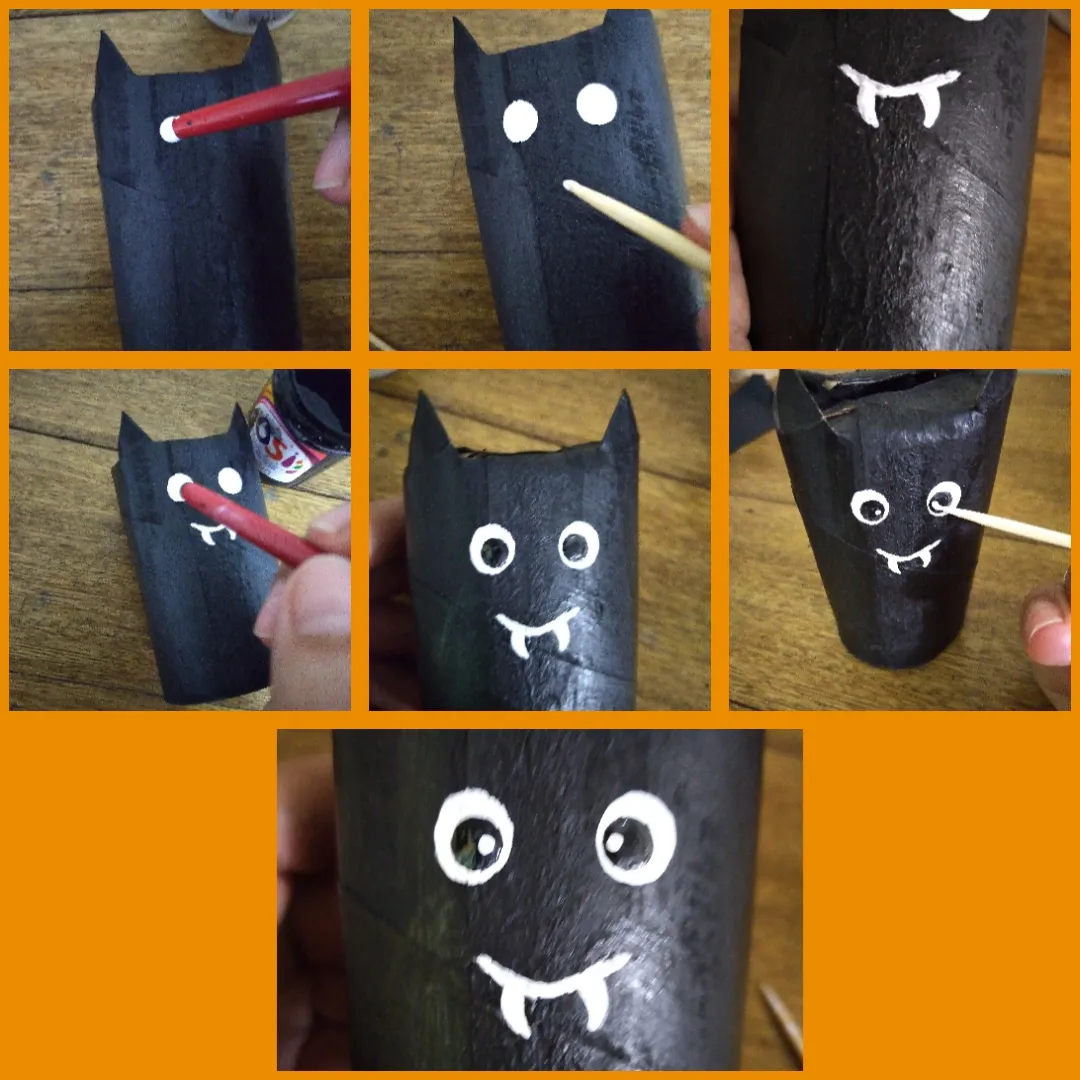
• El primero que hice fue el murciélago: pintamos el tubo de carton con la pintura negra.
• The first one I made was the bat: we painted the cardboard tube with black paint.
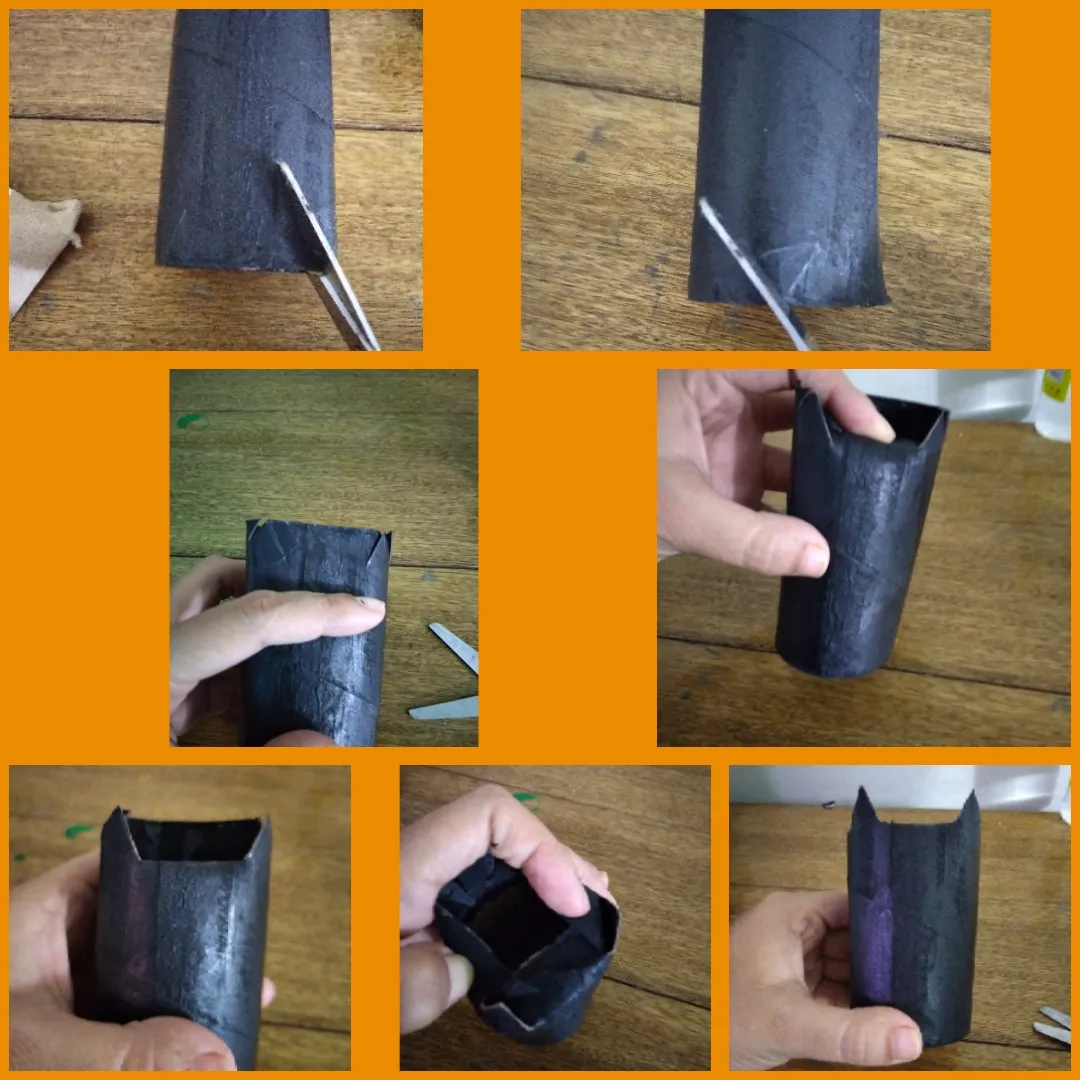
• Luego le hacemos unos cortes en la parte superior para sacar las formas de las orejas dejando una distancia en el medio para luego doblar esa parte y el resto del tubo parabque se puedan apreciar las orejas que sacamos, como te muestro en las imagenes.
• Then we make some cuts in the upper part to remove the shapes of the ears leaving a distance in the middle and then fold that part and the rest of the tube so that the ears that we remove can be appreciated, as I show you in the images.
• Para el rostro del murciélago use la parte trasera del pincel para hacer los ojos es mas fácil de hacer un circulo con el primero le hice un circulo blanco y luego negro, aprovechamos la pintura blanca y con ayuda del palillo hacemos la boca y los colmillos, con el palillo también le puse un puntito blanco a los ojos.
• For the bat's face, use the back of the brush to make the eyes. It is easier to make a circle with the first one, I made a white circle and then black, we took advantage of the white paint and with the help of the toothpick, we made the mouth and fangs. , with the toothpick I also put a white dot to the eyes.
• Dibuje en la cartulina negra dos alas de murciélago, las recorte y las pegue en la parte trasera de nuestro murciélago.
• Draw two bat wings on the black cardboard, cut them out and glue them to the back of our bat.
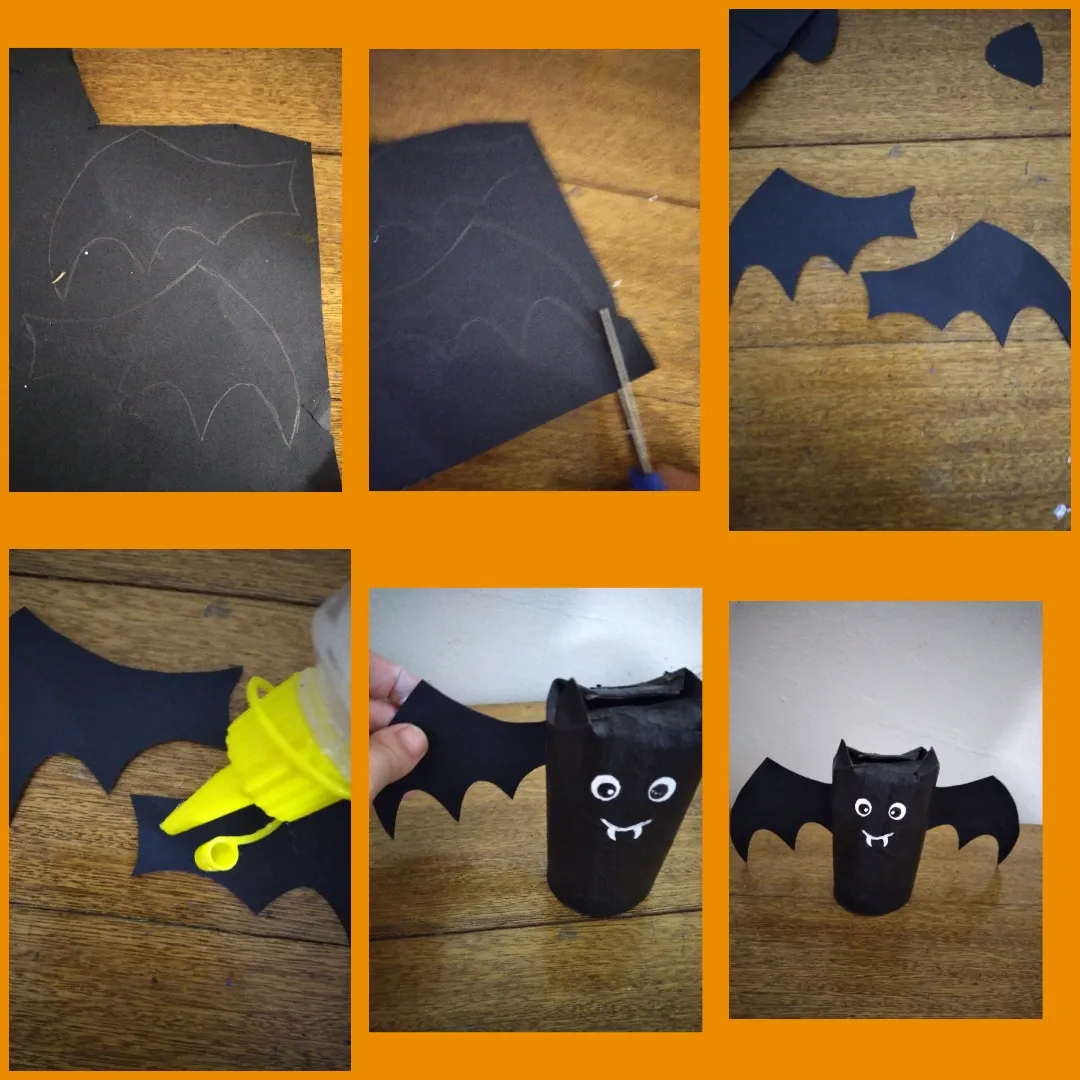
• Por ultimo mezcle un poco de pintura para hacer un poco de gris y con ayuda del palillo hacerle la nariz y darle un toque a las orejas.
• Finally mix a little paint to make a little gray and with the help of the toothpick make the nose and give a touch to the ears.
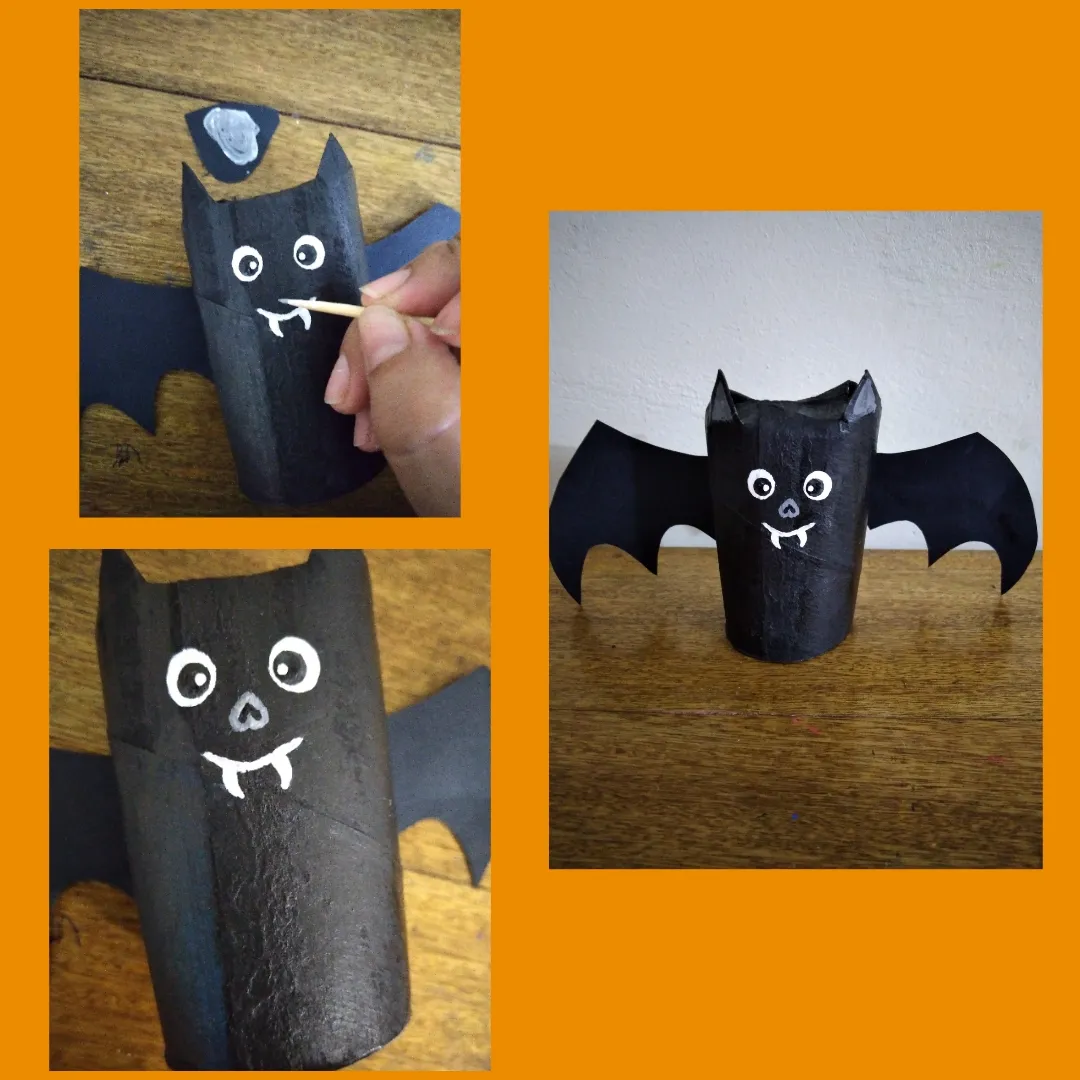
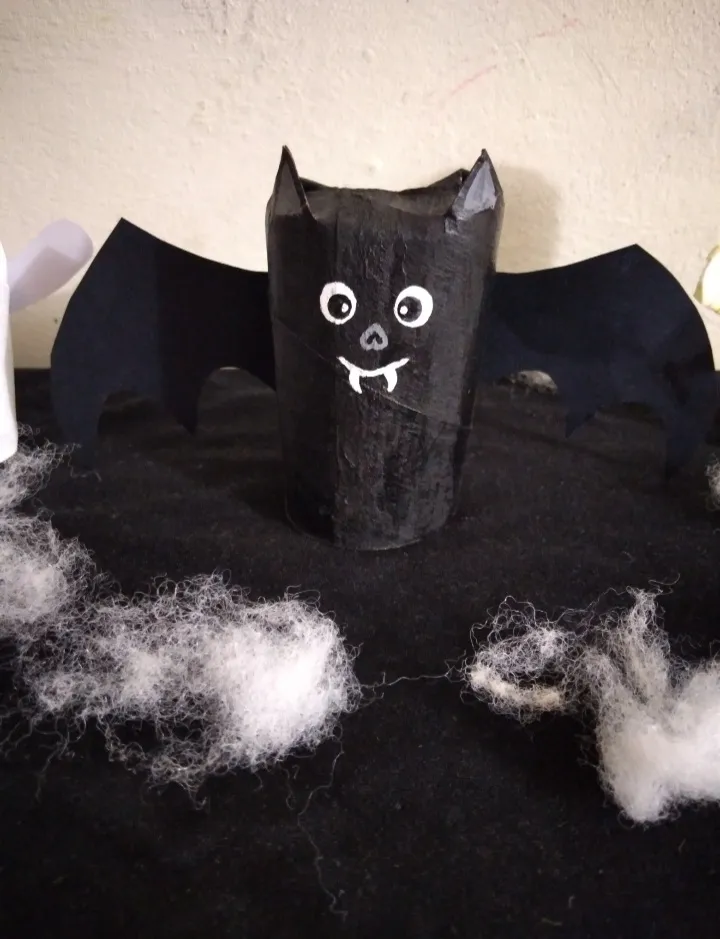
• Y obtendremos un lindo murciélago🦇.
• And we will get a cute bat🦇.
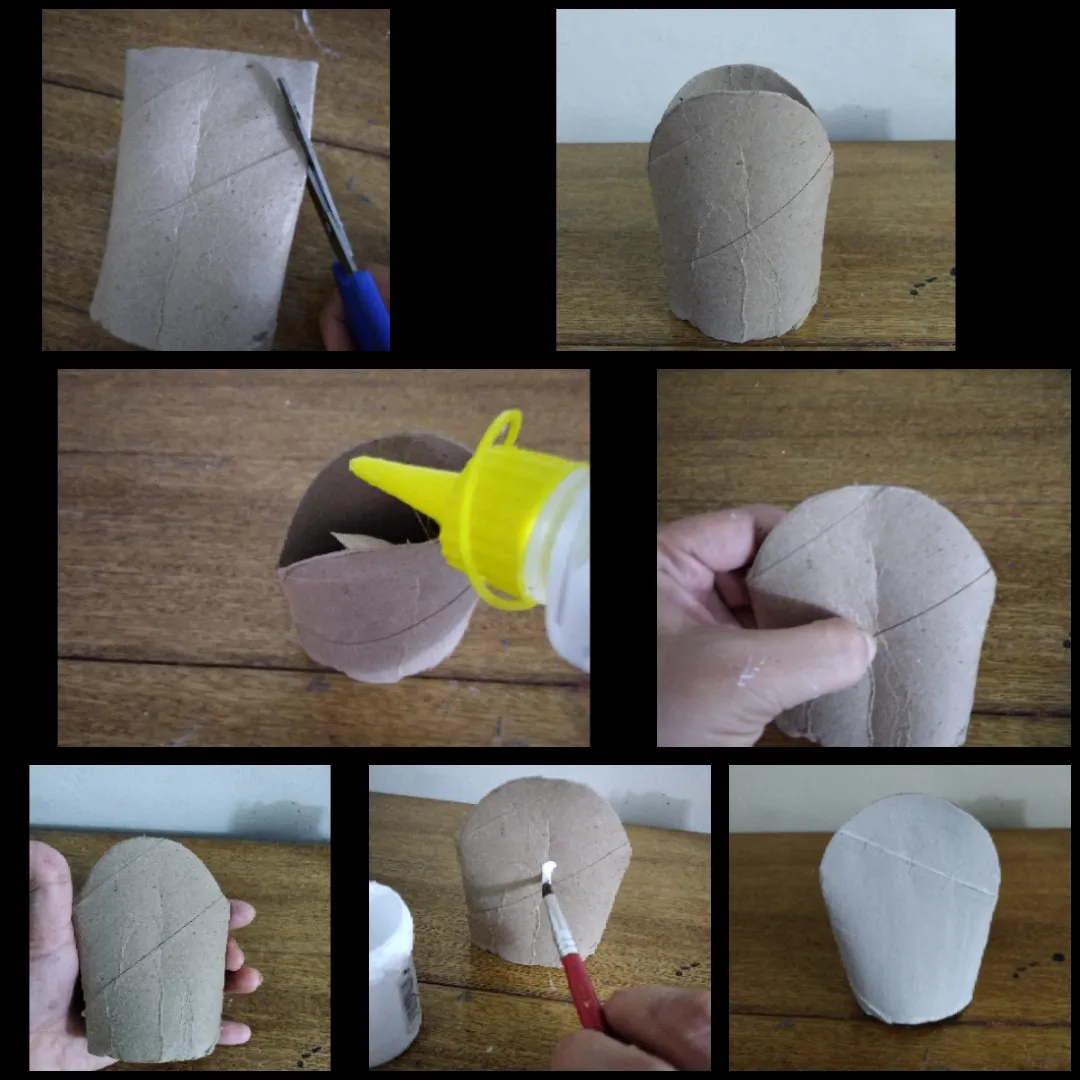
• Luego hice el fantasma este es el mas facil de realizar lo primero que hacemos es recortar la parte superior en forma circular, ponemos silicon en la parte interna para unir ambos lados y lo pintamos todo de blanco.
• Then I made the ghost, this is the easiest to do. The first thing we do is cut the upper part in a circular shape, we put silicone on the inside to join both sides and we paint it all white.
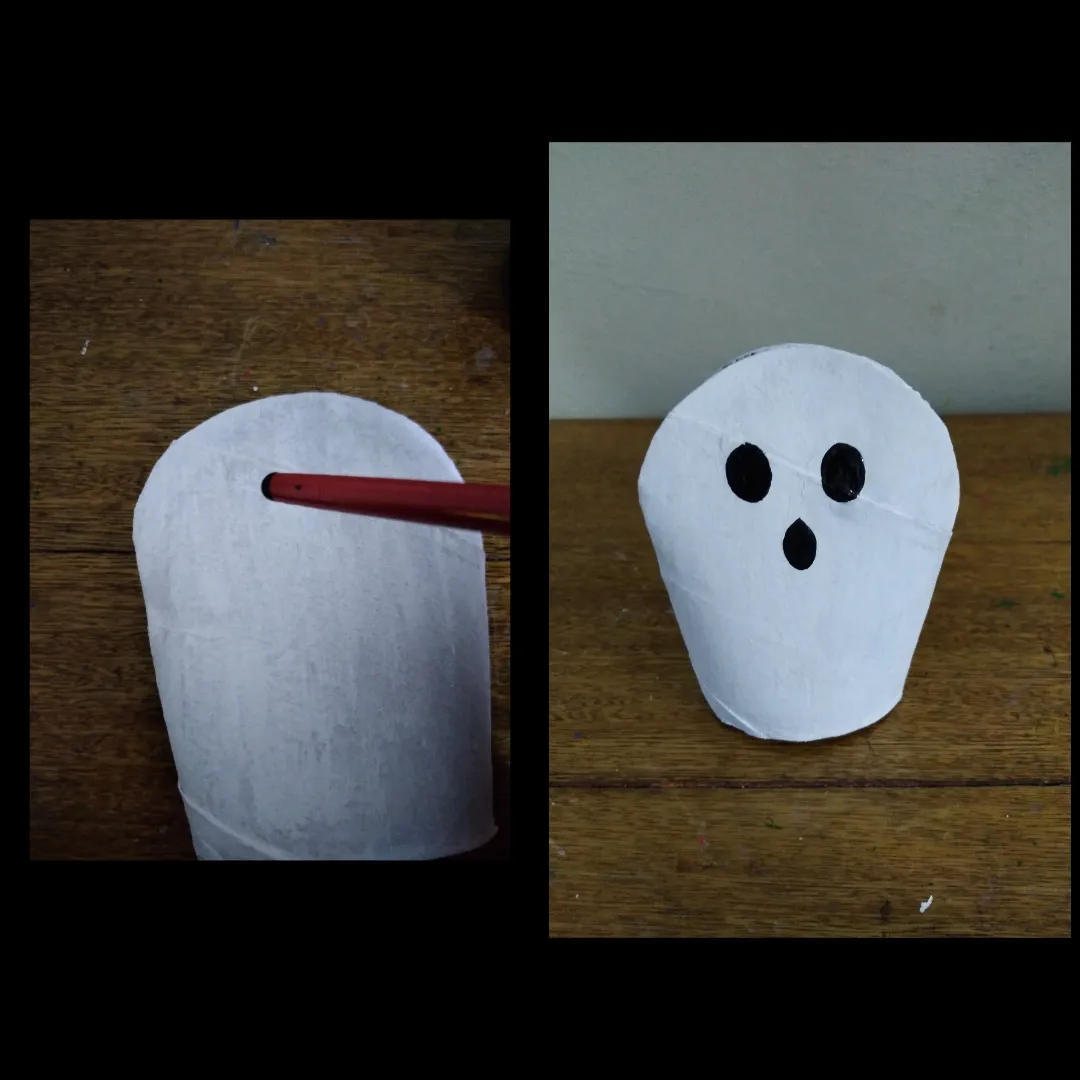
• Le hacemos los ojos y la boca asustadisa con la parte trasera del pincel.
• We make scared eyes and mouth with the back of the brush.
• Por ultimo sacamos los brazos en la cartulina blanca y se los pegamos en los laterales.
• Finally we take out the arms on the white cardboard and stick them on the sides.
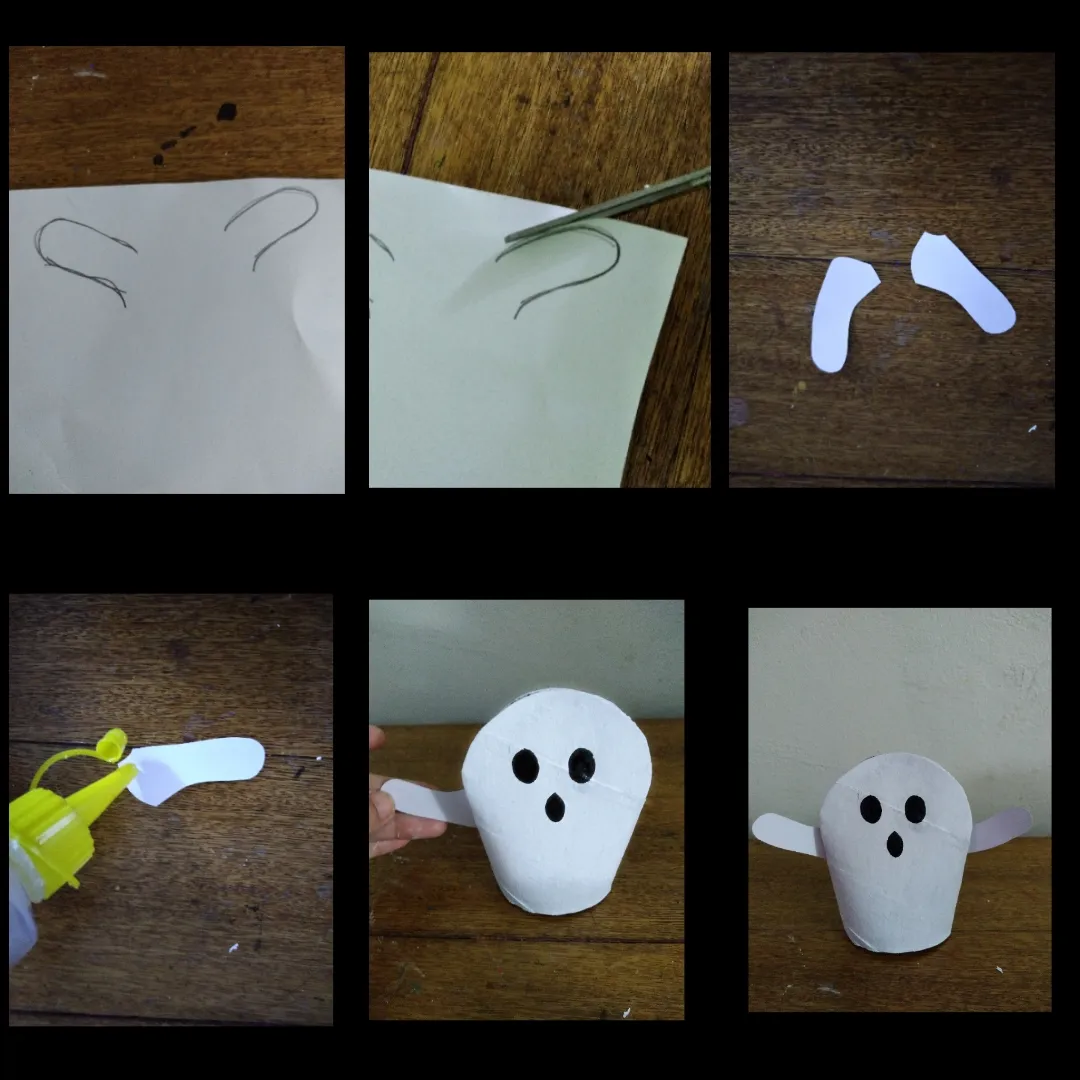
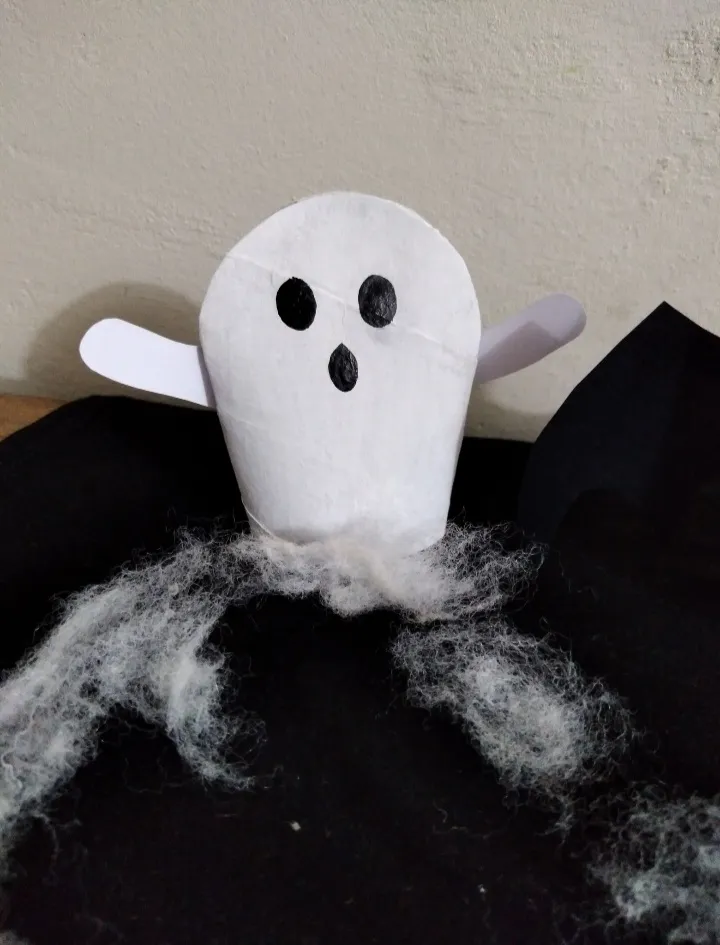
• Y obtenemos un lindo fantasmita👻.
• And we get a cute little ghost👻.
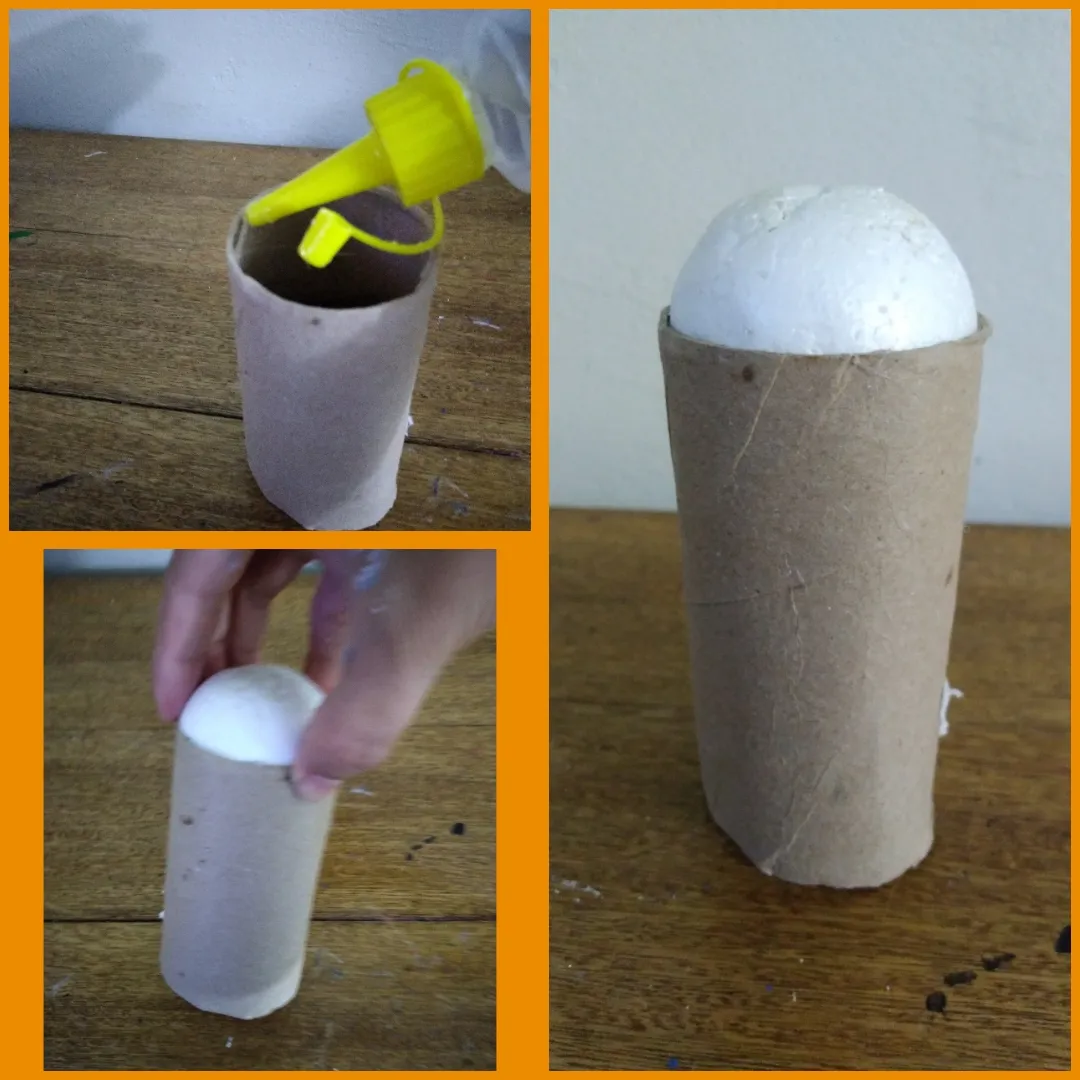
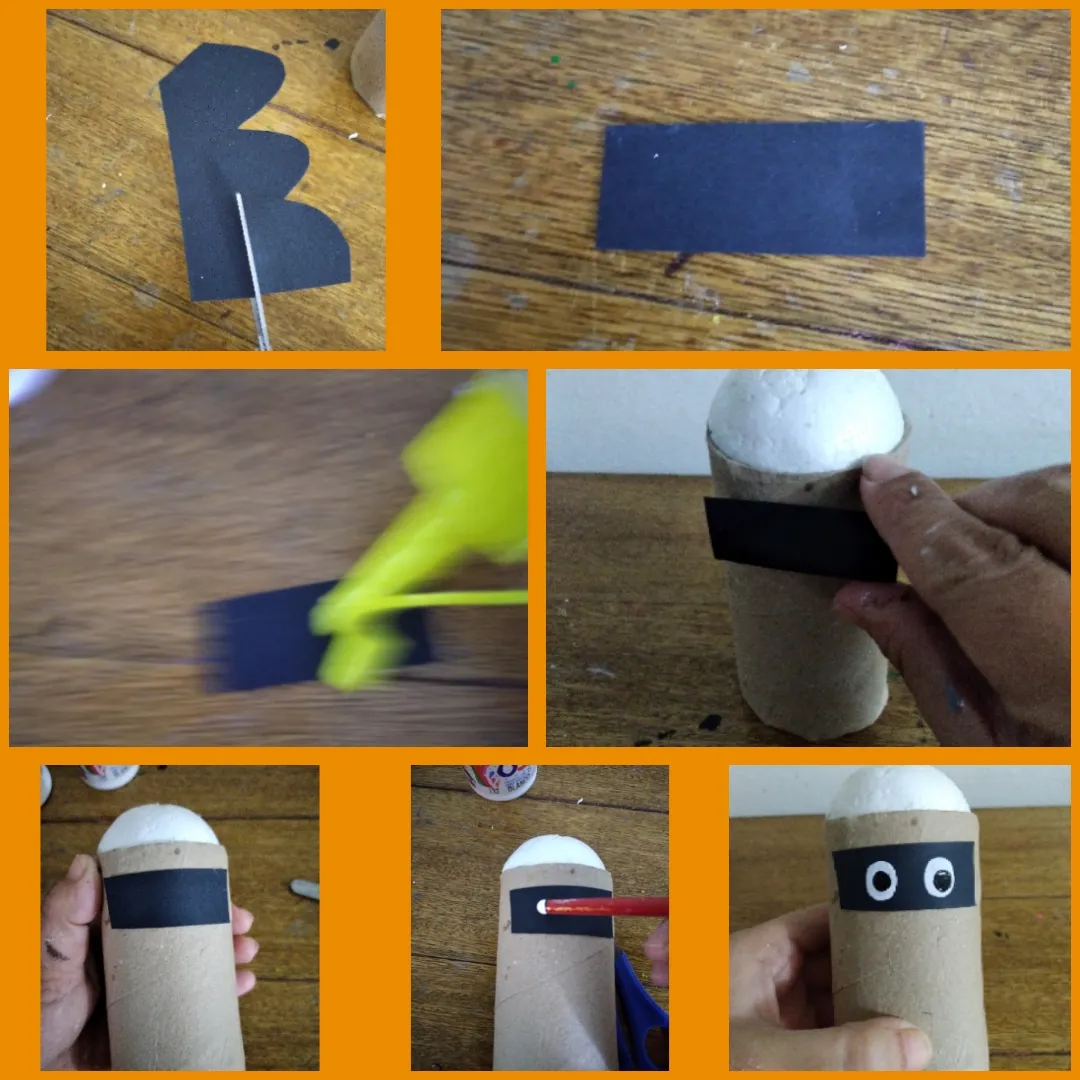
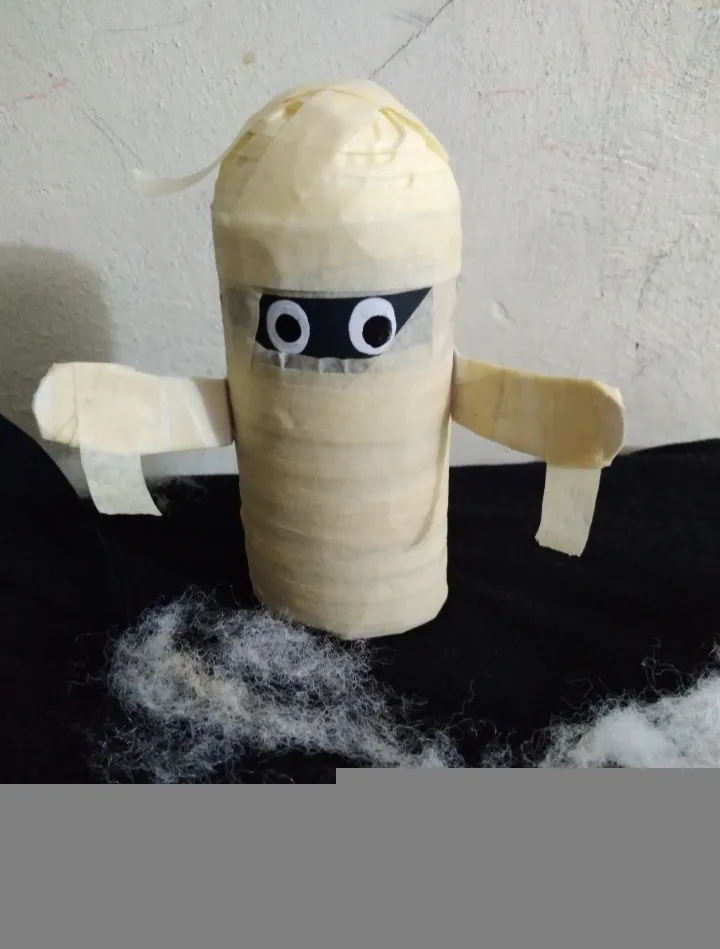
• Para hacer el 3er y ultimo muñeco que es una creativa momia: tomamos el medio circulo y lo pegamos en ka parte interna superior del tubo de carton.
• To make the 3rd and last doll that is a creative mummy: we take the half circle and stick it on the upper inner part of the cardboard tube.
• Luego del restante que tenemos de cartulina negra sacamos un rectangulo pequeño y lo pegamos donde sera la parte delantera de la momia y con la parte trasera del pincel pintamos los ojos.
• After the remainder that we have of black cardboard we take out a small rectangle and paste it where the front part of the mummy will be and with the back part of the brush we paint the eyes.
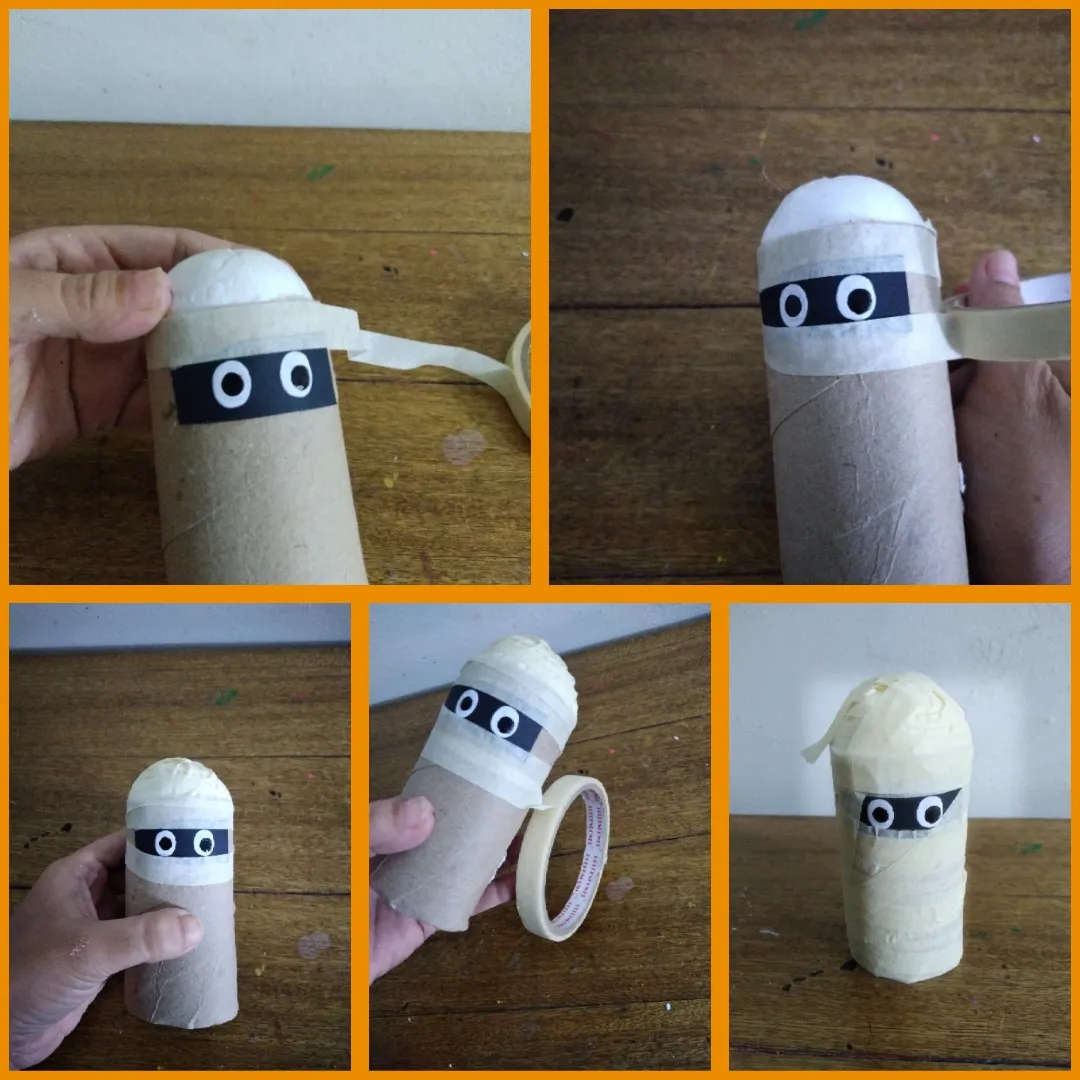
• Ahora tomamos la cinta adesiva de papel y empezamos a envolver todo el tubo de carton dejando solo los ojos descubiertos, le deje un pedazo de la cinta despegado en la cabeza para que parezca más unas vendas reales como te muestro en las imagenes.
• Now we take the paper adhesive tape and we begin to wrap the entire cardboard tube leaving only the eyes uncovered, leave a piece of the tape detached on the head to make it look more like real bandages as I show you in the images.
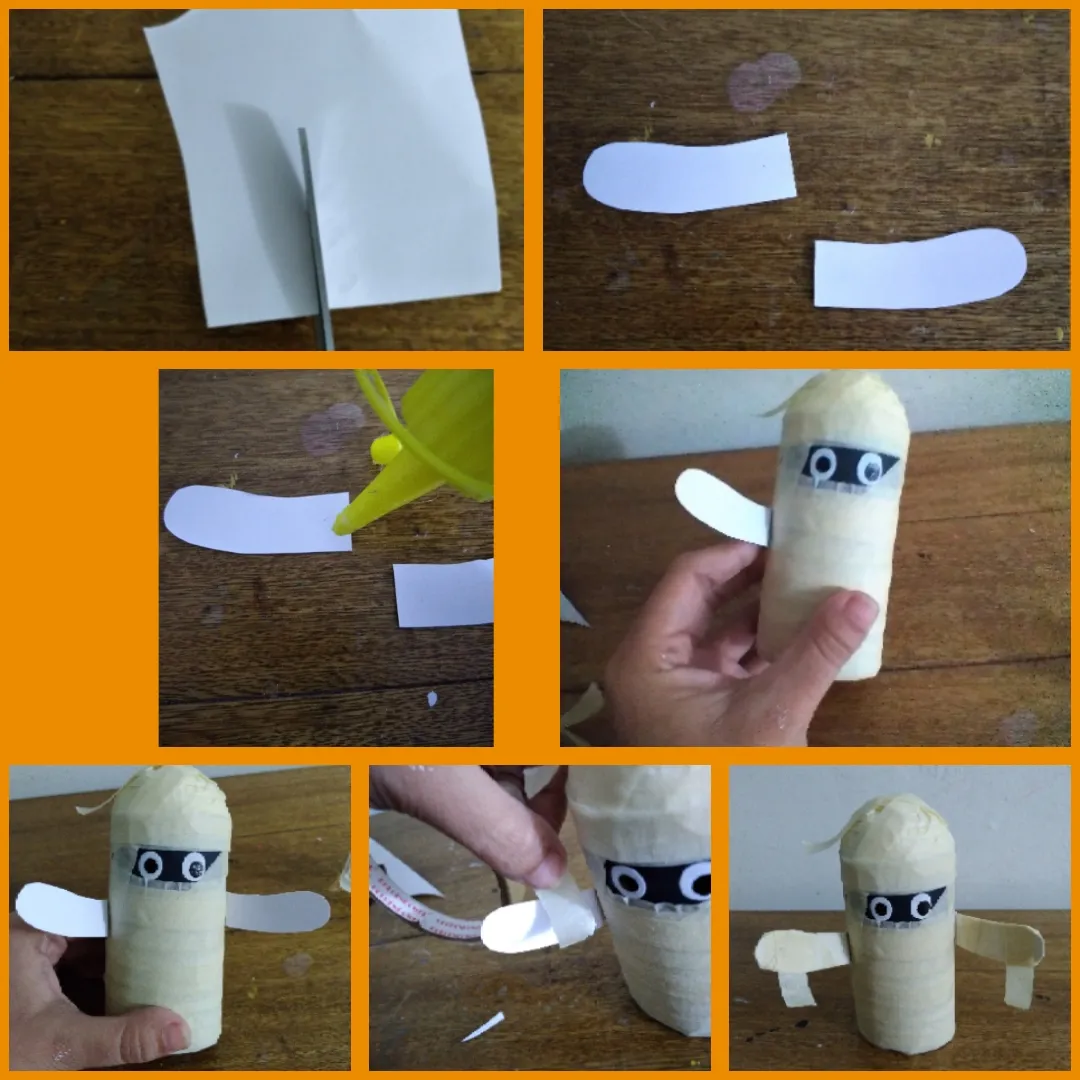
• Una vez envuelto todo lo que es el cuerpo debla momia, sacamos unos brazos de la cartulina blanca, se los pegamos en los laterales y los envolvermos como hicimos con el cuerpo dejando también cinta despegada en ambos brazos.
• Once everything that is the body of the mummy is wrapped, we take out some arms from the white cardboard, we stick them on the sides and wrap them as we did with the body, also leaving tape detached on both arms.
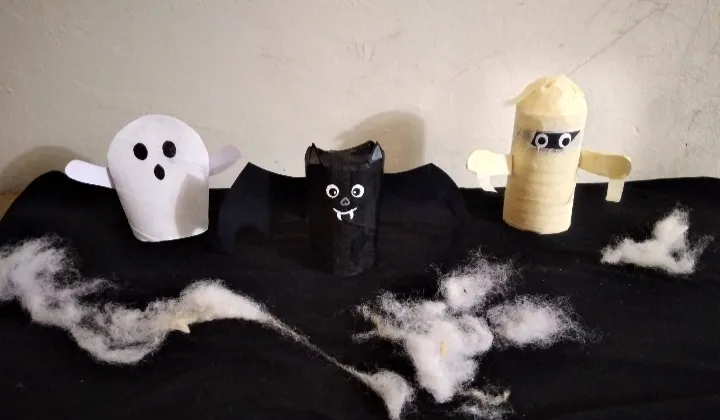
• Y listos! Esta es mi manualidad de hoy para ustedes tres divertidos muñecos de hallowen🎃.
• And ready! This is my craft today for you three funny Hallowen dolls🎃.
Es un gusto compartir con ustedes mis ideas💡
It is a pleasure to share my ideas with you💡
Dios les bendiga 😇
God bless you 😇
Imagen creada con app Canva.
Image created with Canva app.