"Todo niño es un artista, el problema es seguir siendo un artista cuando crecemos".
Feliz miércoles mis geniales #Hivers hoy les traigo el tutorial de como realizar rostros de frente para figurines de moda, tanto de hombre como de mujer.

Tengo ya varias maneras de dibujar rostros porque he indagado mucho con diversos diseñadores que han dado clase gratuita on line, he aprendido mucho de ellos pero al final adapto mi propio estilo, en un próximo post te hablaré de esos tutores geniales para que también aprendas de ellos, mientras tanto ¡vamos a poner manos a la obra!
- Papel (yo uso mayormente de reciclaje para practicar) si tienes tu block de dibujo mucho mejor.
- Lápiz 2B es lo mejor.
- Borra.
- Marcador fino negro No. 34, marrón, No.29, verde claro No.33, naranja No.03 todos de la marca Kores.
- Regla
6.- ¡Motivación!
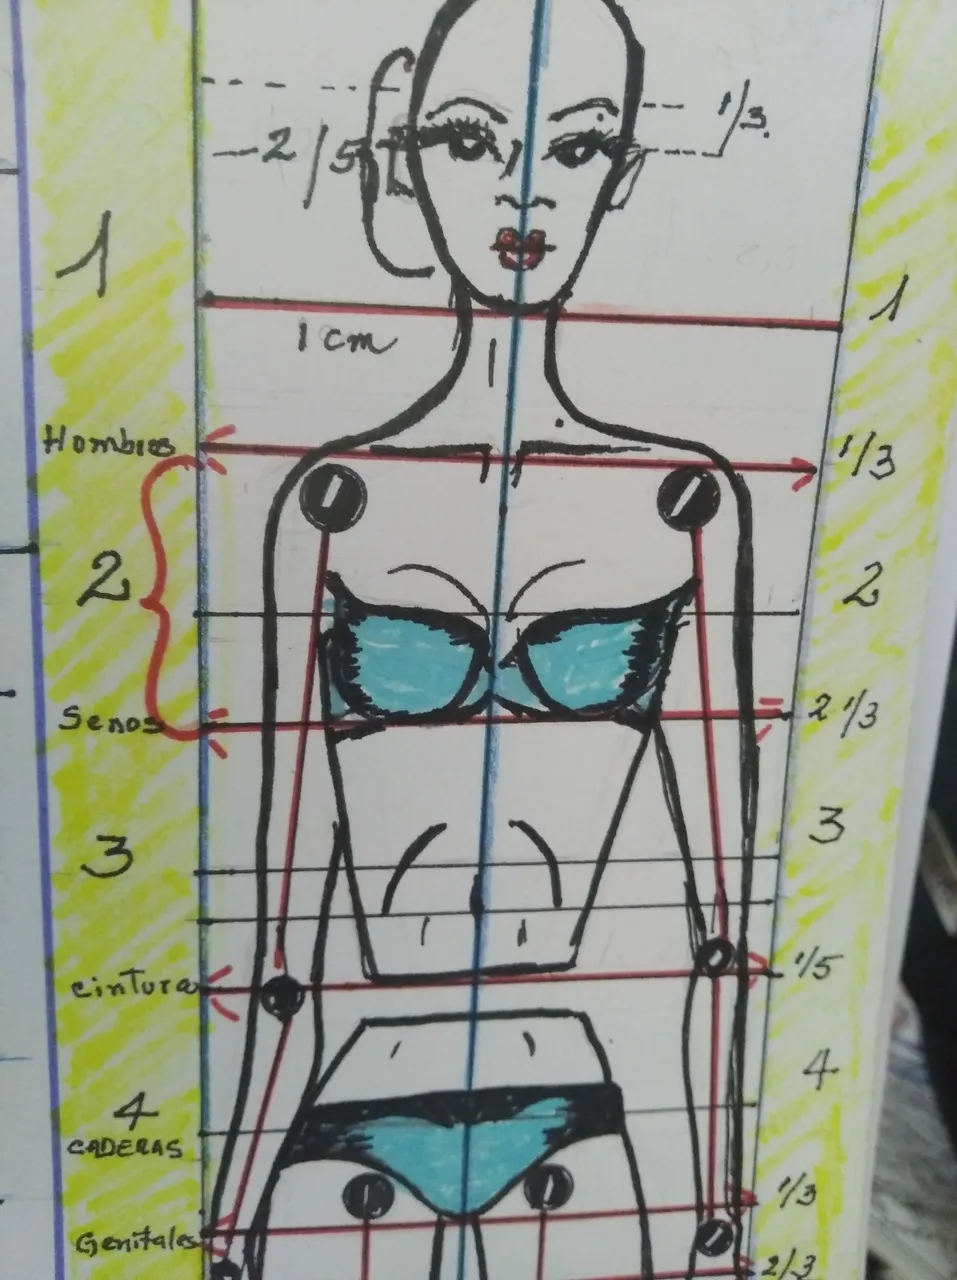
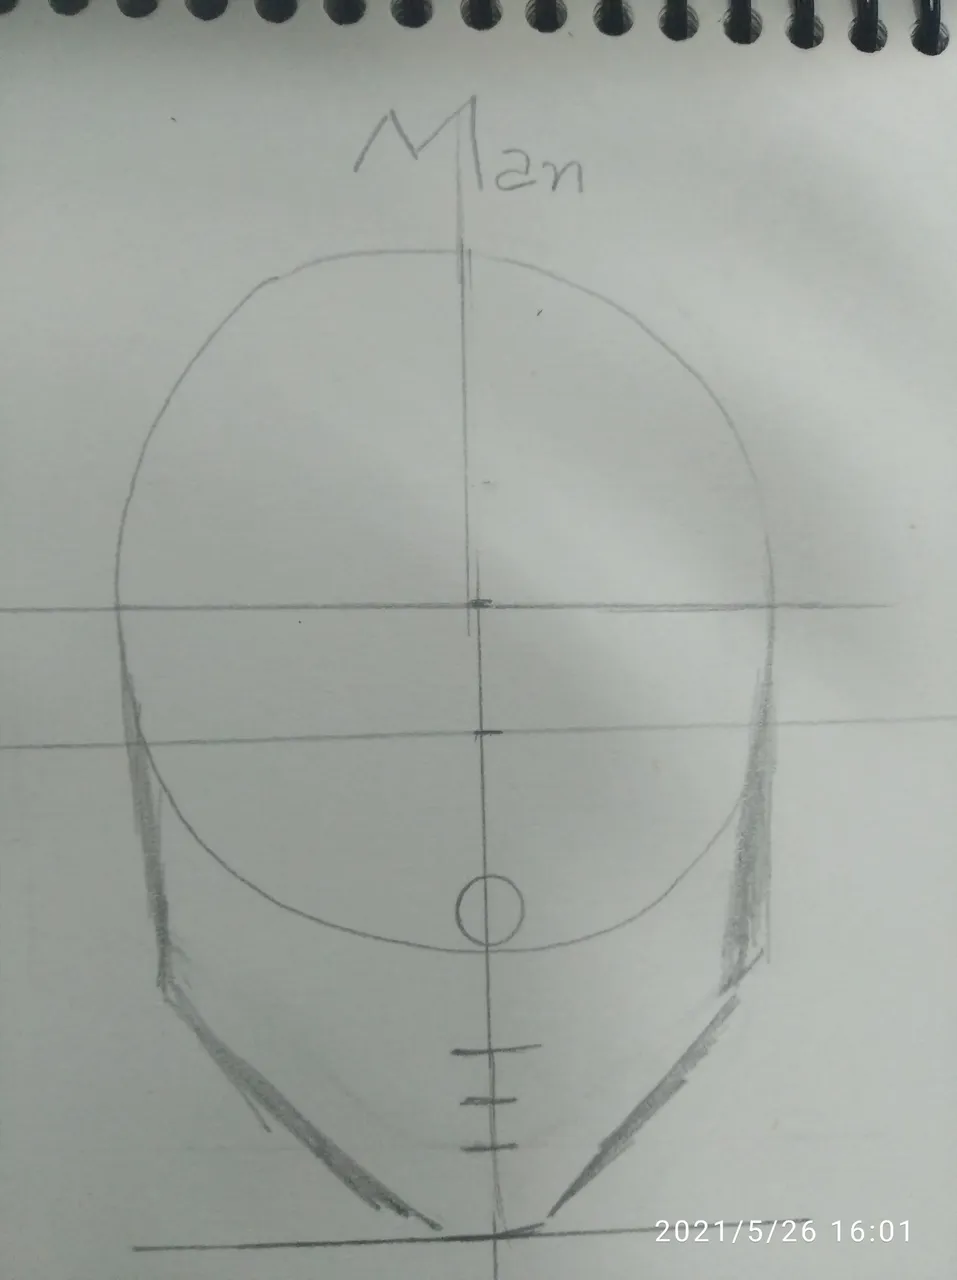
¿Te acuerdas de que para empezar todo figurín debemos primero realizar una línea de equilibrio? bueno tal cual comenzarás ahora, fíjate que todo tiene su proporción según las medidas que tu vayas a elaborar tu maniquí, en este caso nos vamos a enfocar en los rostros solamente.
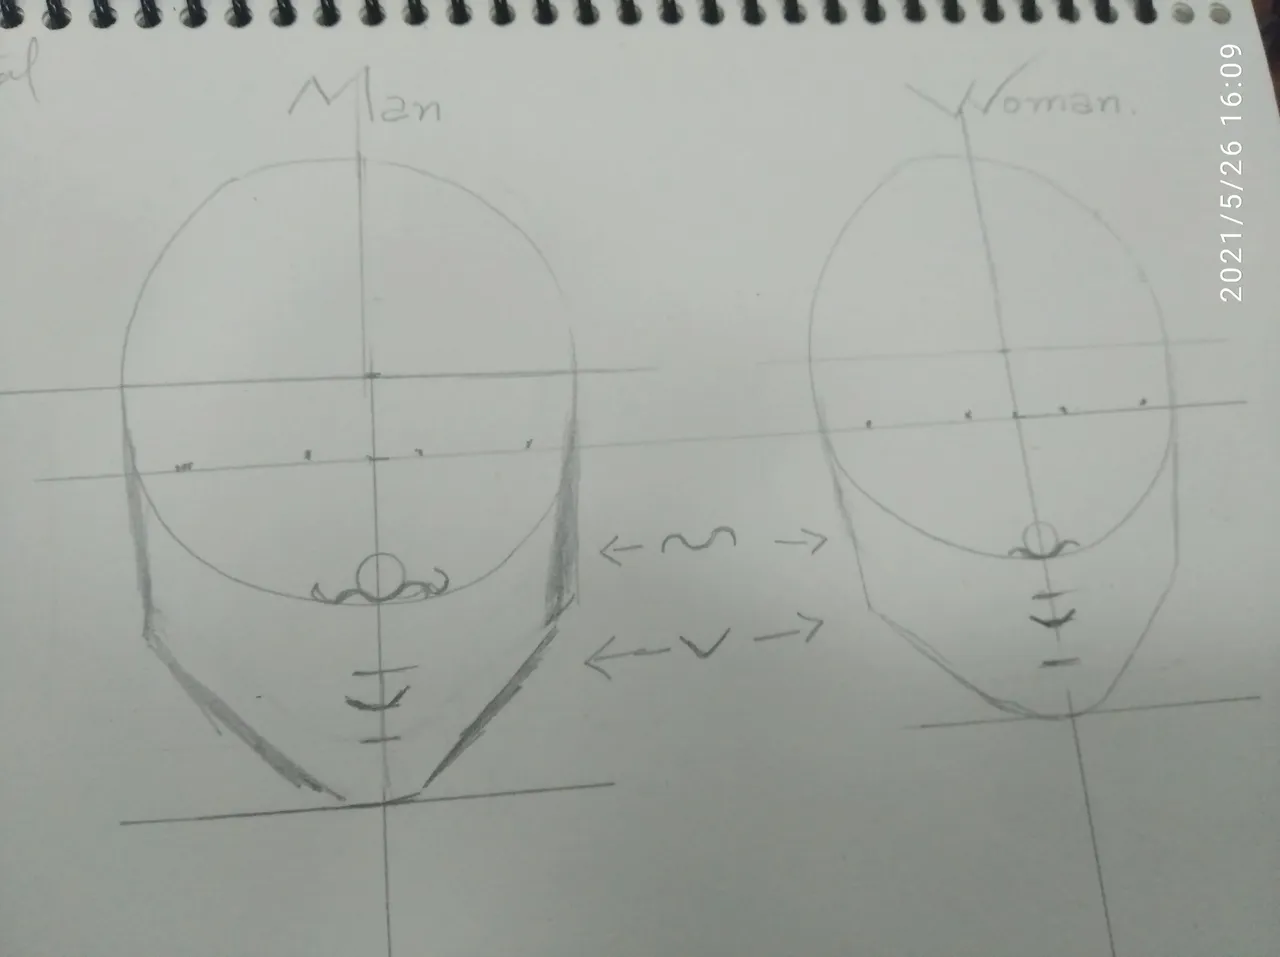
Aquí coloco por separado rostro de de mujer y rostro de caballero, en el primer caso tanto como en el segundo dibuje las circunferencias a pulso y luego tracé dos líneas hacia abajo para indicar la zona de mandíbula, en el primer tercio irán las cejas, segundo los ojos, tercer tercio la nariz y luego boca. Fíjate que la diferencia entre rostro de hombre y de mujer será como dibujar la mandíbula, en el caso del caballero lo harás fuerte mientras que en el caso de las chicas será más suave… claro todo dependerá de tu estilo.
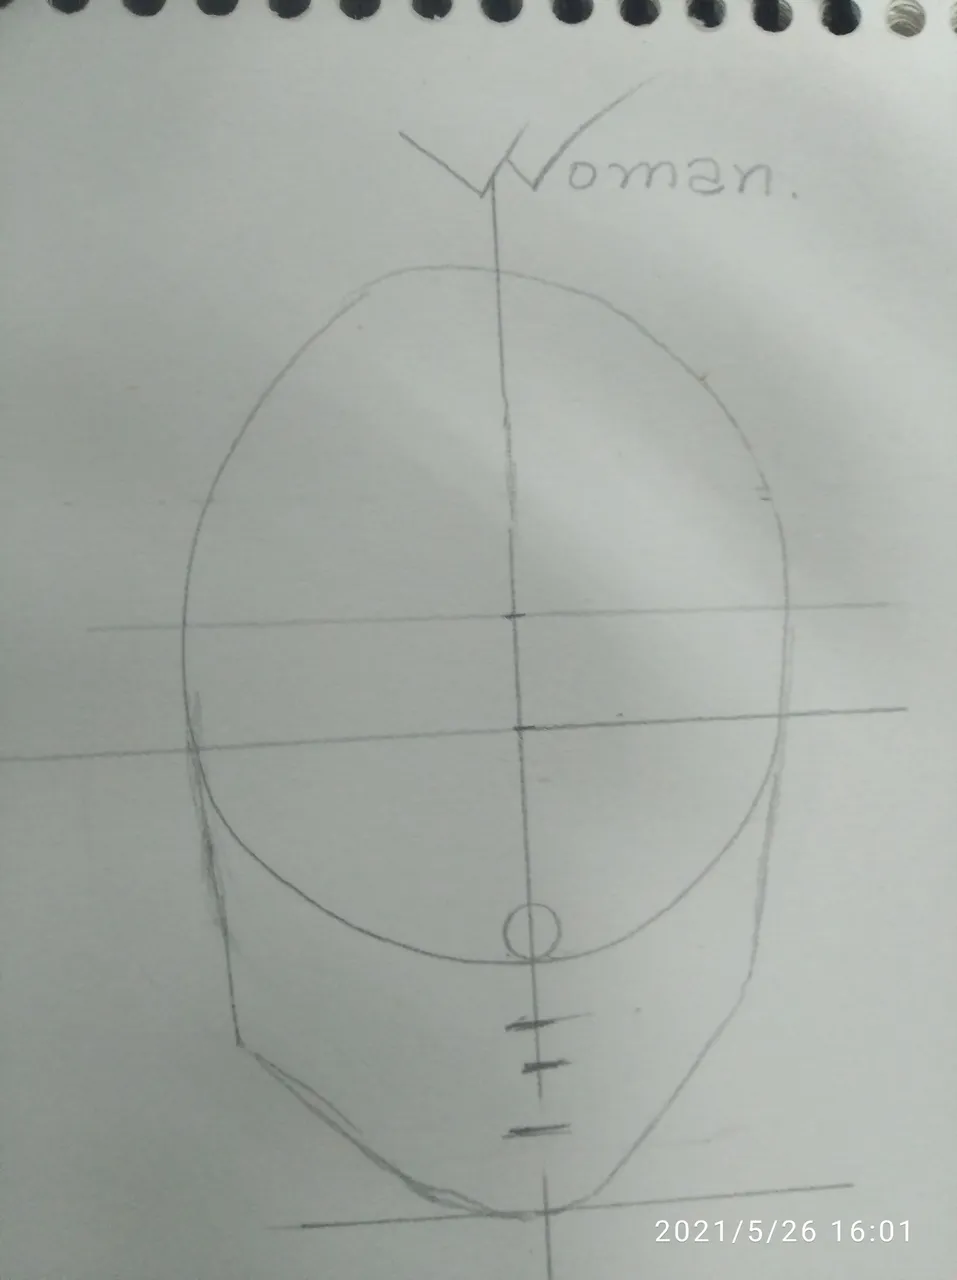
Bien, ya has realizado las líneas guías, ahora bien, en donde va la nariz harás un pequeño círculo que te guiará la base de como hacerla, incluso puedes dibujar una letra m o una letra w como lo quieras hacer y para la boca realizamos una pequeña letra v, esa será tu guía en el medio. En la parte de los ojos colocarás varios puntos equidistantes entre sí para poder entonces realizar la figura que corresponde.

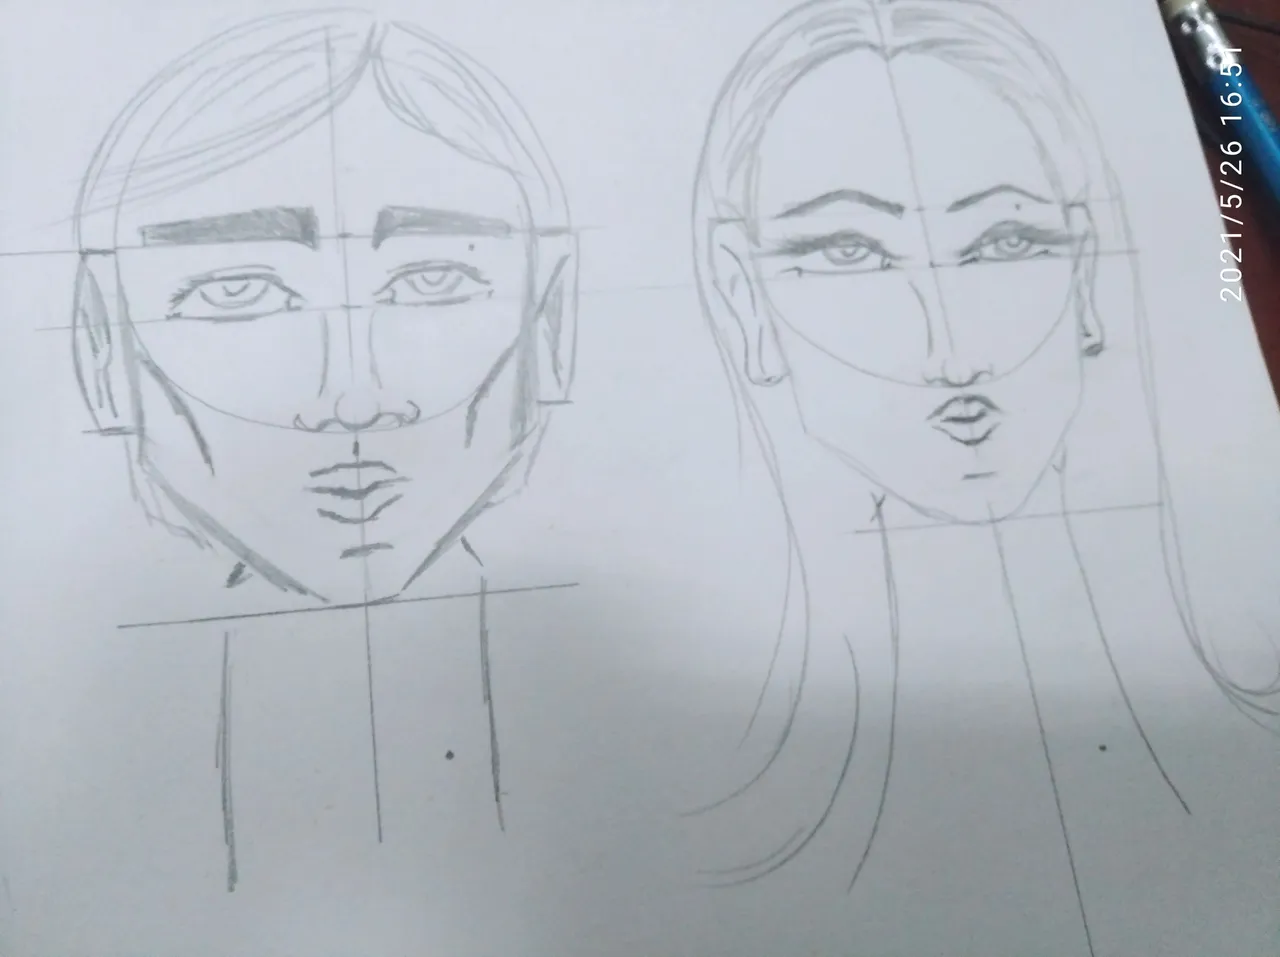
Se me olvidó decirte y ya lo habrás notado, las orejas… ¿Son muy grandes verdad? ¡Por éso creo que me están viendo mis maniquís de esa manera jajajaja!, recuerda que van ubicadas entre la línea guía de cejas y comienzo de la nariz. Ahora realiza las facciones del rostro, marca un poco más fuerte los pómulos y rasgos del hombre, su cuello debe ser ancho y en el caso de la mujer más suave y cuello más delicado, si quieres resaltar pómulos de ella puedes guiarte con las líneas base de la circunferencia .
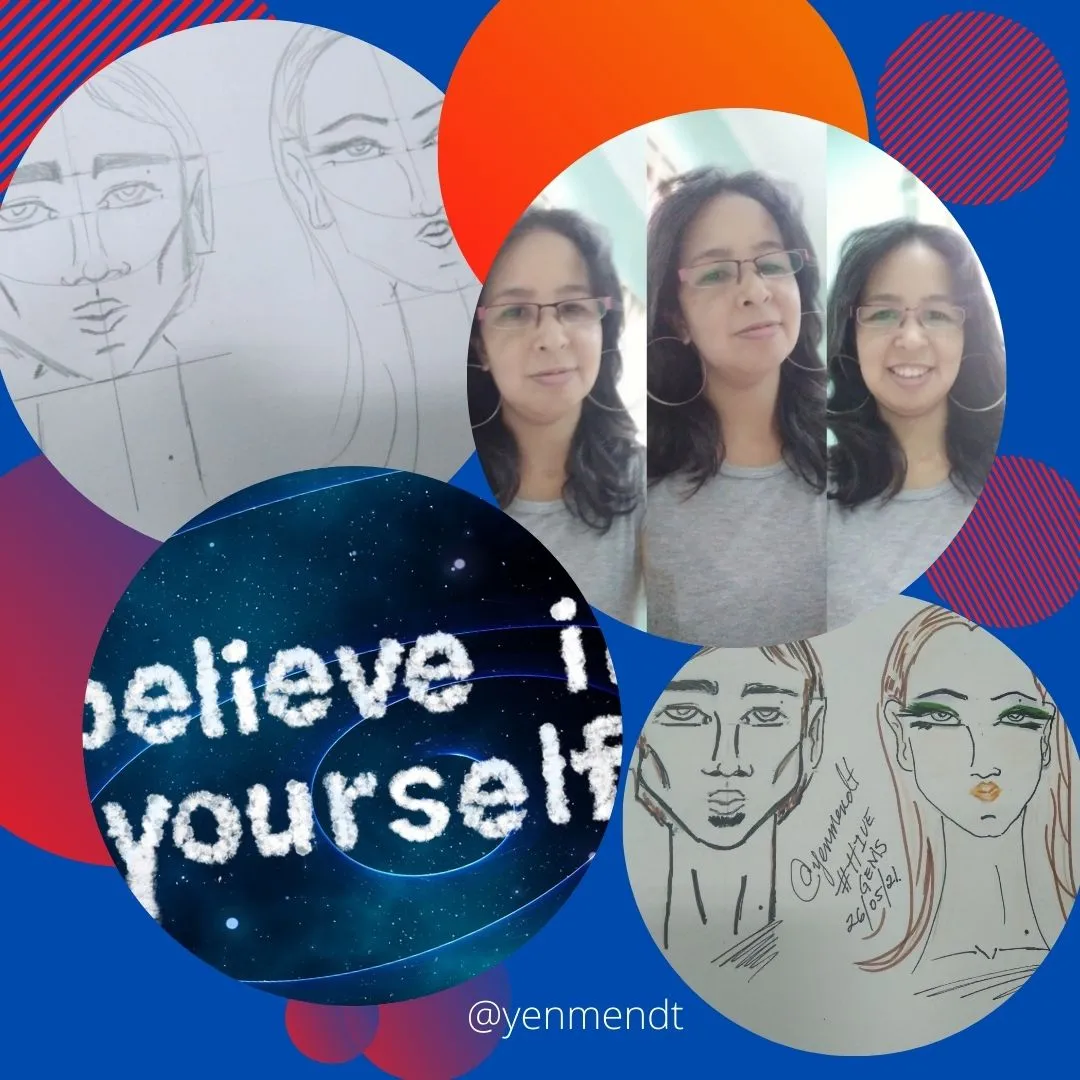
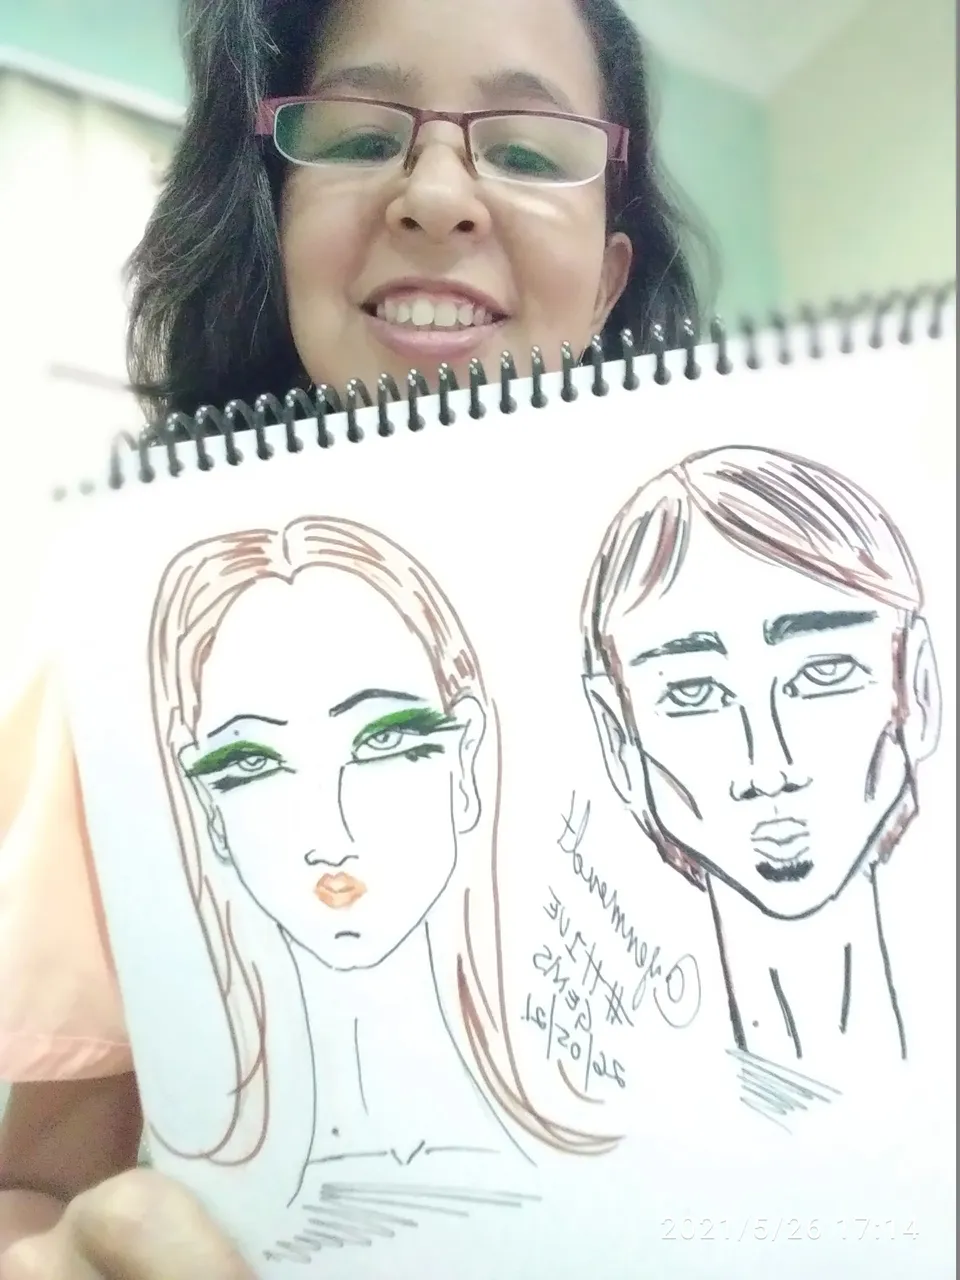
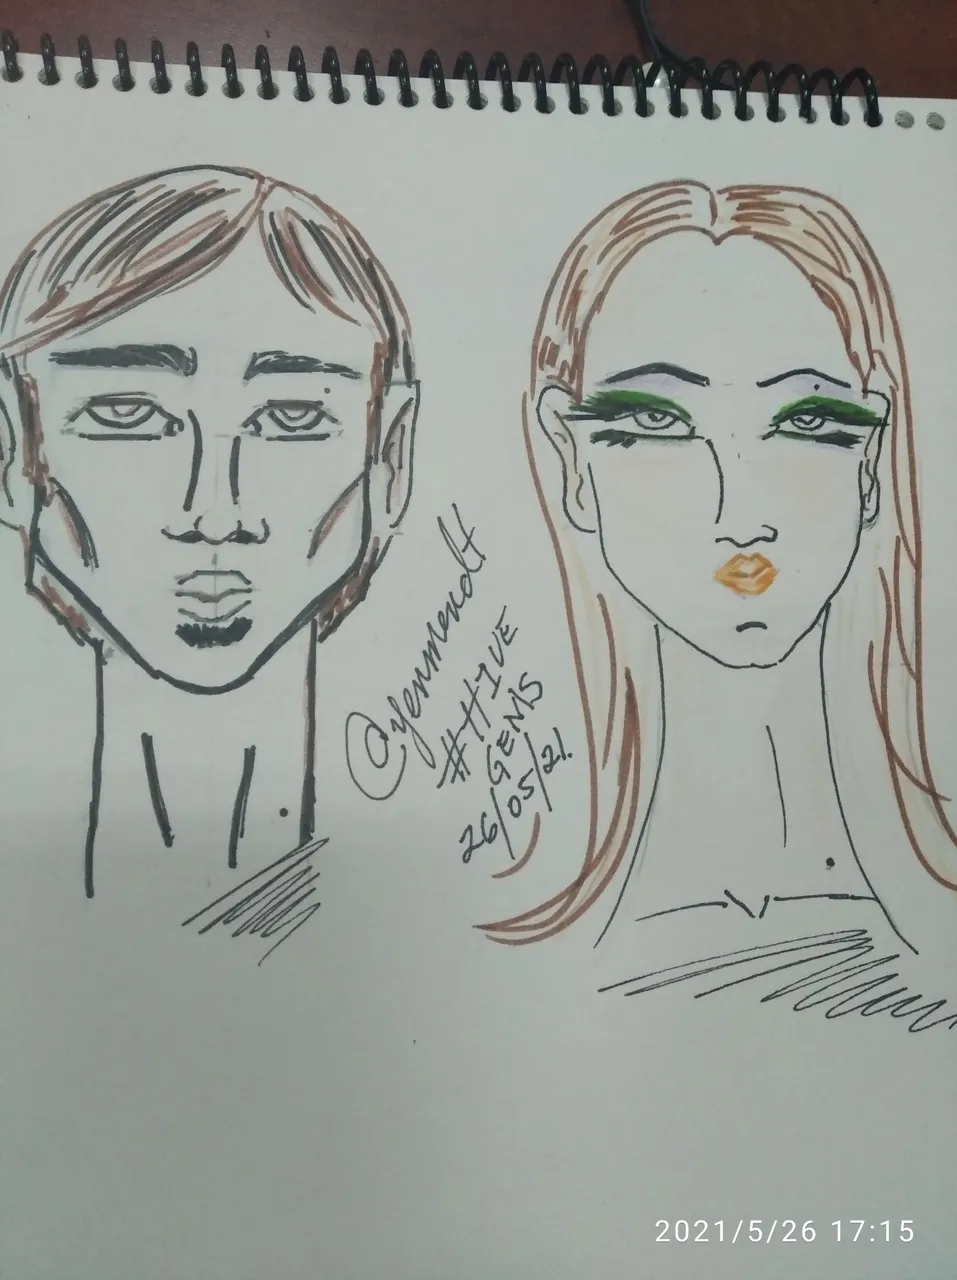
Y así queda el arte final luego de haber borrado las líneas guías, recuerda que tus figurines serán tan altos o bajitos como desees, ojos grandes , pequeños igual todo lo demás lo primordial es que se entienda que es lo que quieres transmitir y que te sientas feliz luego de haberlo dibujado.
****Recomendación final****
Cuando llegue la musa, debes dejarte llevar, sea la hora que sea, date unos minutos para ti, diviértete creando algo, aunque creas que es insignificante, resulta que vale oro porque despejó tu mente y lo que crees que has dibujado no es nada, para otros es una obra de arte.

Ilustró para ti: Yenni Méndez
Fuente: Todas las ilustraciones son propias.
La última foto es un video que hice en tiktok y esta en mi instagram:@yenyen_2_7 para que veas los diferentes rostros que hice y que te sirva de inspiración.
Cámara: Mi genial teléfono Redmi 7A.
Traductor versión gratuita: DeepL
> Now in English:
> "Every child is an artist, the problem is to remain an artist when we grow up".
Happy Wednesday my cool #Hivers today I bring you the tutorial on how to make front faces for fashion figurines, both male and female.
I already have several ways to draw faces because I have done a lot of research with several designers who have given free online classes, I have learned a lot from them but in the end I adapt my own style, in a next post I will tell you about those great tutors so you can also learn from them, meanwhile let's get to work!
> #MATERIALS:
- paper (I use mostly recycled for practice) if you have your
sketch pad all the better.- 2B pencil is best.
- Eraser.
- Black fine marker No. 34, brown, No.29, light green No.33,
orange No.03 all Kores brand.- Ruler
- Motivation!
Do you remember that to start every figurine we must first make a line of balance? Well, just as you will start now, notice that everything has its proportion according to the measures that you are going to elaborate your mannequin, in this case we are going to focus on the faces only.
Here I place separately a woman's face and a man's face, in the first case as well as in the second one I draw the circumferences with my hand and then I draw two lines down to indicate the jaw area, in the first third will go the eyebrows, second the eyes, third third the nose and then the mouth. Note that the difference between a man's and a woman's face will be how to draw the jaw, in the case of the gentleman you will make it strong while in the case of the girls it will be softer... of course everything will depend on your style.
Well, you have already made the guide lines, now, where the nose goes you will make a small circle that will guide you the base of how to make it, you can even draw a letter m or a letter w as you want to do and for the mouth we make a small letter v, that will be your guide in the middle. In the part of the eyes you will place several points equidistant from each other so you can then make the corresponding figure.
I forgot to tell you and you may have already noticed, the ears... They are very big aren't they? that's why I think my mannequins are seeing me that way hahahahahaha, remember that they are located between the guide line of the eyebrows and the beginning of the nose. Now make the features of the face, mark a little stronger the cheekbones and features of the man, his neck should be wide and in the case of the woman softer and more delicate neck, if you want to highlight her cheekbones you can guide you with the base lines of the circumference.
And this is the final art after erasing the guide lines, remember that your figurines will be as tall or short as you wish, big eyes, small eyes and everything else, the most important thing is that you understand what you want to transmit and that you feel happy after having drawn it.
******Final recommendation******
When the muse arrives, you must let yourself go, whatever time it is, give yourself a few minutes for you, have fun creating something, even if you think it is insignificant, it turns out to be worth gold because it cleared your mind and what you think you have drawn is nothing, for others it is a work of art.
Illustrated for you: Yenni Méndez
Source: All illustrations are my own.
The last picture is a video I made on tiktok and it's on my instagram:@yenyen_2_7 so you can see the different faces I made and get some inspiration.
Camera: My cool Redmi 7A phone.
Translator free version: DeepL