
Has it happened to you that you find a Parchis board but you do not have the chips to play?
Well it happened to me, hahaha ... so I want to explain how I did it in case it happens to you.

Te ha pasado que encuentras un tablero de Parchís pero no tienes las fichas para jugar?
Pues a mi si me pasó, hahaha... así que quiero explicarte cómo lo hice por si te llega a pasar.
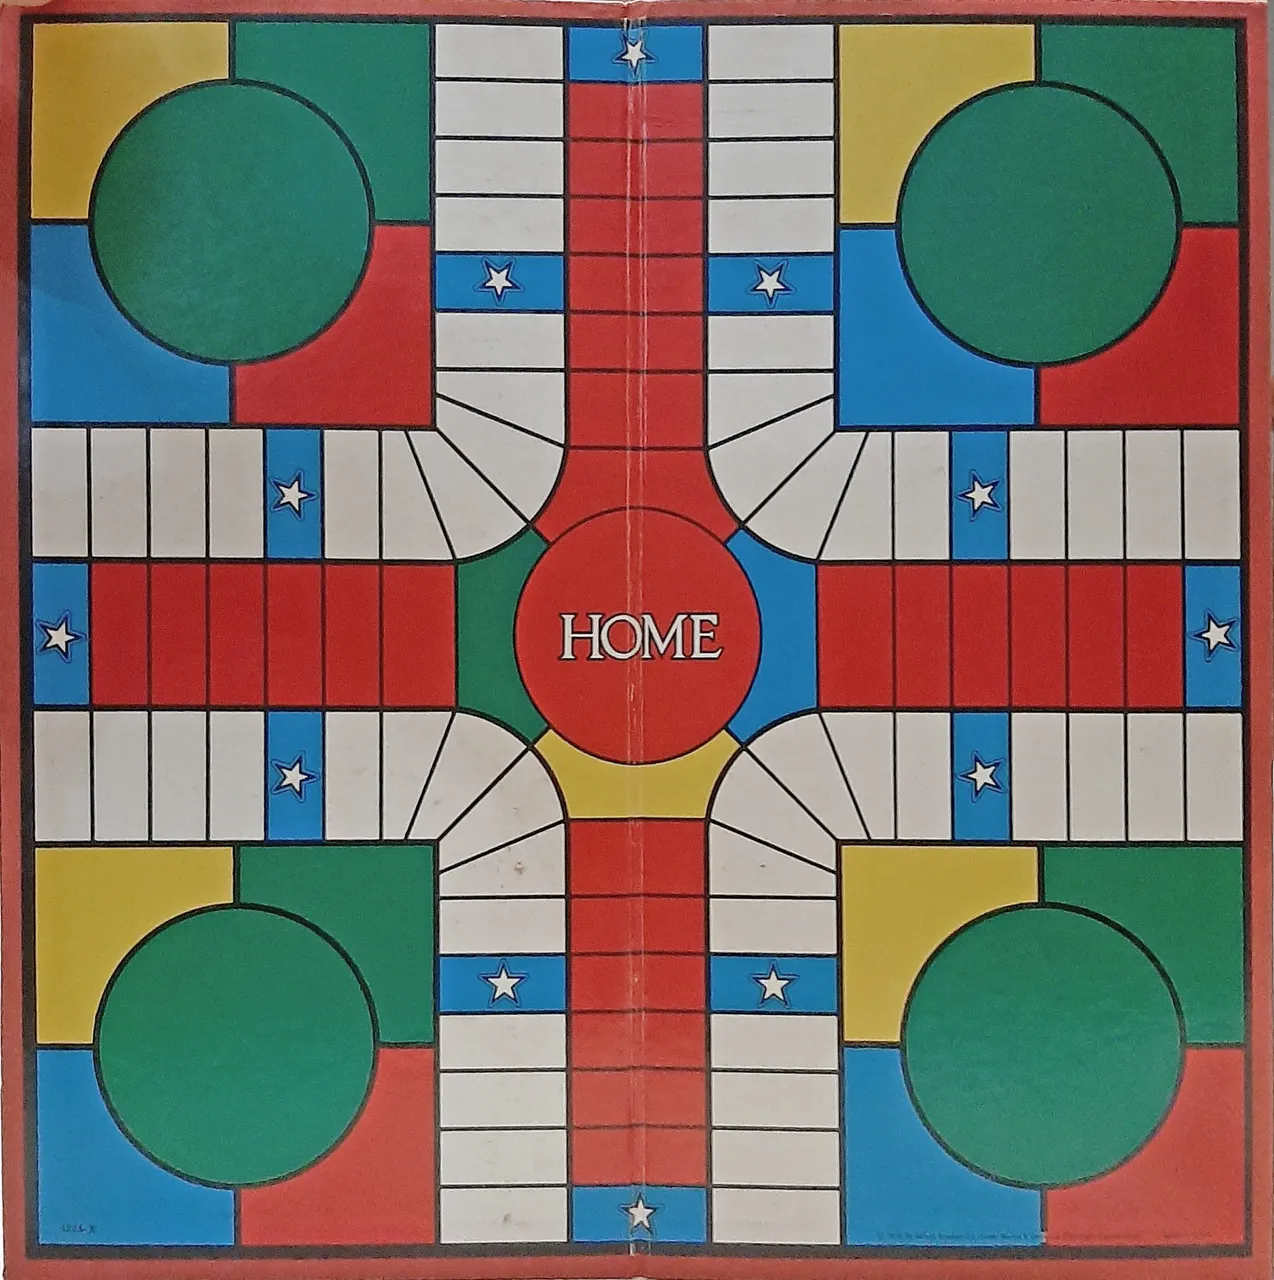
In this way I found the board (dirty, faded and without chips), and what I did was take chips from an incomplete game of Checkers that I found, but you can use what you find at home, which is more or less the same size.
You must get 12 units, or if you only find 4 of each shape it can work the same, because you can divide by type of shape and then give them the same color.
Likewise, if you want to make it more fun and personalized, you can search for anything you find that has the size and only paint it in the corresponding color.
De esta forma encontré el tablero (sucio, desteñido y sin fichas), y lo que hice fue tomar fichas de un juego de Damas incompleto que encontré, pero puedes utilizar lo que encuentres en casa, que sea más o menos del mismo tamaño.
Debes conseguir 12 unidades, o si solo encuentras 4 de cada forma puede funcionar igual, porque puedes dividir por tipo de forma y luego darles el mismo color.
De igual forma, si quieres hacerlo más divertido y personalizado puedes buscar cualquier cosa que encuentres que tenga el tamaño y solo lo pintas del color correspondiente.
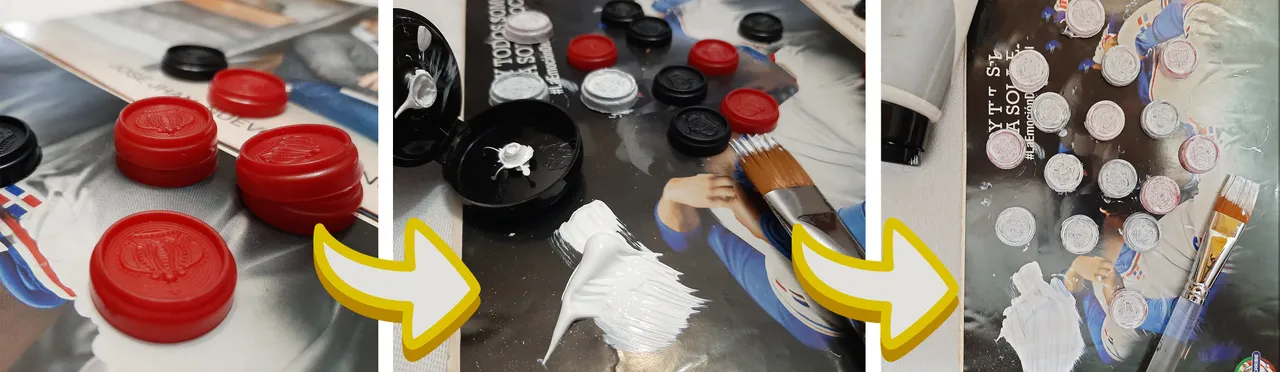
The first thing to do is to paint all the tiles white, so they can take the color we want. If you have a sandpaper, I recommend you to pass it to the surface of the tiles, this way the paint adheres better, I used white acrylic paint and gave it two coats of paint, I really do not recommend another paint (unless it is specialized) since neither tempera nor watercolor will adhere to the plastic, and the oil takes too long to dry, and is not a good friend of plastic either.
Lo primero que hay que hacer es pintar todas las fichas de color blanco, para que puedan tomar el color que queremos. Si tienen una lija de agua, les recomiendo pasársela a las dichas ya que de esta forma la pintura de adhiere mejor, utilicé pintura acrílica blanca y le di dos manos de pintura, realmente no recomiendo otra pintura (a menos que sea especializada) ya que ni la tempera ni la acuarela se van a adherir al plástico, y el óleo tarda demasiado tiempo en secar, y no es muy amigo del plástico tampoco.
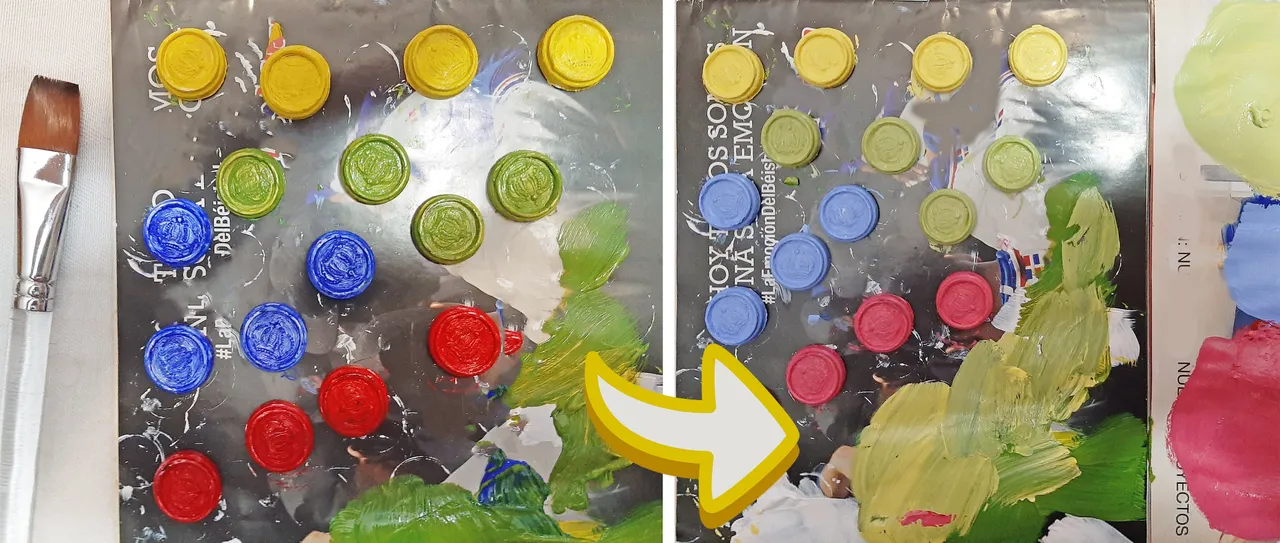
Then it's time to give the first coat of paint, you separate the tiles 4 by 4 and you paint it whit yellow, blue, red and green like the board.
On the other hand, after I saw that the color was not going to be exactly the same as the board, I decided to personalize it and paint the second hand with pastel colors, you can do it the way you want.
The bottom part can be painted in black, white or gray as I did.
Luego toca dar la primera mano de pintura, separas las ficha de 4 en 4 y las pintas de amarillo, azul, rojo y verde como el tablero.
Yo en cambio, después de que ví que el color no iba a ser exactamente igual que el tablero decidí personalizarlo y pintar la segunda mano con colores pasteles, tu puedes hacerlo de la forma que te plazca.
La parte de abajo se puede pintar de color negro, blanco o un gris como lo hice yo.
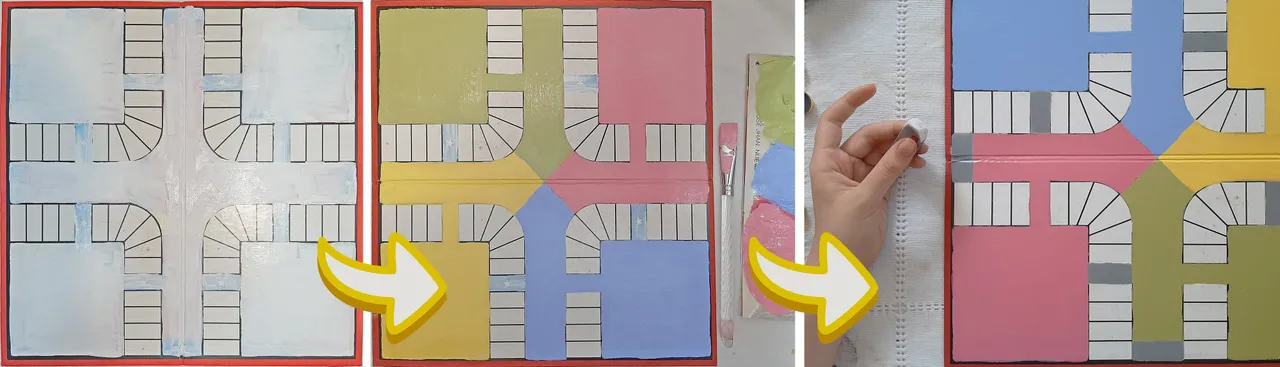
After seeing how pretty the chips were, I decided to paint the entire board and customize it.
As with the tiles, I sanded the part I was going to paint (the color areas), then I gave him two coats of white acrylic paint and started painting with the same pastel shades that I had already achieved.
After giving it two coats of color, with a eraser and you start to erase all the dirt from the white squares (although don't believe it, yes, the rub helps a lot to clarify the squares)
I really decided not to paint them white because it was not so dirty after cleaning, and if I did it later I could be confused with the layout of the box lines.
Después de ver que bonitos me quedaron las fichas, decidir pintar todo el tablero y personalizarlo.
Igual que con las fichas, lijé la parte que iba a pintar (las áreas de color), luego le di dos manos de la pintura acrílica blanca y comencé a pintar con las mismas tonalidades pasteles que ya había conseguido.
Luego de dale dos manos de color, con una borra de leche comenzamos a borrar toda la suciedad de las casillas blancas (aunque no lo creas, si, la borra ayuda muchísimo a aclarar las casillas)
Yo realmente decidí no pintarlas de blanco porque no quedó tan sucio después de la limpieza, y si lo hacia luego se me podían confundir el trazado de las lineas de las casillas.
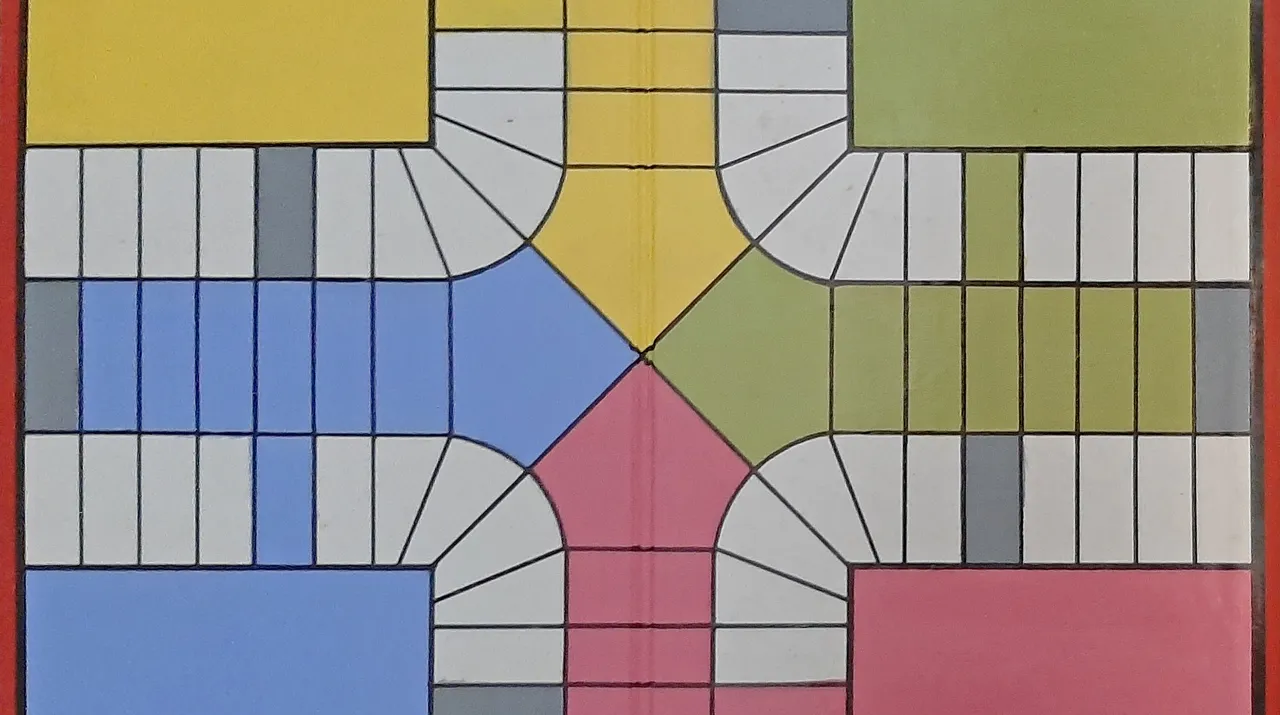
Then what you have to do is draw the black lines on the edges of the squares, I did it with a fine permanent black marker, you can do it with a brush if you want and you can do it, it depends on you.
And finally, we apply a fixative of acrylic spray paint to the entire surface, so that the paint takes care of us.
Luego lo que toca es dibujar las líneas negras de los bordes de las casillas, yo lo hice con un marcador negro permanente fino, tu si quieres y te animas lo puedes hacer con pincel, ya eso depende de ti.
Y por ultimo, le pasamos un fijador de pintura acrílica en spray a toda la superficie, para que la pintura se nos cuide.
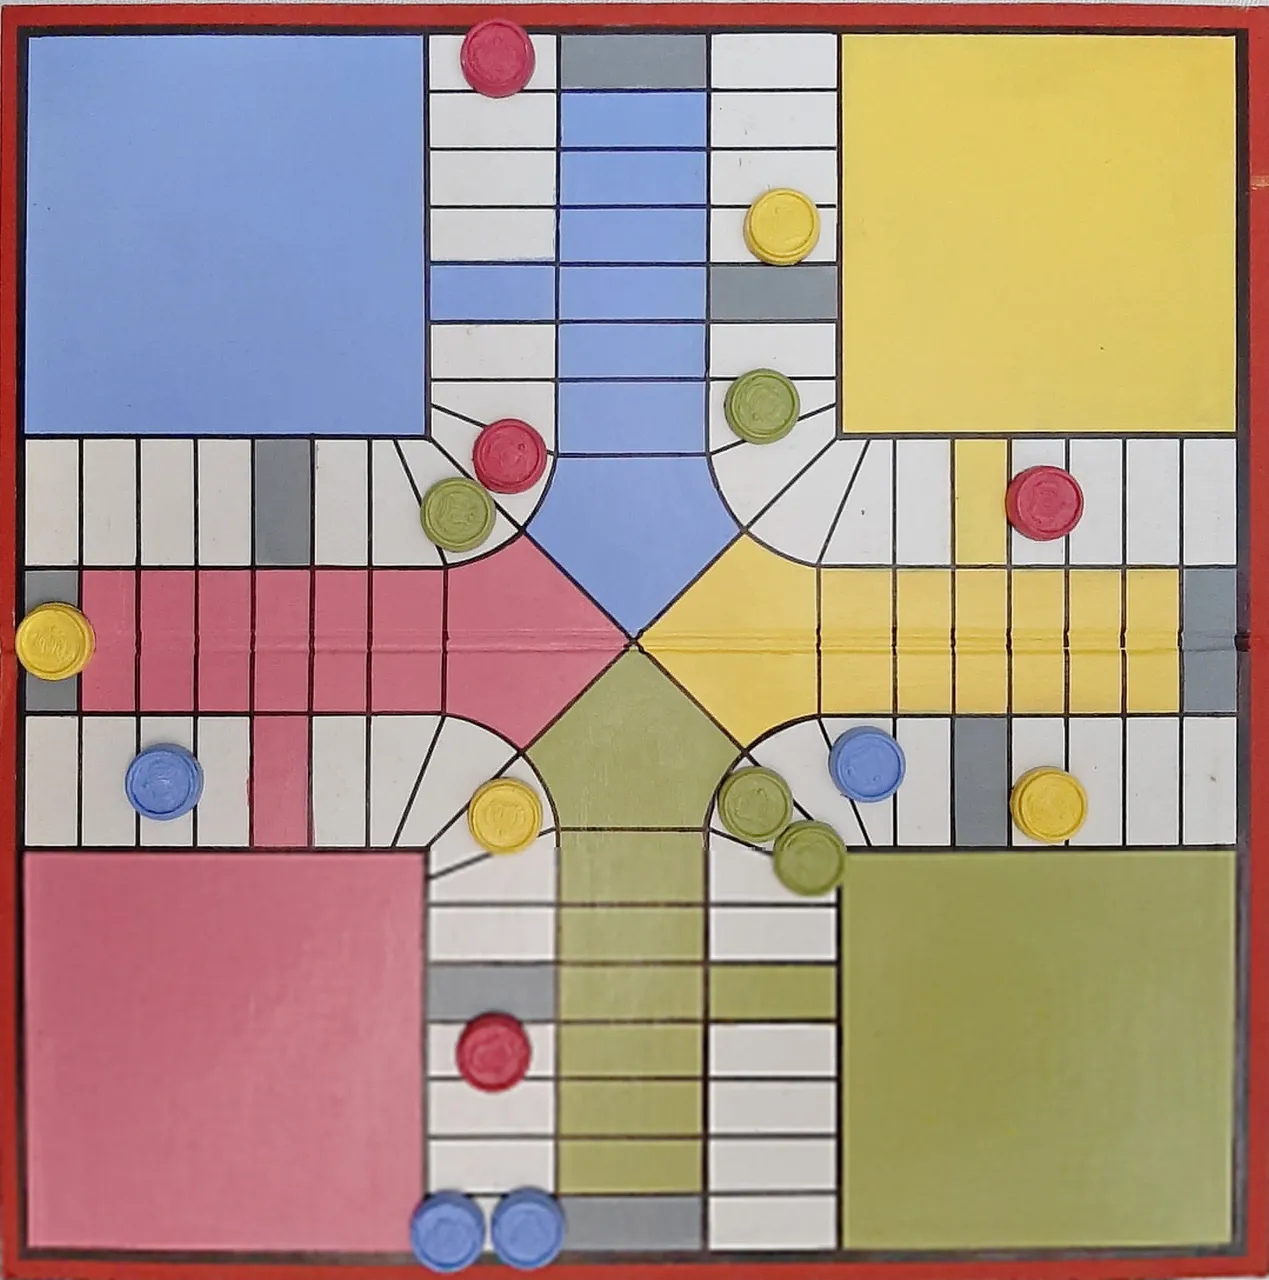
And Voilá, it has some imperfections, but that is what makes it more interesting and unique.
Hopefully the tutorial has served you something, because I loved how it turned out.
Until next time, thanks for reading!
Y Voilá, tiene algunas imperfecciones, pero eso es lo que lo hace más interesante y único.
Ojala que el tutorial te haya servido de algo, porque a mi me encantó como quedó.
Hasta la próxima, gracias por leer!