❣️¡Hola amigos de hive!❣️
❣️Hello friends of hive!❣️
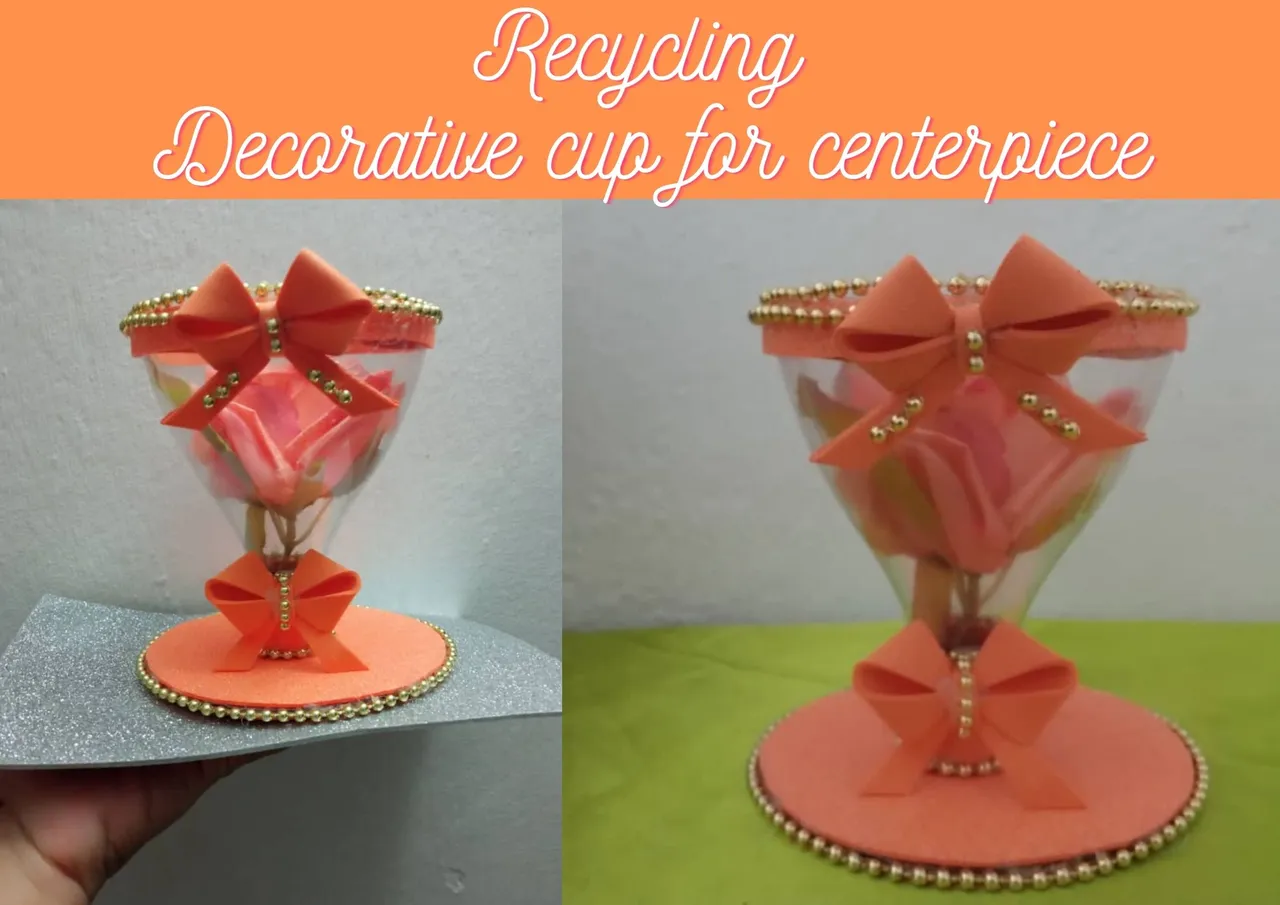
Today I show you how to make a beautiful and simple centerpiece cup with recycled material. This project is ideal for decorating birthday parties, weddings, 15 years and for our home, can be done quickly with materials we already have at home, while contributing to the environment.
Materiales para la elaboración de esta copa para centro de mesa
- Foami
- CD
- Botella de refresco
- Tijera
- Pegamento
- Flor de plástico
- Collares
Materials for making this centerpiece cup .
- Foami
- CD
- Soda bottle
- Scissors
- Glue
- Plastic flower
- Necklaces

Paso a paso de este sencilla copa para centro de mesa
Step by step of this simple centerpiece cup .
Paso Nº 1 || Step Nº 1:
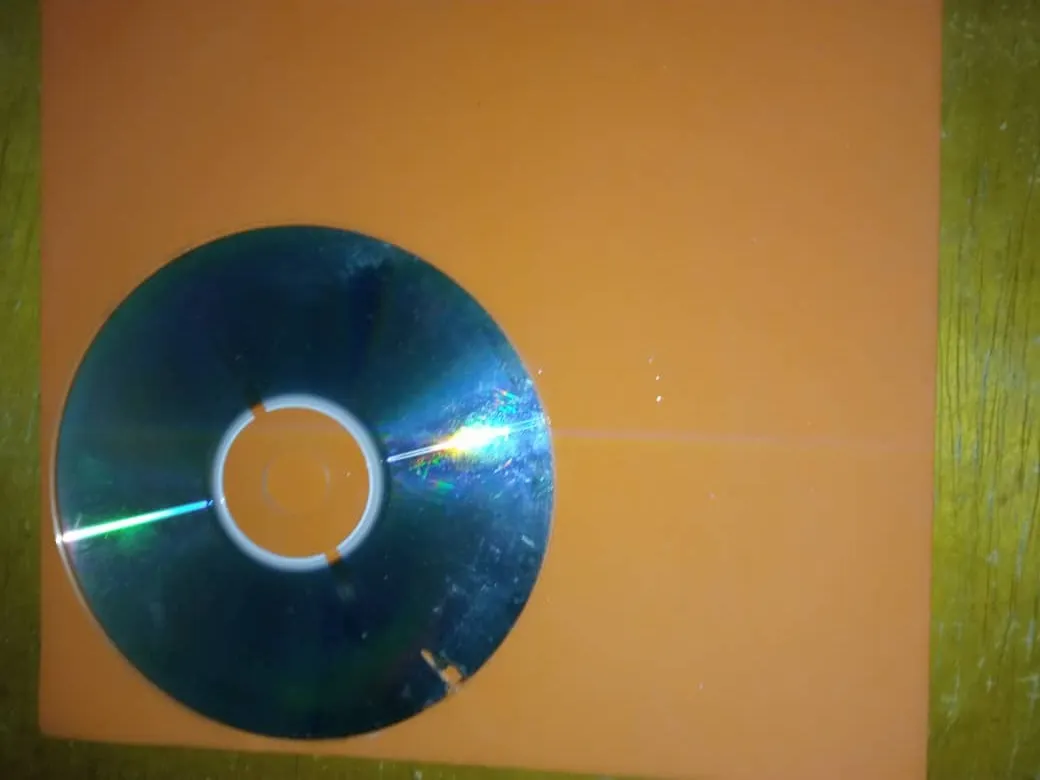
Pegamos el CD en el foami, recortamos, y eso lo hacemos por ambos lados, uno con el foami normal y el otro lado con el foami escarchado.
We glue the CD on the foami, cut it out, and we do it on both sides, one side with the normal foami and the other side with the frosted foami.


Paso Nº 2 || Step Nº 2:
Ahora colocamos el collar alrededor del CD.
Now we place the necklace around the CD.

Paso Nº 3 || Step Nº 3:
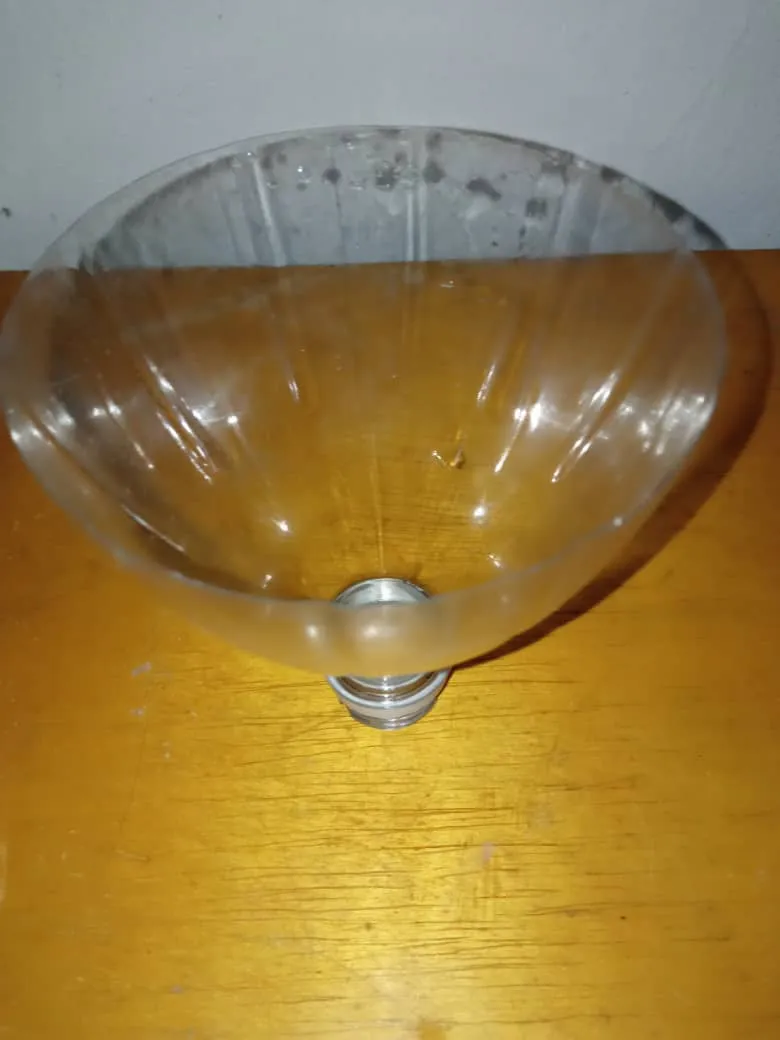
Luego cortamos la botella y pegamos una cinta de foami escarchado en la base de la copa. le colocamos collar y la pegamos en el cd.
Then we cut the bottle and glue a frosted foami ribbon on the base of the cup. We put a necklace on it and glue it on the cd.

Paso Nº 4 || Step Nº 4:
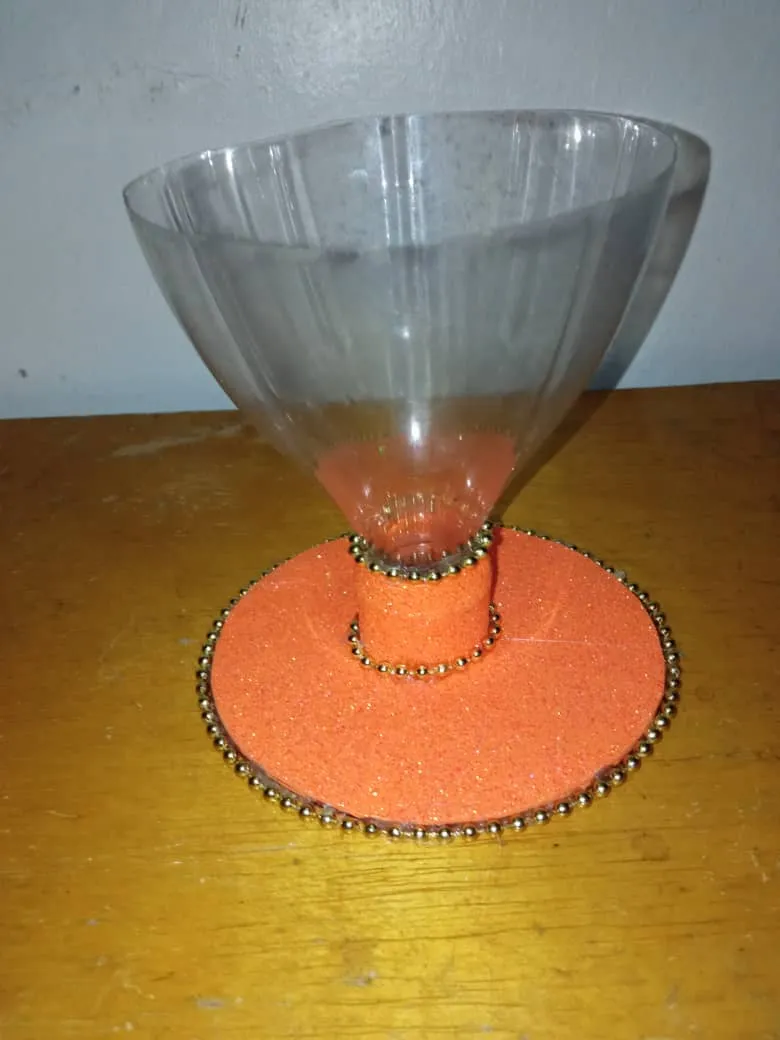
Ahora recortamos una cinta de 1 cm de ancho hora y se pega en la parte de arriba de la copa, luego le colocamos collar .
Now we cut a 1 cm wide ribbon and stick it on the top of the cup, then we place a necklace on it.


Paso Nº 5 || Step Nº 5:
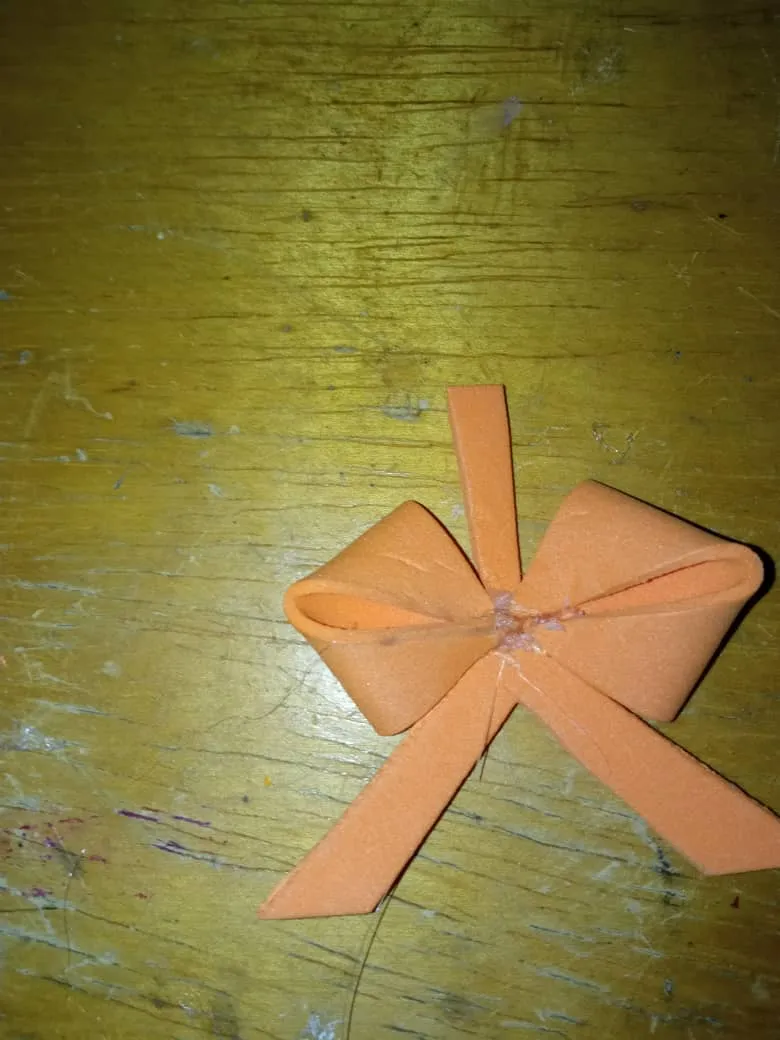
Luego con el foami naranja normal, recortamos un cuadrado de 6 x 6 cm, luego con una regla y la tijera le hacemos dos marcas diagonal, para luego cortar con la tijera , haciendo varios cortes como muestra las imagenes, unimos y pegamos, eso sera los lazos para decorar la copa.
Then with the normal orange foami, cut a square of 6 x 6 cm, then with a ruler and scissors we make two diagonal marks, then cut with the scissors, making several cuts as shown in the images, join and glue, that will be the bows to decorate the cup.


Paso Nº 6 || Step Nº 6:
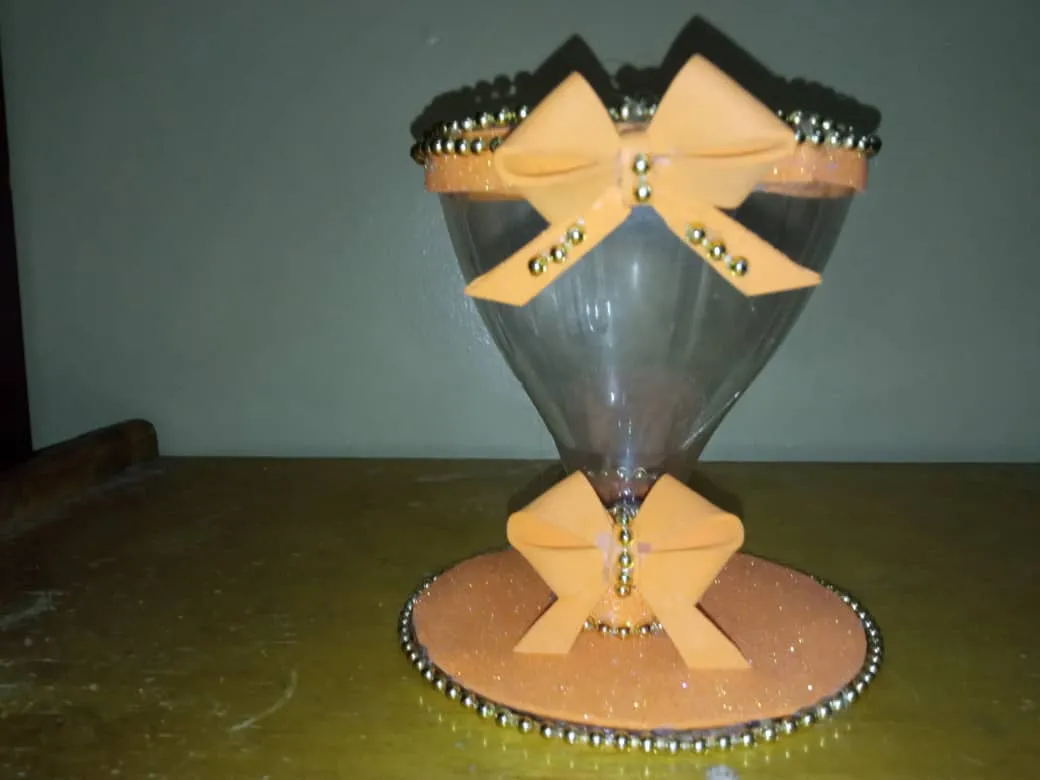
Para finalizar colocamos otra cinta de foami dentro y pegamos collares e introducimos la flor en la copa.
Finally, we place another foami ribbon inside and glue necklaces and insert the flower in the cup.
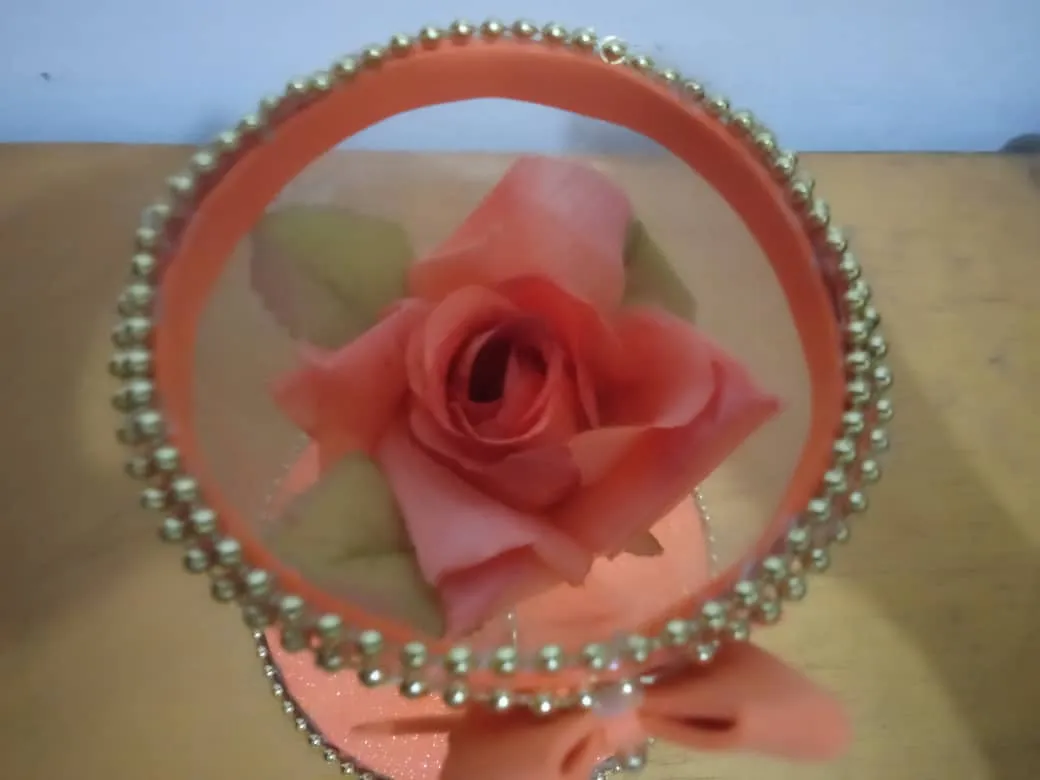
Este es el resultado final, con esto hemos creado una linda copa para centro de mesas.
This is the final result, with this we have created a nice centerpiece cup.

¡Hasta la próxima!
See you next time! .