Saludos cordiales para todos los lectores. En esta oportunidad me complace traerles un tutorial para realizar una Flor de Loto en origami. El resultado es increíble y el procedimiento es fácil, por lo que resulta ideal si estas comenzando.
Warm greetings to all readers. This time I am pleased to bring you a tutorial to make a Lotus Flower in origami. The result is amazing and the procedure is easy, so it is ideal if you are just starting out.
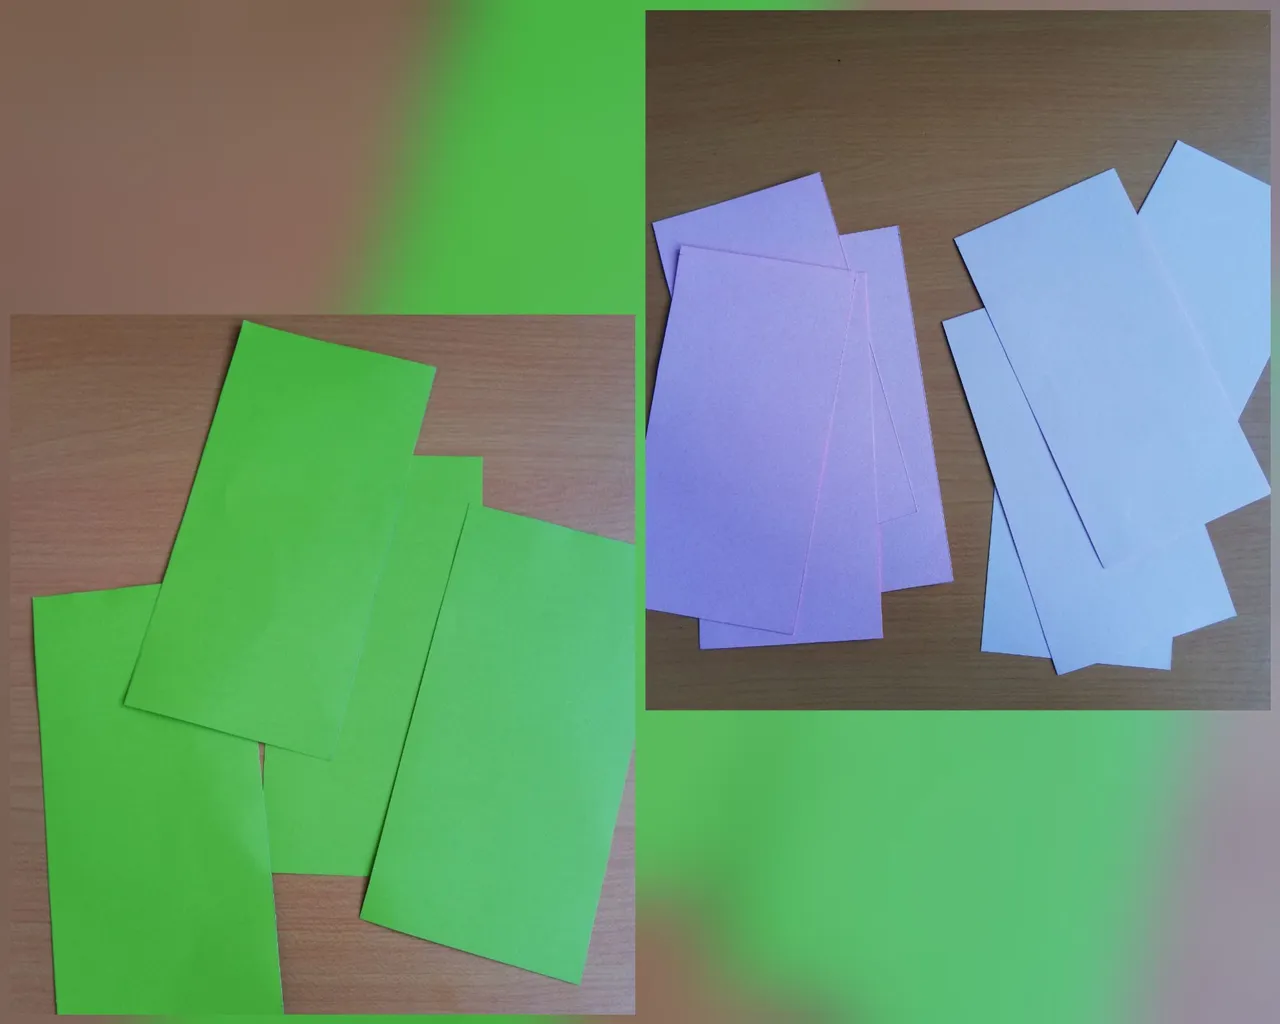
Lo que vamos a necesitar son 8 rectángulos rosados (o el color que desee para la flor) y 4 verdes. En mi caso, utilicé unos de 7cm x 14cm. Pueden ser de 15cm o 16cm si desea las hojas un poco más largas.
What we will need are 8 pink rectangles (or the color you want for the flower) and 4 green ones. In my case, I used 7cm x 14cm. They can be 15cm or 16cm if you want the leaves a little longer.
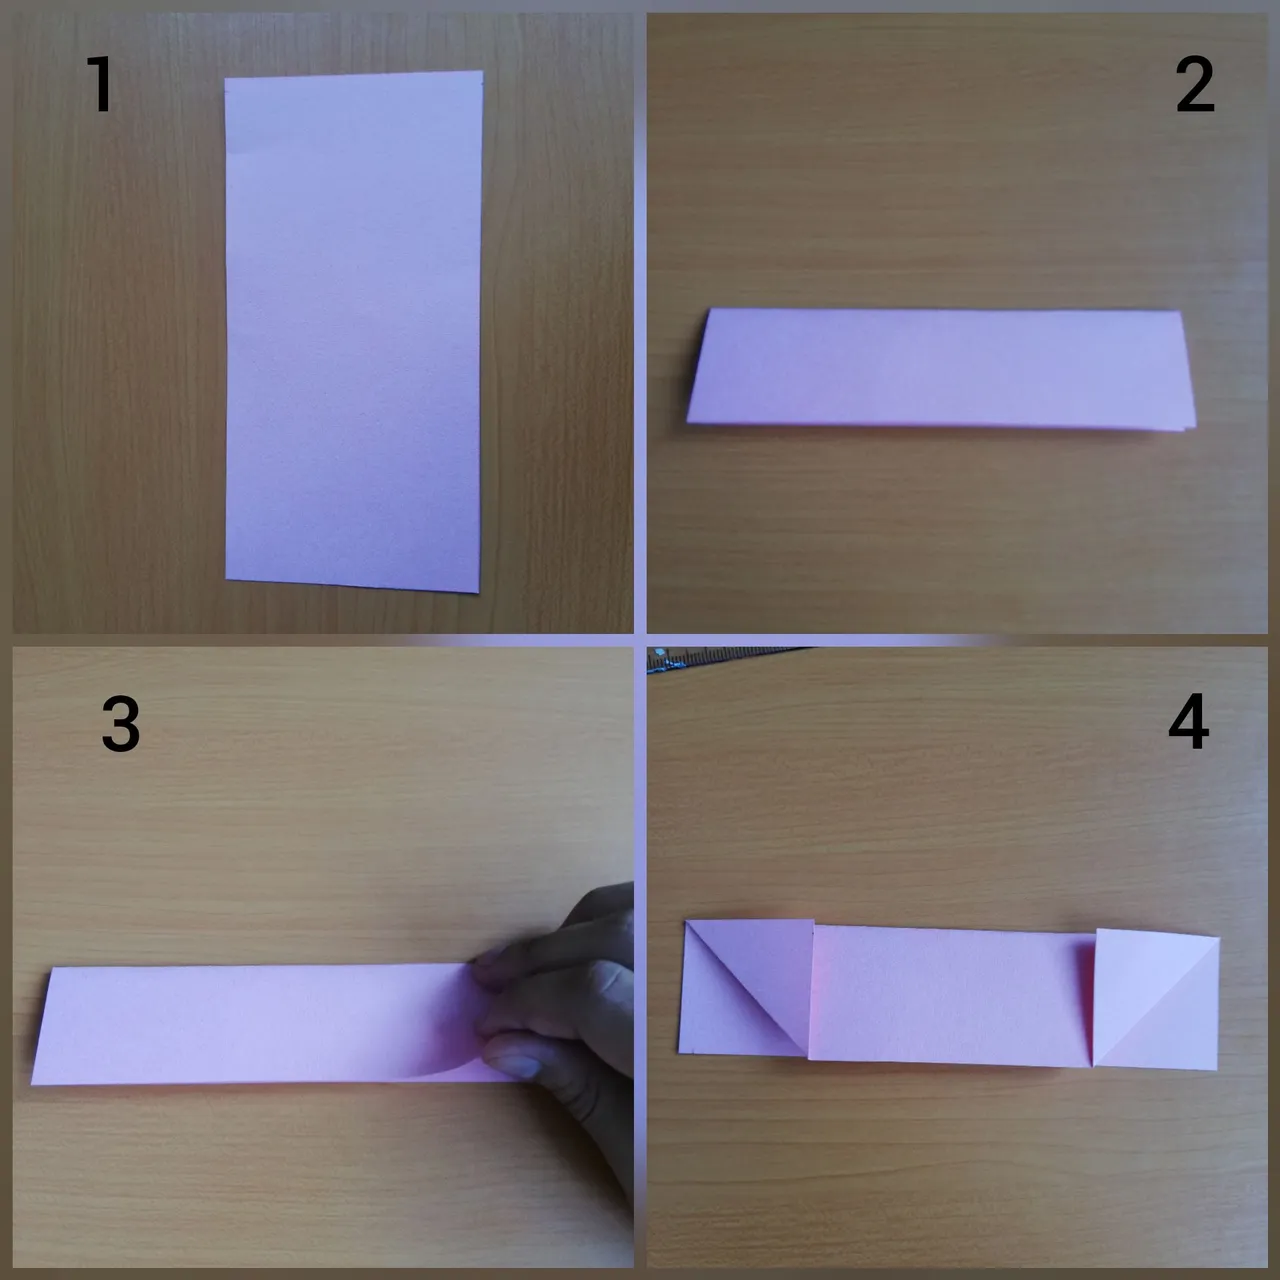
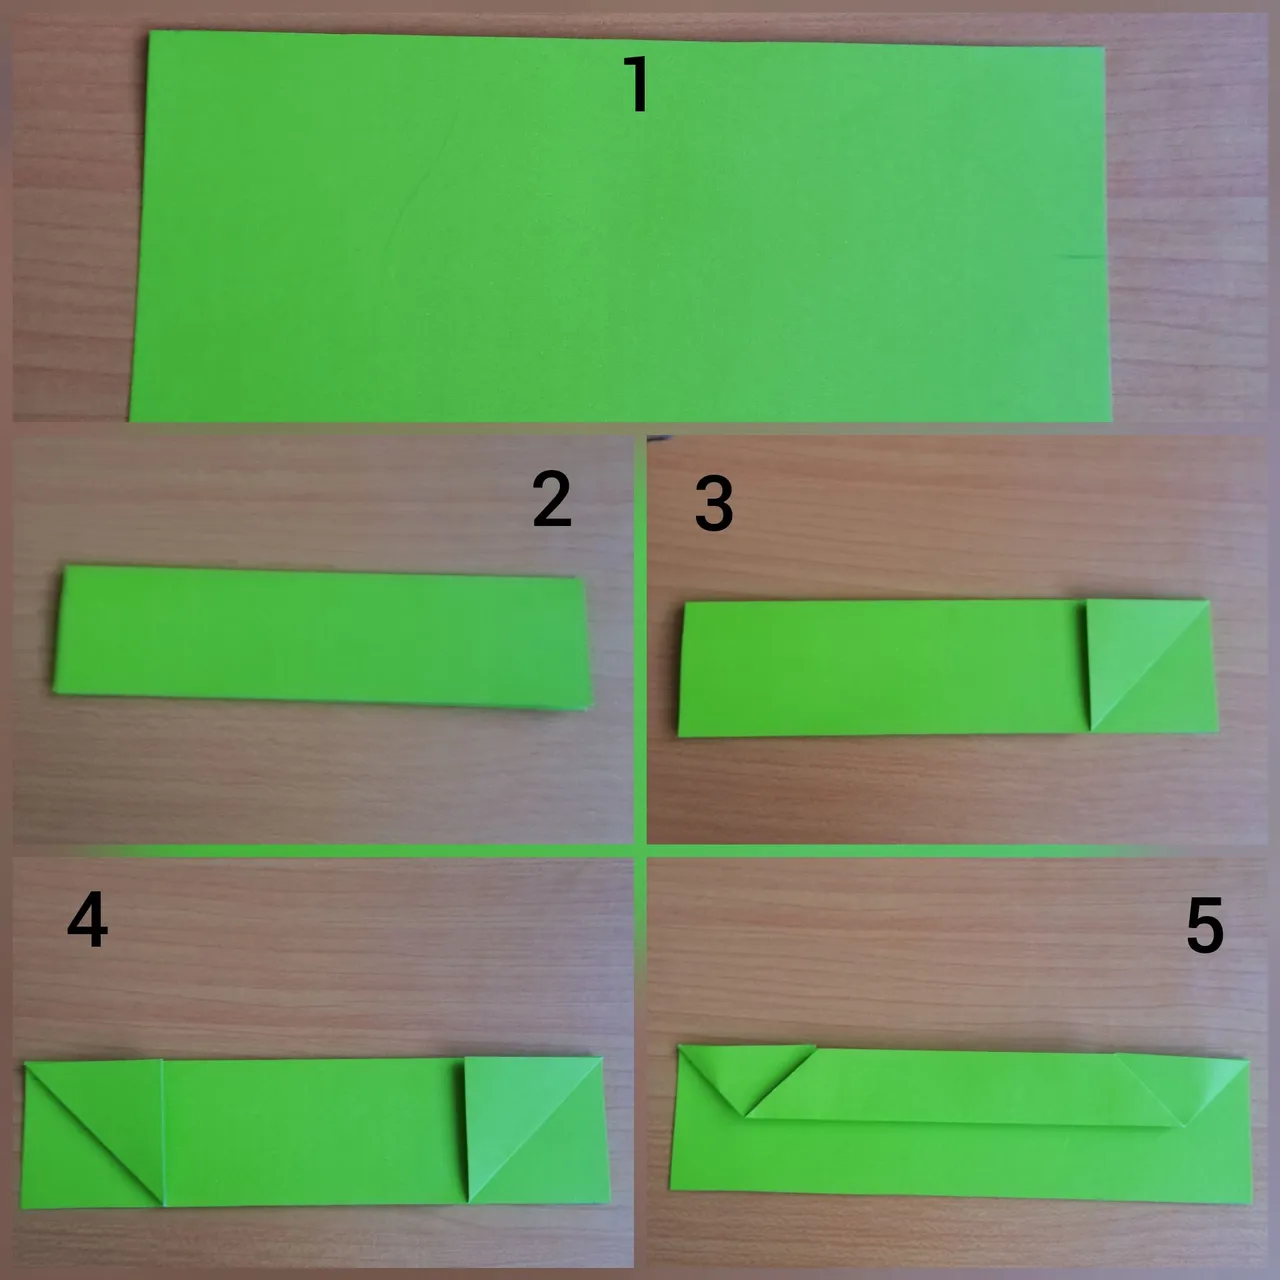
- Para comenzar (1) doblaremos por la mitad del rectángulo (2)
- Ahora doblaremos las puntas inferiores hacia arriba (3) y (4)
- To begin (1) fold the rectangle in half (2)
- Now we will fold the lower ends upwards (3) and (4)
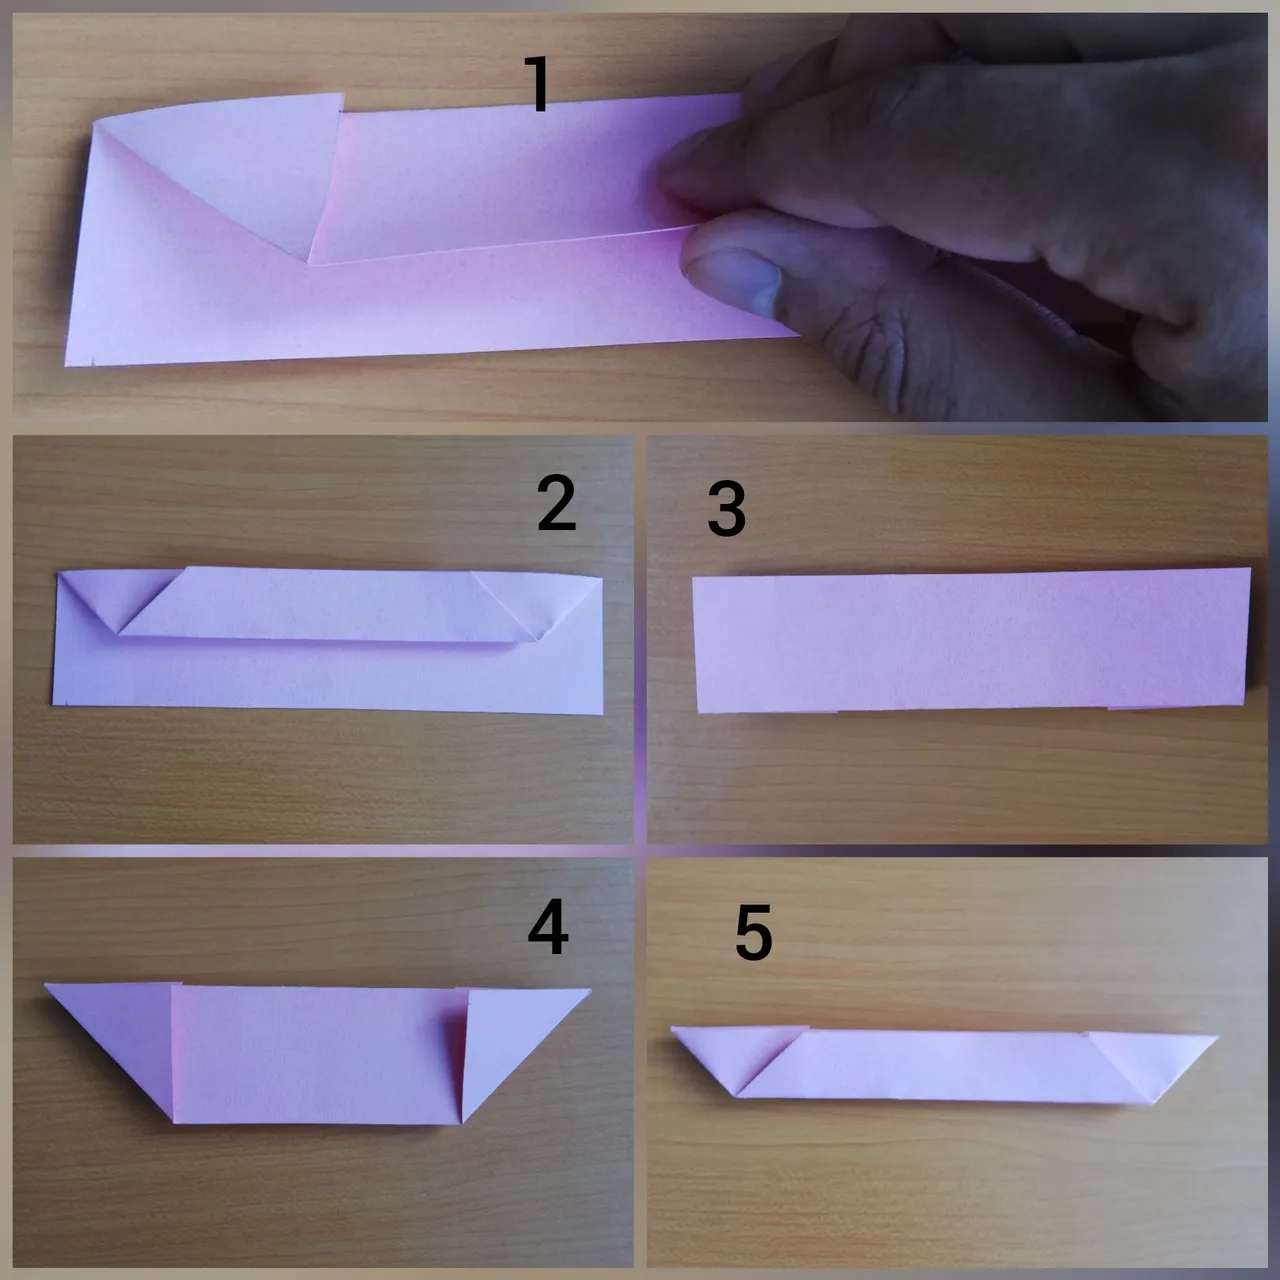
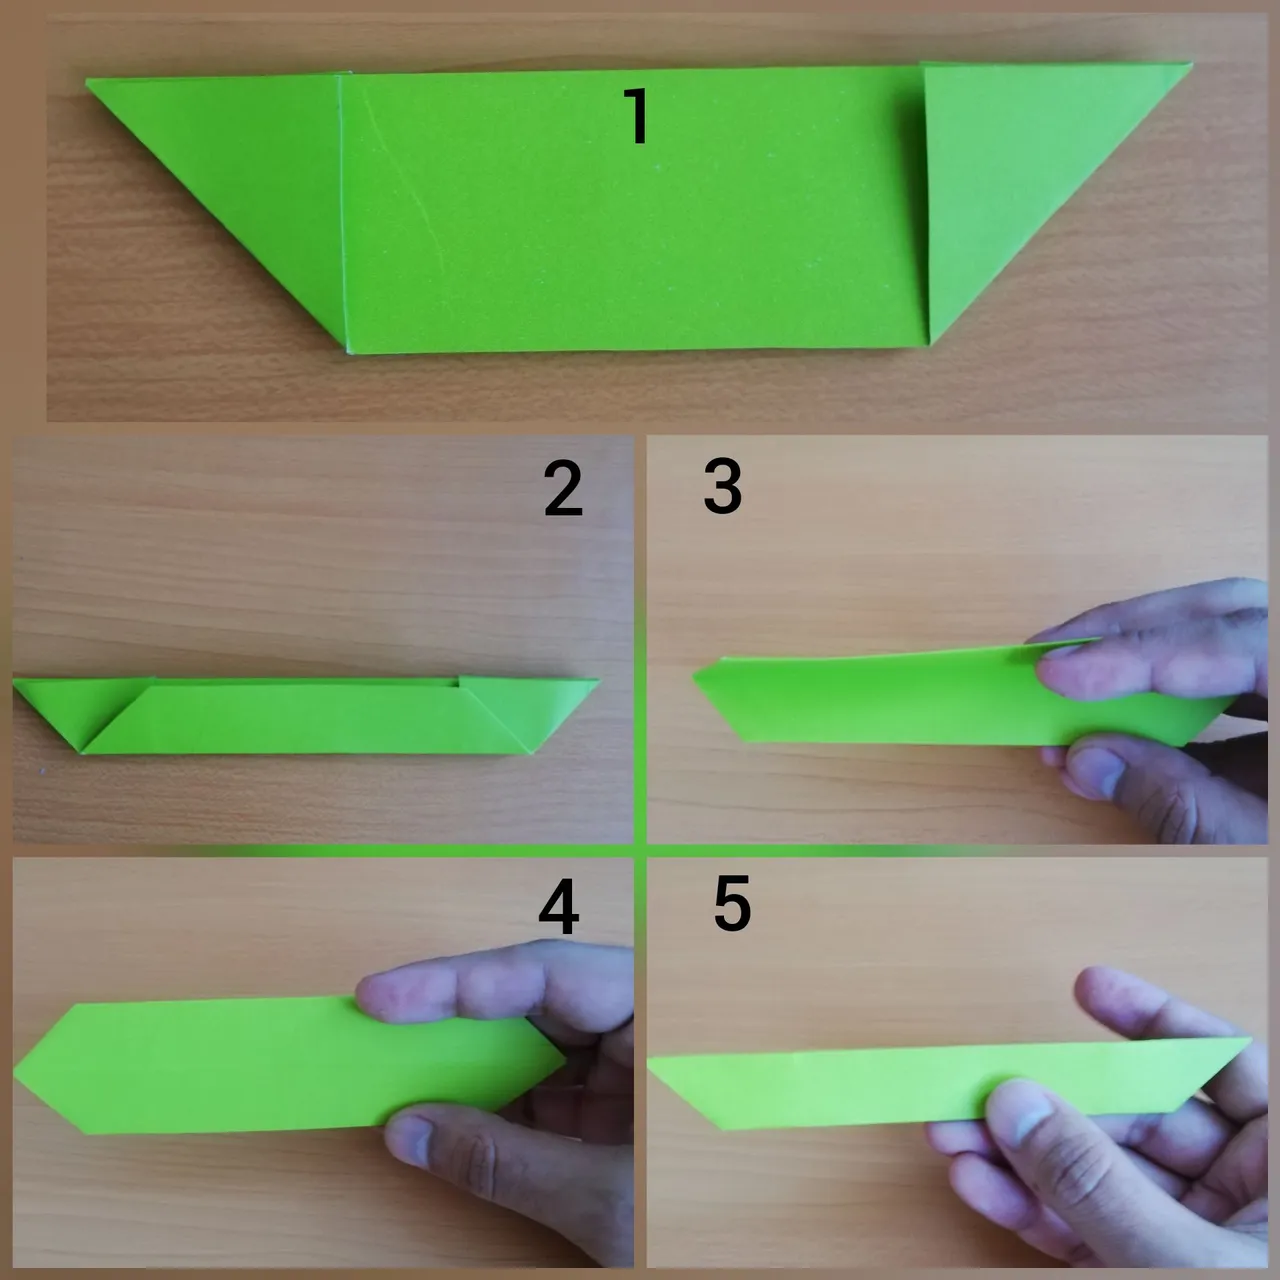
- Una vez tengamos los triángulos hechos, doblaremos por la mitad, hacia arriba (1) y (2)
- Volteamos (3) y repetimos el procedimiento (4) y (5)
- Concluido, repetimos los mismo con los 7 rectángulos restantes
- Once we have the triangles made, we fold them in half, upwards (1) and (2)
- Turn over (3) and repeat the procedure (4) and (5)
- Once finished, we repeat the same with the remaining 7 rectangles.
- Tomaremos el rectángulo (1) y lo doblaremos por la mitad (2)
- Doblaremos las esquinas (3) y (4)
- Doblaremos por la mitad hacia arriba (5)
- Take the rectangle (1) and fold it in half (2)
- We will fold the corners (3) and (4)
- Fold in half upwards (5)
- Doblaremos del mismo modo el otro lado (1) y (2)
- Abriremos por la parte inferior (3) para cerrar hacia el otro lado (4) y (5)
- Lo mismo se realizará con los otros 3 rectángulos
- Fold the other side in the same way (1) and (2)
- We will open at the bottom (3) to close the other side (4) and (5)
- The same will be done with the other 3 rectangles
- Ahora teniendo todas nuestras partes listas (1) y (2)
- Colocaremos una parte rosada dentro de otra (3) y (4)
- Luego, abriremos para colocar una parte verde dentro de las rosadas (5), (6) y (7)
- Repetiremos lo mismo para que nos queden 4 partes en igual orden (8)
- Now we have all our parts ready (1) and (2)
- We will place one pink part inside another (3) and (4)
- Then, we will open to place a green part inside the pink ones (5), (6) and (7)
- We will repeat the same so that we have 4 parts in the same order (8)

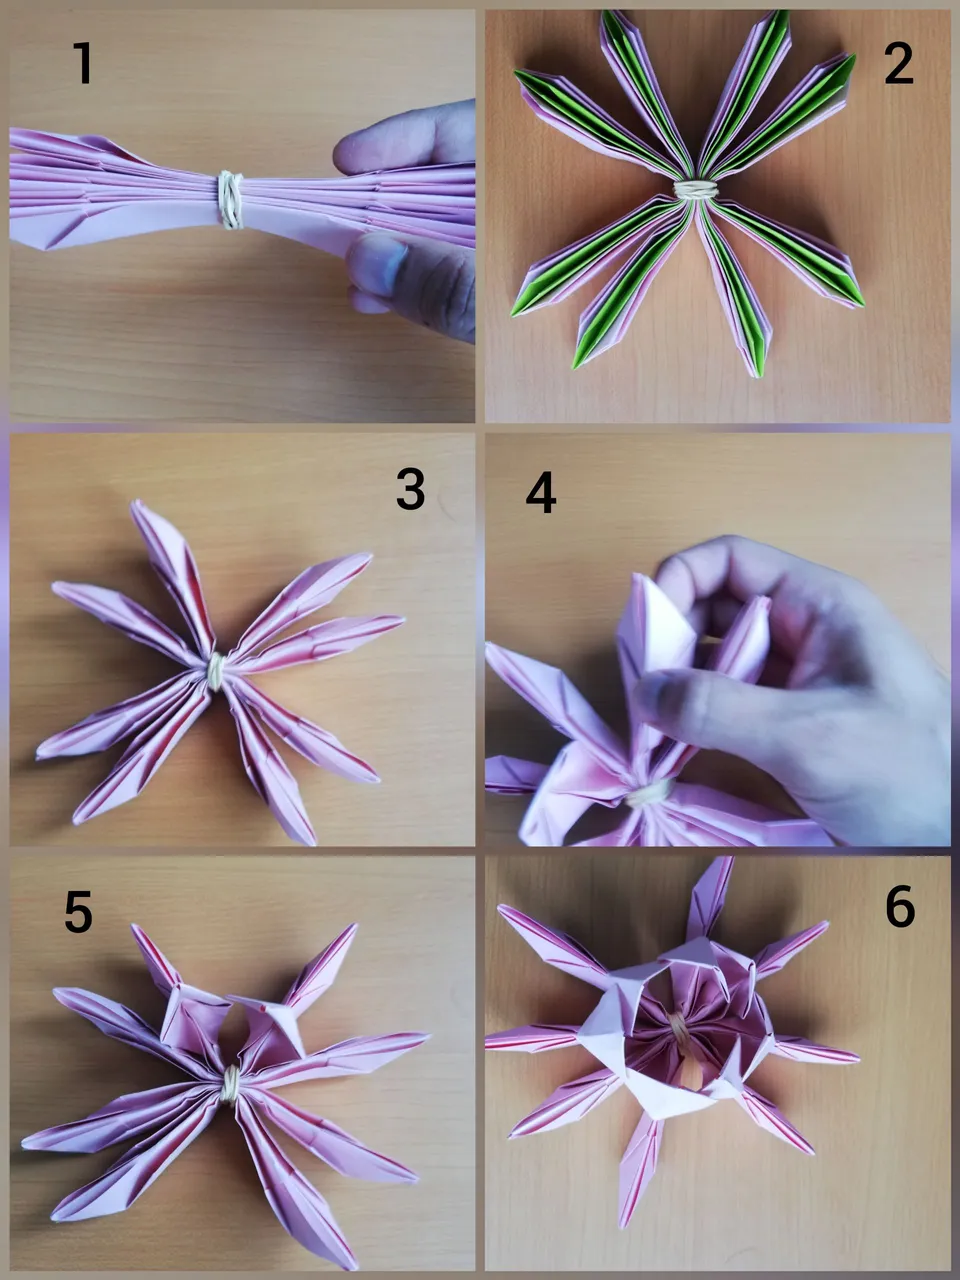
- Sujetaremos las 4 partes con una liga o alambre por el centro (1)
- Separaremos doblando hacia los lados, buscando que queden simétricos (2)
- El lado donde se ve lo verde queda hacia abajo (3)
- Y ahora procedemos a doblar con cuidado, las partes, hacia arriba (4), (5) y (6), hasta completar todas.
- We will hold the 4 parts with a rubber band or wire through the center (1)
- Separate them by folding them to the sides, trying to make them symmetrical (2)
- The side where you can see the green is downwards (3)
- And now we proceed to fold carefully the parts upwards (4), (5) and (6), until all of them are completed.
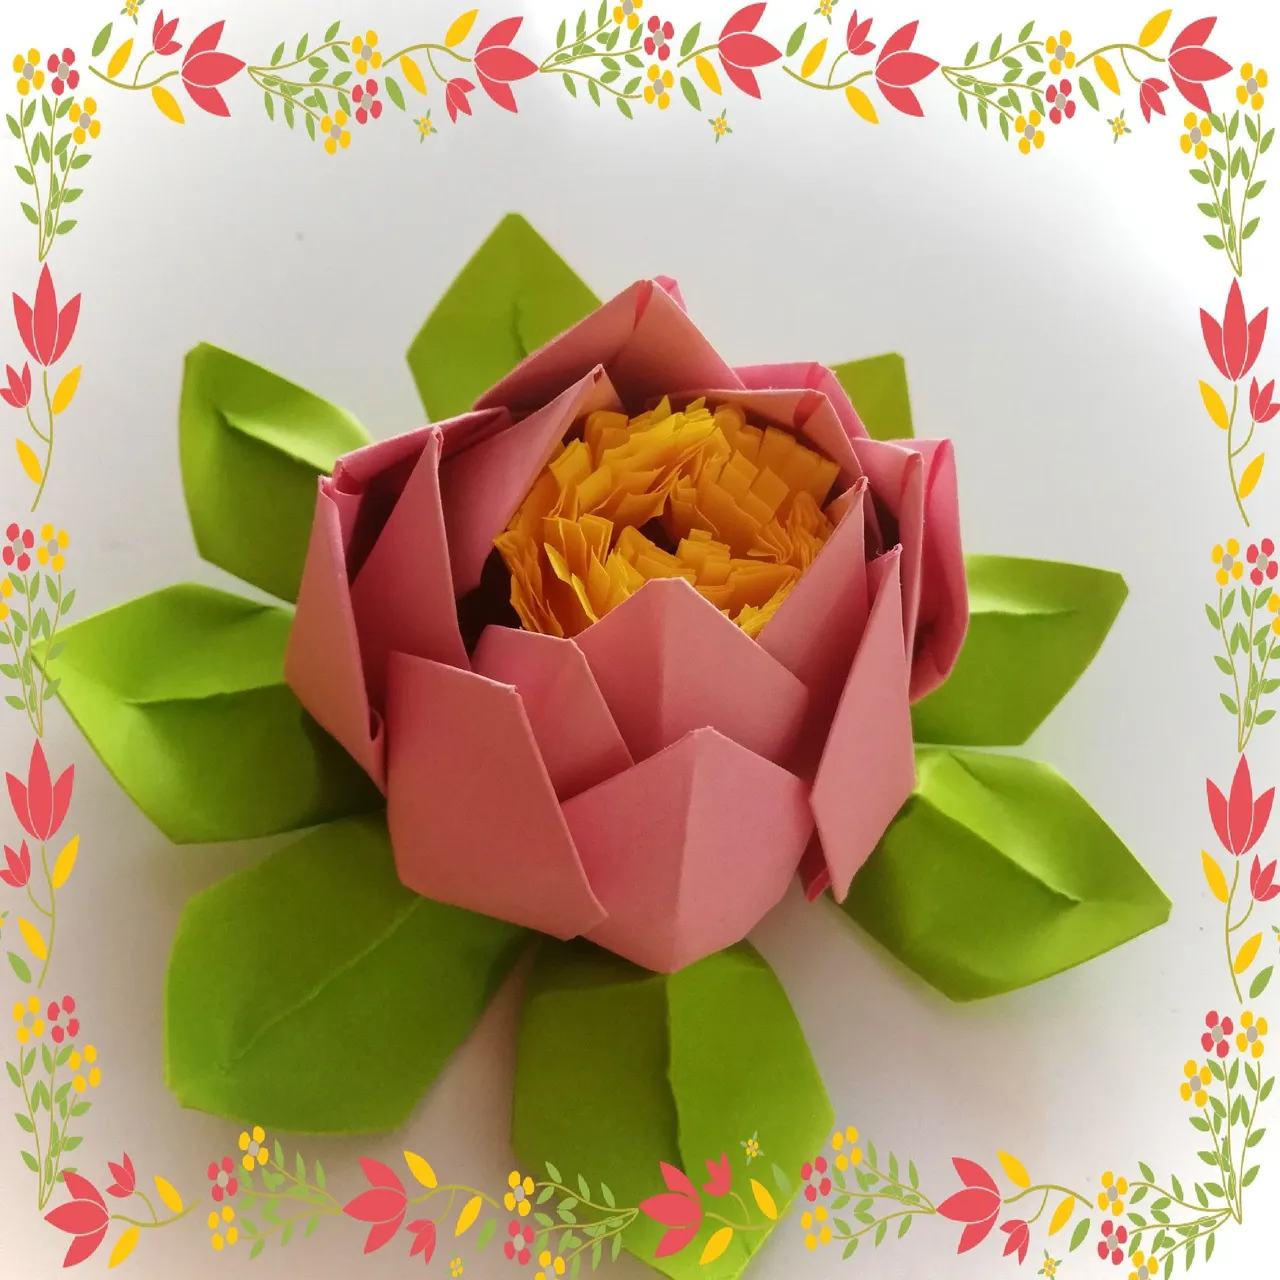
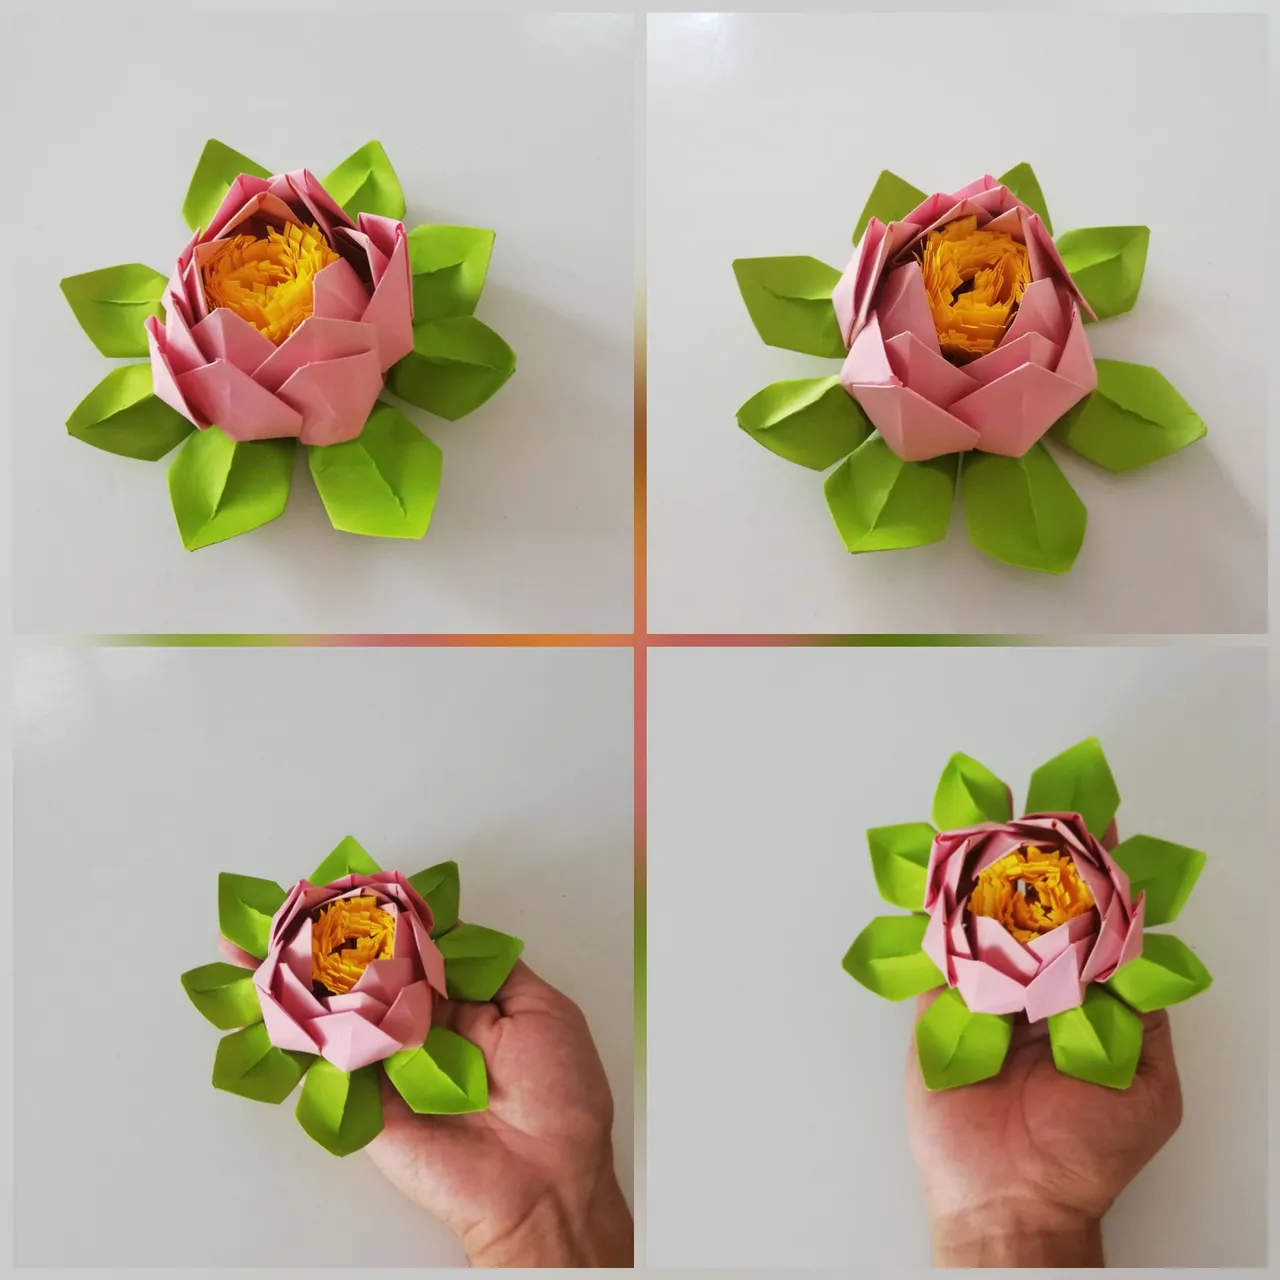
Una vez dobladas todas las partes, tendríamos nuestras flor pero para un detalle más, utilicé un pedazo amarillo para rellenar el centro.
Once all the parts were folded, we would have our flower but for an extra detail, I used a yellow piece to fill in the center.
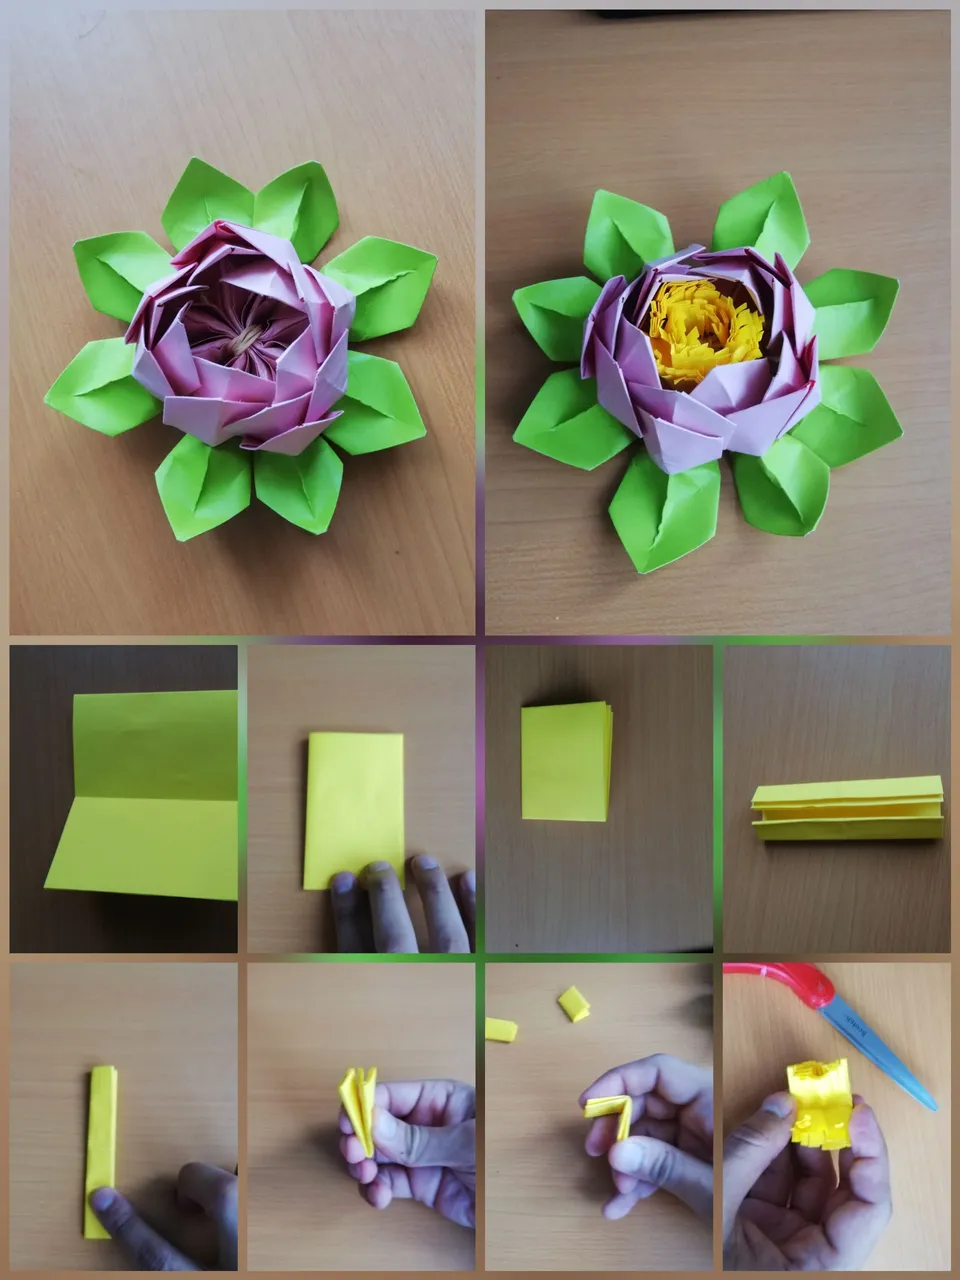
El resultado final es una hermosa flor
The end result is a beautiful flower
Con esto concluimos este origami y me despido hasta una próxima publicación. Si desean que traiga el tutorial de alguna flor en específico, pueden dejármelo dicho en los comentarios.
With this we conclude this origami and I say goodbye until a future post. If you want me to bring the tutorial of a specific flower, you can let me know in the comments.
Origamis
Ranita Saltarina en origami/
Origami Jumping Frog
(Tutorial detallado/detailed tutorial)
Bella mariposa en origami/
Beautiful origami butterfly
(Tutorial detallado/Detailed tutorial)