¡¡Hola a toda la comunidad de Hive!!
El día de hoy podrán realizar un toppers paso a paso. Hermosa manualidad que es apoyada por @appreciator @trafalgar Agradezco su apoyo. Comencemos!.
El día de hoy podrán realizar un toppers paso a paso. Hermosa manualidad que es apoyada por @appreciator @trafalgar Agradezco su apoyo. Comencemos!.
Hello to all the Hive community !!
Today you will be able to make a toppers step by step. Beautiful craft that is supported by @appreciator @trafalgar I appreciate your support. Let's get started!


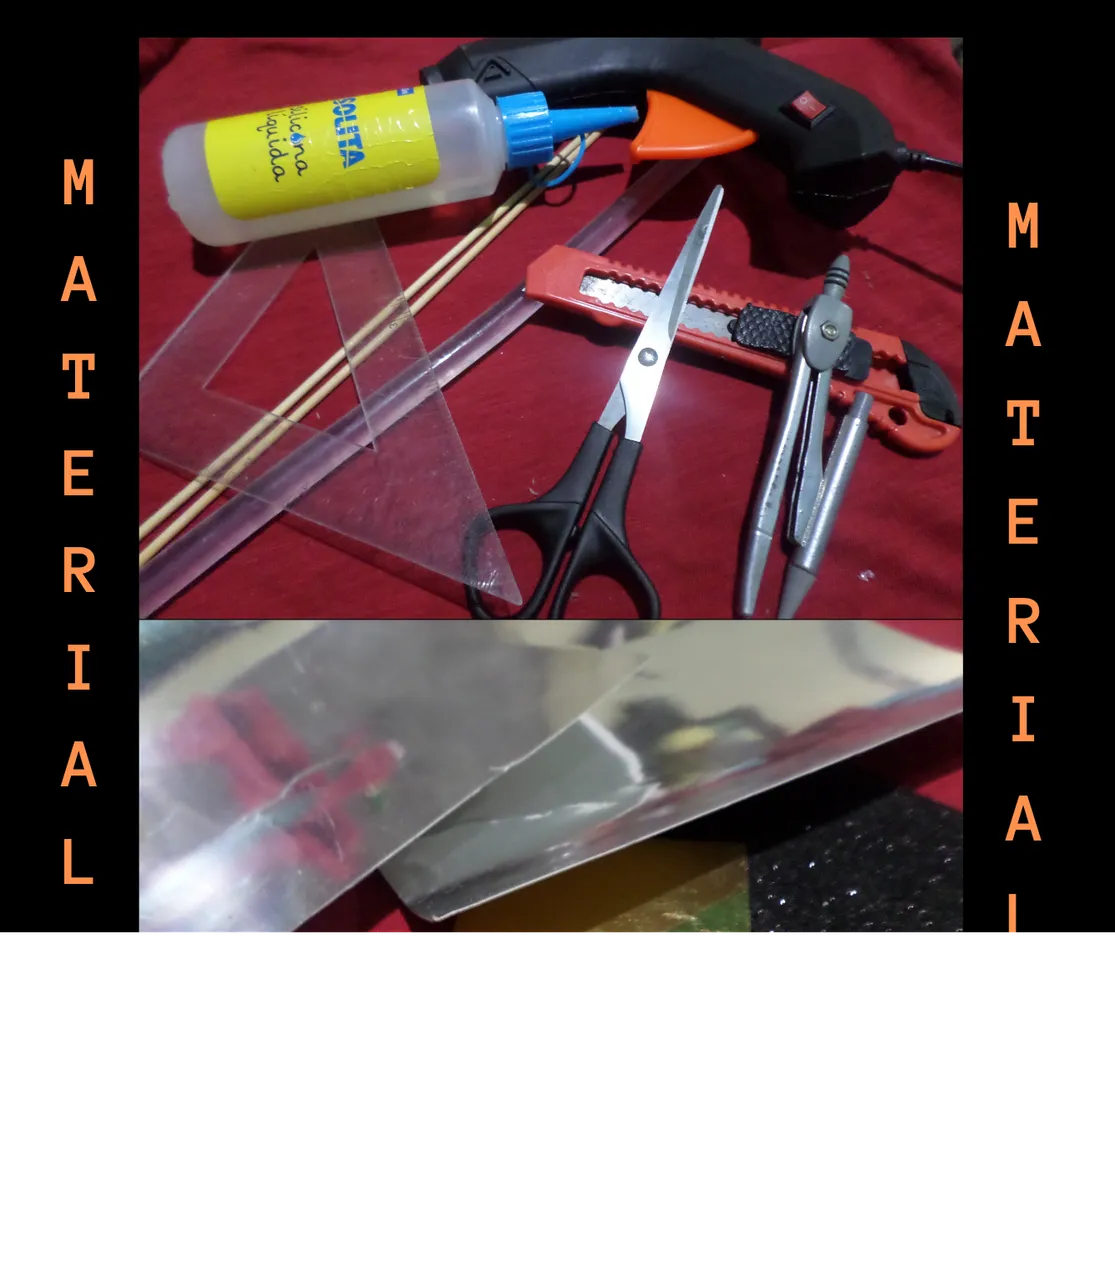
Materiales que necesitas:
- Cartulina espejo, rosa y negra o color opcional
- Silicón líquido y en barra
- Tijeras
- Compás y regla
- Papel crepé
- Palitos de altura
- Plástico transparente, gris o blanco
Materials you need:
-Mirror cardboard, pink and black or optional color.
-Liquid and stick silicone.
-Scissors.
-Compass and ruler.
-Crepe paper.
-Height sticks .
-Clear, gray or white plastic.

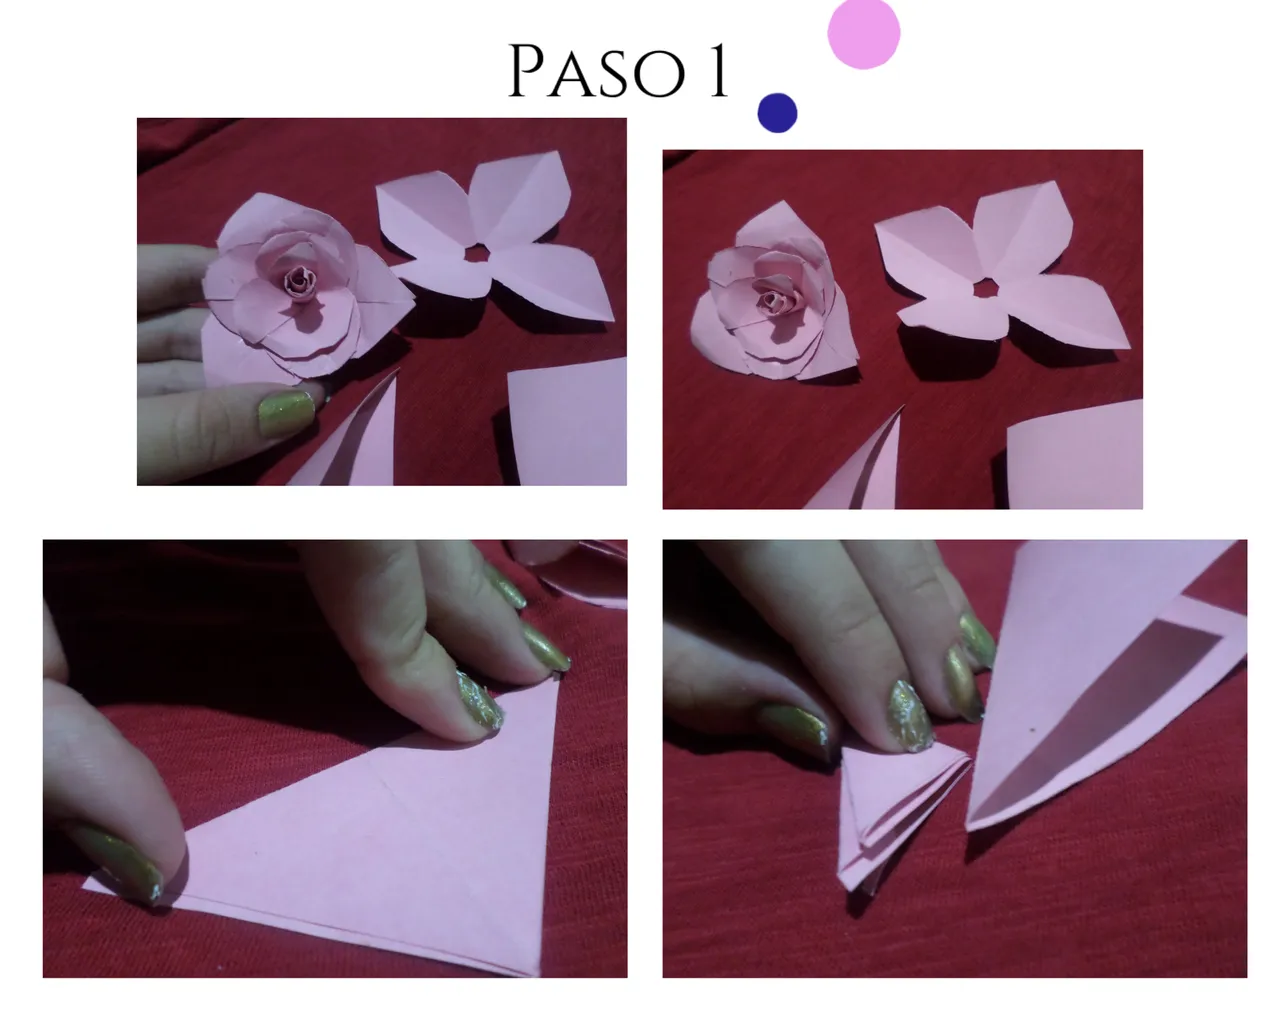
Paso 1 de 4 | Step 1 of 4:
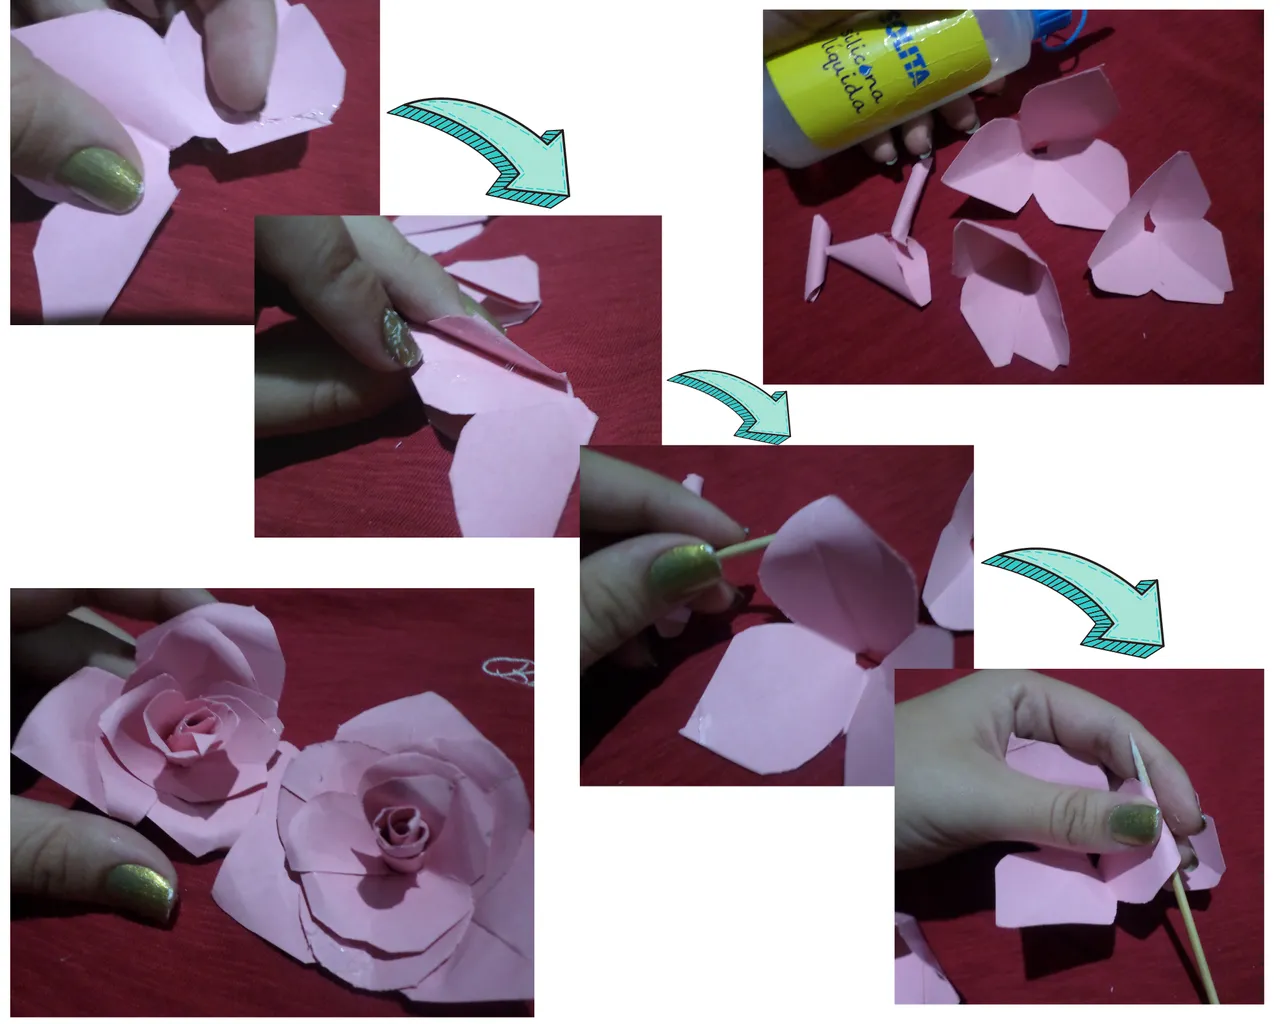
Comencemos haciendo la flor de papel.
Tomamos la cartulina de 11x11 cm, en este caso son tres cuadros. Uno de los cuadros los doblamos a la mitad de forma triangular y luego realizamos otro dobles que quede un triangulo más pequeño y por ultimo hacemos otro triangulo más, de manera que quede mucho más pequeño, hacemos este mismo proceso con los otros dos cuadros
Let's start by making the paper flower
We take the 11x11 cm cardboard; in this case there are three squares. One of the squares we fold them in half in a triangular shape and then we make another double that is a smaller triangle and finally we make another triangle, so that it is much smaller, we do the same process with the other two squares.
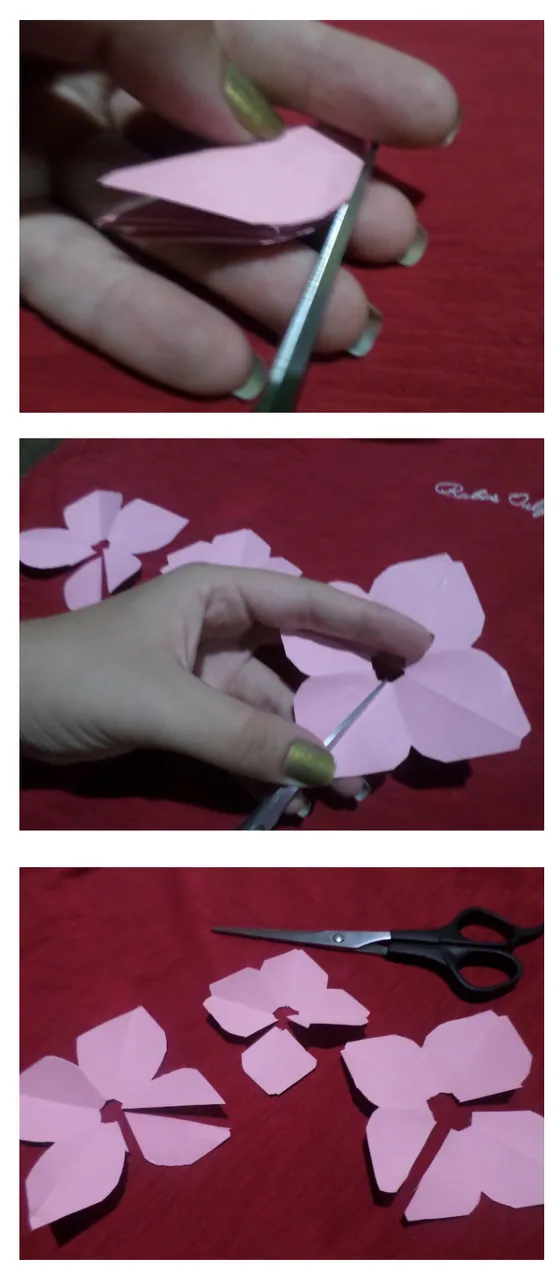
Paso 2 de 4 | Step 2 of 4
Hacemos una media luna en las tres piezas en la parte superior de ellas la más corta y cortamos, podemos utilizar la misma guía de la primera como referencia para las otras de esta manera todas quedan iguales. En la primera capa recortamos un pétalo, en la segunda capa o pieza recortamos dos pétalos y en la tercera pieza recortamos 3 pétalos.
We make a half moon in the three pieces in the upper part of them the shortest and cut, we can use the same guide of the first one as a reference for the others in this way all are the same. In the first layer we cut one petal, in the second layer or piece we cut two petals and in the third piece we cut 3 petals.
Paso 3 de 4| Step 3 of 4
Tomamos un palito o pincel y hacemos un dobles mínimo en los cortes 1, 2 y 3 esos no lo botaremos, todo aquí se usará. Bueno, realizamos un pequeño enrollado o giro en ellas para dar forma como la parte central de la rosa, luego tomamos los más grandes y afincamos sus líneas, es decir volvemos a doblar cada parte para ver más su doblaje con mucho cuidado y delicadeza. En las partes más chicas introducimos el palito o pincel por lo que debemos percatarnos que en espacio en el sea del grueso del pincel.
We take a stick or brush and make a minimum doubles in the cuts 1, 2 and 3 those we will not throw away, everything here will be used. Well, we make a small roll or twist in them to give shape as the central part of the rose, then we take the larger ones and we anchor their lines, that is to say we return to fold each part to see more of its folding with great care and delicacy. In the smallest parts we introduce the stick or brush so we must make sure that the space in it is of the thickness of the brush.

Paso 4 de 4 | Step 4 of 4
Así mismo tomamos el pegamento en barra y unimos todas las puntas, (punta con punta) así como ven en la imagen, con sus respectivos dobles. En las piezas más grandes pegamos las puntas y hacemos lo mismo con las otras tres, colocamos una encima de otra cada vez queda un poco más grande, es lo que se quiere lograr conseguir.
Sacamos los doblés de los pétalos con un palito lo ponemos detrás del pétalo e inclinamos un poco hacia atrás una por una.
Finalizando la rosa, colocamos capa por capa y pegamos cuidadosamente de manera que ya se vea una flor asimétrica, de la más grande a la más pequeña, como podrán ver así nos quedó la flor.
We take the glue stick and join all the tips (tip to tip) as you can see in the picture, with their respective doubles. In the larger pieces we glue the tips and do the same with the other three, we place one on top of another each time is a little bigger, is what you want to achieve.
We remove the doubles of the petals with a stick we put it behind the petal and tilt back a little one by one.
Finishing the rose, we place layer by layer and glue carefully so that we can see an asymmetrical flower, from the largest to the smallest, as you can see so we got the flower.
If you like you can repeat these steps to make more roses:)
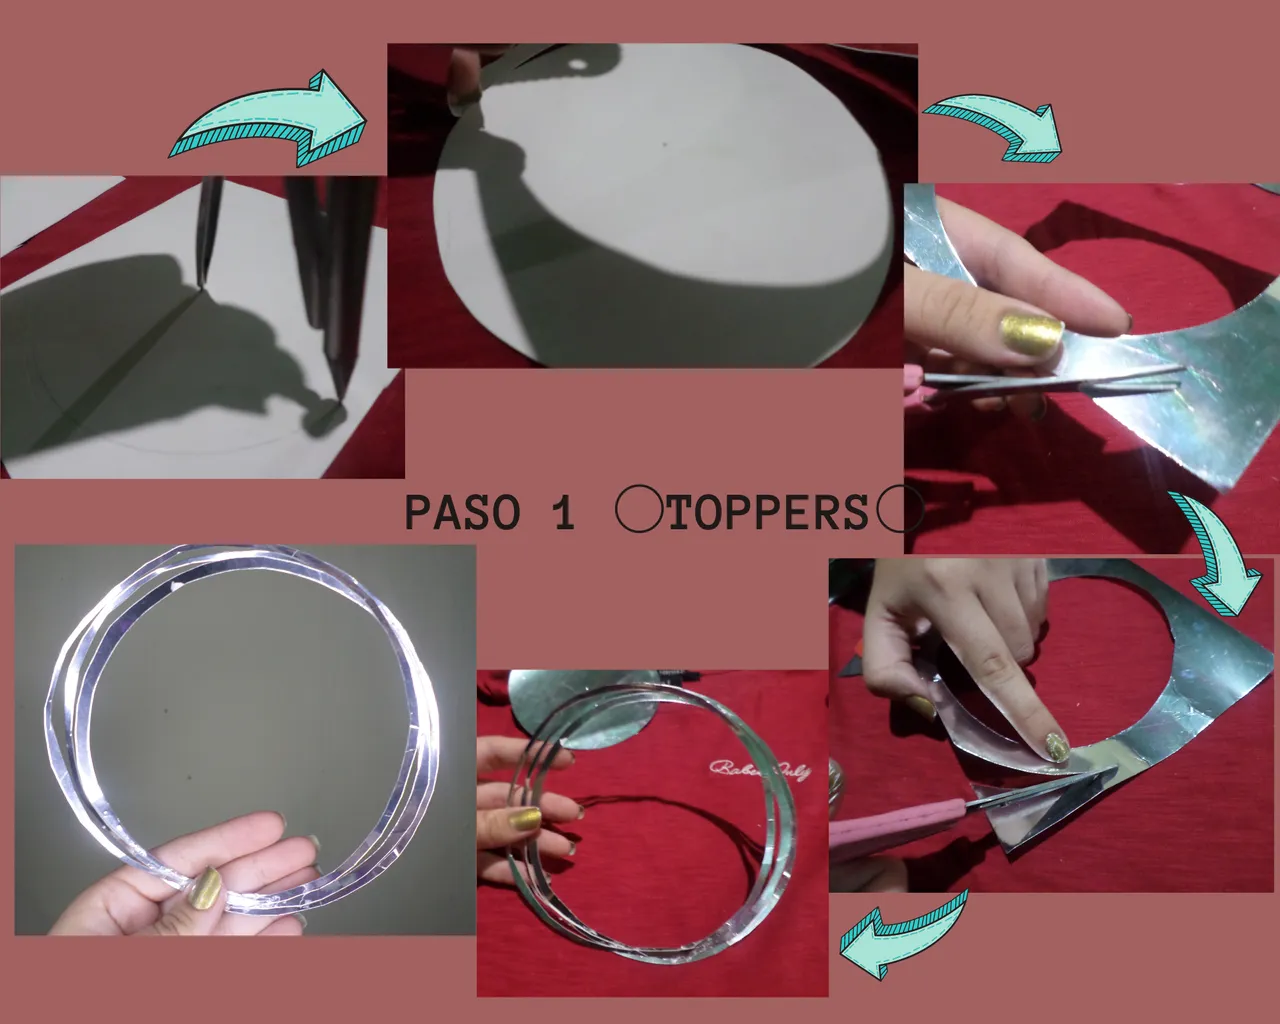
Ahora bien, comenzamos con el Toppers en general, con sólo 3 pasos:
Now, we start with the Toppers in general, with only 3 steps:
Paso 1 de 3 | Step 1 of 3:
En una cartulina espejo hacemos un círculo con el compás del lado contrario. Lo cortamos con un exacto para no romper la línea, seguidamente hacemos con la parte de afuera para completar dejamos un grosor de 1 cm, de esta forma nos podrá salir 3 círculos más. Listos los círculos, ahora unimos de manera que no queden derechos juega con tu imaginación.
On a mirror cardboard we make a circle with the compass on the opposite side. We cut it with an exact to not break the line, then we do with the outside part to complete leaving a thickness of 1 cm, in this way we can get 3 more circles. The circles are ready, now we join them so that they are not straight, play with your imagination.
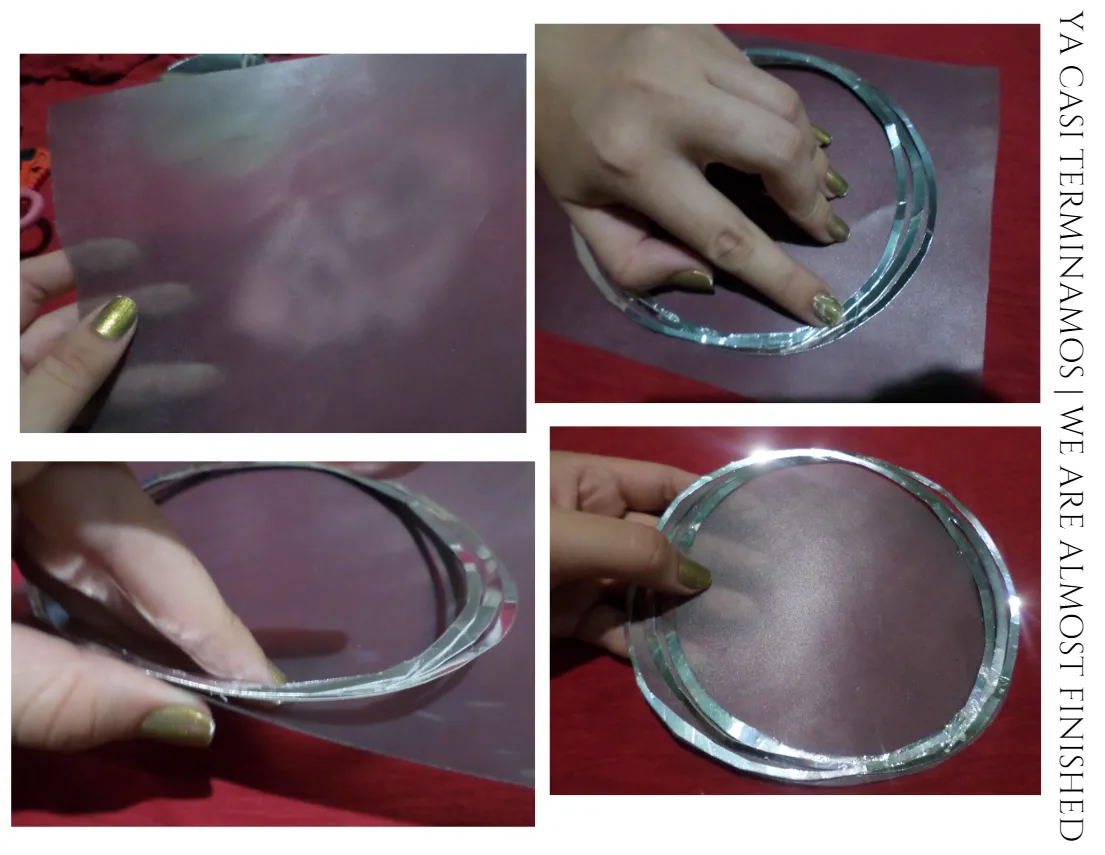
Paso 2 de 3 | Step 2 of 3:
Tomamos el plástico, lo elegí gris, medimos con lo realizado y cortamos.
We take the plastic, I chose gray, we measure with what we have done and cut.
Paso 3 de 3 | Step 2 of 3:
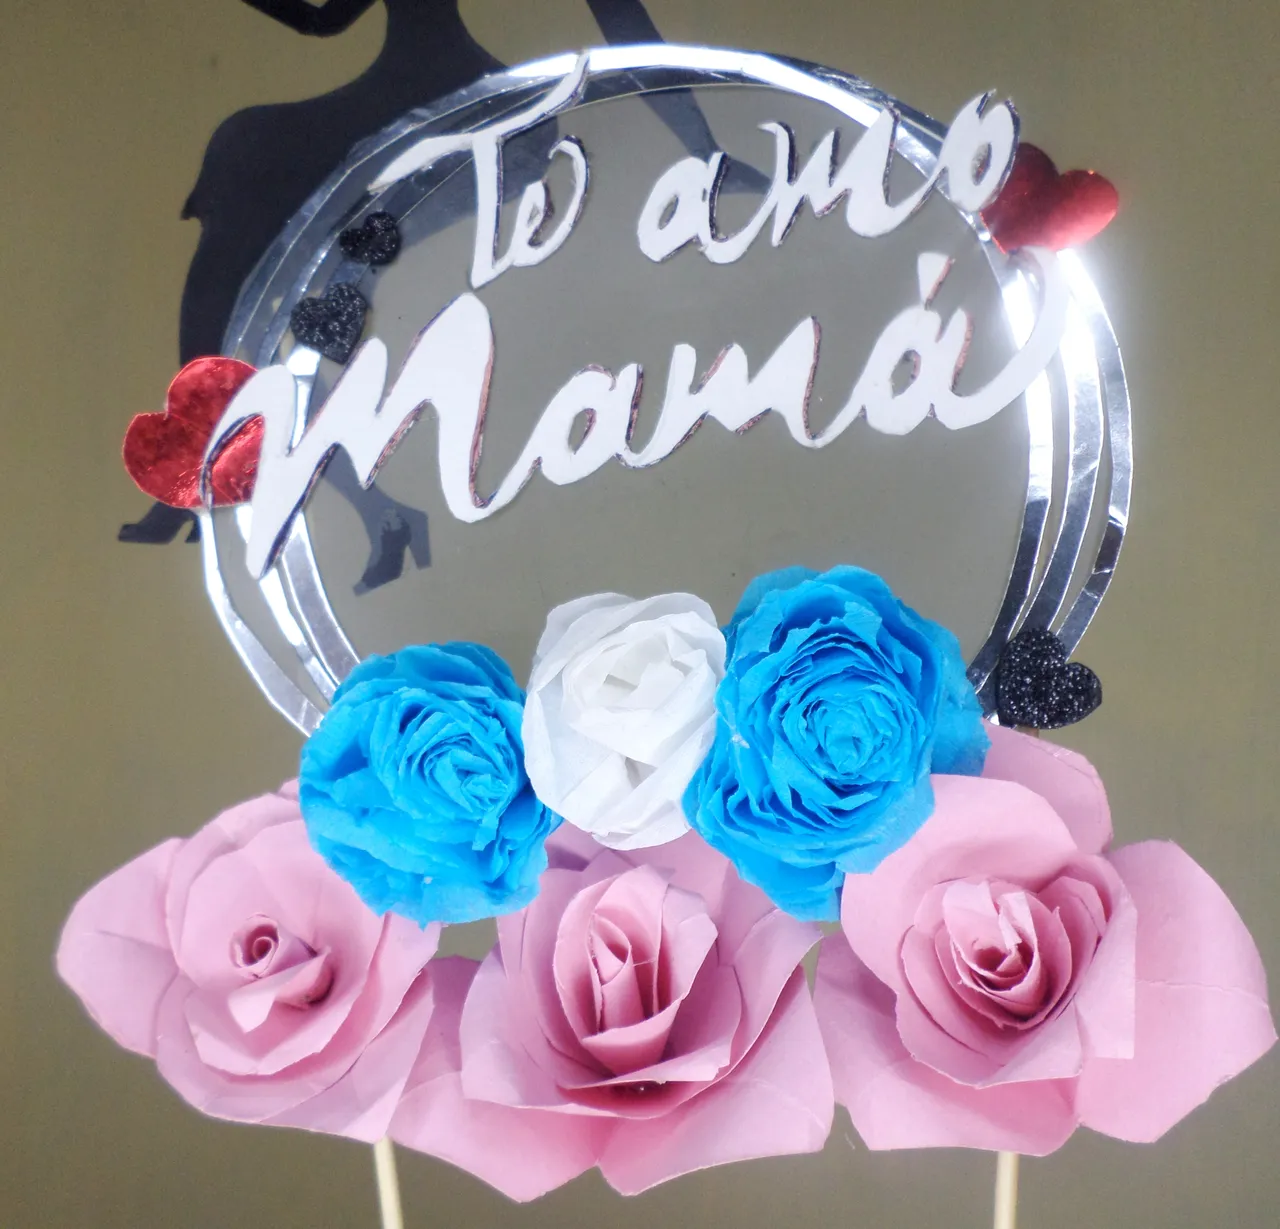
Armado final, te explico a ti; las letras y la silueta que vez tienen otro proceso un poco largo lo cual lo dejaré para un próximo post. En fin, une todo lo hecho hasta ahora y este es el resultado que encontrarás.
Final assembly, I'll explain to you; the letters and the silhouette you see have another process a little long which I'll leave for a future post. Anyway, join everything done so far and this is the result you will find.
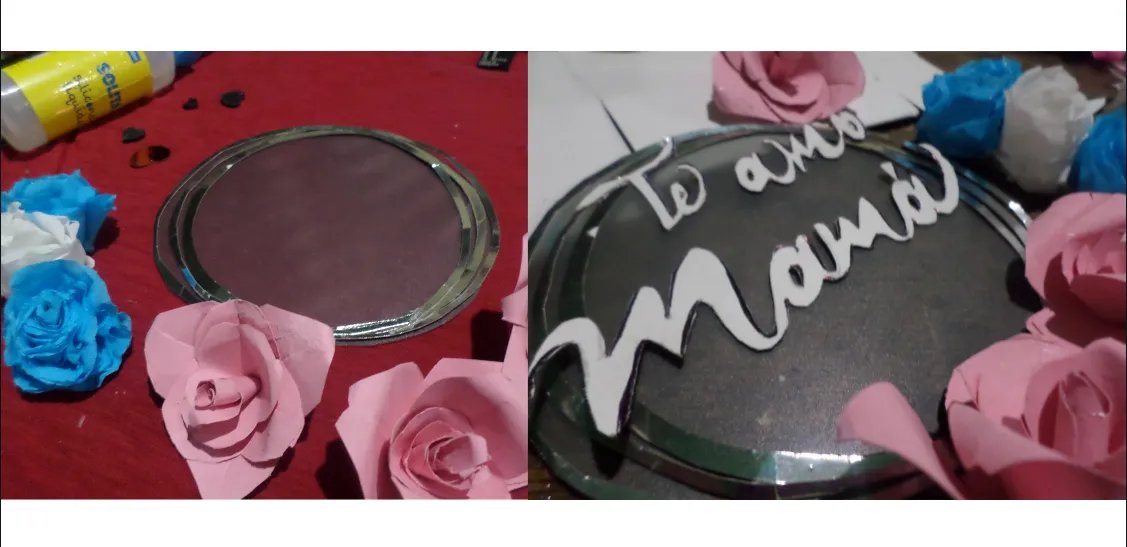

Photograph of my property

¡Gracias por llegar hasta acá! Espero y te ayude a crear e imaginarte otros toppers similares, sin más que agregar que tengas un feliz día, hasta la próxima.
Thanks for making it this far! I hope and help you to create and imagine other similar toppers, without more to add have a happy day, see you next time.