Hola qué tal compañeros Hivers, yo feliz de compartir en este día con ustedes, les traigo en esta oportunidad cómo elaborar una flor de Tulipán 🌷 en papel, es super fácil de hacer, ideal para decorar en casa o hasta para un detalle especial, para familiares y amigos.
Hello, how are you, fellow Hivers, I am happy to share this day with you, I bring you in this opportunity how to make a Tulip flower 🌷 on paper, it is super easy to do, ideal to decorate at home or even for a special detail, to family and friends.
Aquí les muestro el paso a paso muy detallado, para que lo realicen ustedes también.
Here I show you the very detailed step by step, so that you can do it too.
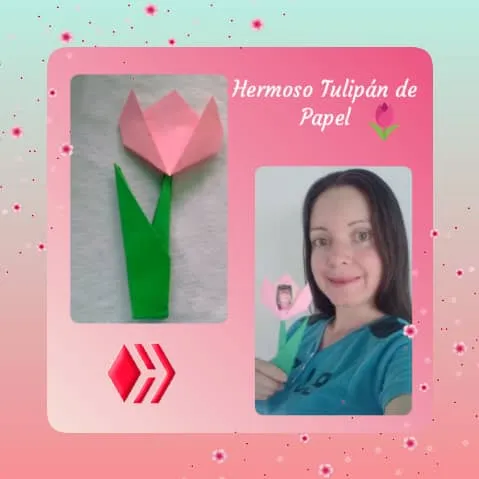
Hermosa Flor de Tulipán, elaborada en papel 🌷
Beautiful Tulip Flower, made of paper 🌷
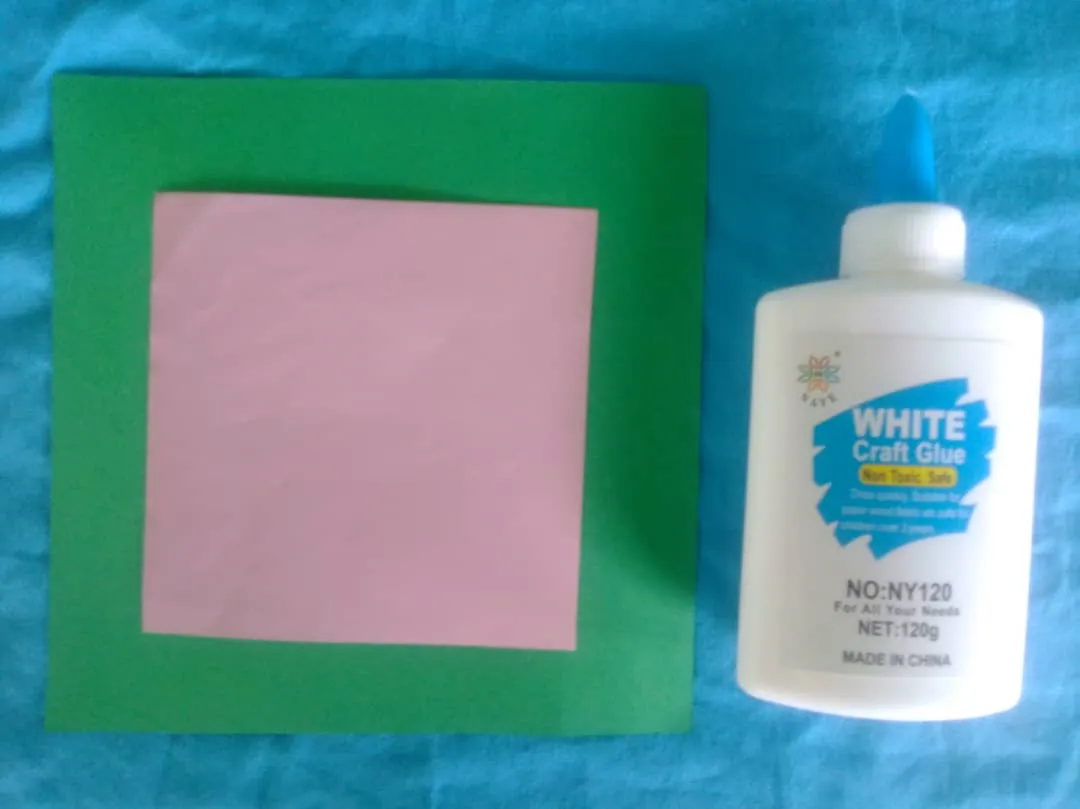
Materiales
Papel rosado (cuadrado de 10 cm)
Papel verde (cuadrado de 15 cm)
Pega blanca
Materials
Pink paper (10 cm square)
Green paper (15 cm square)
White glue
Elaboración/Elaboration
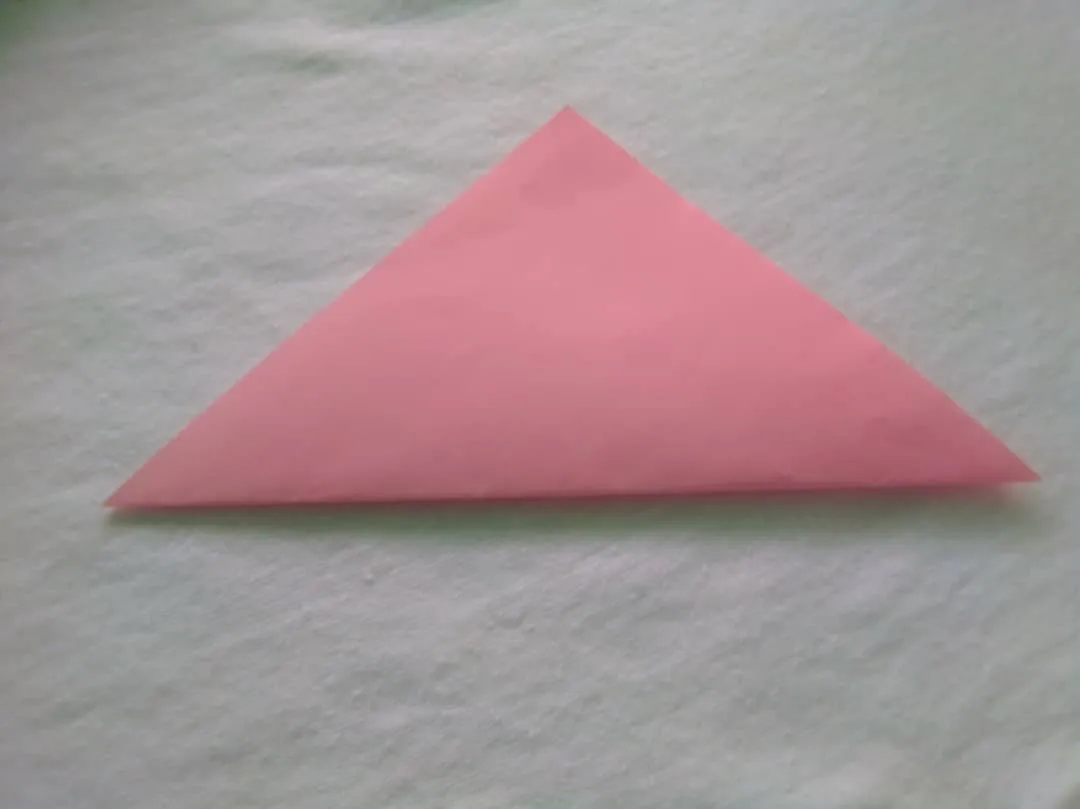
Para elaborar la flor/To make the flower
1.Primero tomamos el papel rosado y lo doblamos diagonalmente de modo de obtener un triángulo.
1.First we take the pink paper and fold it diagonally so as to obtain a triangle.
2.Continuamos ubicando el centro del triángulo y lo doblamos hacia arriba ambos lados, de modo que queden 3 puntas hacia arriba.
2.We continue to locate the center of the triangle and fold it up on both sides, so that there are 3 points up.
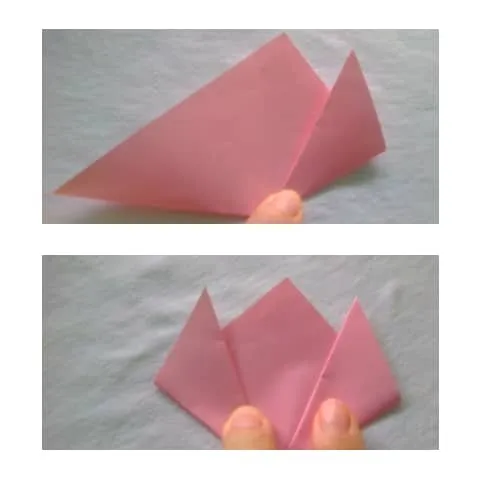
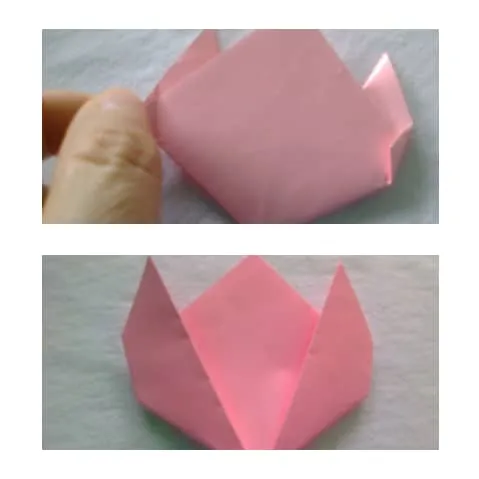
3.Seguidamente doblamos los extremos de la flor y ya está lista.
3.Next we fold the ends of the flower and it is ready.
Para la elaboración del tallo y la hoja/ For the elaboration of the stem and the leaf
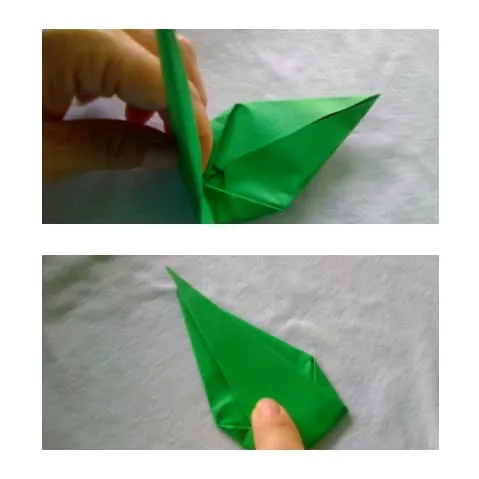
1.Para ello tomamos el papel verde, hacemos el primer doblez, de modo que resulte un triángulo de la siguiente forma.
1.To do this we take the green paper, make the first fold, so that a triangle results in the following way.
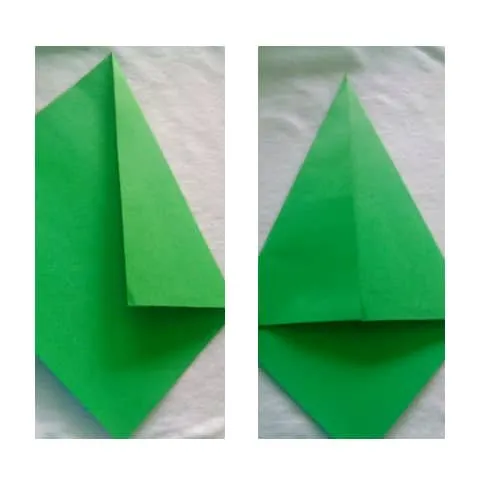
2.Luego doblamos la parte de abajo, también en ambos extremos, que resulte otro triángulo.
2.Then we fold the bottom part, also at both ends, which results in another triangle.
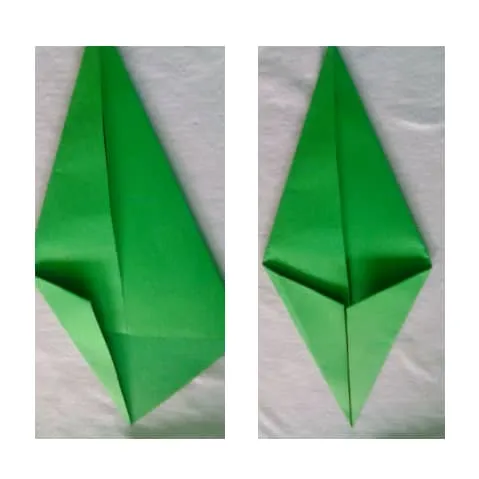
3.En la parte superior, volvemos a realizar otro doblez, obteniendo un triángulo mucho más delgado, parecido a un diamante.
3.At the top, we make another fold, obtaining a much thinner triangle, similar to a diamond.
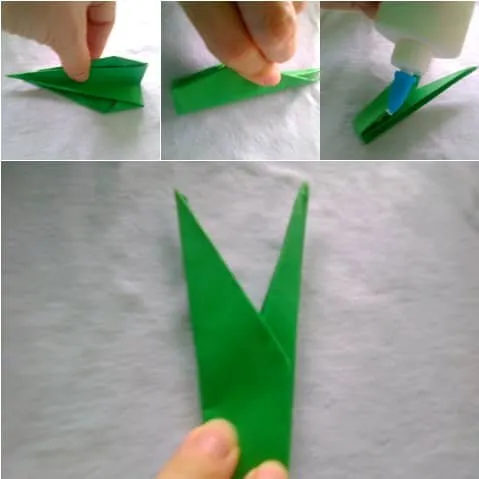
4.En este paso ubicamos el centro y doblamos.
4.In this step we locate the center and fold.
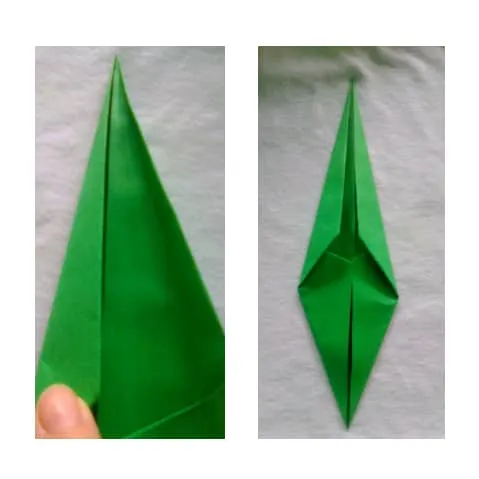
5.Luego doblamos hacia adentro, hacemos un poco de presión, abrimos un poco, podemos agregar pega blanca para que tenga mayor consistencia y esta lista esta parte.
5.Then we fold inwards, we do a little pressure, we open a little, we can add white glue to make it more consistent and this part is ready.
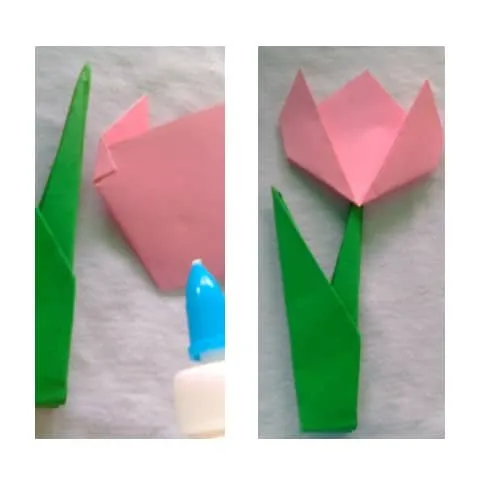
Como paso final le pegamos la flor al tallo y listo, un hermoso detalle en forma de Flor de Tulipán 🌷
As a final step we glue the flower to the stem and voila, a beautiful detail in the shape of a Tulip Flower 🌷
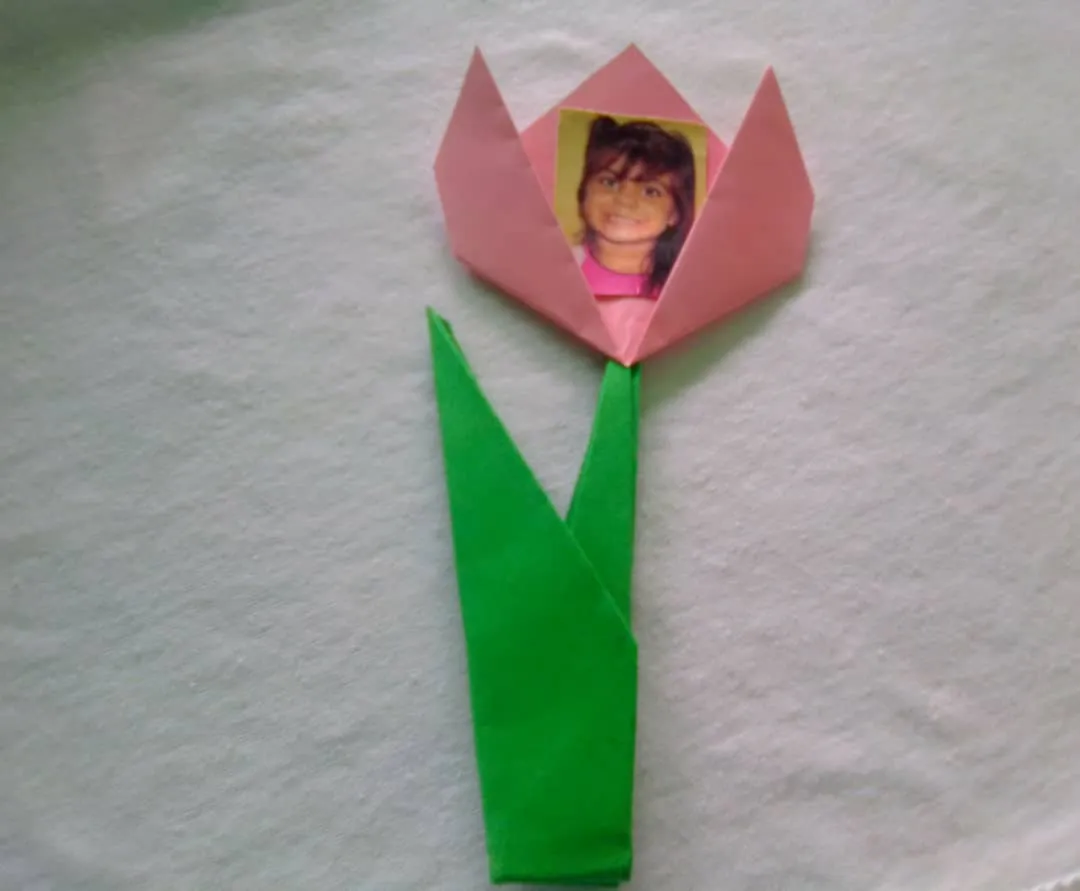
Le agregué una foto de mi niña en la parte de la flor, para hacerla mucho más hermoso y personalizado.
I added a photo of my girl in the flower part, to make it much more beautiful and personalized.
Hasta aquí mi publicación, nos estamos leyendo pronto, muchas gracias por visitar mi blog.
So far my post, we are reading soon, thank you very much for visiting my blog.