¡Hola queridos usuarios de Hive ✨💕!
Hi dear Hive users ✨💕!
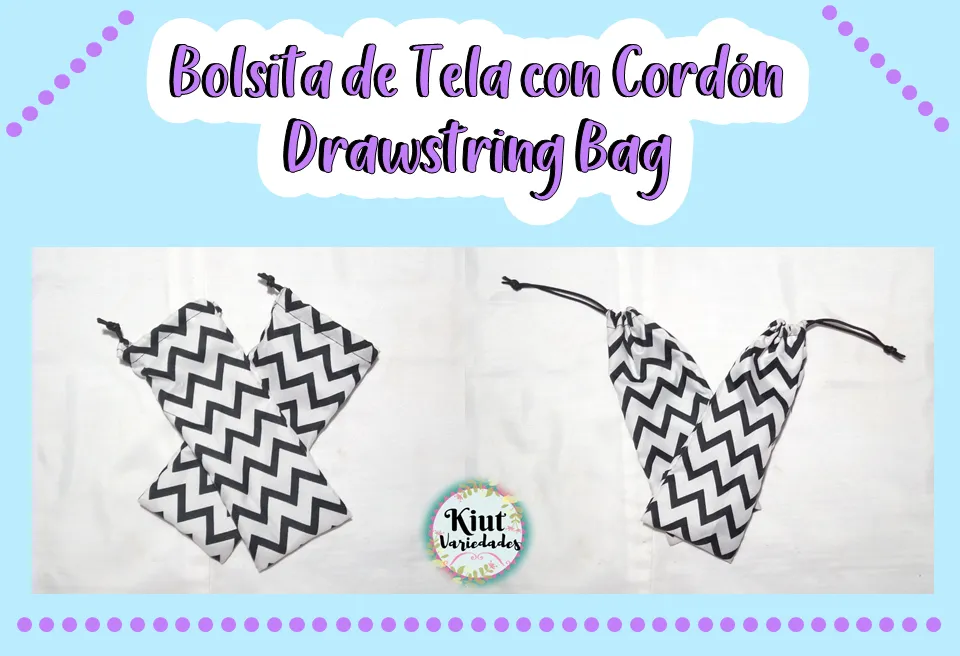
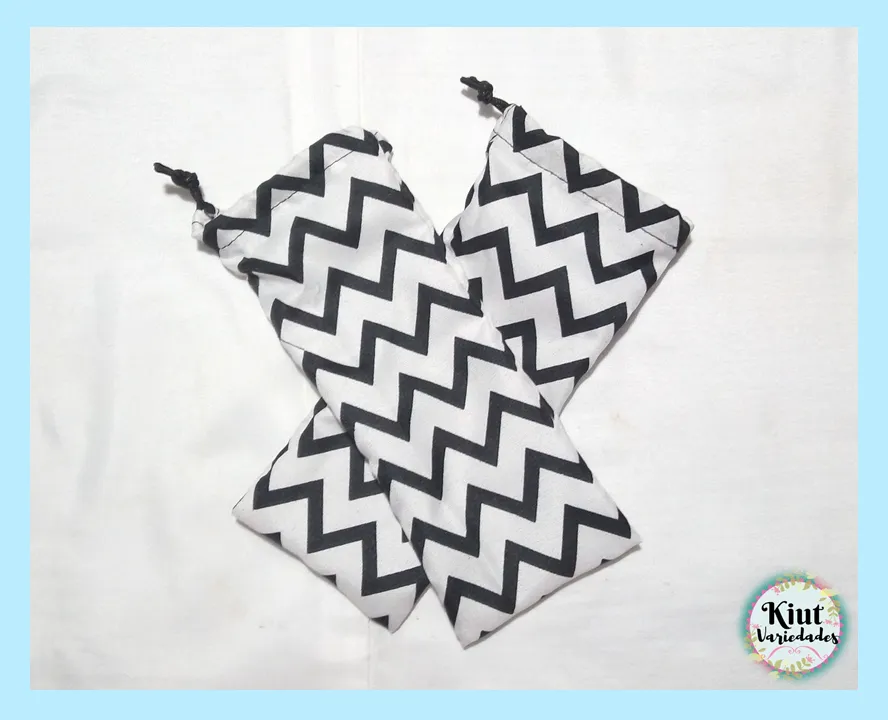
Una de las manualidades de costura más sencilla de hacer son la bolsitas de tela que poseen un cordón para cerrarlas, estas bolsitas son sumamente prácticas para guardar pulseras, anillos, relojes, lentes y demás cosas, el día de hoy les estaré enseñando a realizarlas y de verdad podrán ver lo fáciles que son de hacer.
One of the easiest sewing crafts to make are the fabric bags that have a cord to close them, these bags are extremely practical to store bracelets, rings, watches, glasses and other things, today I will be teaching you how to make them and you can really see how easy they are to make.

🧵 MATERIALES || MATERIALS 🧵
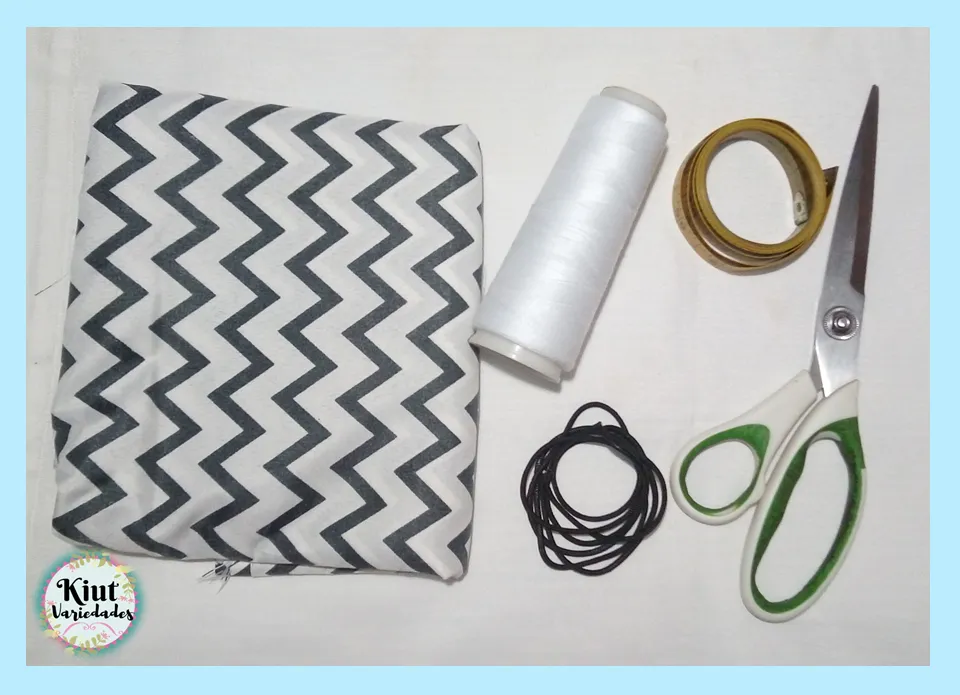
- Tela no elástica.
- Cordón.
- Tijera.
- Cinta métrica.
- Hilo.
- Máquina de Coser o Aguja.
- Non-stretch fabric.
- Cord.
- Scissors.
- Tape measure.
- Thread.
- Sewing machine or needle.
🧵 COMENCEMOS || LET'S GET STARTED 🧵
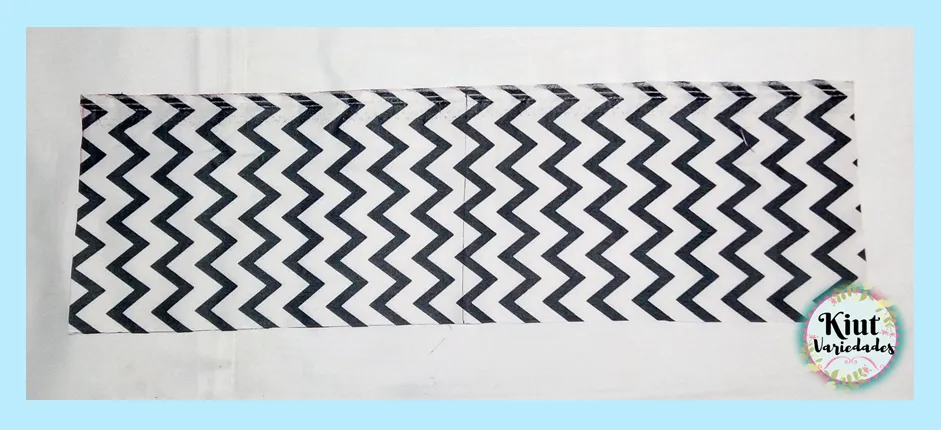
Comenzamos cortando un rectángulo que tenga de ancho la medida de nuestra preferencia + 4cm aproximadamente, y el doble del largo que queramos tenga nuestra bolsita + 6cm.
We start by cutting a rectangle with the width of the size of our preference + 4cm approximately, and twice the length we want our bag to be + 6cm.
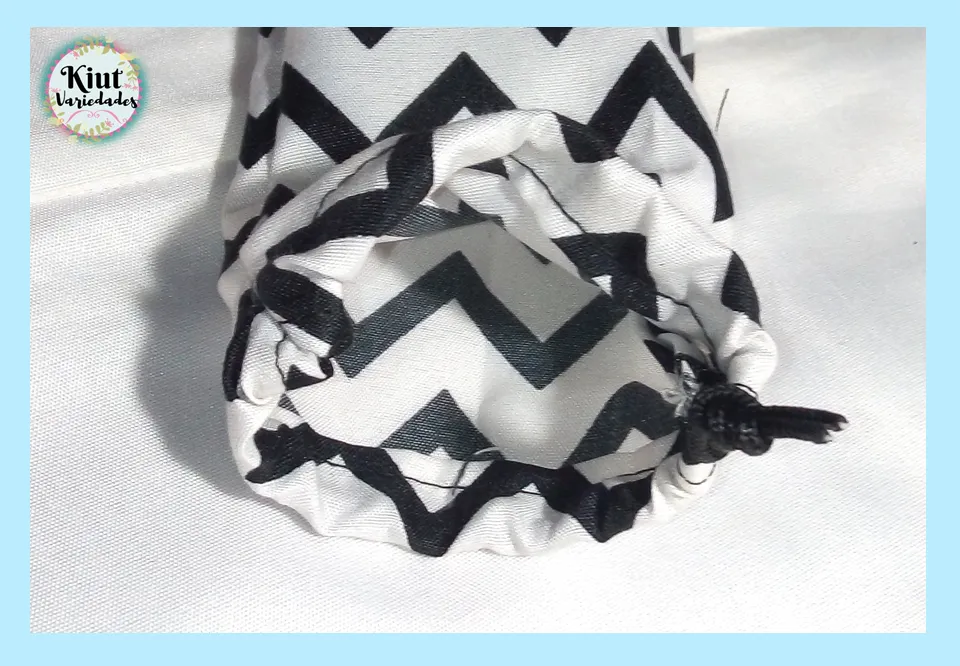
Haremos un pequeño ruedo en los laterales del rectángulo por todo el largo, luego haremos un ruedo un poquito más grande (lo suficiente para que el cordón pase) en los extremos del rectángulo.
We will make a small roll on the sides of the rectangle along the entire length, then we will make a slightly larger roll (just enough for the cord to pass through) at the ends of the rectangle.
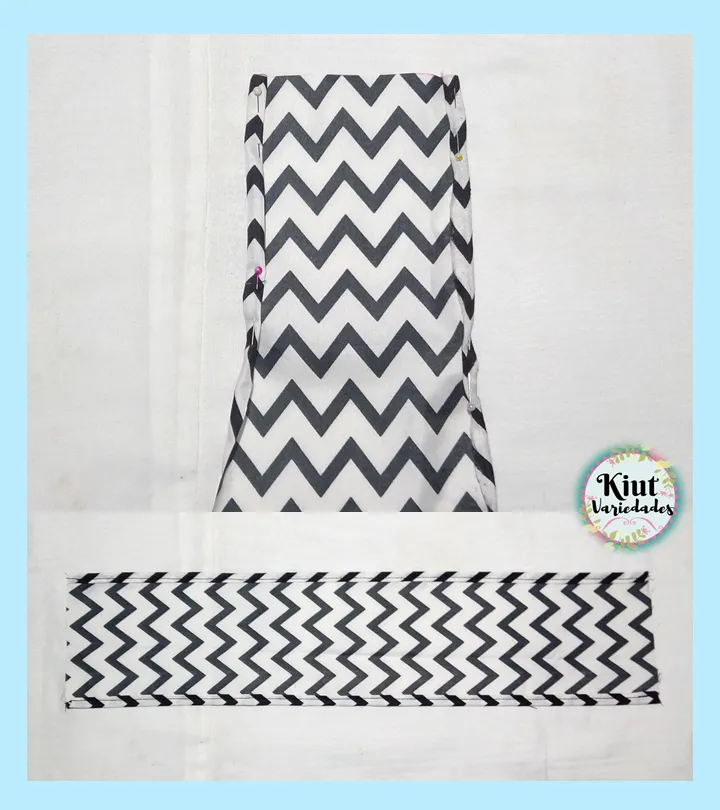
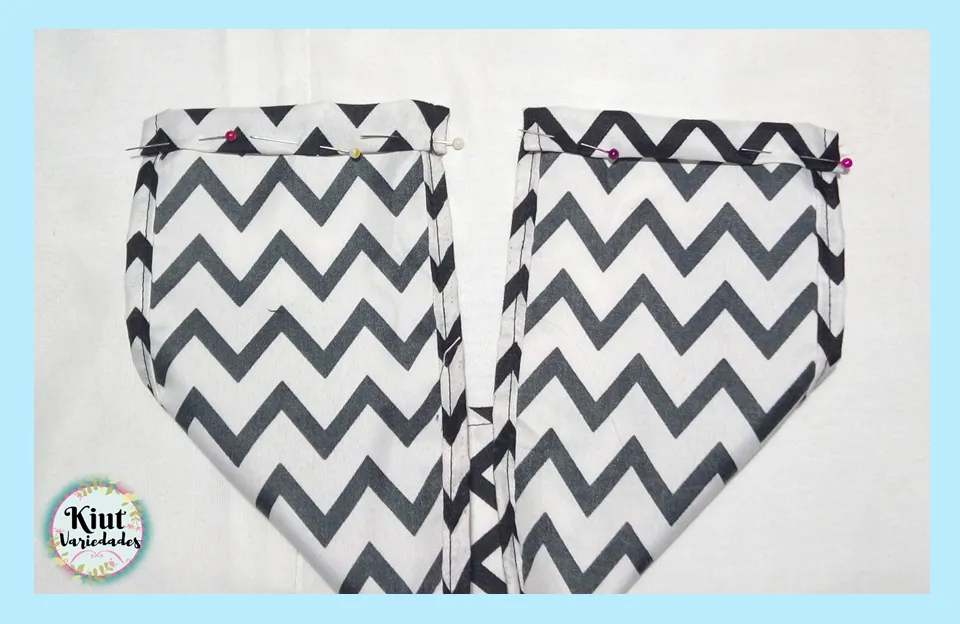
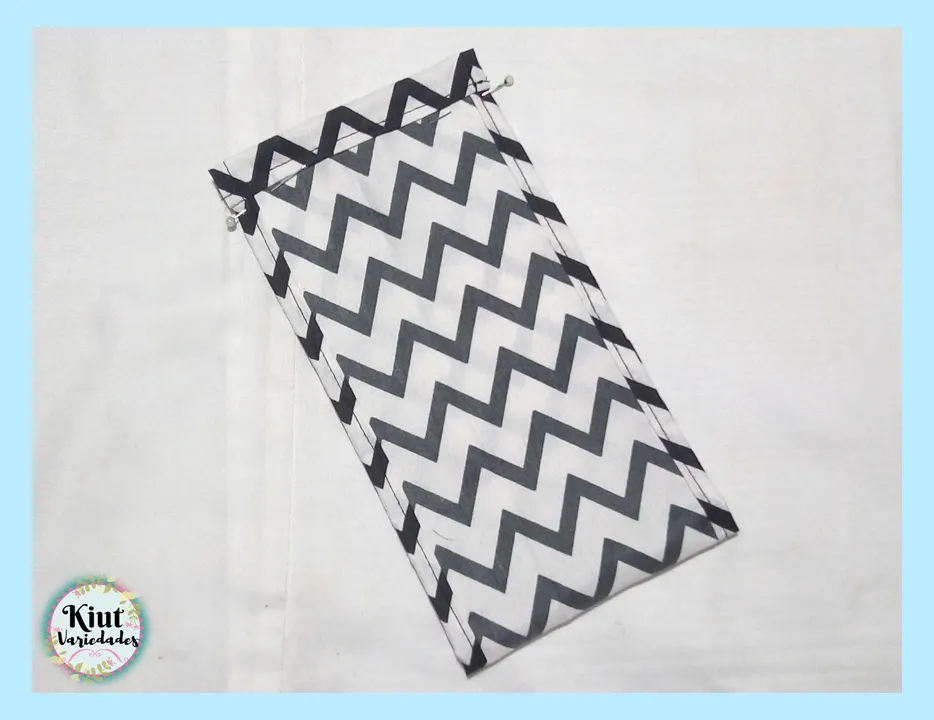
Doblamos la pieza a la mitad, enfrentando los derechos de tela, y coseremos por los laterales dejando la parte del ruedo superior sin coser, es decir esta parte debe quedar abierta.
Fold the piece in half, facing the right sides of the fabric, and sew along the sides, leaving the upper hem unsewn, i.e. this part should be left open.
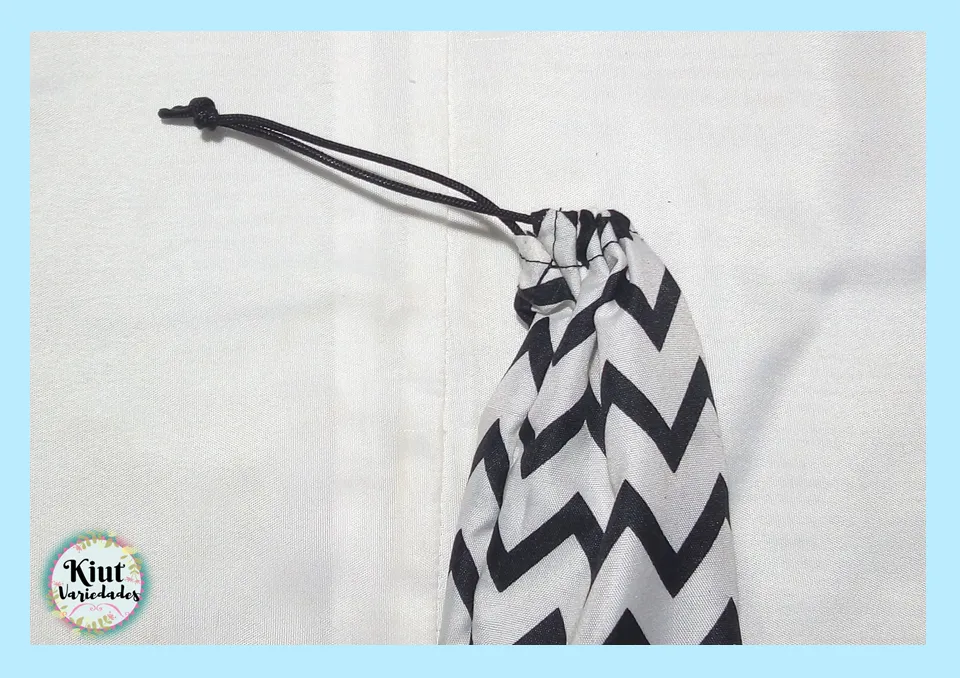
Luego voltearemos la pieza y mediremos la tira del cordón como se muestra en la imagen, y de esta misma forma lo vamos a introducir por el ruedo de en la parte superior (por eso esta parte no debe quedar unida).
Then we will turn the piece over and measure the strip of cord as shown in the image, and in the same way we will introduce it through the rounding at the top (that is why this part should not be joined).
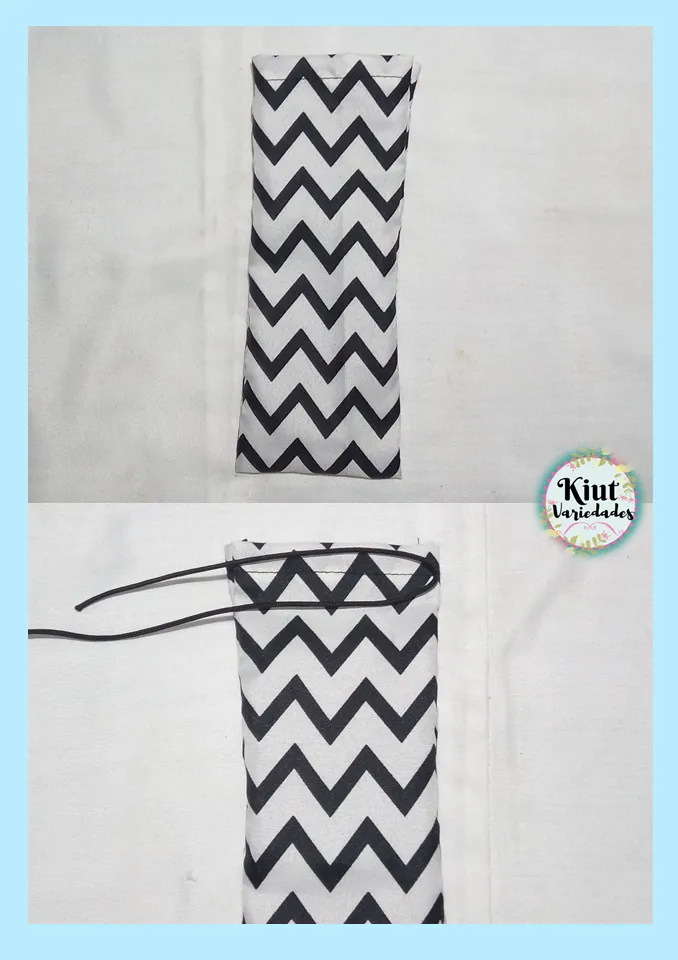
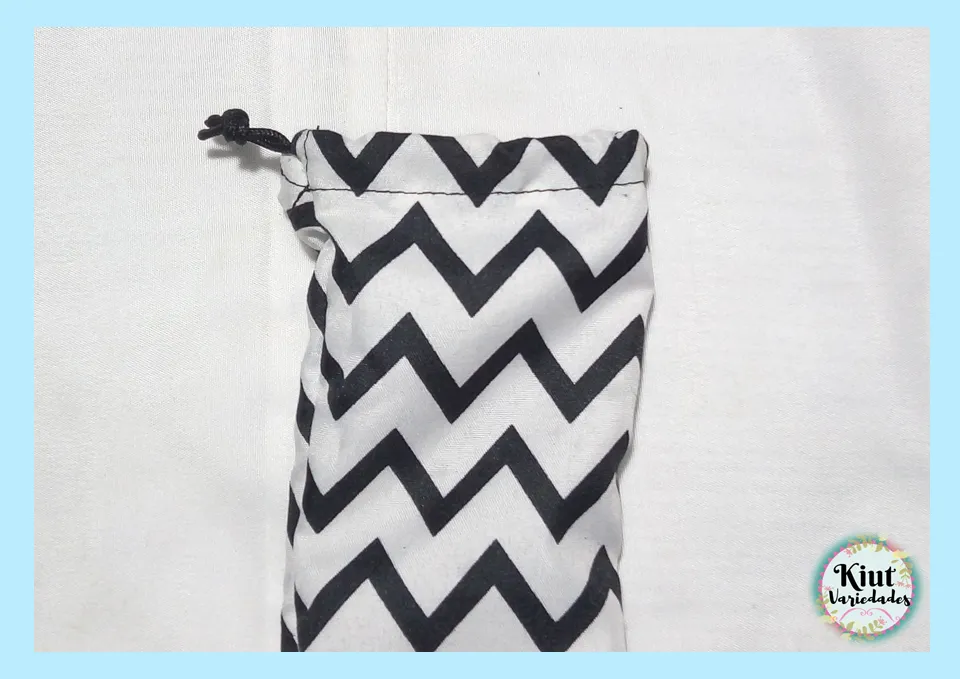
Una vez lo tengamos listo, haremos un nudo bien apretado uniendo cada extremo del cordón.
Once we have it ready, we will tie a tight knot joining each end of the cord.

Te invitamos igual que siempre a que intentes este proyecto por tu cuenta y nos cuentes en los comentarios 👇 como es tu experiencia.
We invite you as always to try this project on your own and tell us in the comments 👇 as is your experience..


Síguenos en todas nuestras redes sociales… || Follow us on all our social networks ...
Facebook:KiutVariedades
Instagram:@Kiut_variedades
Twitter:@Kiut_variedades