Hola a todos mis queridos amigos de Hive que la bendición de Dios los cubra a todos, hoy les traigo un tutorial en tres simples pasos para hacer un bello conejo.
Hello to all my dear friends at Hive may the blessing of God cover you all, today I bring you a tutorial in three simple steps to make a beautiful rabbit.
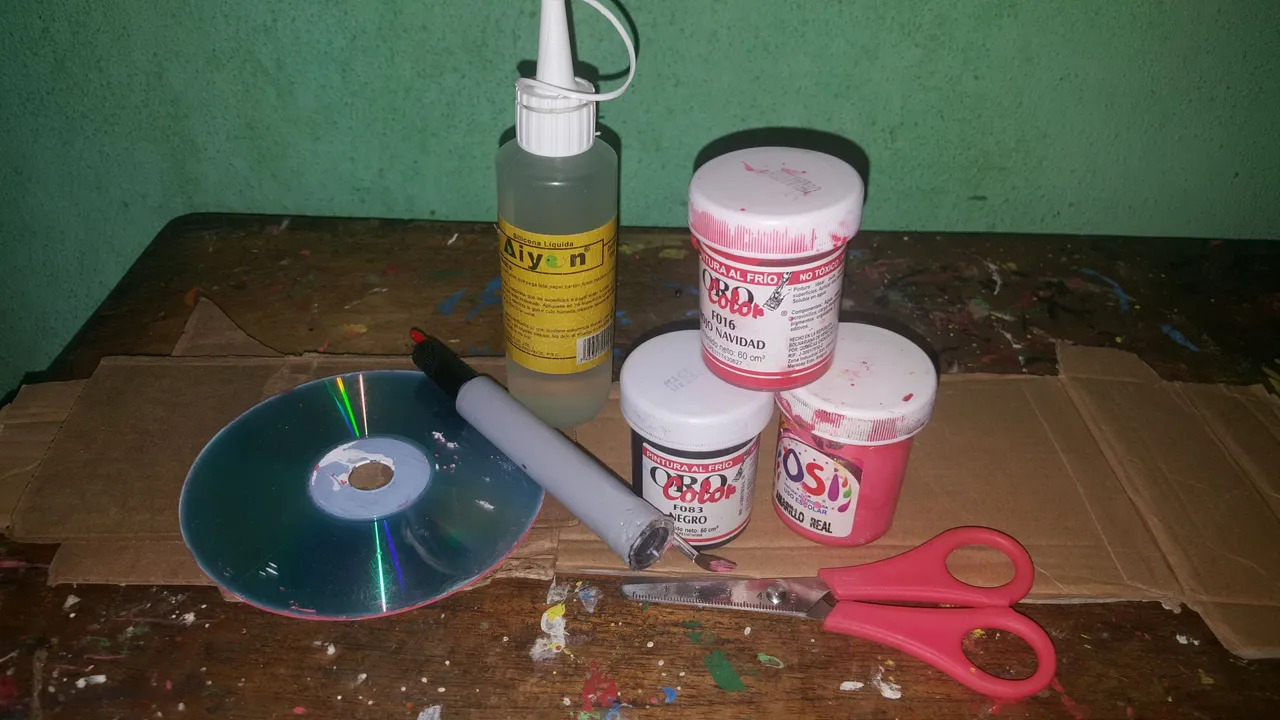
Materiales:
Cartón
Pintura blanca, roja, rosada y negra
Pincel
Tijera
Marcador
Silicon liquidó
1 CD.
Materials:
Paperboard
White, red, pink and black paint
Brush
Scissor
Marker
Liquid silicone
1 CD.
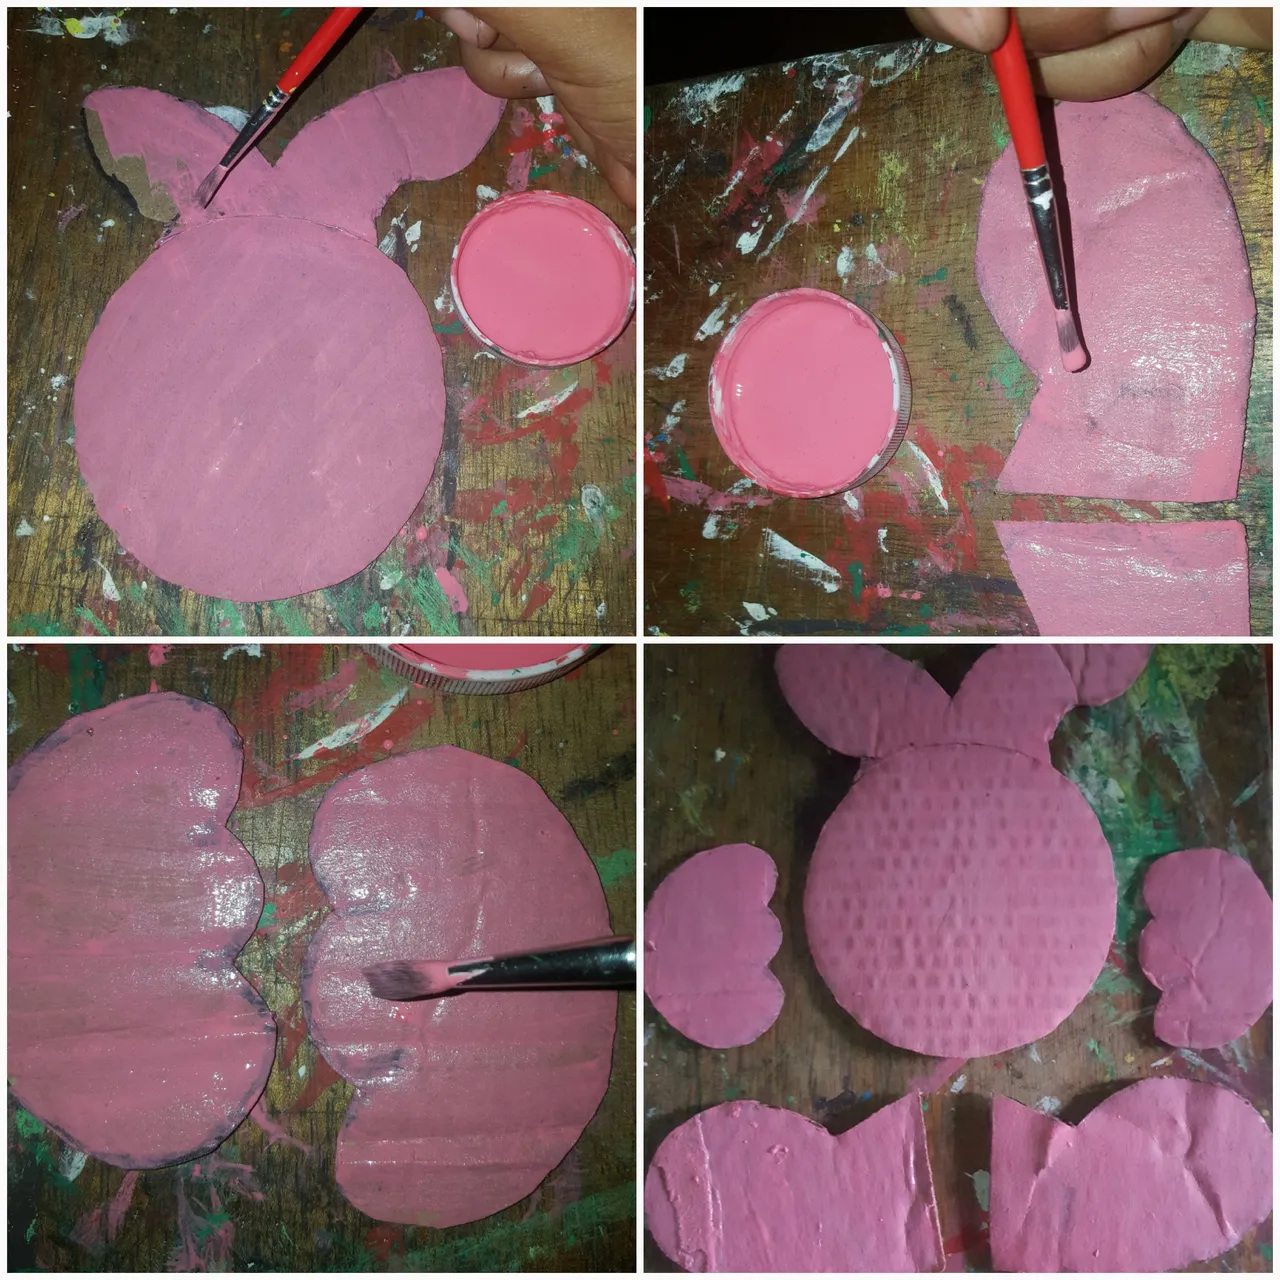
Paso 1: En este primer paso marcamos las partes del conejo en el cartón con el marcador, la cabeza y orejas juntas, las patas y las manos.
Step 1: In this first step we mark the parts of the rabbit on the cardboard with the marker, the head and ears together, the legs and the hands.
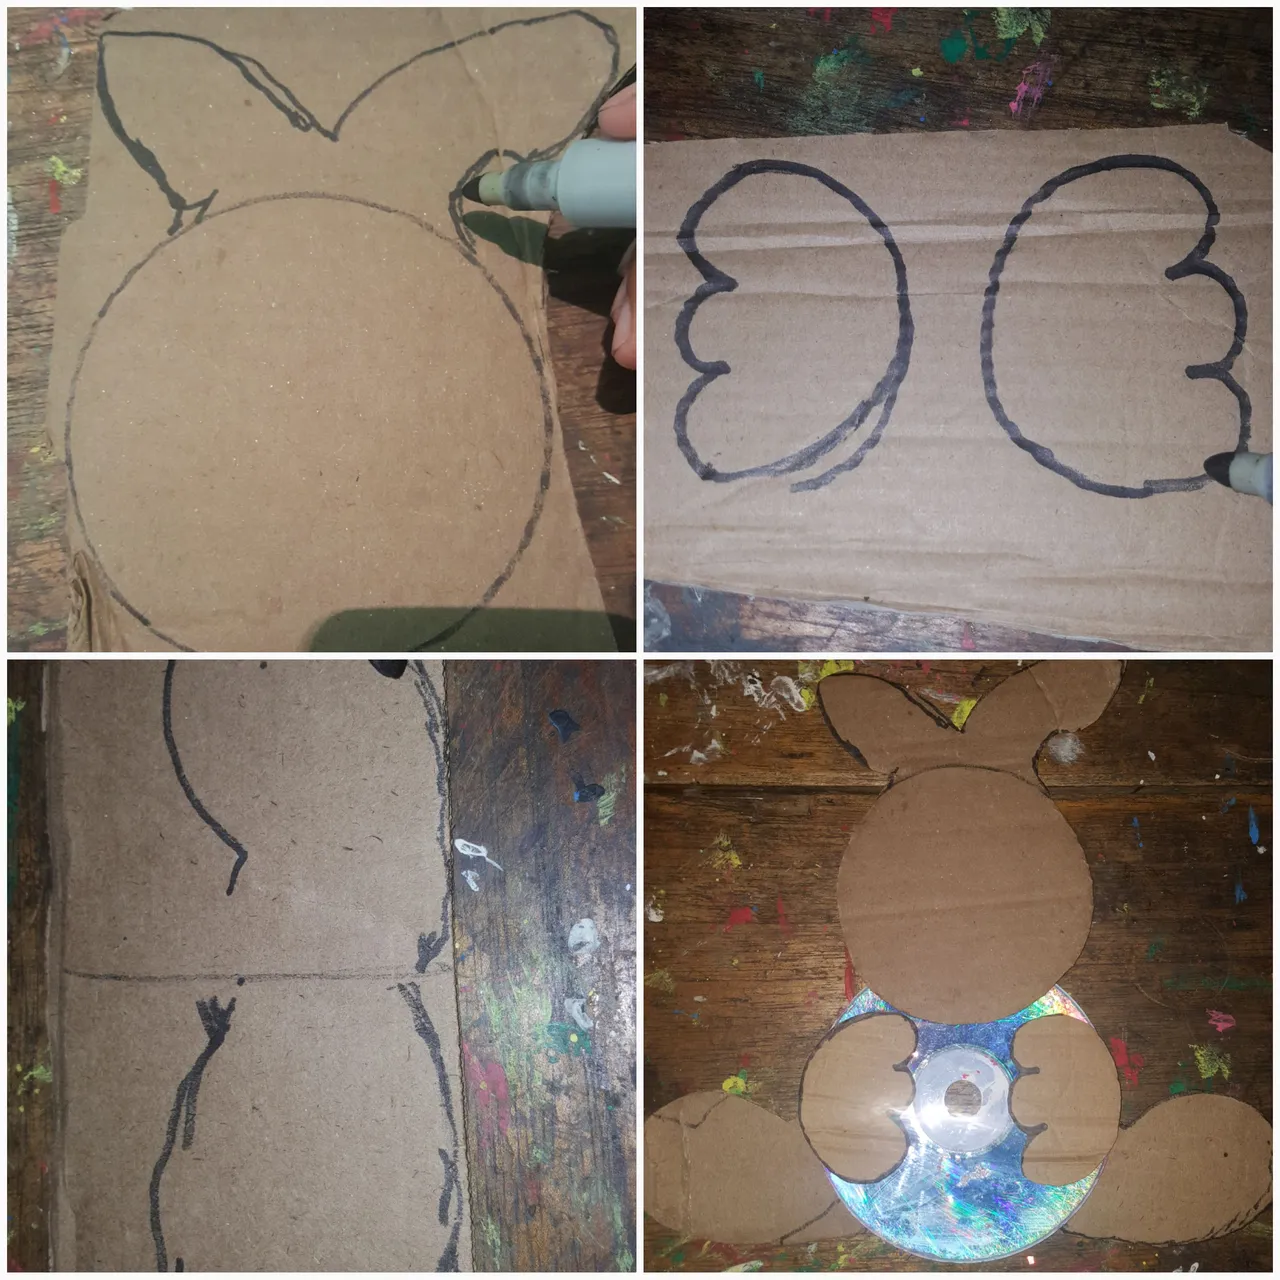
Así quedan cada una de las piezas después de haberlas cortados con la tijera.
This is how each of the pieces look after they have been cut with the scissors.
Paso 2: Nos toca pintar cada una de las piezas, las cuales vamos a pintar con la pintura rosada.
Step 2: We have to paint each of the pieces, which we are going to paint with the pink paint.
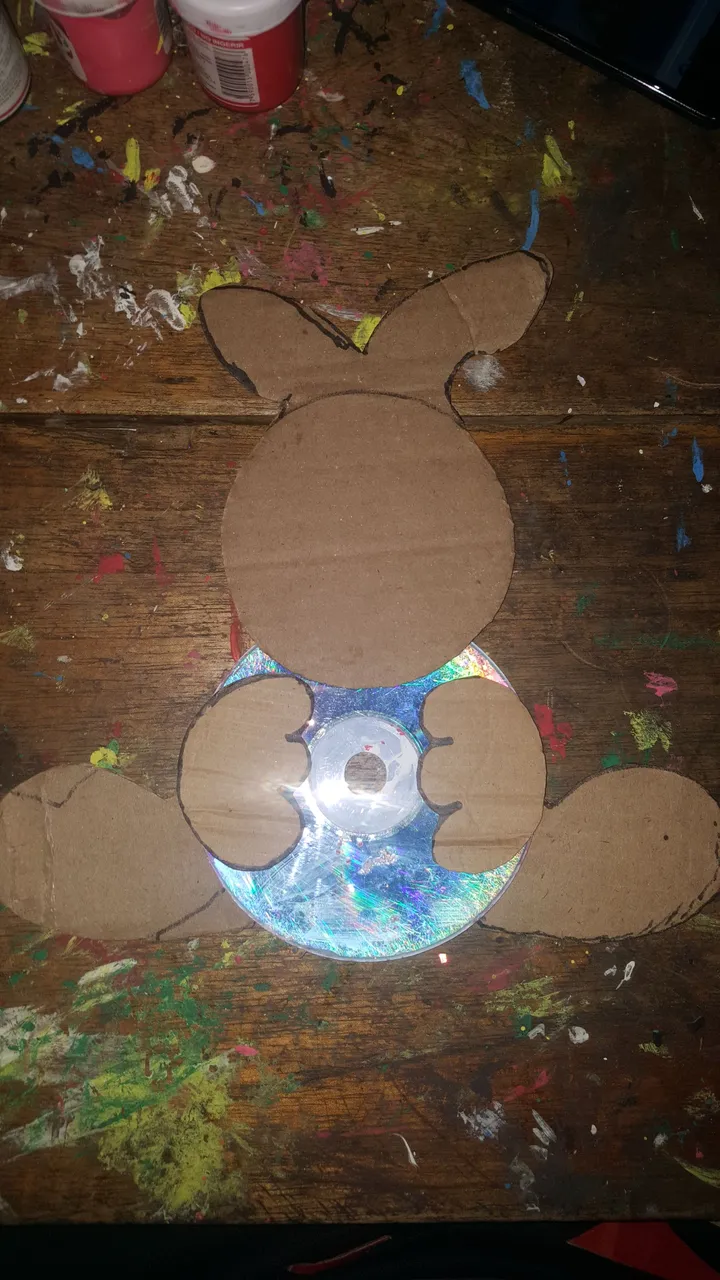
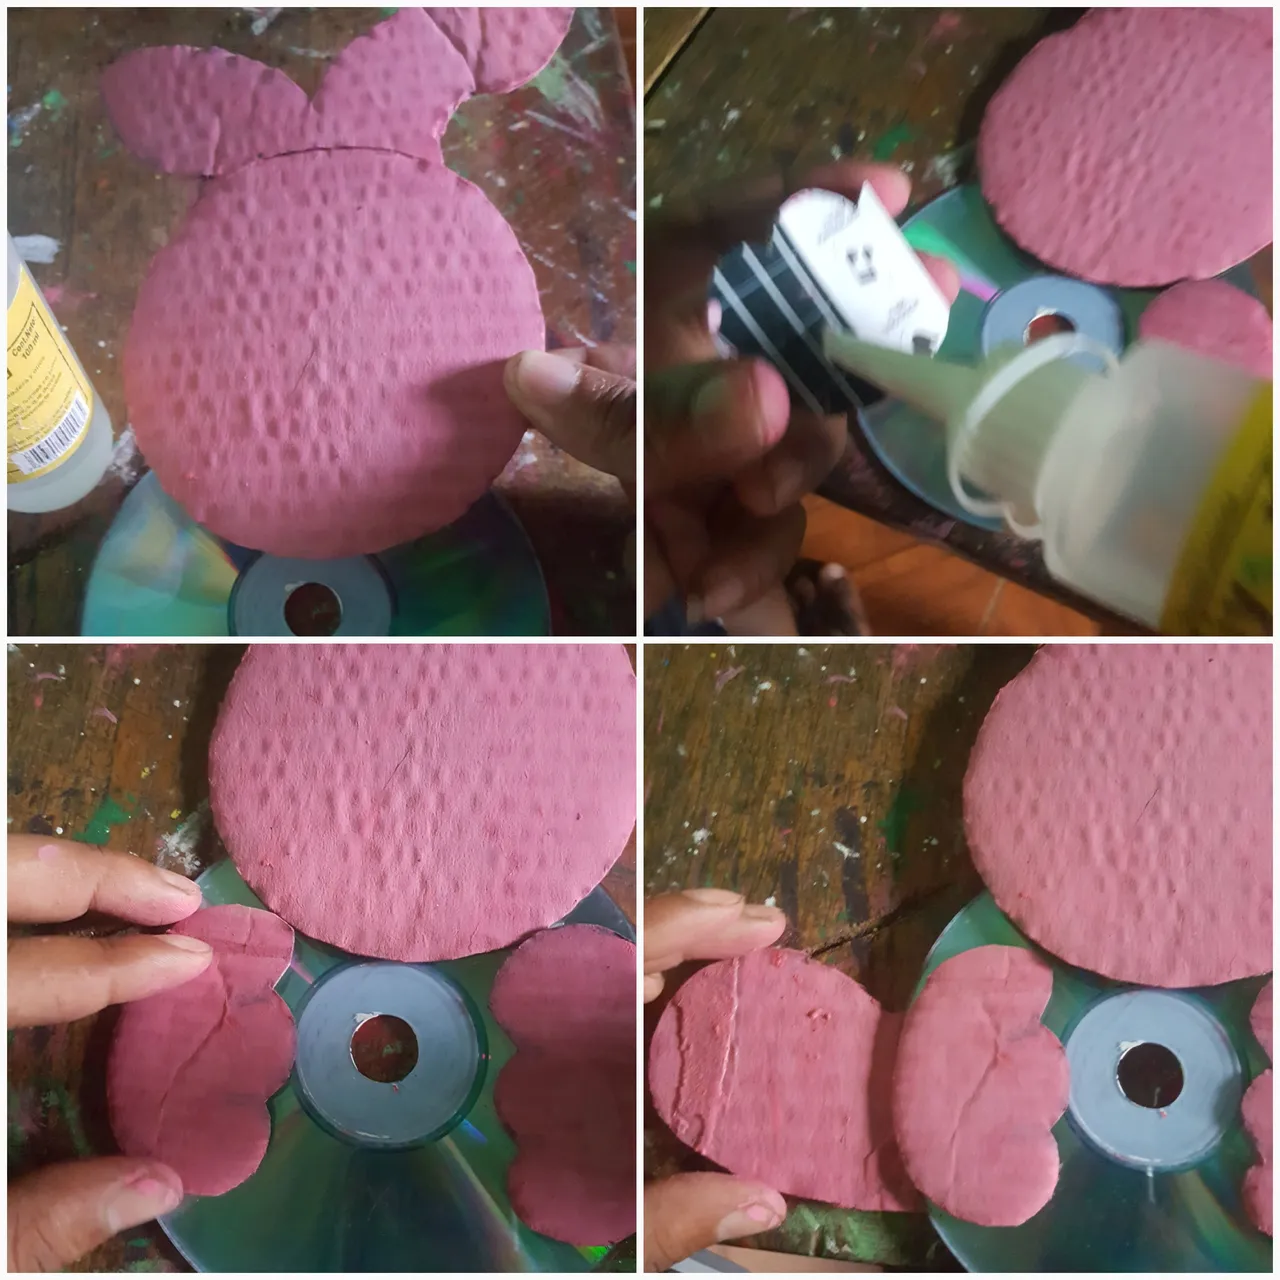
Después de tener todas las partes del conejo pintadas nos toca pegar cada una, primero pegamos la cabeza luego las manos y después las patas en la parte de abajo del CD como lo ilustra la imagen.
After having all the parts of the rabbit painted we have to glue each one, first we glue the head then the hands and then the legs on the bottom of the CD as illustrated in the image.
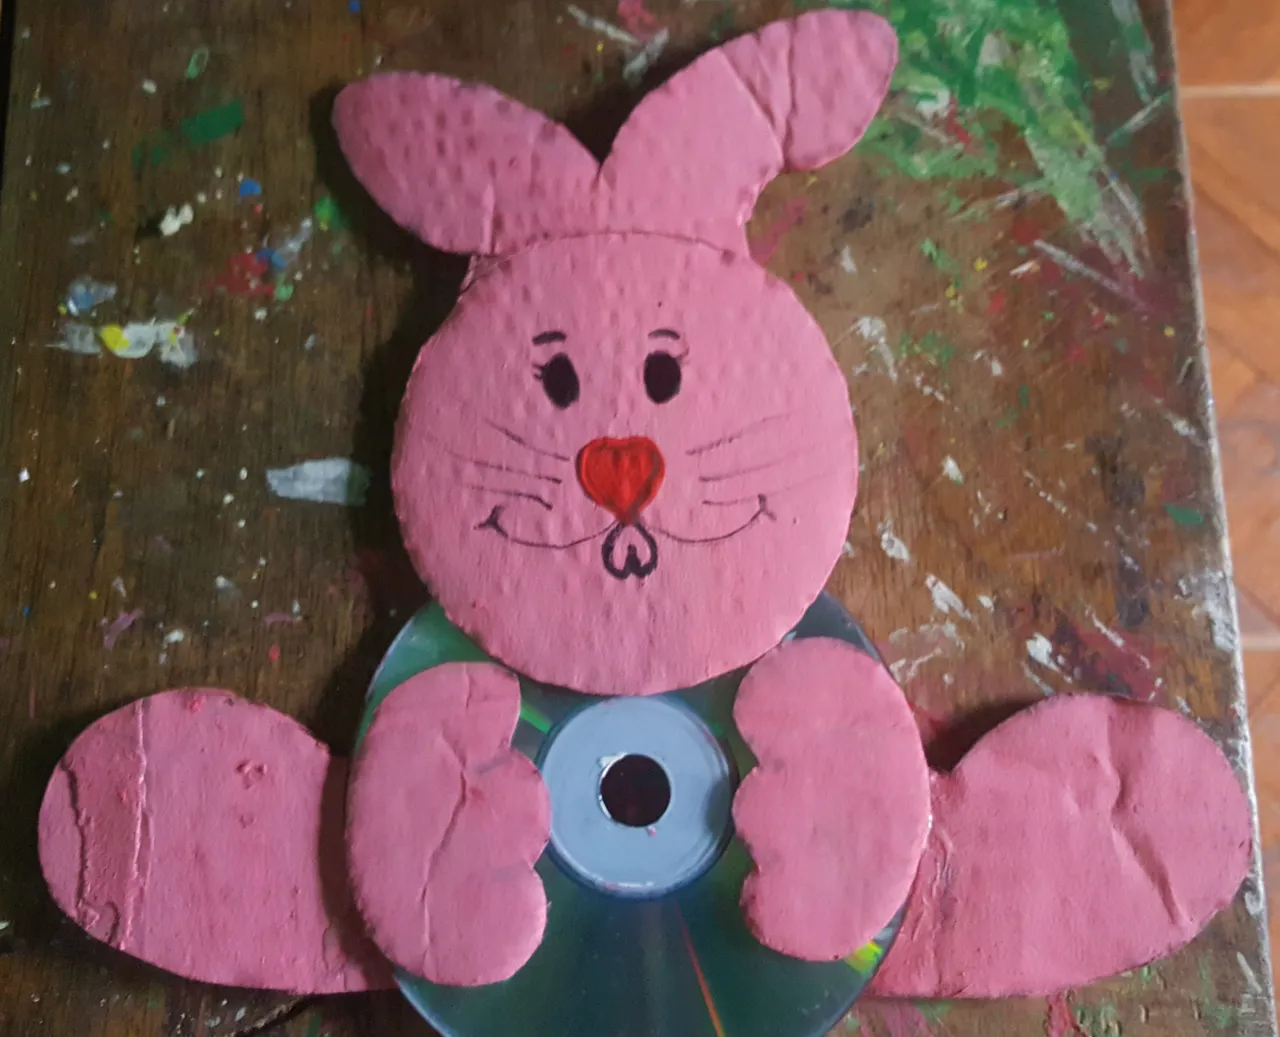
Paso 3: En este paso le damos forma a la cara del conejo para la cual utilizaremos el marcador le pintamos los ojos la nariz, la boca y los dientes, después lo repasamos con el pincel y la pintura negra.
Step 3: In this step we will shape the rabbit's face for which we will use the marker, we will paint the eyes, the nose, the mouth and the teeth, then we will go over it with the brush and black paint.
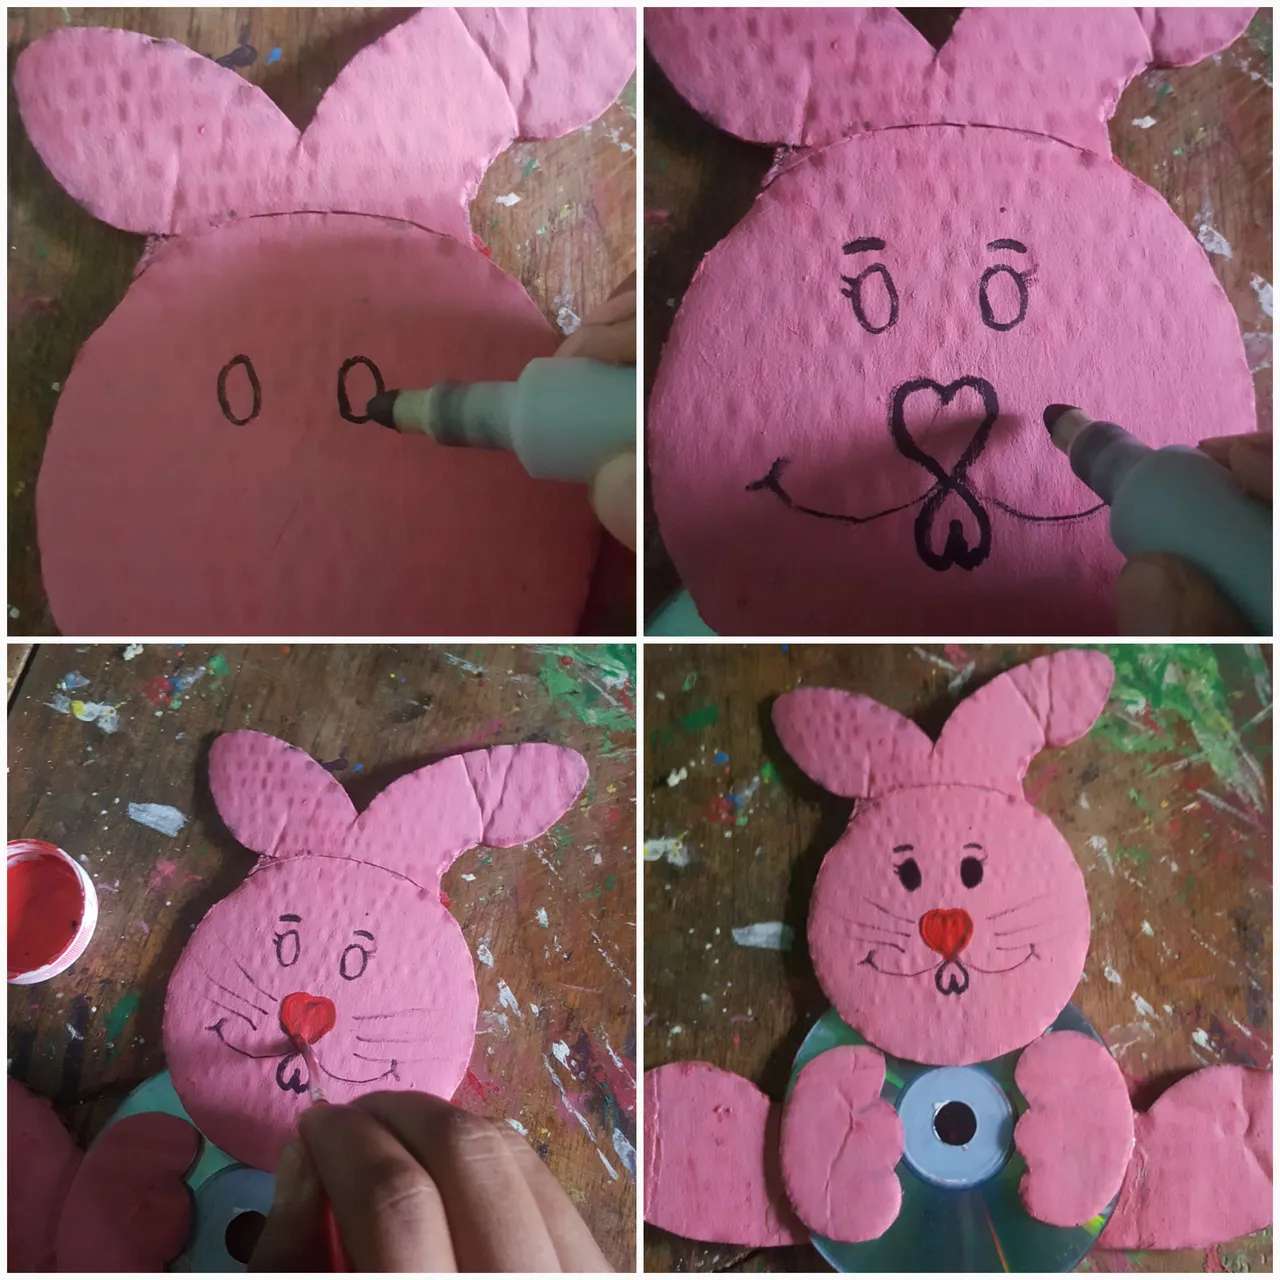
En las orejas le ponemos un detalle con la pintura blanca para así dar por concluido esta bella elaboración.
In the ears we put a detail with the white paint in order to conclude this beautiful elaboration.