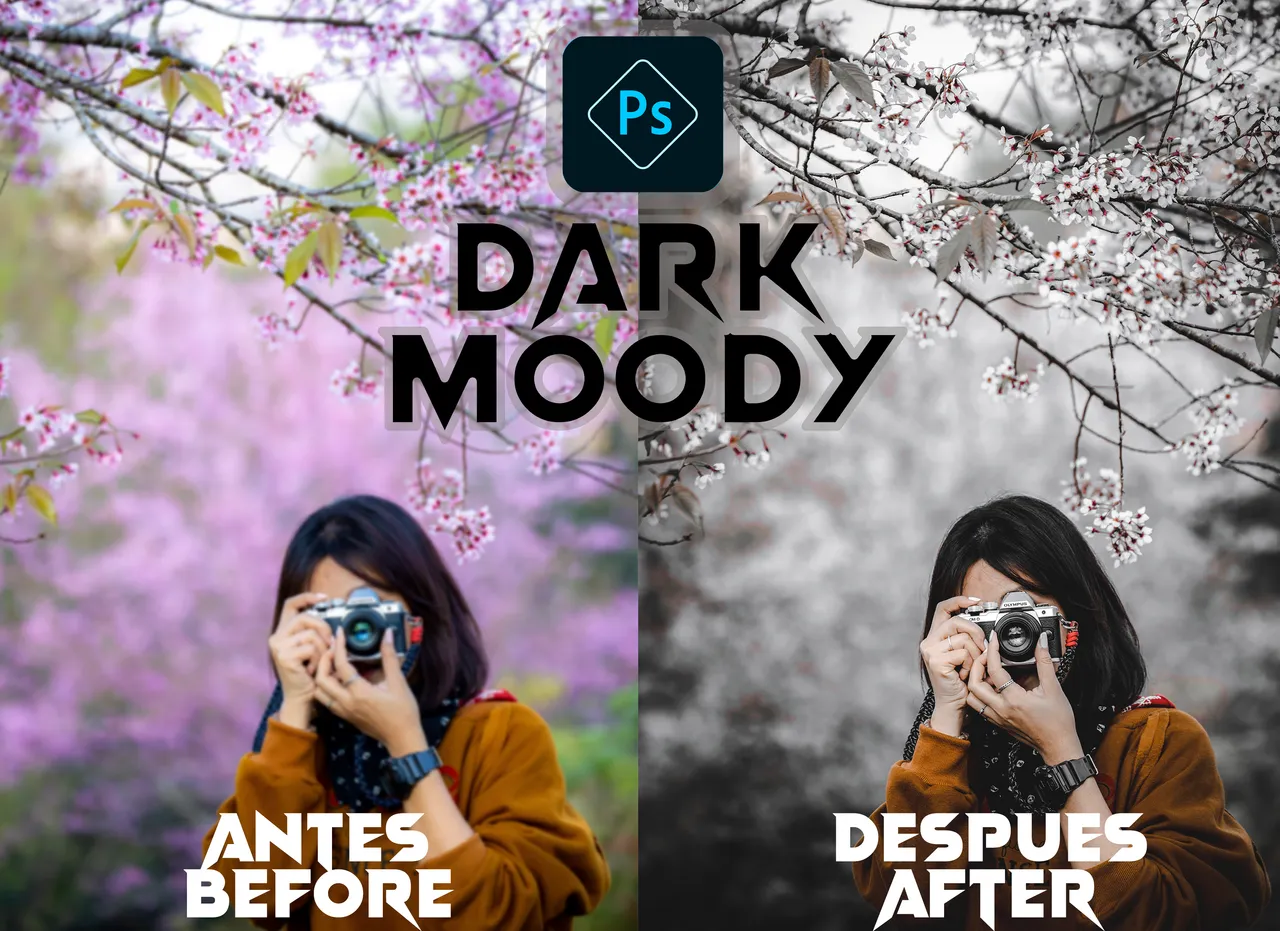
Muy buenas compañeros, estamos aquí con un nuevo post para el blog, y el día de hoy haremos el efecto Dark Moody en photoshop.
El estilo “dark moody”, también denominado “chiaroscuro “ un término sacado del mundo del arte, hace referencia al uso de un marcado contraste entre luz y sombra o las parte más iluminadas contra las partes más oscuras de una imagen. A mí me encanta crear este tipo de fotografías que crean un fuerte impacto visual y a veces transmiten una sensación algo melancólica, que en el espectador crea una sensación de añoranza.
Very good colleagues, we are here with a new blog post, and today we will make the Dark Moody effect in photoshop.
The style "dark moody", also called "chiaroscuro" a term taken from the art world, refers to the use of a marked contrast between light and shadow or the most illuminated parts against the darkest parts of an image. I love creating these types of photographs that create a strong visual impact and sometimes convey a somewhat melancholic feeling, which creates a sense of longing in the viewer.
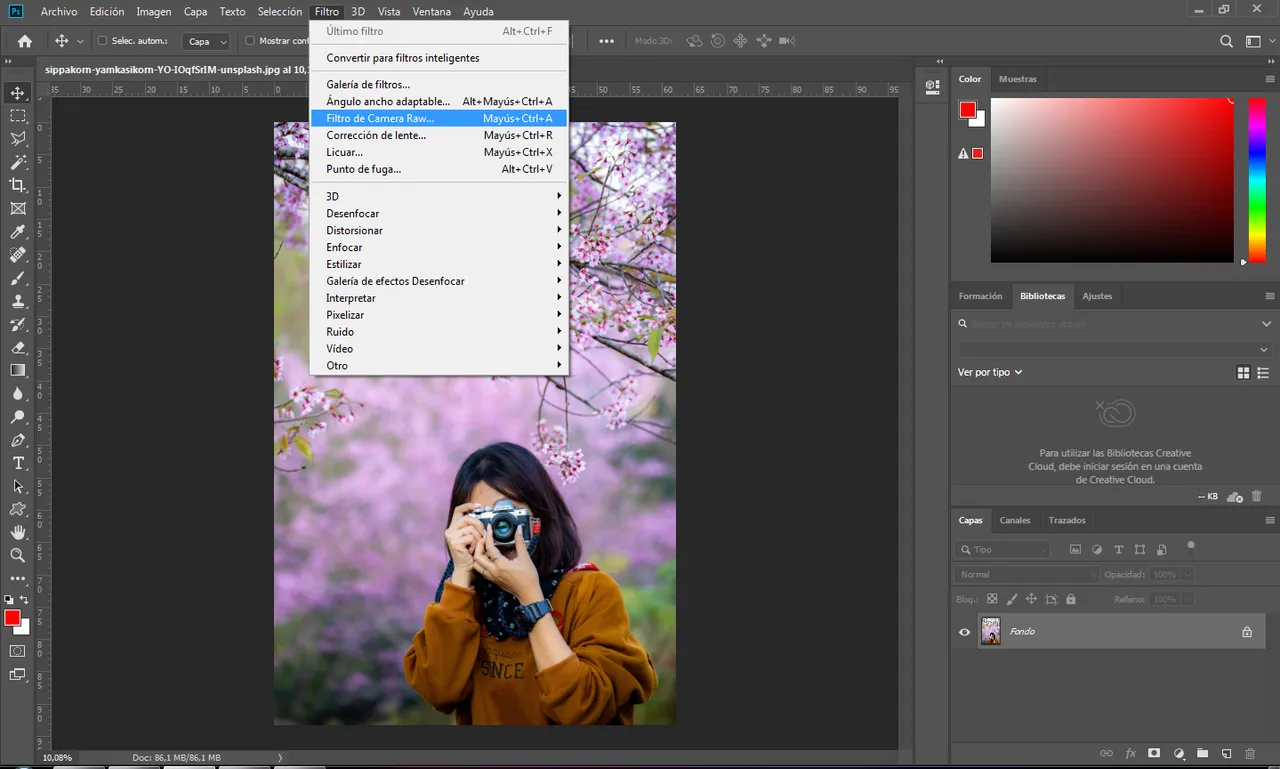
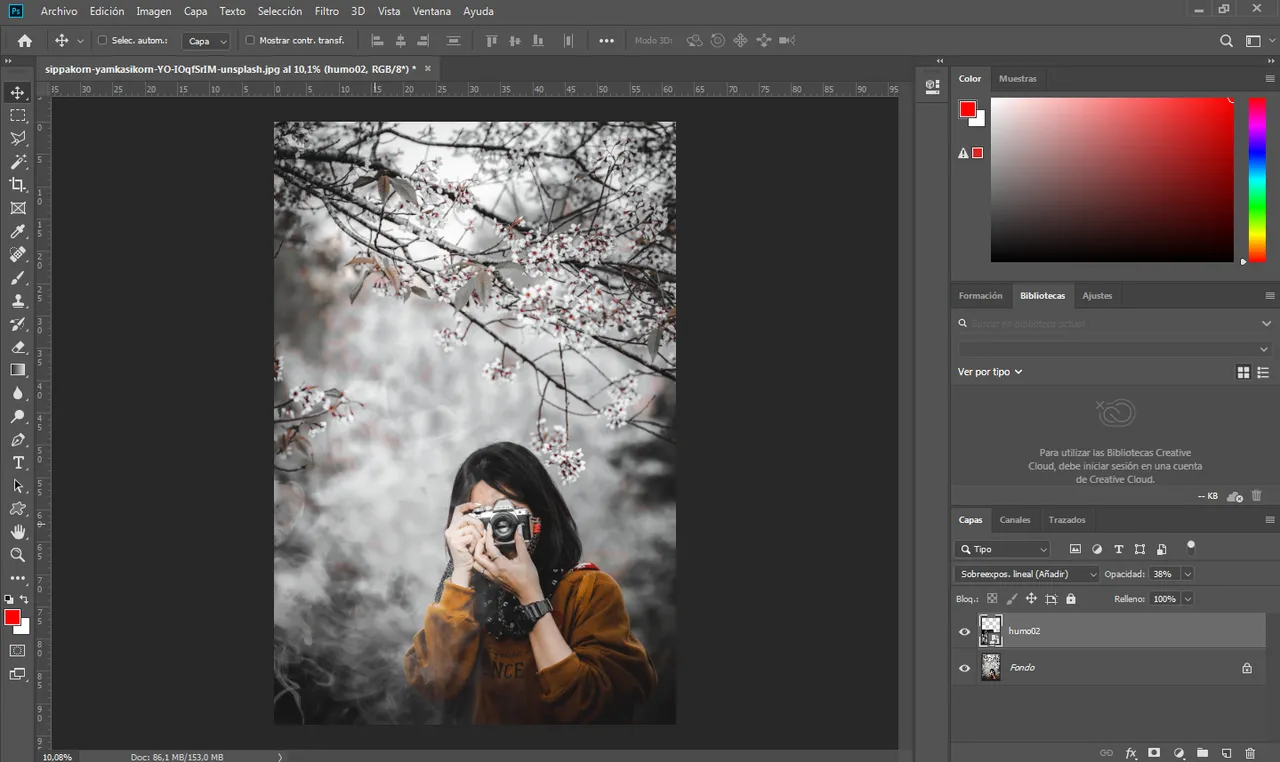
Nos dirigimos a photoshop y elegimos la foto a la que le queremos aplicar este efecto, luego de eso vamos a filtros y filtros de cámara raw.
We go to photoshop and choose the photo to which we want to apply this effect, after that we go to filters and raw camera filters.
Ahora bien, la clave para conseguir imágenes del tipo “moody” está en cómo manipulamos la luz (natural o artificial). Cuando creo este tipo de imágenes, normalmente bloqueo una gran parte de la luz que entra sobre la escena. Así me aseguro de obtener un acento de luz sobre mi sujeto principal, mientras que lo demás áreas de la imagen quedan más oscuras y con sombras importantes.
Now, the key to getting images of the "moody" type is in how we manipulate light (natural or artificial). When I create these types of images, I usually block a large part of the light that enters the scene. This way I make sure to get an accent of light on my main subject, while the other areas of the image are darker and with significant shadows.
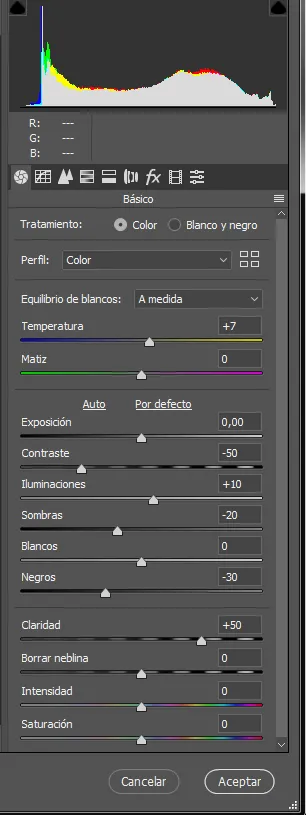
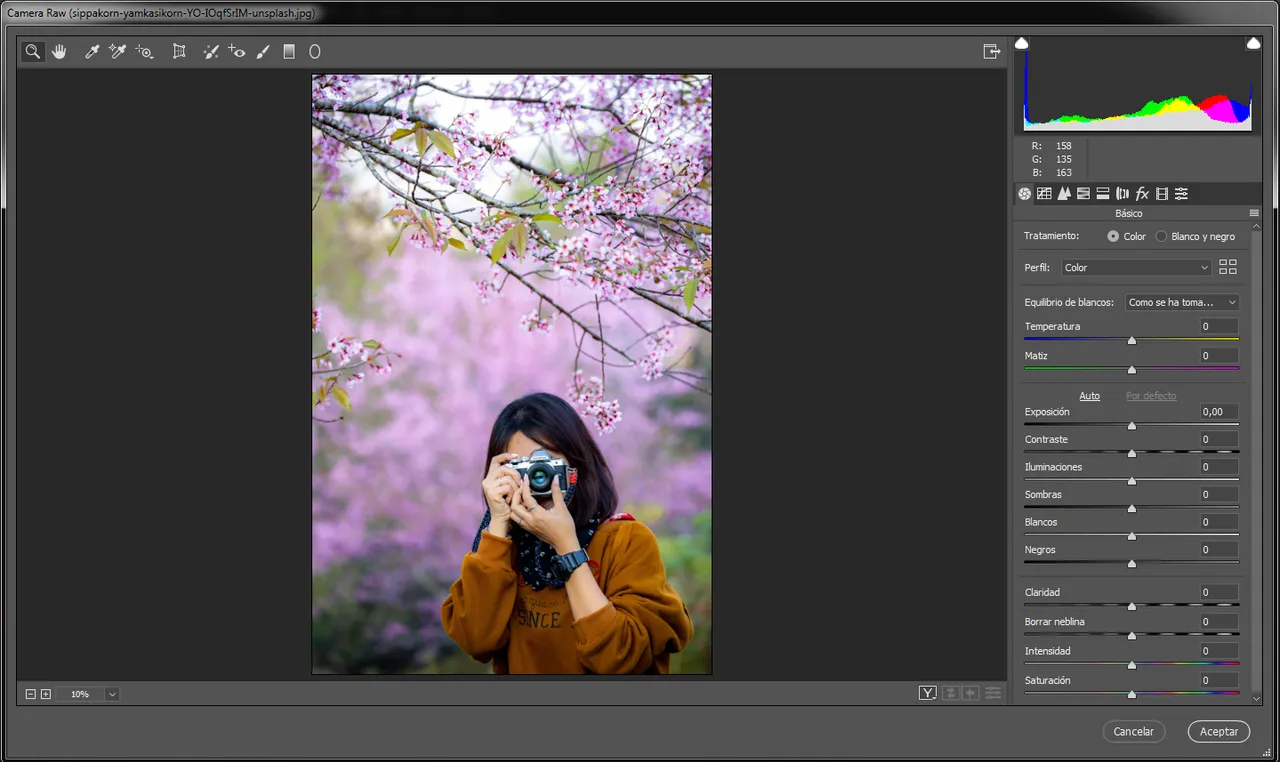
Para conseguir ese efecto que estamos buscando nos vamos a la primera casilla de camera raw BASICO y colocamos los parámetros que salen en la foto.
Esto para mantener los colores que son más vivos de la imagen.
To achieve that effect we are looking for, we go to the first box of camera raw BASIC and place the parameters that appear in the photo.
This to keep the colors that are more vivid in the image.
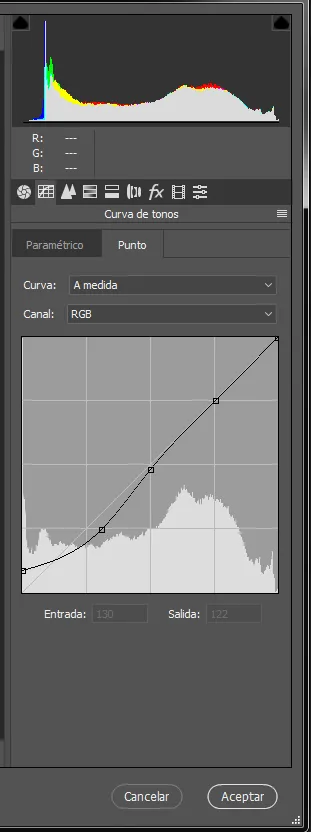
Vamos a la siguiente casilla CURVAS DE TONOS
En entrada le damos un valor de 130
Y en salida un valor de 122.
Let's go to the next box Tone curves
At the entrance we give it a value of 130
And in output a value of 122.
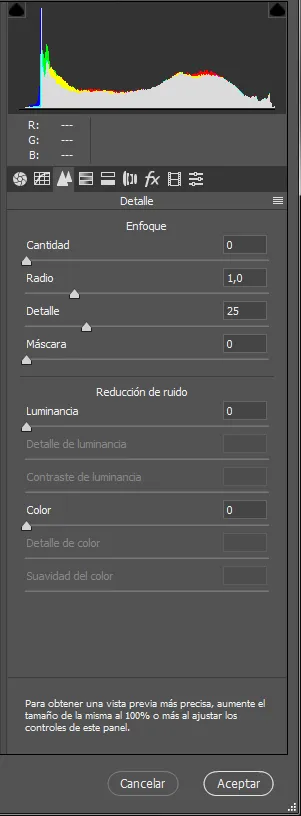
En la próxima casilla DETALLE
En radio le damos un valor de 1.0
Y en detalle un valor de 25
In the next box DETAIL
In radio we give it a value of 1.0
And in detail a value of 25
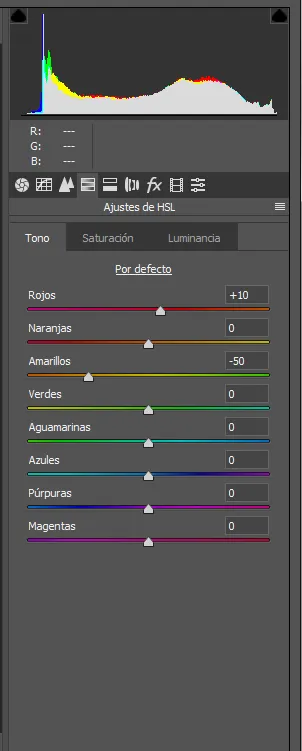
Siguiente casilla AJUSTES DE HSL
Solo movemos los rojos con un valor de +10
Y amarillos con un valor de -50
Next box HSL SETTINGS
We only move the red ones with a value of +10
And yellows with a value of -50

Siguiente casilla DIVIDIR TONOS
En tono damos un valor de 210
Y en saturación damos un valor de 2
Next box DIVIDE TONES
In tone we give a value of 210
And in saturation we give a value of 2
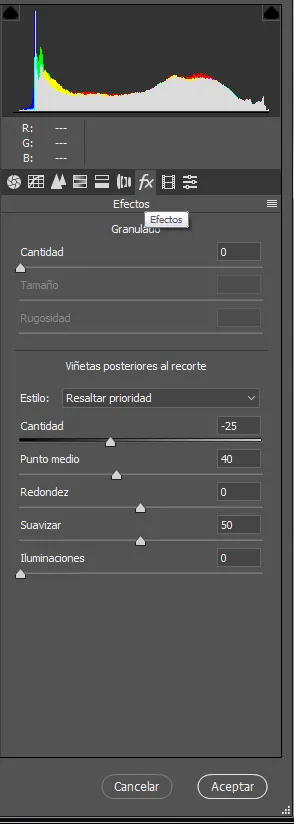
Luego nos dirigimos a la casilla EFECTOS
En ESTILO colocamos resaltar prioridad
CANTIDAD -25
PUNTO MEDIO 40
SUAVIZAR 50
ILUMINACIONES 0
Then we go to the box EFFECTS
In STYLEwe puthighlight priorityQUANTITY -25
MIDPOINT 40
SOFTEN 50
LIGHTING 0
Click en aceptar
Click accept
➣Y bueno amigos eso es todo por hoy espero te haya gustado si fue así por favor compártelo me ayudarías mucho, nos vemos en unos días con post nuevo, hasta la próxima.
➣Well friends that's all for today I hope you liked it if it was like that please share it, you would help me a lot, see you in a few days with a new post, until next time.
Todas las imágenes mostradas son de mi propiedad. Son capturas tomadas al momento de realizar la explicación.
All the images shown are my property. They are captures taken at the time of the explanation.