Hola buenas noches comunidad de hive, espero todos se encuentren muy bien y hayan tenido un excelente día le doy gracias a Dios por nuevamente estar aquí con ustedes, hoy quiero compartirles este creativo bricolaje que realice en casa.
Hello, good night, hive community, I hope you are all very well and have had an excellent day, I thank God for being here with you again, today I want to share with you this creative DIY that I do at home.
Se caracteriza por una:
It is characterized by a:
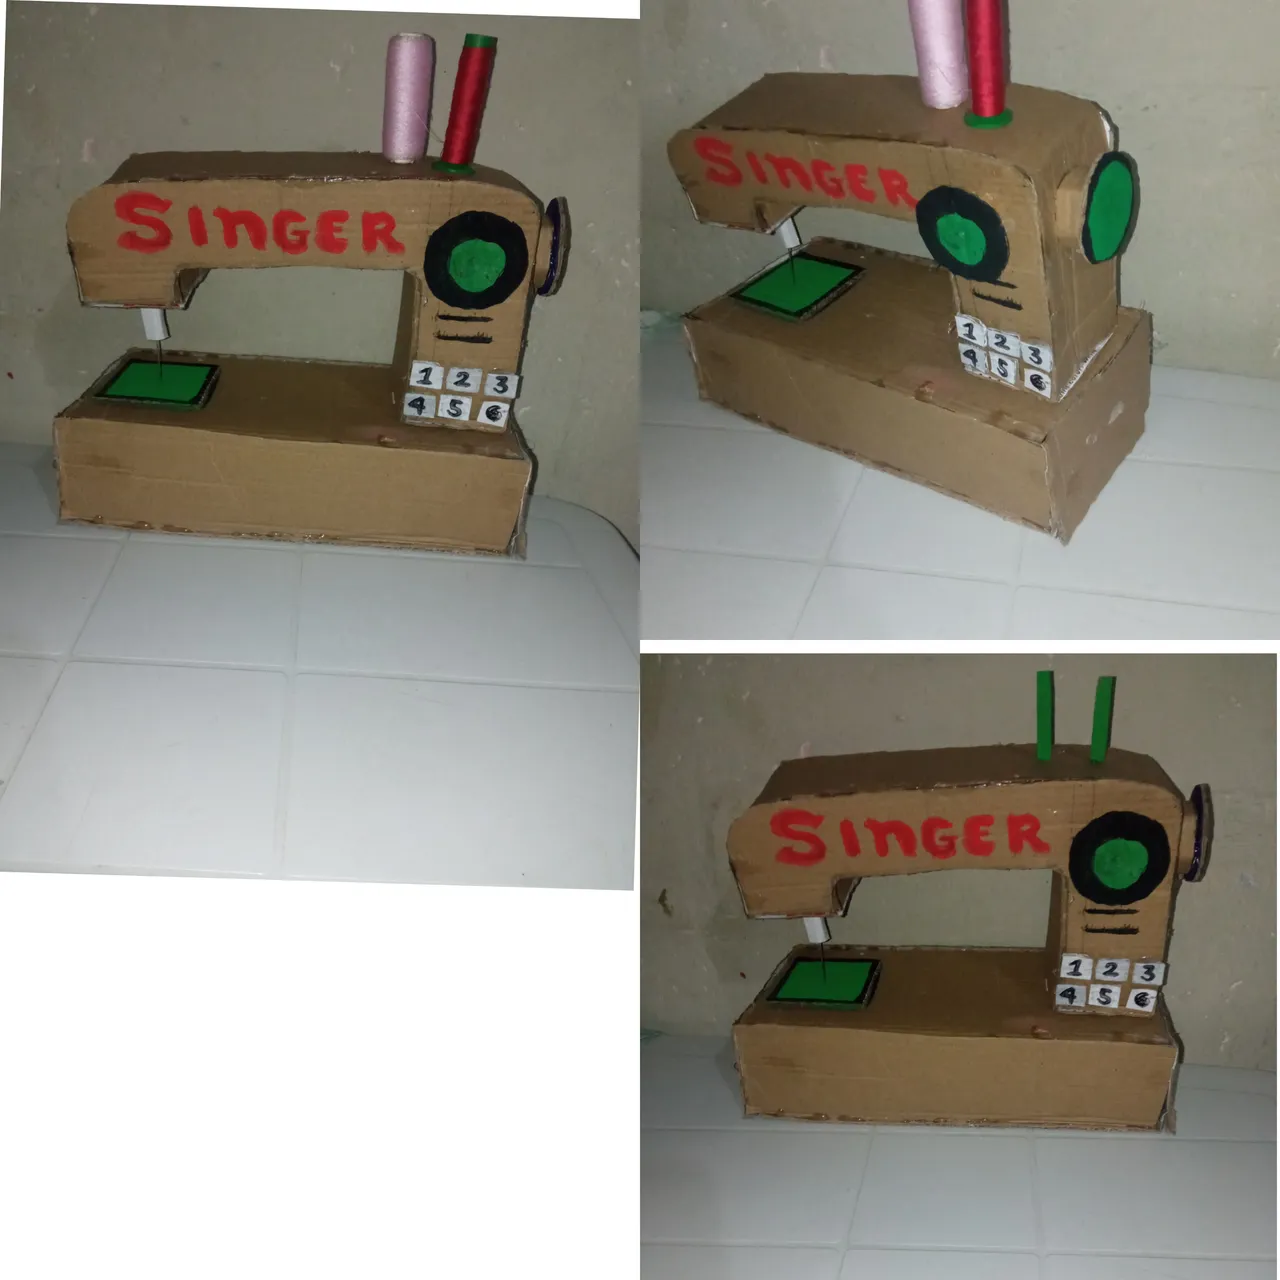
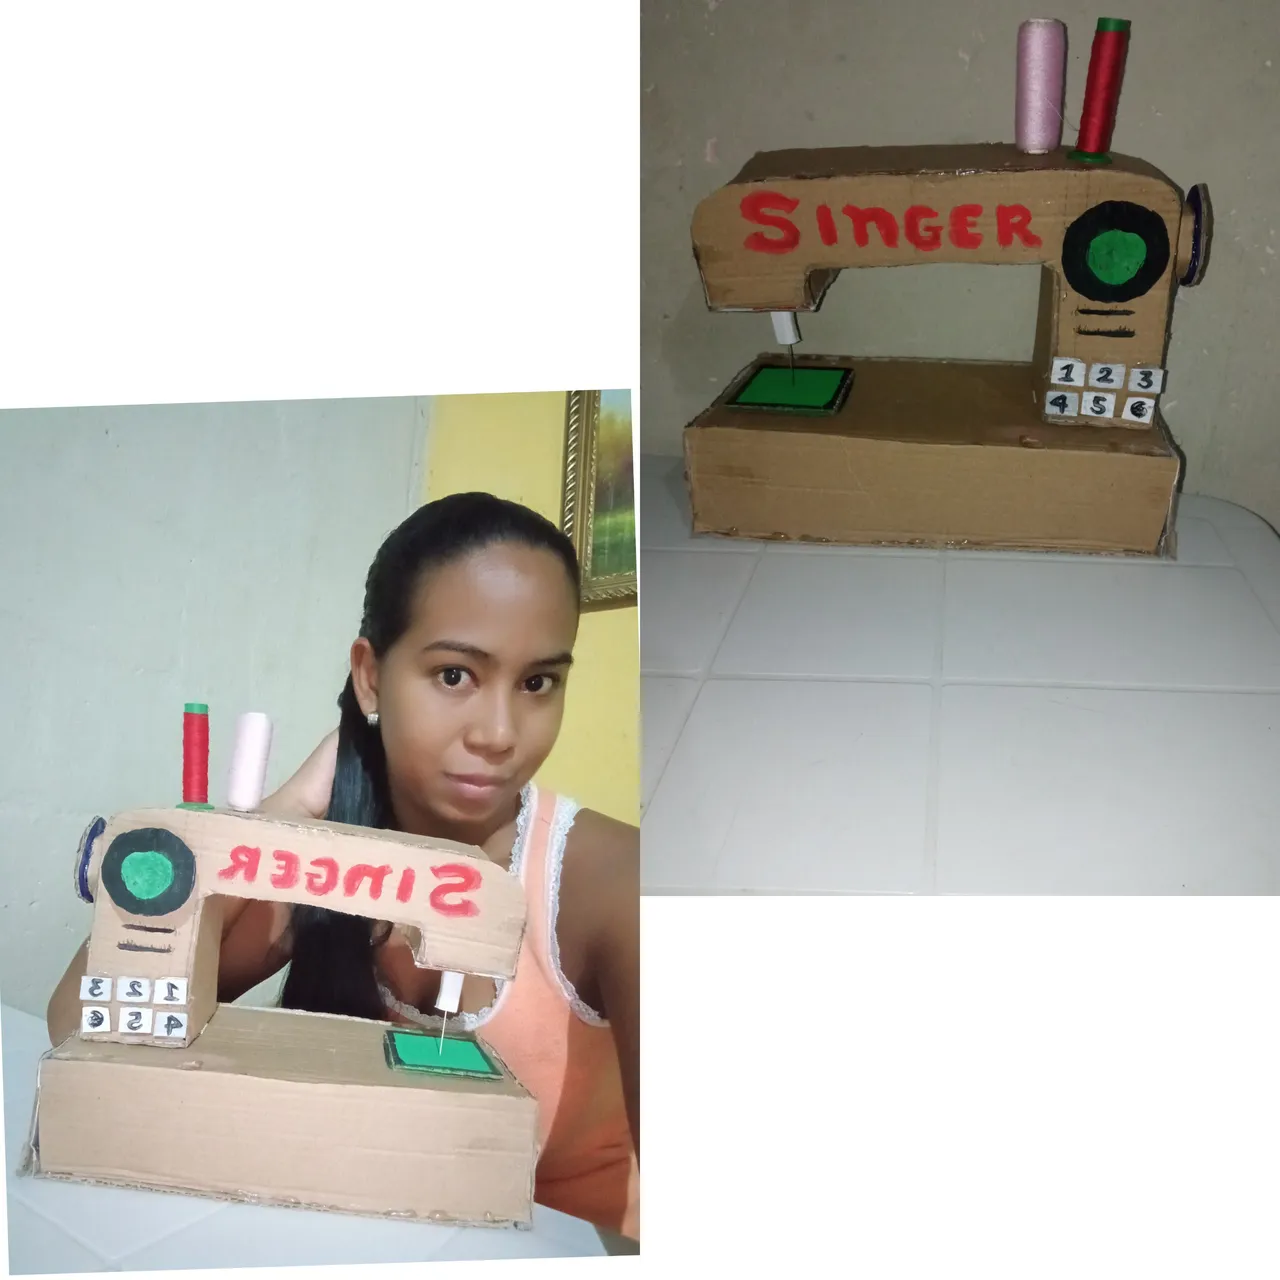
Hermosa y creativa maquina de coser realizada con materiales de provecho.
Beautiful and creative sewing machine made with useful materials.

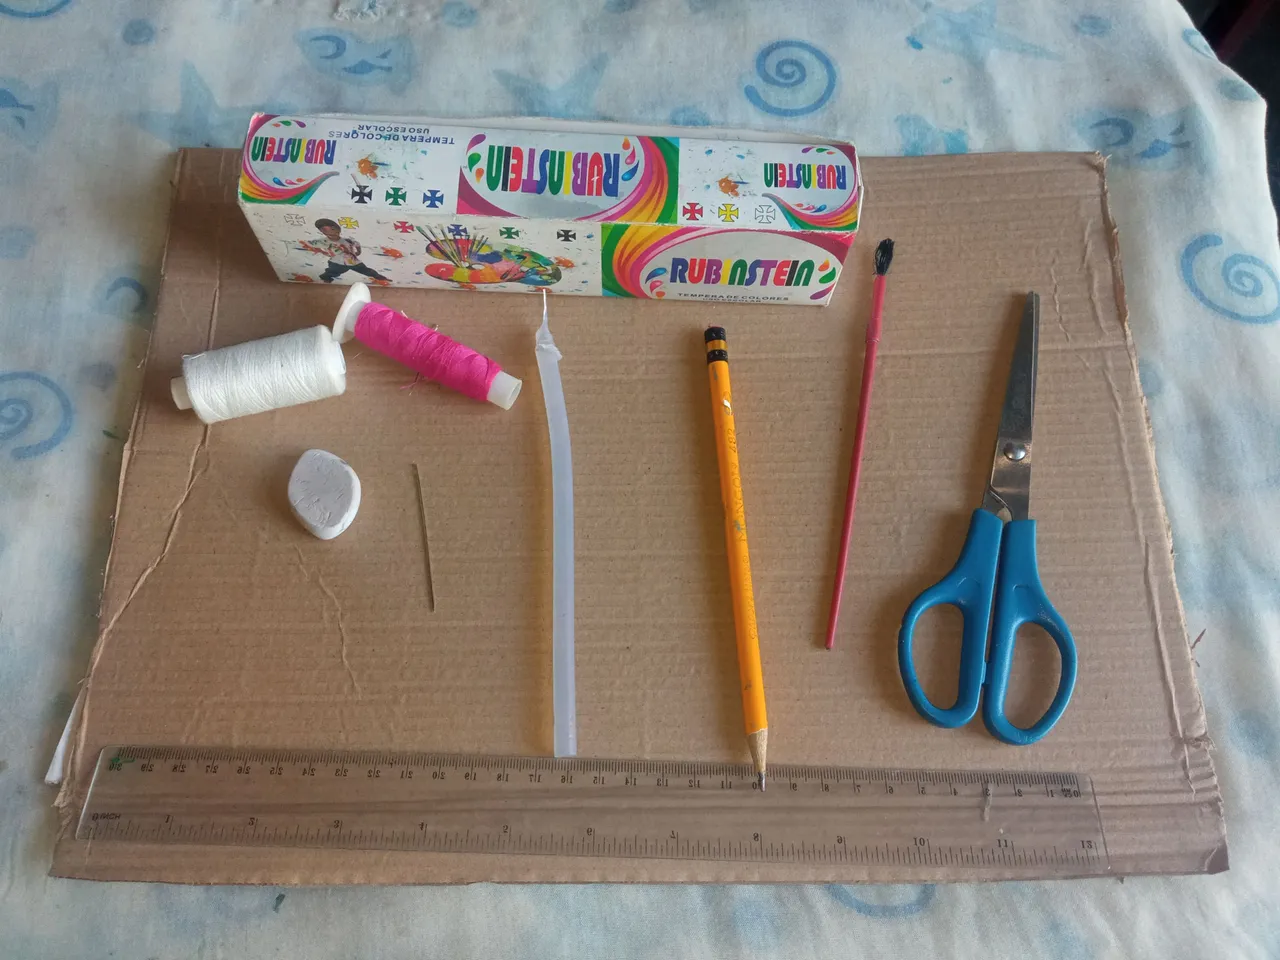
Para poder realizar esta creativa y bonita maquina de coser tenemos que tener estos siguientes materiales que les mostrare en la parte de abajo.
In order to make this creative and beautiful sewing machine we have to have these following materials that I will show you below.
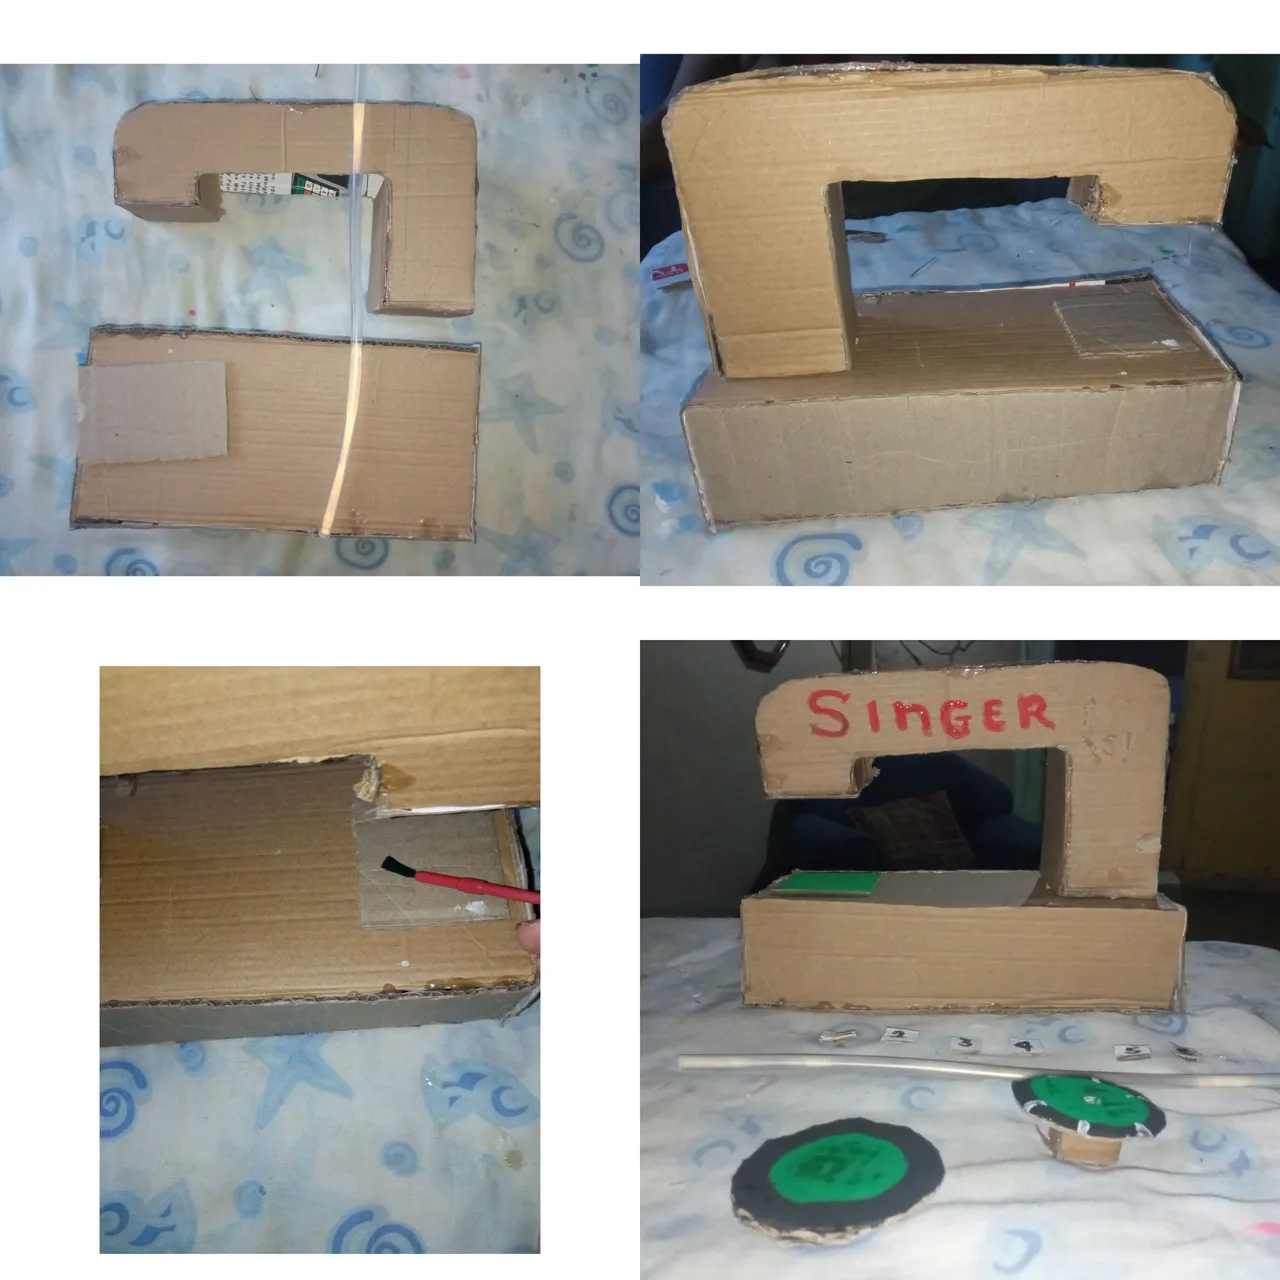
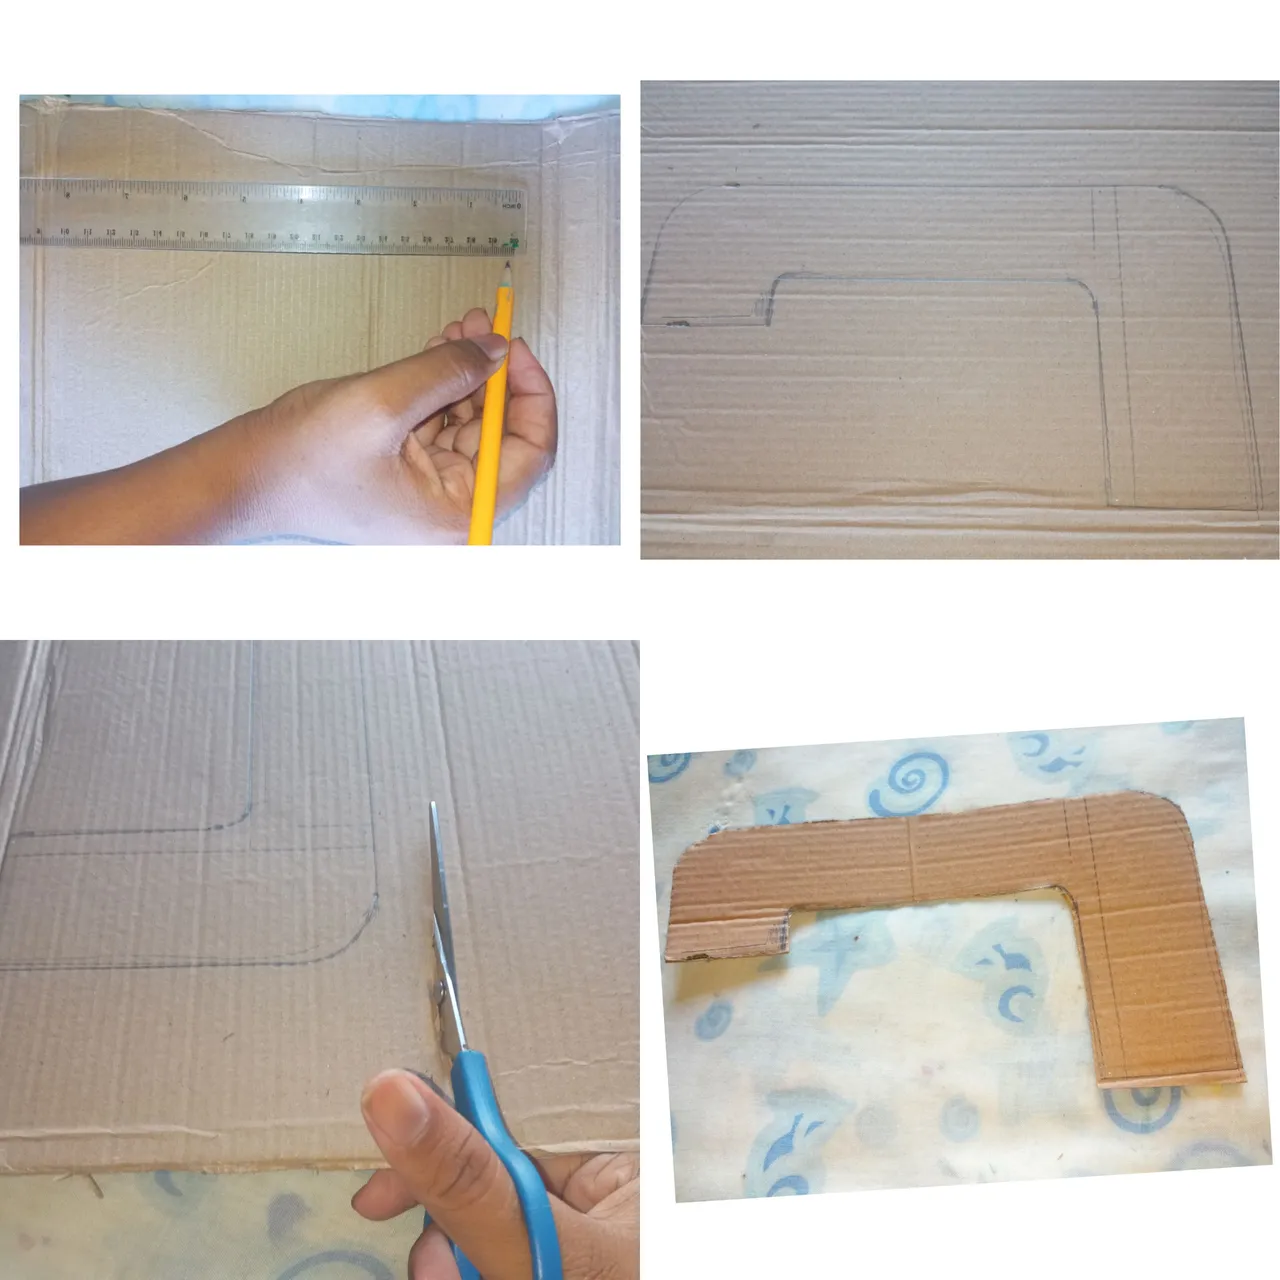
1 paso: Tomaremos la regla y el lápiz y procederemos a dibujar la parte de arriba de nuestra maquina y recortaremos
1 step: We will take the ruler and pencil and proceed to draw the upper part of our machine and cut
2 paso: Ya recortada procedemos a ponerla encima de un pedazo de cartón y sacaremos otra del mismo tamaño luego recortaremos una tira para pegarla por el medio y así ira tomando una mejor forma
2 step: Once cut, we proceed to put it on top of a piece of cardboard and we will take another of the same size then we will cut a strip to stick it in the middle and thus it will take a better shape
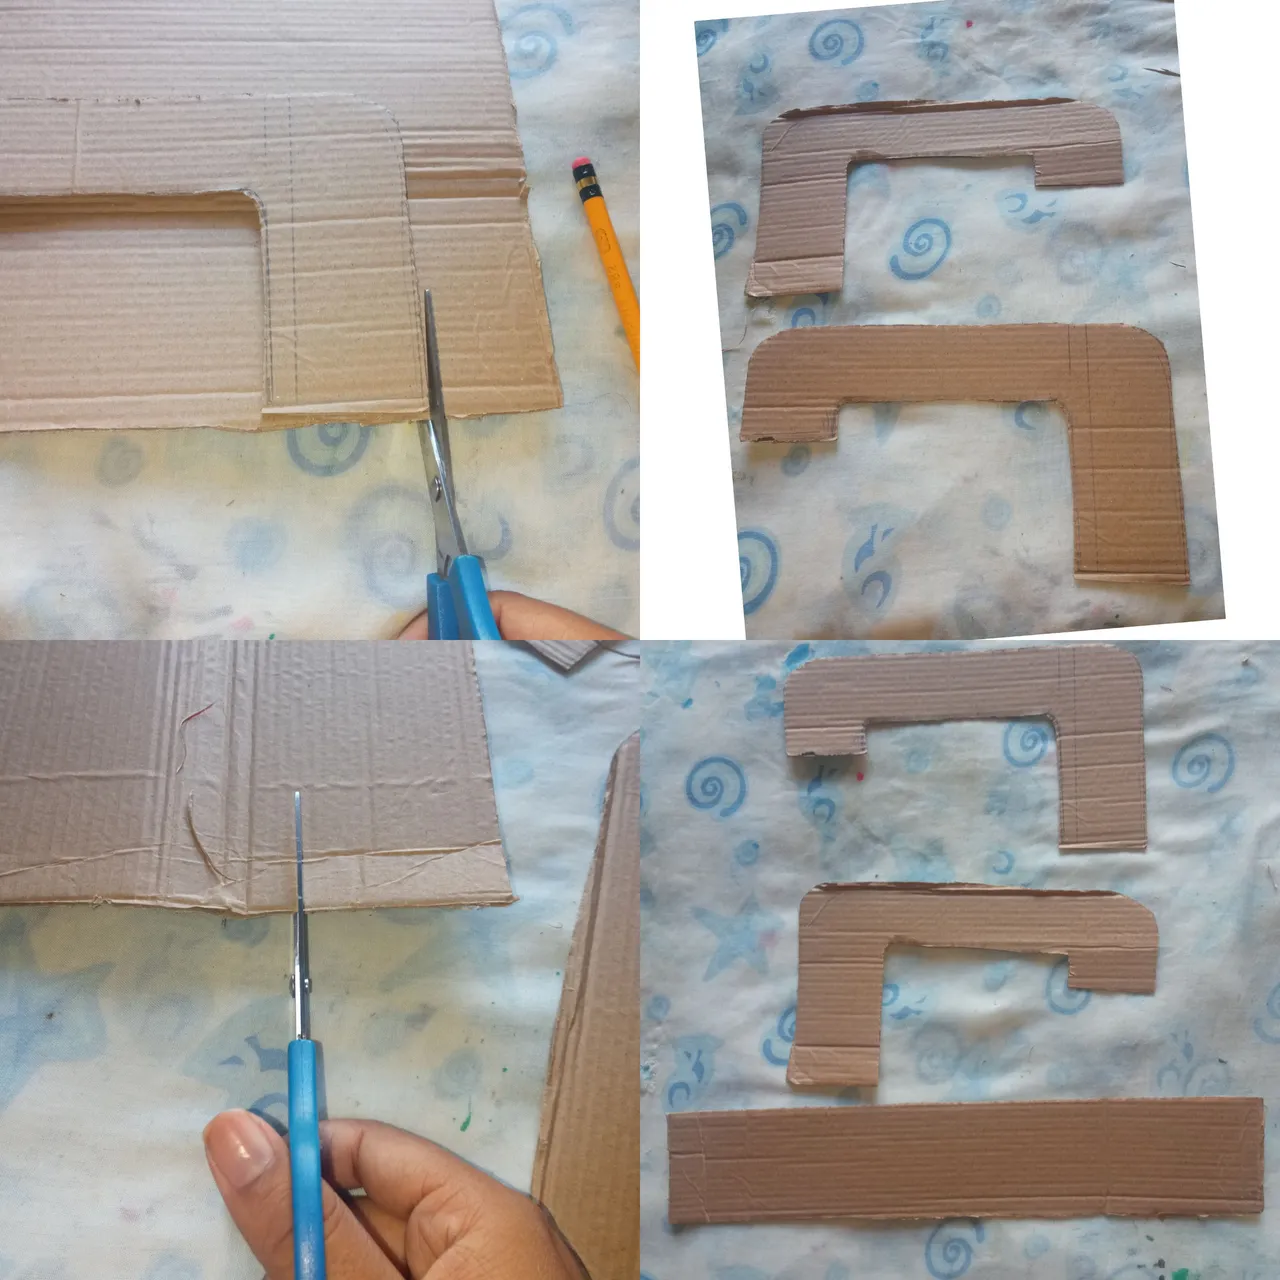
3 paso: Ya lista nuestra forma de arriba procederemos a medir el ancho de la forma de arriba para así sacar la parte de abajo luego la forma de abajo la sacaremos doble
Step 3: Our top shape is already ready, we will proceed to measure the width of the top shape in order to remove the bottom part, then the bottom shape will be doubled.
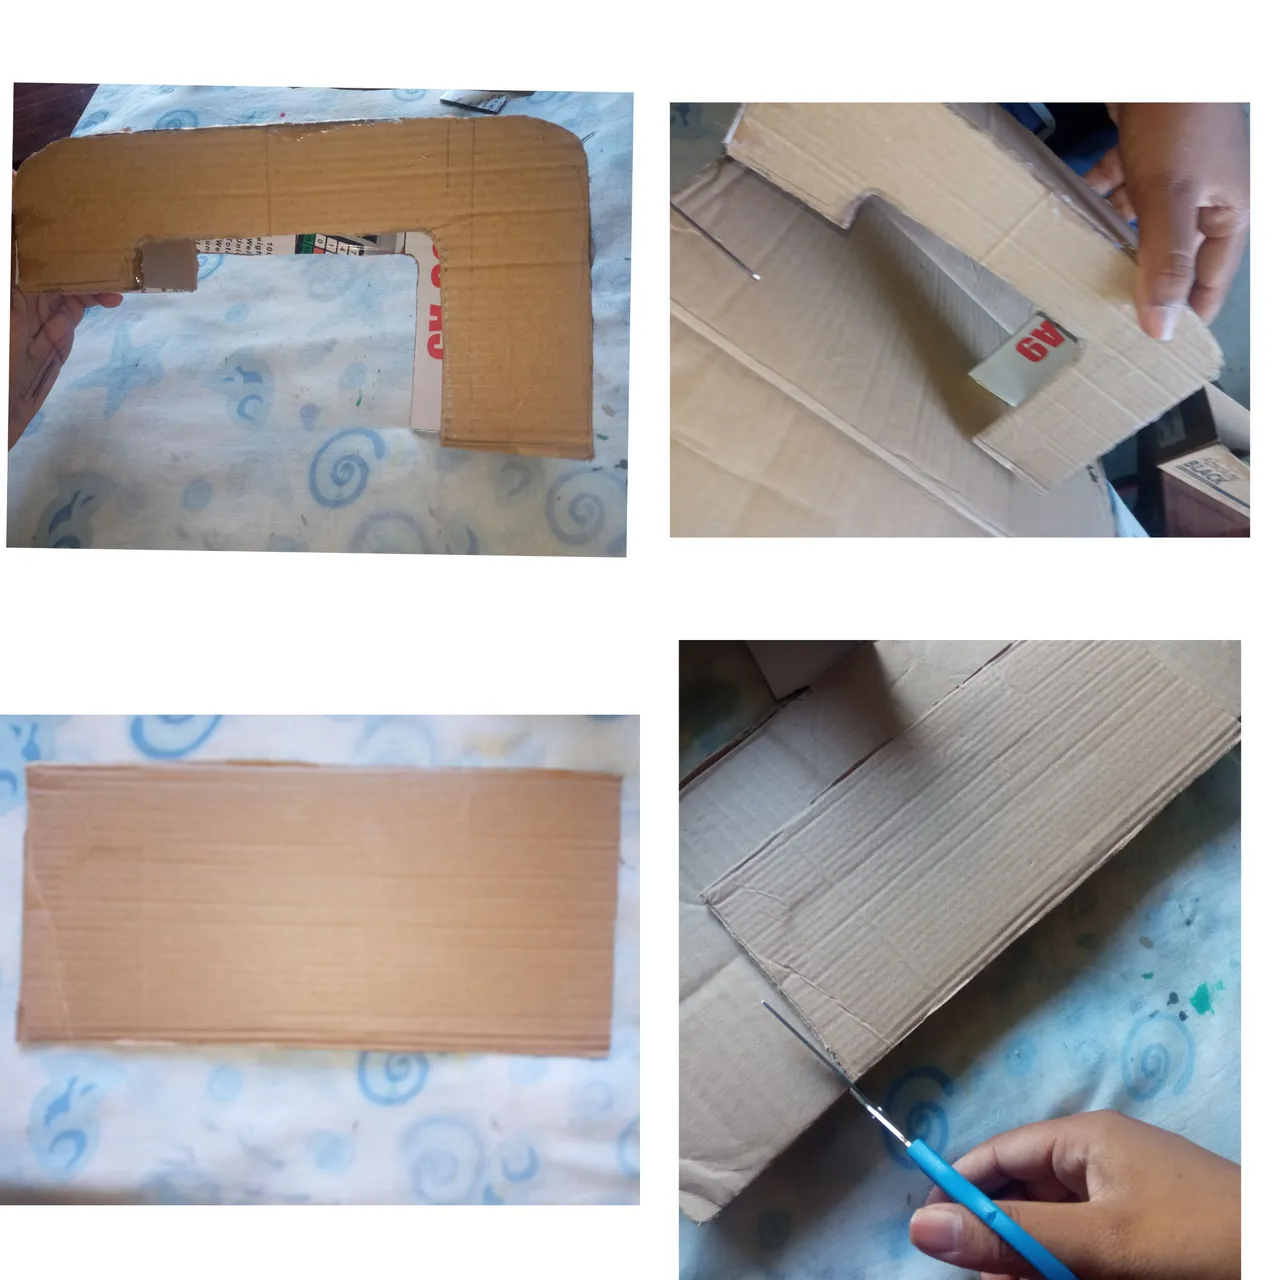
4 paso: Recortaremos dos tiras y con el silicon encofraremos una vez lista con la tijera procederemos a sacar las teclas
Step 4: We will cut two strips and with the silicone we will form once ready with the scissors we will proceed to remove the keys

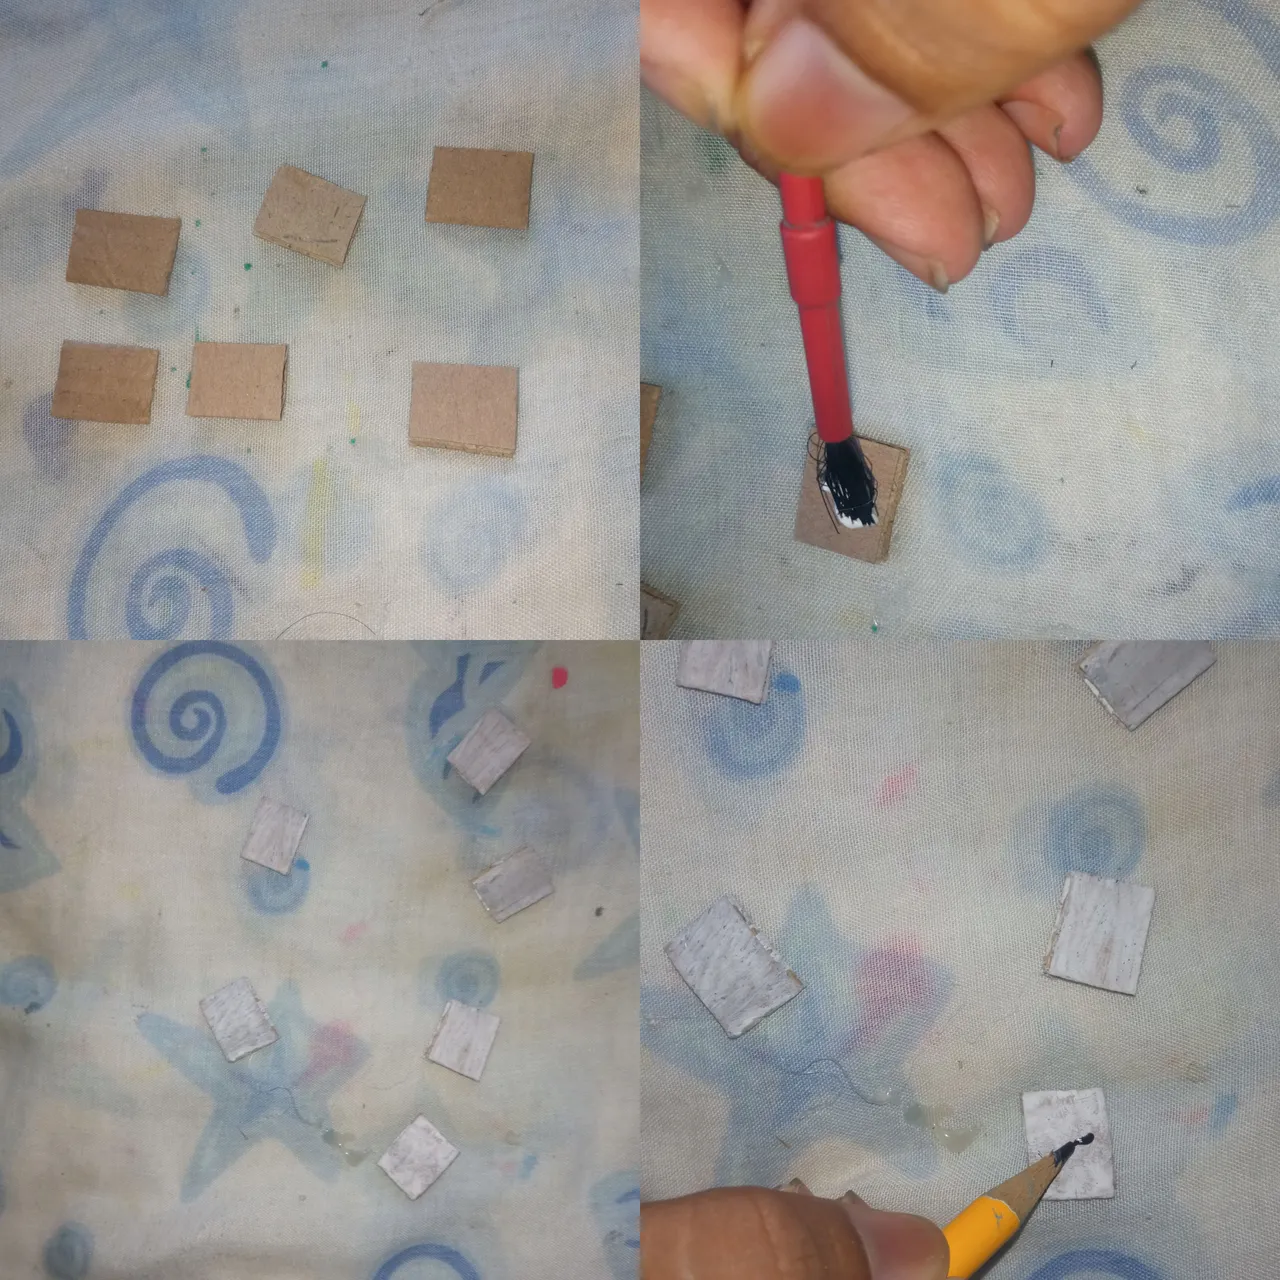
5 paso: Ya recortada con el pincel la pintaremos de color blanco y luego con la punta del lápiz y tempera negro dibujaremos los números del uno al seis
5 step: Already cut out with the brush we will paint it white and then with the tip of the pencil and black tempera we will draw the numbers from one to six
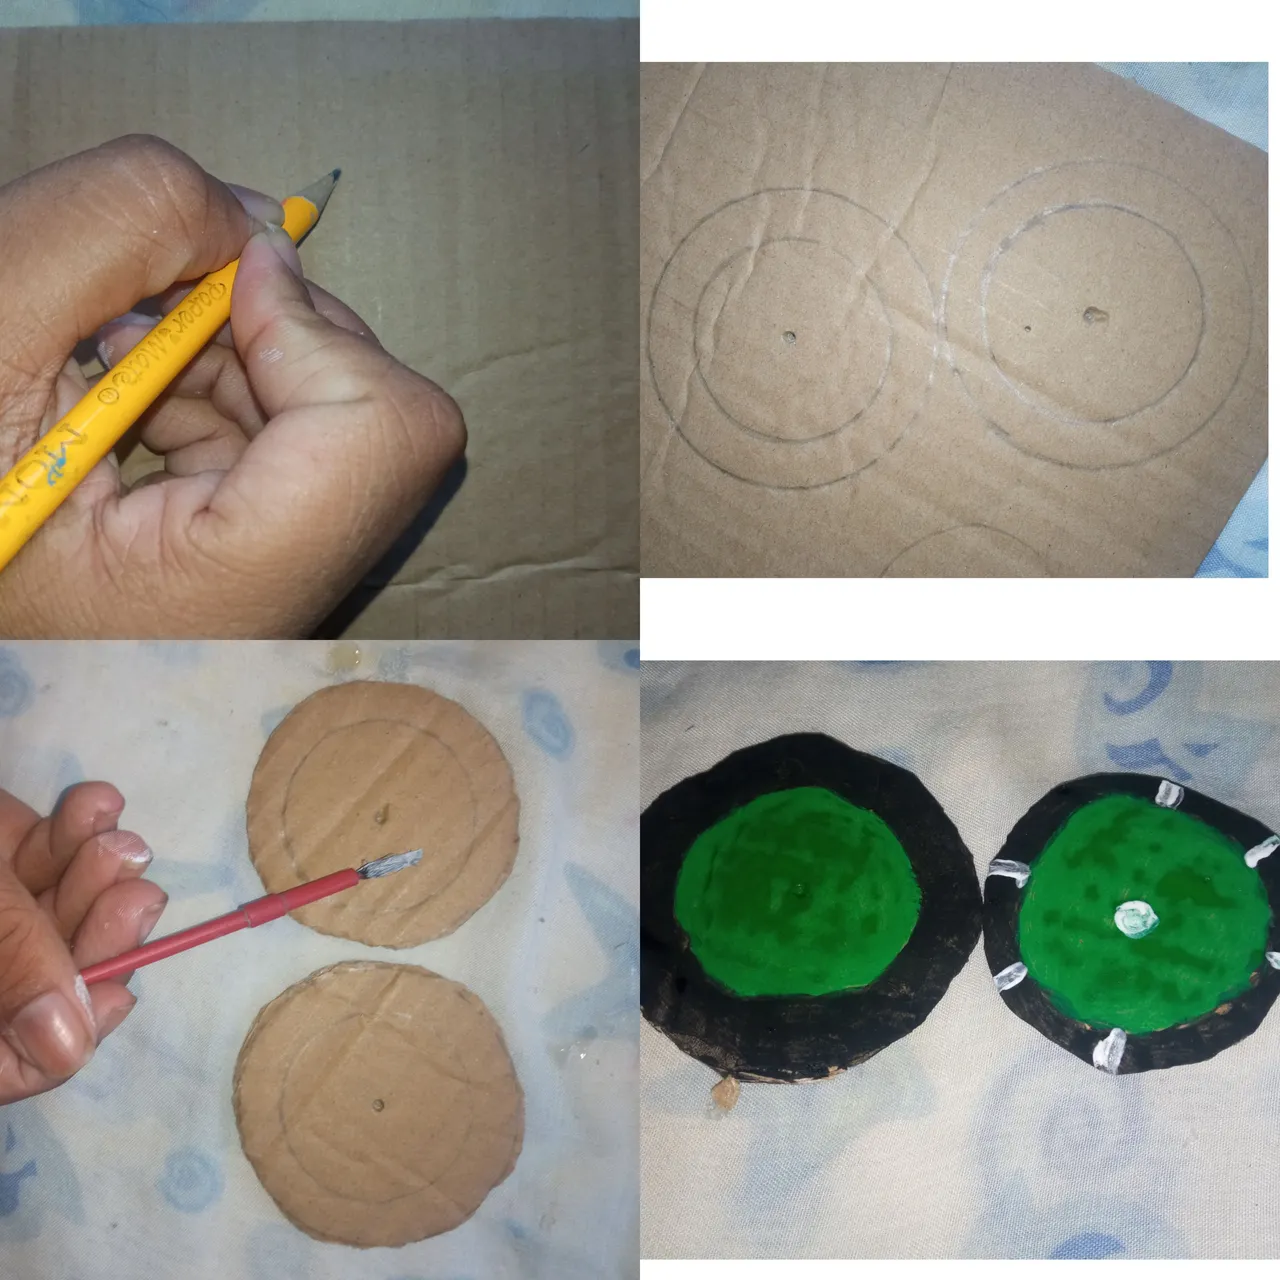
6 paso: Con el lápiz dibujaremos dos redondo las cuales harán función de los botones luego lo pintaremos de color verde y negro
6 step: With the pencil we will draw two round ones which will function as the buttons then we will paint it green and black
7 paso: Recortaremos un pedazo de cartón cuadrado y con el silicon procederemos a pegar nuestras formas y luego pintaremos pequeños detalles como la marca y el pedazo de cartón que lleva por la parte de la aguja; una vez listo los botones y las demás piezas procedamos a pegarlas y a continuación les mostrare como quedo
Step 7: We will cut out a square piece of cardboard and with the silicone we will proceed to glue our shapes and then we will paint small details such as the brand and the piece of cardboard that leads to the needle part; Once the buttons and the other pieces are ready, let's proceed to glue them and then I will show you how